Hello friends!
I am back again today to share a fun little technique that I discovered while creating my latest idea-ology project that I shared a couple weeks ago. Not sure why I haven’t thought to try it before, but, it works great and adds a little whimsy, ethereal twist to coloring them.
I am a HUGE fan of the coloring that Paula Cheney does to color paper dolls with Distress Crayons. They are always so beautiful. I have colored many of them this way but struggle sometimes to get the color just right or when I do, I accidently rub some of the color off as it isn’t permanent. This Alcohol technique makes the colors pretty permanent. If you’d like to see how Paula creates her magic, be sure to check out her technique for them HERE on her blog oneluckyday.net
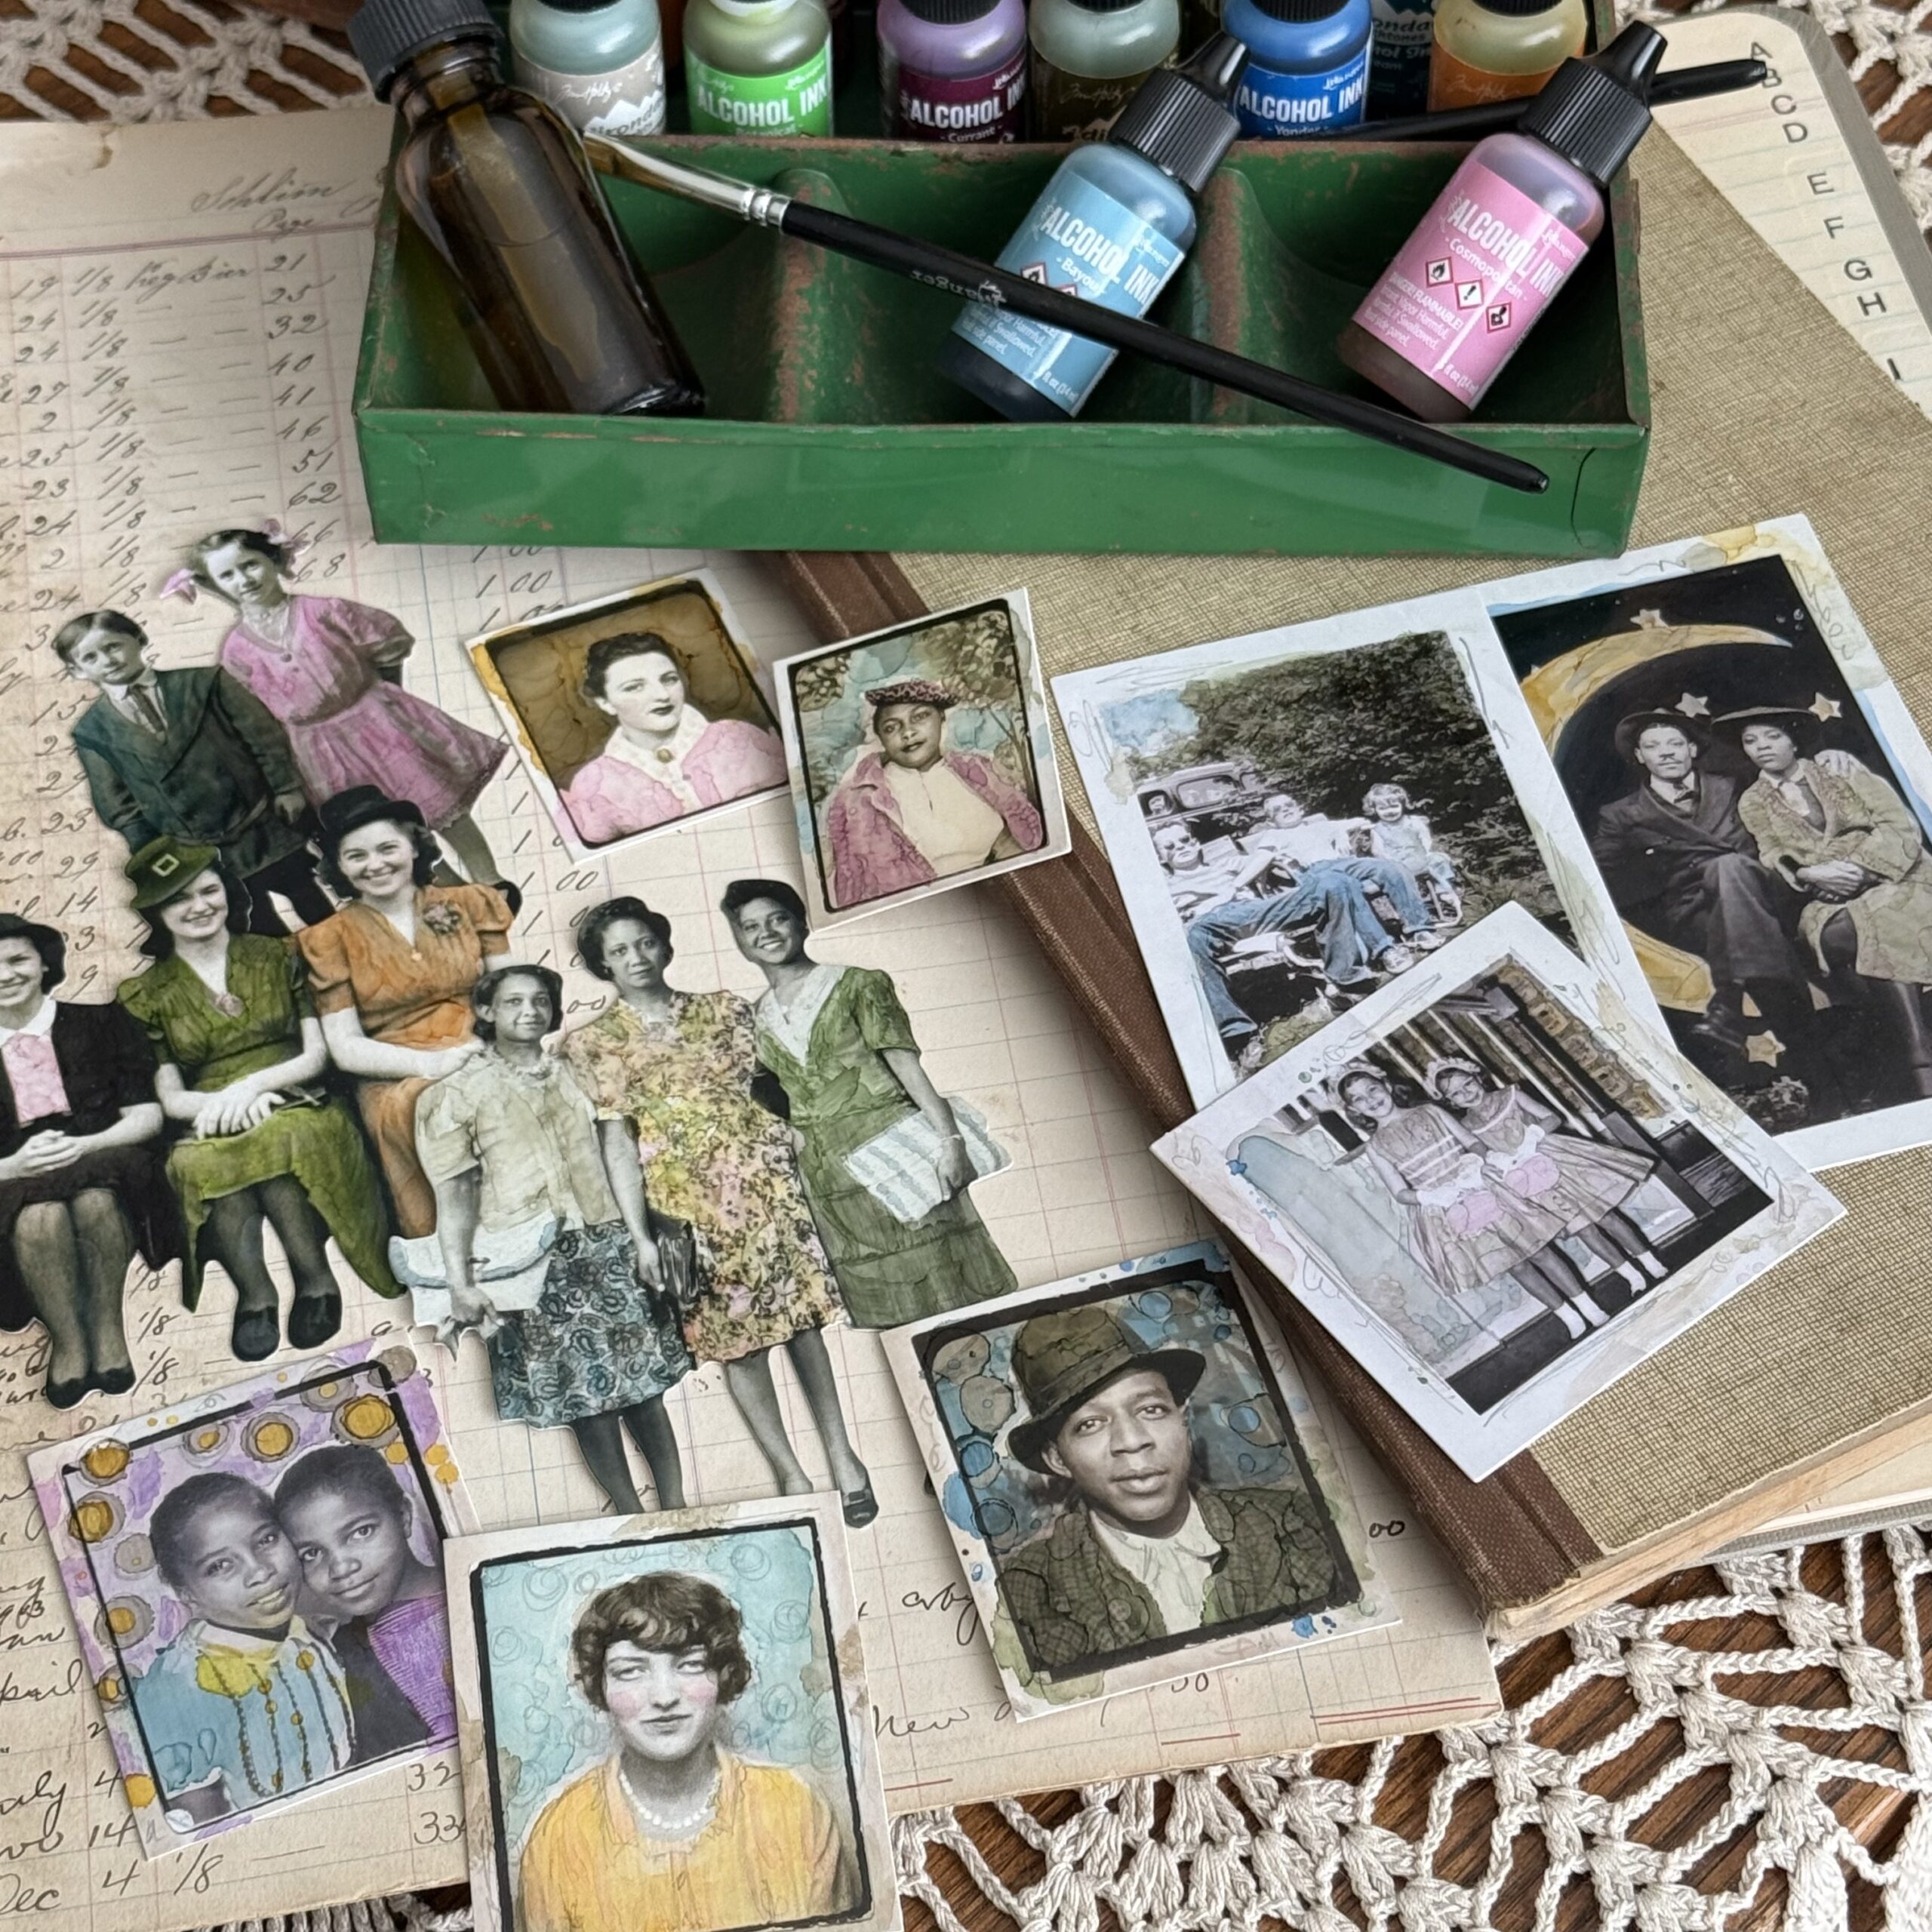
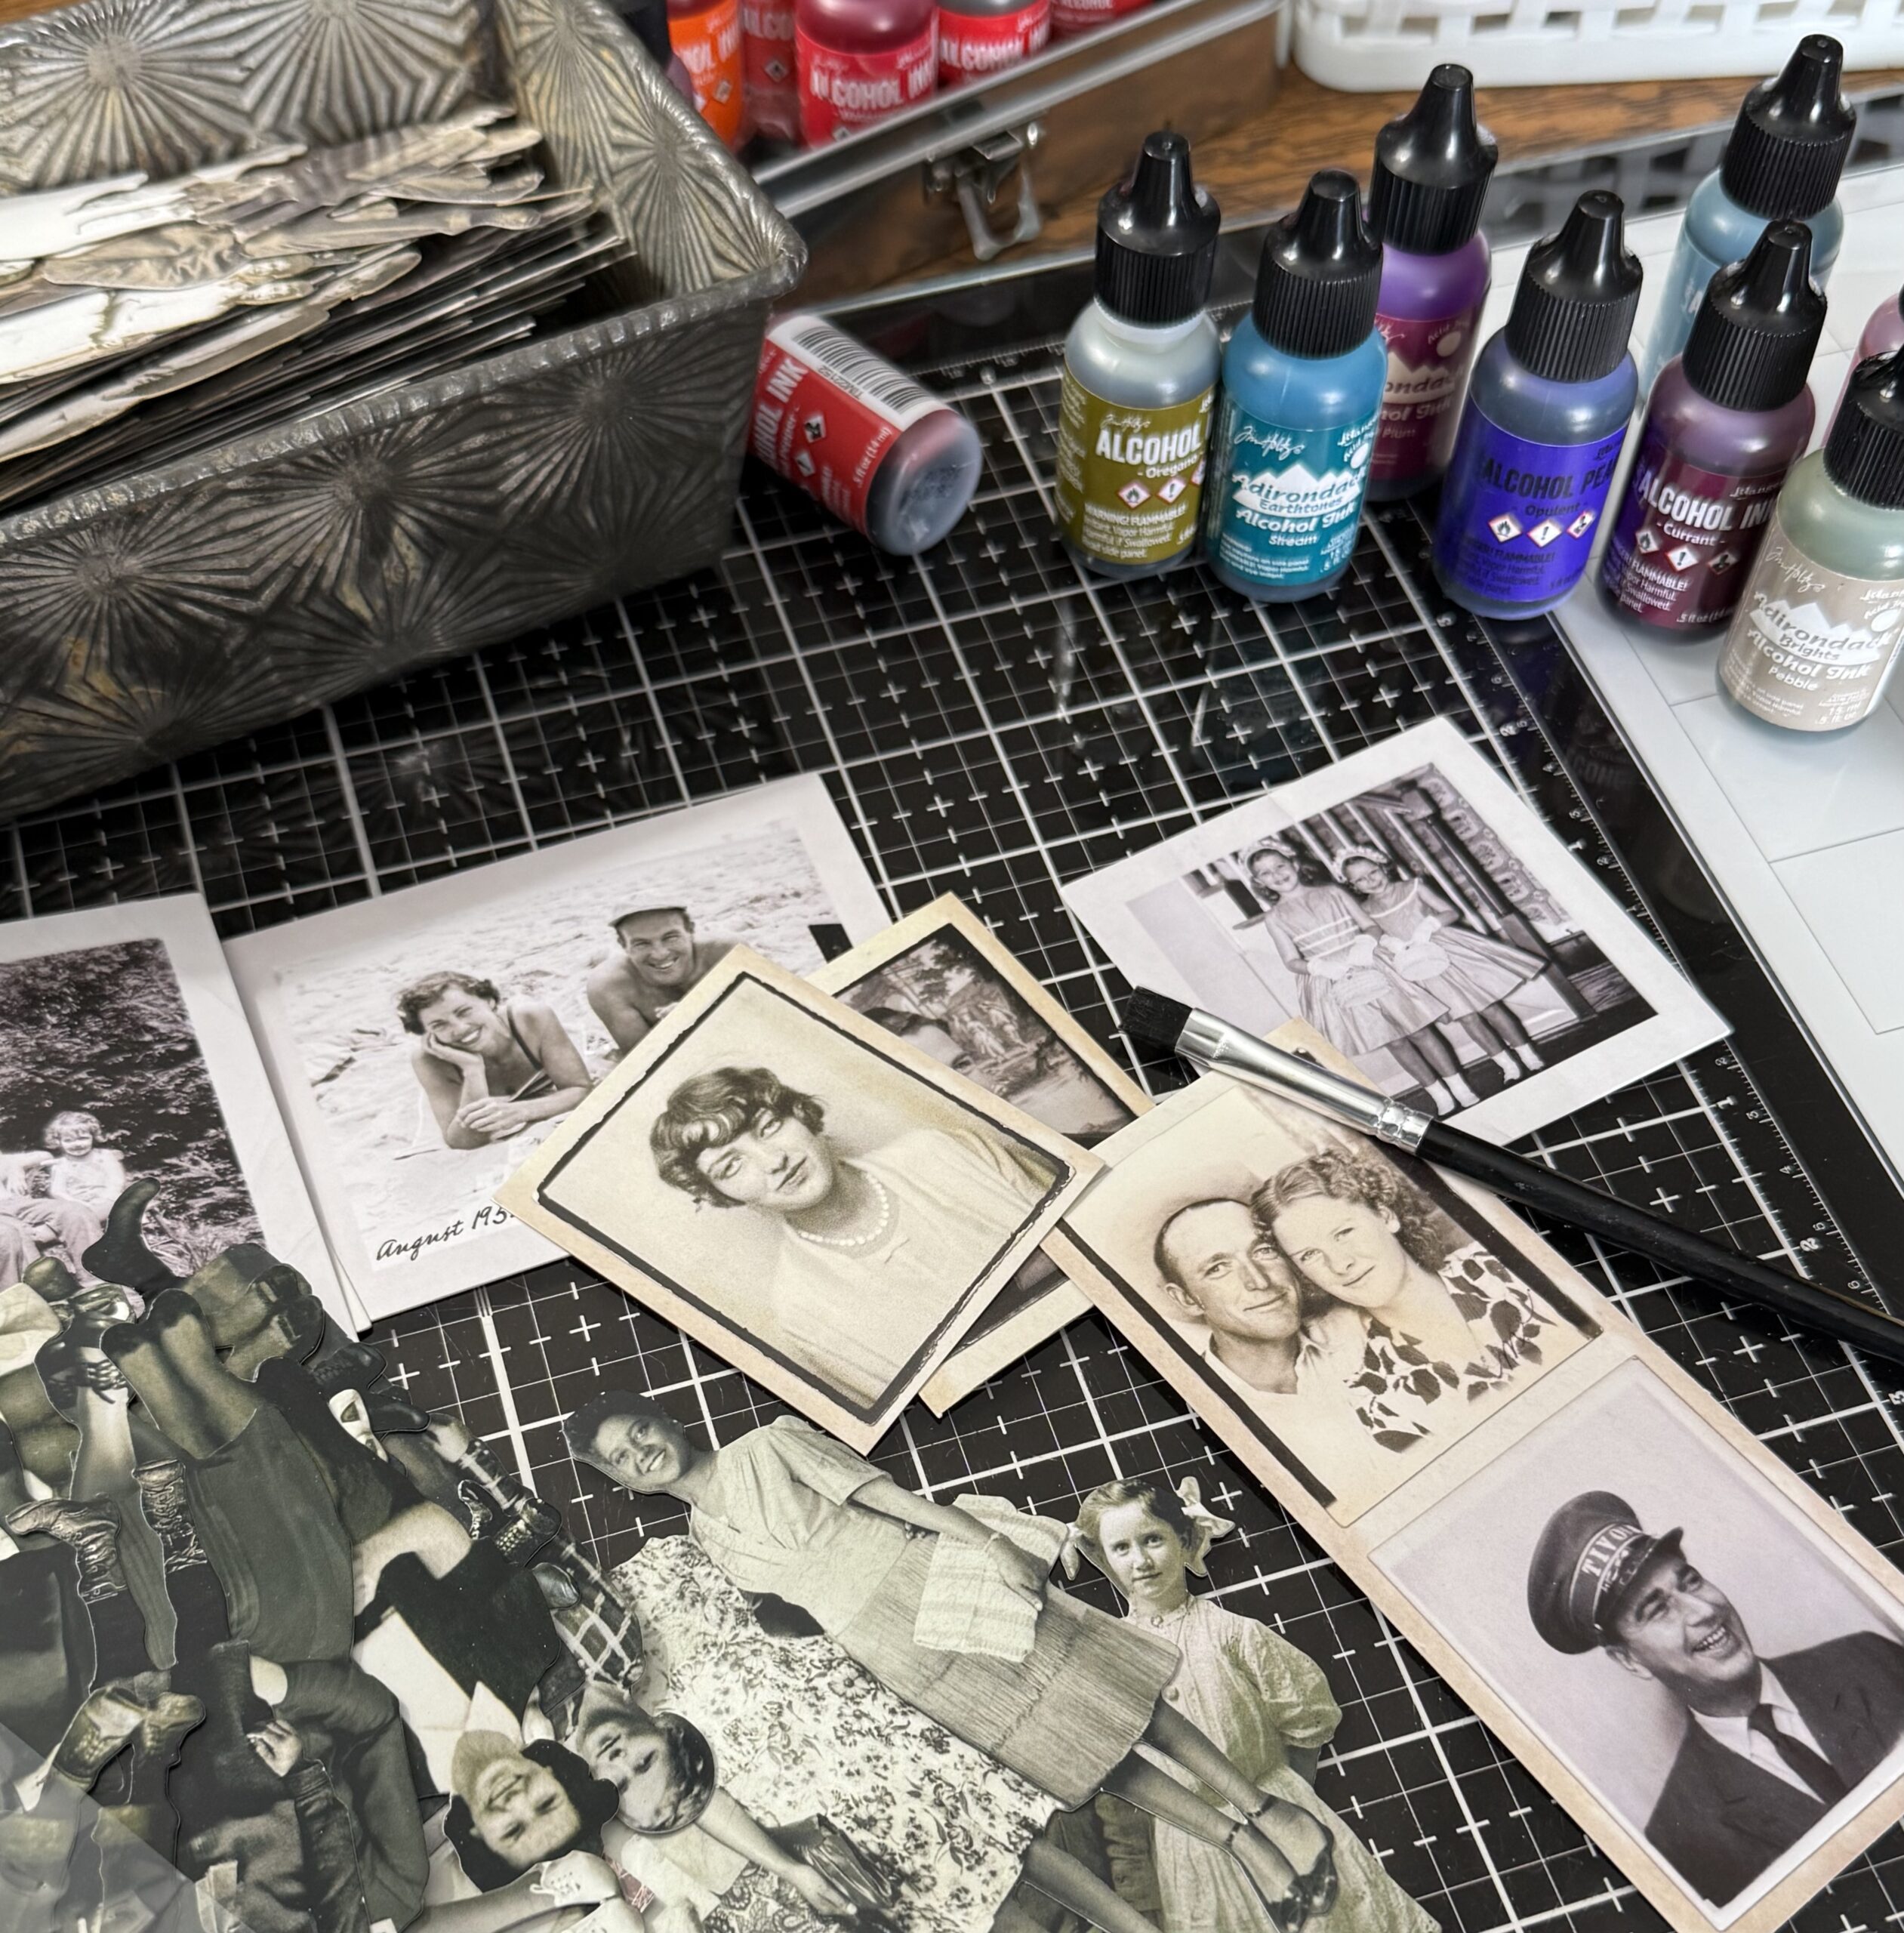
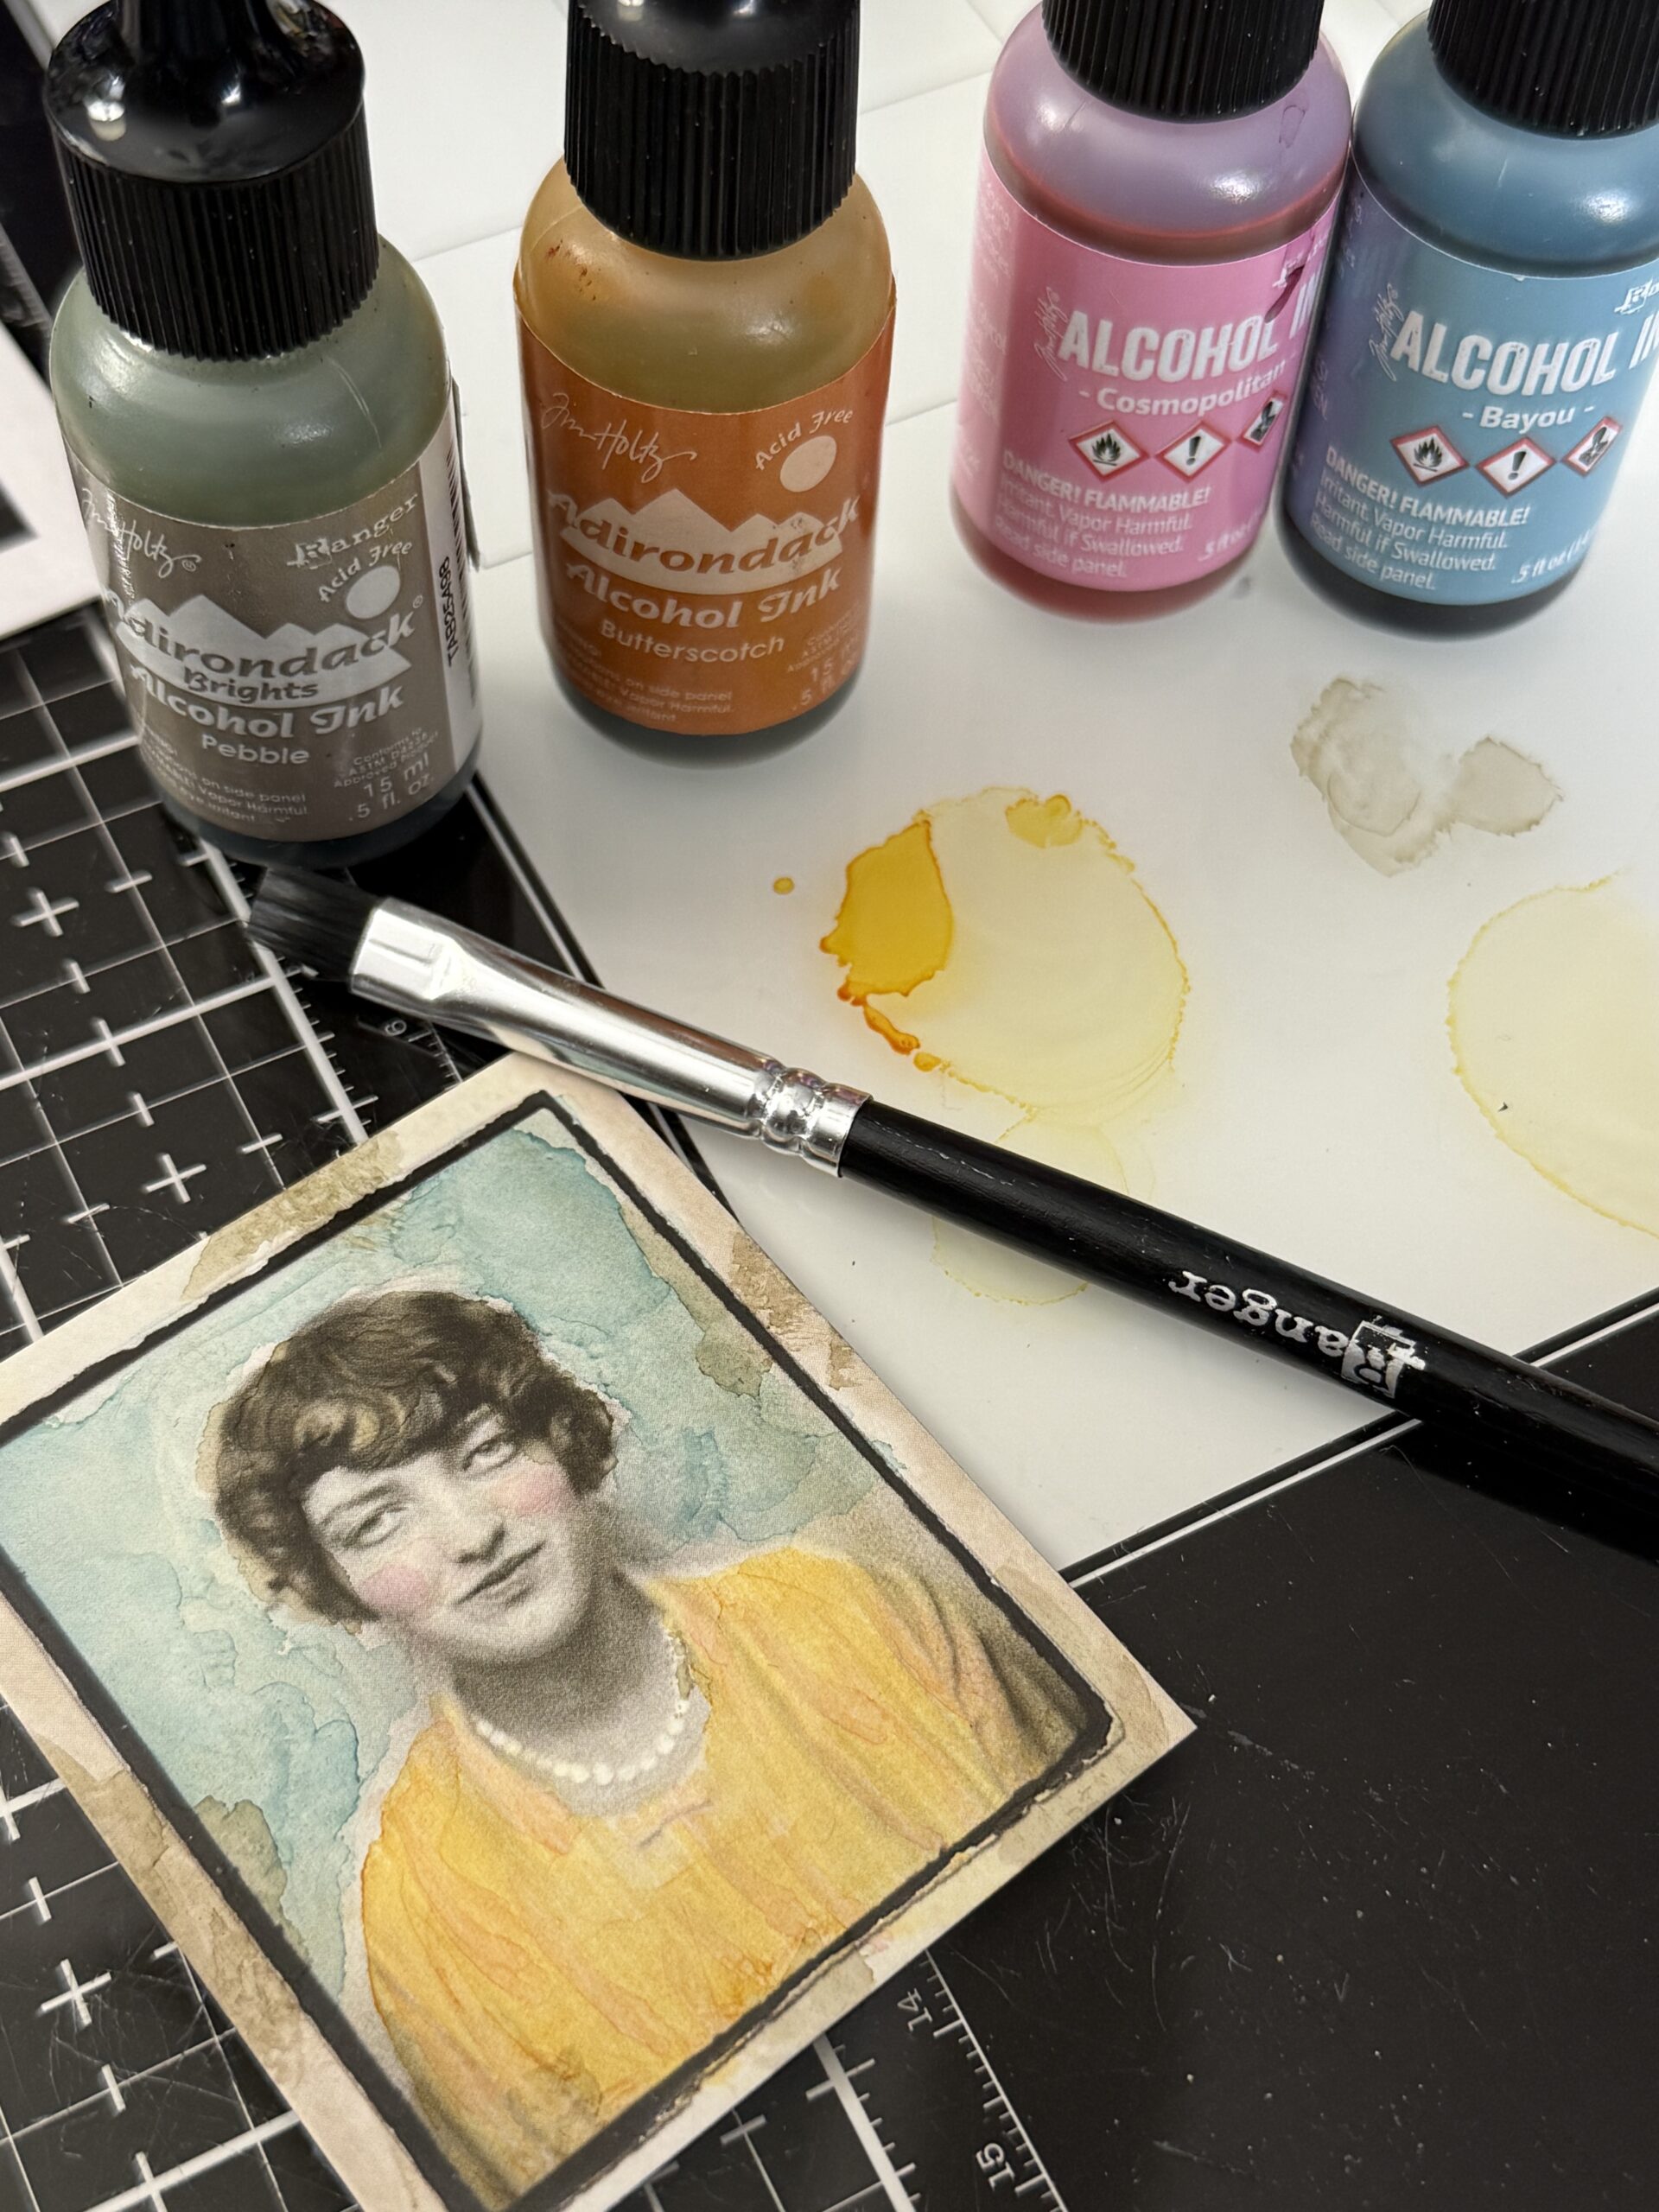
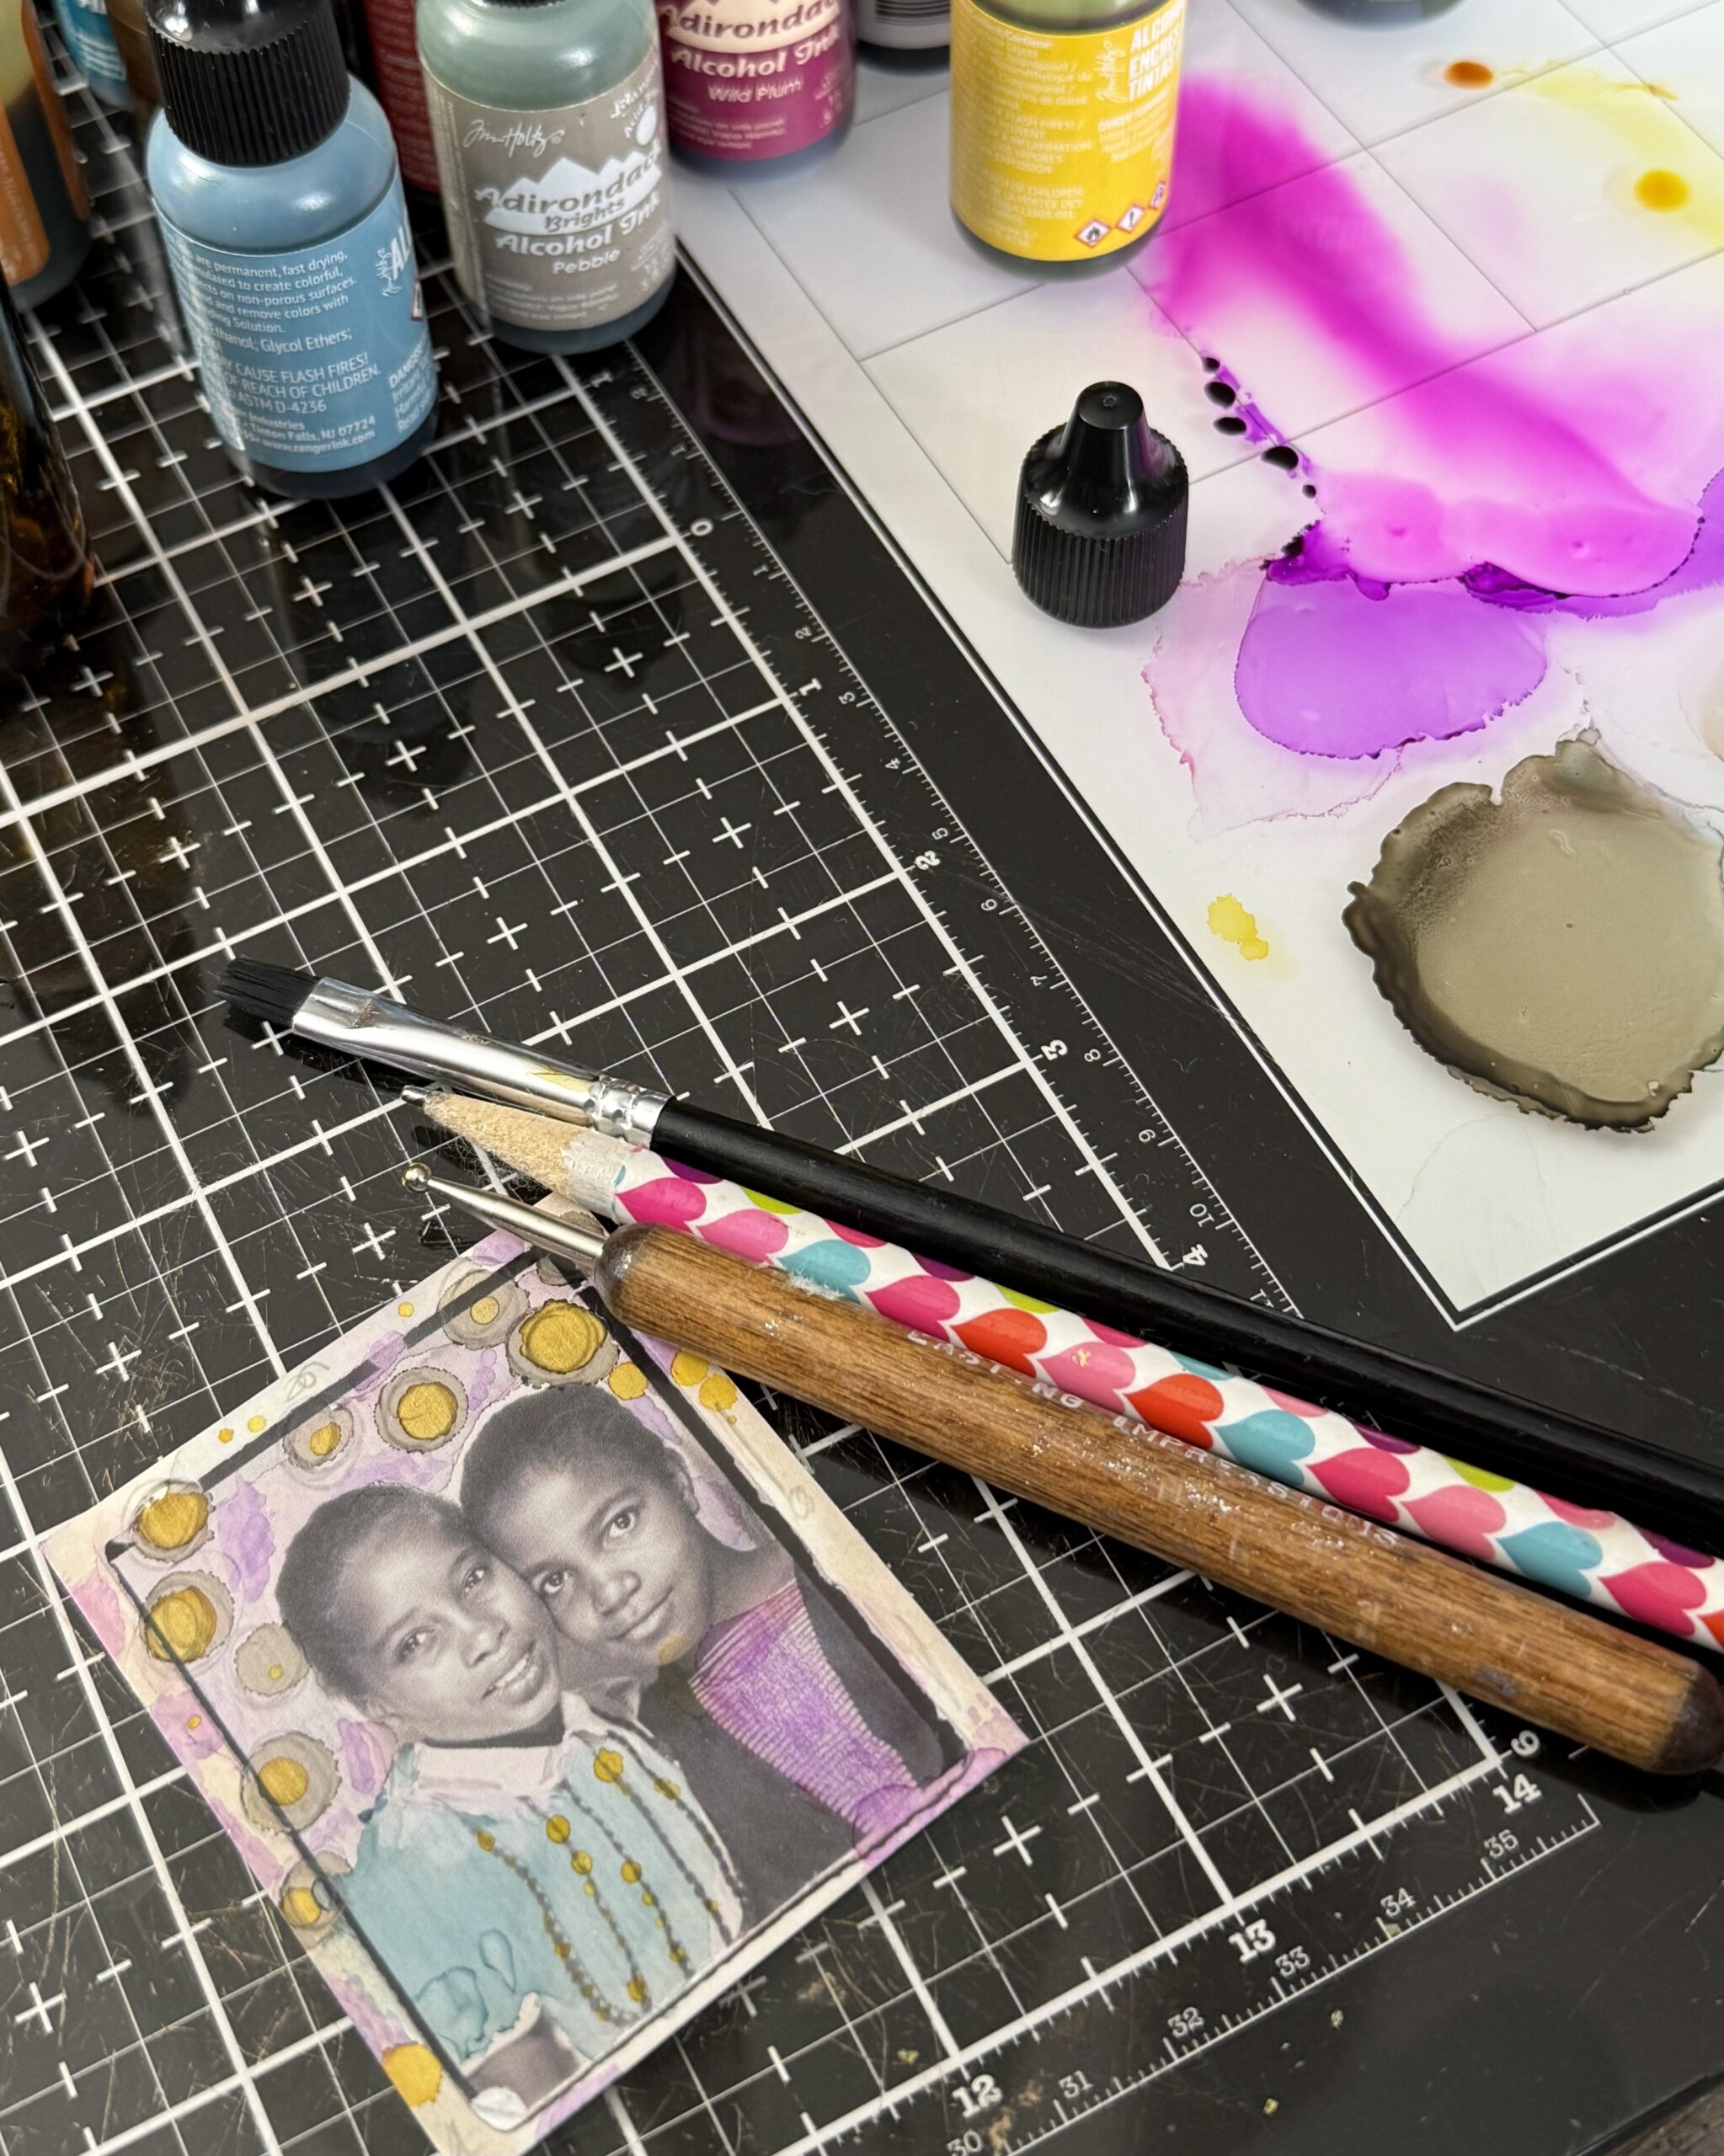
I started by selecting some idea-ology snapshot photos, paper dolls, Photo Booth and Photomatic and gathered some Alcohol Inks. I used the paint brush that was found in the Alcohol Ink Tool Set.. these brushes are made to be used with Alcohol Inks and the bristles stand up to the alcohol in the inks, making them perfect for using for this technique. I also used 91% Isopropyl Alcohol as water while painting on the photos. The Isopropyl Alcohol works to clean the brush and also to blend colors together and thin the color, as water would do with paints. My heat tool was also used to dry the alcohol inks in between applying different colors to the photos.
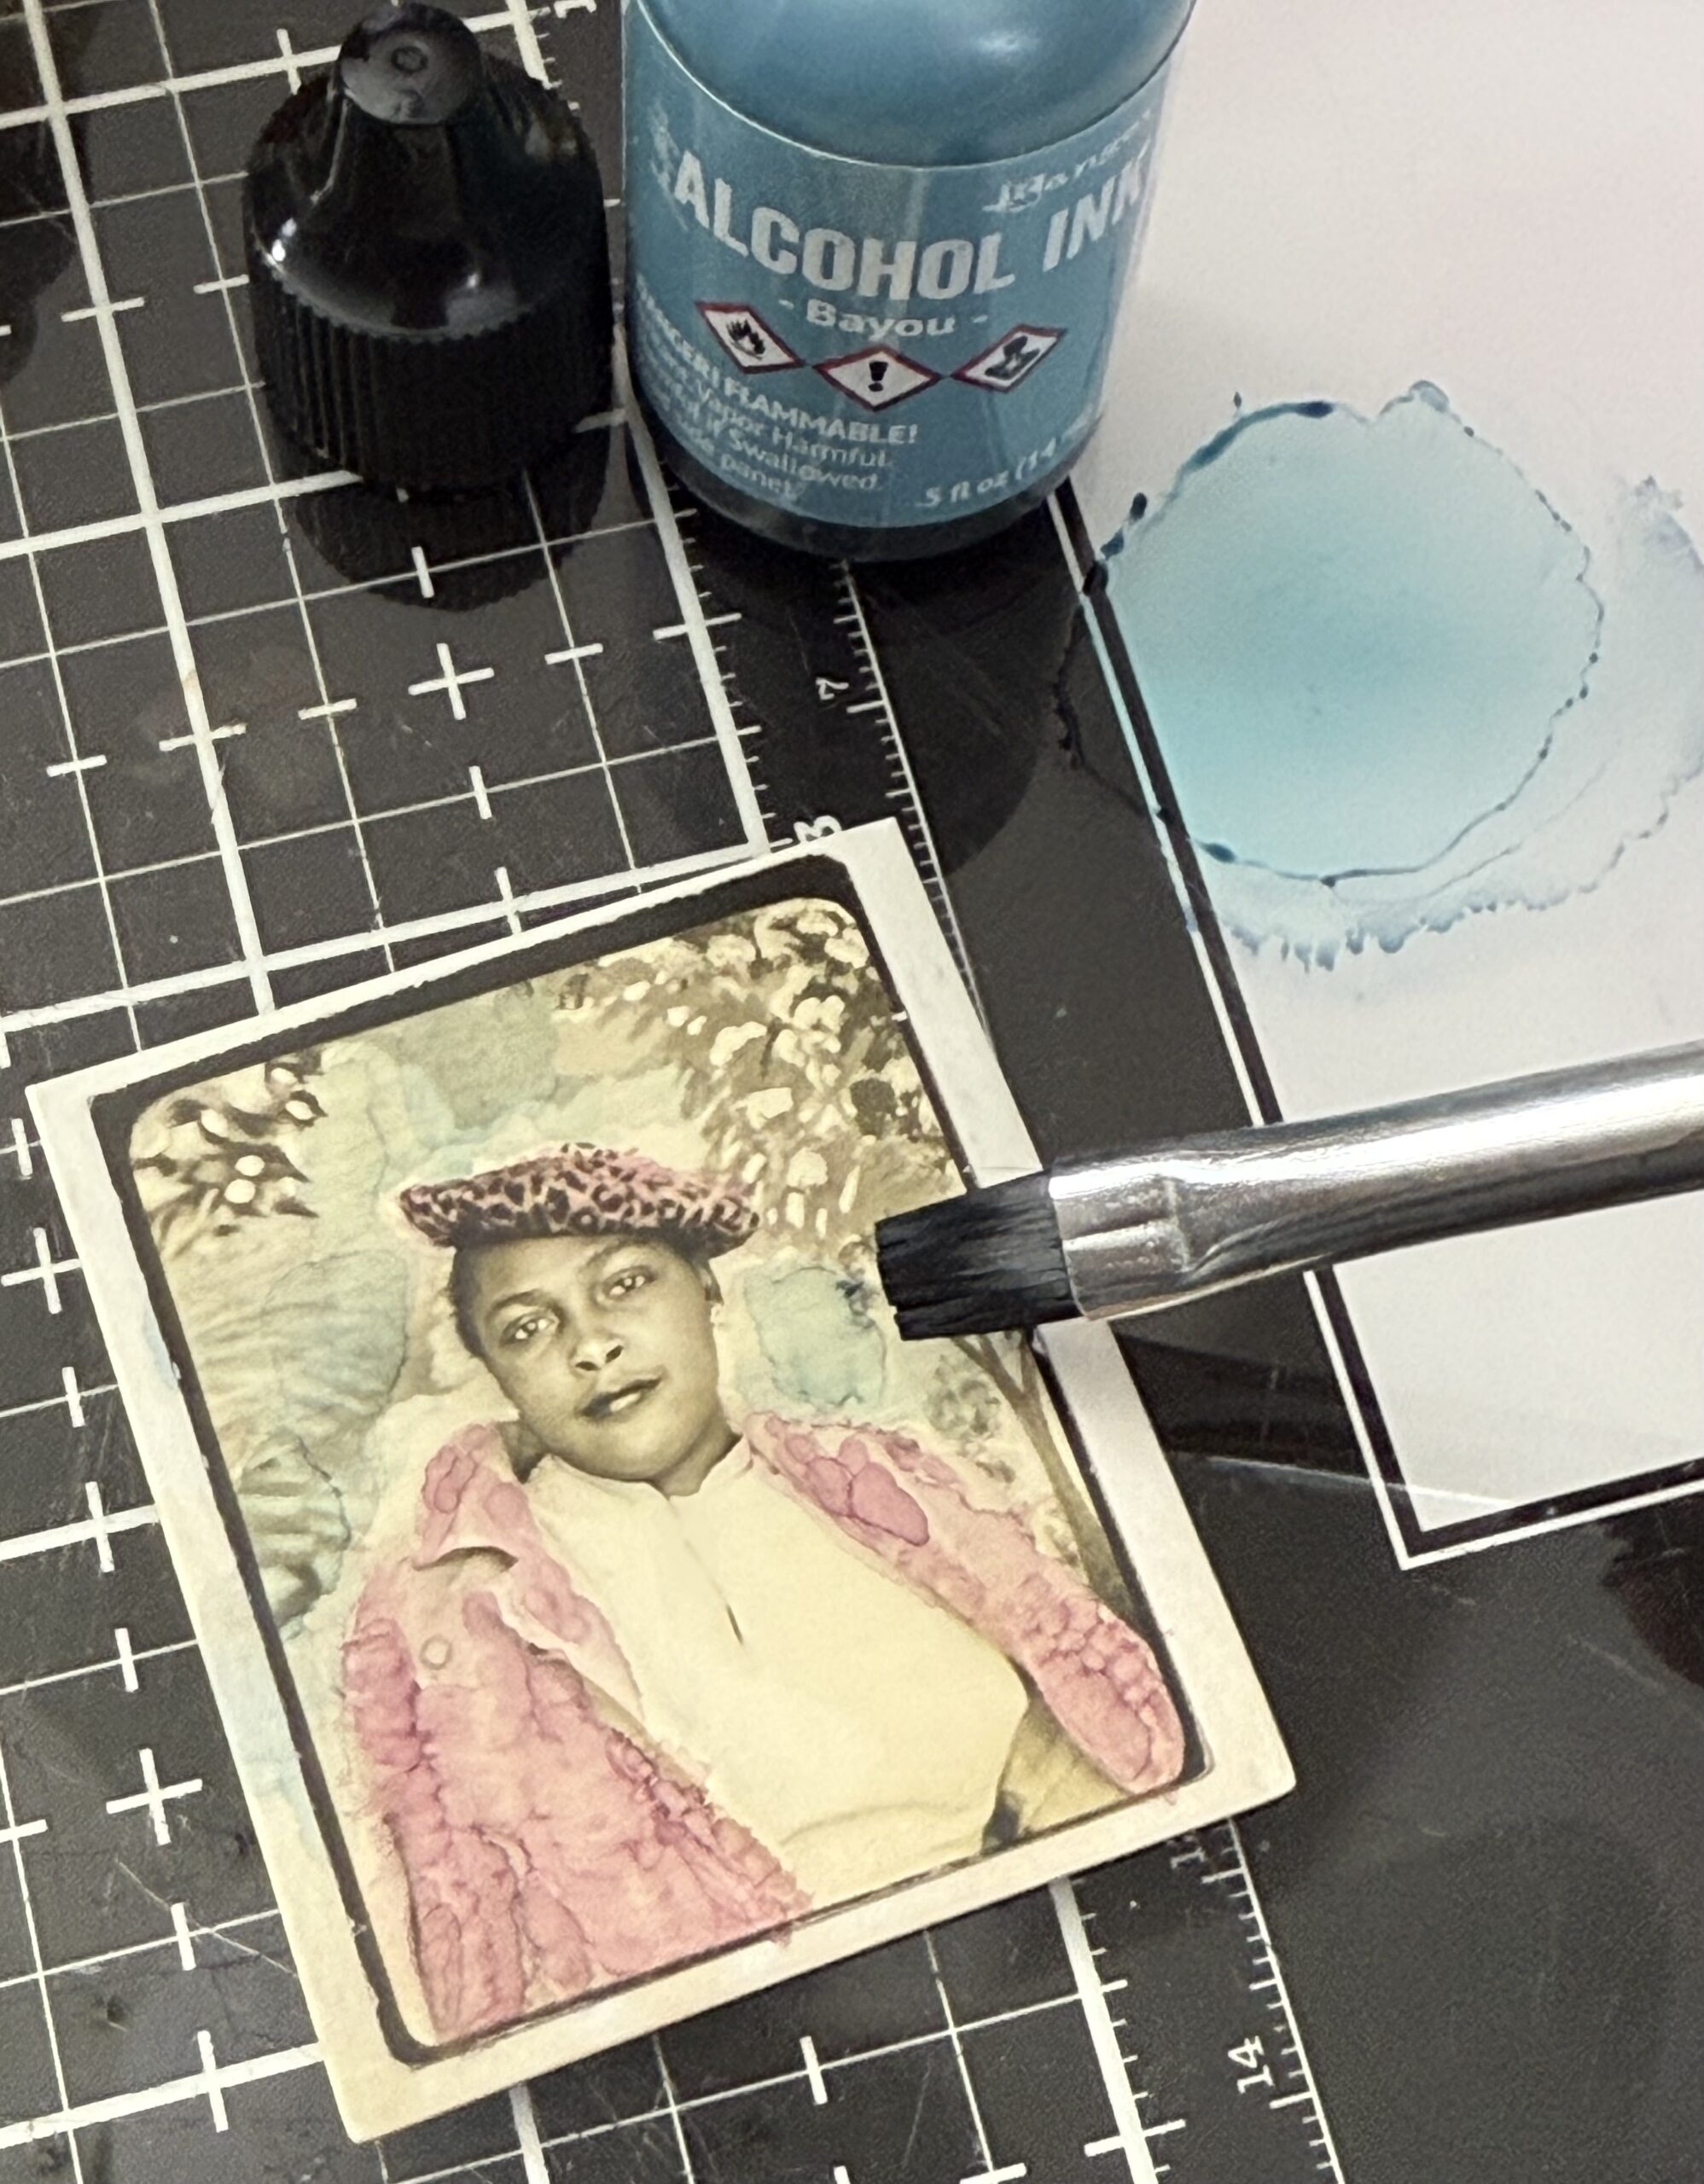
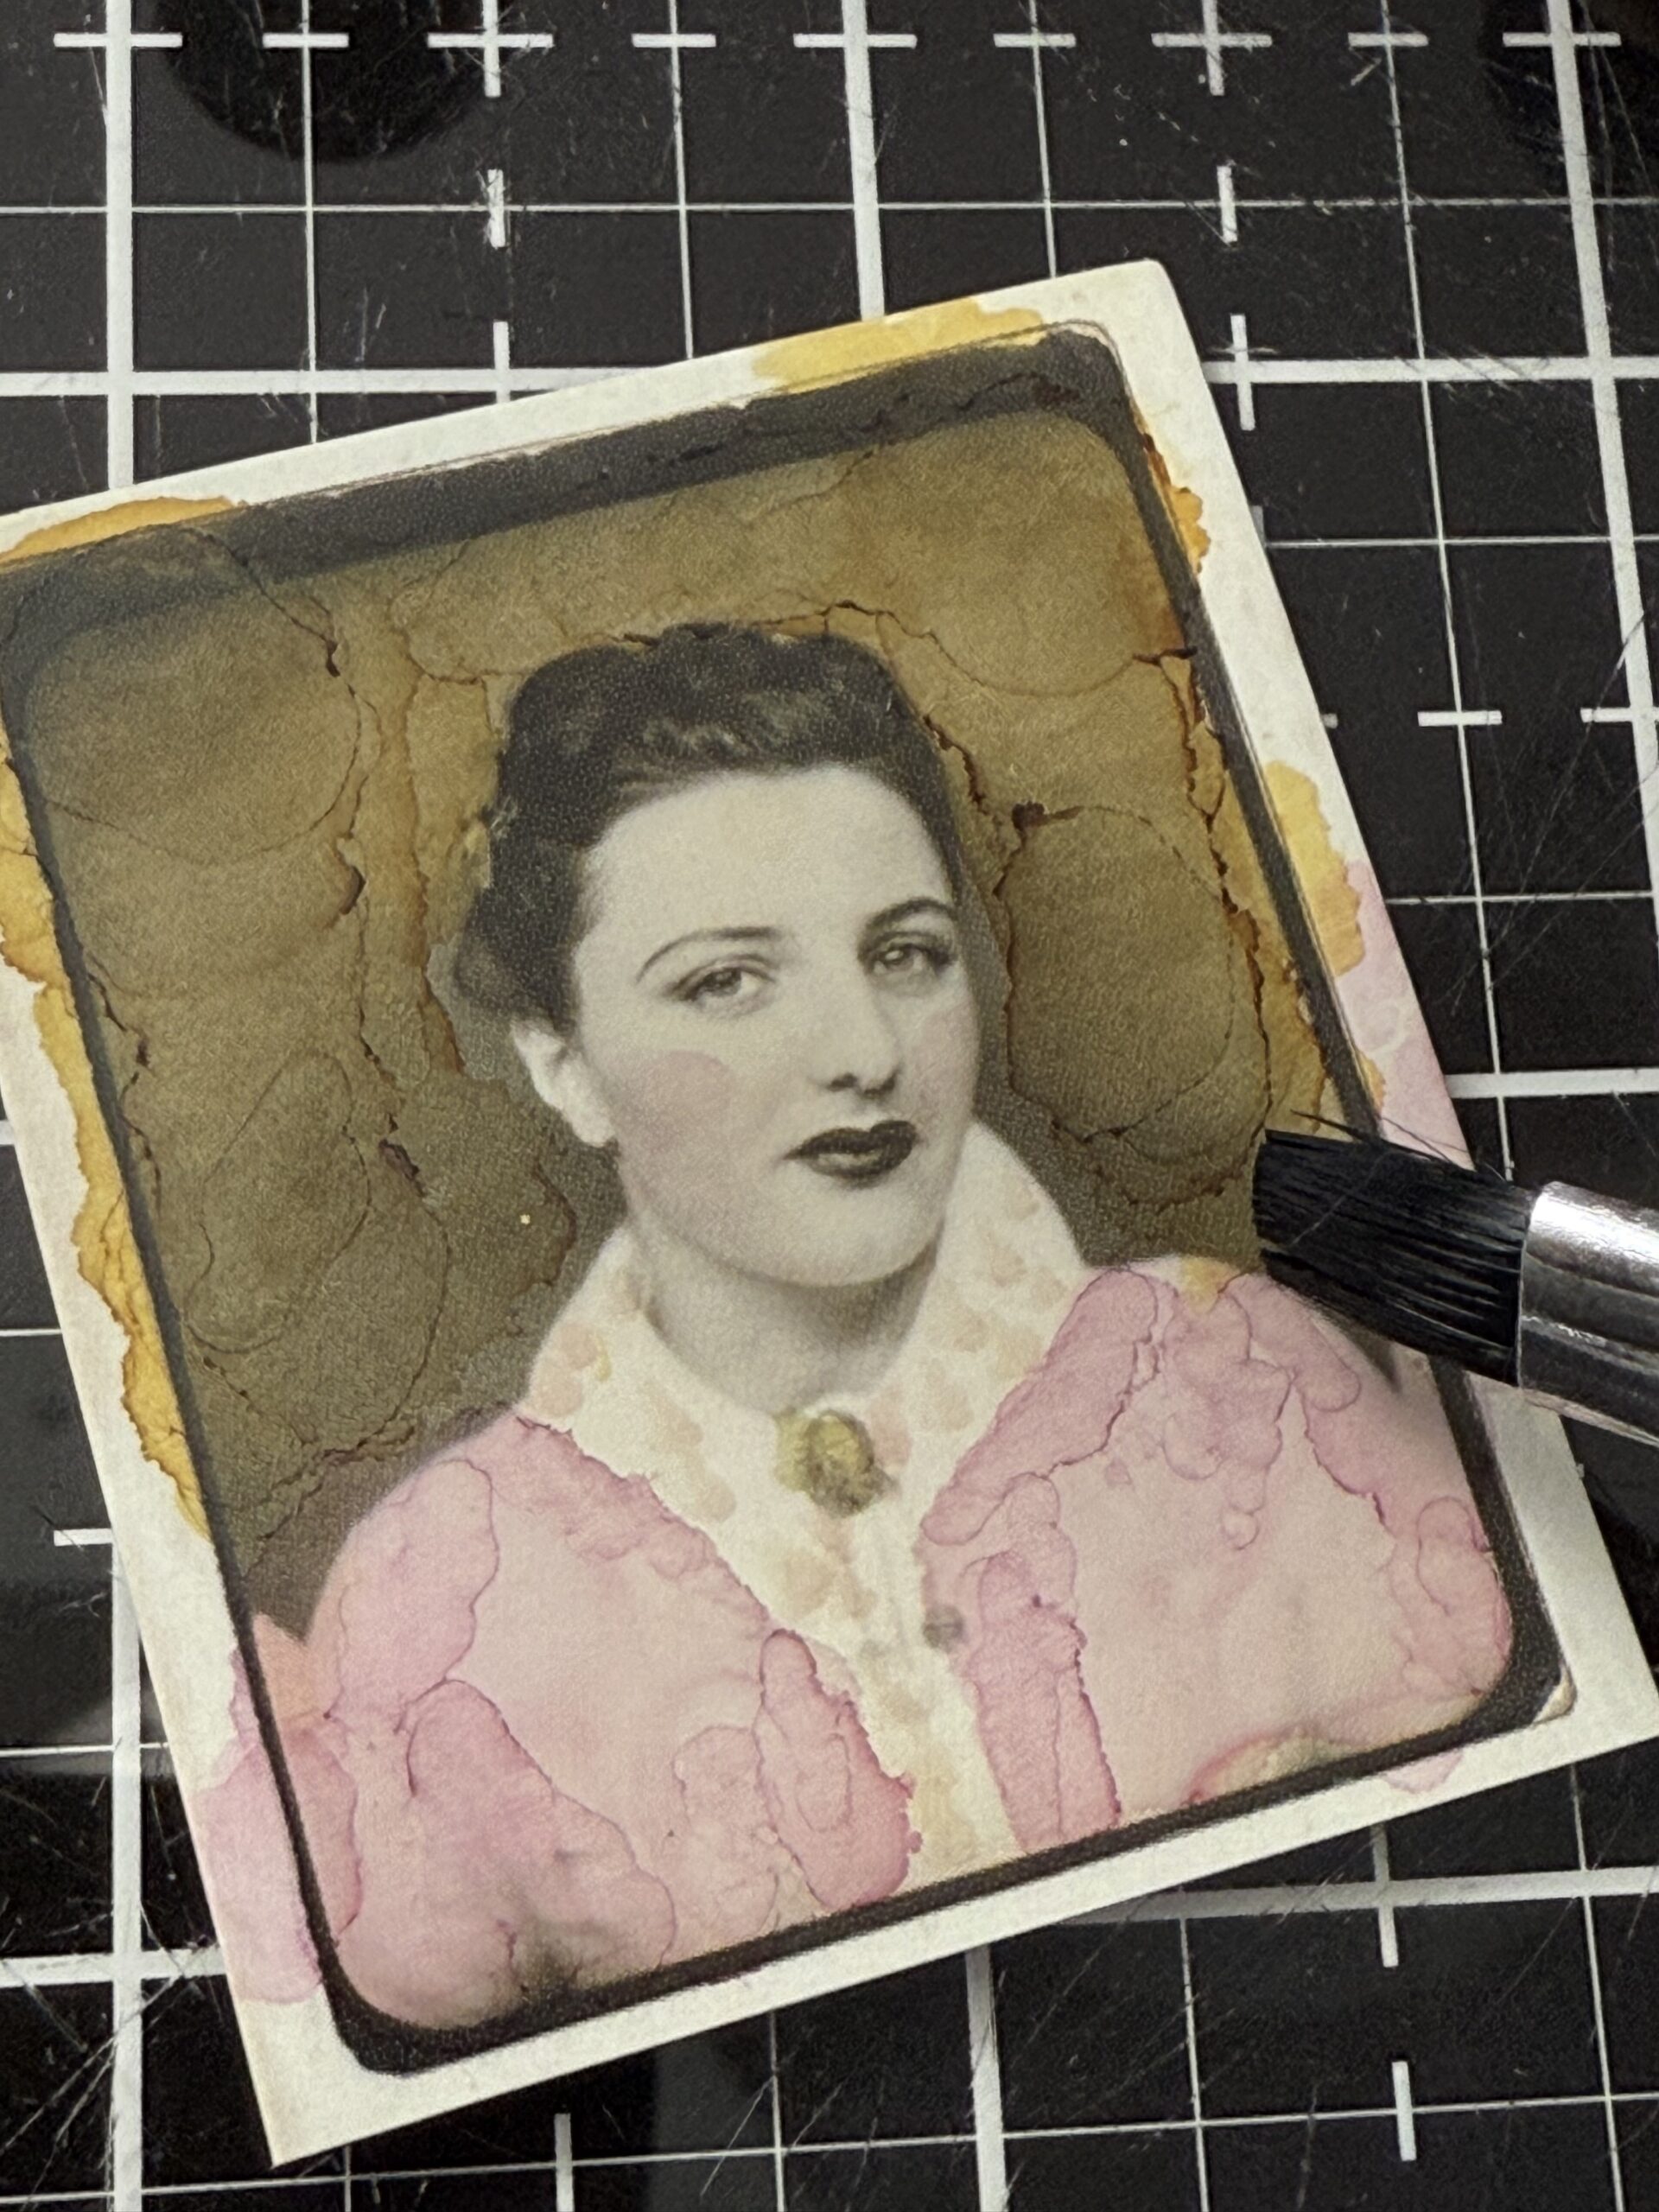
I started by using a couple of Photo Booth photos.
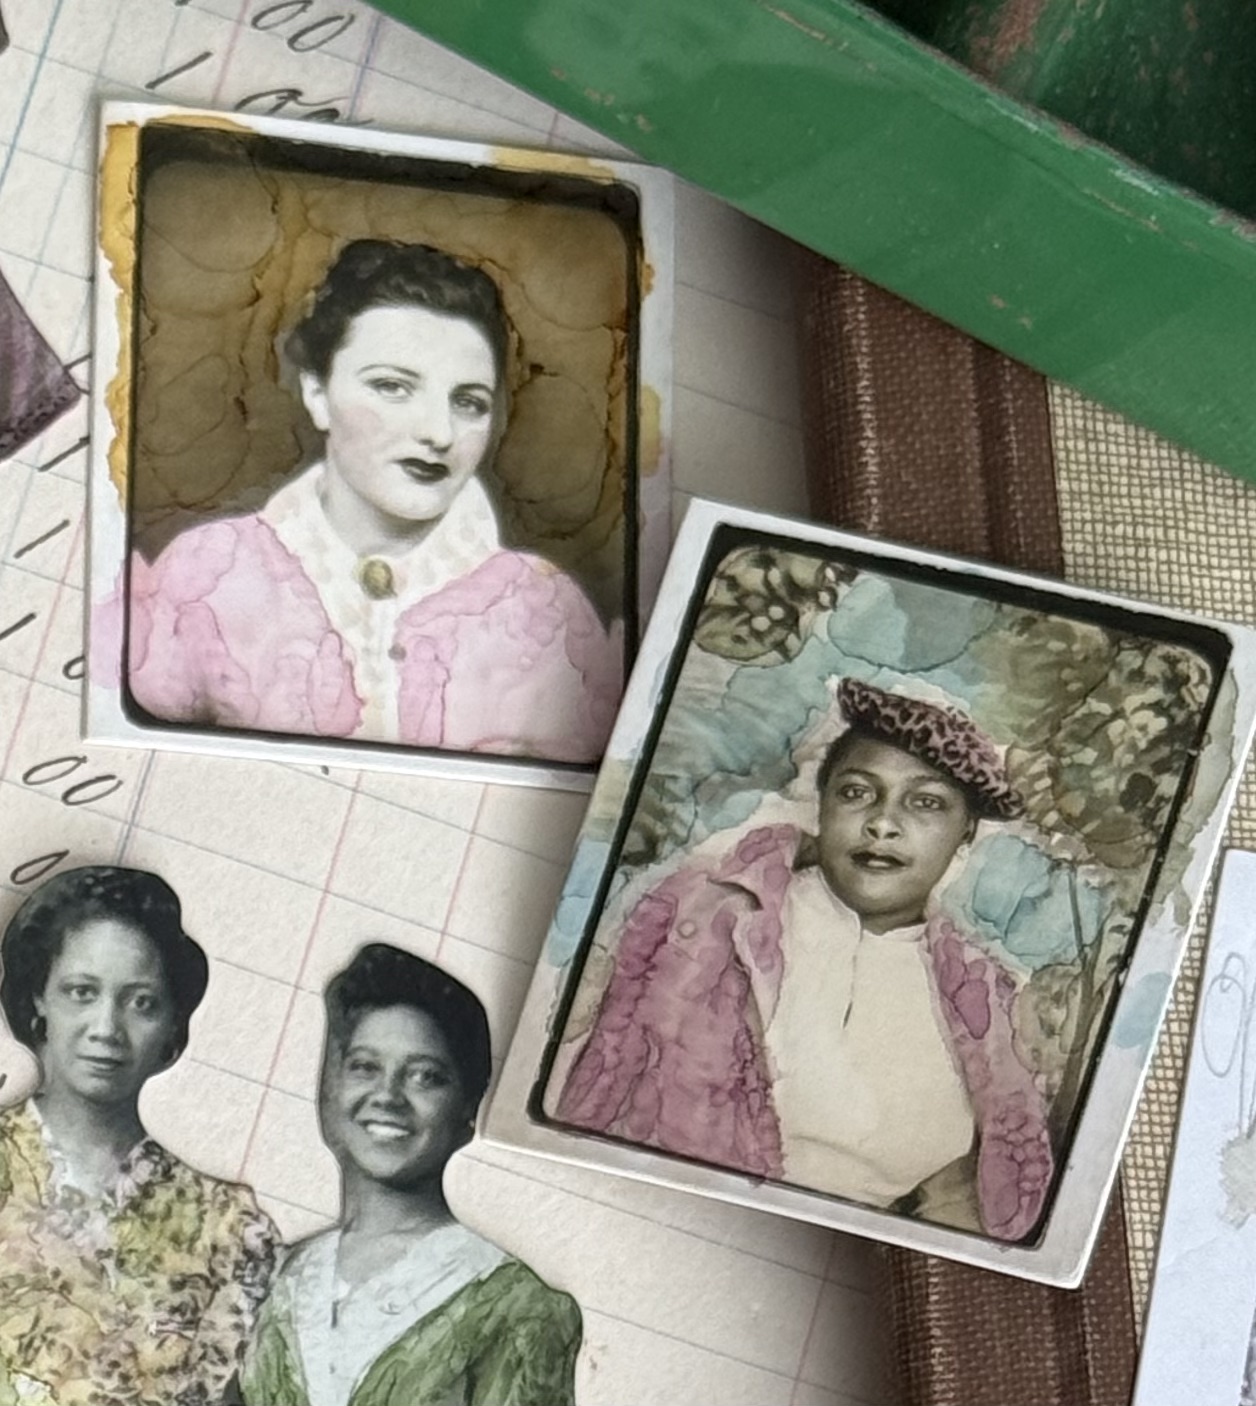
Yonder, Currant and Pebble were my color choices for this first one…I then added some Wilderness into the background to accent the tops of the trees in the background.
I started by dripping some Currant and Yonder onto my glass mat, then dripped on some isopropyl alcohol. I picked up a combo of the colors and painted that onto her coat. The little tiny dots of blended color are created when you dot the paint brush onto the painted color. If you have any experience with alcohol ink, this is how the alcohol ink color moves. I just dotted my paint brush to create tiny accents on her coat and colored her hat using the same color. I quickly used my heat tool to dry the colors.
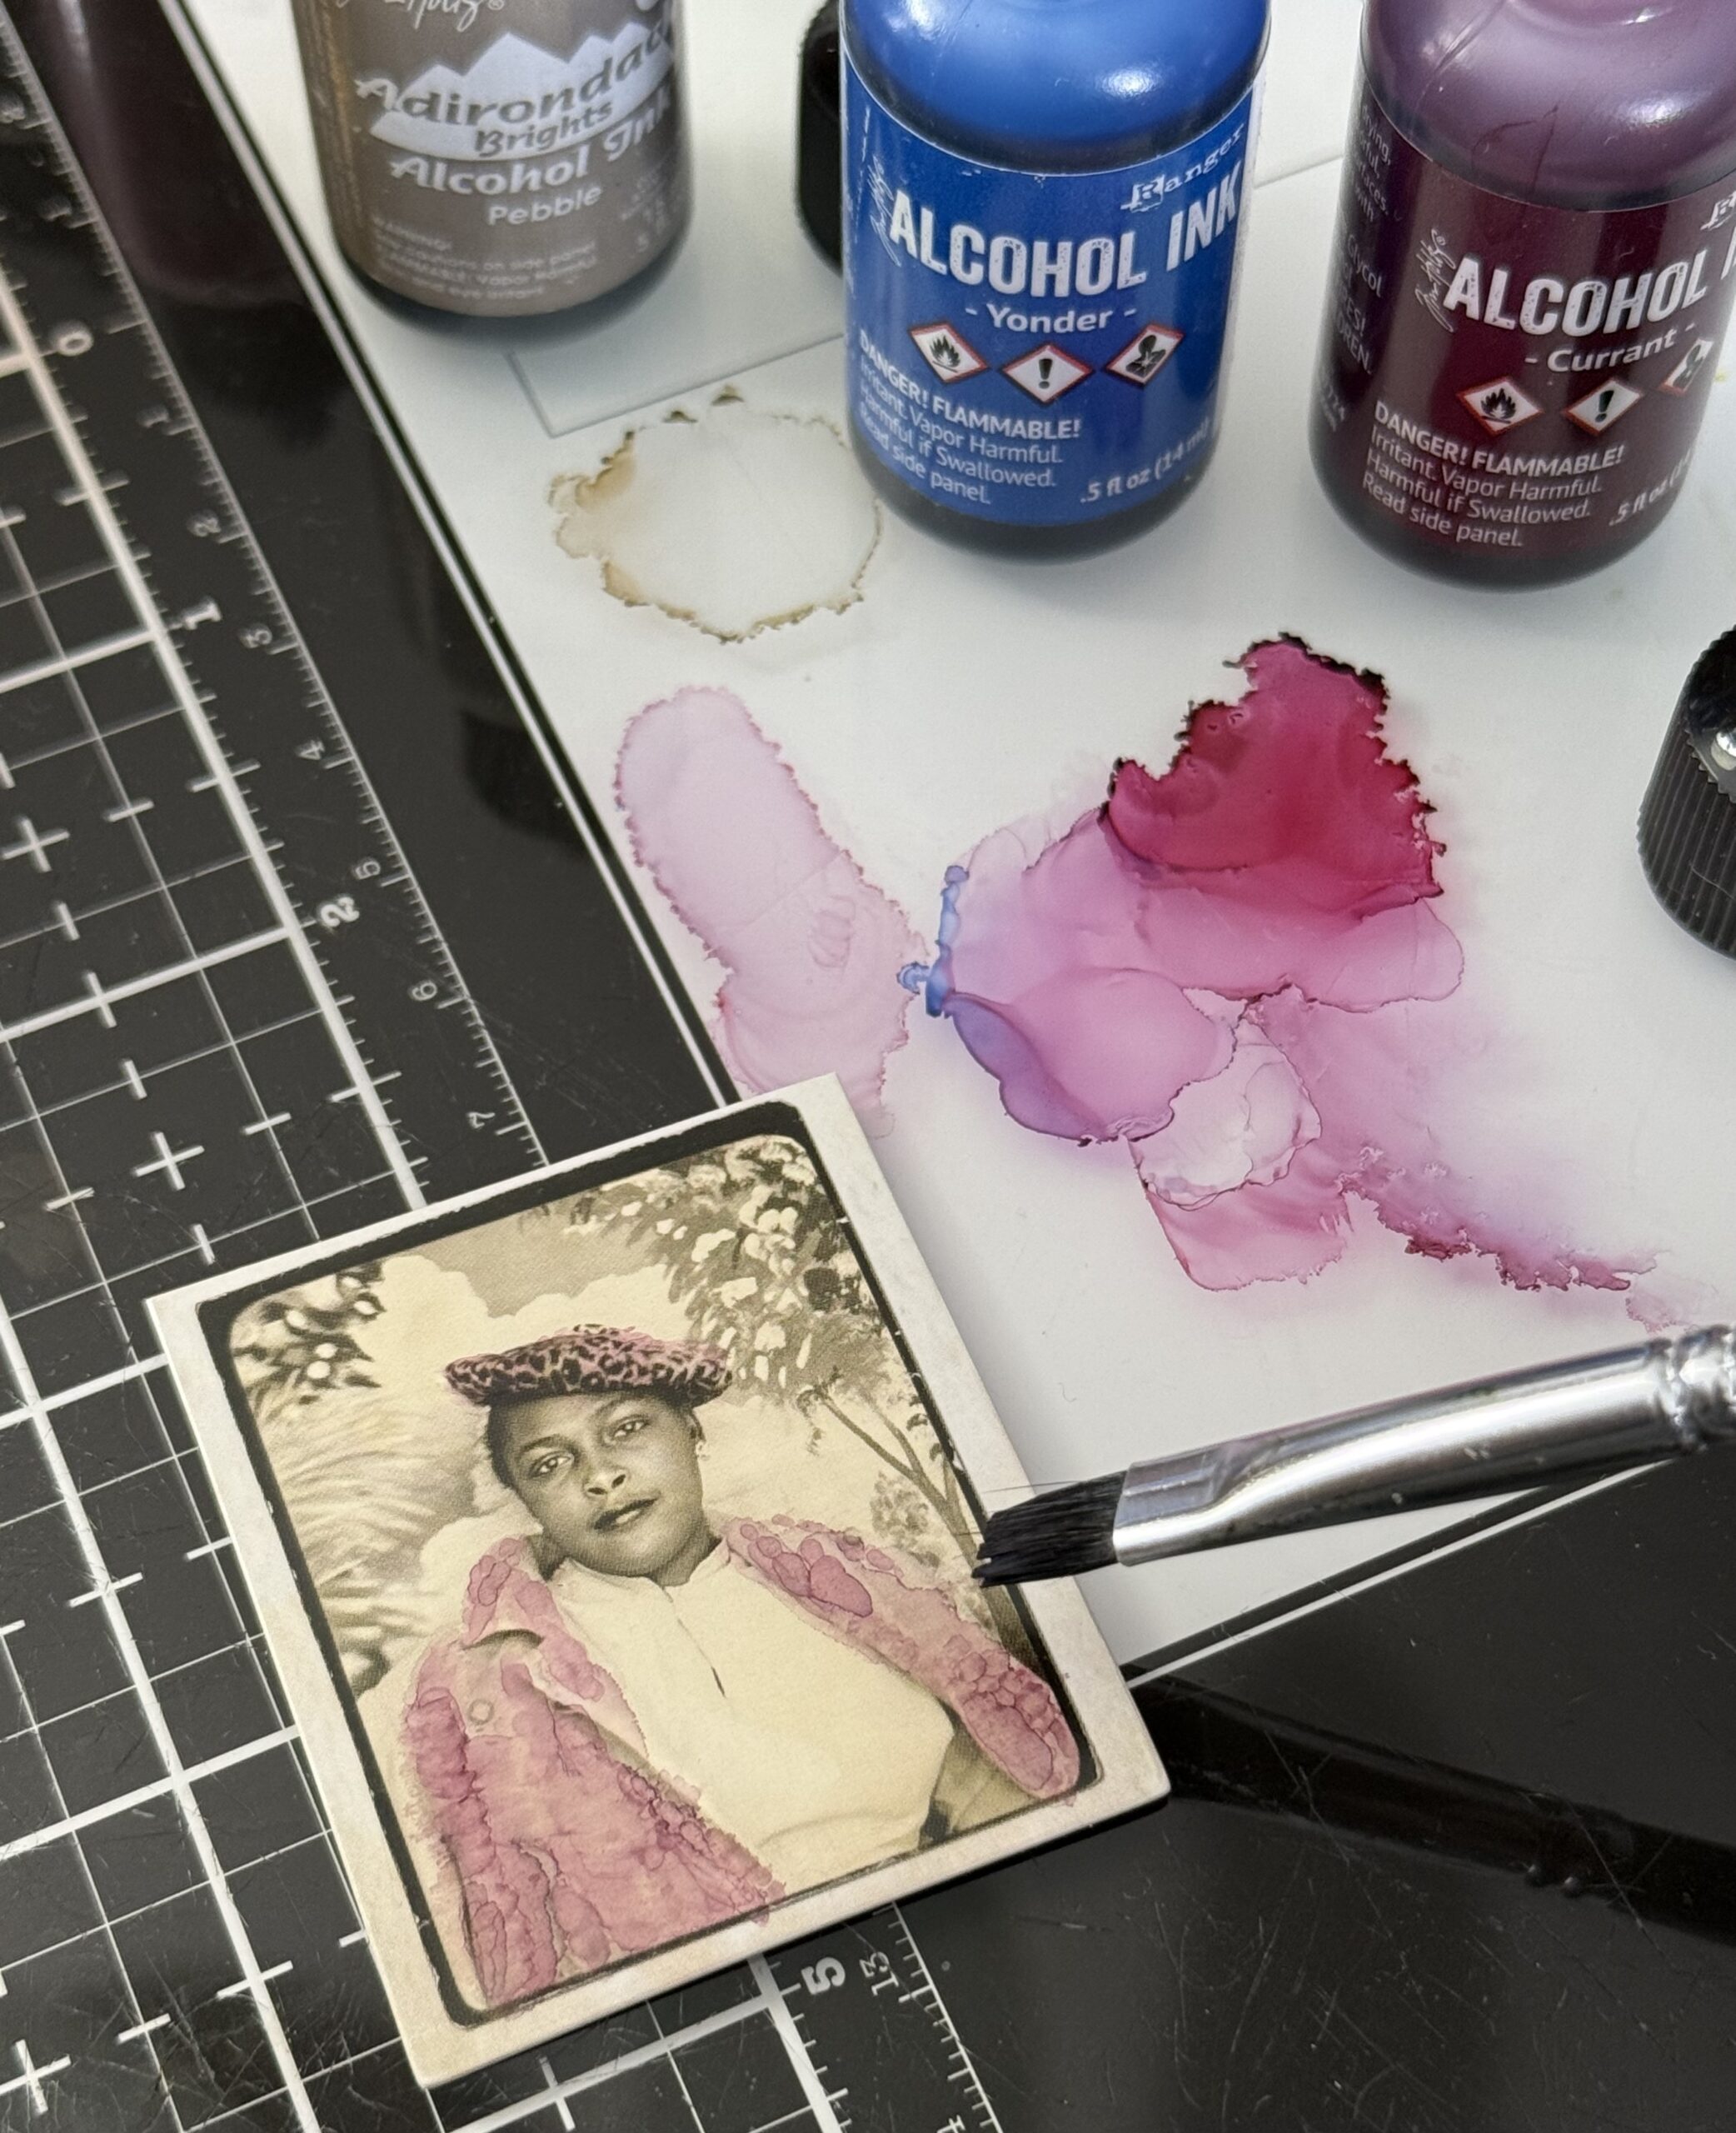
Then I added some of the Bayou to the sky background areas, I dried the color using my heat tool and layered on a little my Bayou.
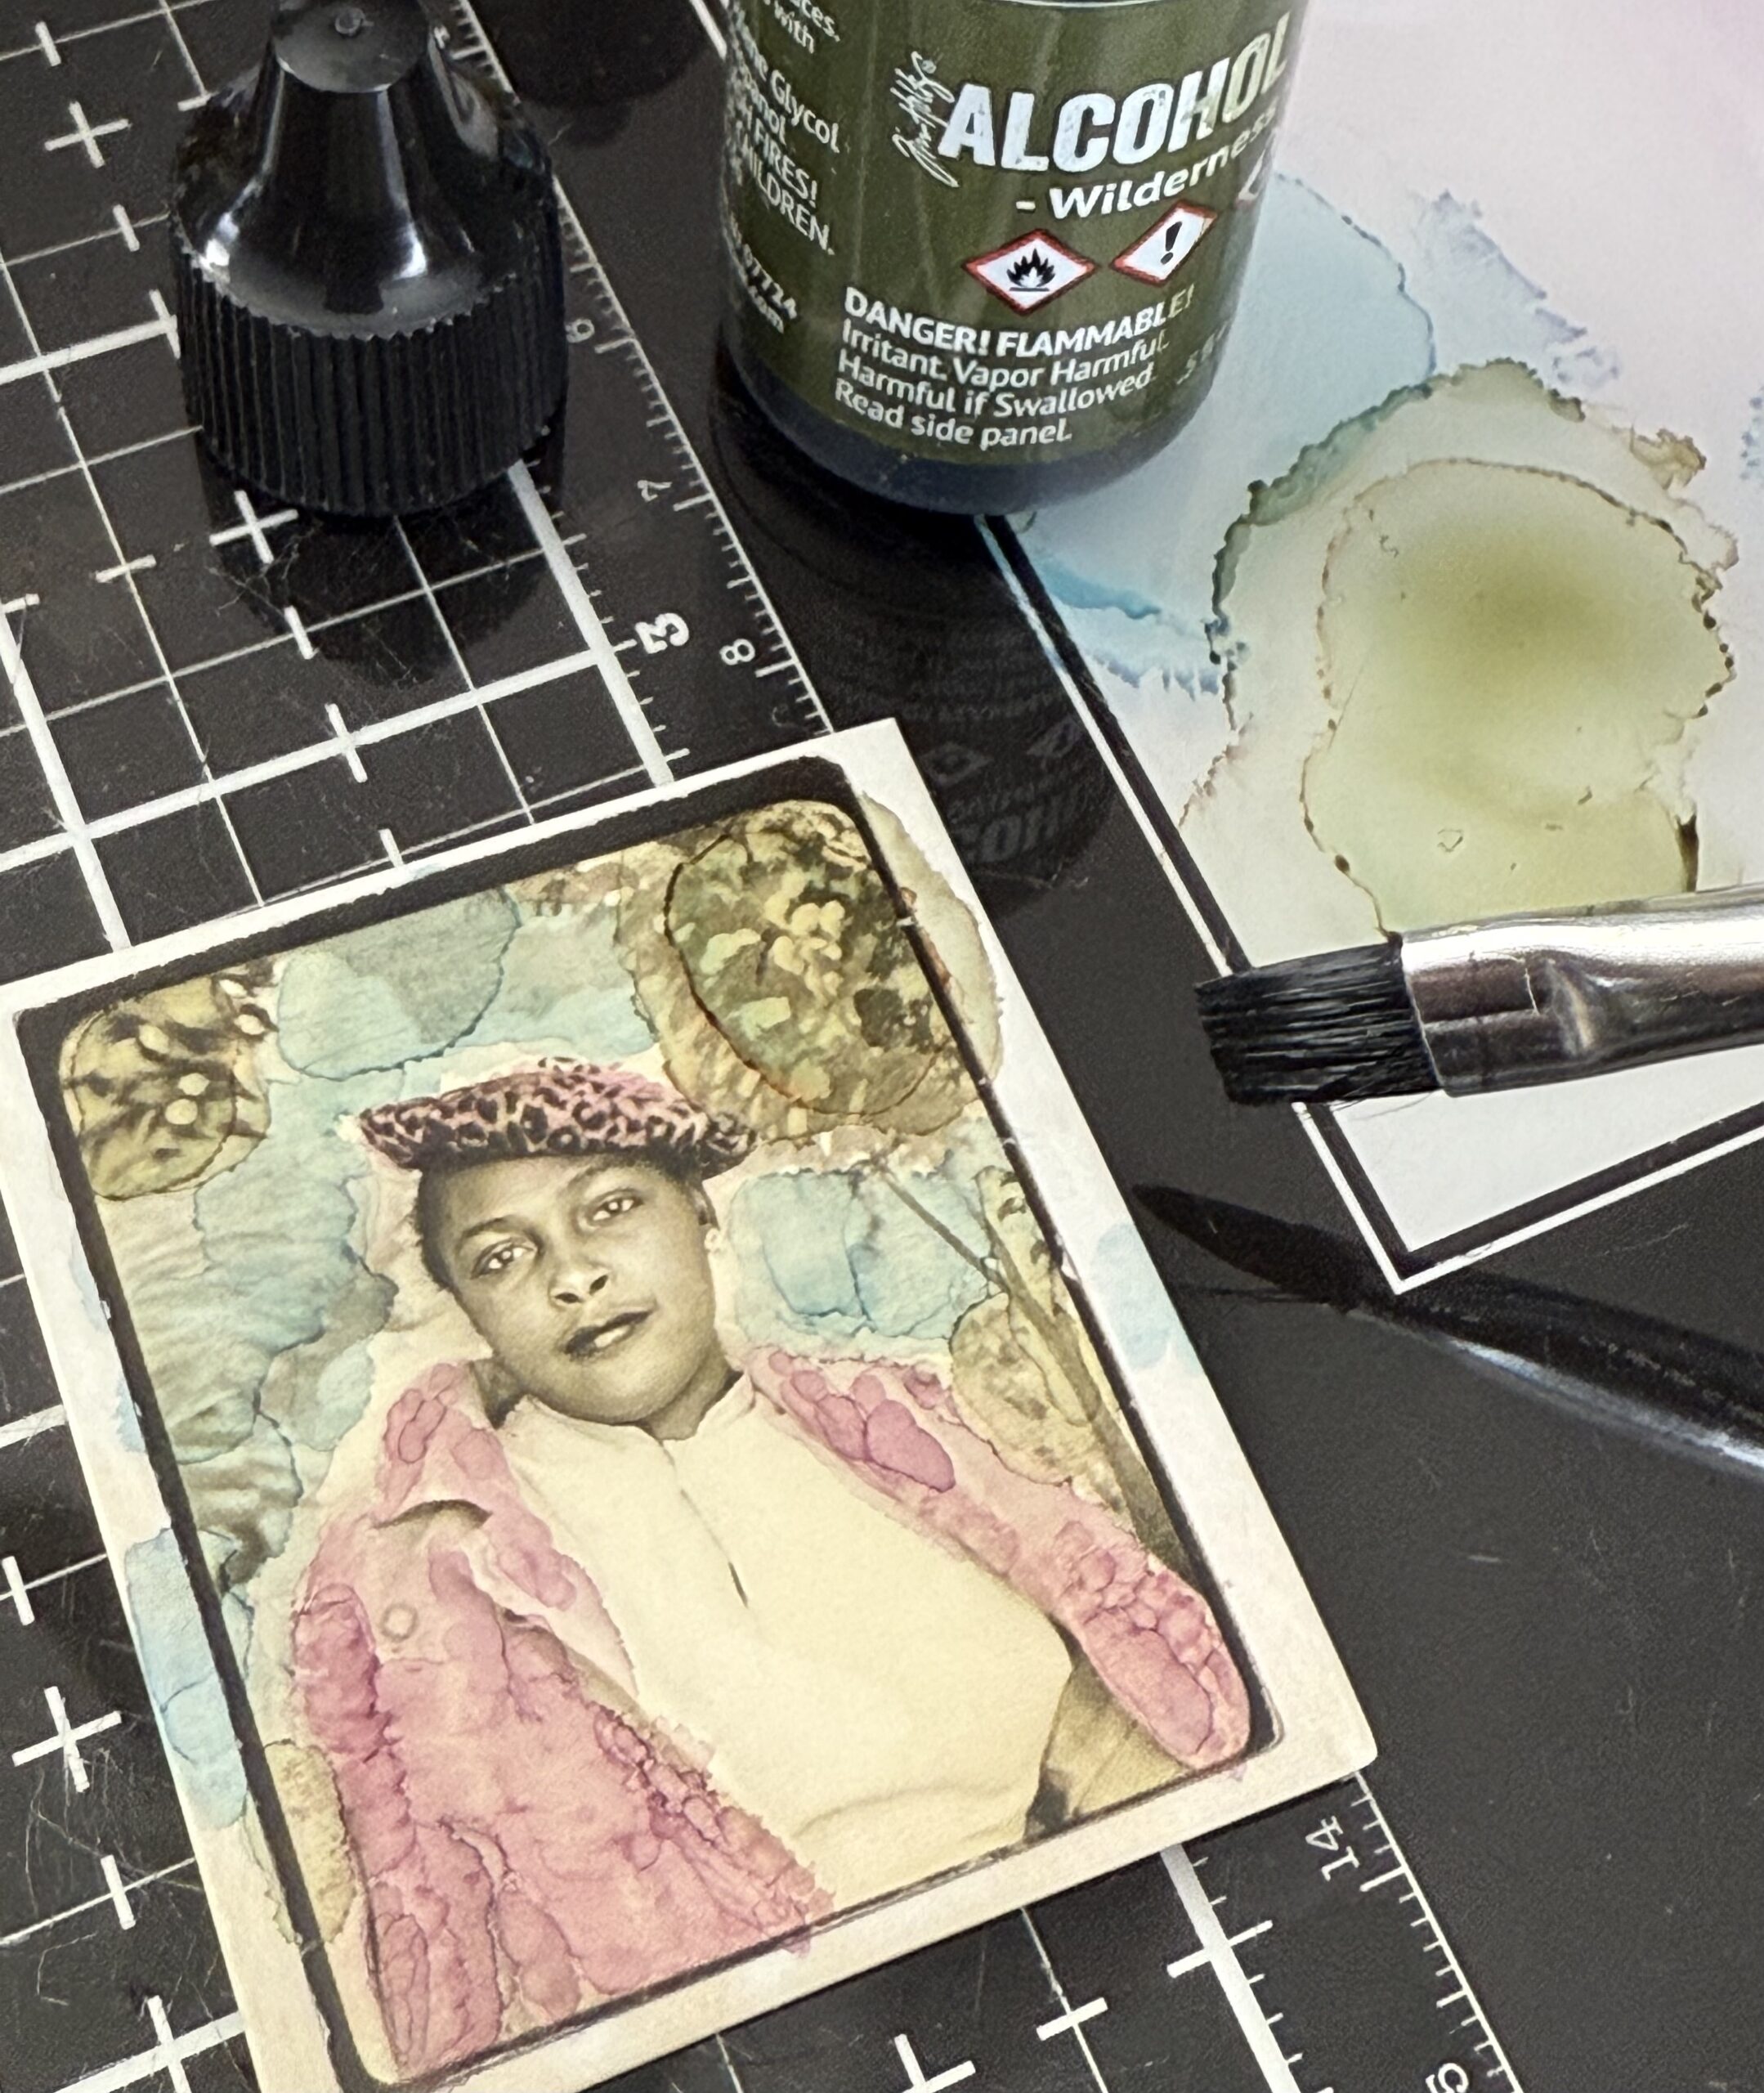
Then I added some Wilderness Alcohol ink onto the tree background on the right and a dab on the left. I also added some color onto the edges to create a watercolored look. Then I dried it with my heat tool again.
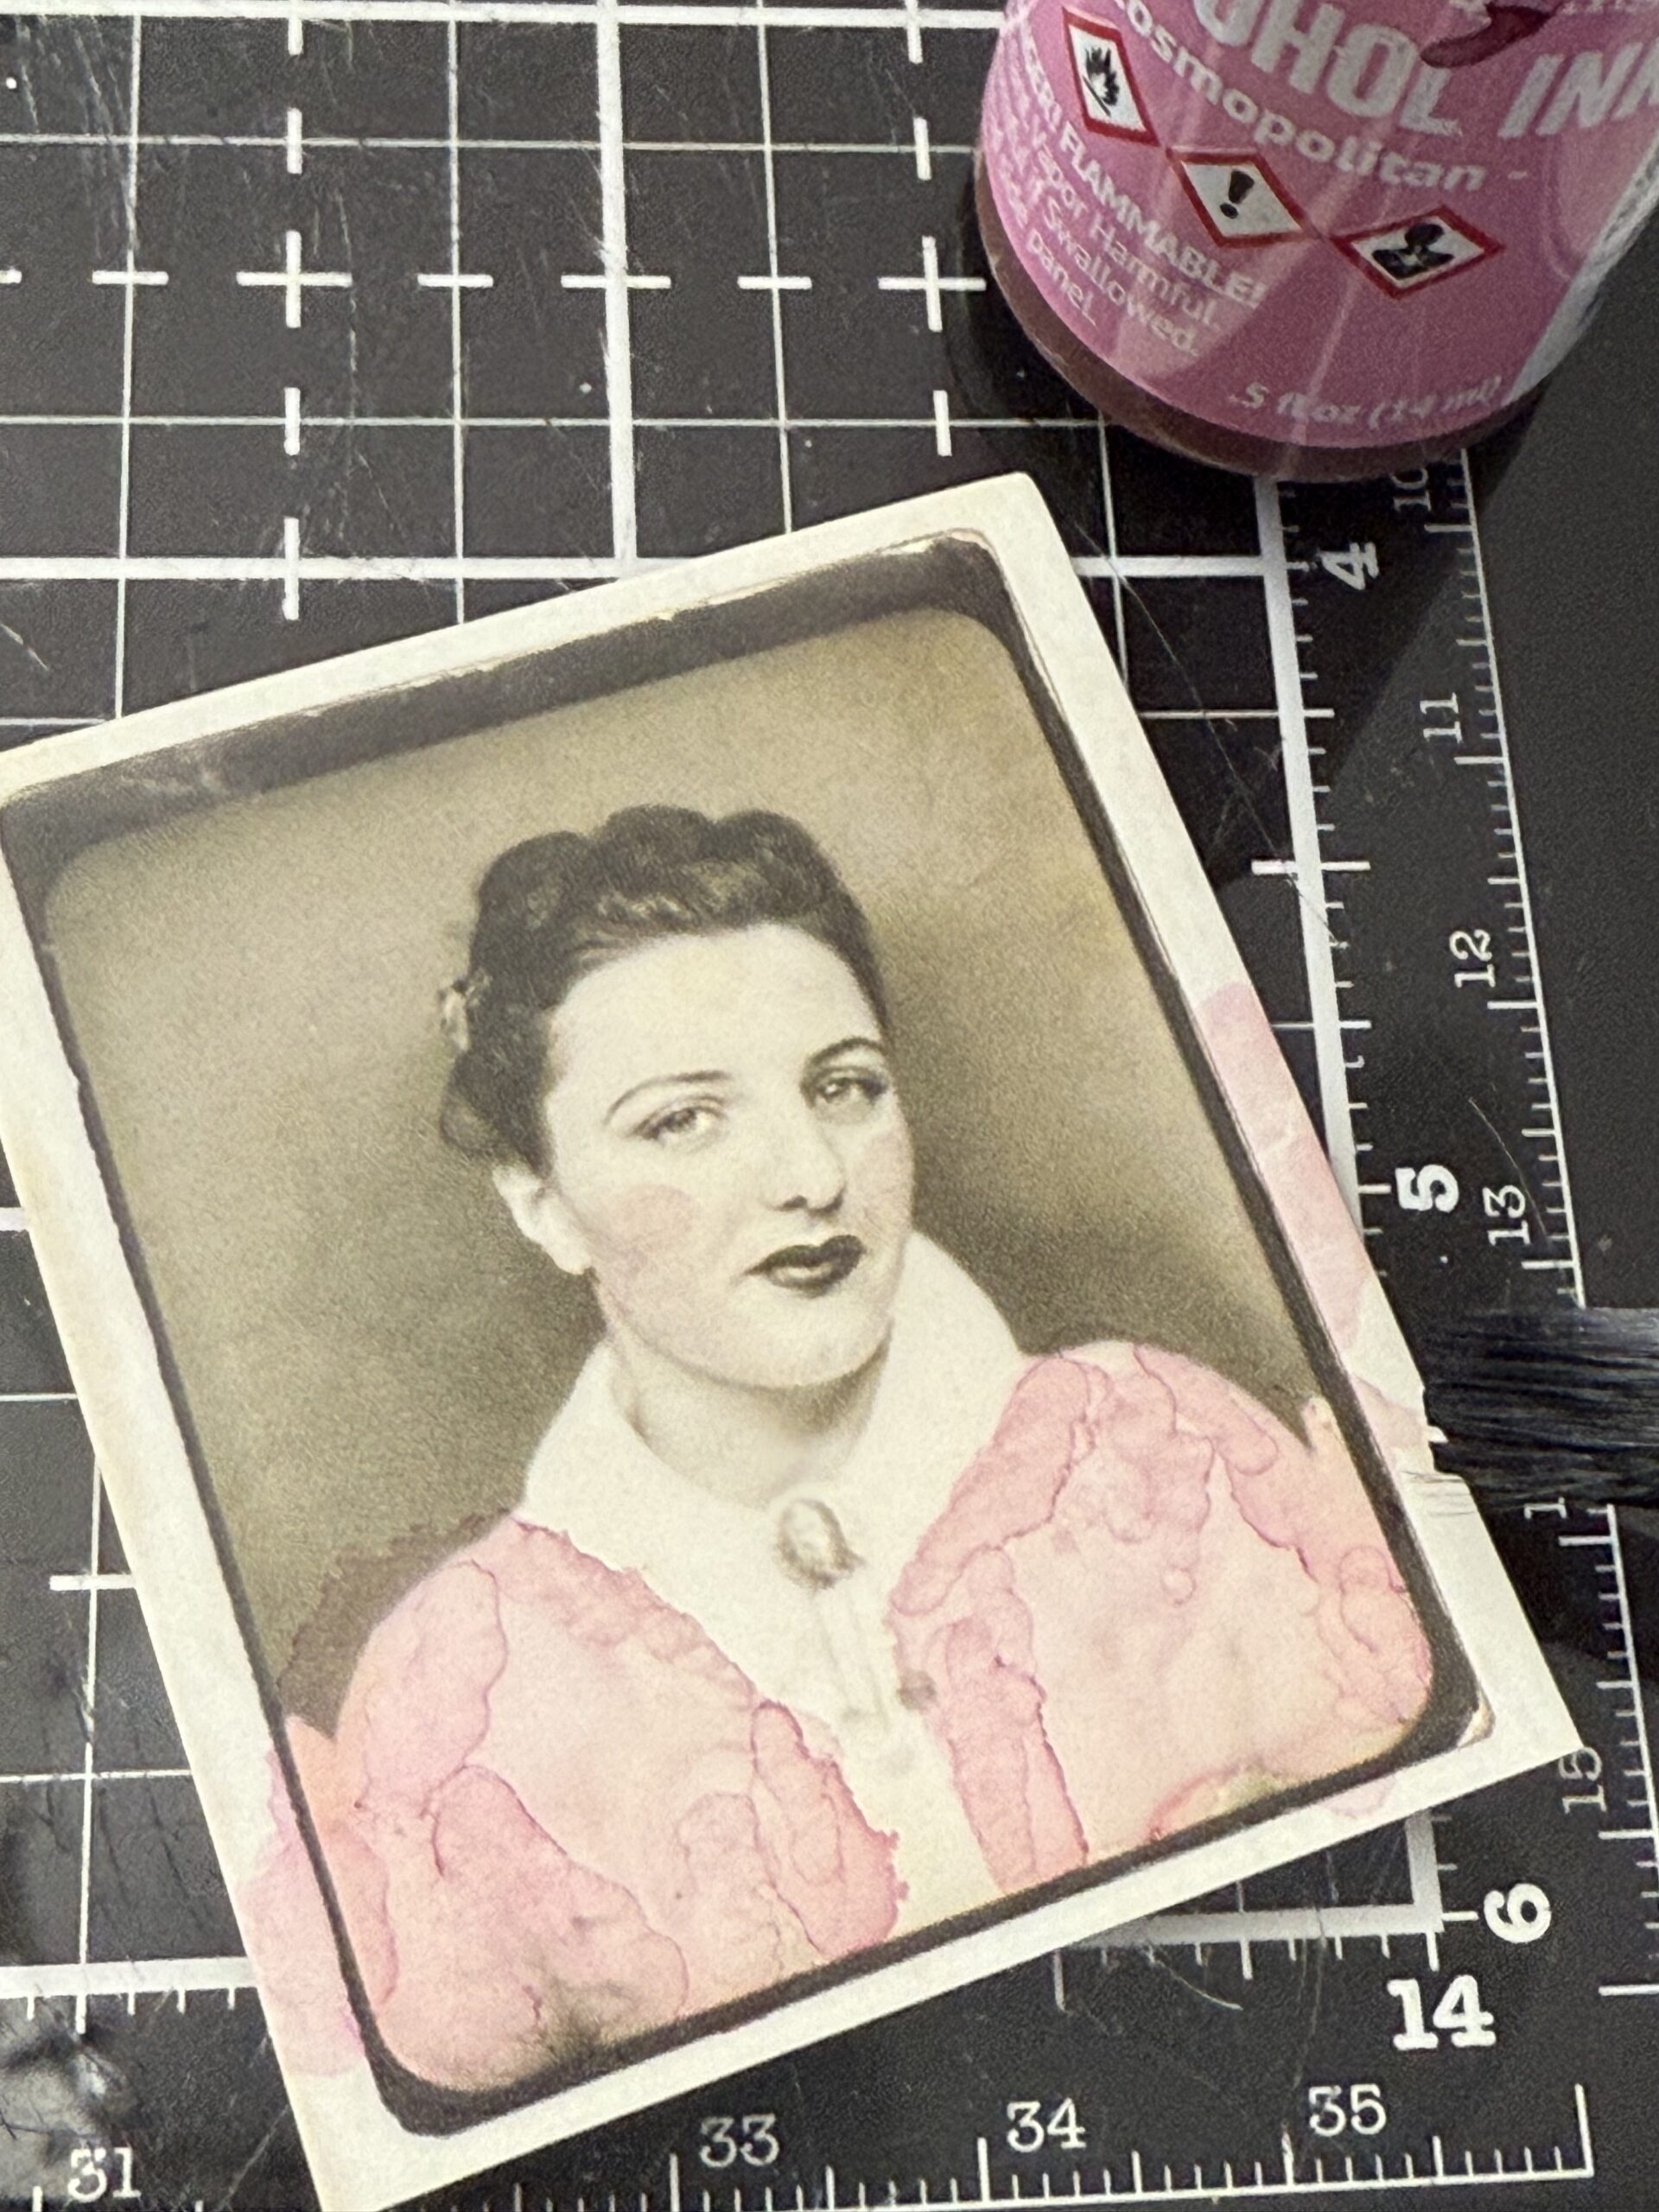
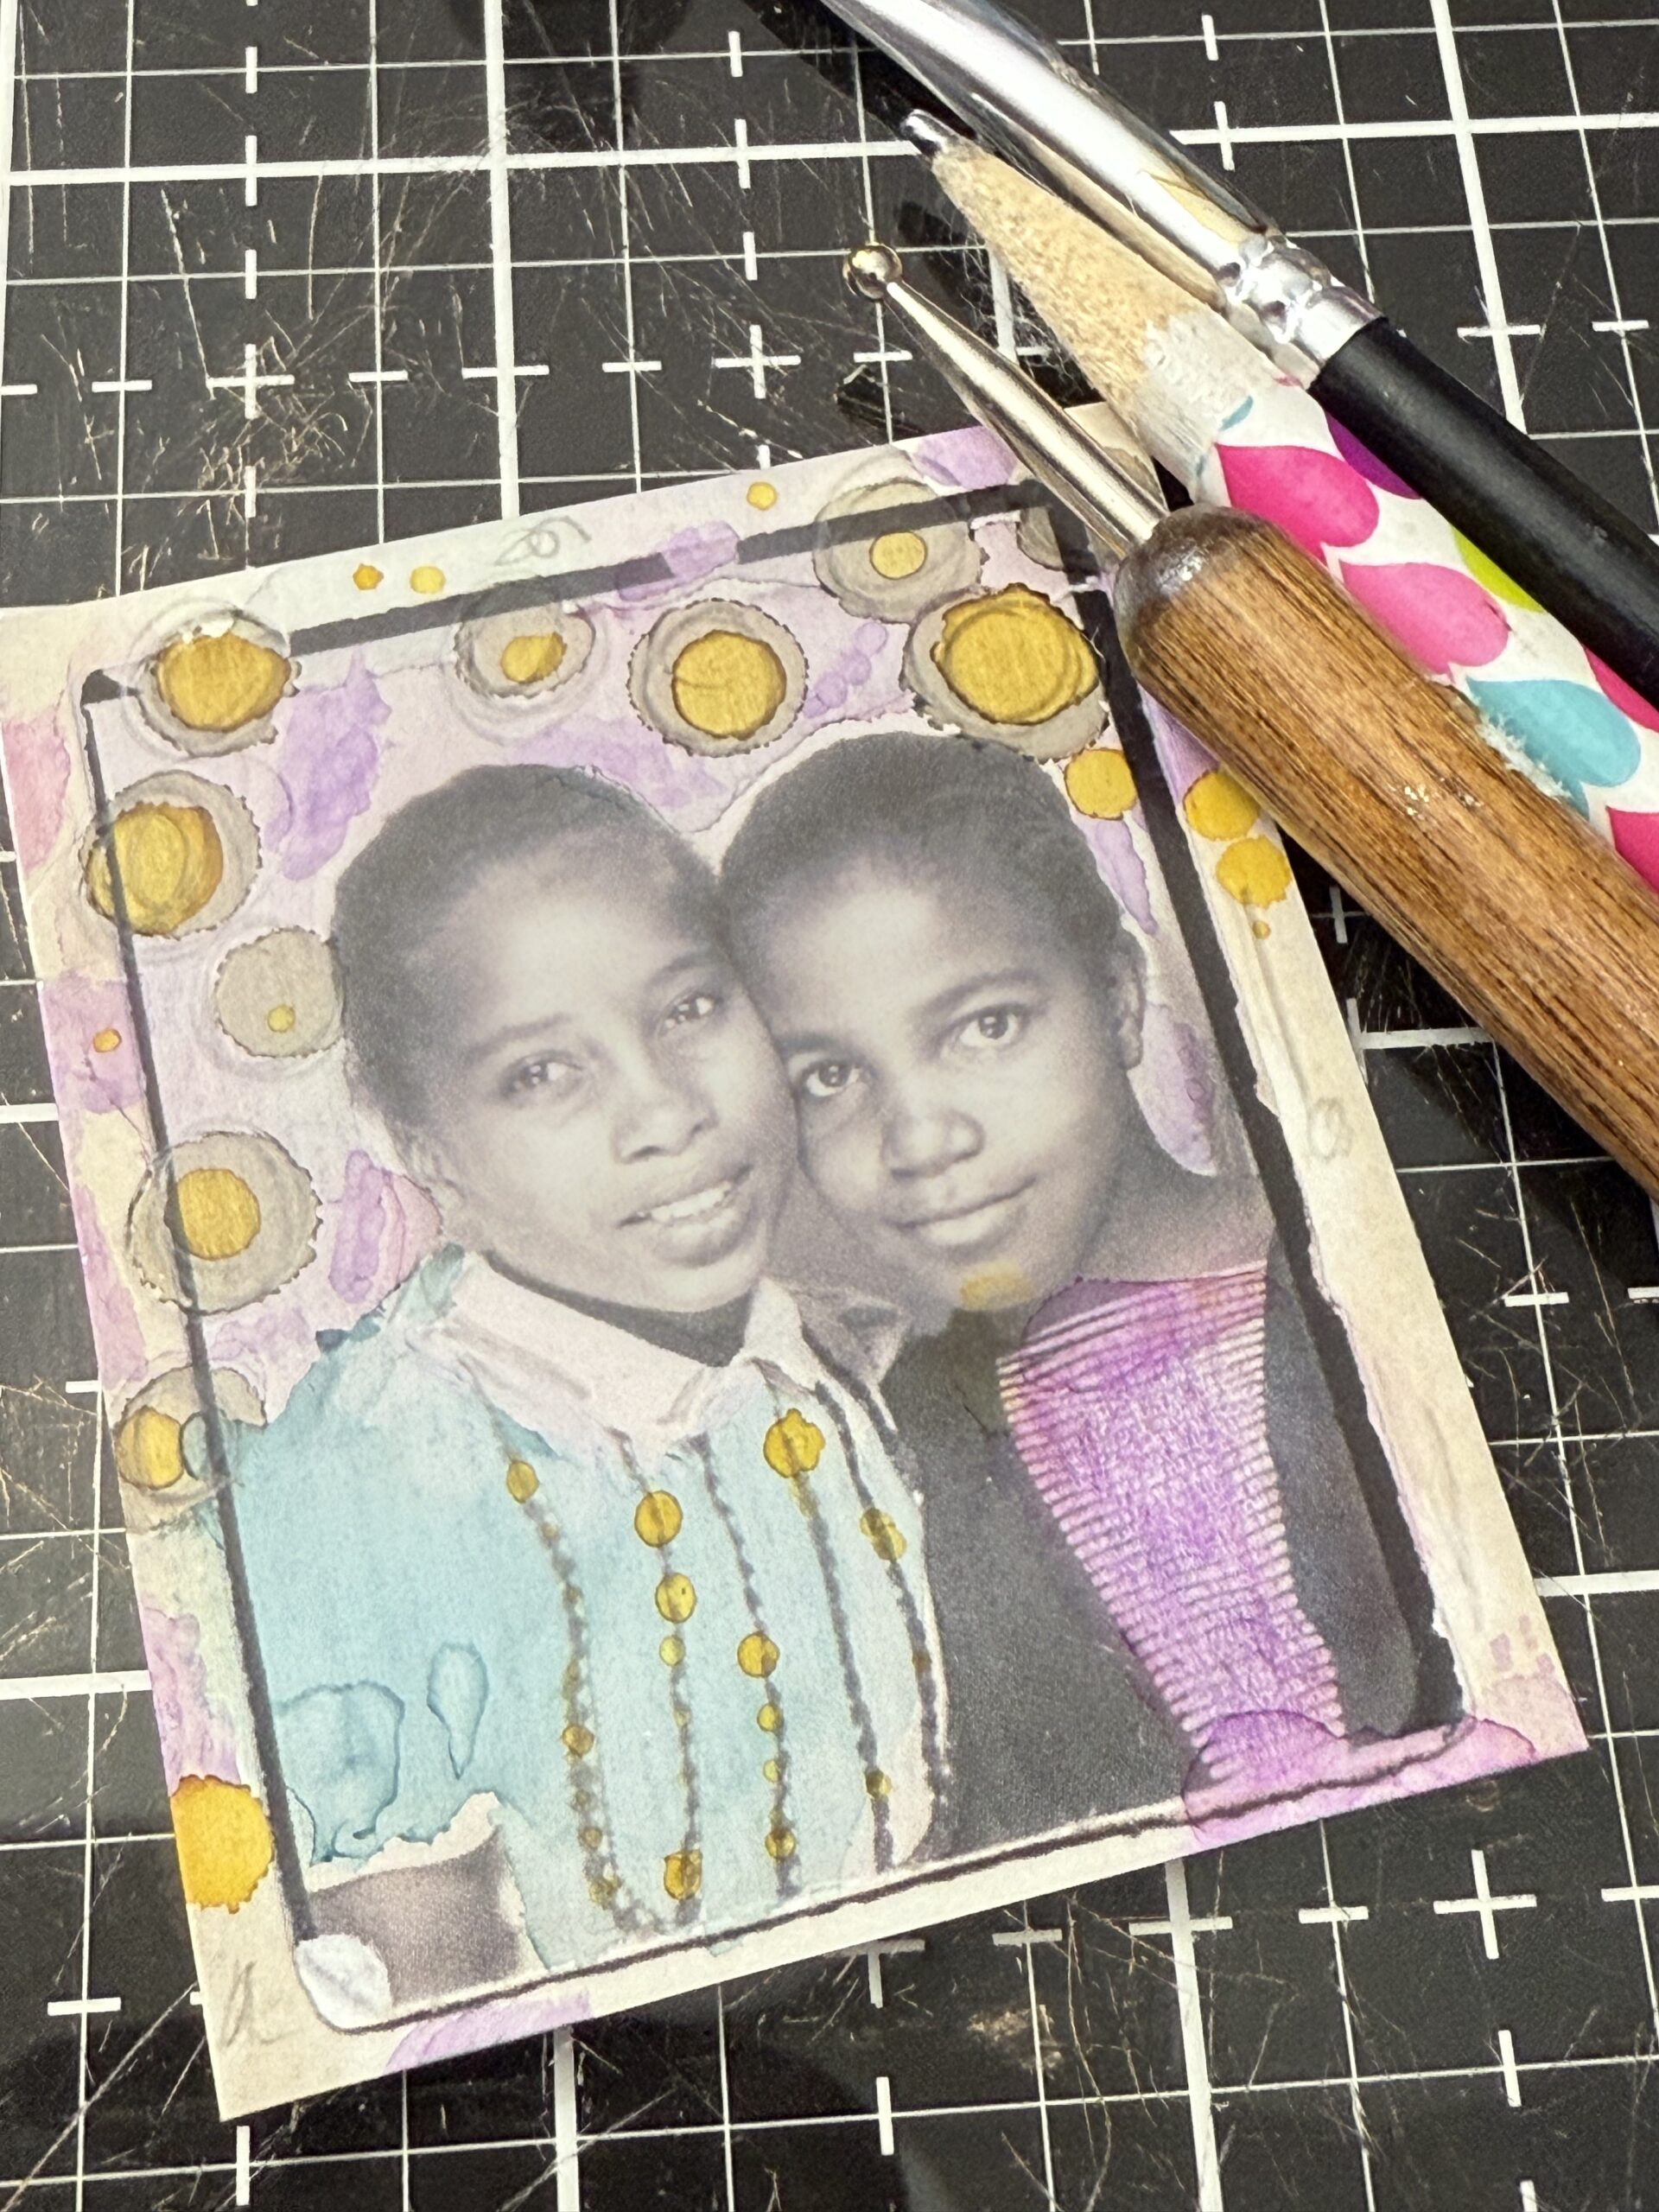
On the Photo Booth photo below, I started with cosmopolitan on her dress, then some little additions on her cheeks. To do the cheeks, I lightly dabbed on a little pink, then using my finger, smudged it to give it a my realistic look. If you add too much, use the paint brush washed out with isopropyl alcohol and wipe off your mistake. This can be done quickly before the color sets on the photo.
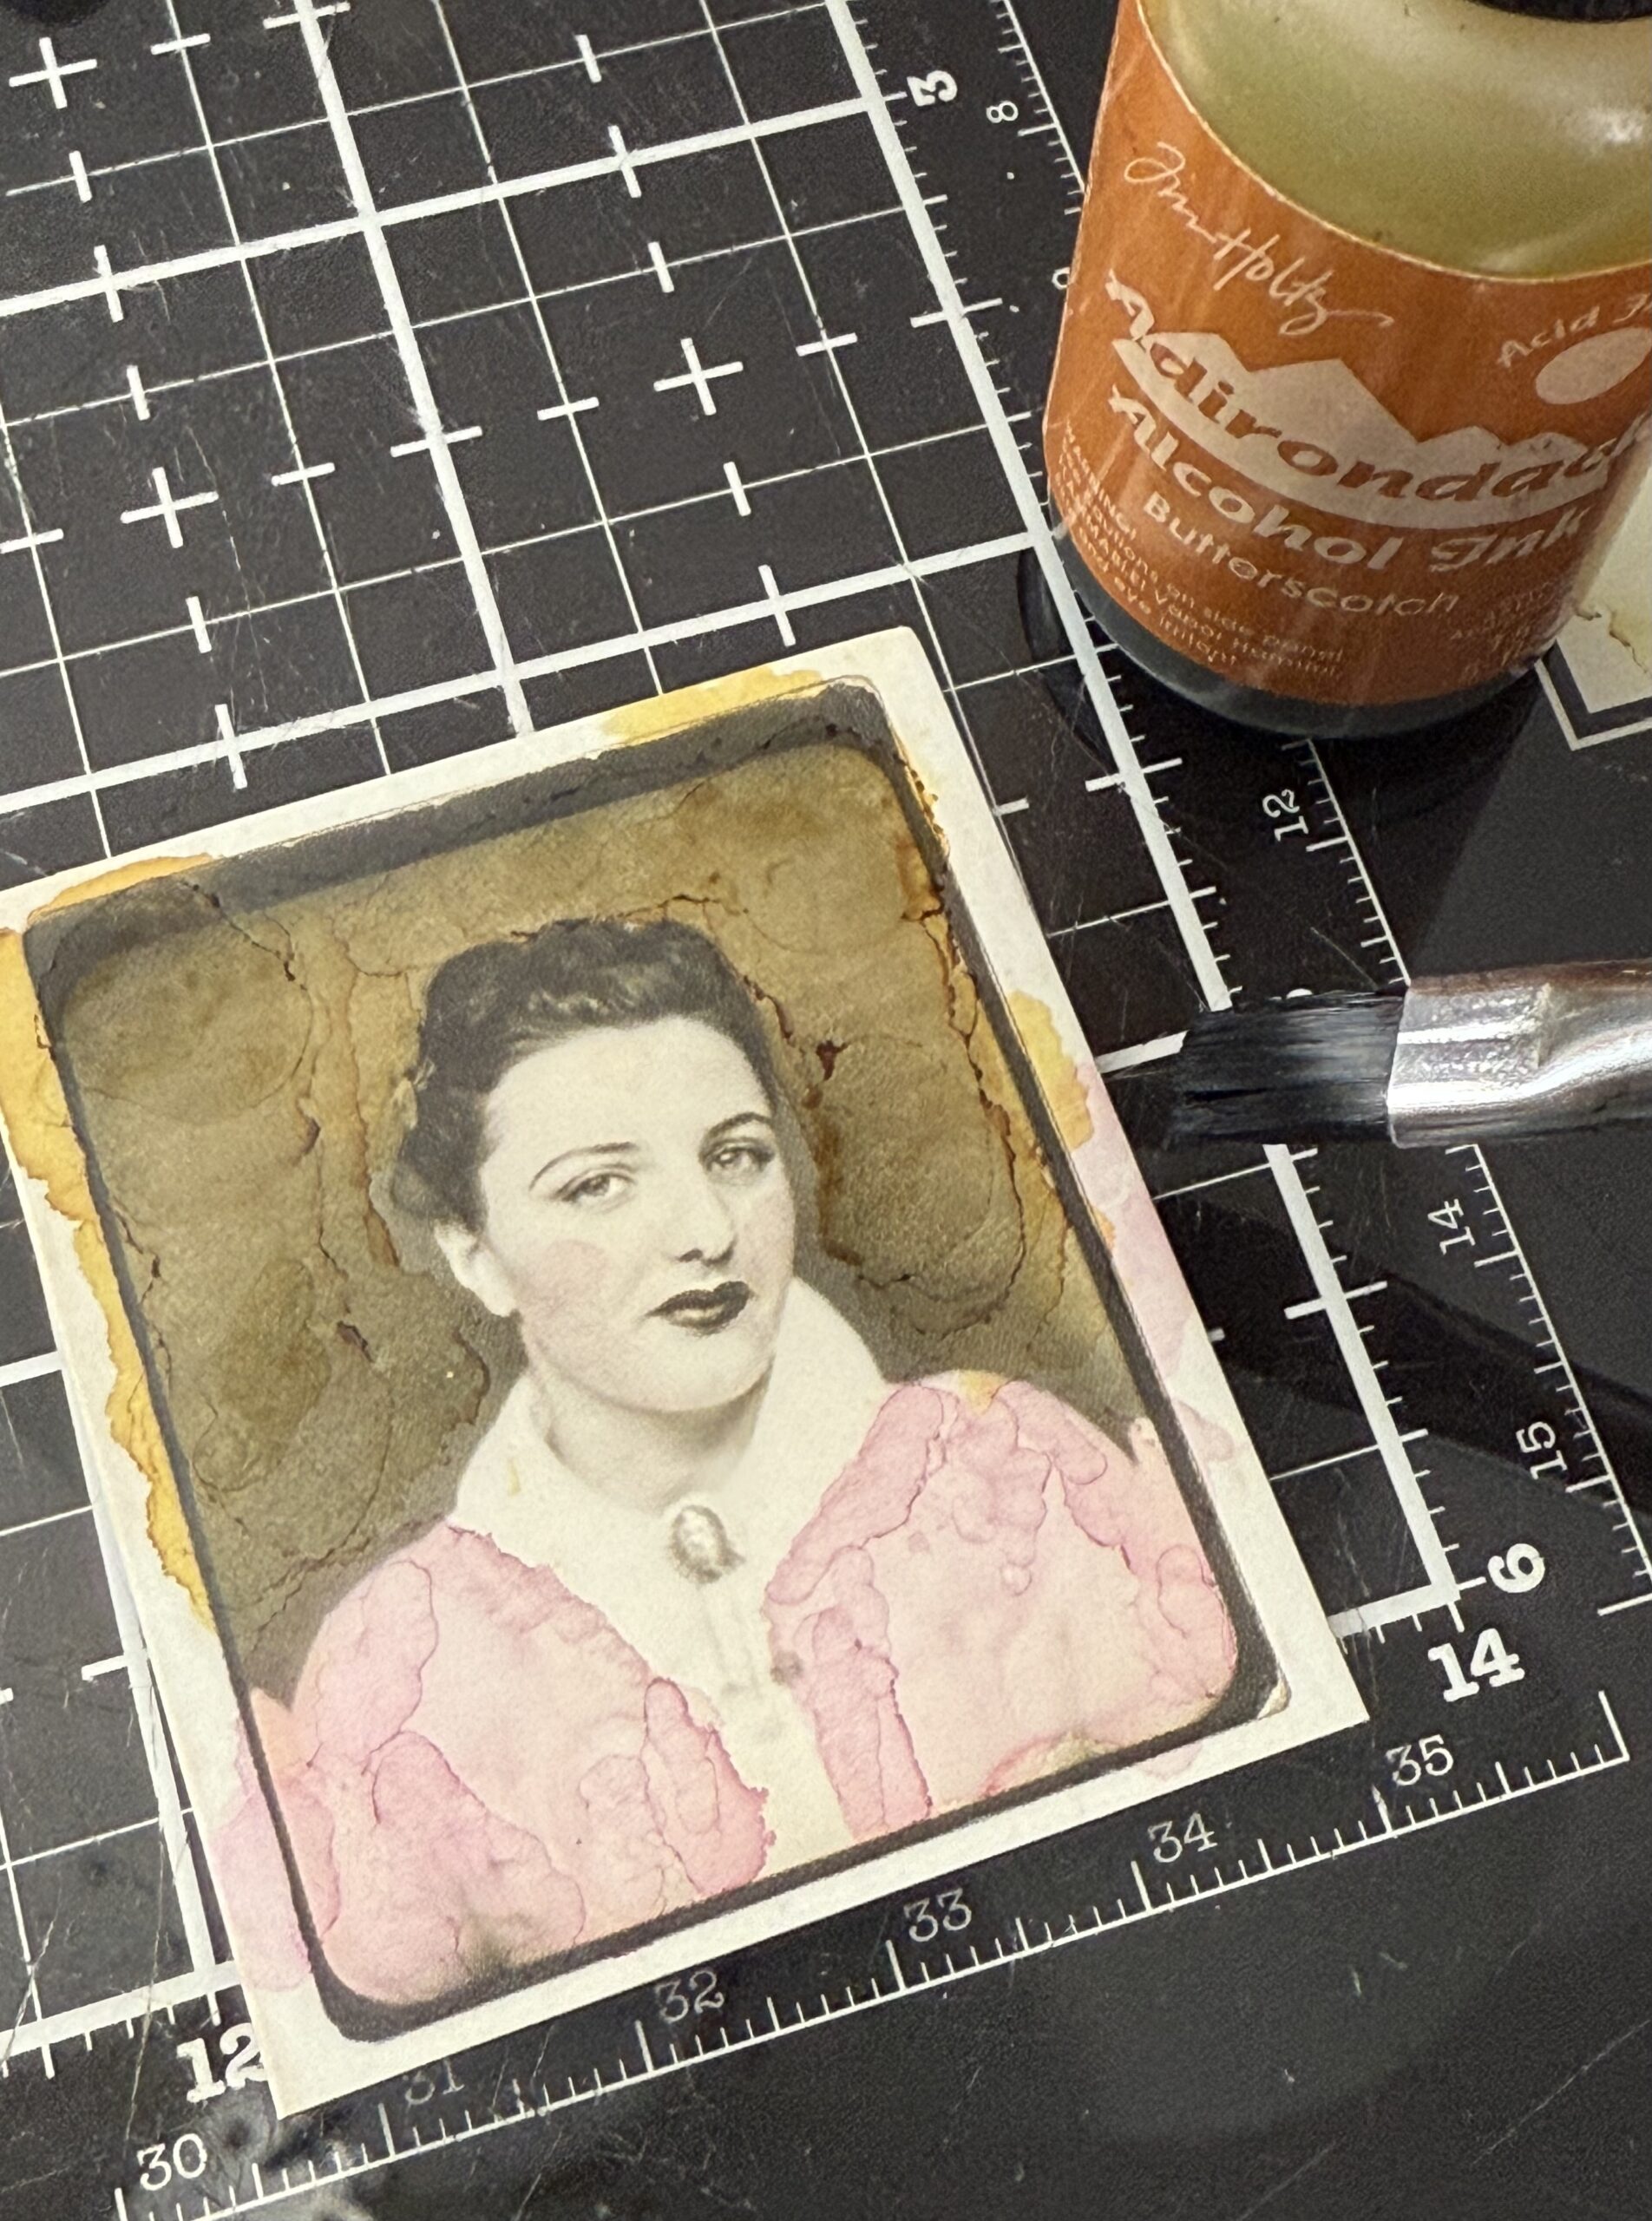
Next, I added some Butterscotch into the background. I let the color wash over the edges again to give it a more watercolored look, then I dried it with my heat tool.
The final addition I made was the little pattern I added to her shirt. This was done after I had washed out my brush a little leaving a small amount of the butterscotch on the brush. I used the corner of the brush to dot on some light color, then dried it with my heat tool. I also added some green off of my glass mat onto her collar broach.
The next ones I created was with a couple idea-ology Photomatic Photos, choosing them because their outfits and backgrounds were light. I also decided to add some more whimsical elements by adding some dots and scribbles into the backgrounds and on their outfits.
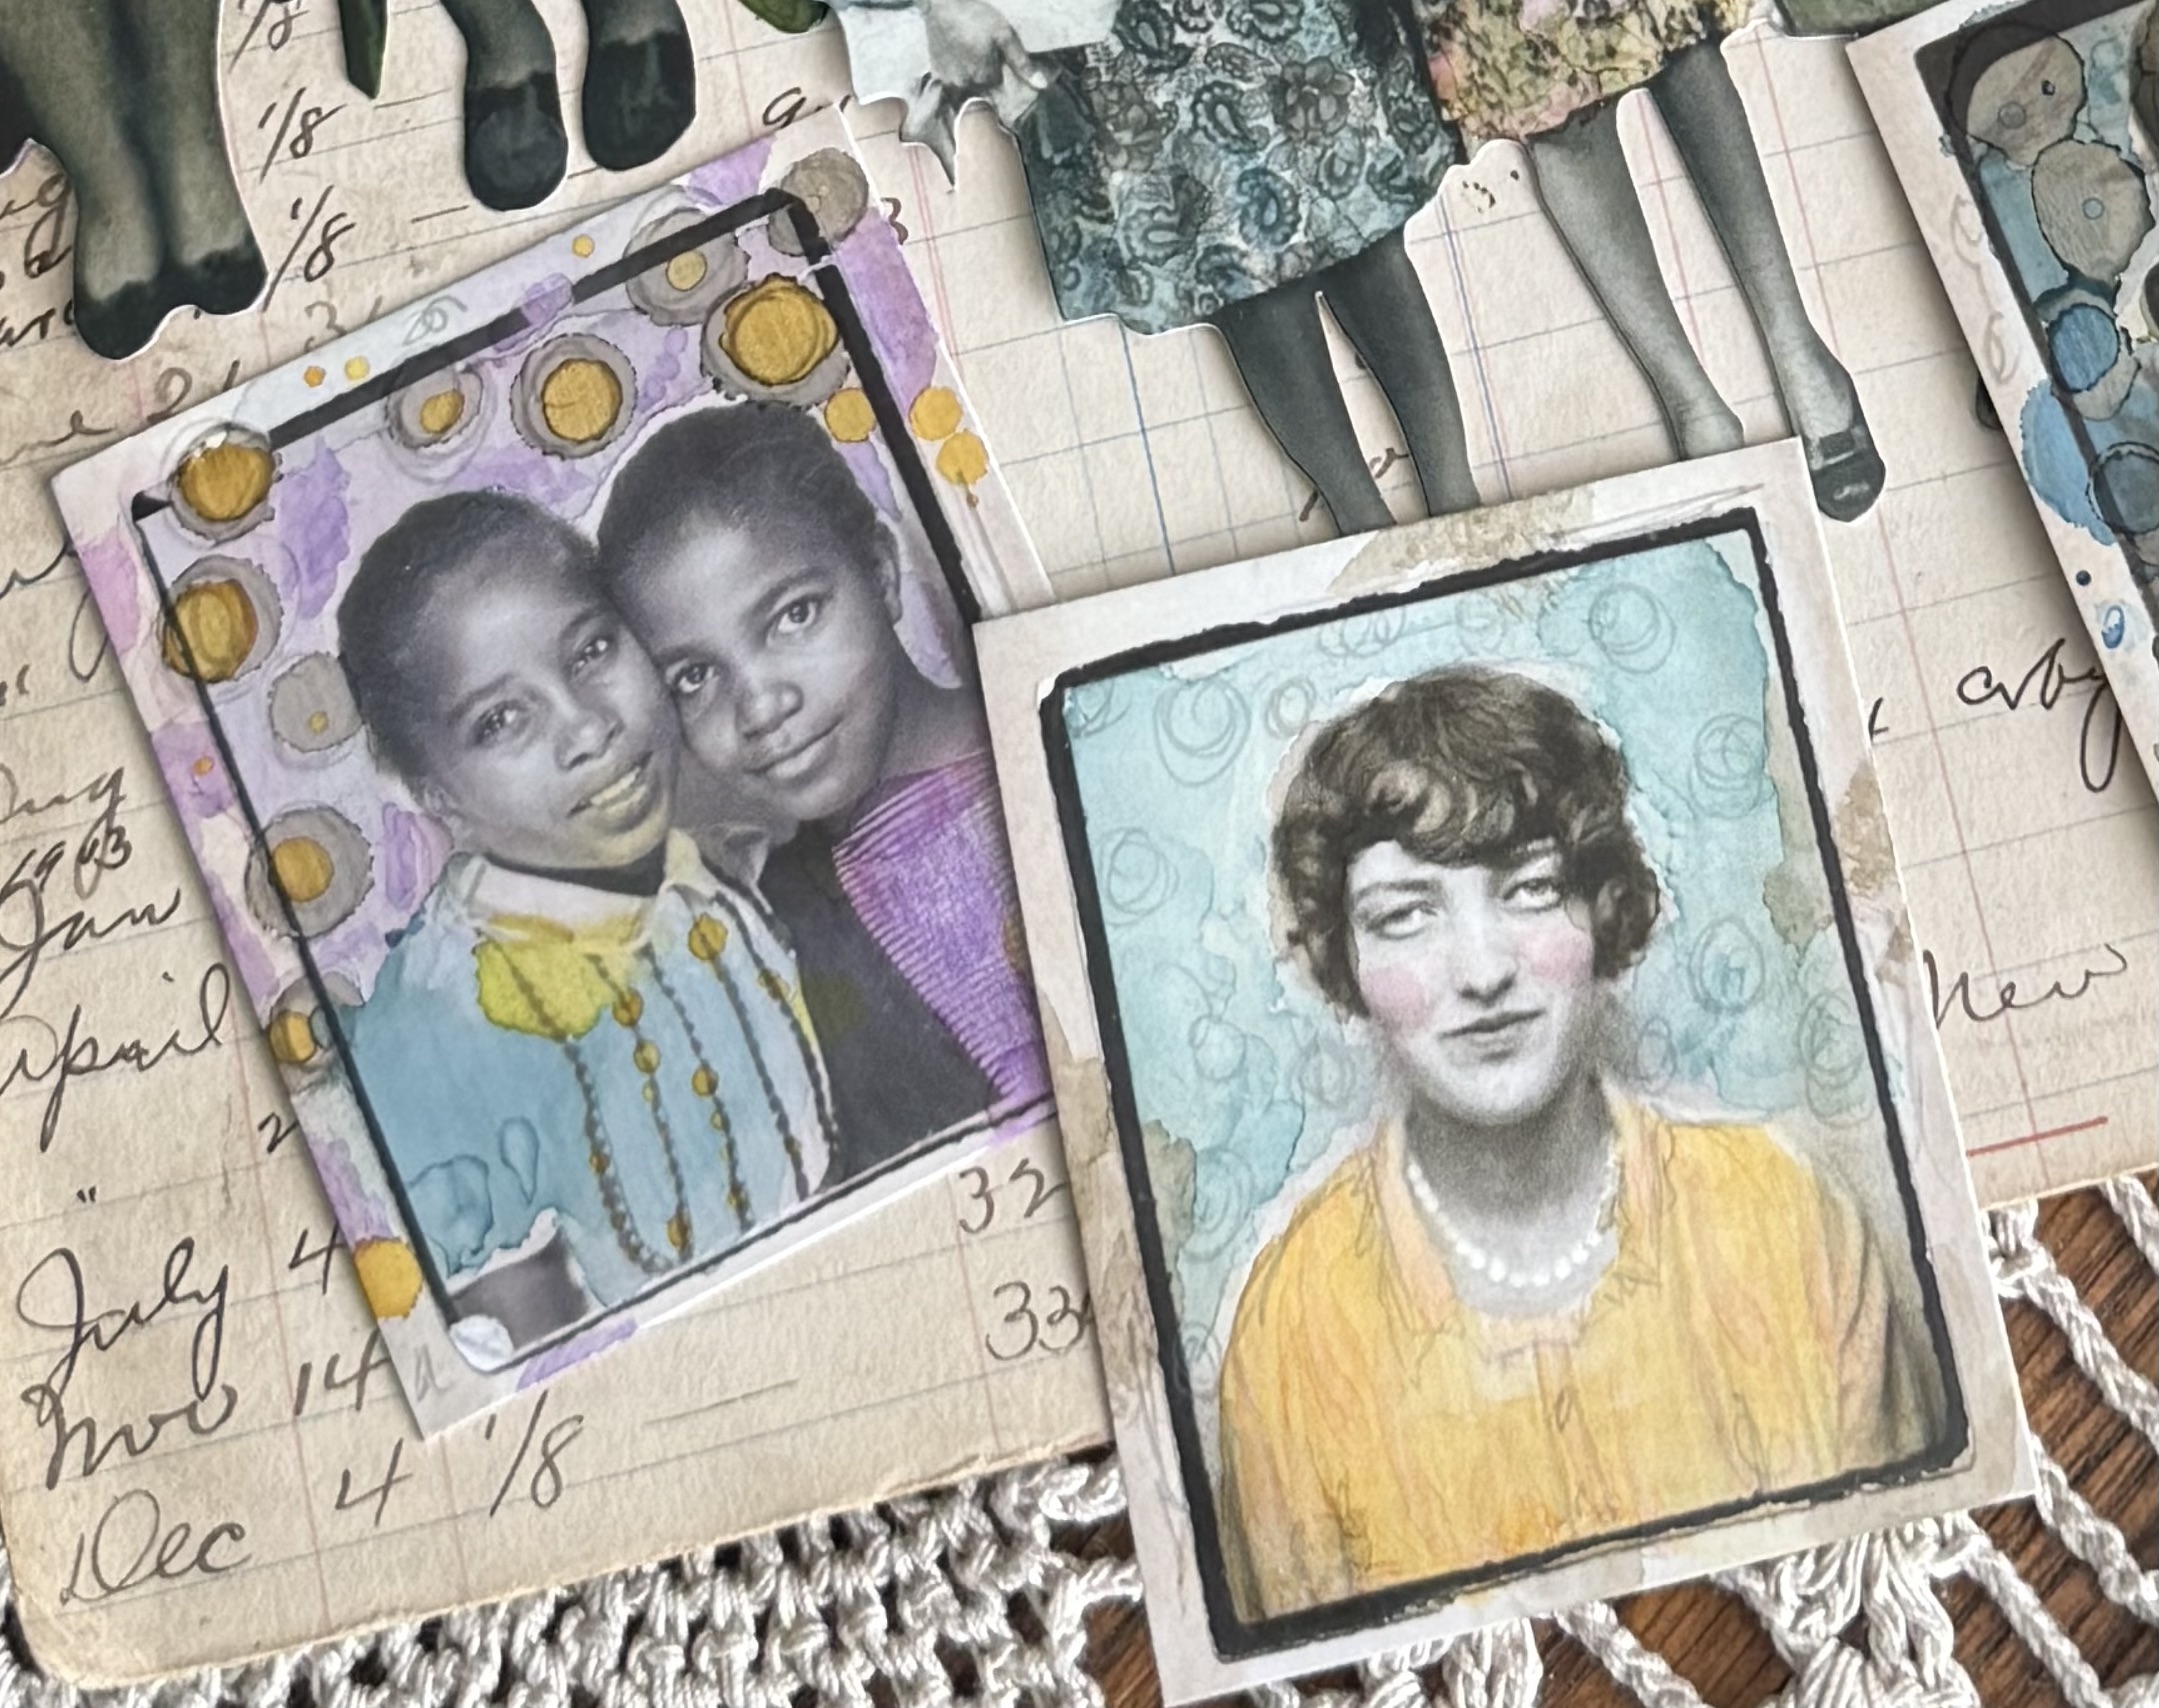
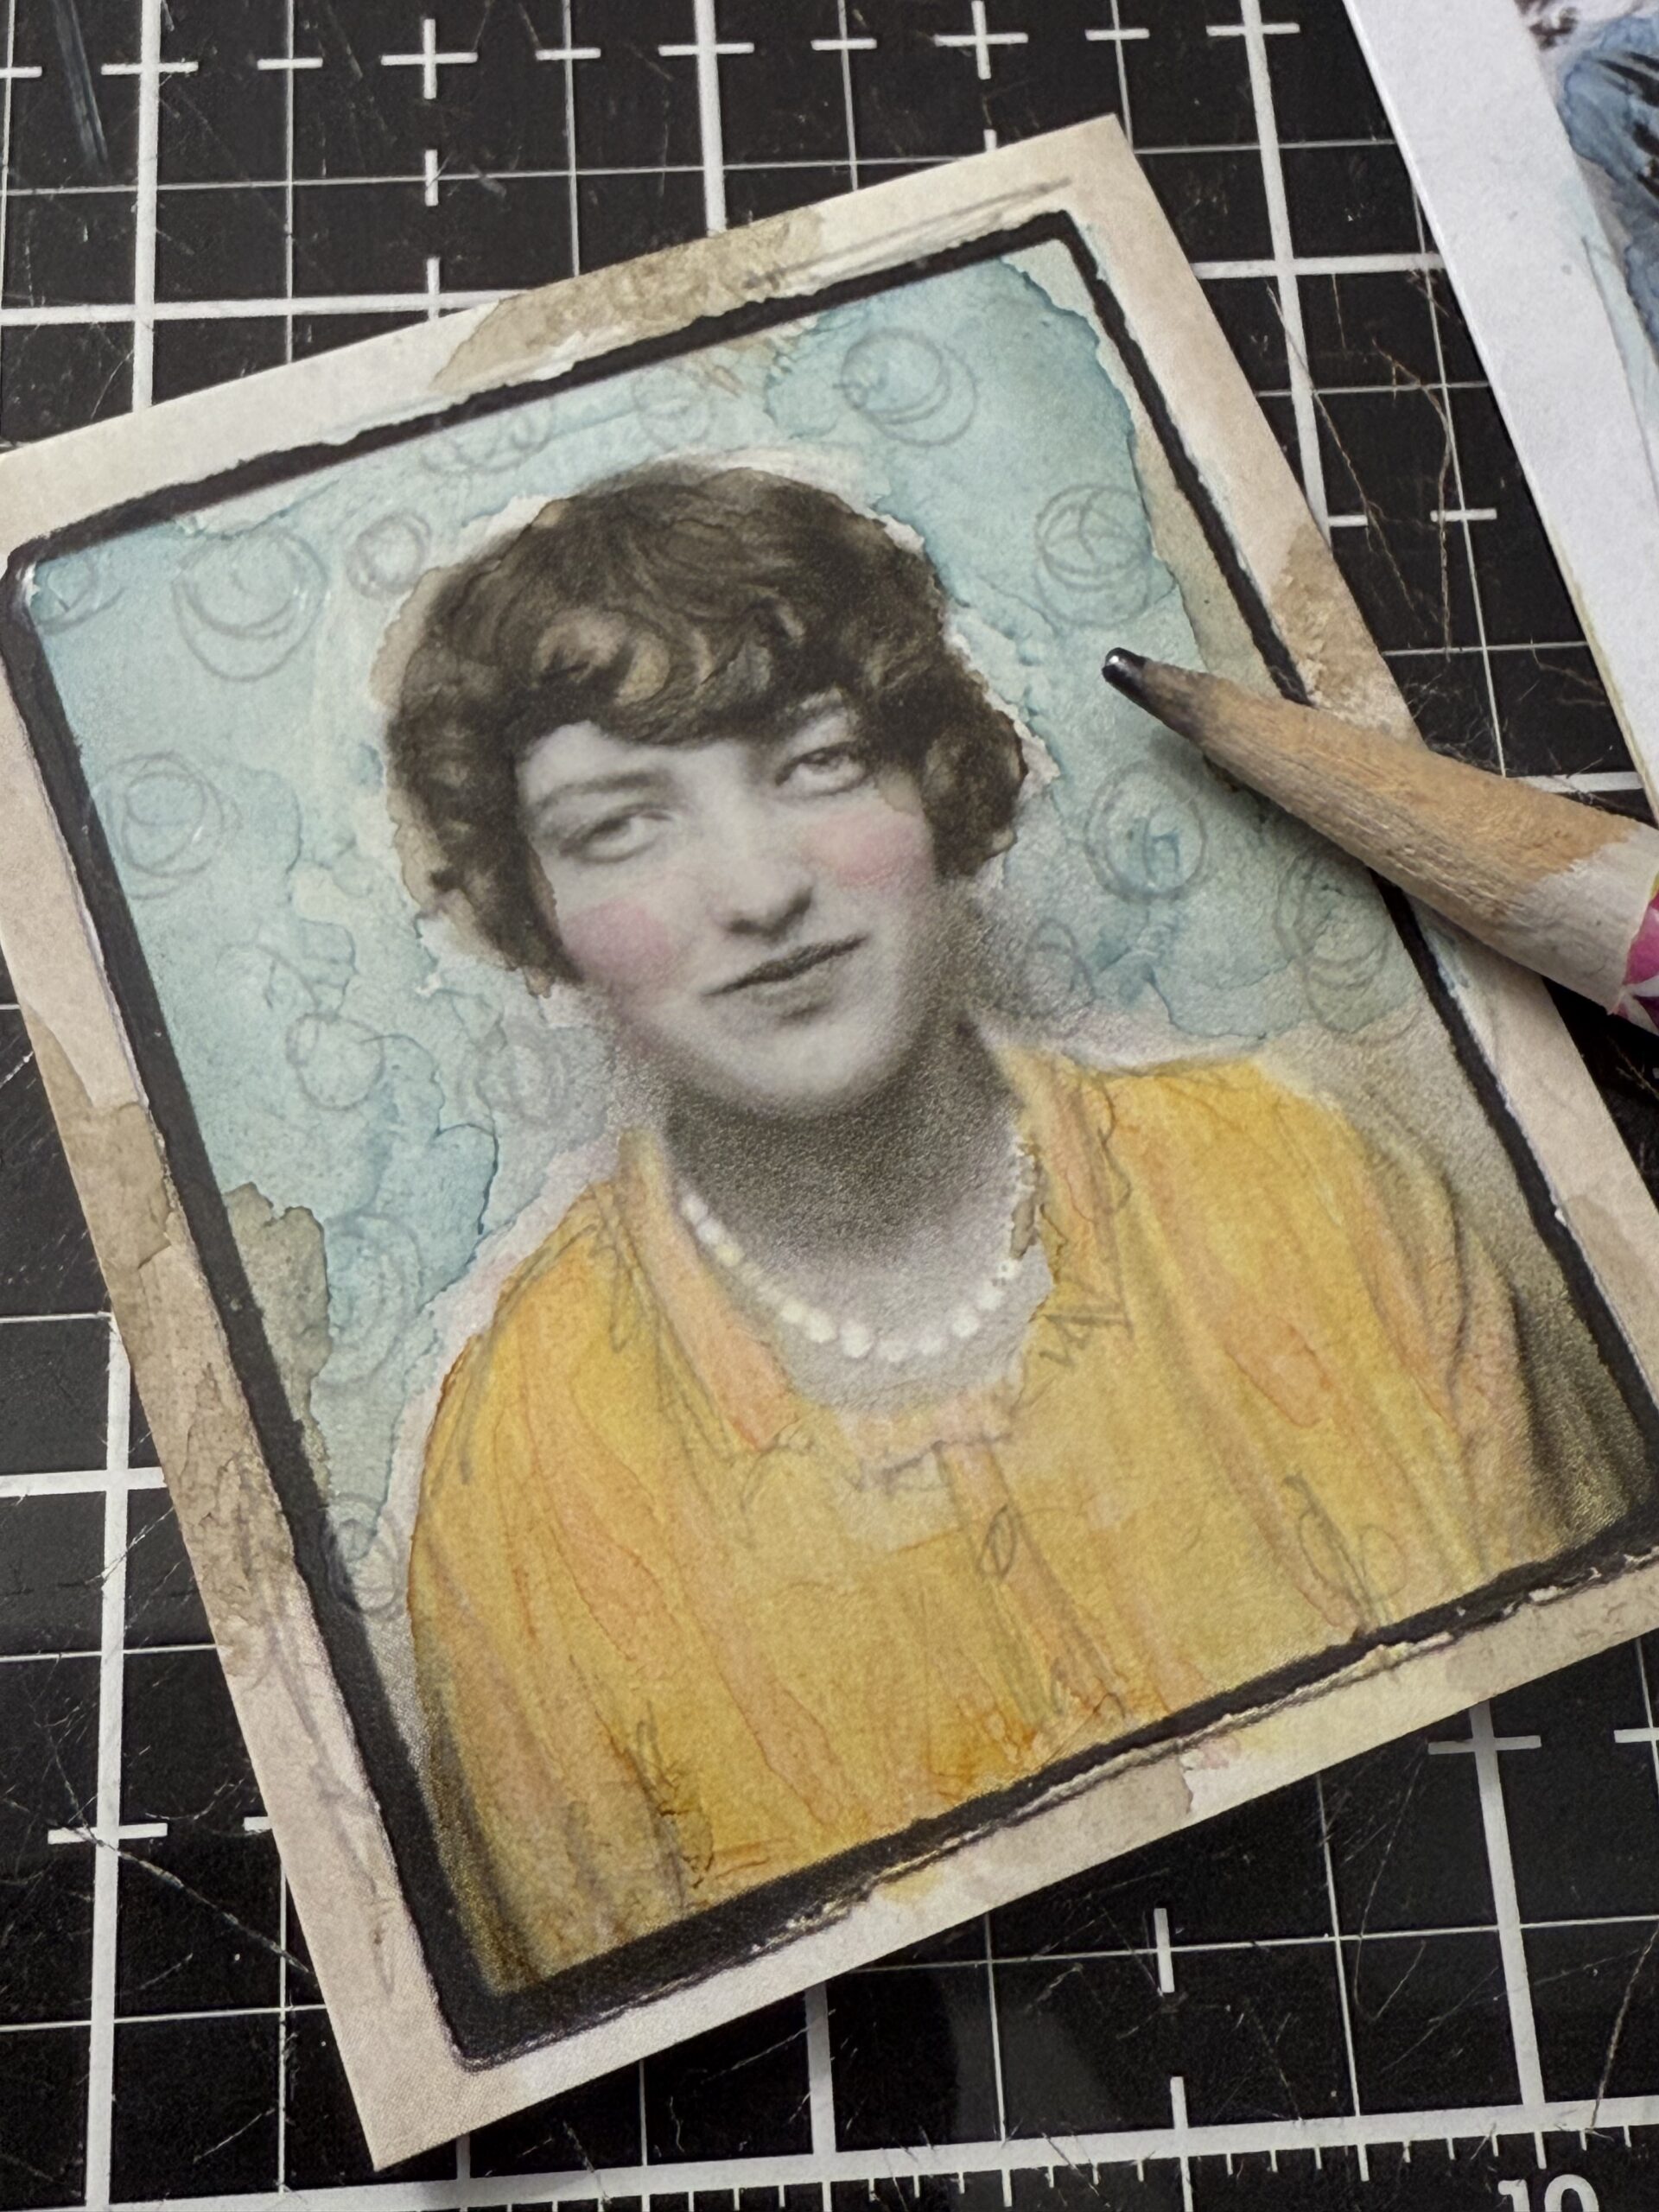
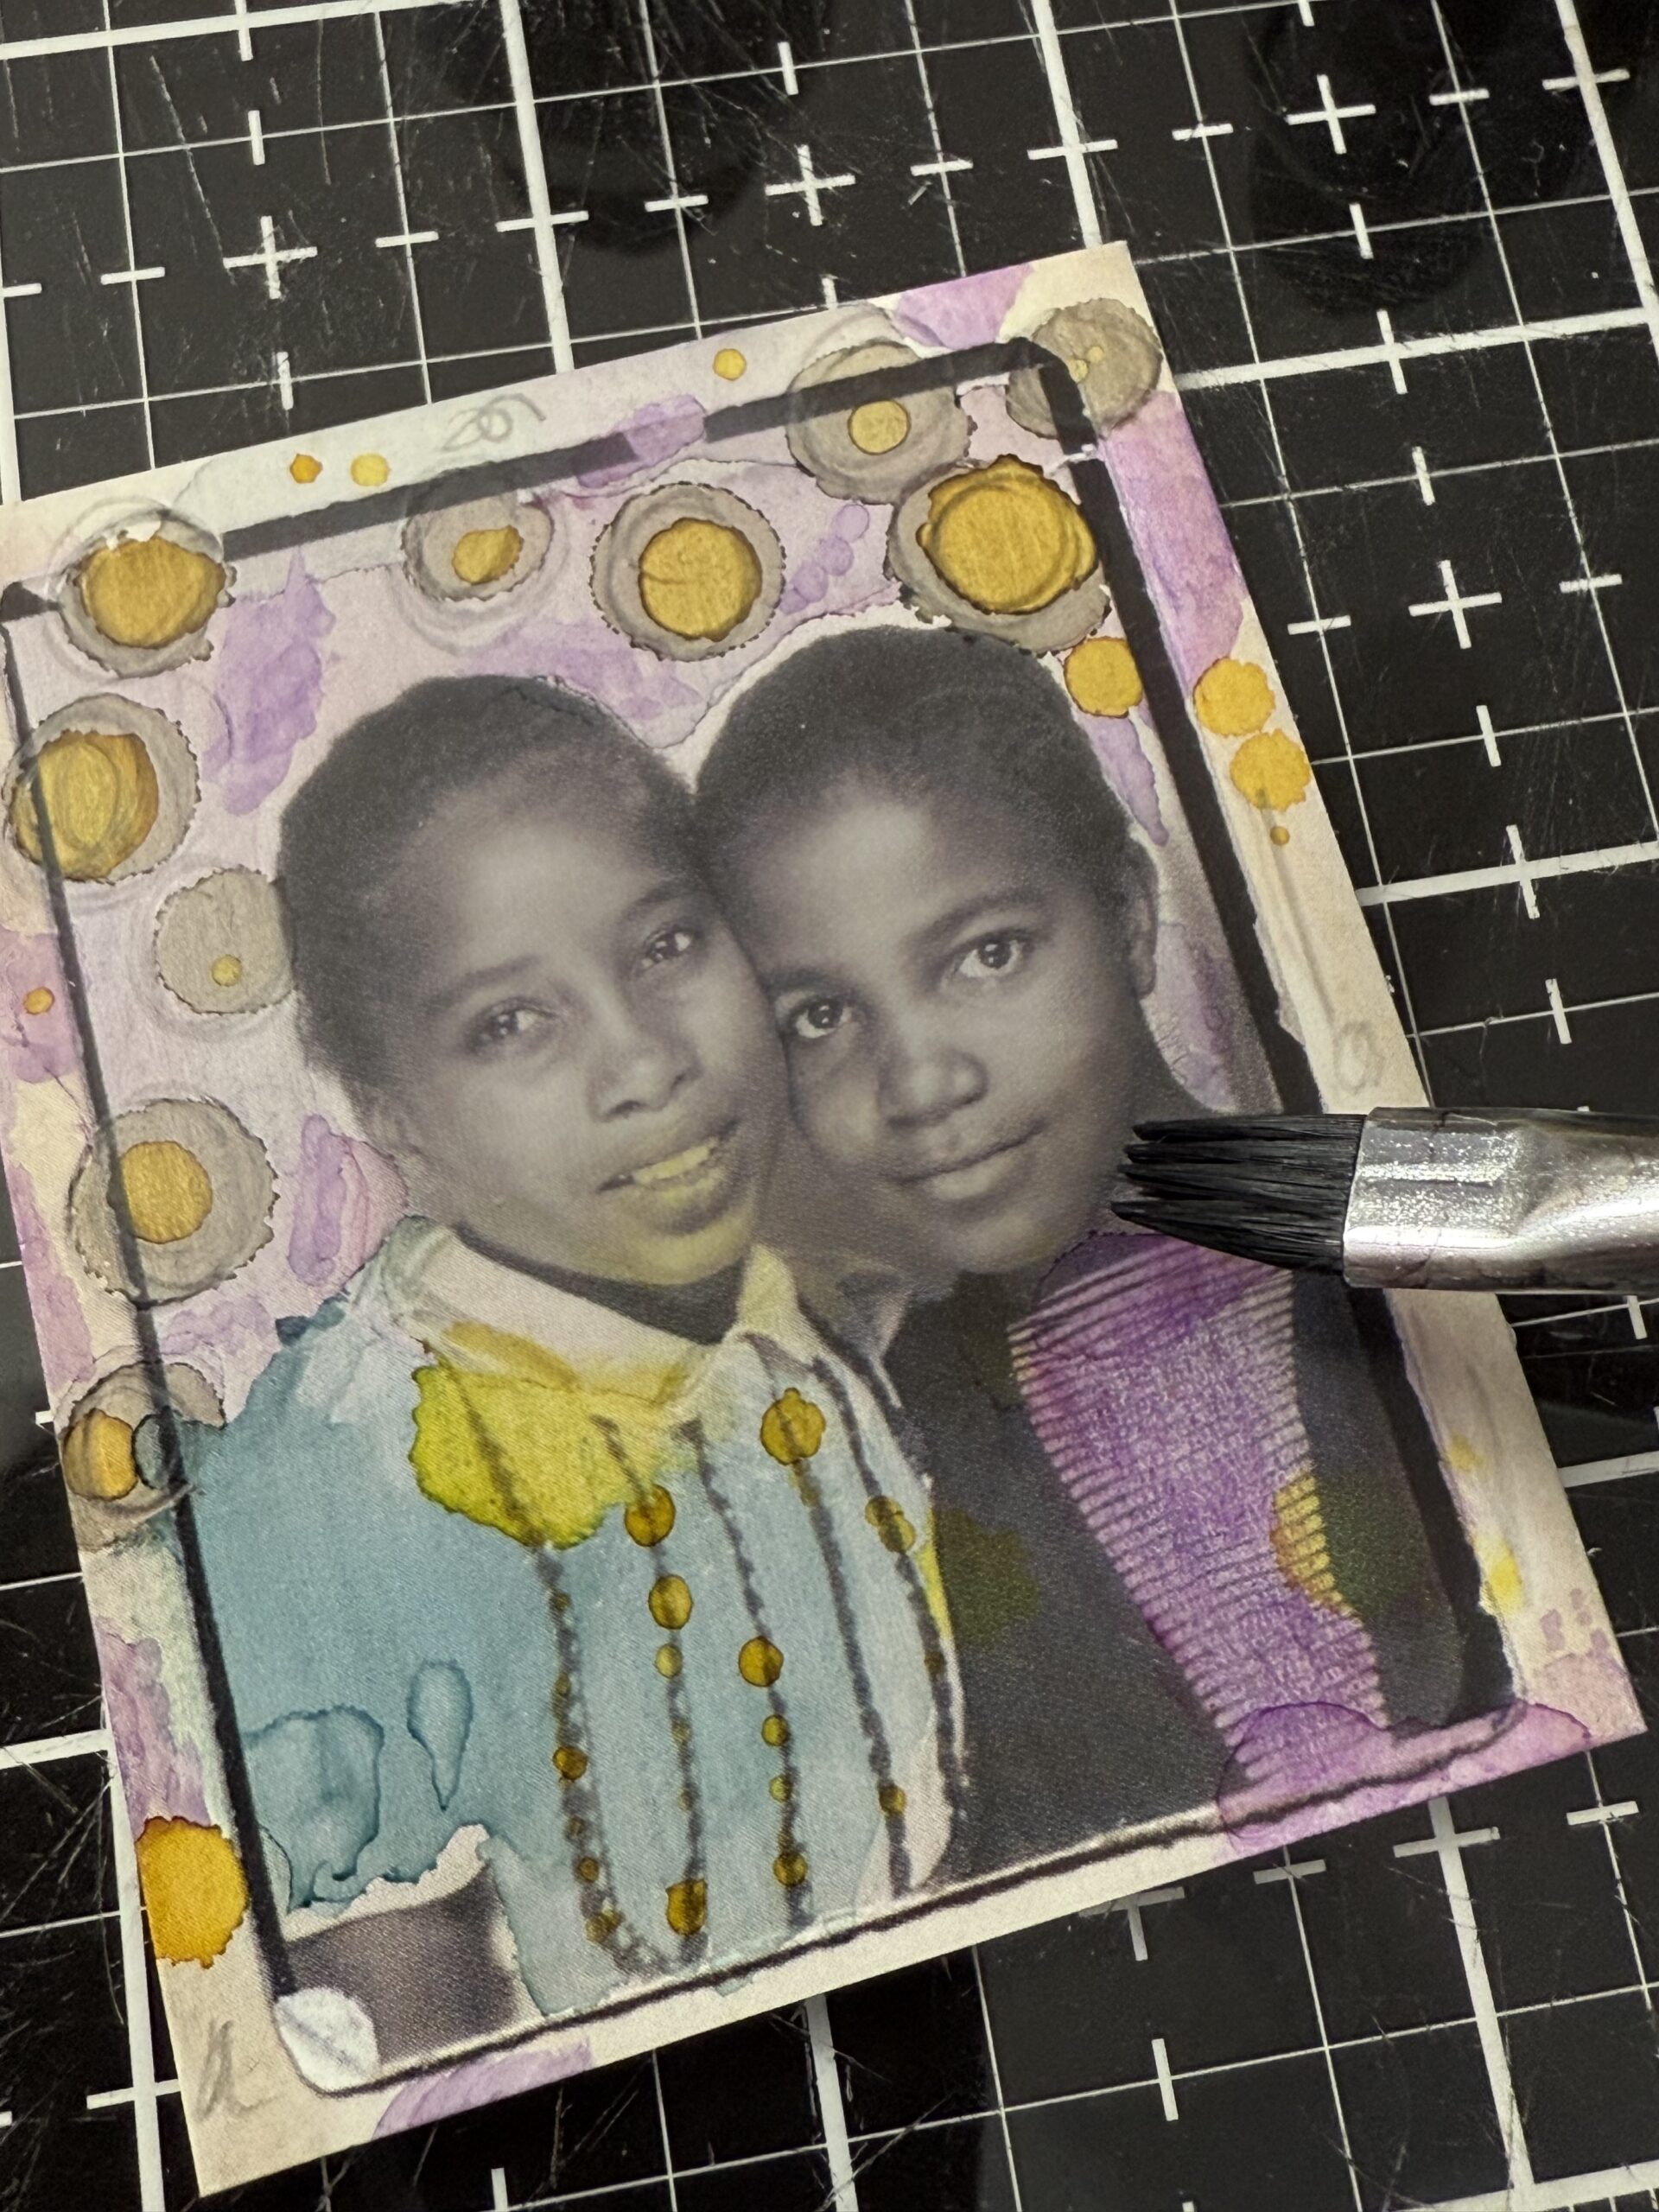
Butterscotch, Cosmopolitan, Bajou and Pebble were used on the first photo. I dripped some ink onto my glass pallet and picked up color with the brush then started with the butterscotch on her dress. After the color was added, I dried it quickly with my heat tool and washed my brush, then I added some Bayou into the background.
Cosmopolitan was used on her cheeks. To add the color to the cheeks, I lightly applied some of the ink then, using my finger, daubed off a little so that the color blended and didn’t leave a bright cheek. The little ink that was left on the paint brush was added onto her dress by daubing the brush in different areas to create highlights and tones.
Pebble was used around the outside of the photo… the alcohol inks create a dreamy look and I thought it would look good with a little color outside the lines to give it more of a watercolored look.
Going with the “artsy” watercolored look, I decided to add some interest into the background using a pencil. I scribbled some whispy circles into the background and added some sketchy marks around the edges of the photo. I also added some whispy details to her dress and collar to define more of her outfit. This is not about perfection, just some whimsical details.
The little girls were colored using Wild Plum, Bayou, Pebble and Dandelion.
I colored the girls dresses and outfits first, then dried it with my heat tool. I added some purple in the background then decided to add some spots of Pebble. I added the pebble color by using the paint brush, then I dried it with my heat tool. The tiny Dandelion yellow dots were added by dipping the tip of a stylus into some of the ink on my glass mat, then touching the tip to the pebble dots. I also added some dots to the little girl in blue’s dress, giving it some more details.
After I had them done, I noticed that somehow I had smudged some yellow onto the chin of the girl on the right, so I grabbed my paint brush, washed it out with the isopropyl alcohol and swiped the color off of her chin, then dried it with a dry cotton cloth.
You can see in the photo below how the isopropyl alcohol removed my mistake…I then added some scribbles around the edges of the photo using a pencil.
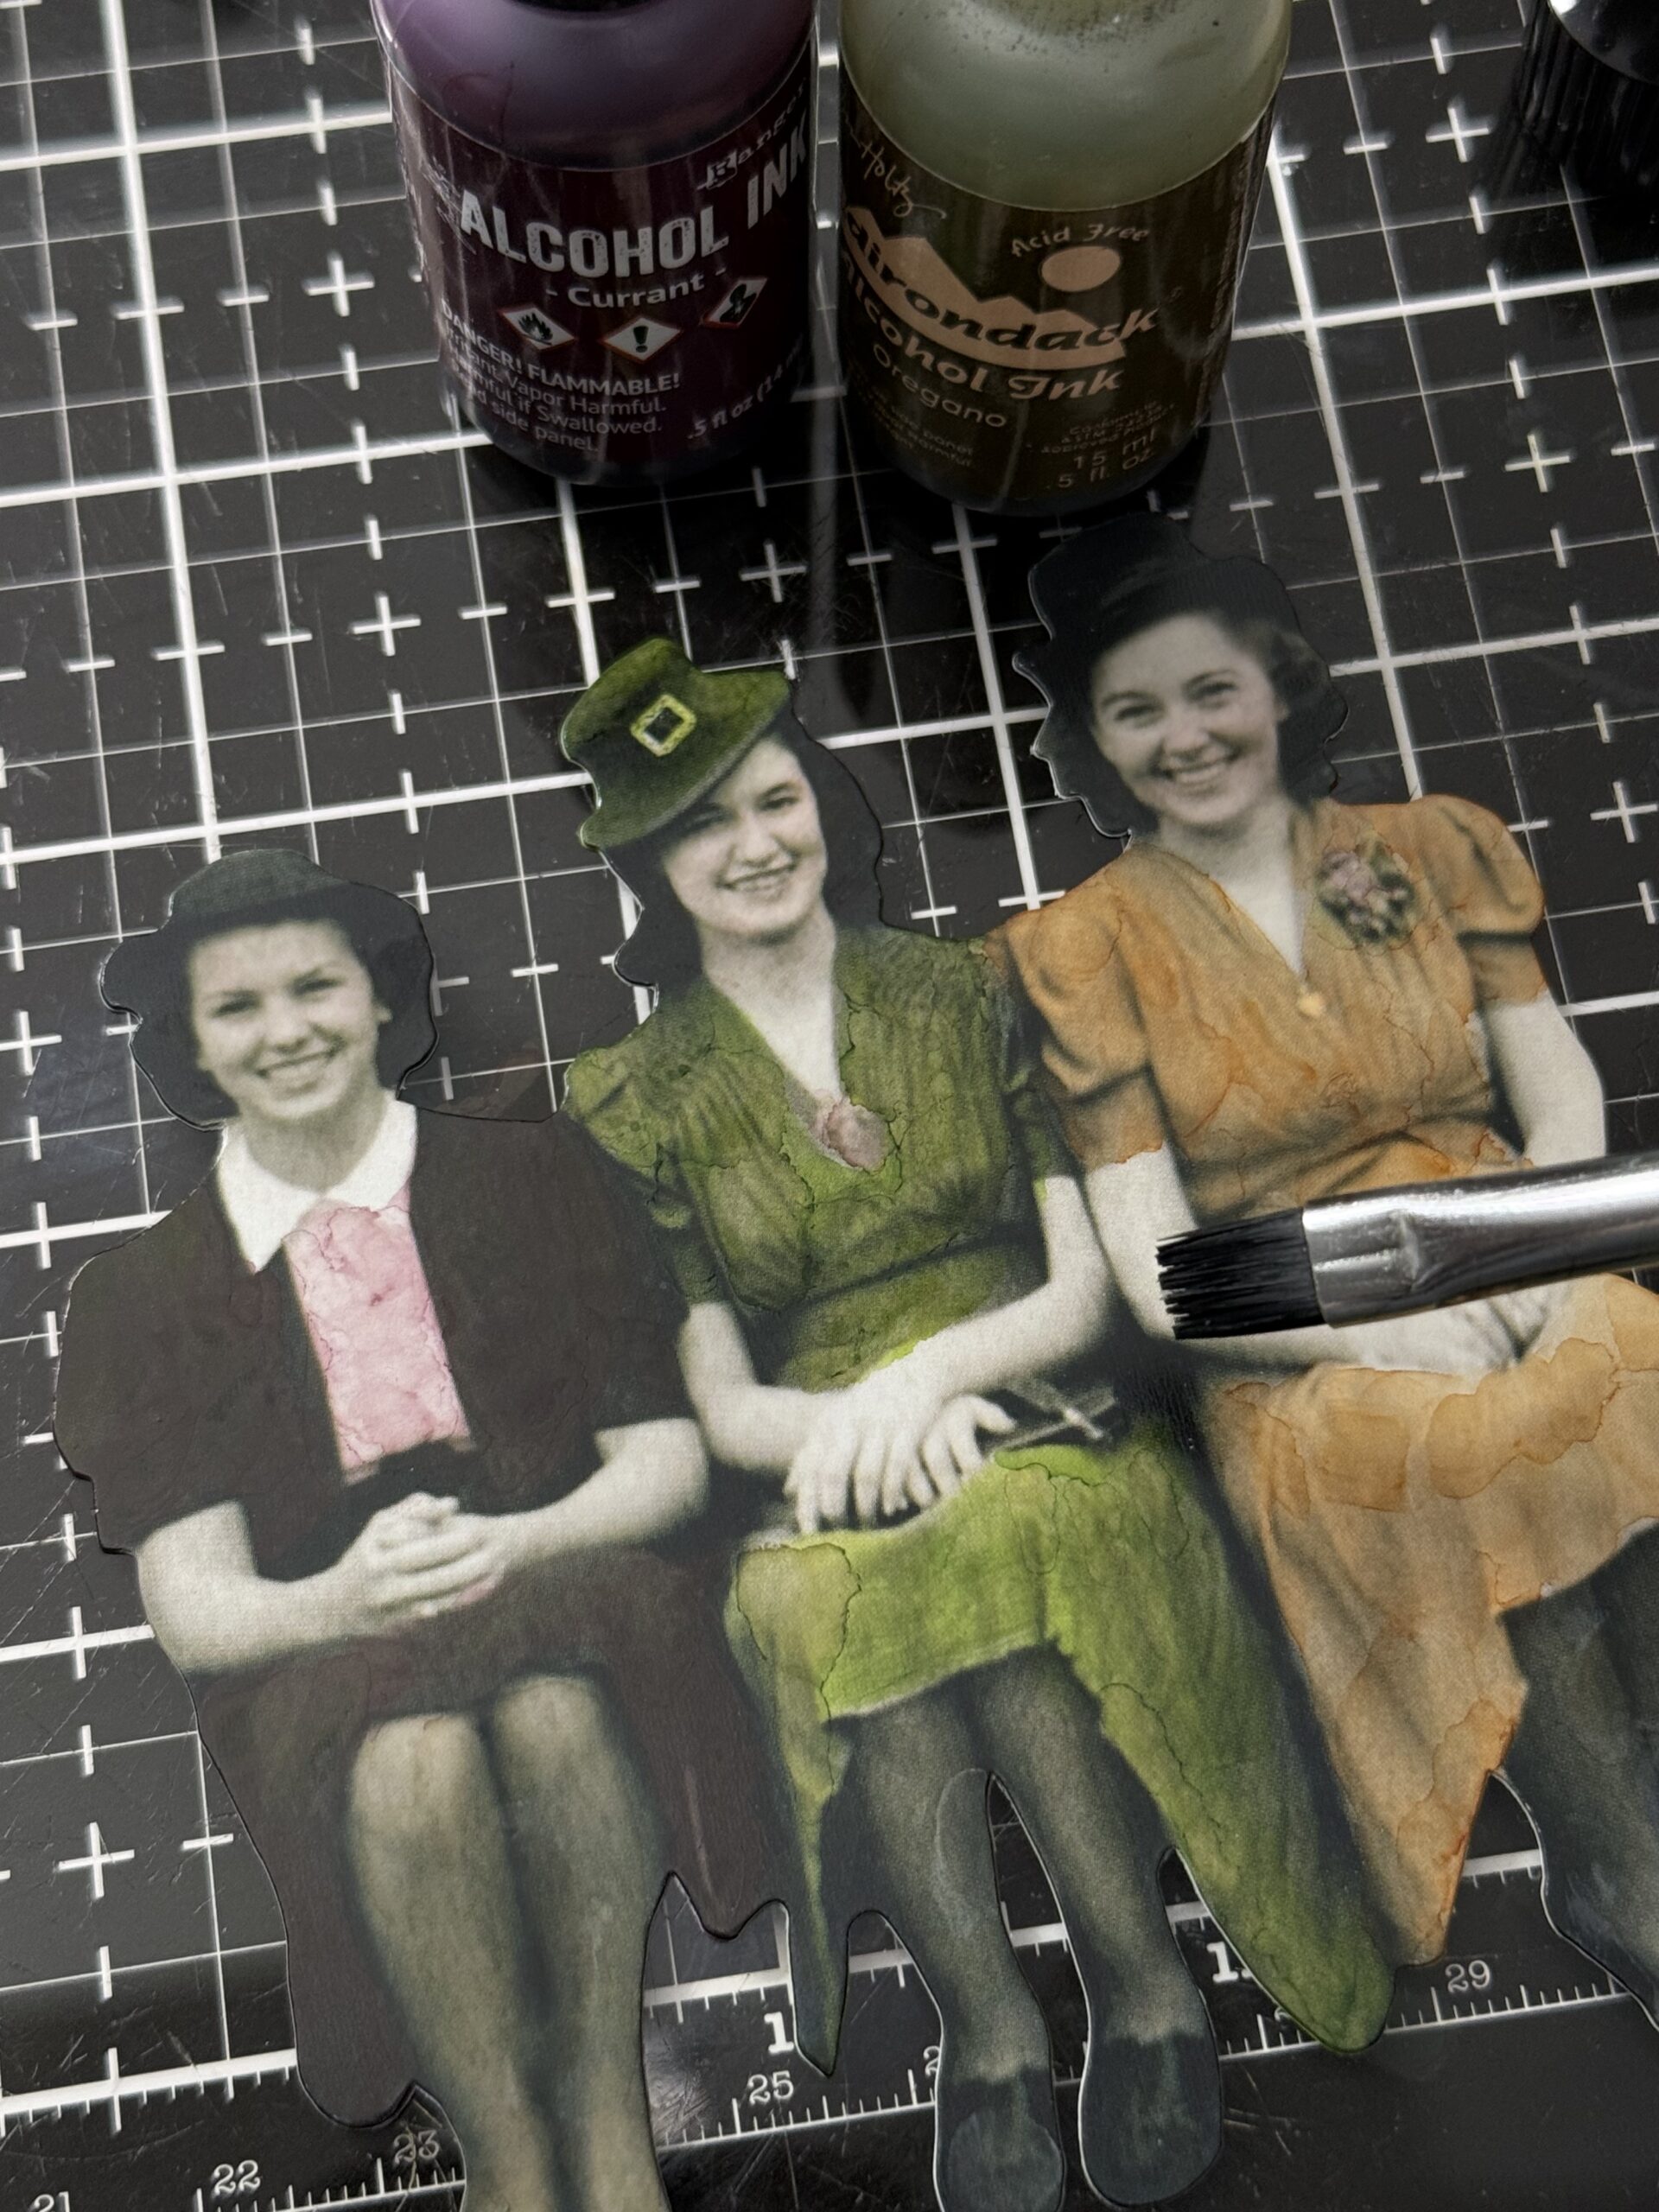
Next up, the paper dolls!
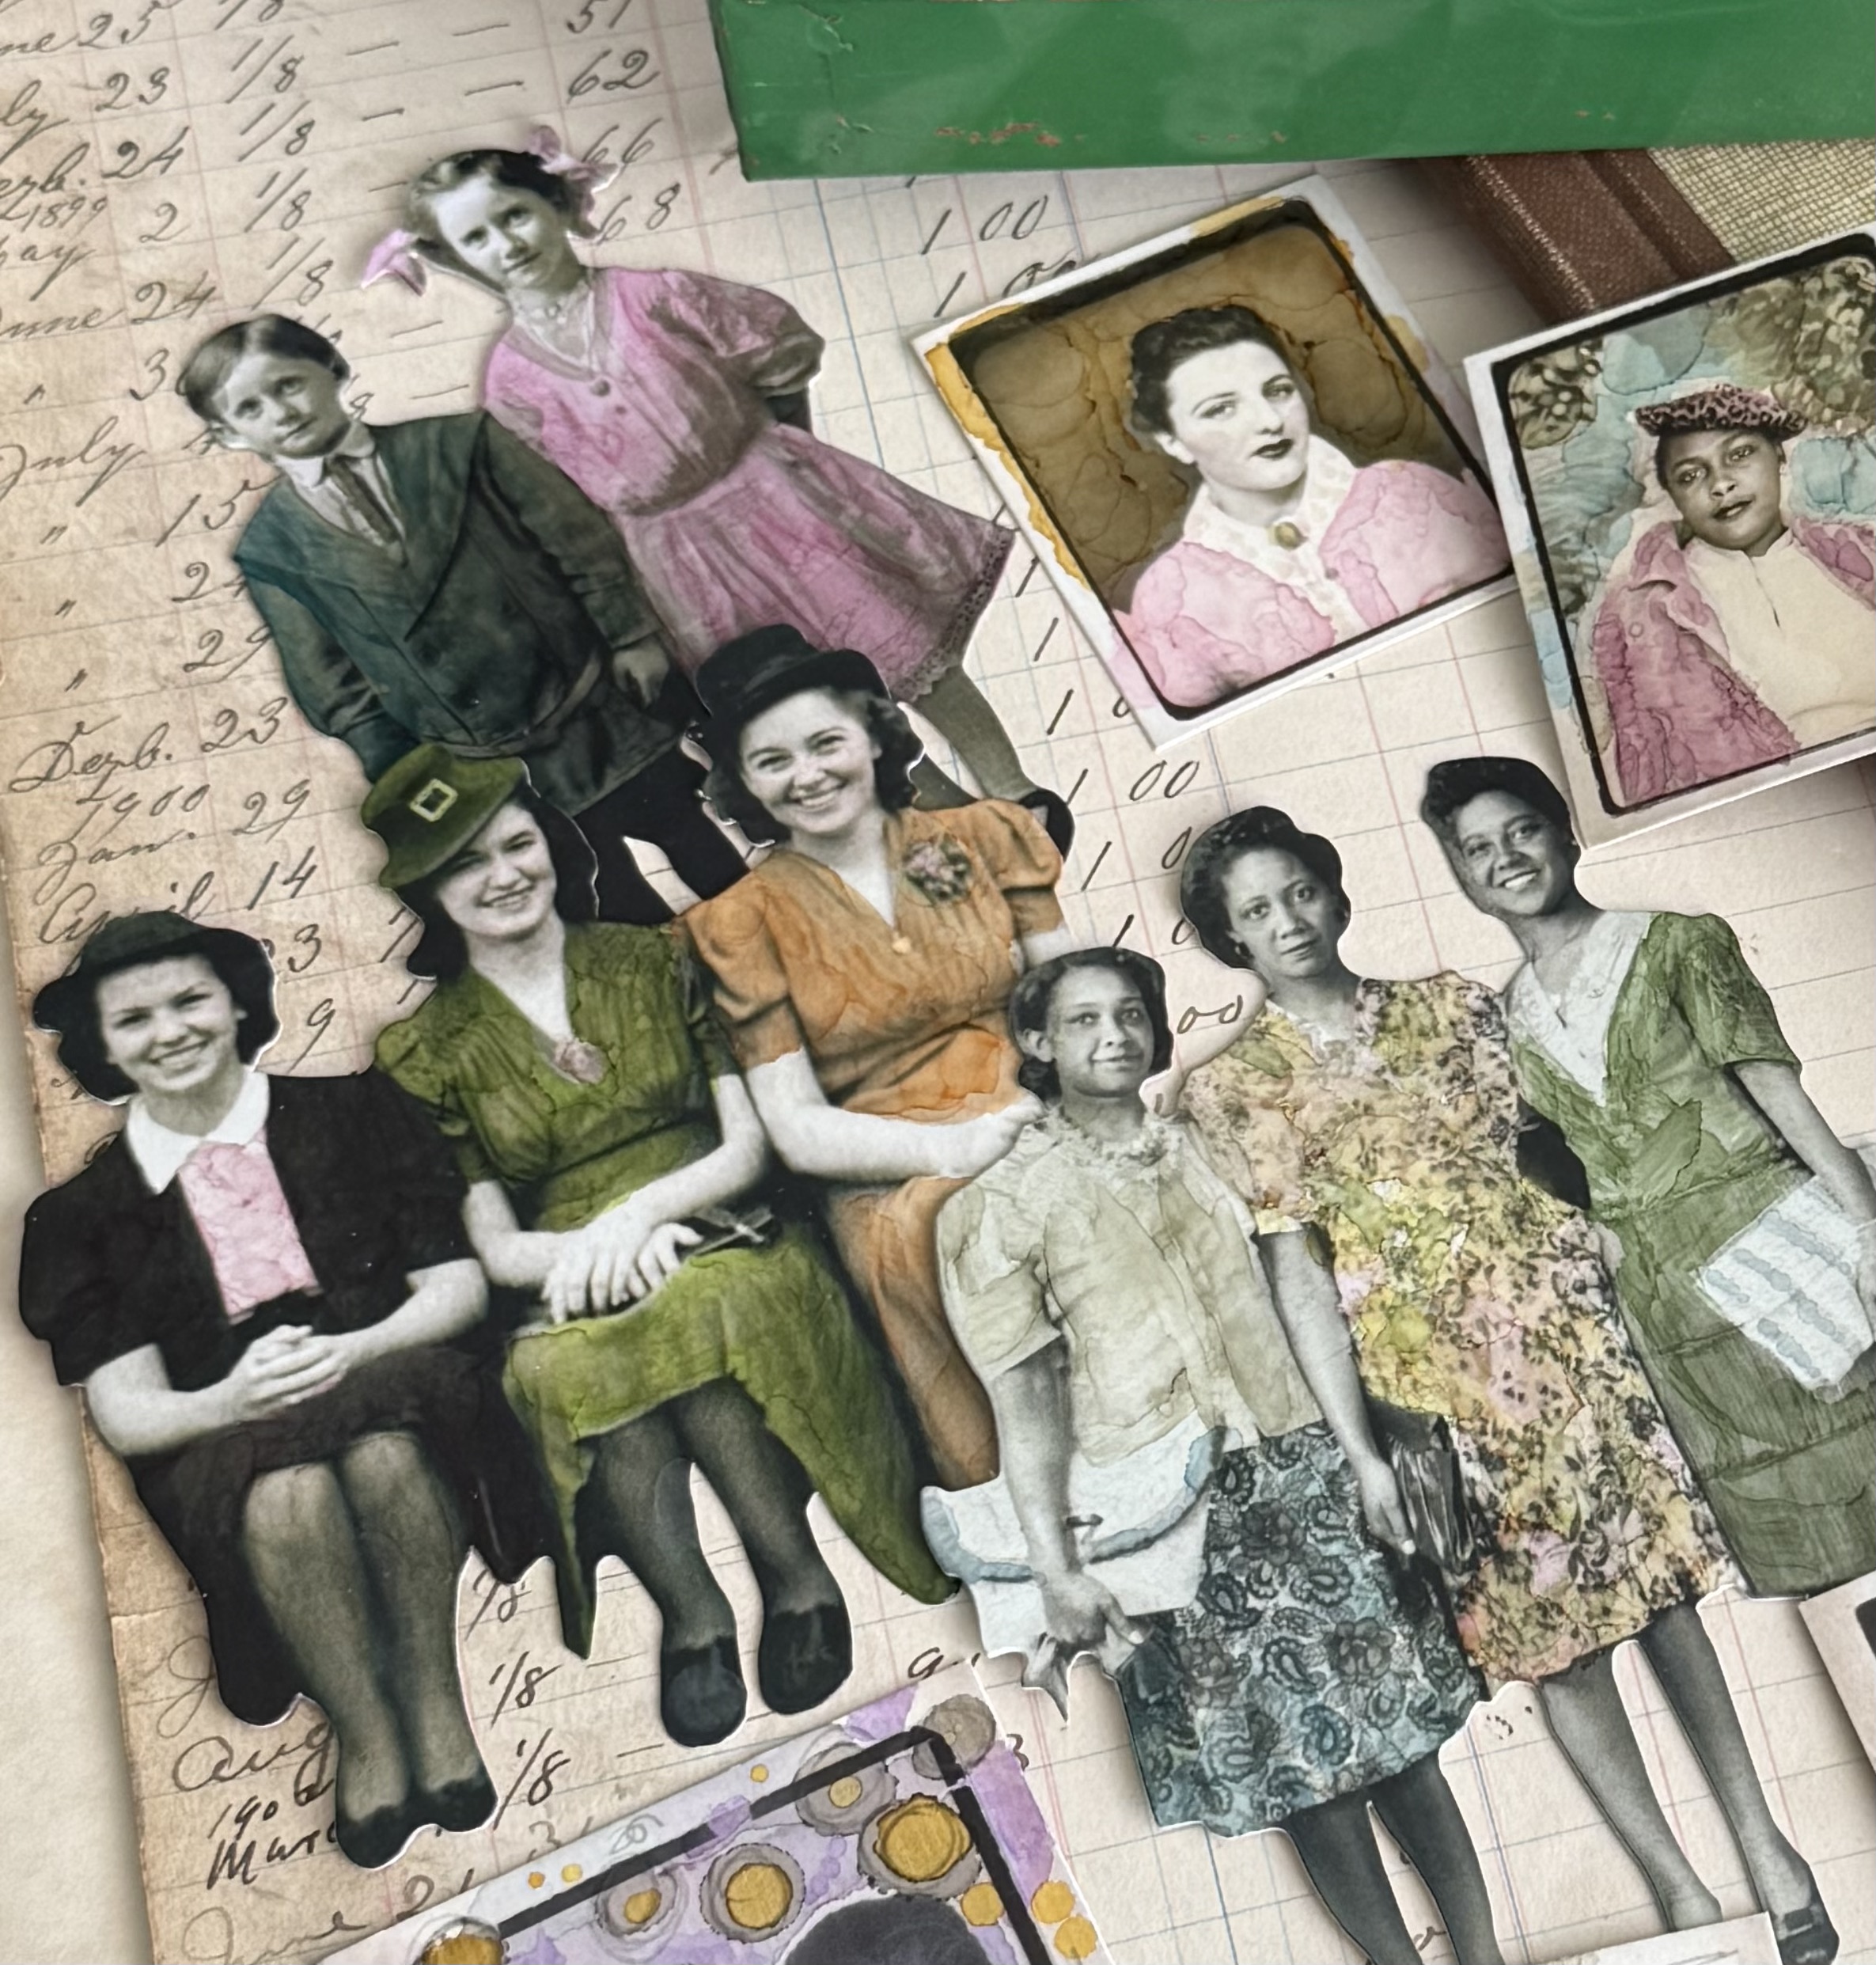
Here I used Botanical to start with on the girl in the centers dress and hat.
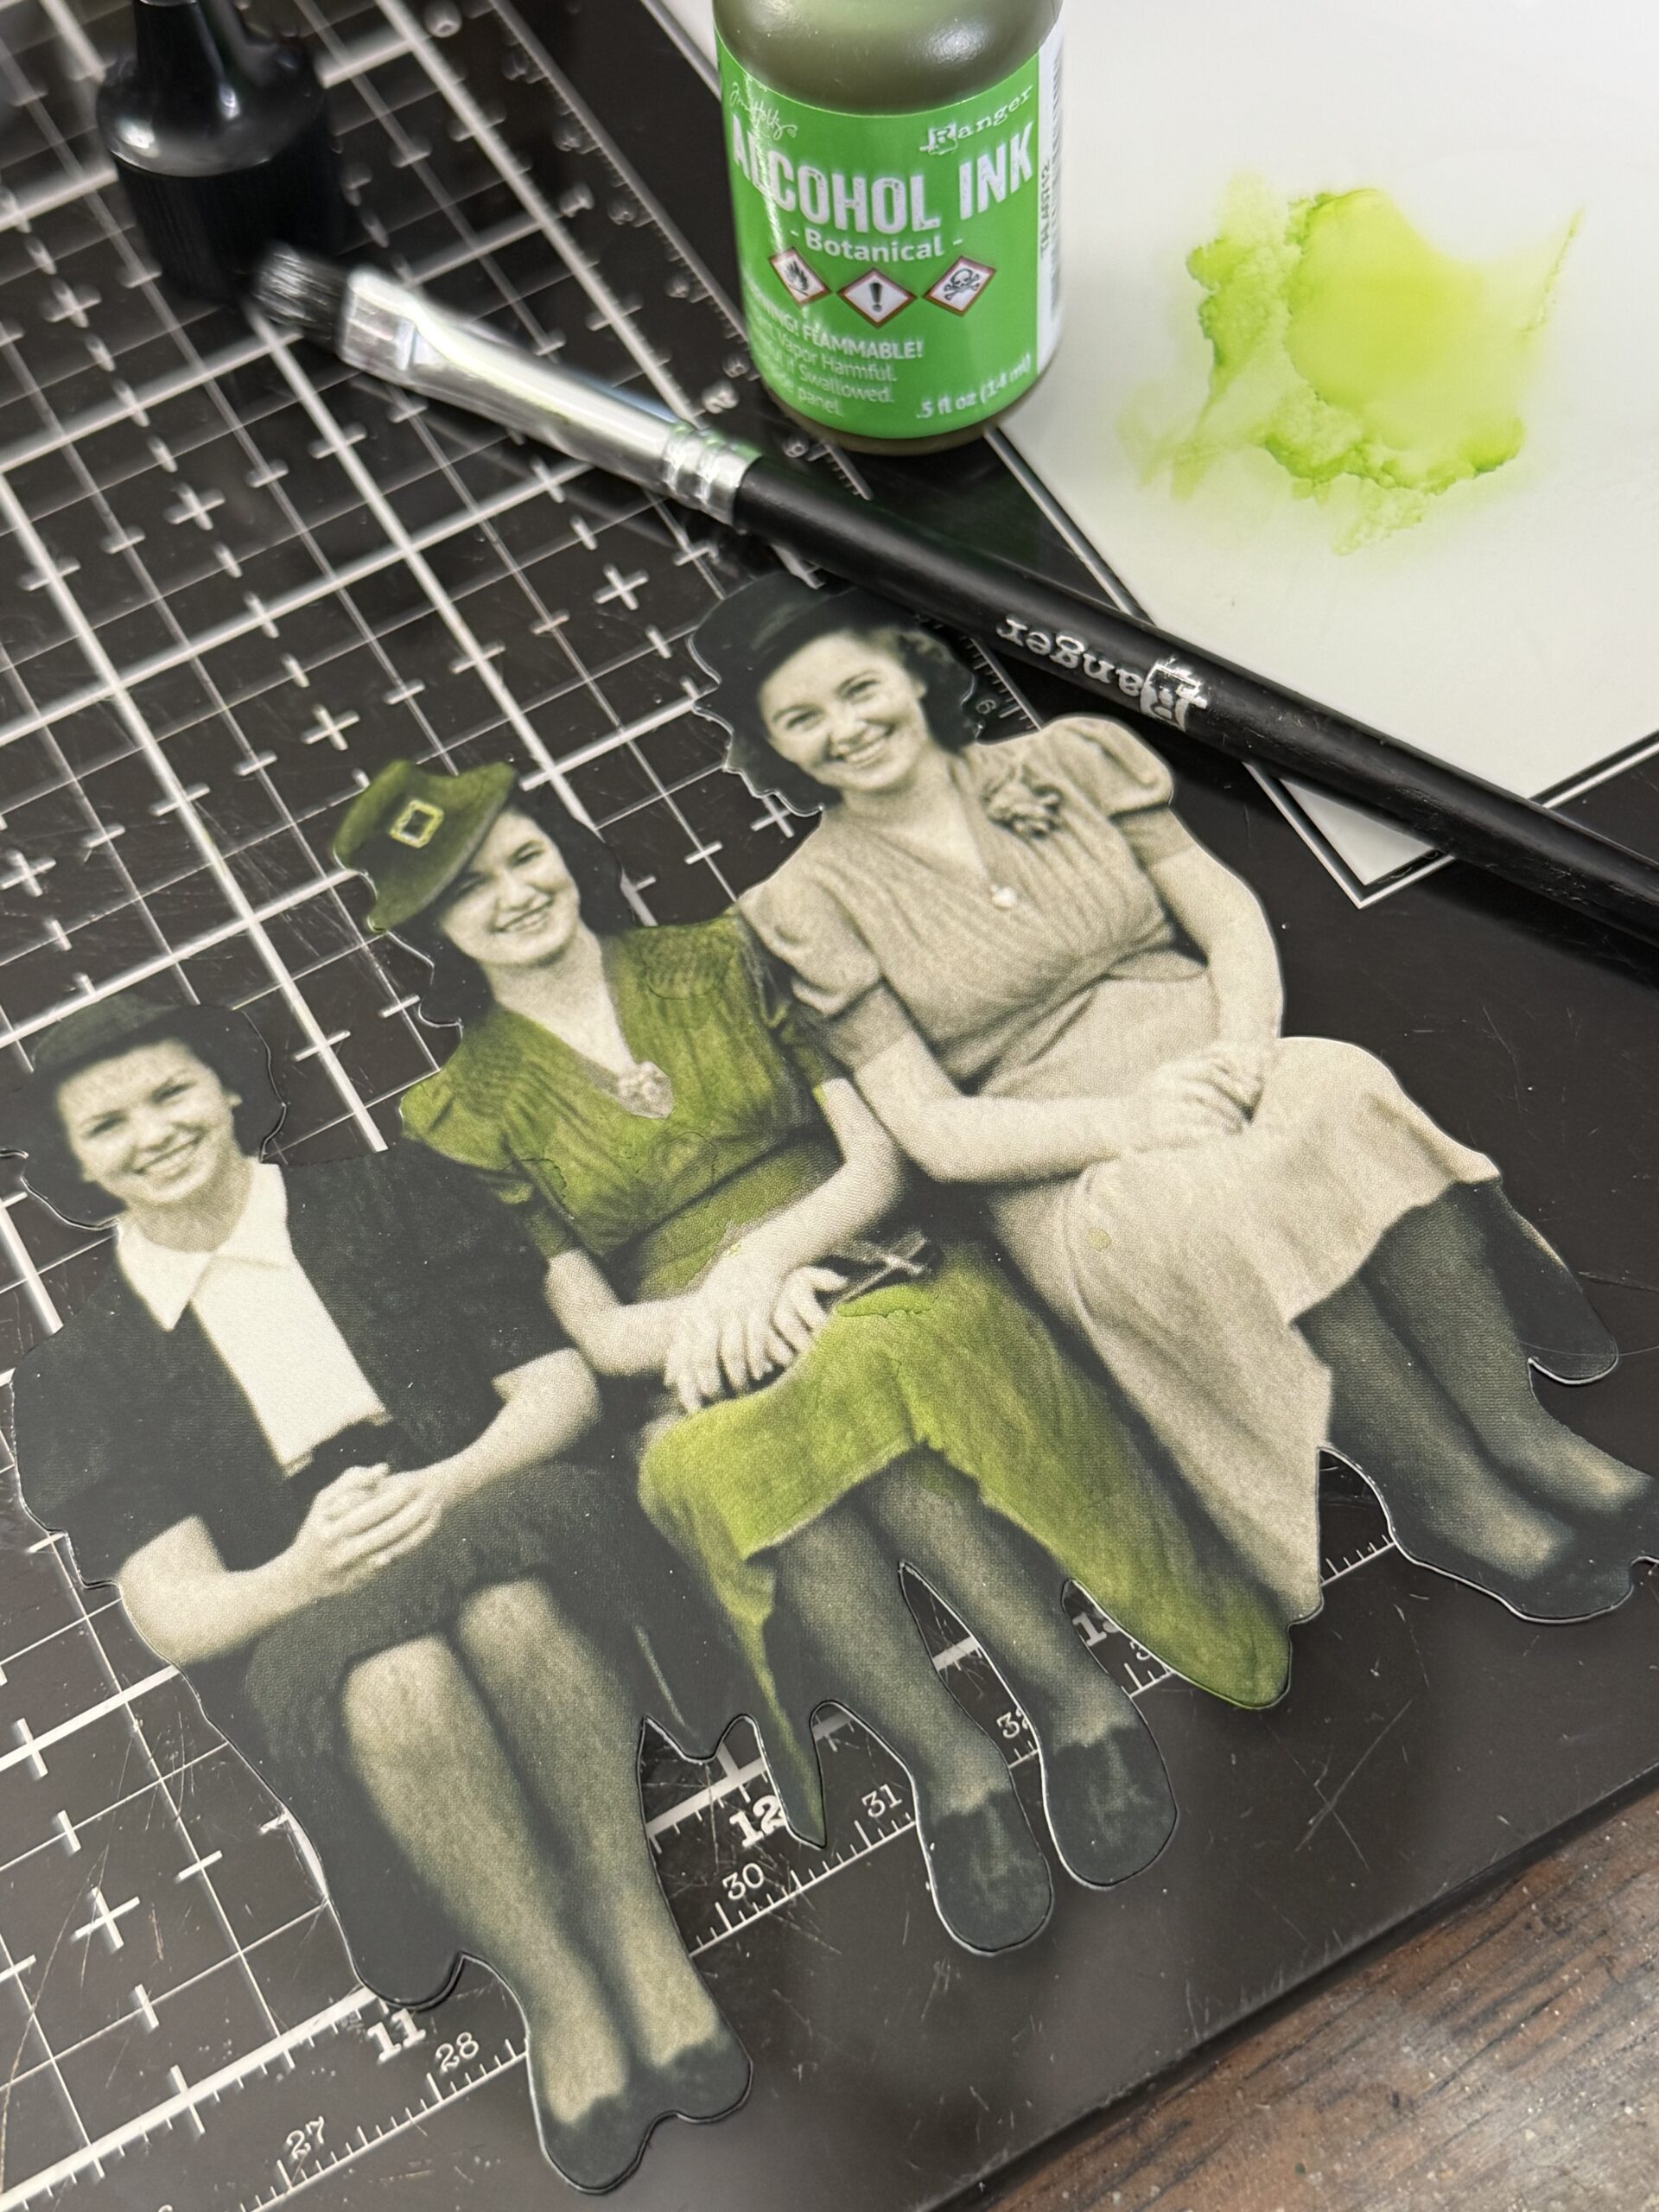
Then some Sunset orange on the girl on the rights dress.

And Currant on the lady on the lefts dress. Her dress was darker but you can see some a difference in the tone of her dress and the color on her top. I also added some Oregano to the green dress just to add some highlights. I colored the flowers and broaches of each of the ladies using leftover ink from my glass mat.
I used the same techniques to color more paper dolls using a variety of colors.

And finally…the snapshot photos. For these, I chose to just highlight and color a few of the items in the photos.
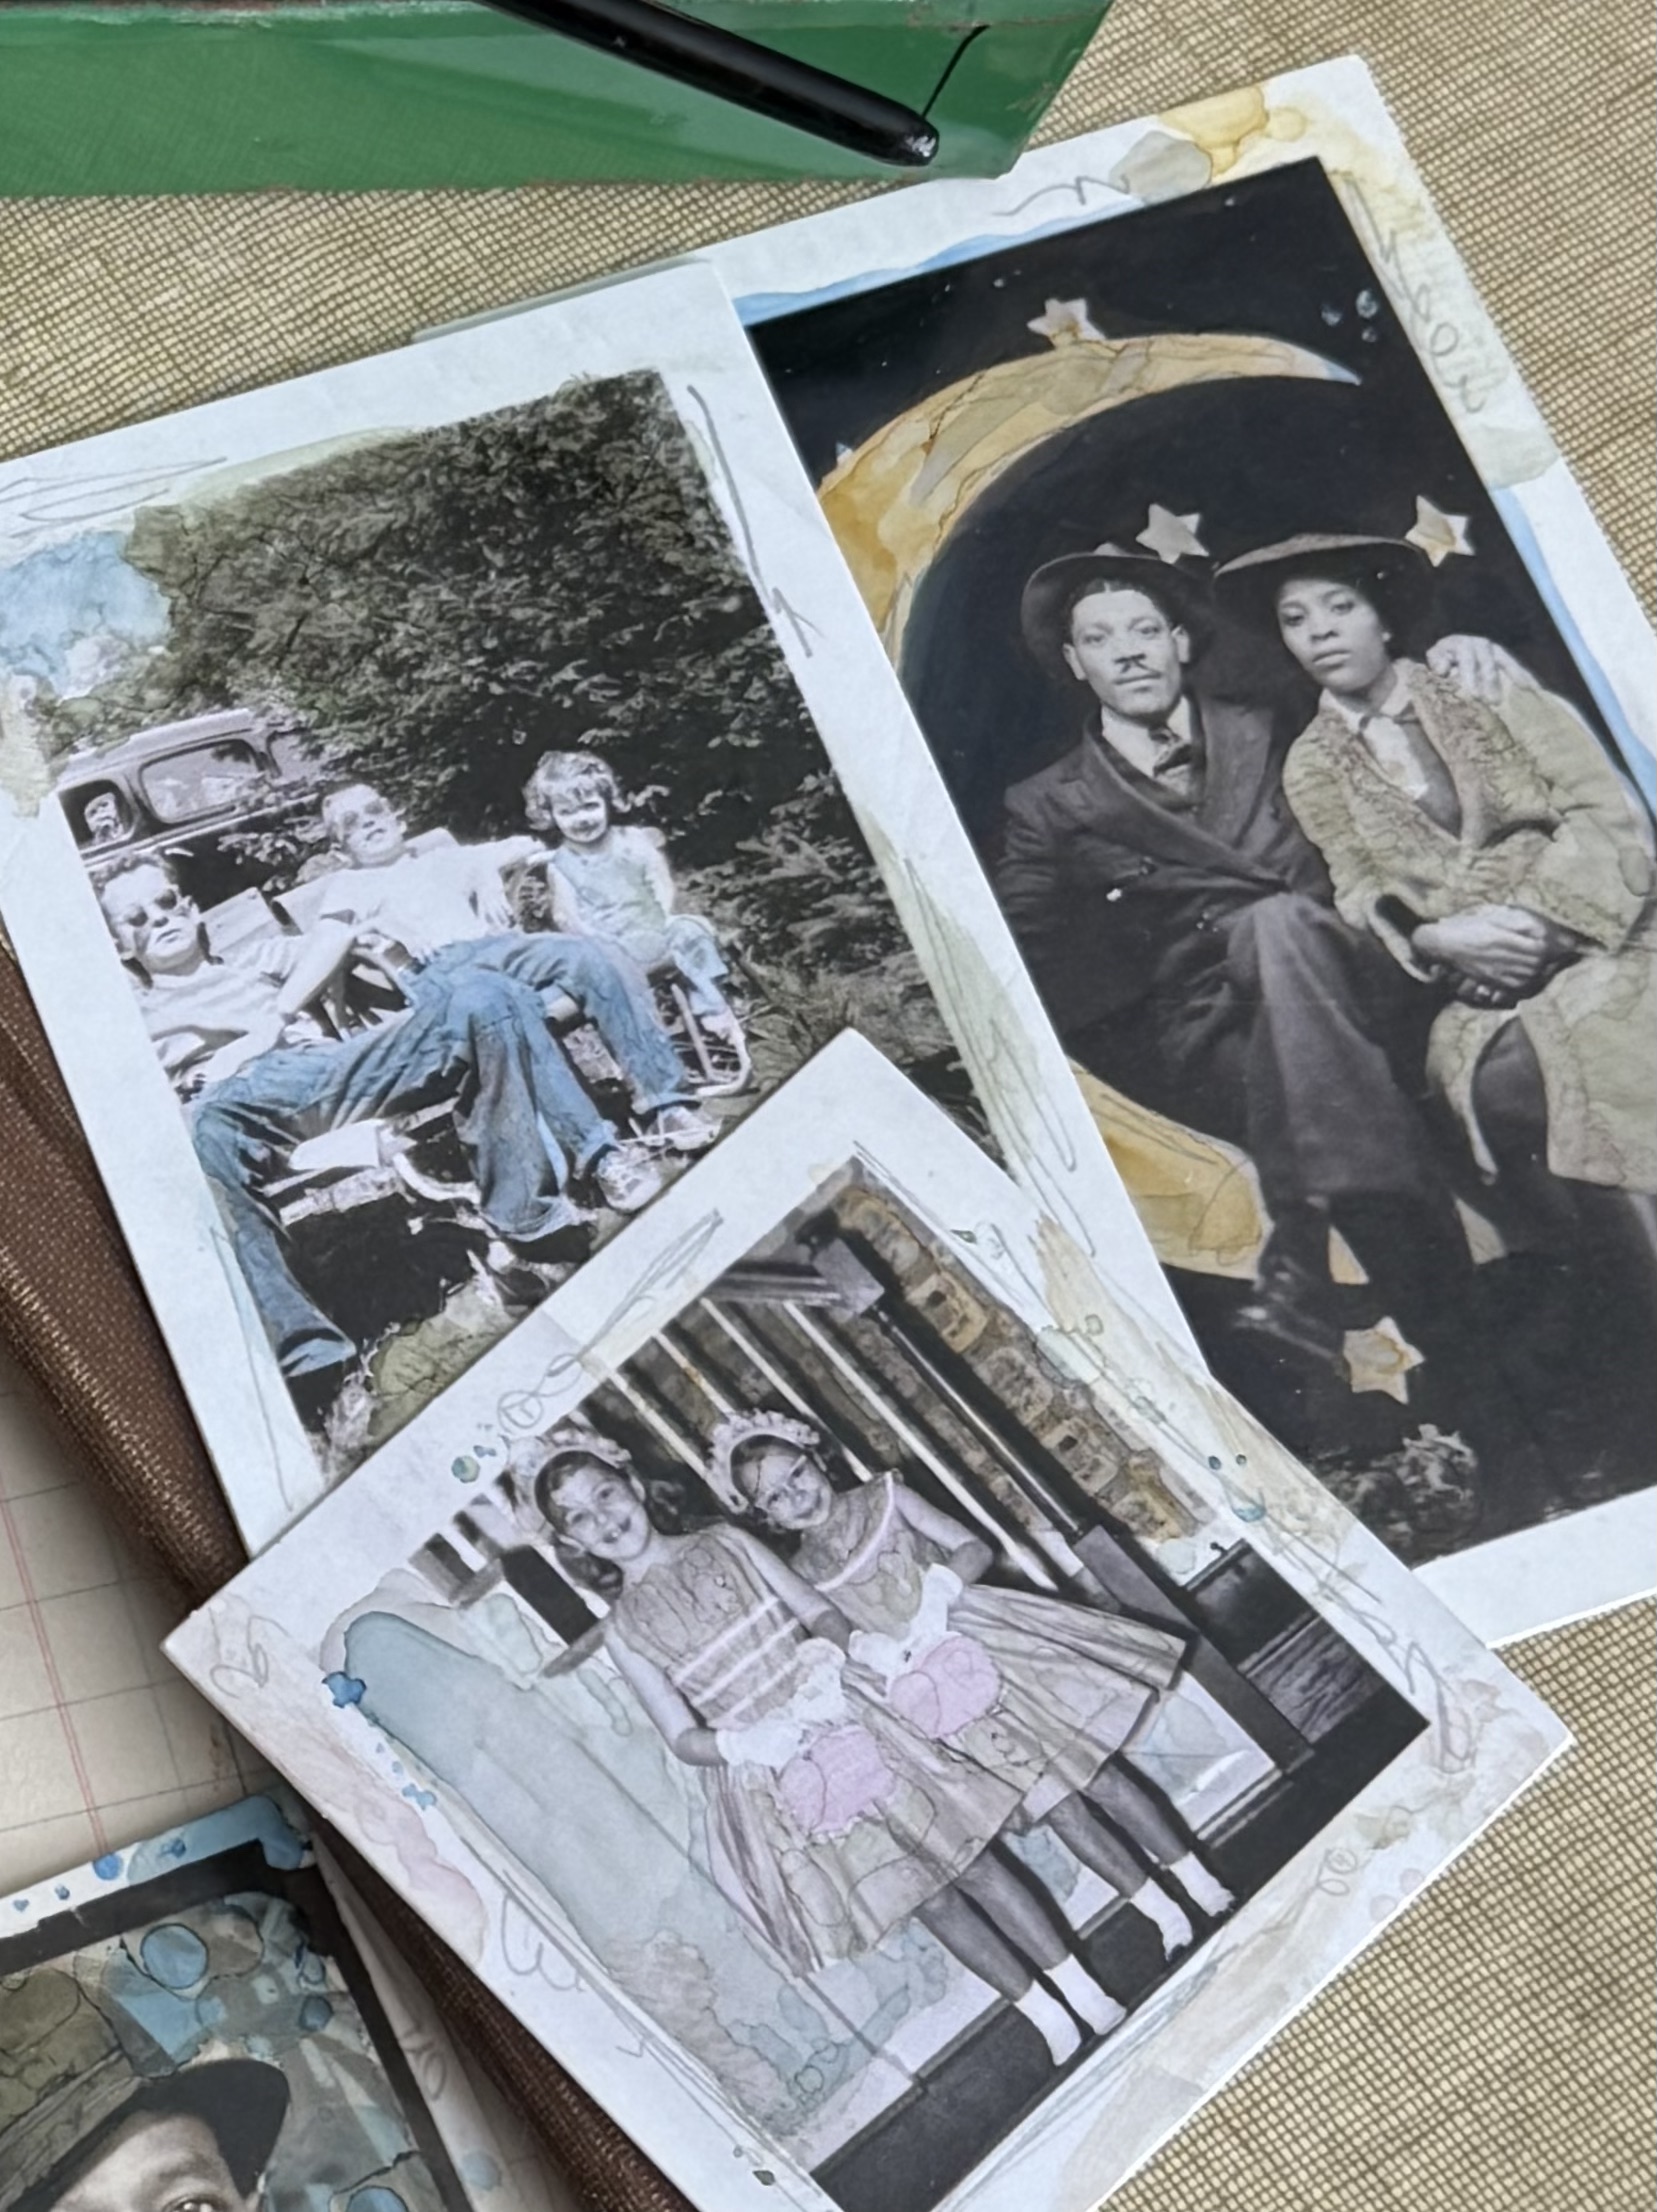
This photo, I colored the blue jeans of the boys and the little girl. The snapshots are more detailed so highlighting some of the basics of the photos worked very well. I chose to color the jeans using a combo of Bayou and Yonder, then colored the grass and trees using Wilderness and Meadow.
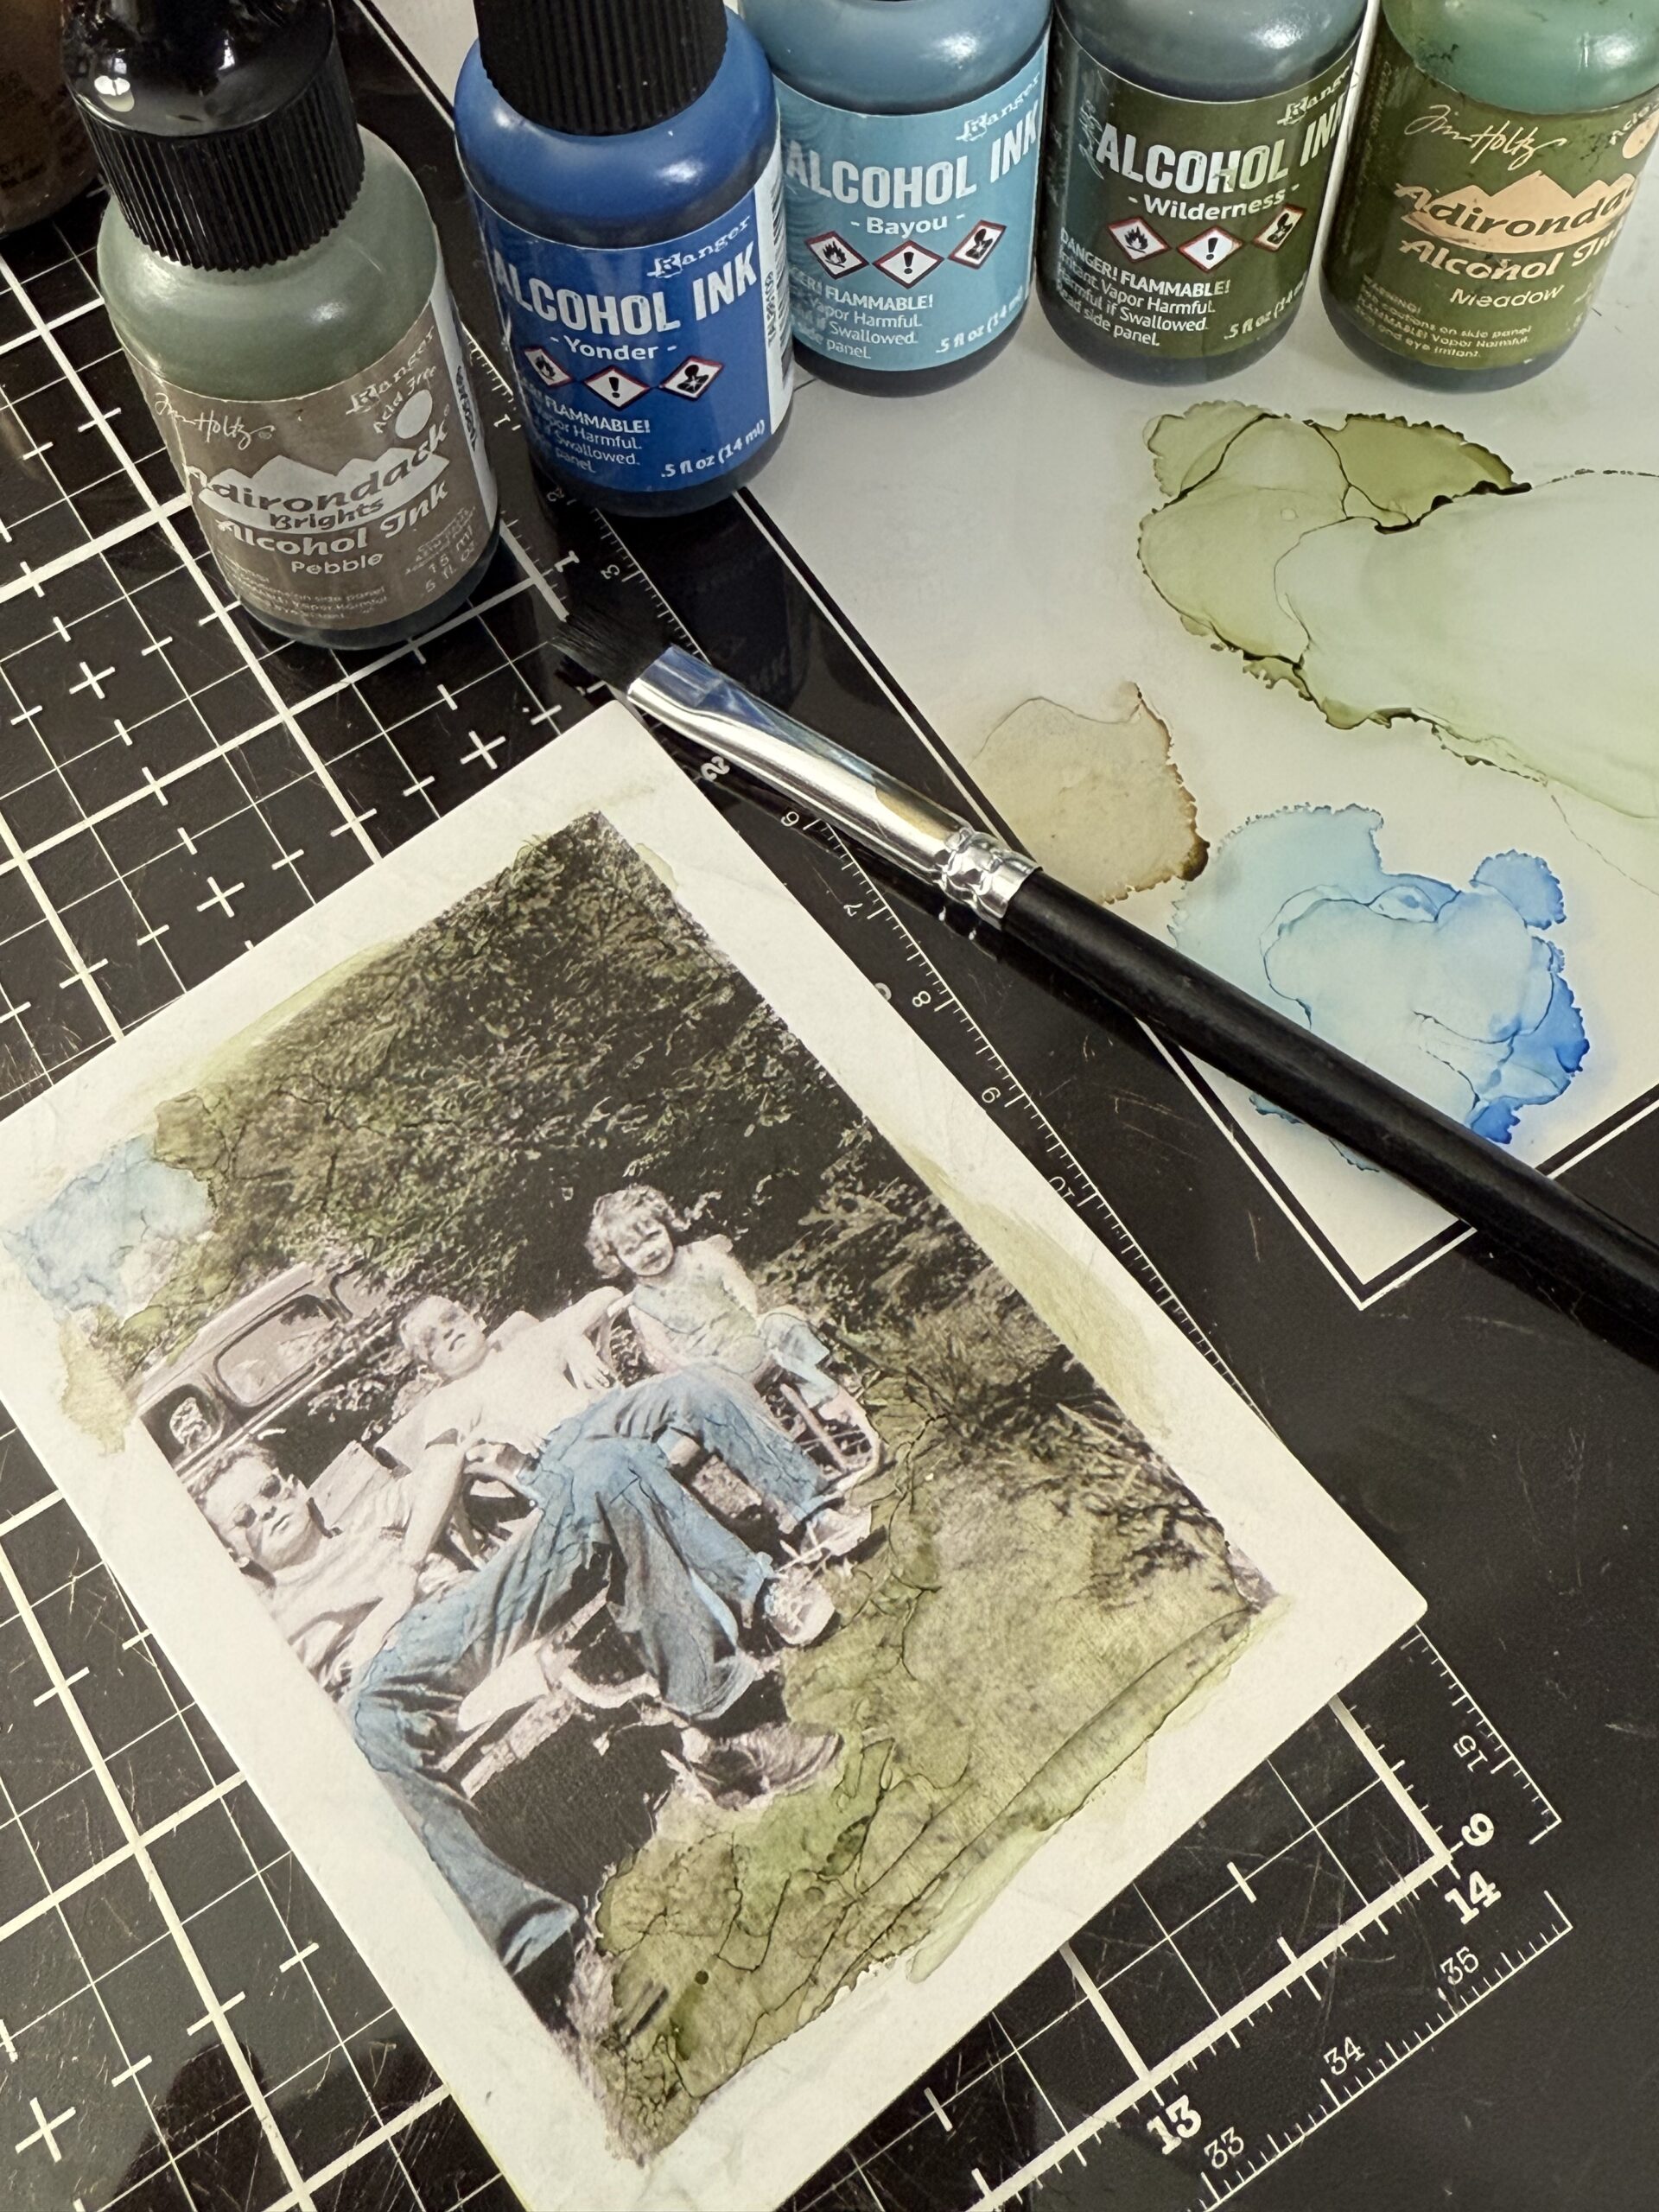
After the inks were dry, I added some splotchy areas around the edges of the photo and added some scribbles using my pencil.

The other snapshots I chose were colored using the same steps but I changed up the colors and added some drips and dots around the edges, then added some scribbles using my pencil.
I hope you enjoyed this post and that you give coloring with Alcohol Inks a try…
Thanks so much for stopping by!
Creatively Yours, Stacy
Shop Simon Says Stamp by clicking on this link. Thank you! I appreciate you for supporting me.
What is an affiliate program, and why should I click on the link and buy through you?
When you shop via the affiliate link on this blog, I receive a small commission from the affiliate provider (Simon Says Stamp) at no extra cost to you, whatsoever. These commissions help me to cover the hosting fees and other costs to run my blog and be able to provide you with FREE inspiration. If you shop the links, THANK YOU! I truly appreciate being able to share my love of creating with you.


Leave a Reply