Hello friends…I’m back AGAIN! Things that go bump in the night are a given in a Haunted House, and being inspired by your imagination and a great stamp set make creating so much fun!
Today, I’m back with a little project that I created using the Sketch Manor Stamp Set that Tim Holtz released and the new Wafer Die set that Simon Says Stamp recently released exclusively by them. It takes the Manor Stamp Set to a whole new level…quite literally!
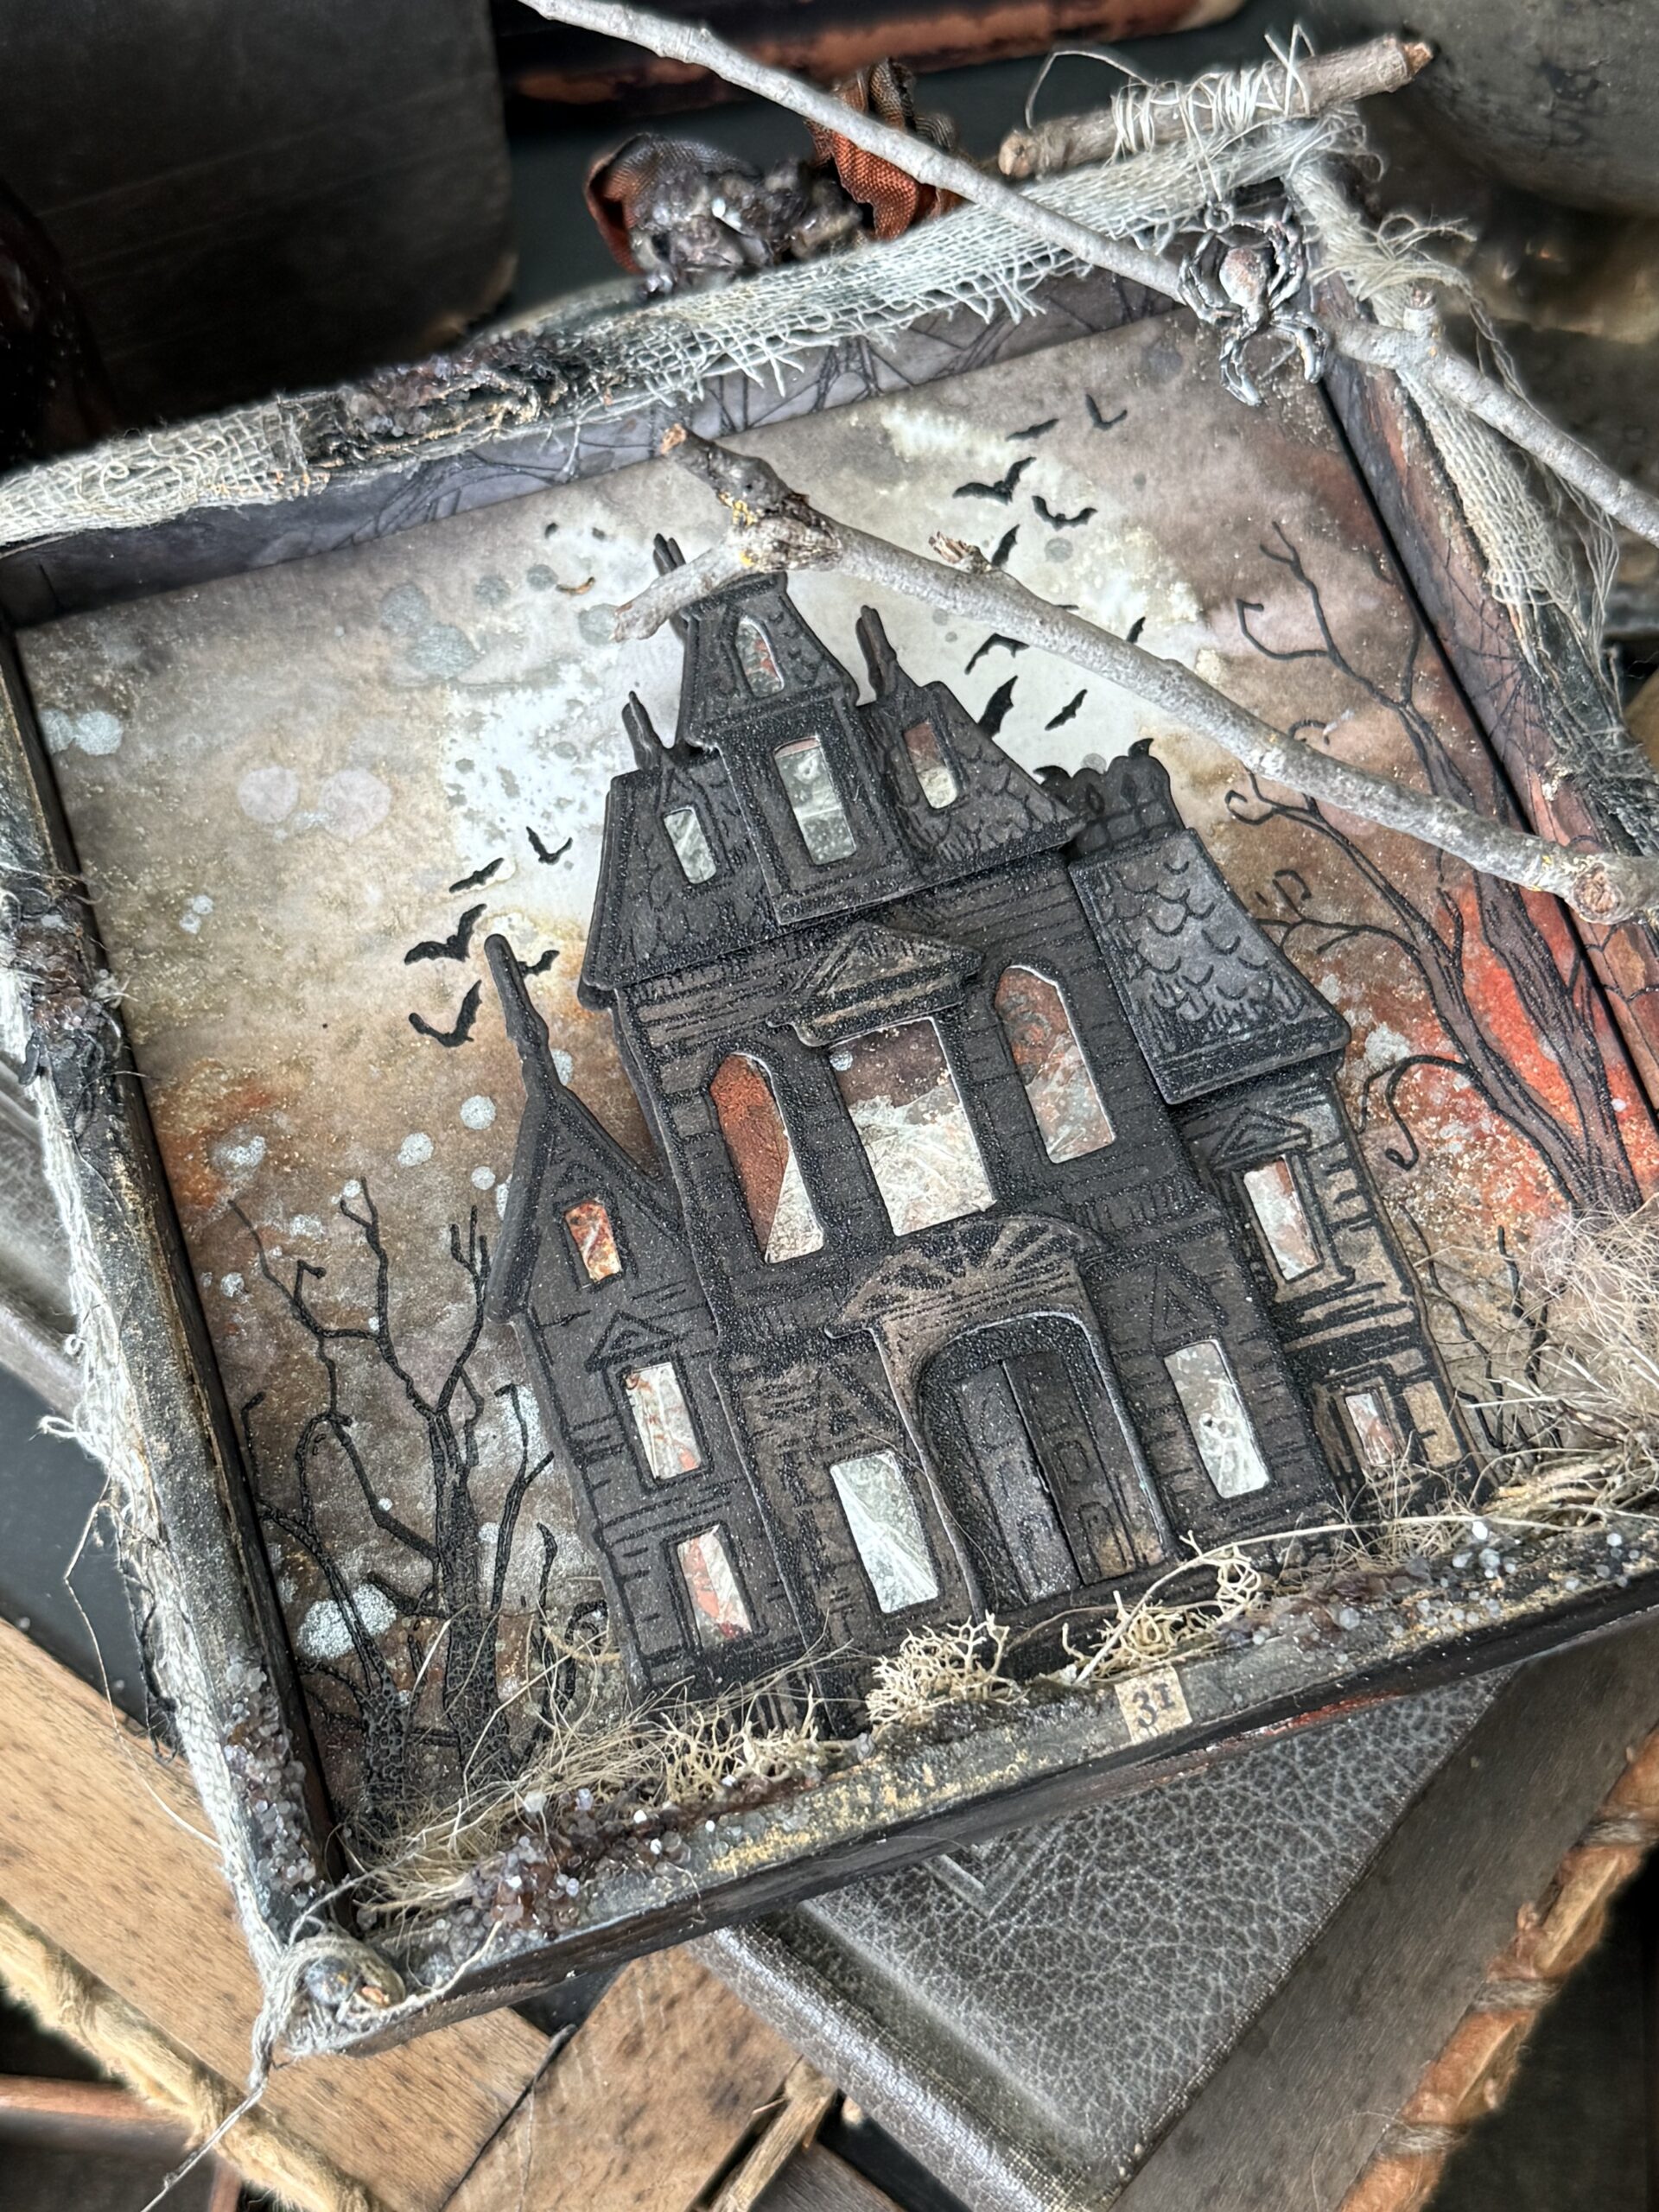
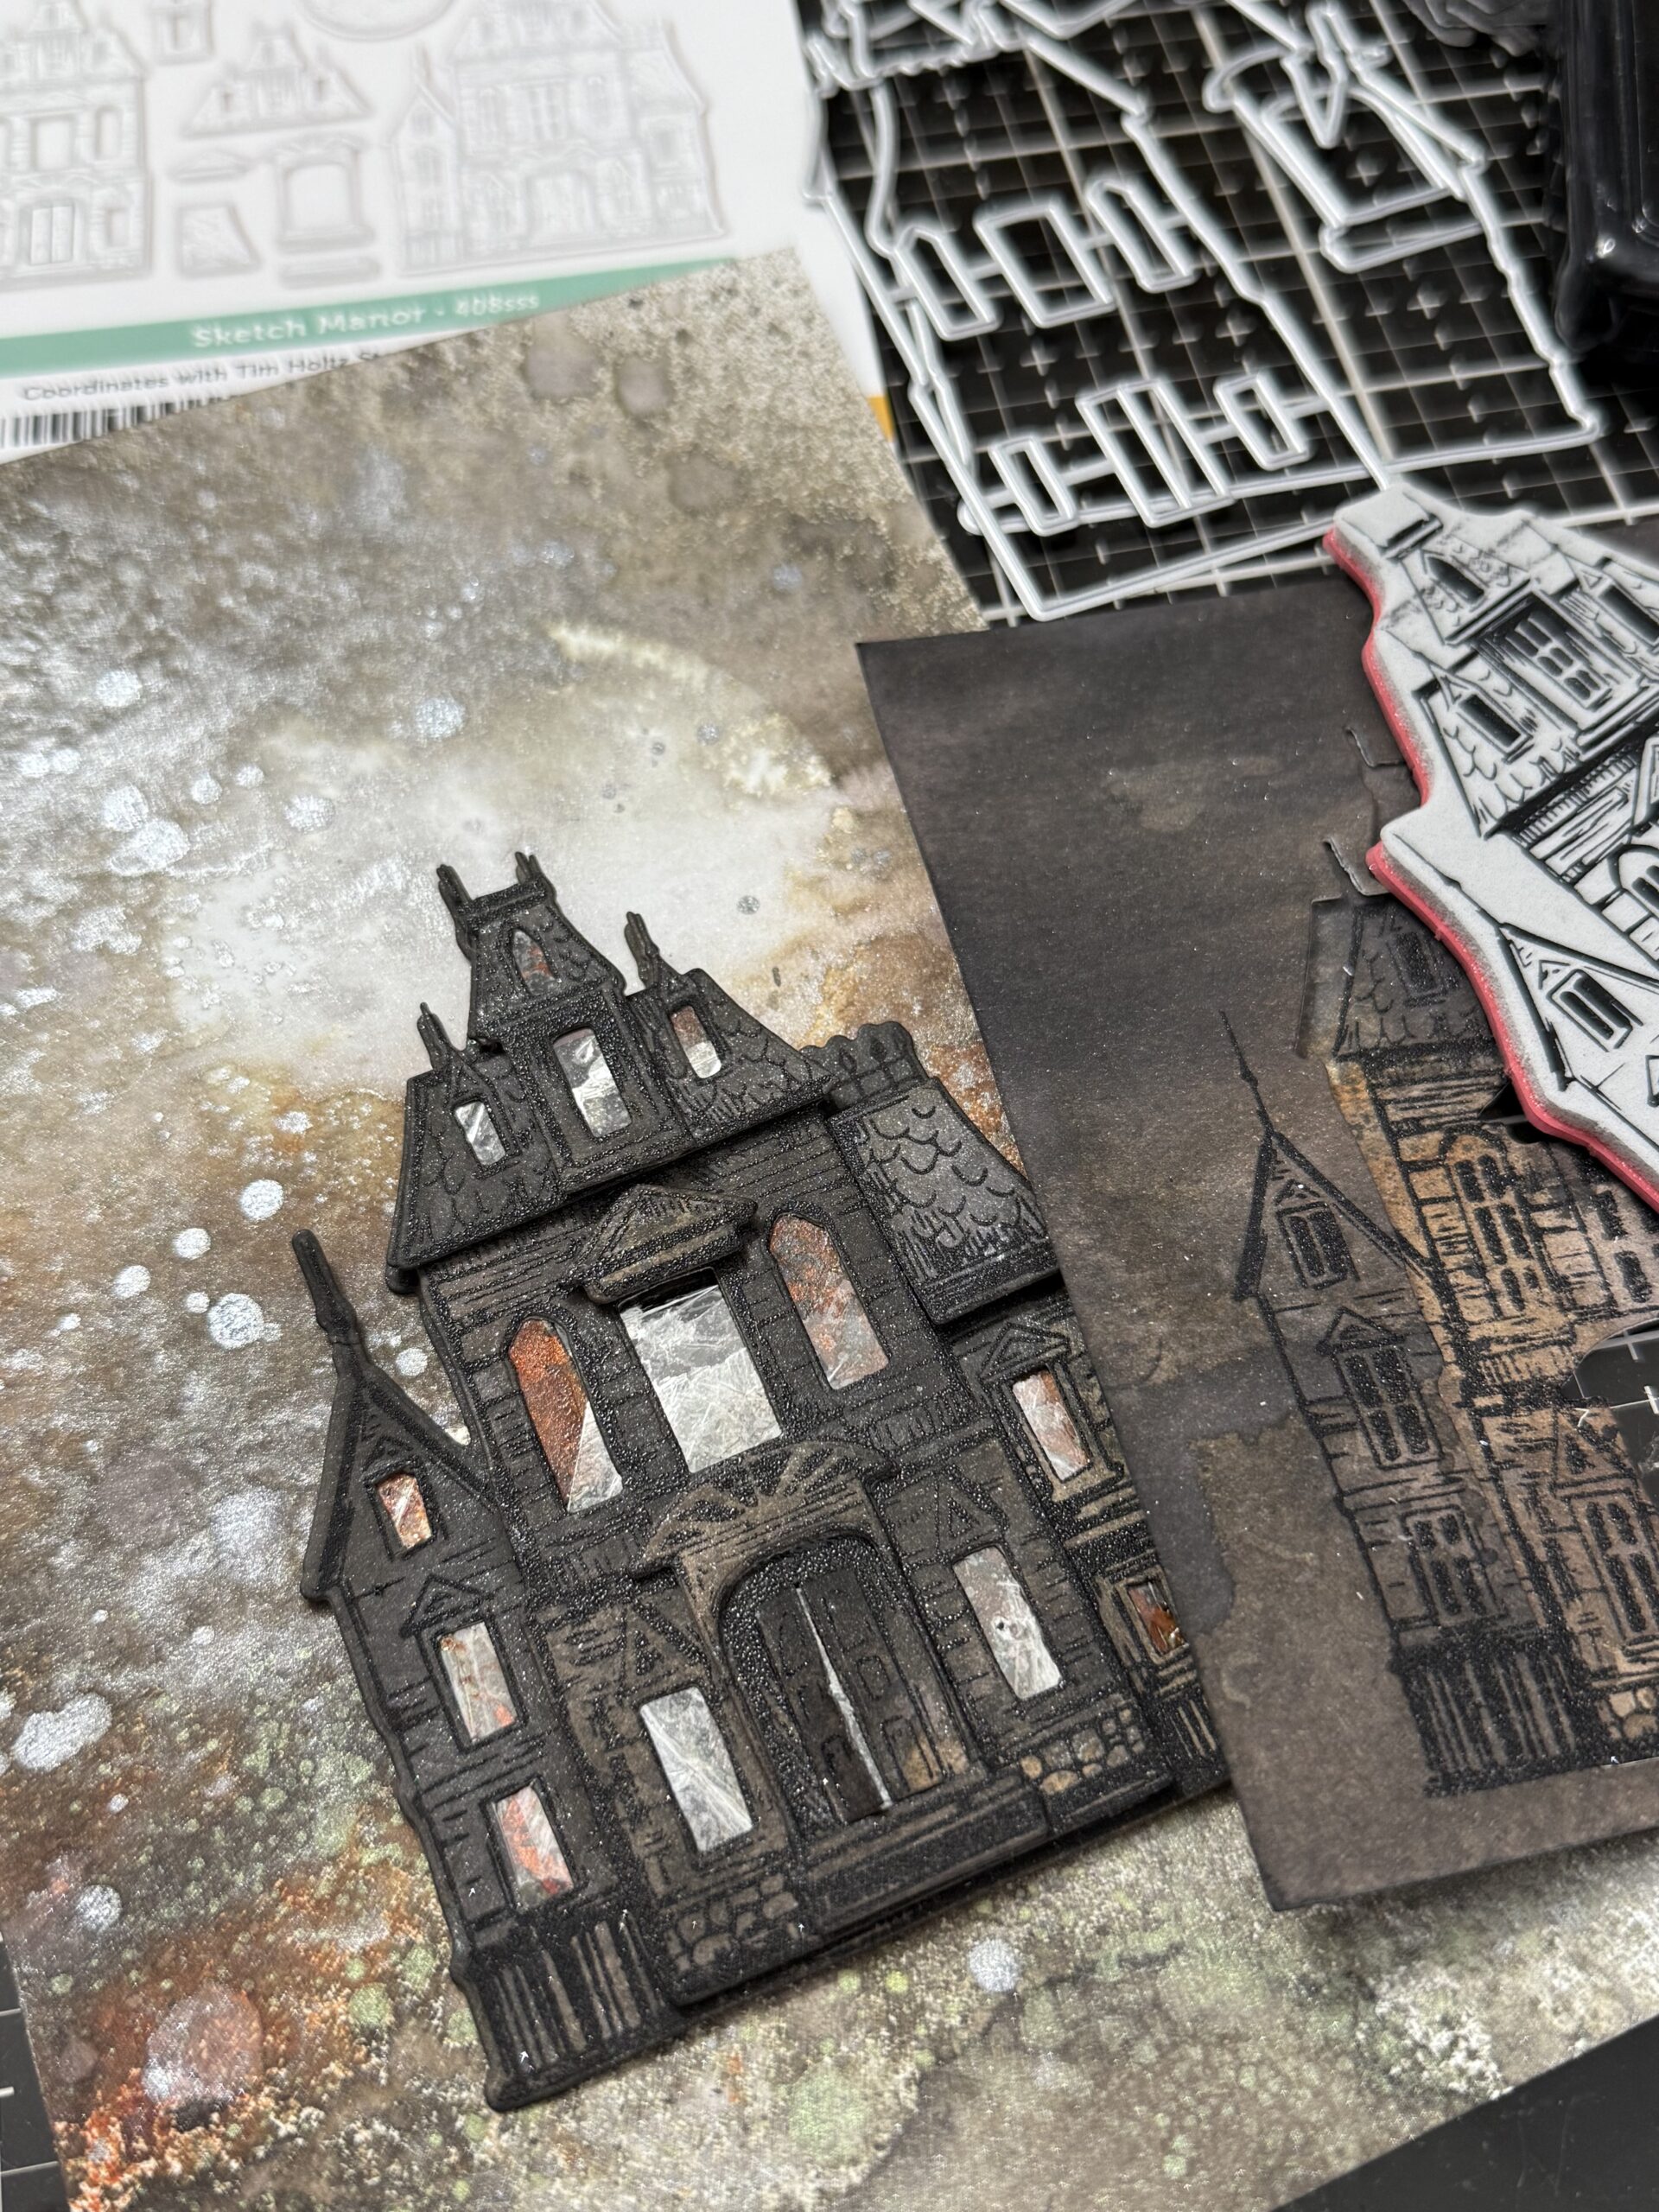
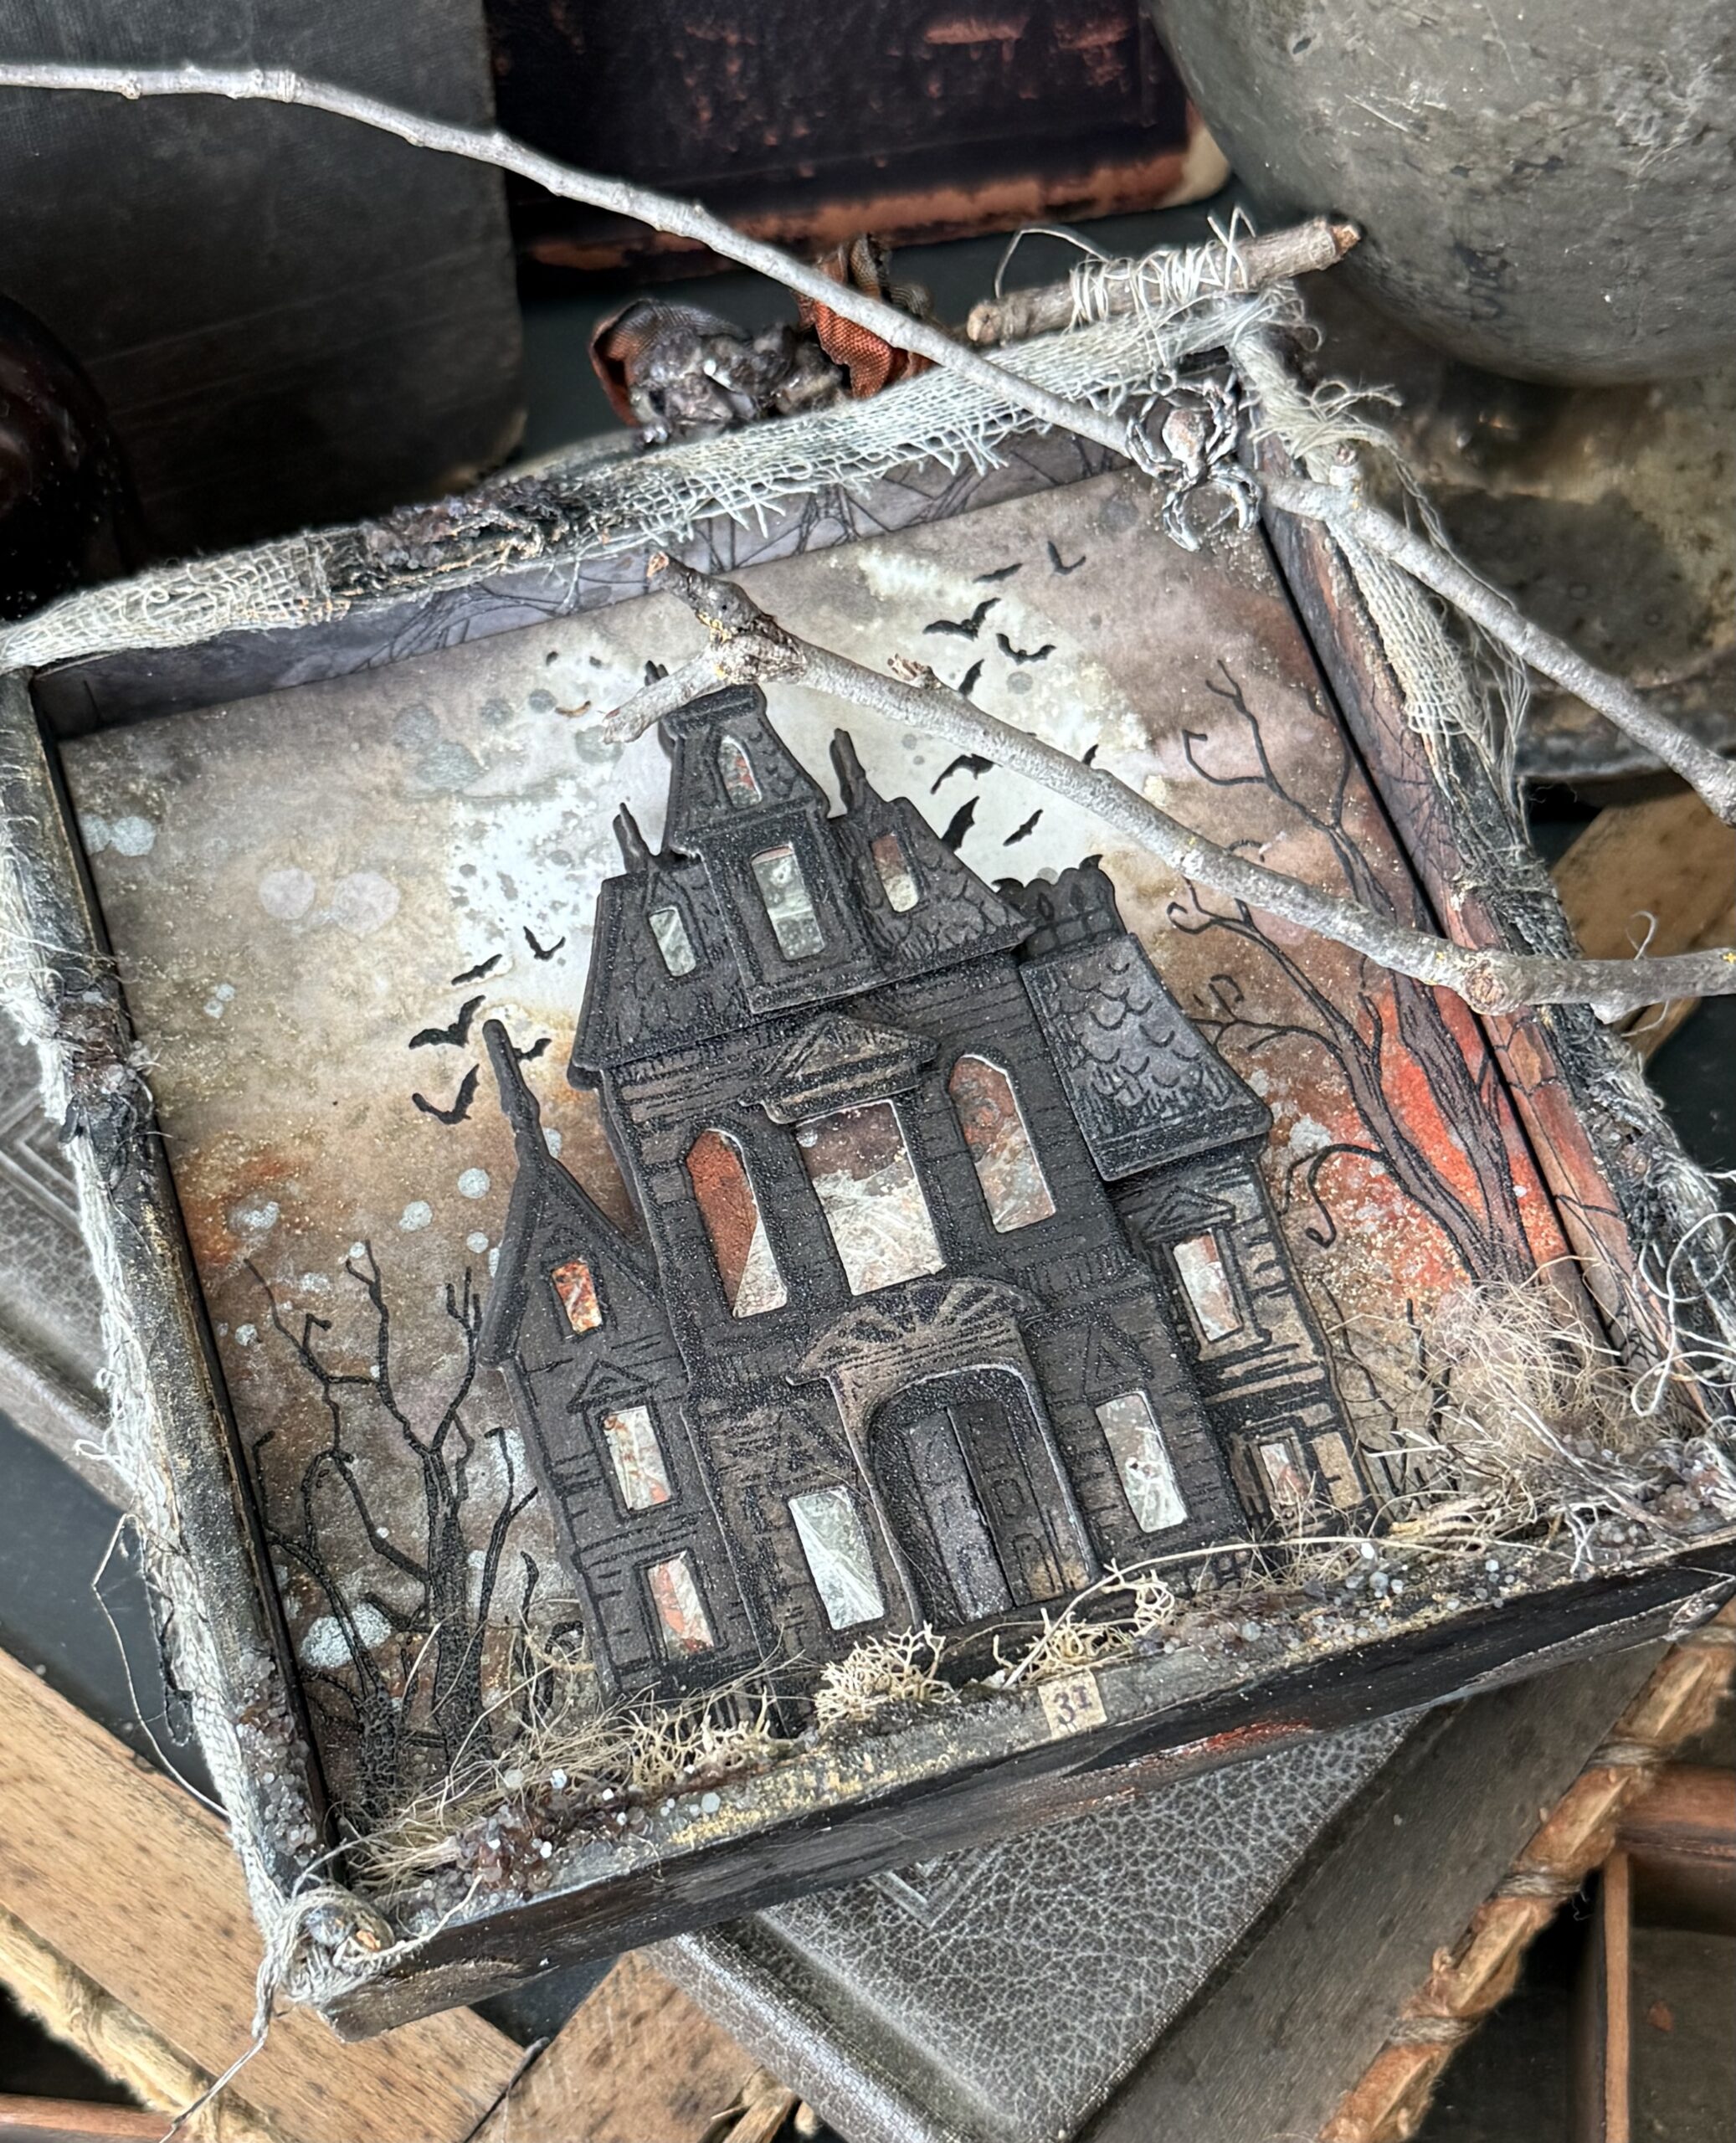
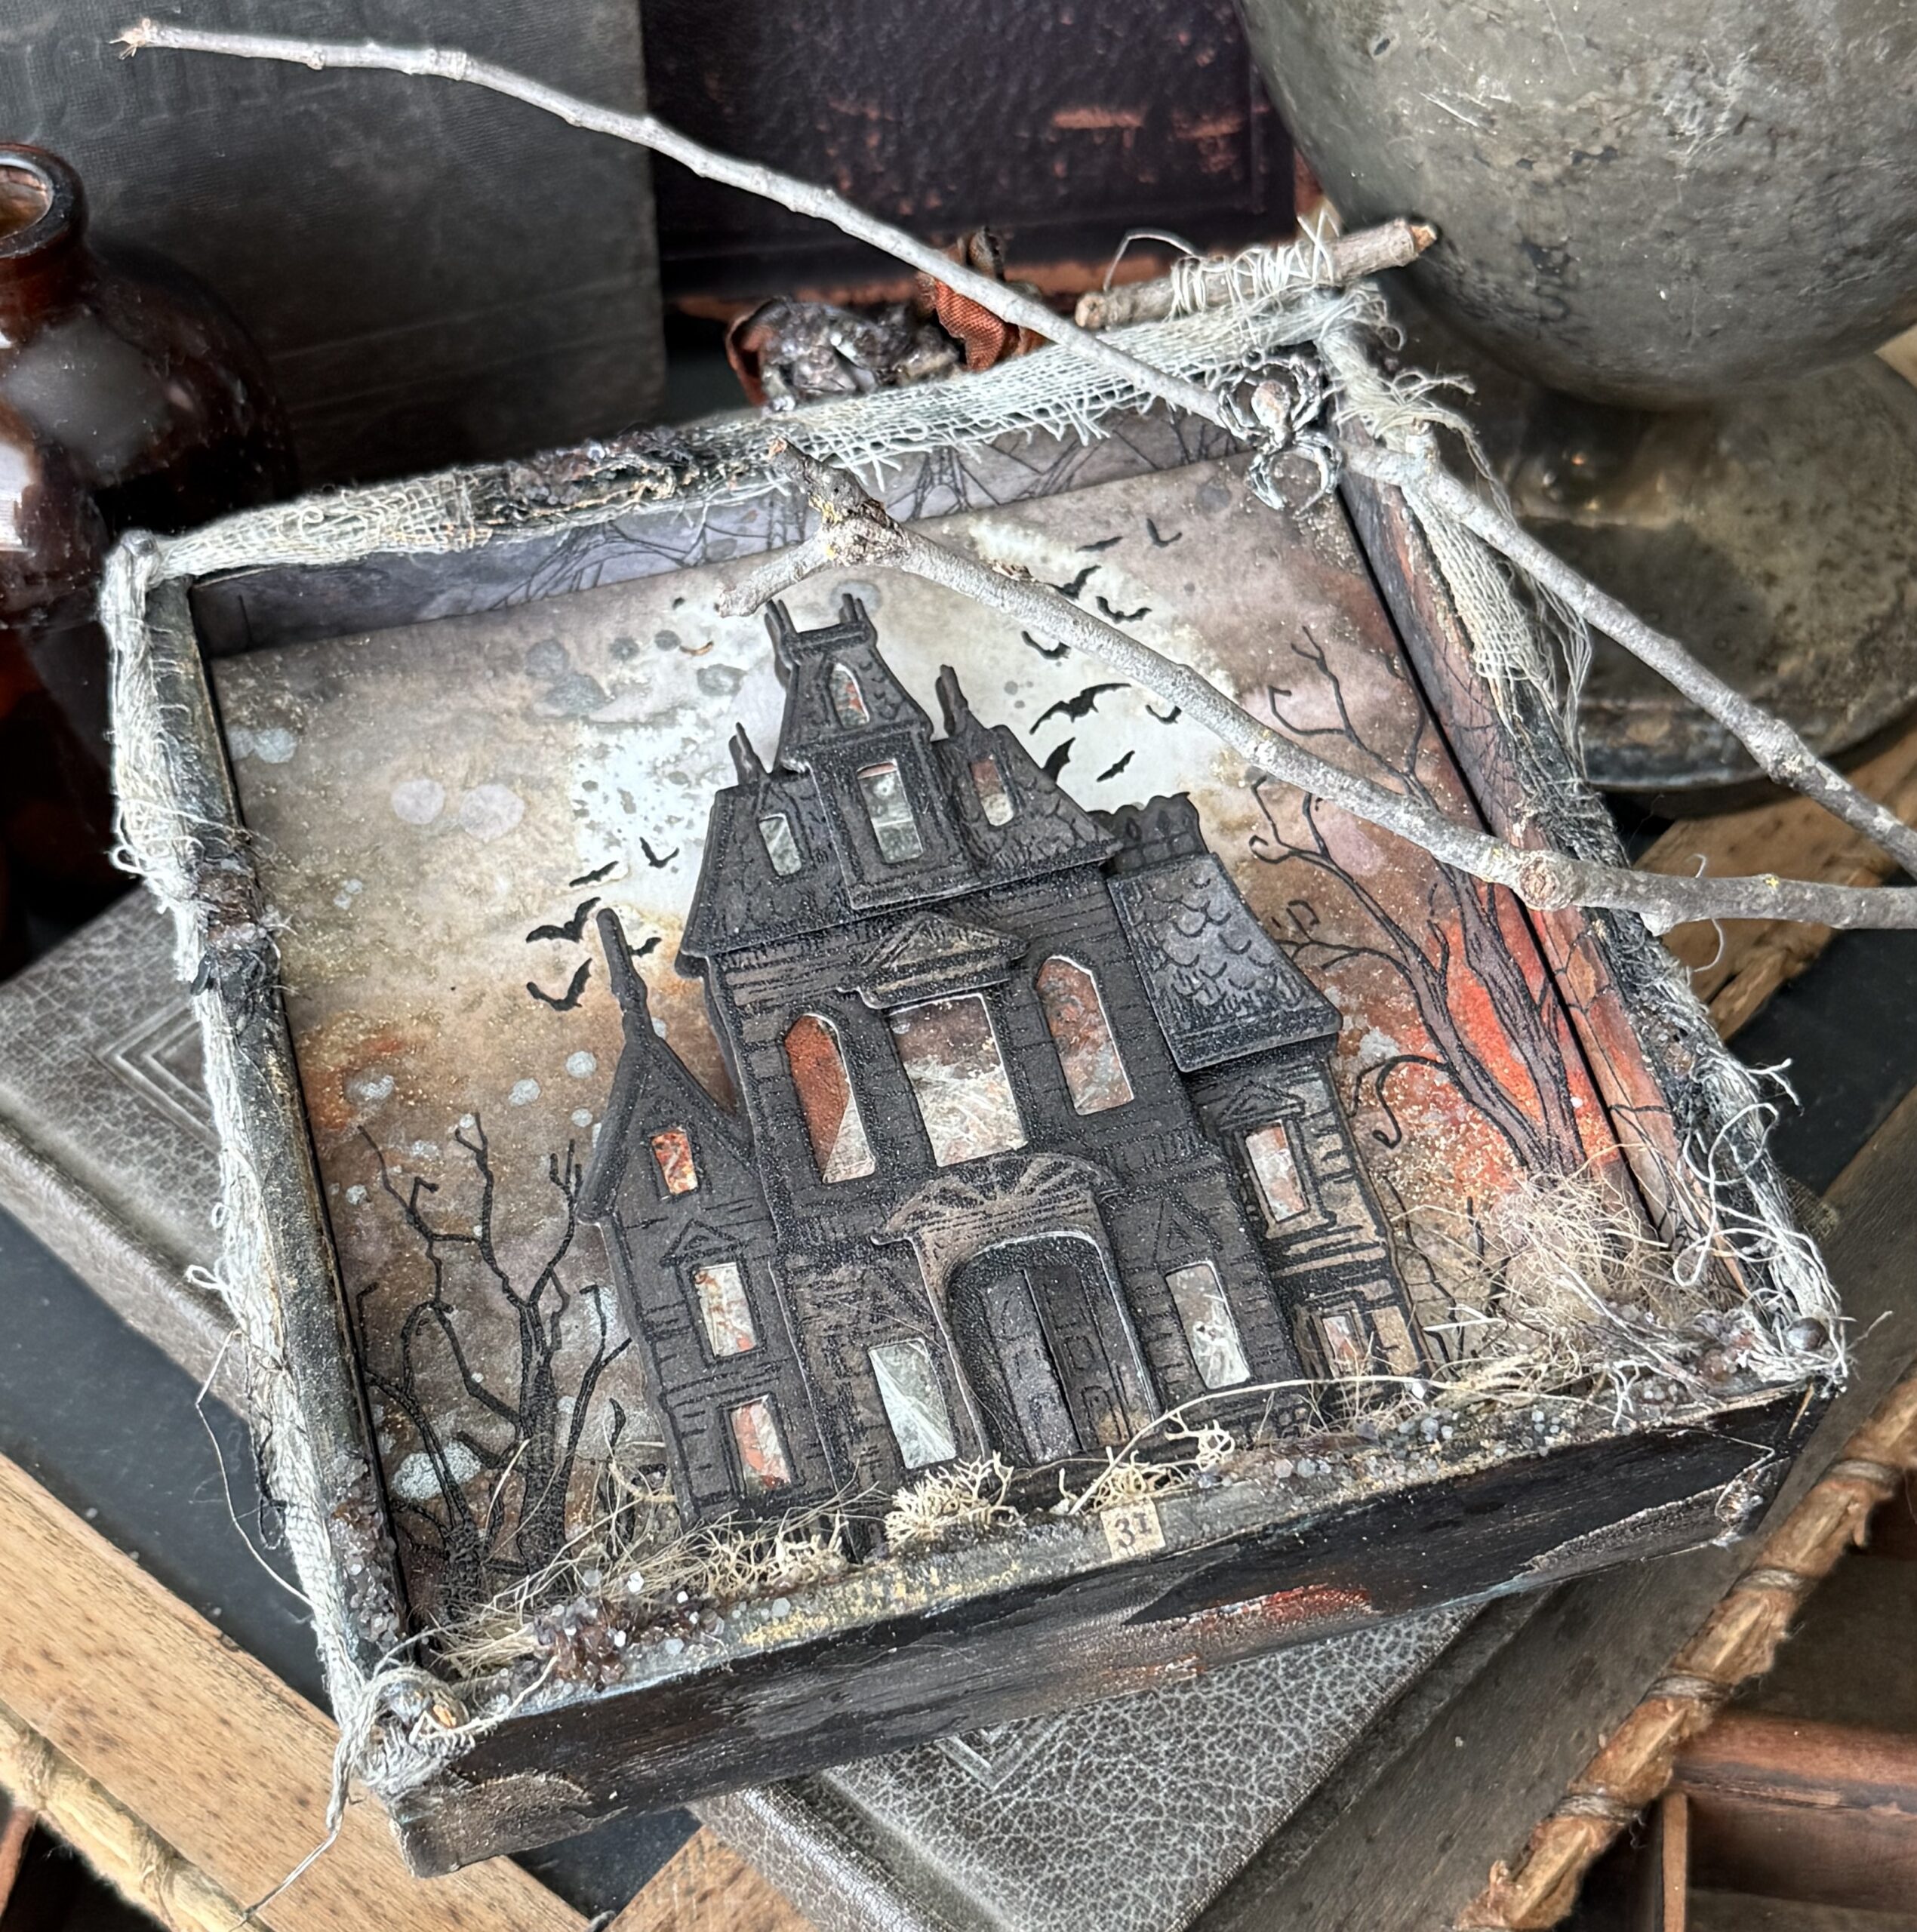
The Wafer Die set brings the House to life by making it very easy to build a Haunted House for display or card making. Simply stamp the House four times and then cut out the pieces and build it up. I used a couple thicknesses of 3D foam adhesive to create the 3D effect.
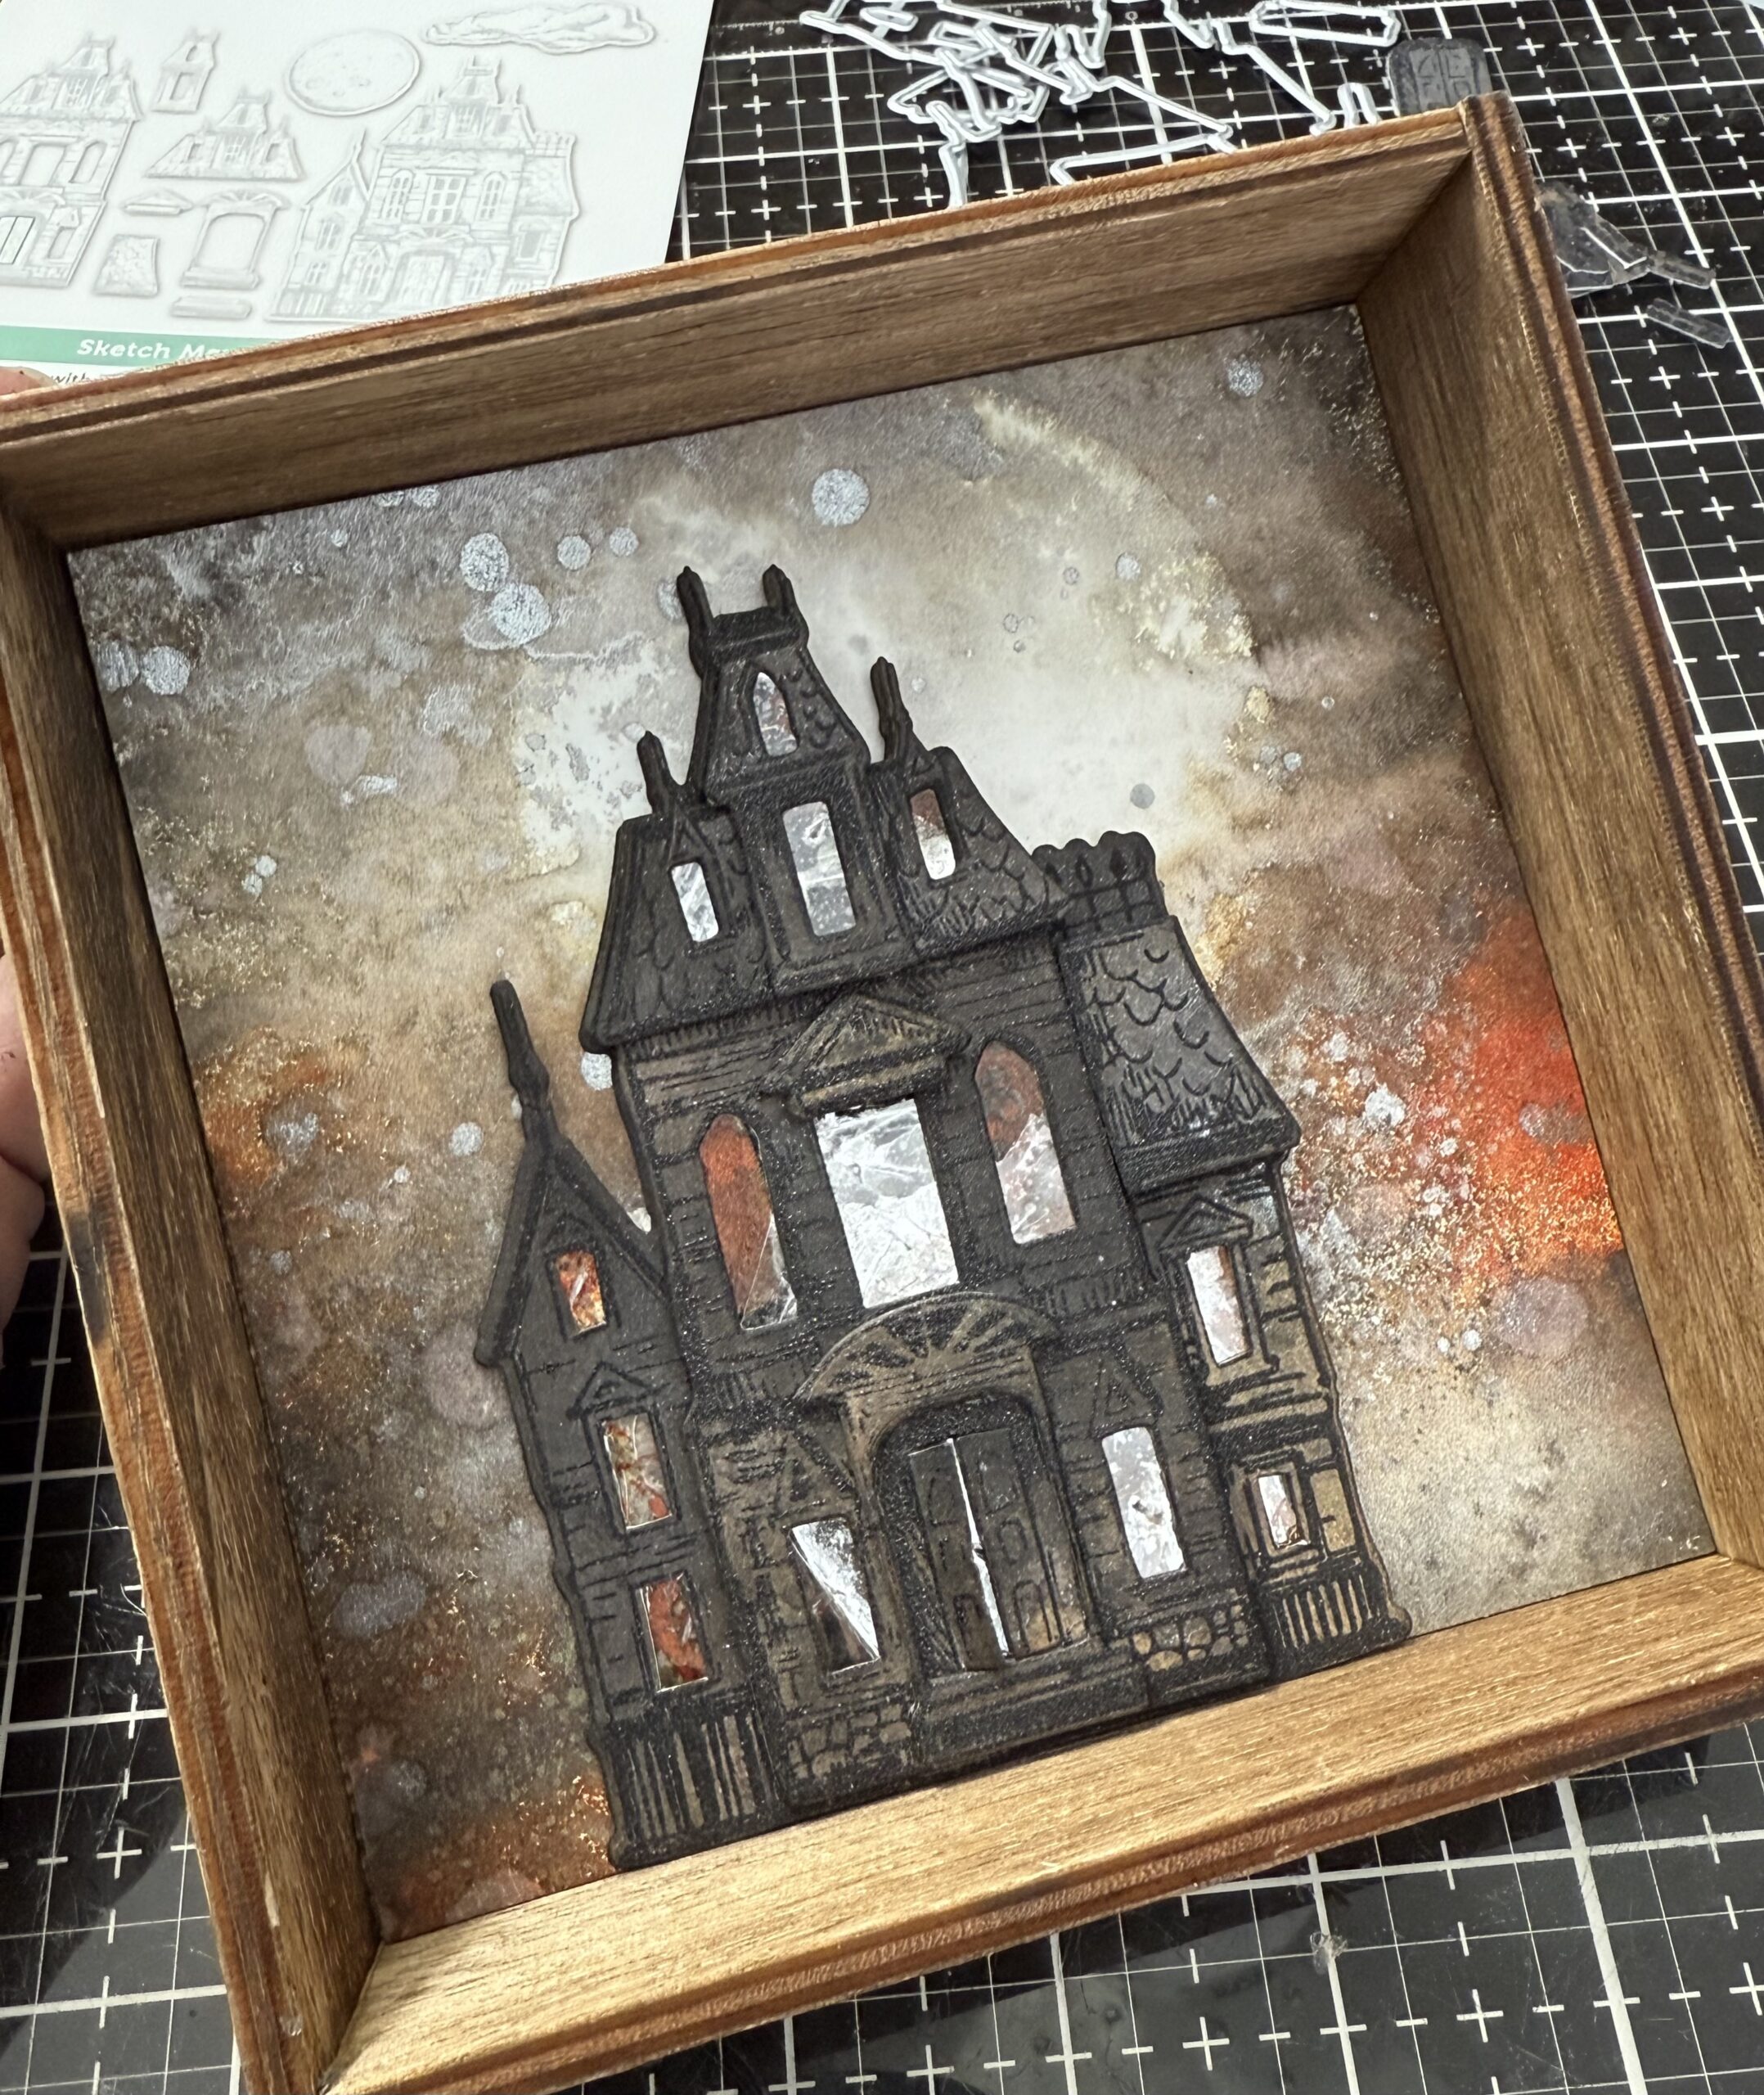
I used the largest idea-ology Square Vignette to display the house and added some more idea-ology pieces to embellish it.
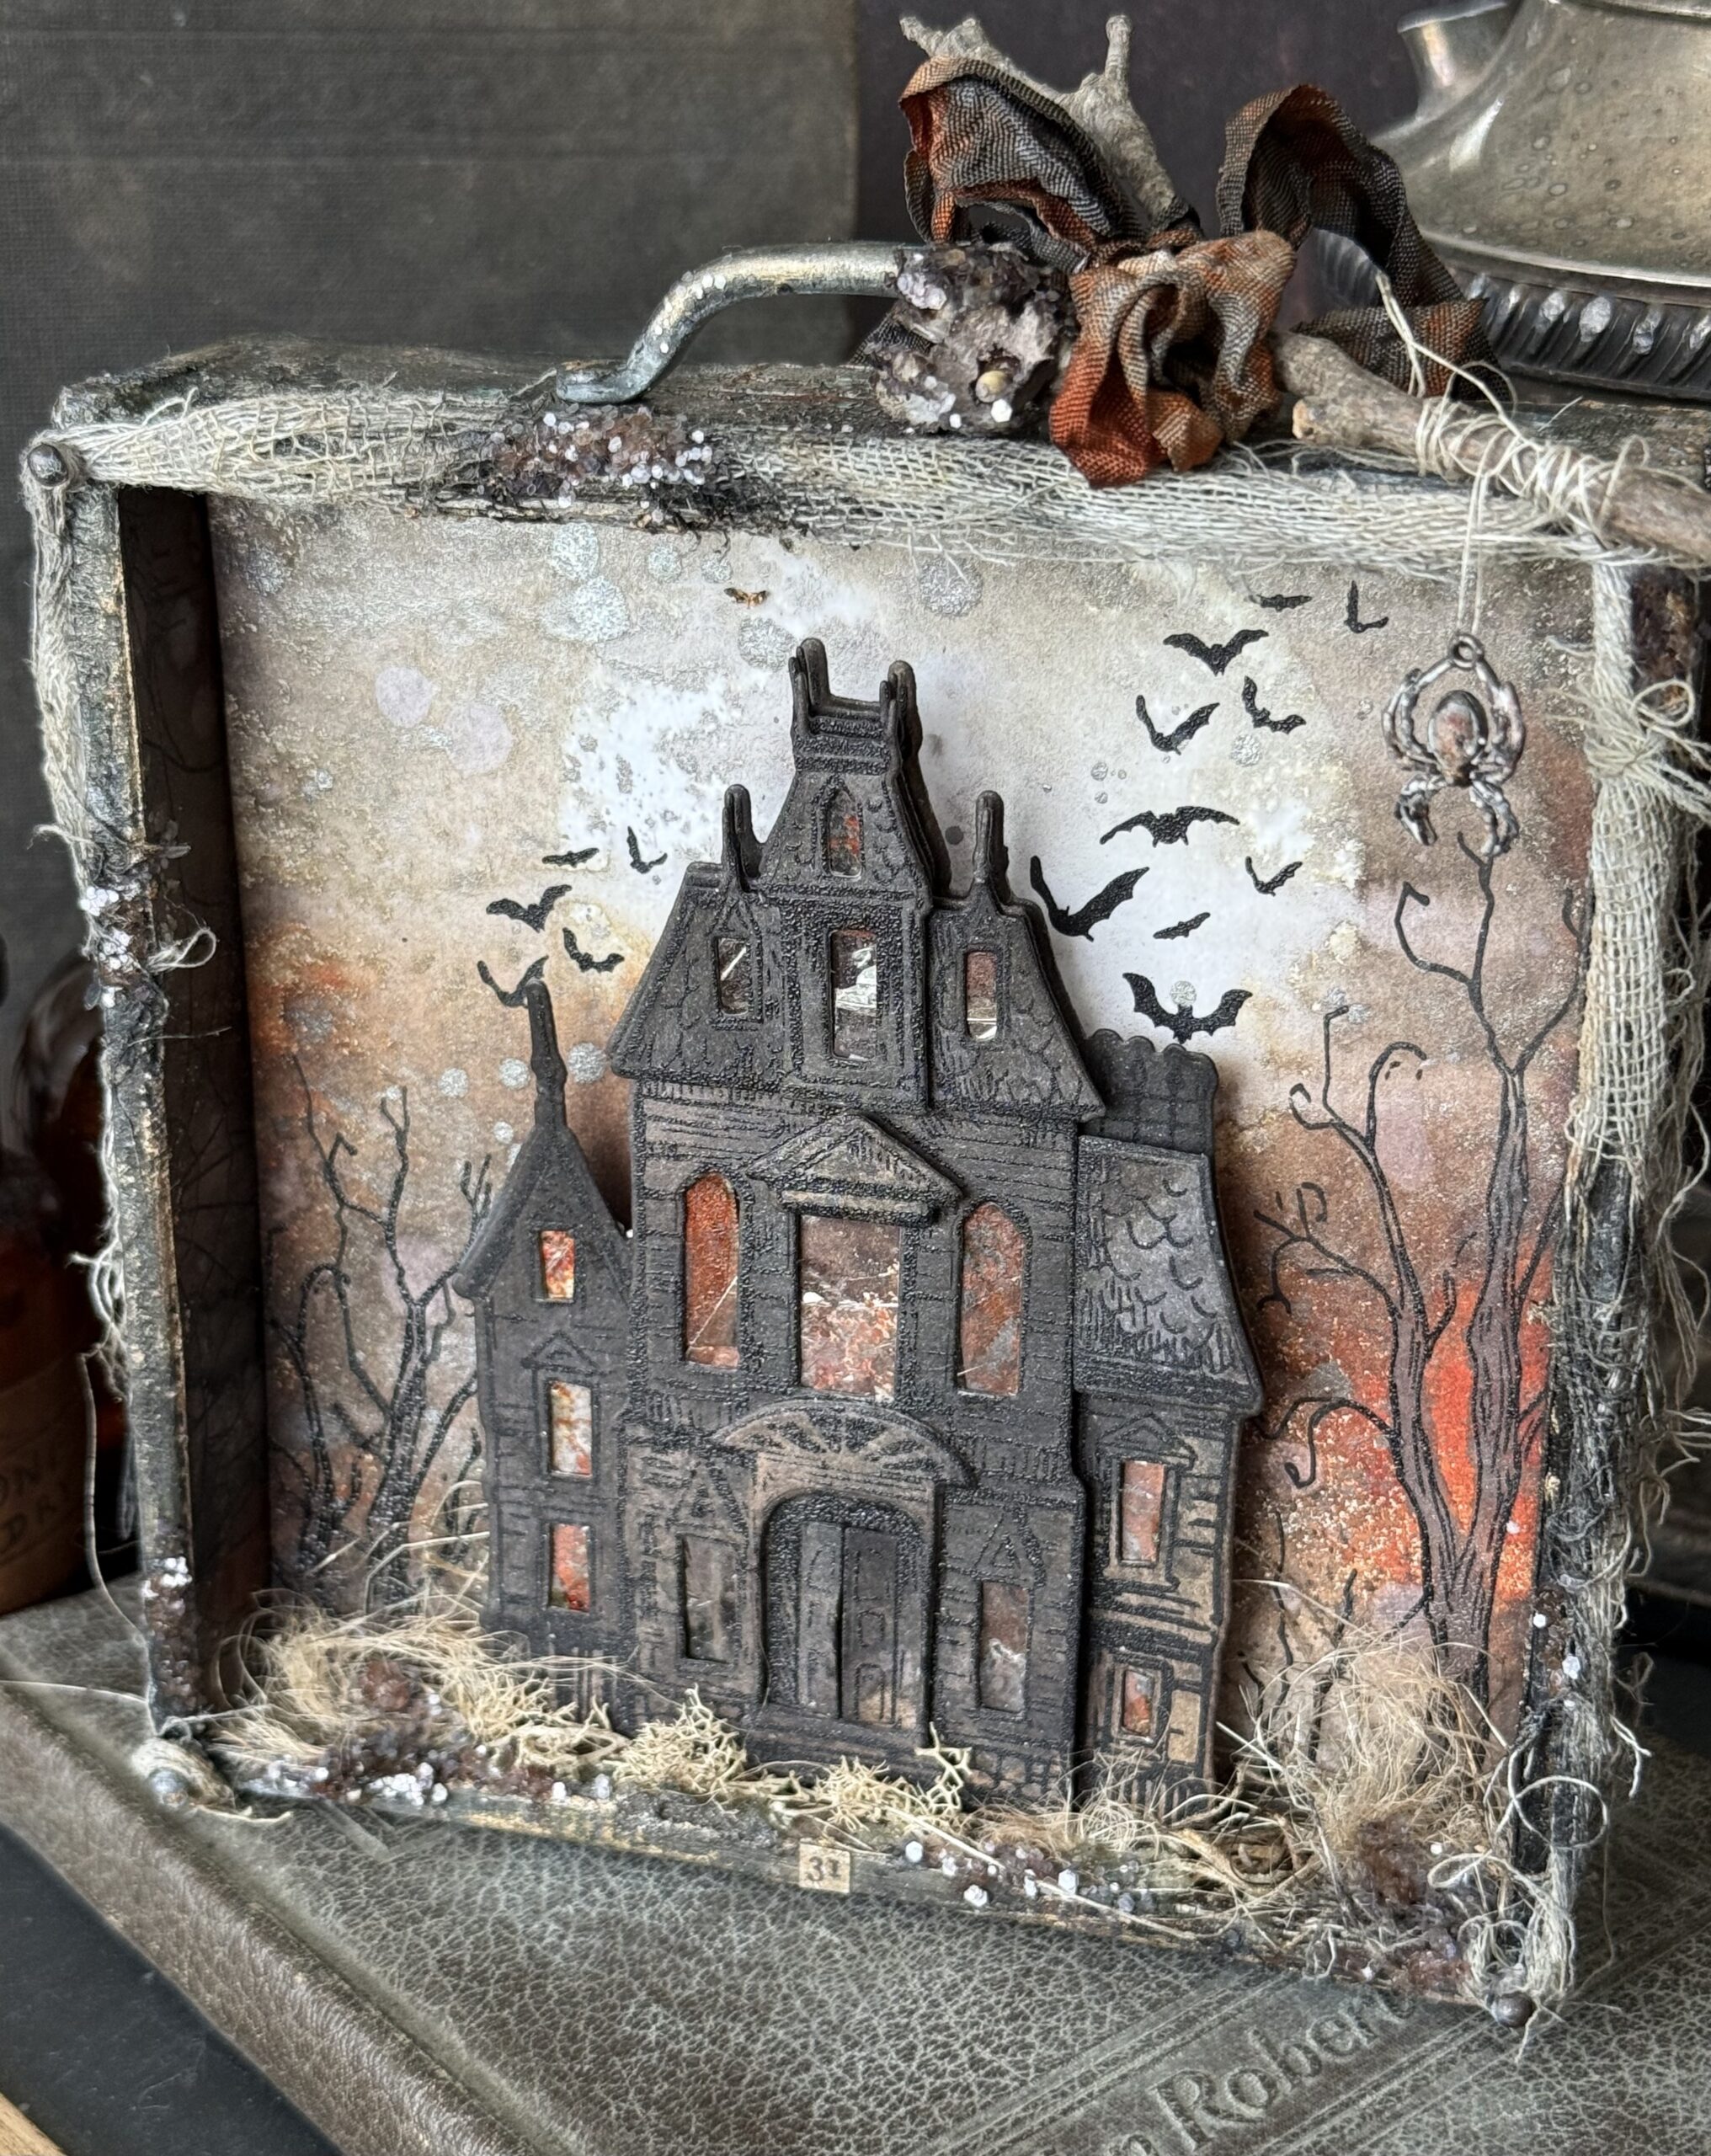
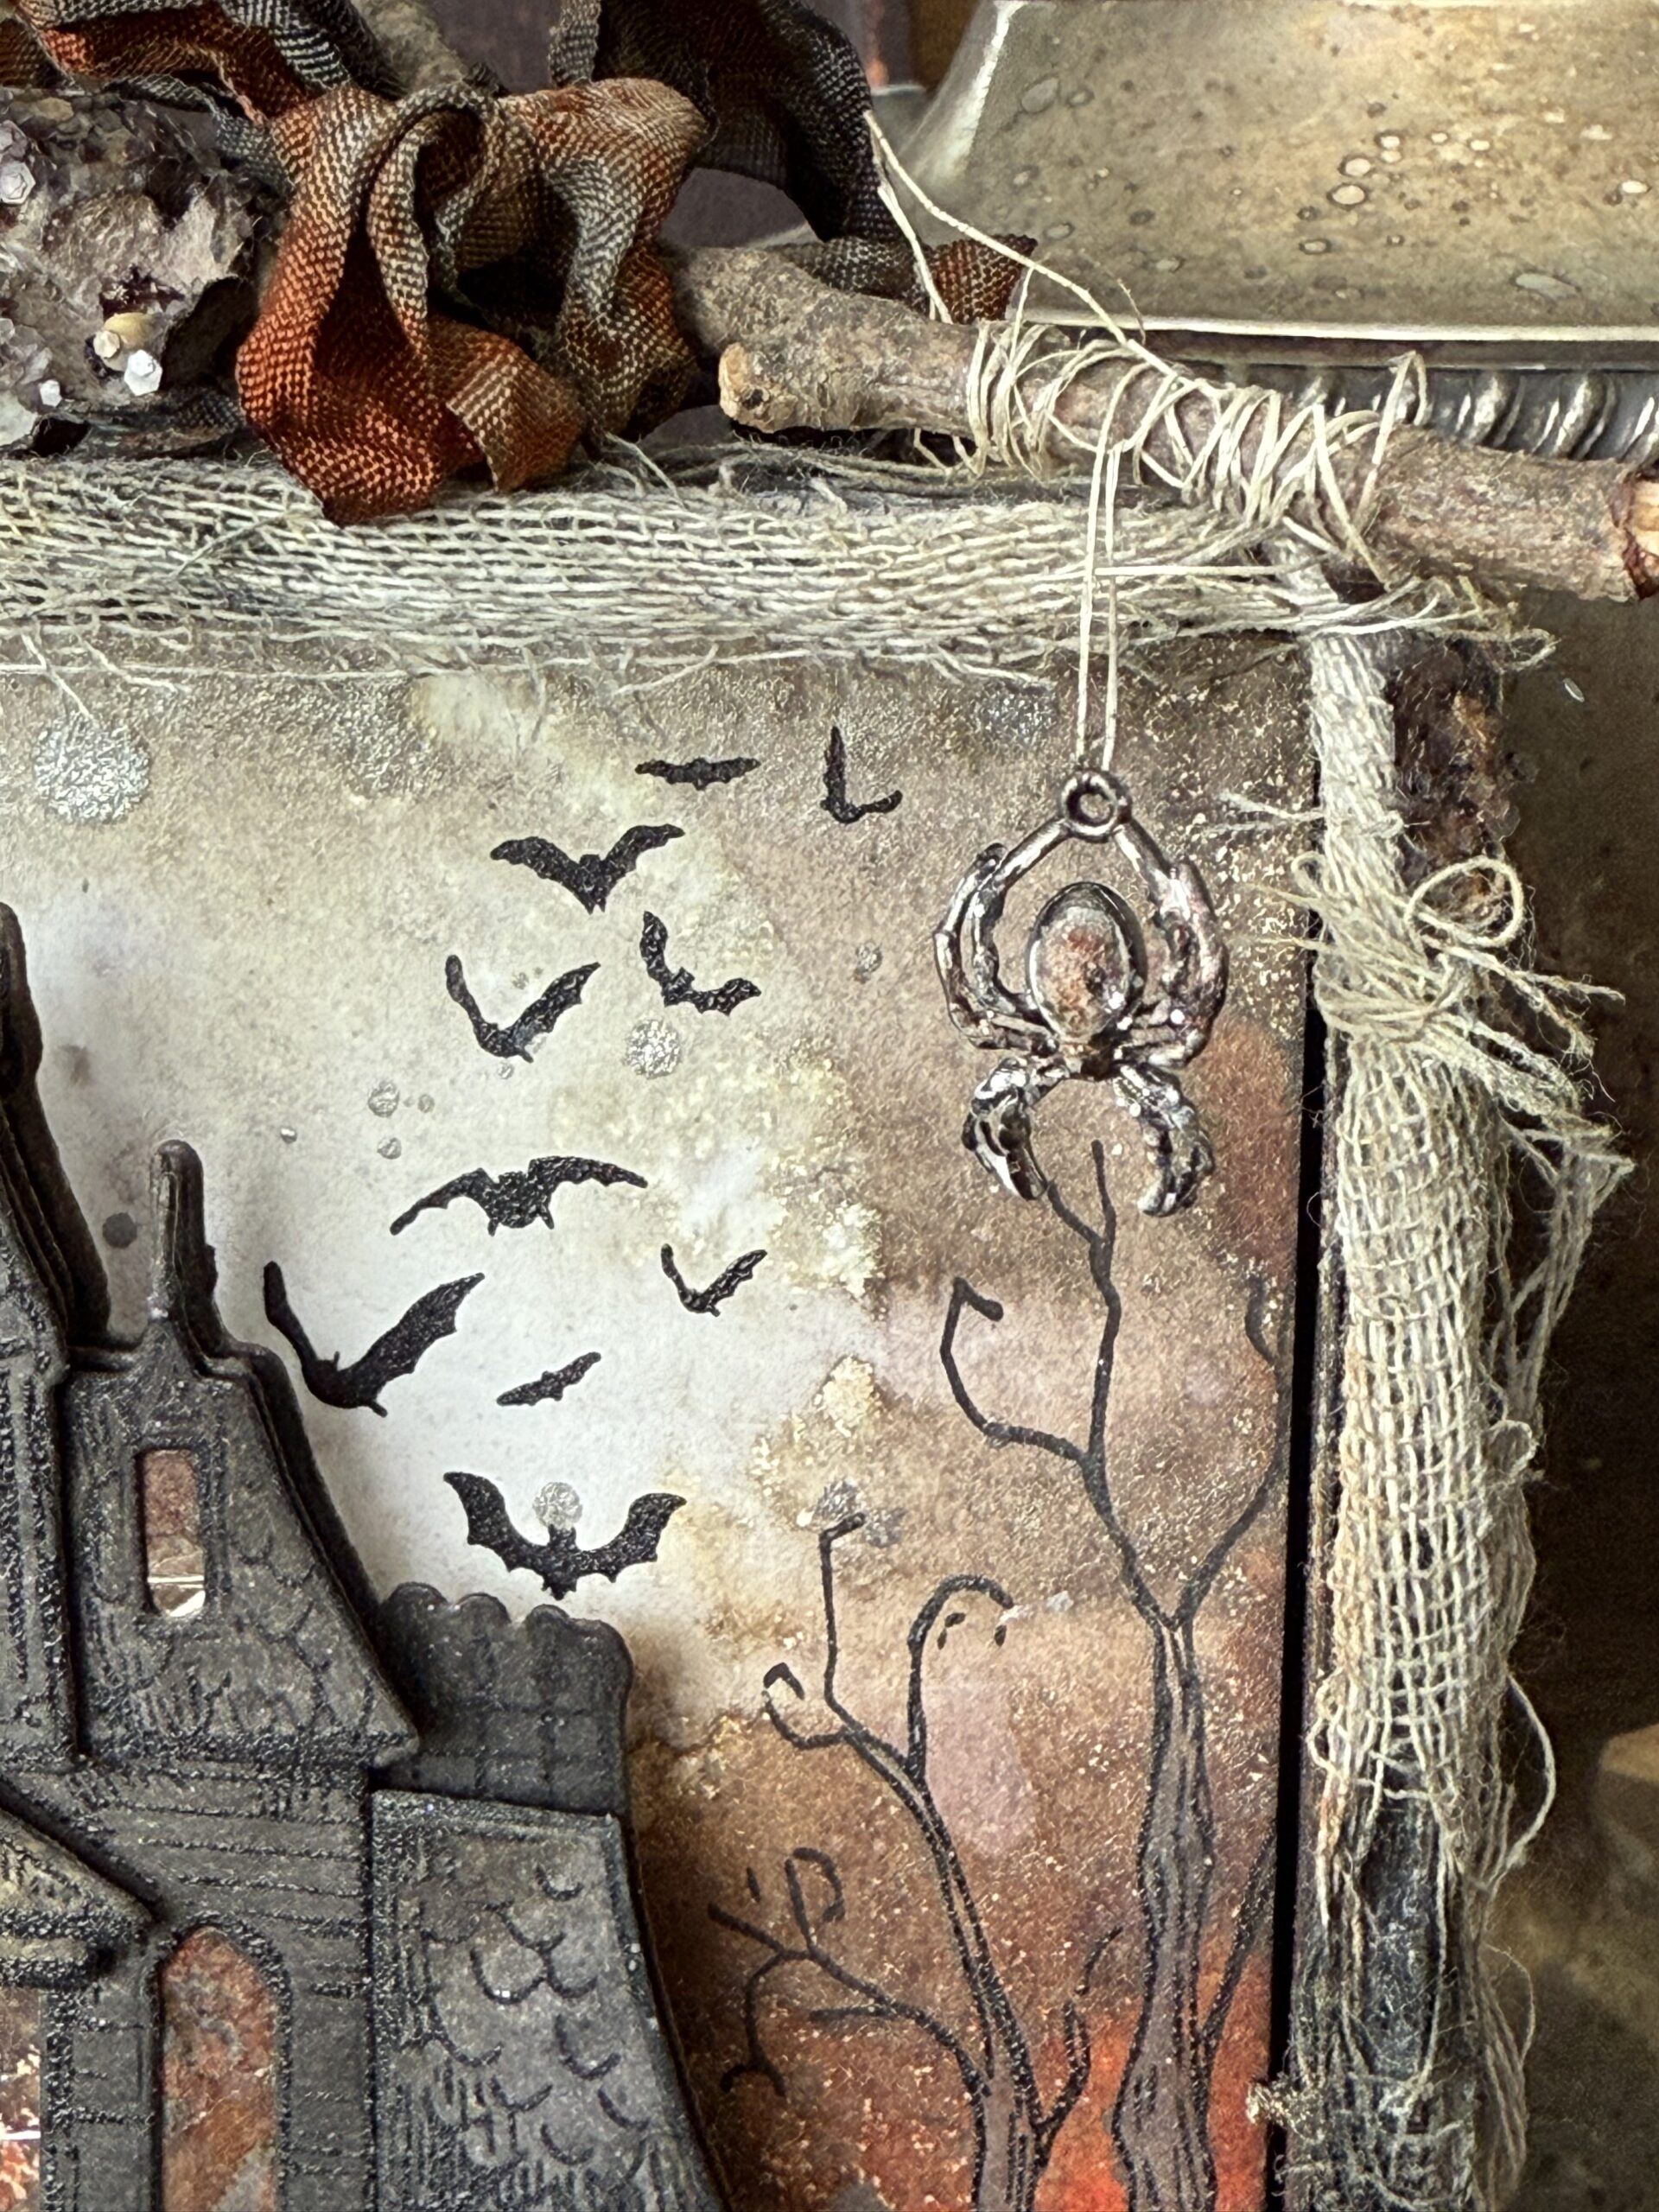
And what Haunted House would be complete without a creepy spider?
So, let’s get to it!
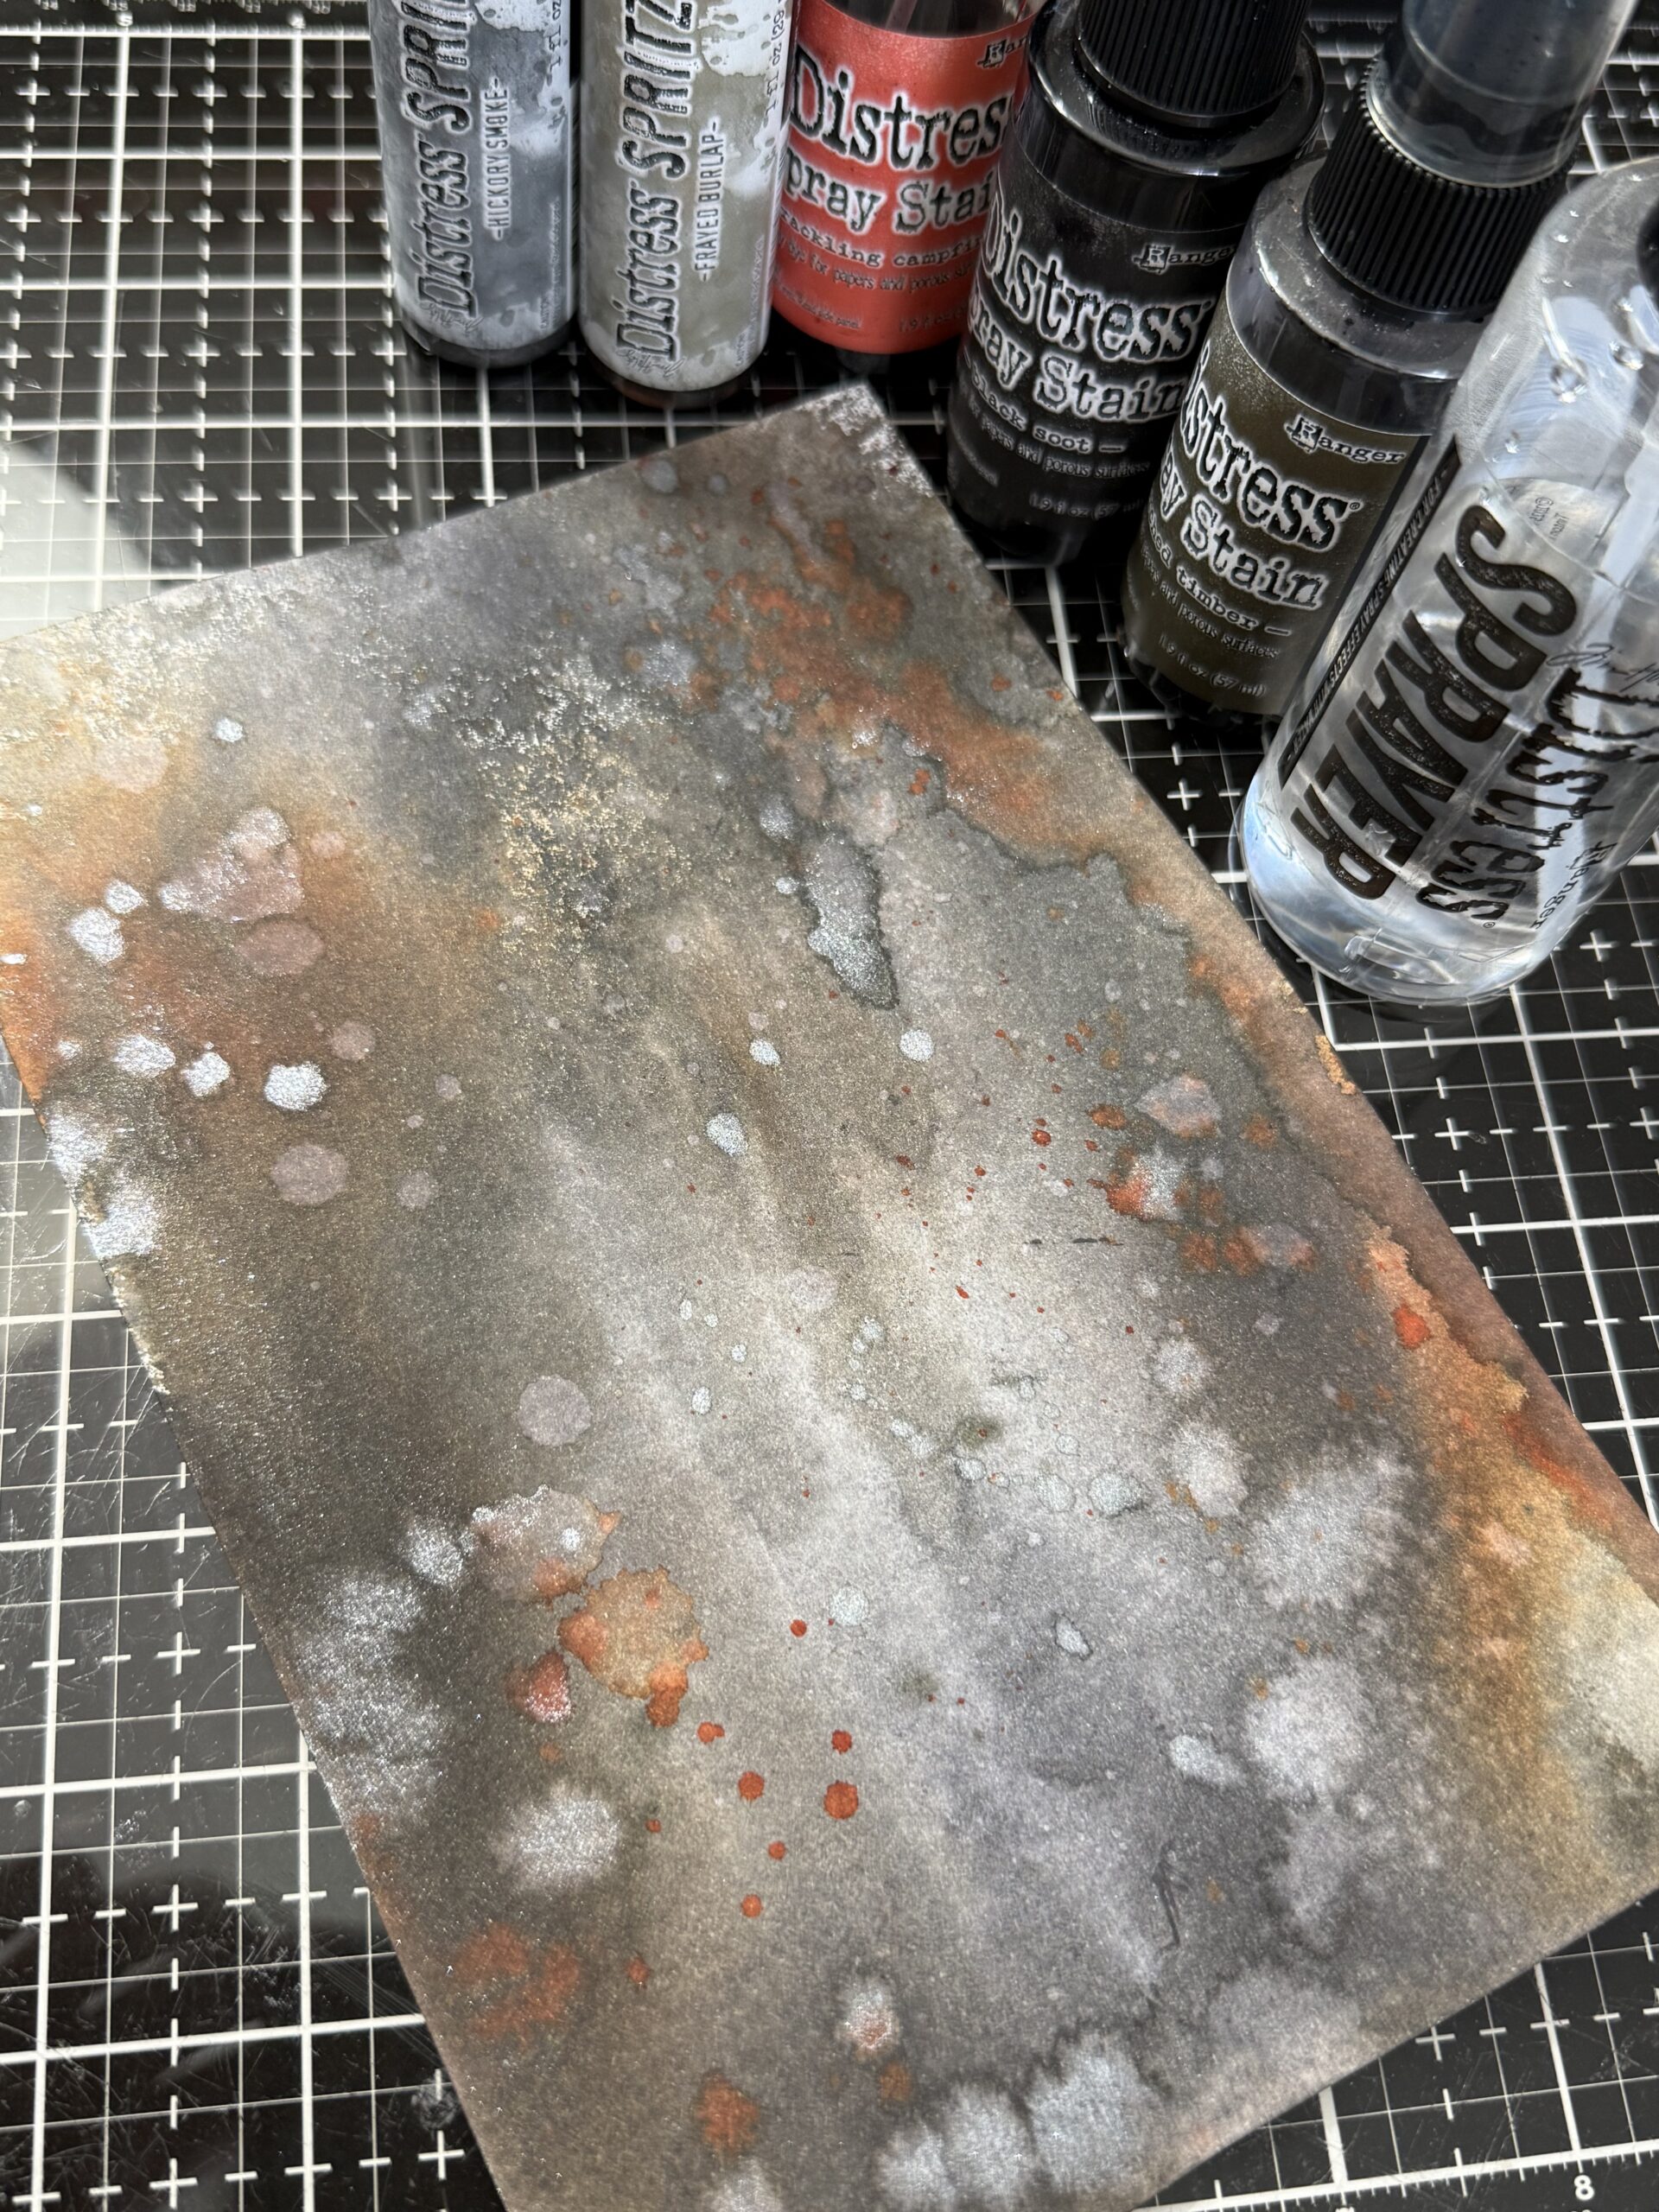
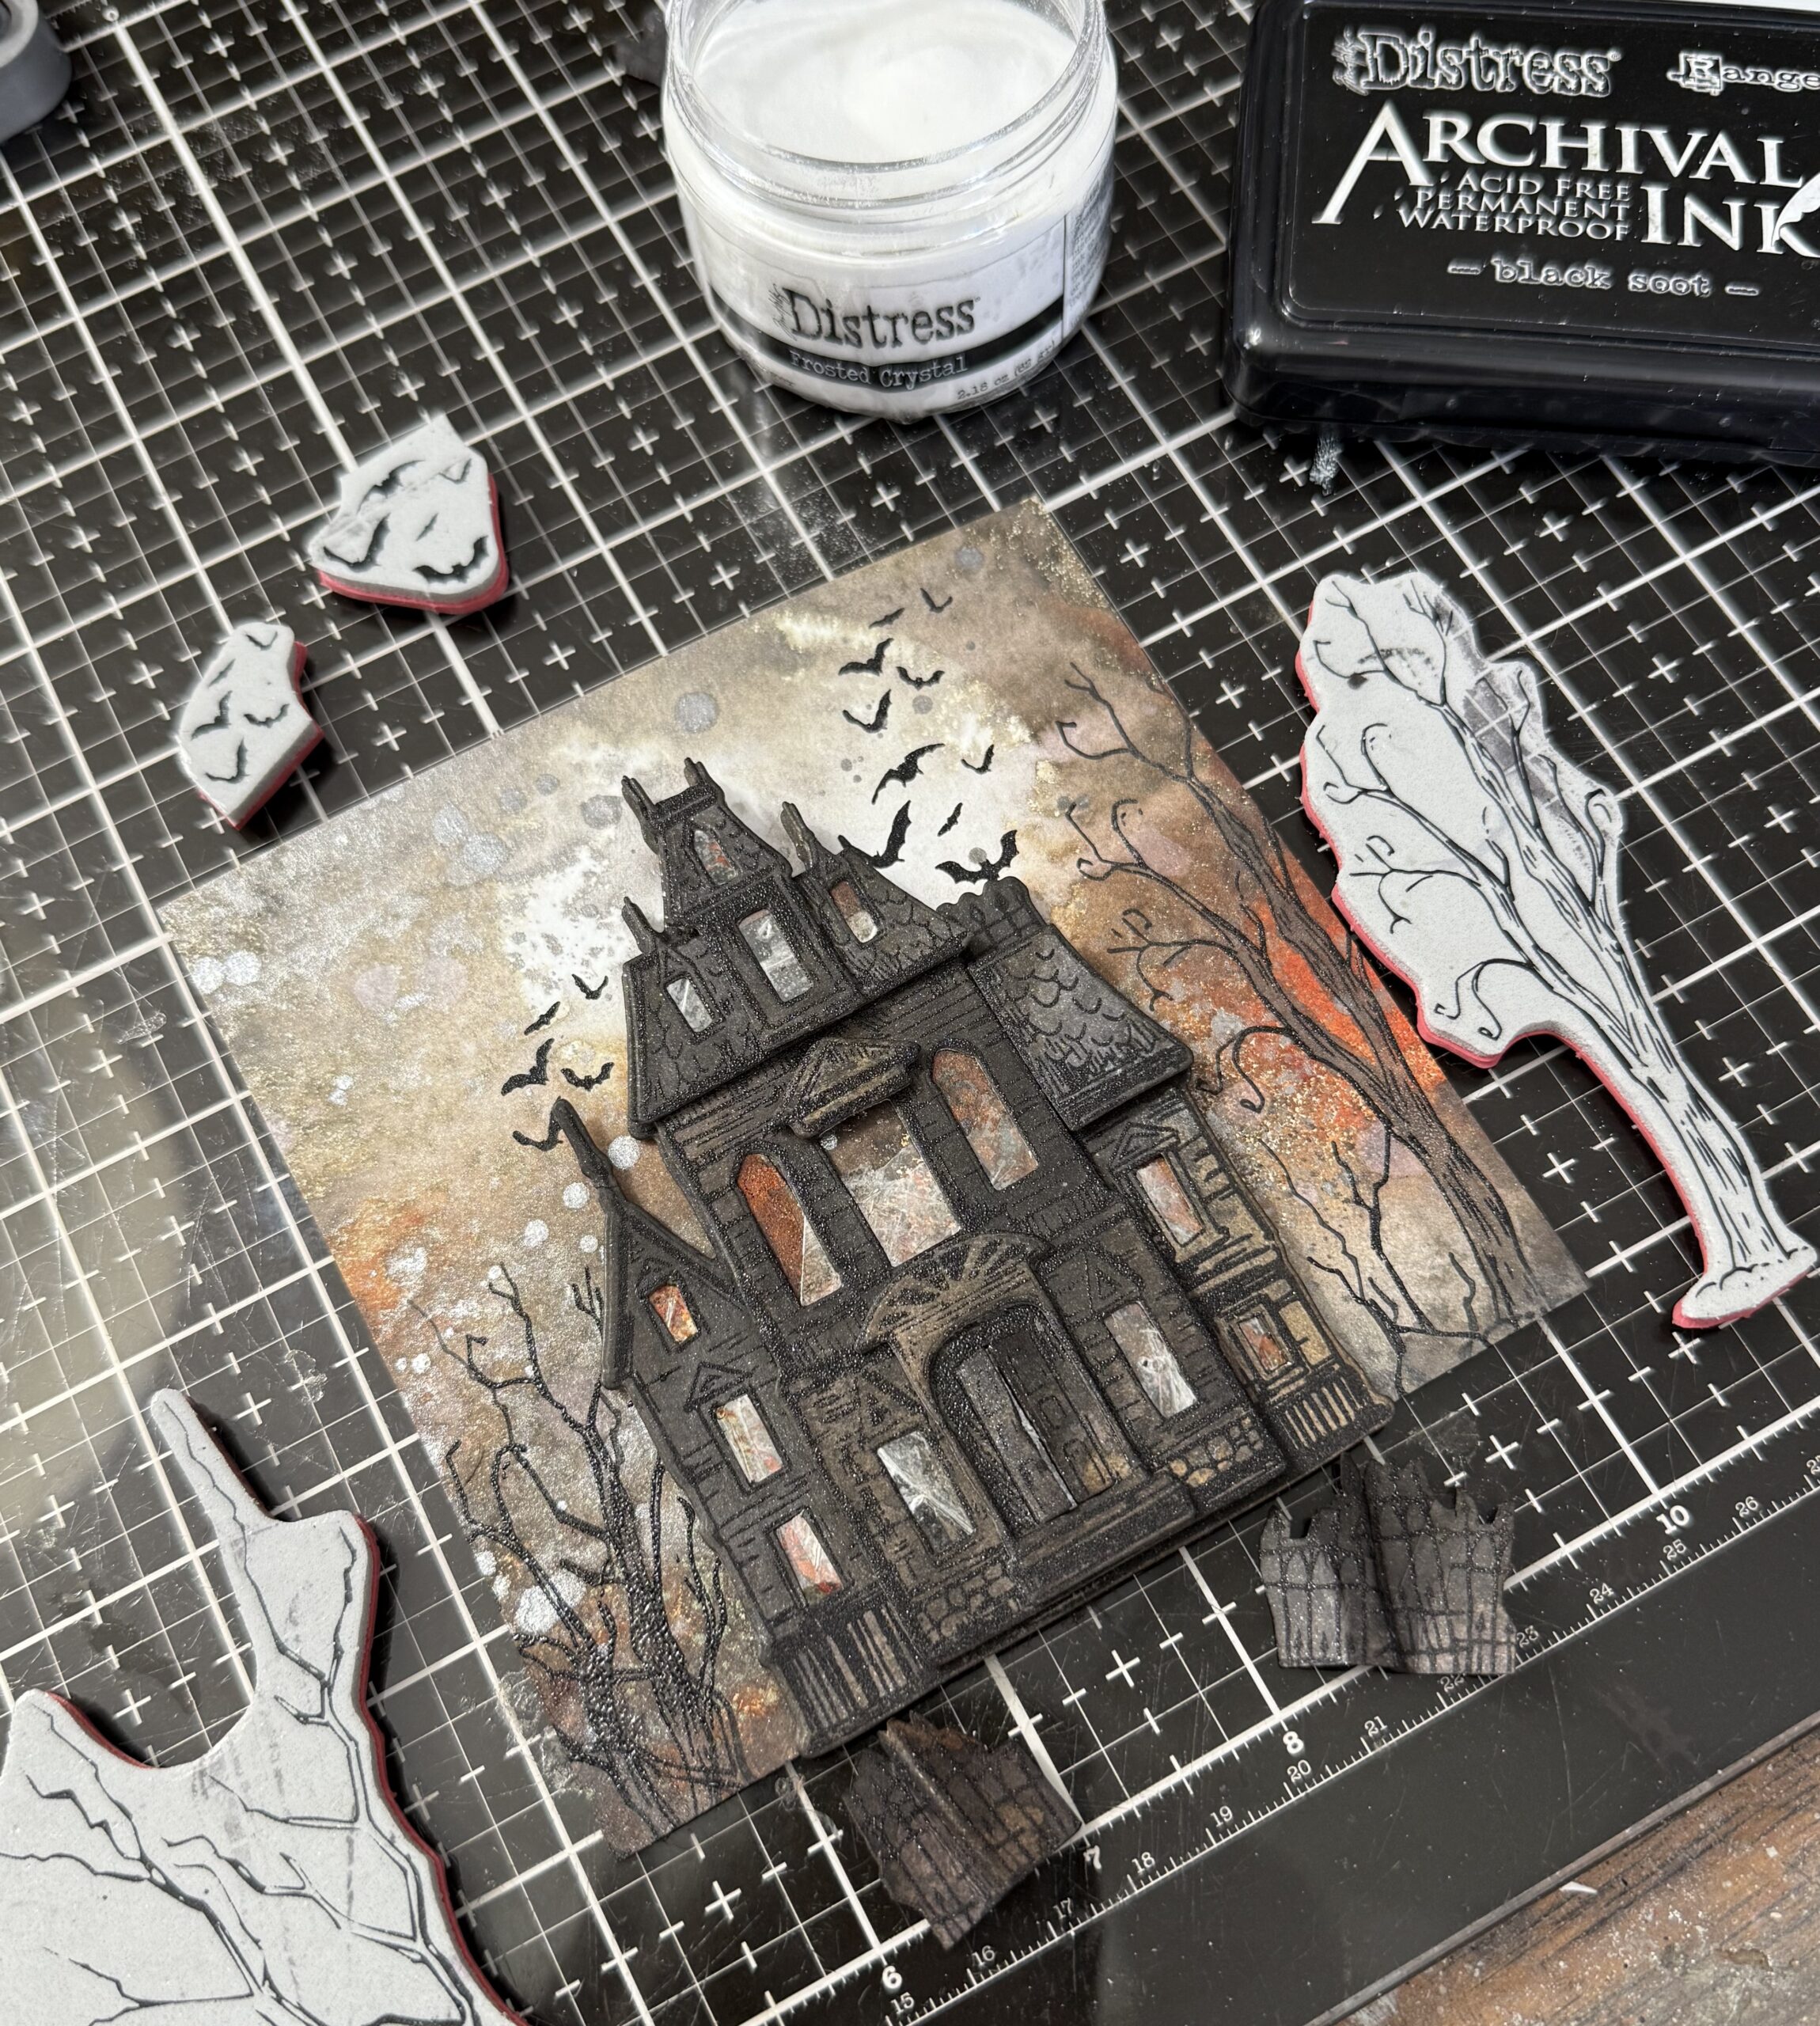
I started by creating the Haunted House. I created paper to stamp the house image onto using Distress Spray Stains and Distress Spritz in Black Soot, Crackling Campfire, and Scorched Timber, the Spritz colors I used was Hickory Smoke and Frayed Burlap. I spritzed Distress Watercolor Paper (smooth side) with water and a combination of the spray colors, then dried the paper using my heat tool. Using Black Soot Archival Ink and a stamp platform, I stamped the house image four times.
After each house was stamped, I removed it from the stamp platform and embossed it using Frosted Crystal Embossing Powder. This gives the image you stamped some extra depth and darkens the black. I used this on all the stamped pieces of the project. I then began cutting the parts and piece of the house. It just takes some arranging to figure out which pieces can get cut from where. I started by cutting out the die with the entire house first, then built it from the bottom up.

I built the house up using foam adhesive, then adhered some pieces of mica tile behind each of the layers to create the look of broken windows. The windows are cut out on the die except for the main house piece. I just used a exacto knife to do that. I placed some pieces of inky scrap paper behind the mica tile to create the look of stained glass.
I created a inky moon background using the second to largest moon stencil in the Tim Holtz Moon Mask kit. The process of making a creepy moon is found in THIS TUTORIAL I did a few years ago. Same process just different colors…I used Distress Spray Stain in Black Soot, Scorched Timber, and Crackling Campfire, then used some Distress Spritz in Hickory Smoke and Peeled Paint.
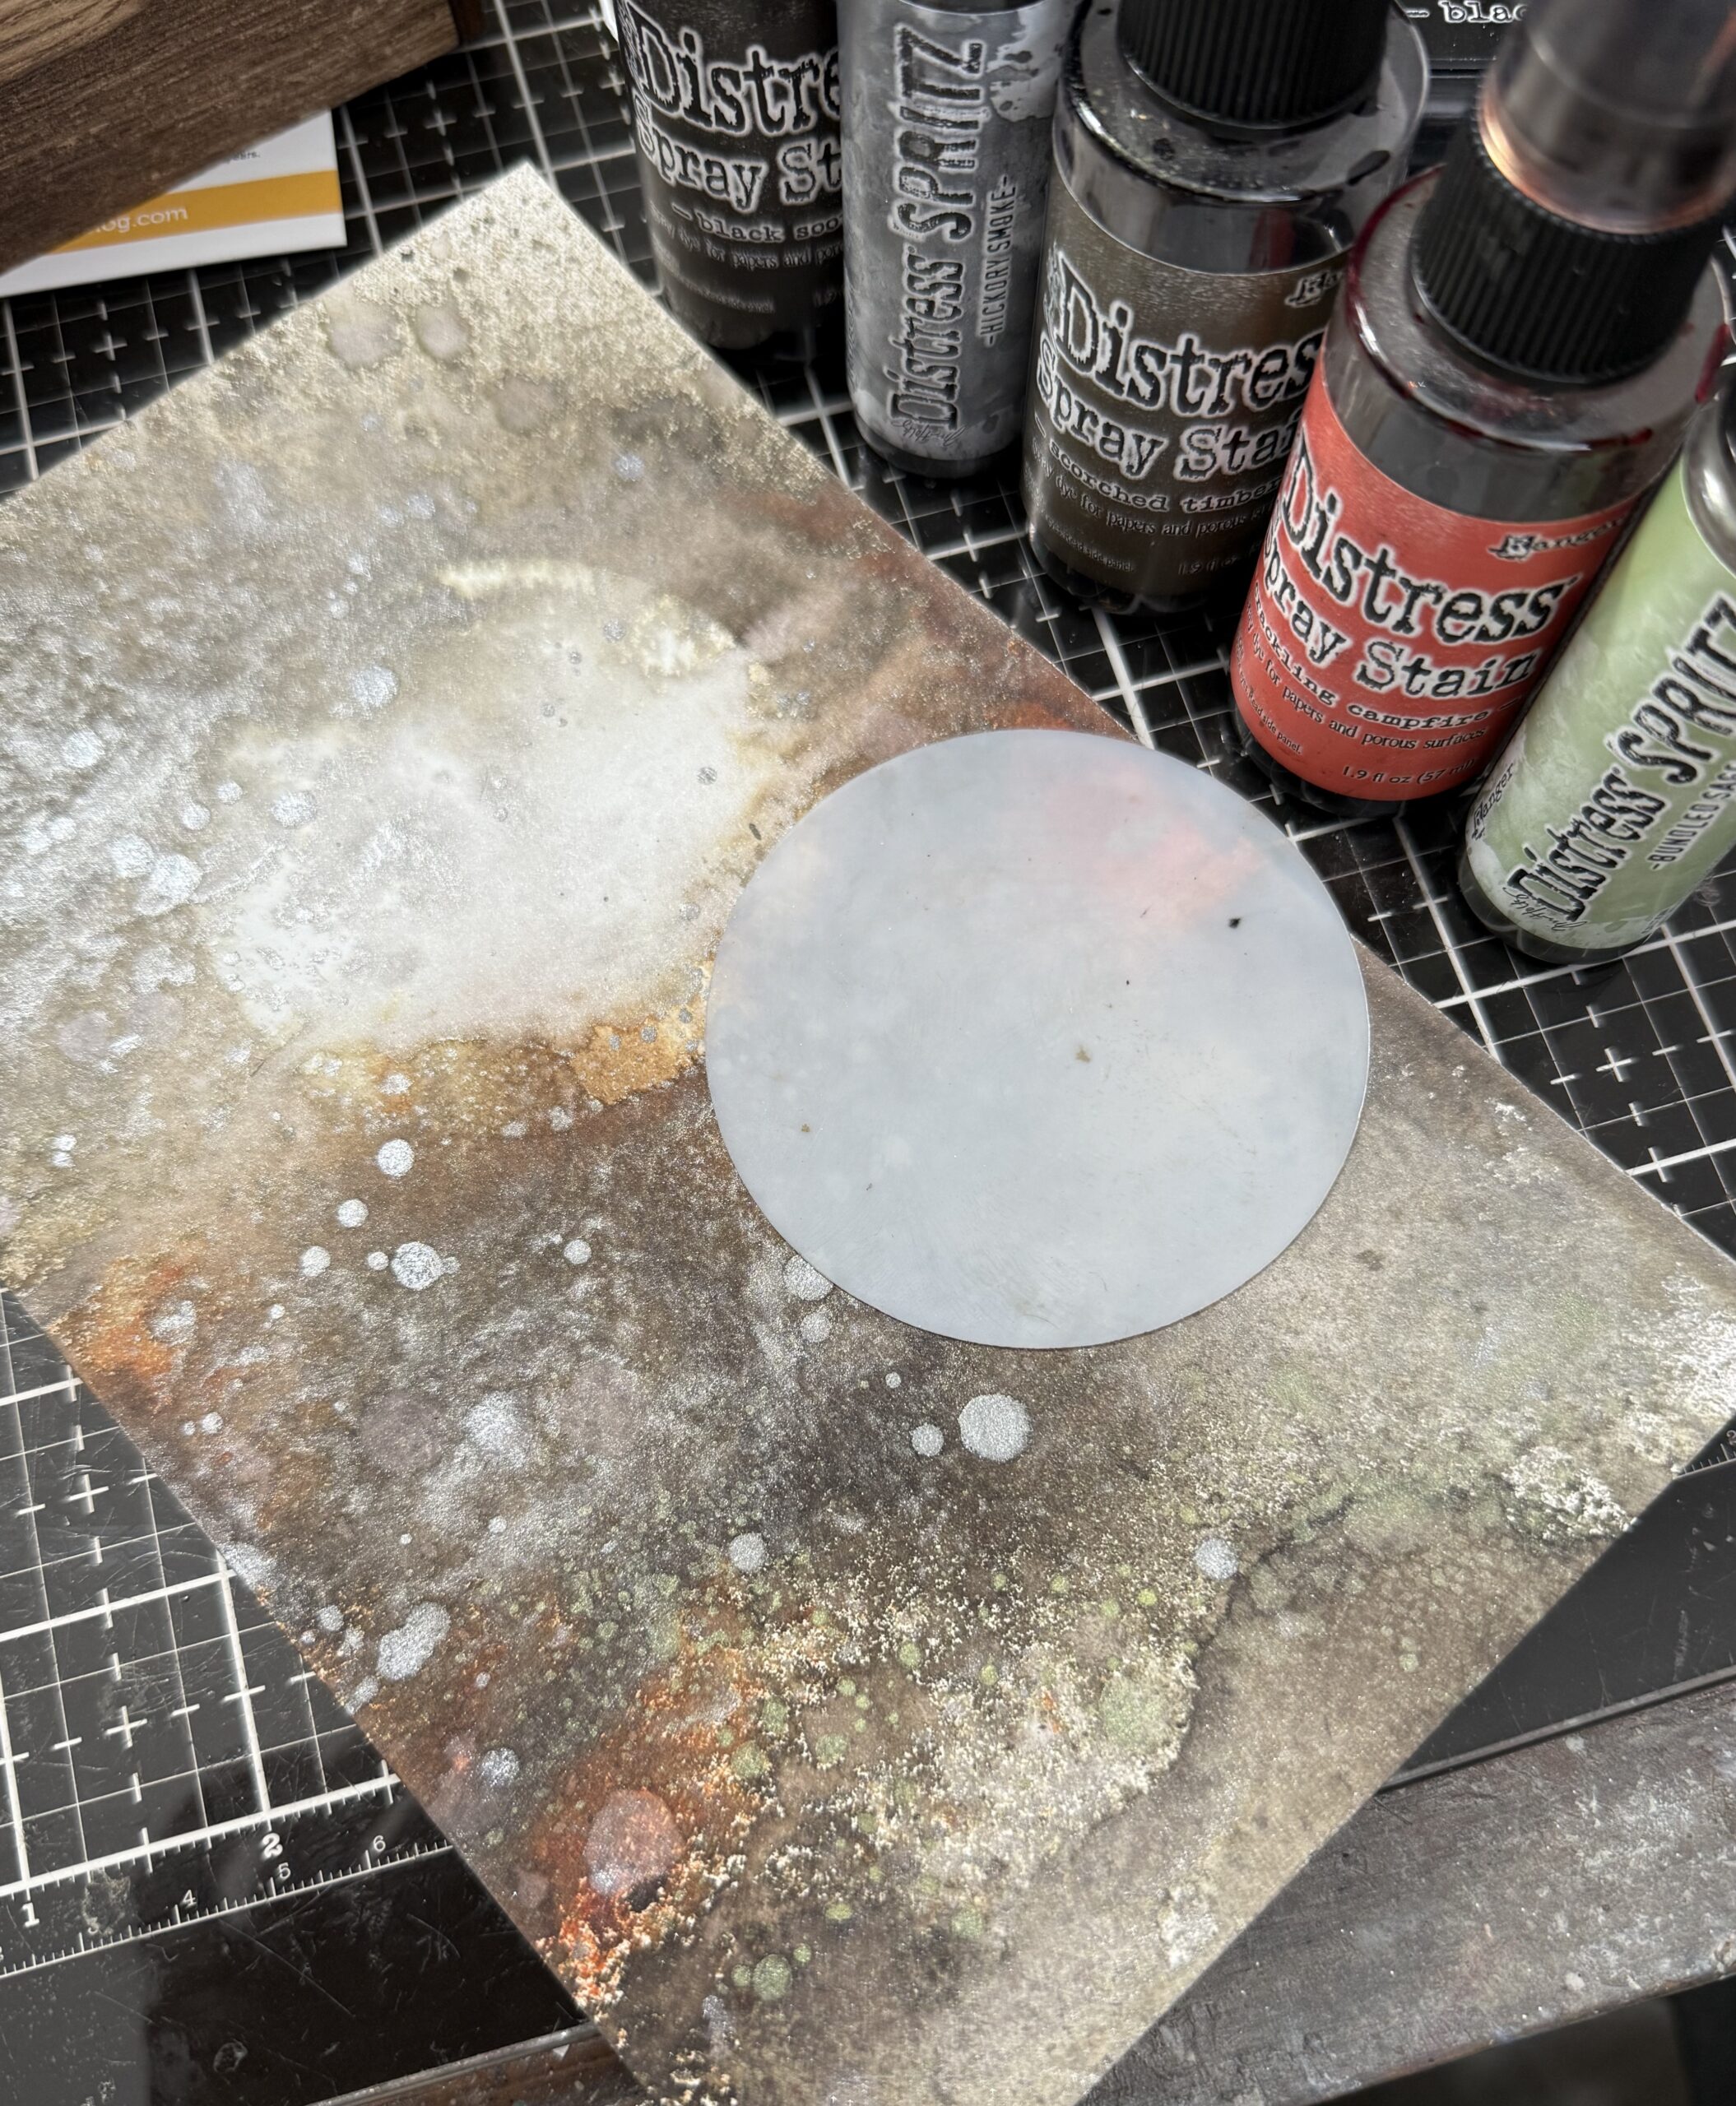
After I was done making the moon background, I trimmed it to fit the largest of the idea-ology square vignette boxes.
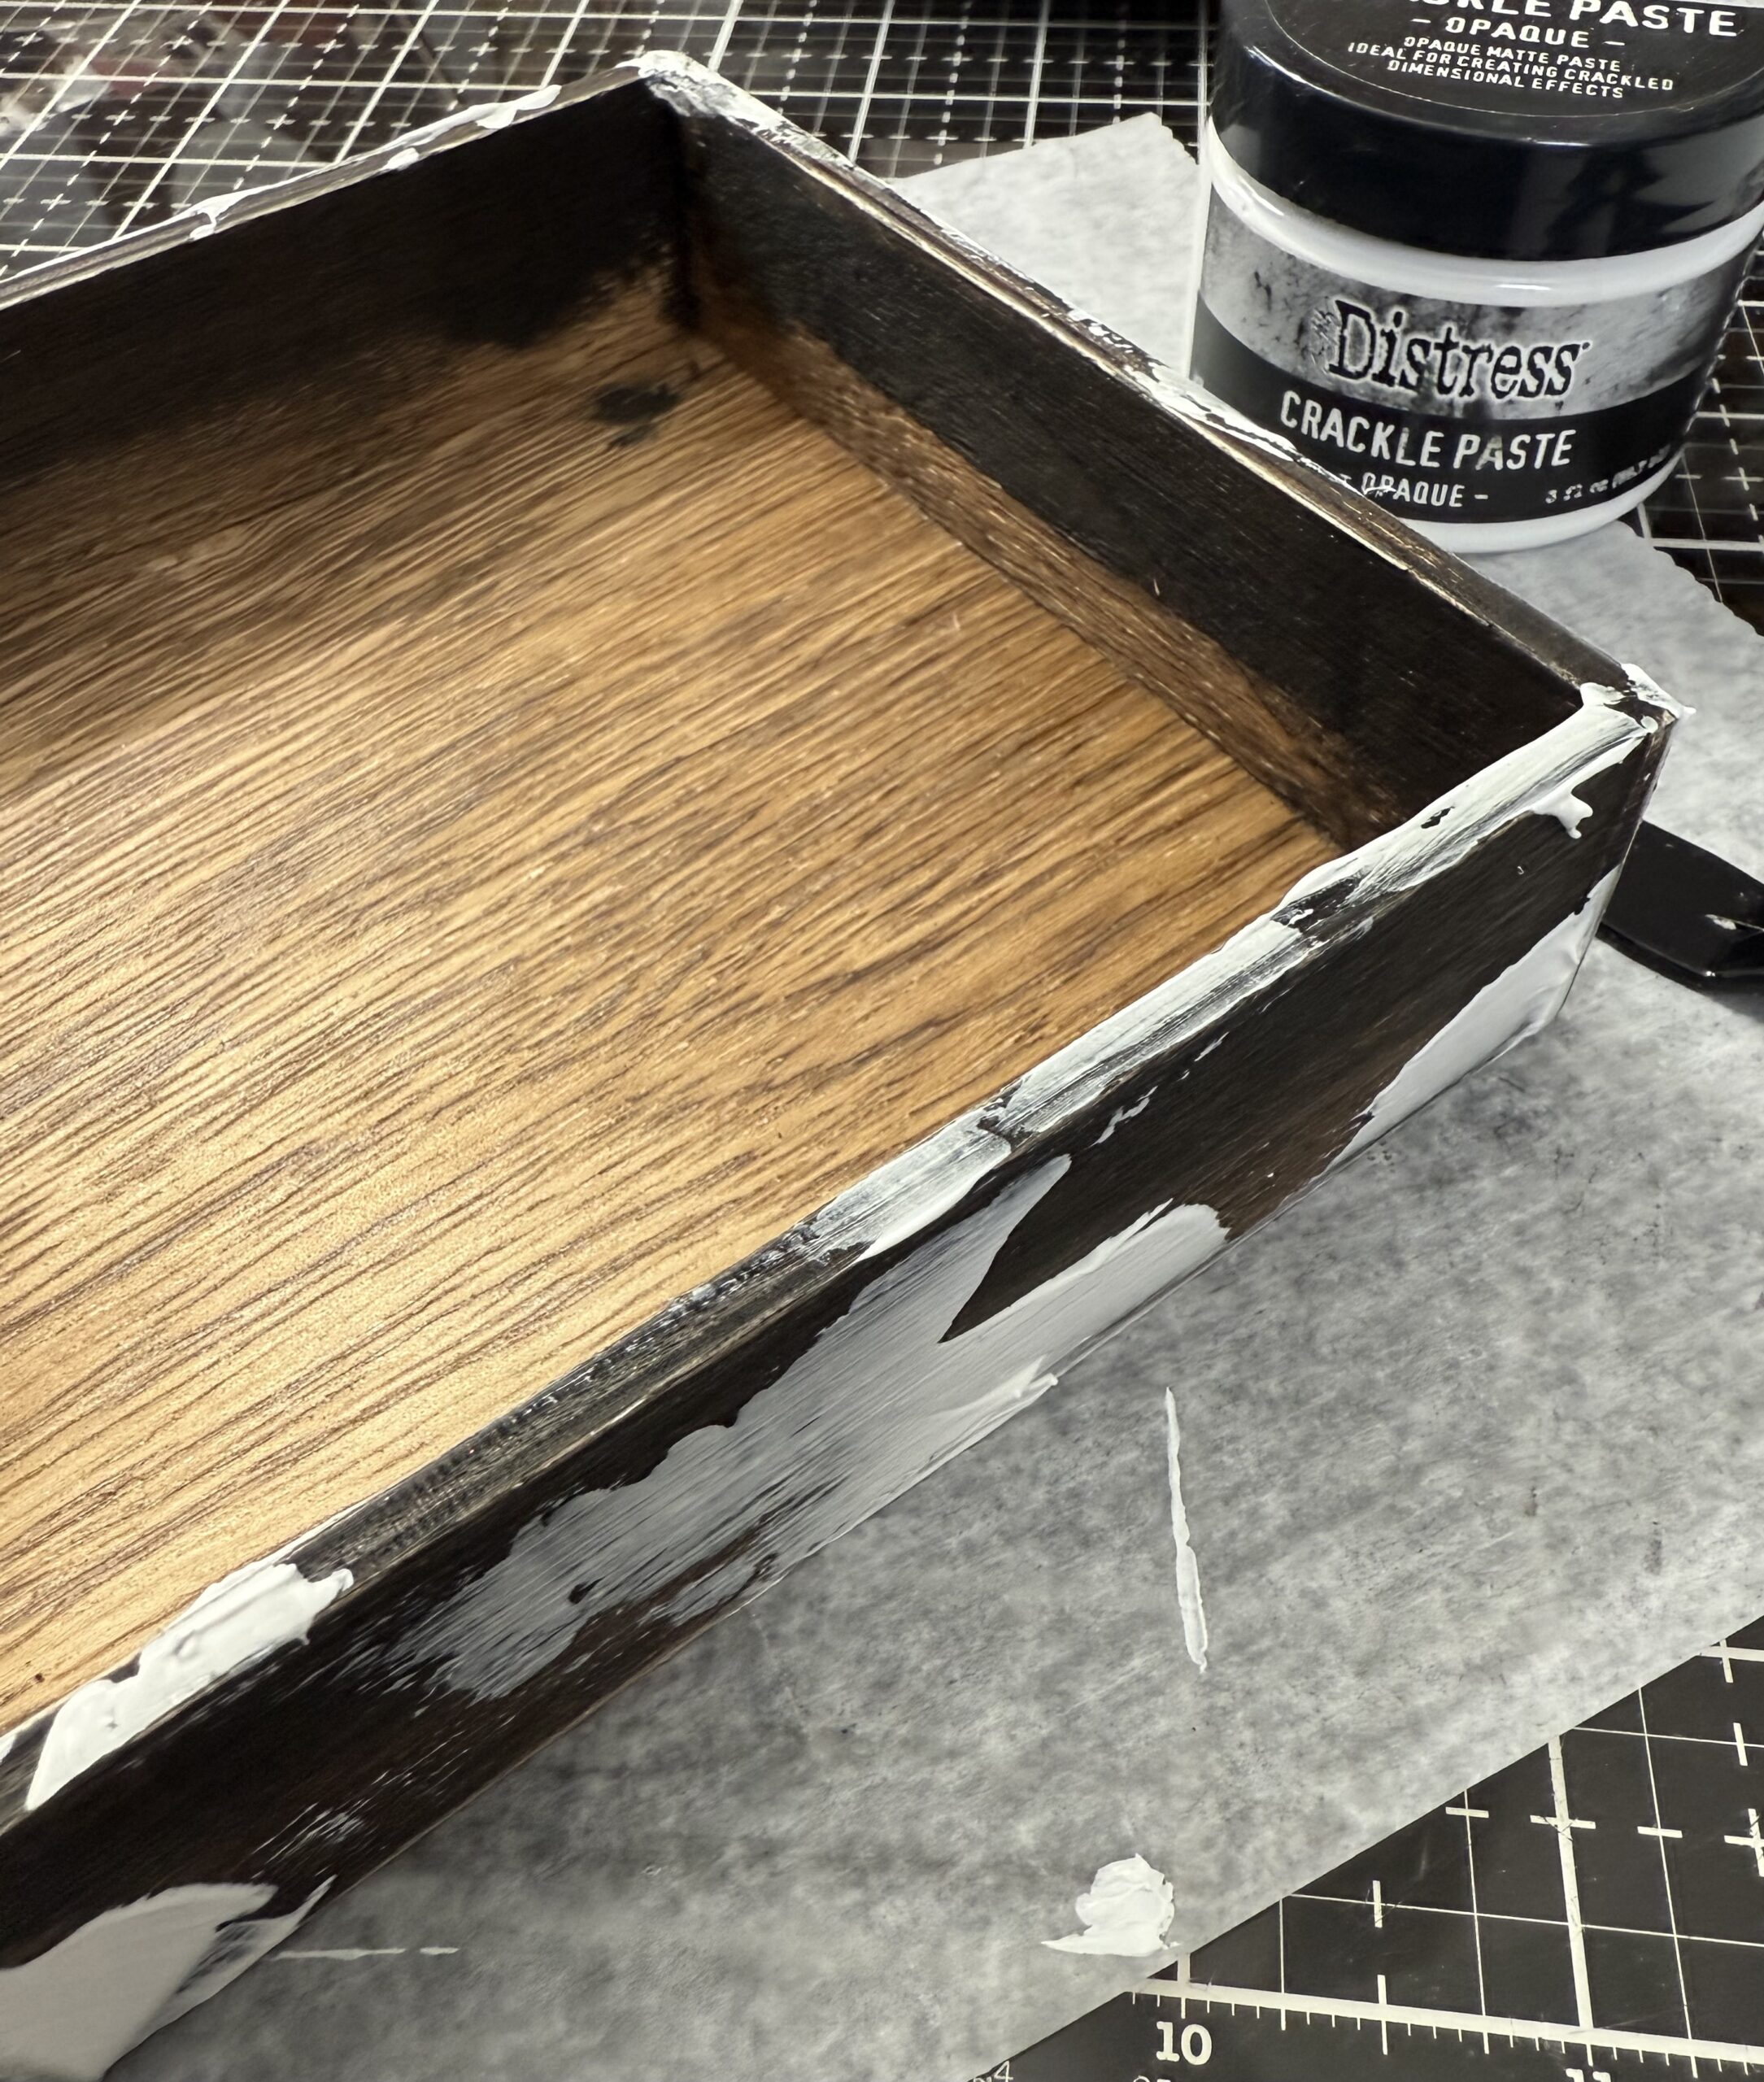
I painted the vignette box using Black Soot Distress Paint, once dry, I sanded the edges of the box using a sanding disk.
Using a palette knife, I added some Distress Crackle Paste onto the front and side edges, then set it aside to dry and crackle.
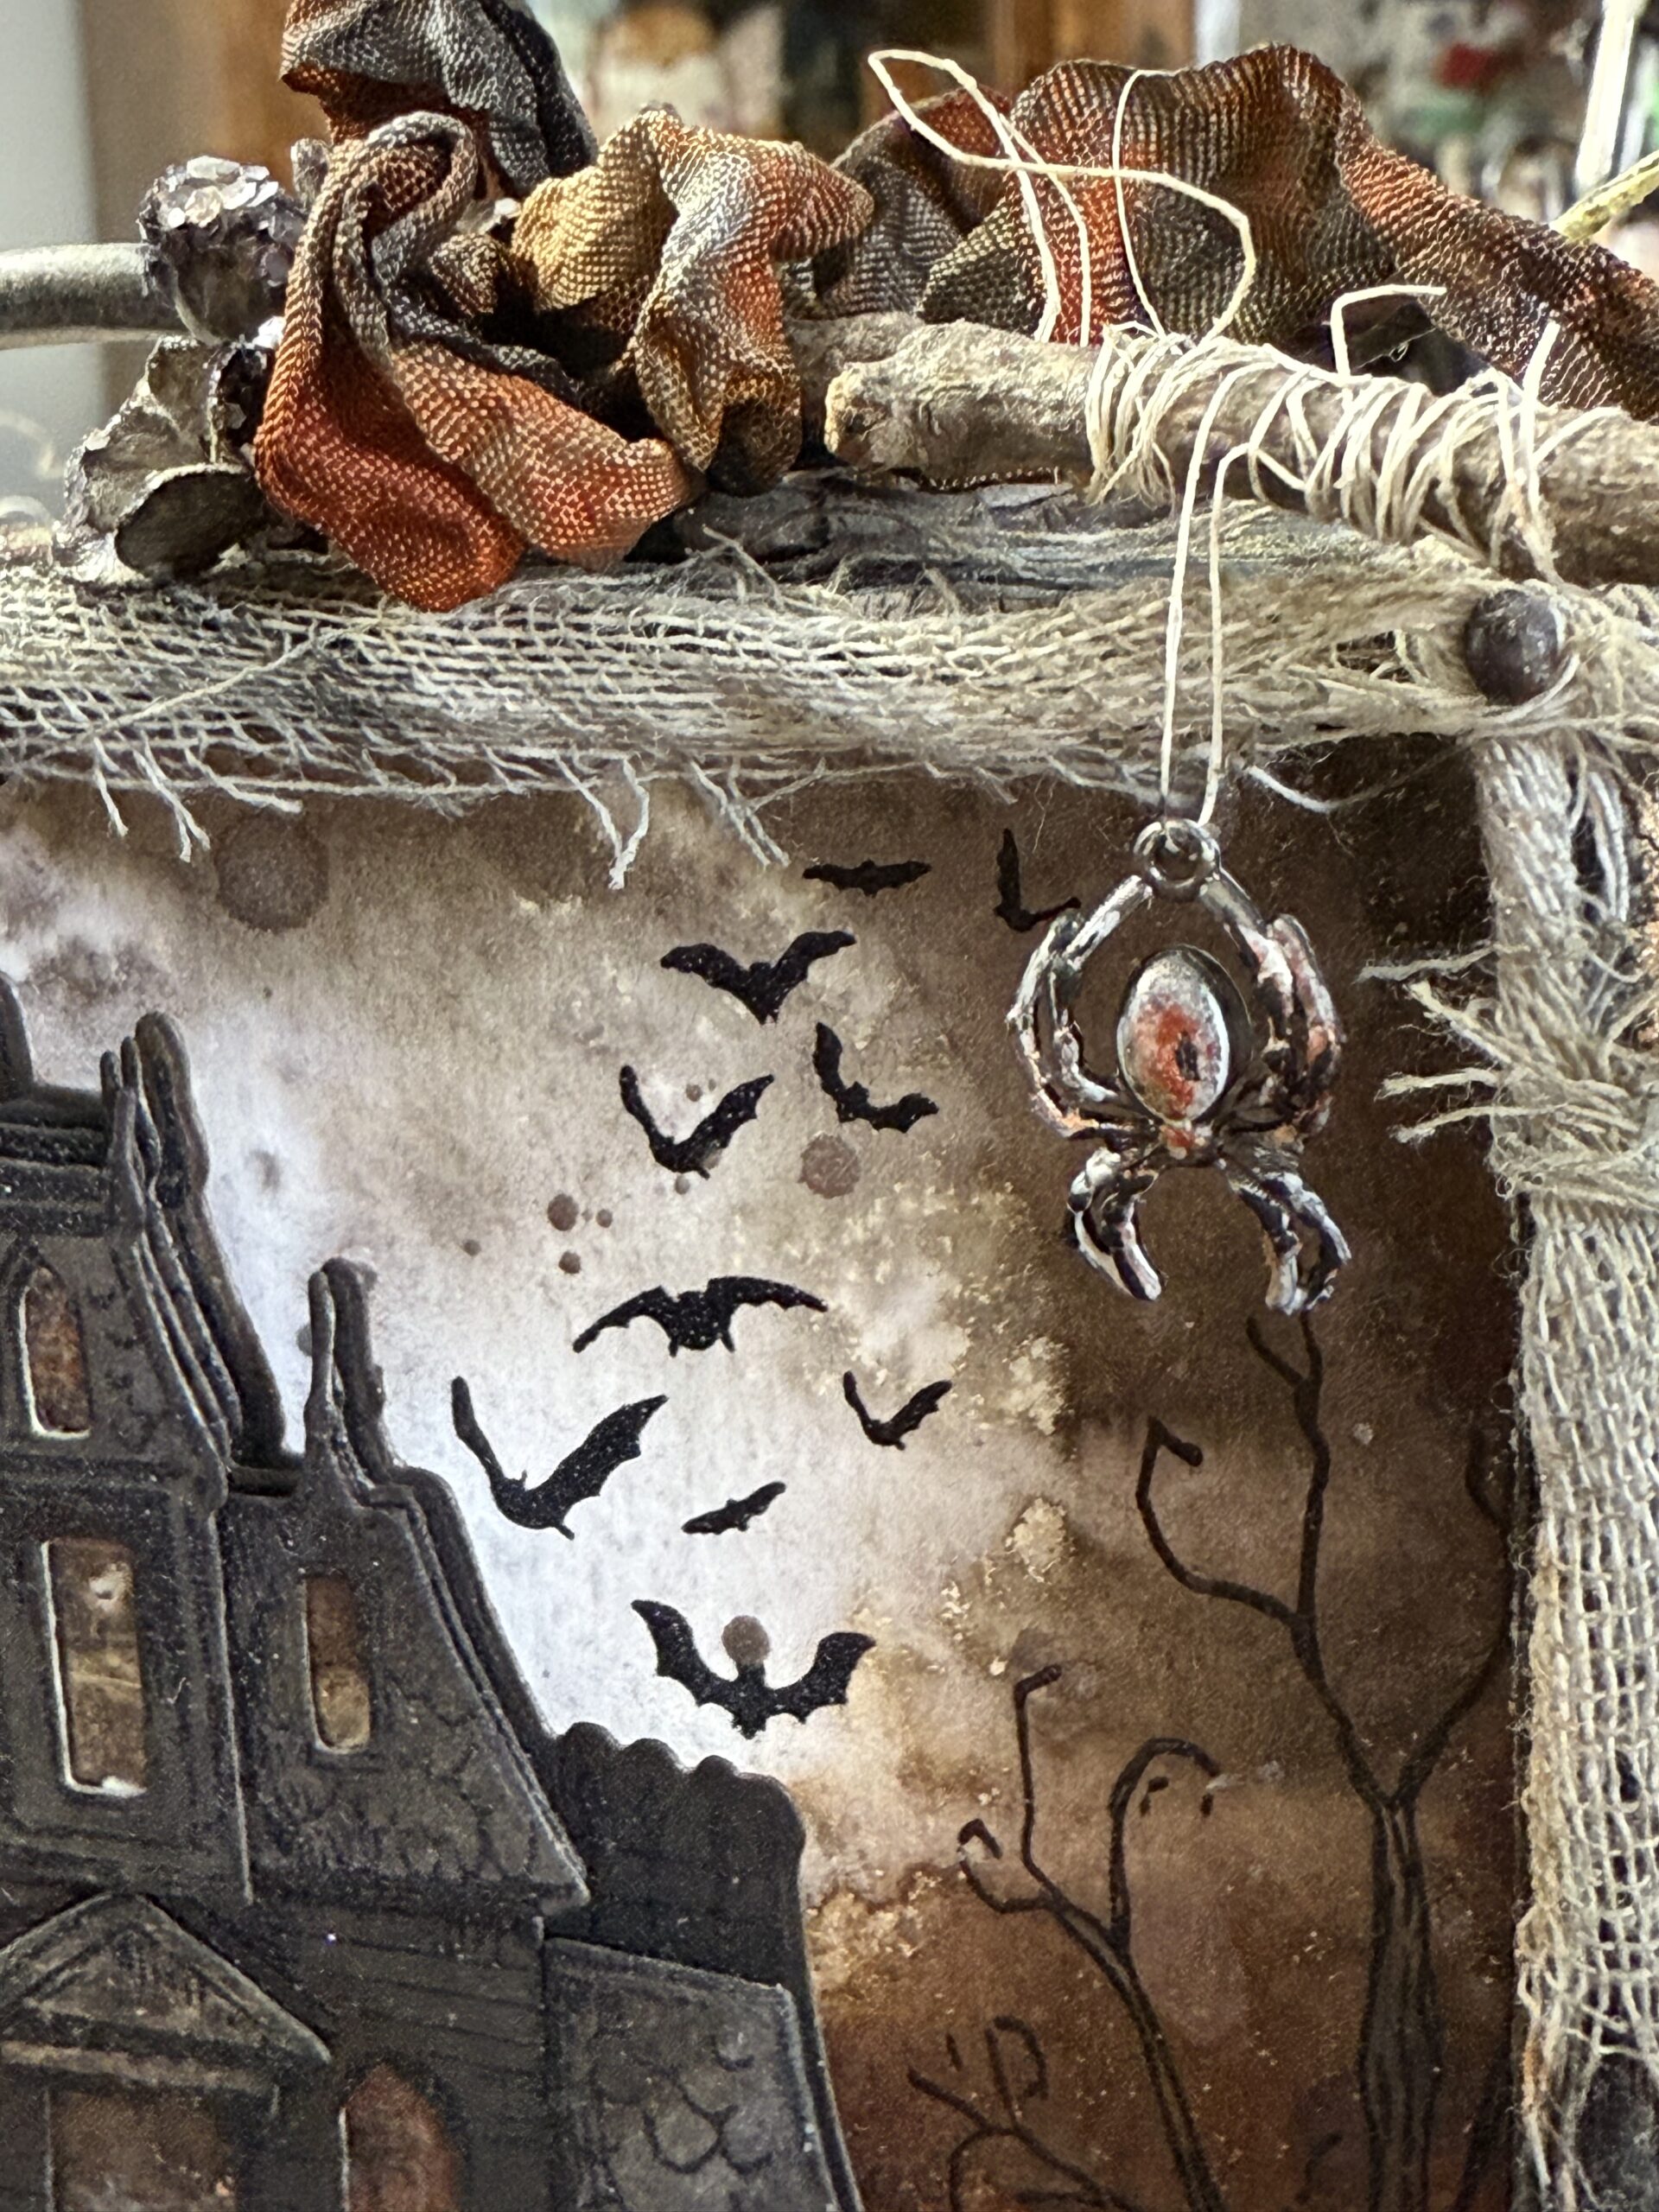
I stamped some trees and some of the bats into the background of the vignette by using the house as a guide for placement. The images were stamped using Black Soot Archival Ink, embossed with Frosted Crystal then colored in (the trunk of the tree) using Brown Oxide Ink and a water brush.
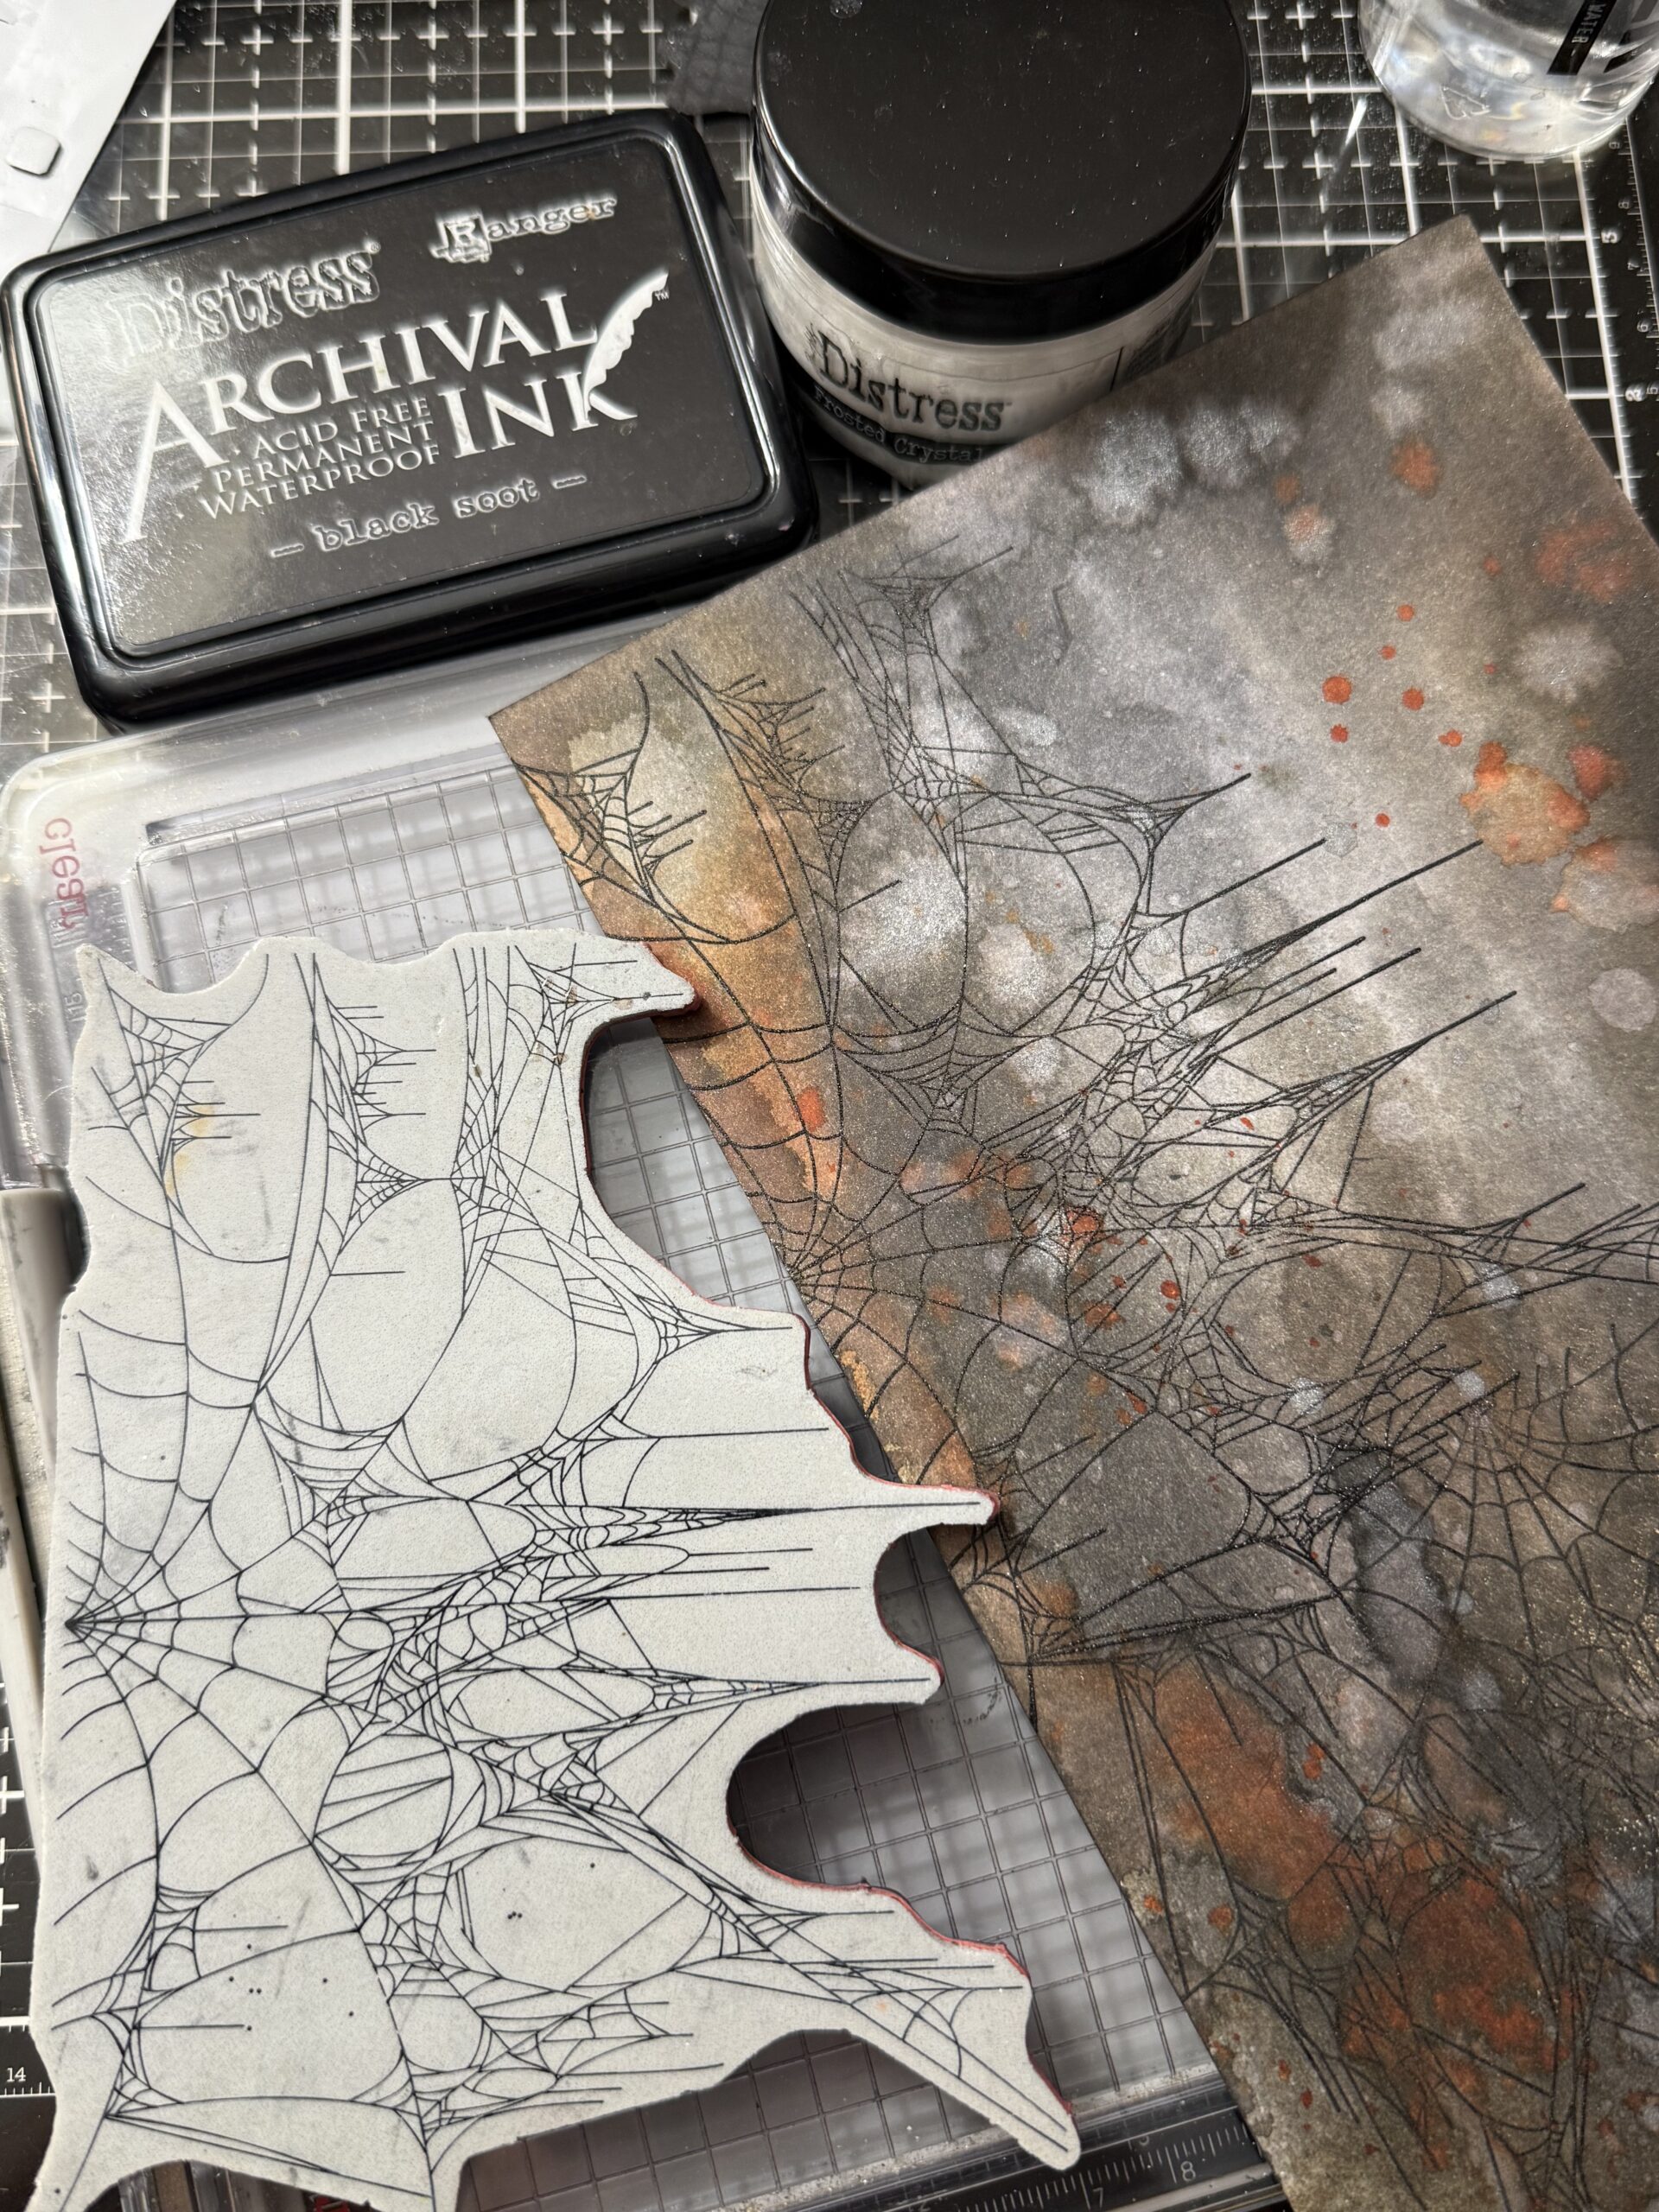
I stamped some cobwebs onto another piece of background paper that I had made, and embossed it using the Frosted Crystal Embossing Powder.
Then the pieces for the inside sides of the box were trimmed to fit.

I painted the crackled edges of the box using Black Soot Distress Paint, then used a few colors of Distress Crayon to emphasize the crackled areas. I added the side papers into the inside edges of the vignette box, then adhered the haunted house and background within the box. I don’t have a photo, but I added some small wood squares into the box first then added the Haunted House background. This brought the background more forward in the box. In the photo you can see that the background does not touch the internal background of the vignette.
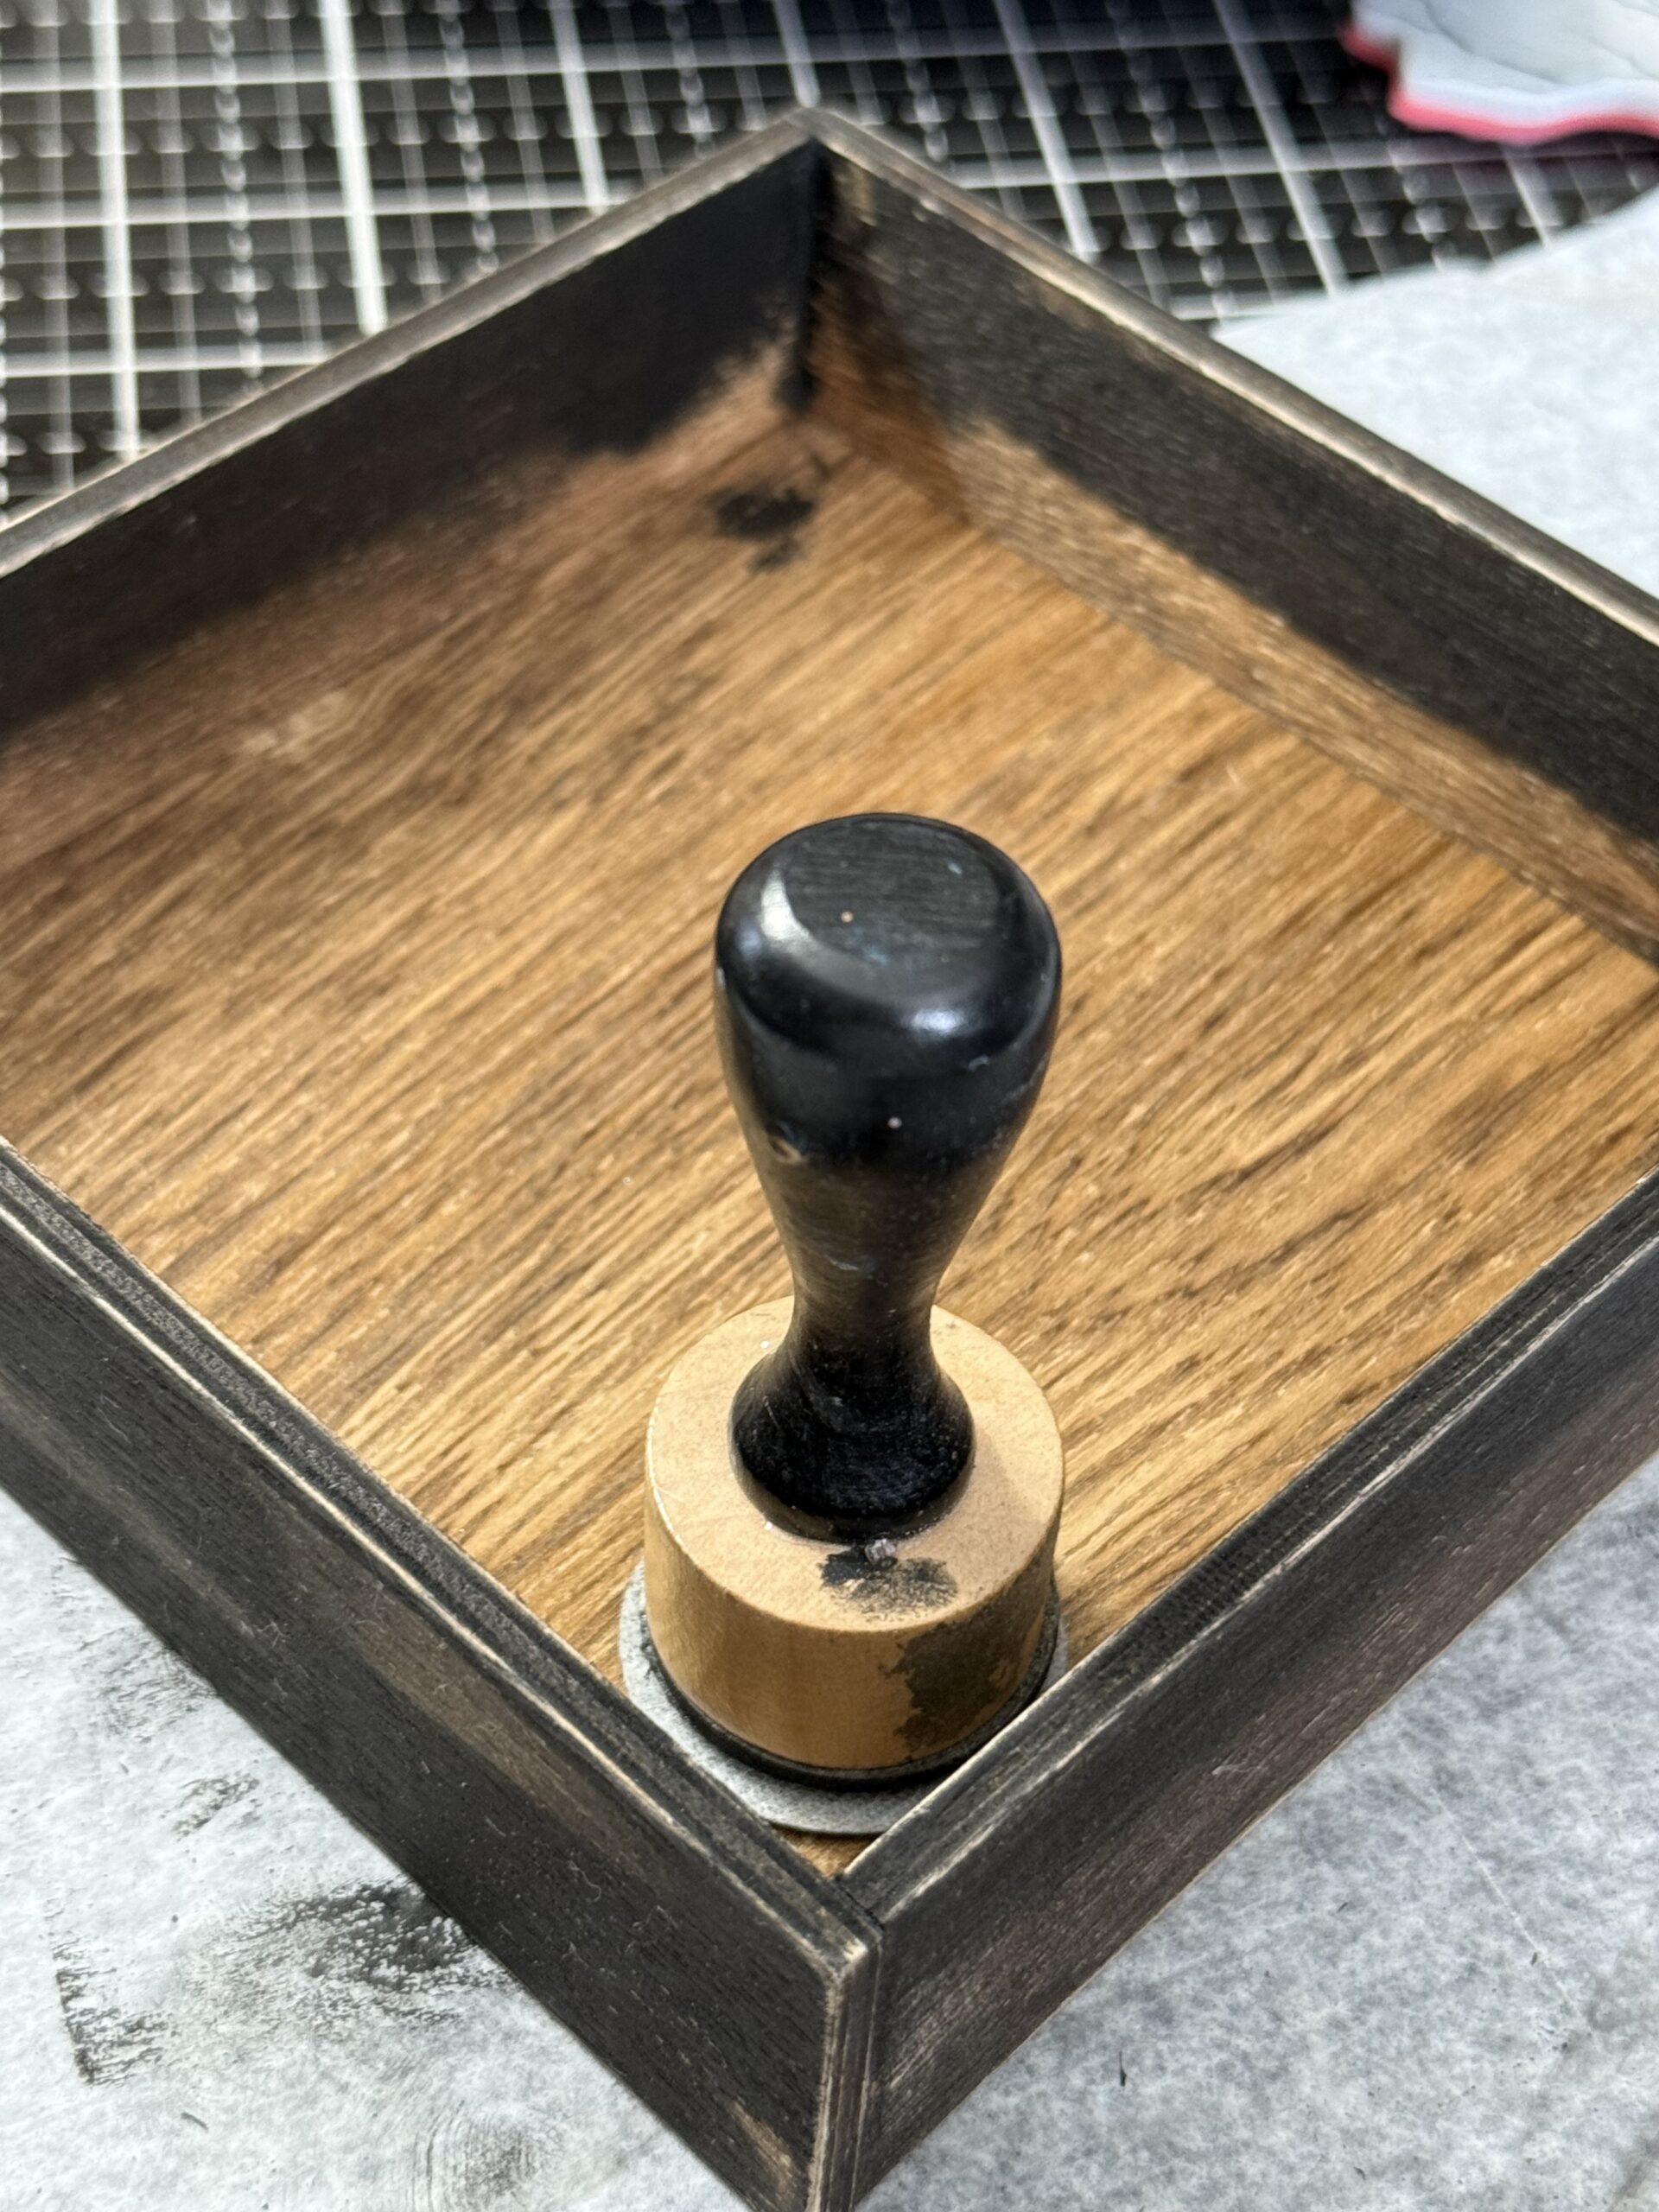
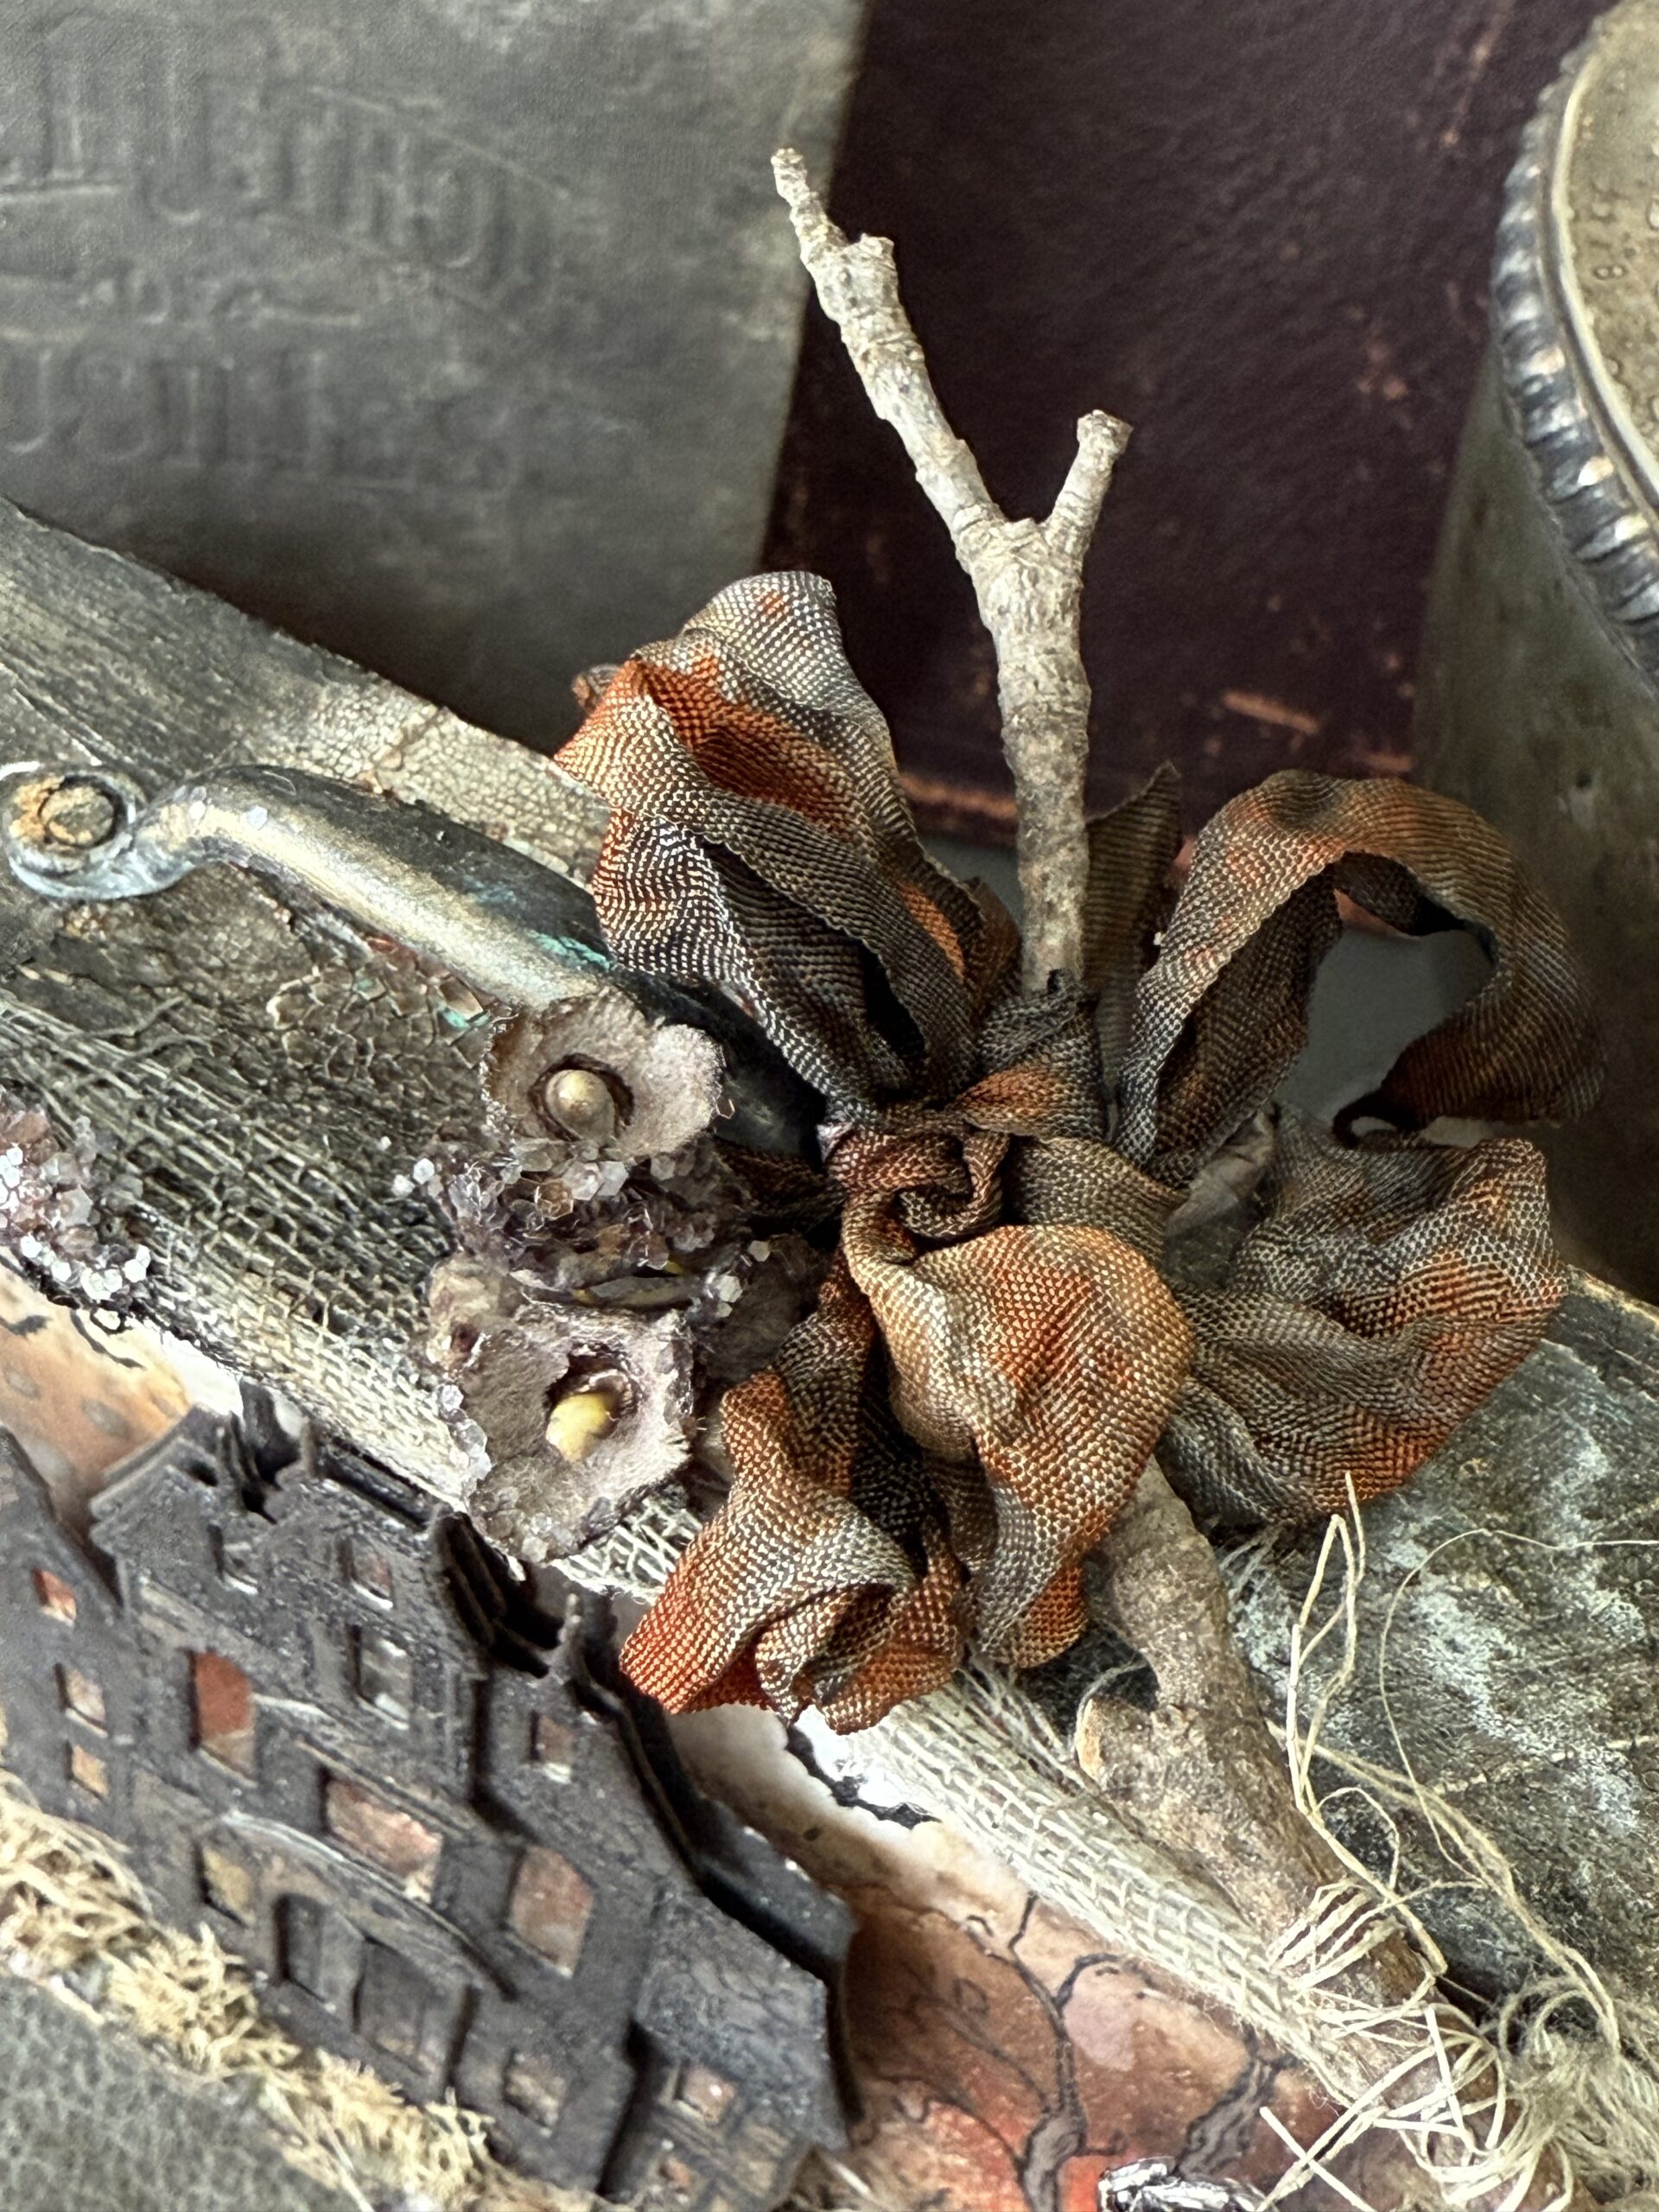
I attached a drawer pull to the top of the vignette using some old nails. The drawer pull was rubbed with some Distress Crayon to add age. I dyed some idea-ology mummy cloth using some ink, dried it with my heat tool and added it to the front of the vignette using collage medium and old nails.
The mummy cloth edge was distressed using a variety of Distress Crayons including Black Soot, Walnut Stain, Rusty Hinge, Tarnished Brass and a little Cracked Pistachio.
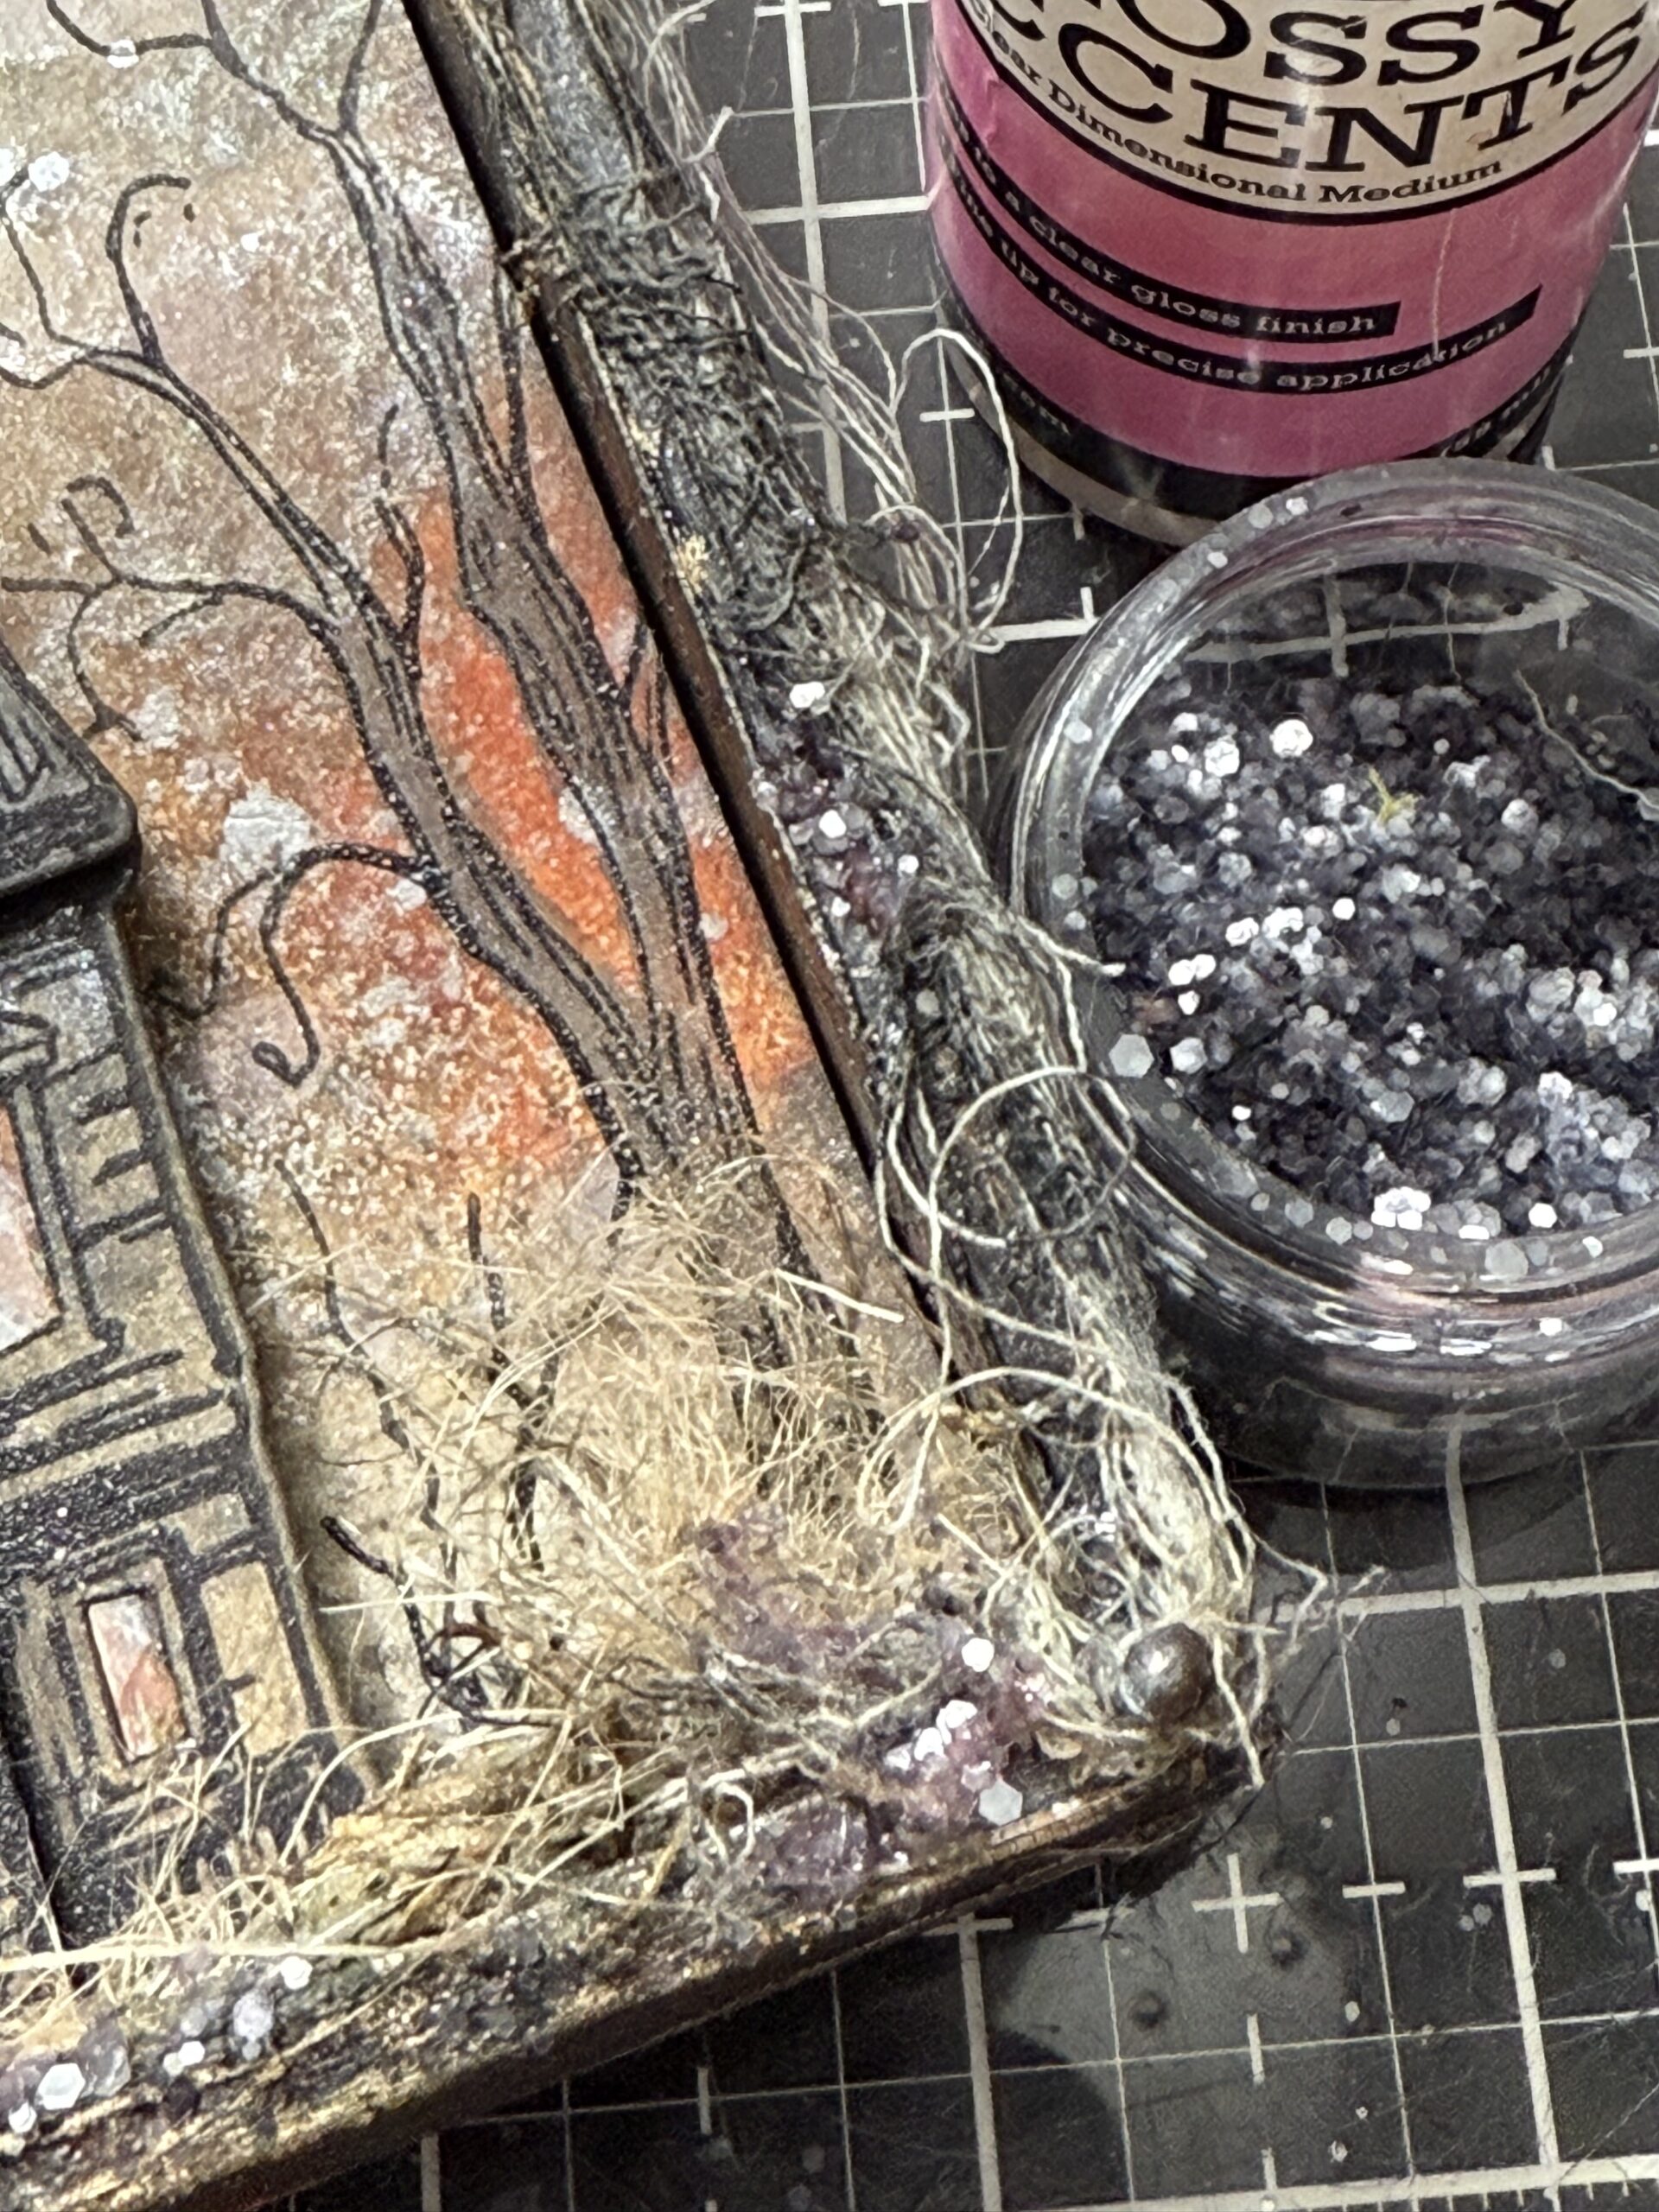
I added some Floral Moss, bits of Natural excelsior basket filler and shredded jute pieces inside the bottom front of the vignette using collage medium, then using a palette knife added some Grit-Paste Crypt around the bottom and the edges of the vignette around the darker areas where the crayon had been rubbed.
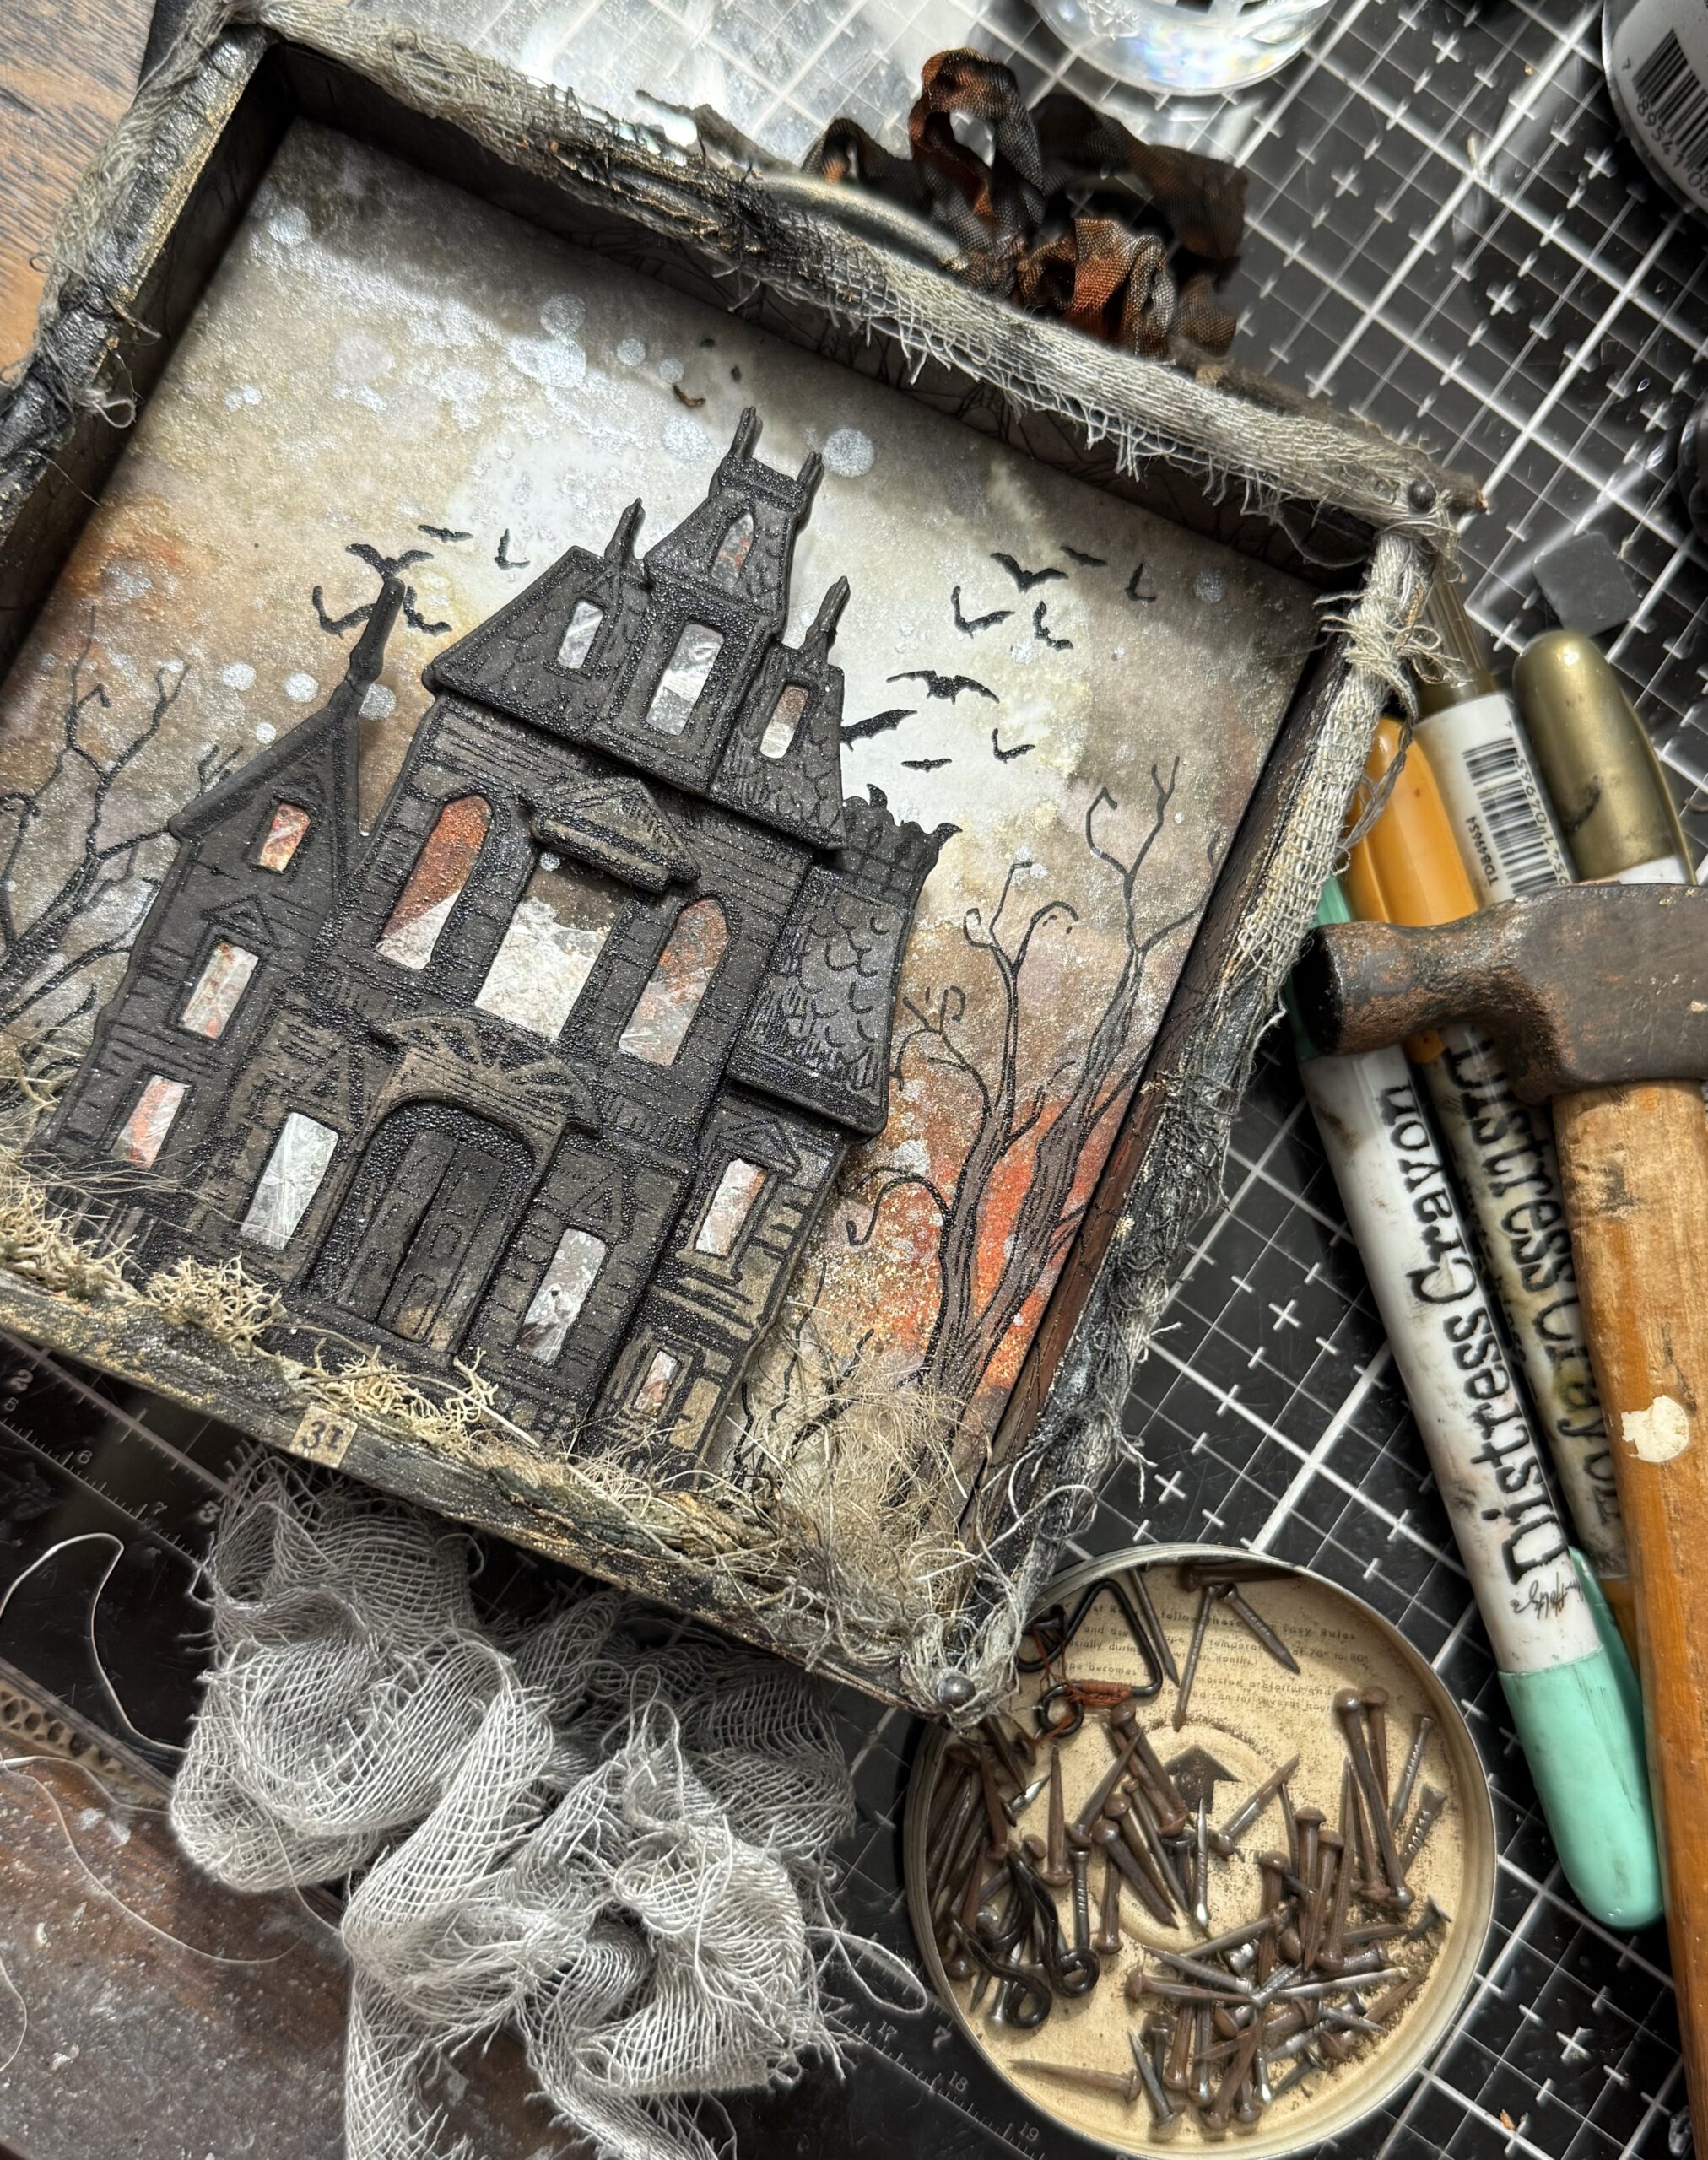
I tied on a small stick to the top drawer pull using a piece of inky ribbon.
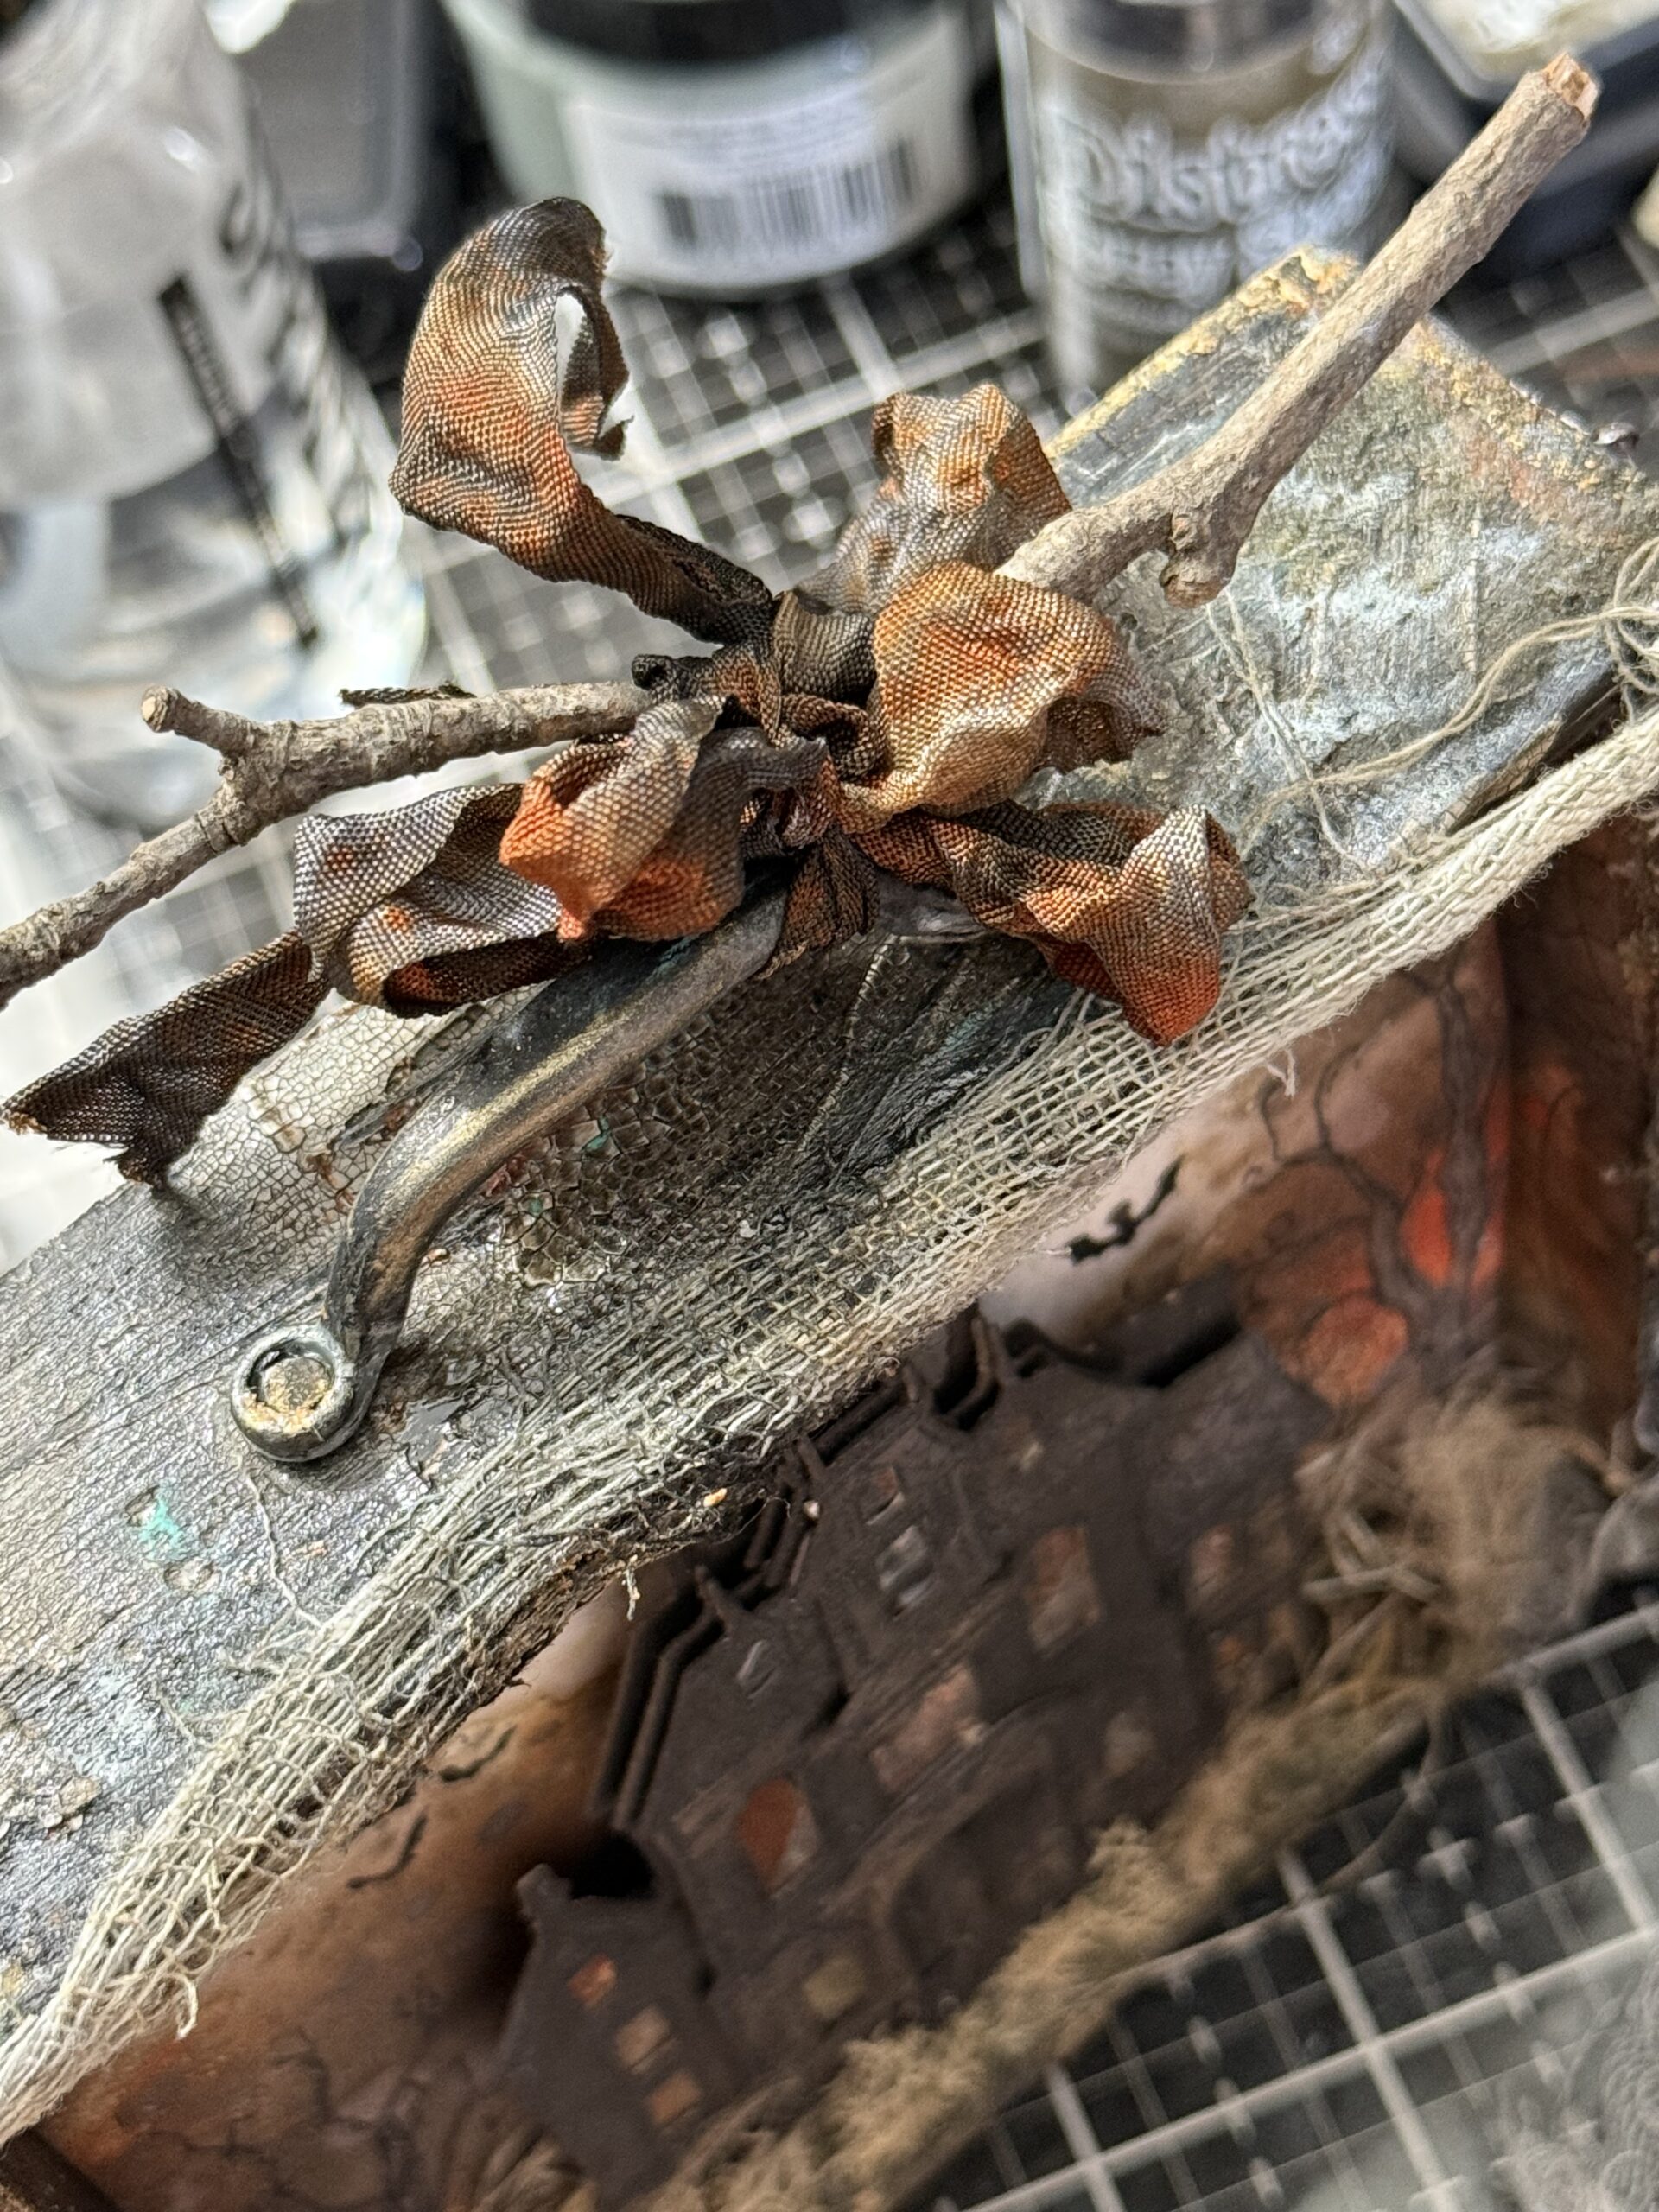
I colored up an idea-ology spider using distress paint and crayons and adhered it to a piece of thin jute, then twisted it onto the stick.
I added some glitter to the edges of the vignette using Glossy Accents and some Chunky Rock Candy Glitter. (if you follow me on Instagram, you might have seen my glitter colors that I created using a variety of Alcohol Inks and Rock Candy Glitter)

I used some of the Chunky Rock Candy that was colored with Black Alcohol Ink. The combos I created are at the ready to use on Halloween Projects throughout the season. It adds such a wonderful vintage vibe!
You can see some of that vintage black sparkle on the edges of the vignette in the photo below. I added a tiny clipping sticker “31” on the front using collage medium and touched up the edges using some Tarnished Brass Distress Crayon.
I adhered a small bouquet of paper flowers to the top of the vignette. The idea-ology flowers were dyed using distress spray and glittered with that black Chunky Rock Candy Glitter.
With that, my project was complete!
Thanks for stopping by, and be sure to check out the entire collection of Tim Holtz and Simon Says Stamp matching Wafer dies…they make creating so much easier!
To shop at Simon Says Stamp CLICK HERE or follow the links below! Creatively yours, Stacy
What is an affiliate program, and why should I click on the link and buy through you?
When you shop via the affiliate link on this blog, I receive a small commission from the affiliate provider (Simon Says Stamp) at no extra cost to you, whatsoever. These commissions help me to cover the hosting fees and other costs to run my blog and be able to provide you with FREE inspiration. If you shop the links, THANK YOU! I truly appreciate being able to share my love of creating with you.


So wickedly delicious….just some yummy “eye” candy….I love it.
You’ve done it again….stunning make with so many spooky details.
Your color combos are spot on. I love the ribbon, it’s just colored to perfection. And of course…. Your signature stick.
Absolutely love this.
Thanks for sharing all the details.