Hello friends! I am back today to share the samples that I made for the NEW Tim Holtz Christmas Stampers Anonymous Stamp Sets and Stencils. I was so excited t make with these because it’s been a minute since Tim designed some stamps…and for them to be Christmas, well…I was so happy!
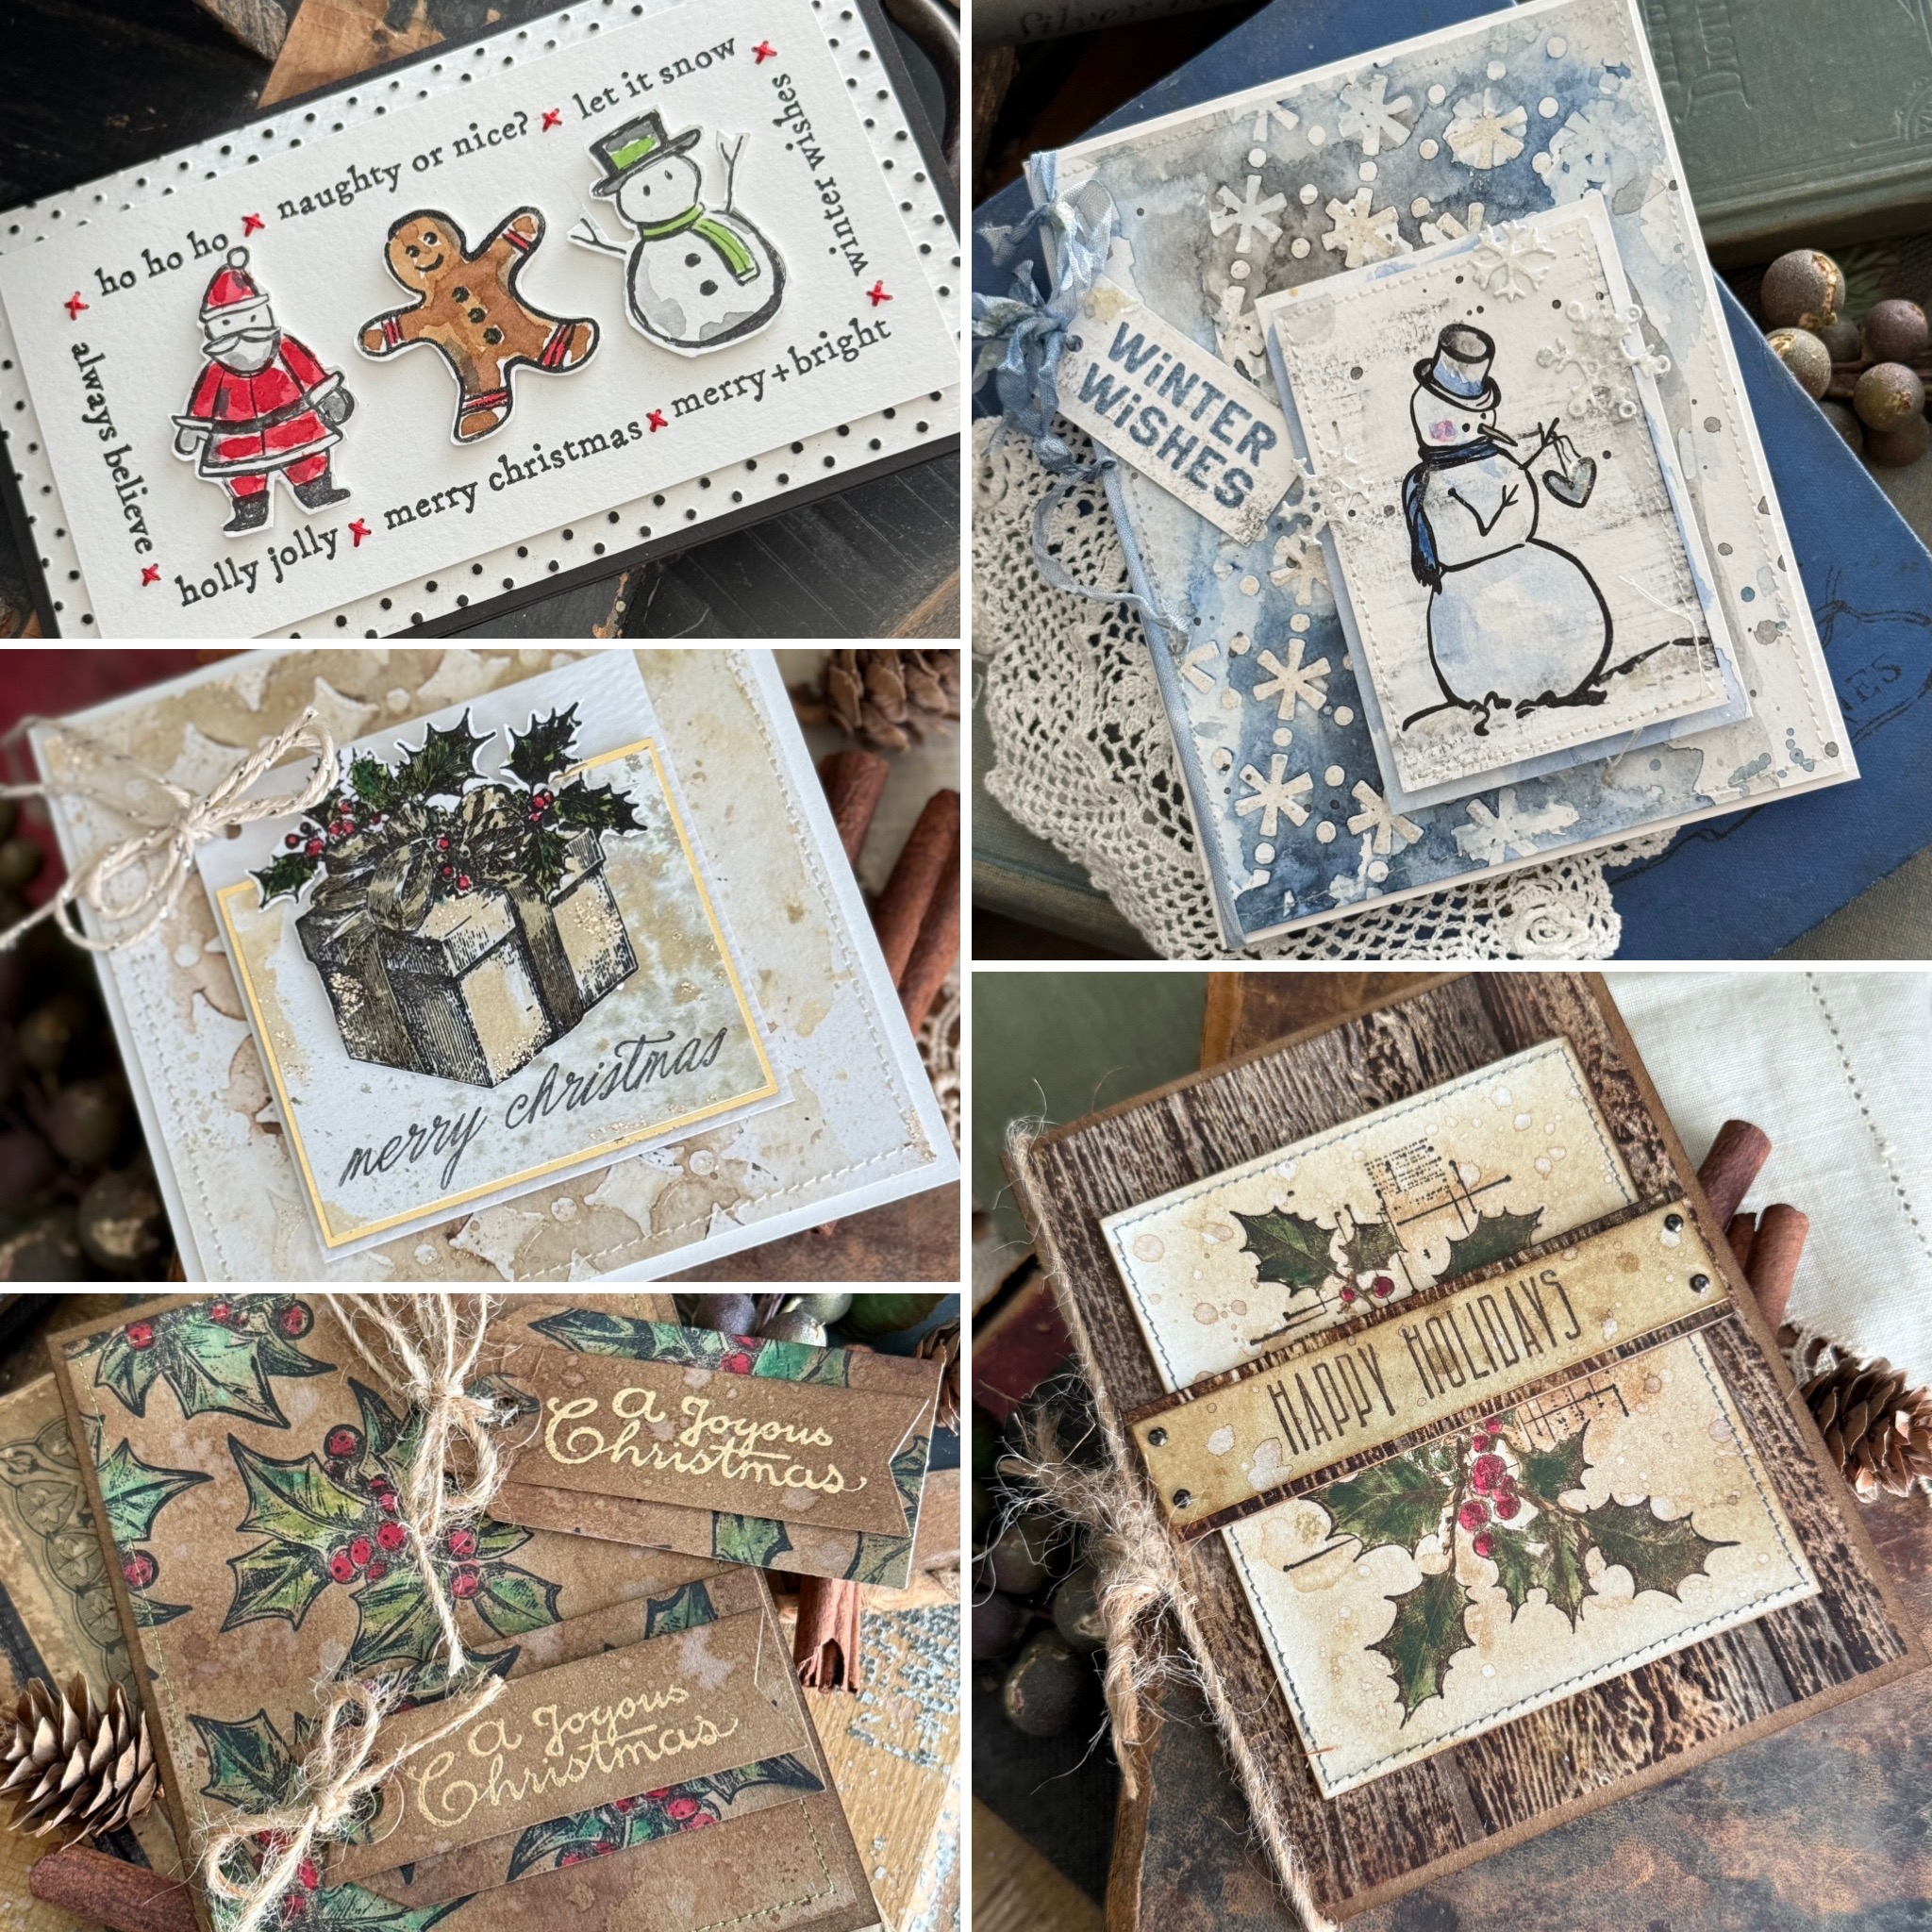
Click HERE to check out the sets and stencils that he released.
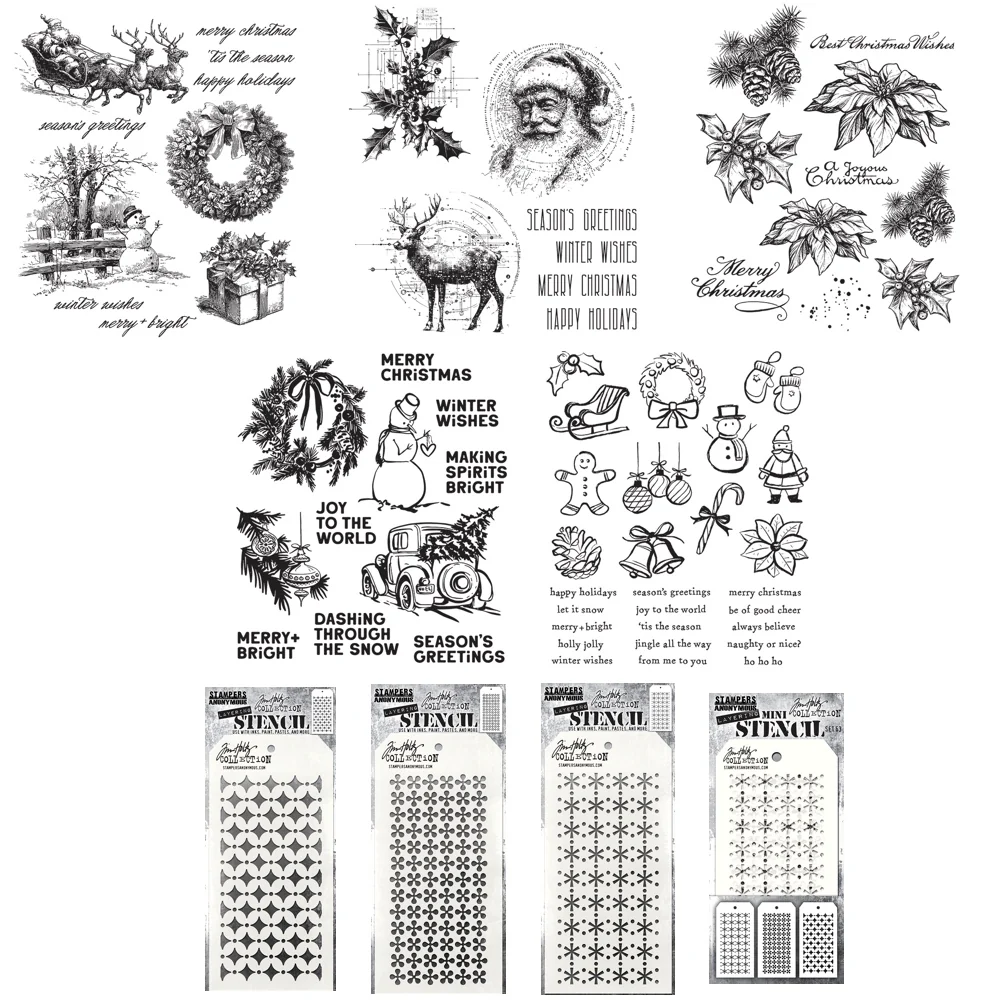
Here’s a look at the cards I made for the release.
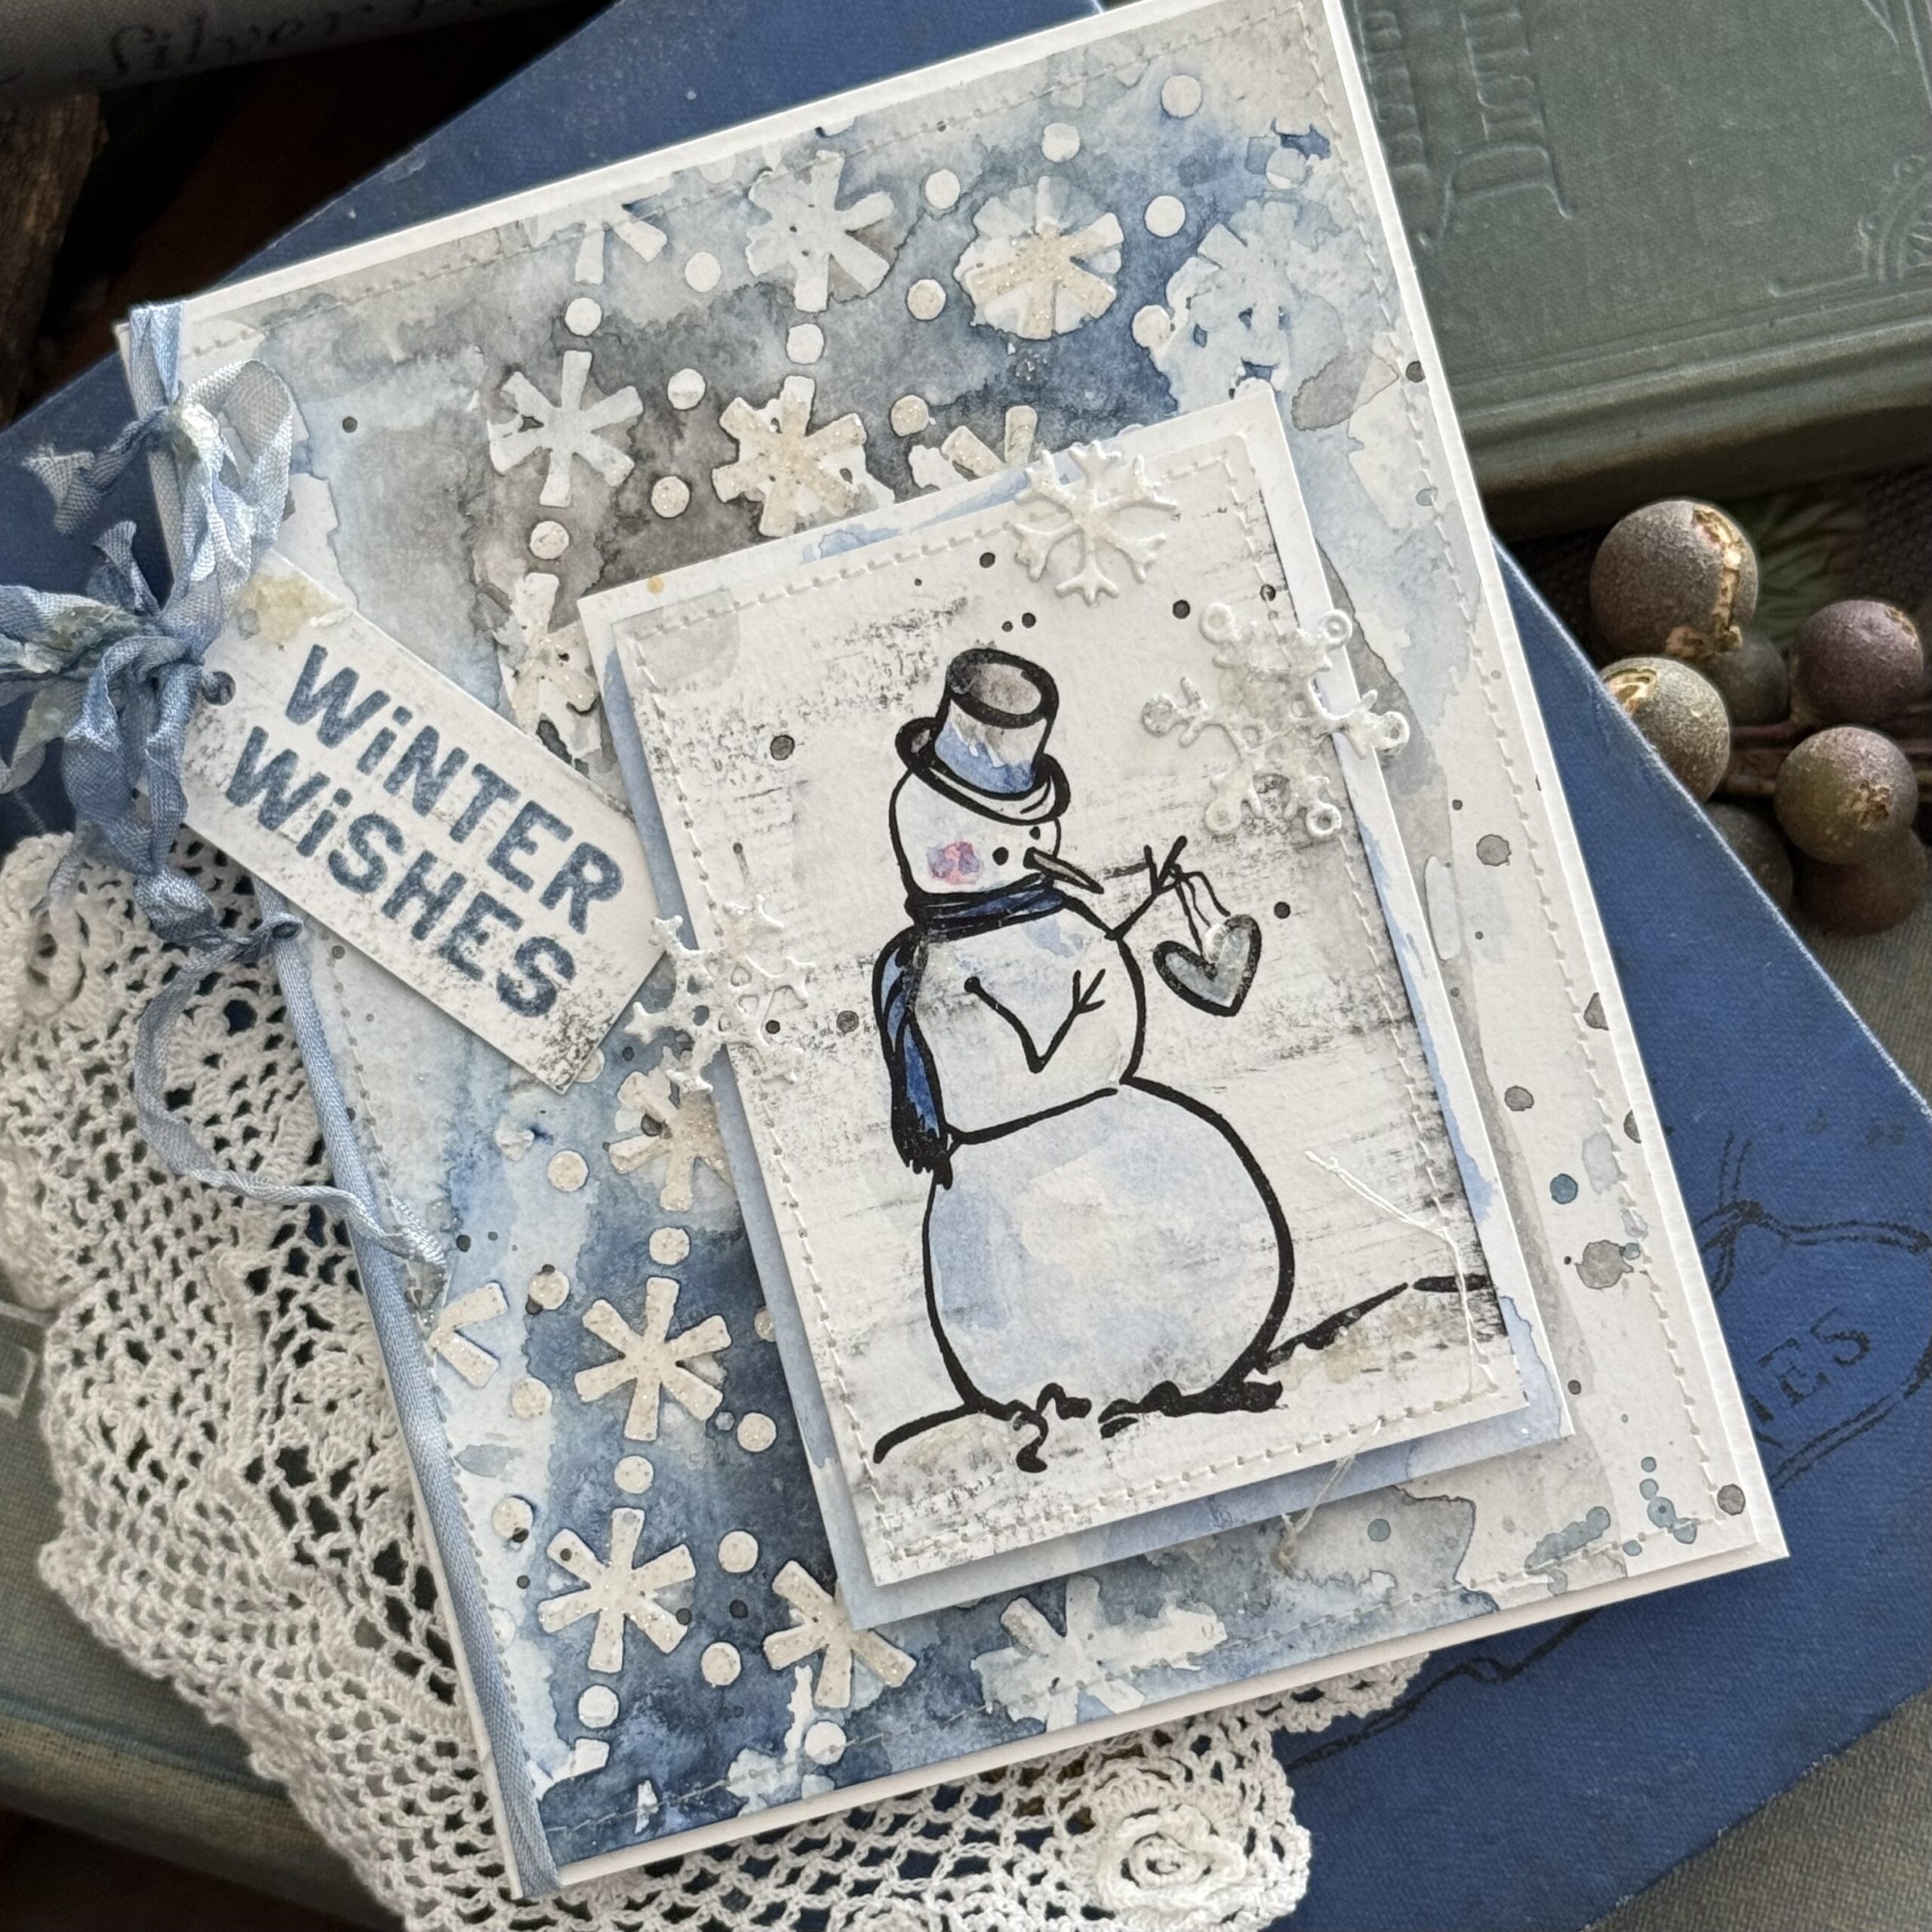
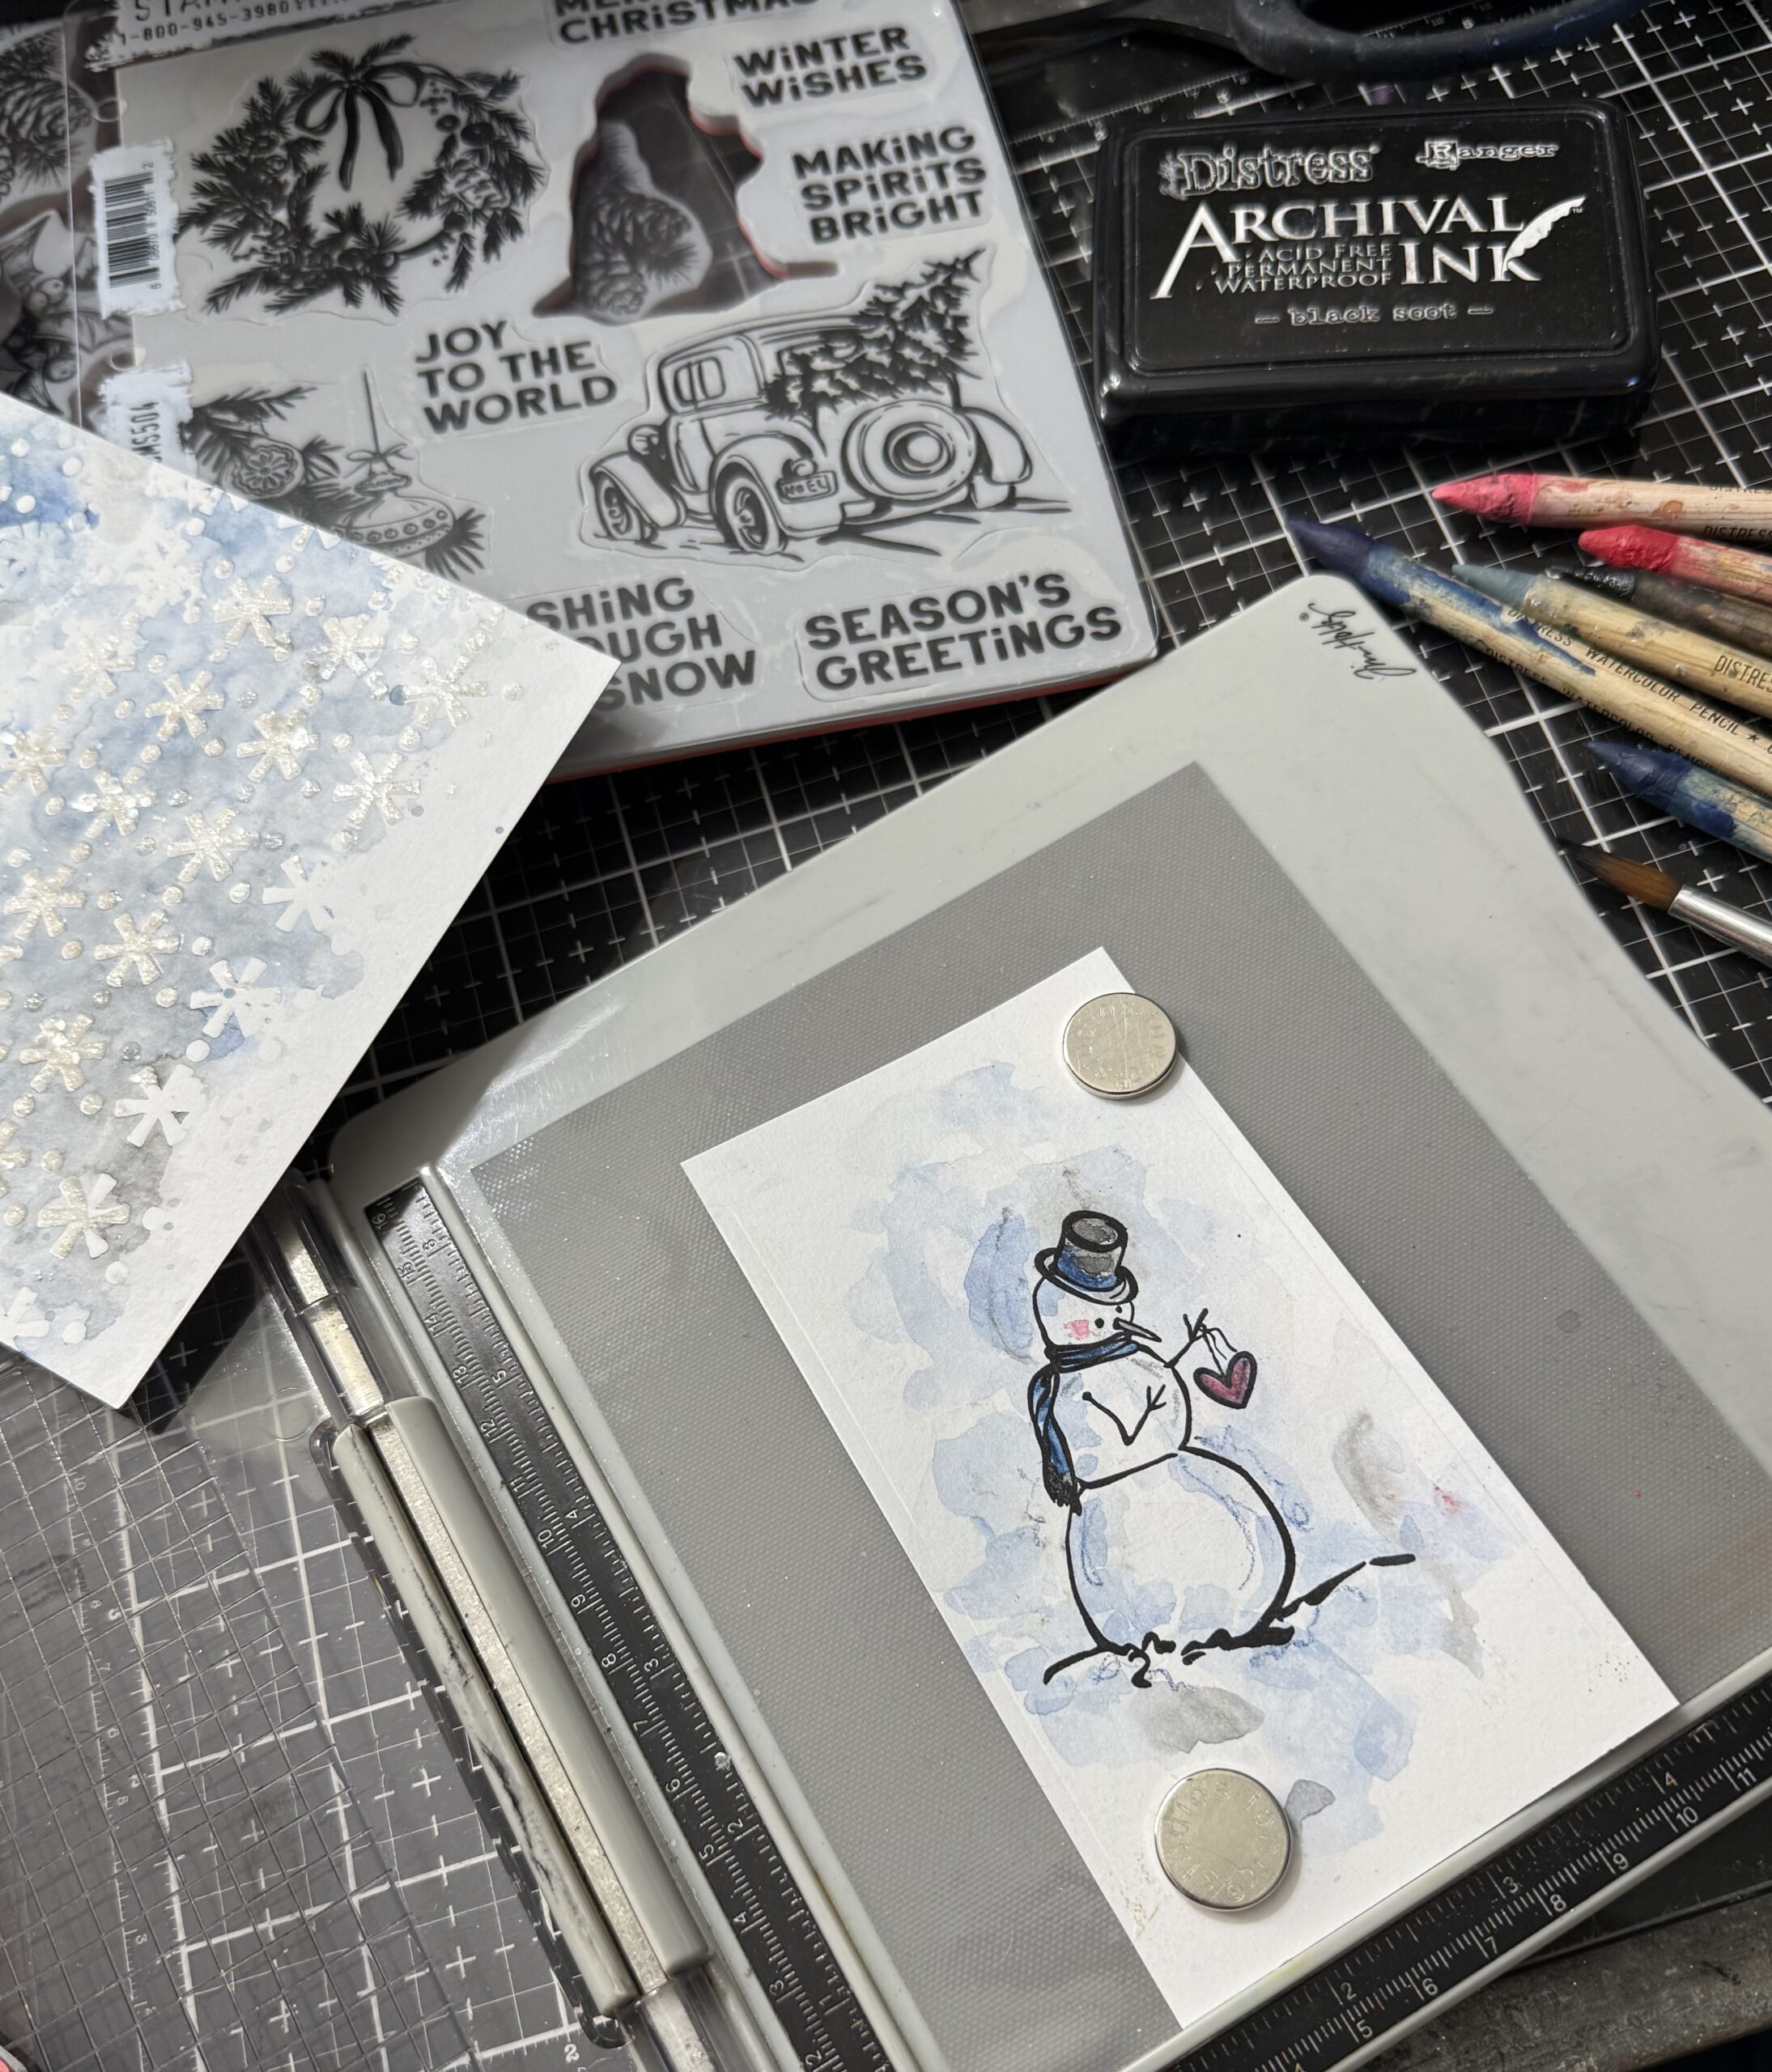
Christmas Wonderment CMS504 – This card was made along with the new mini stencil set 63, to make the background paper.
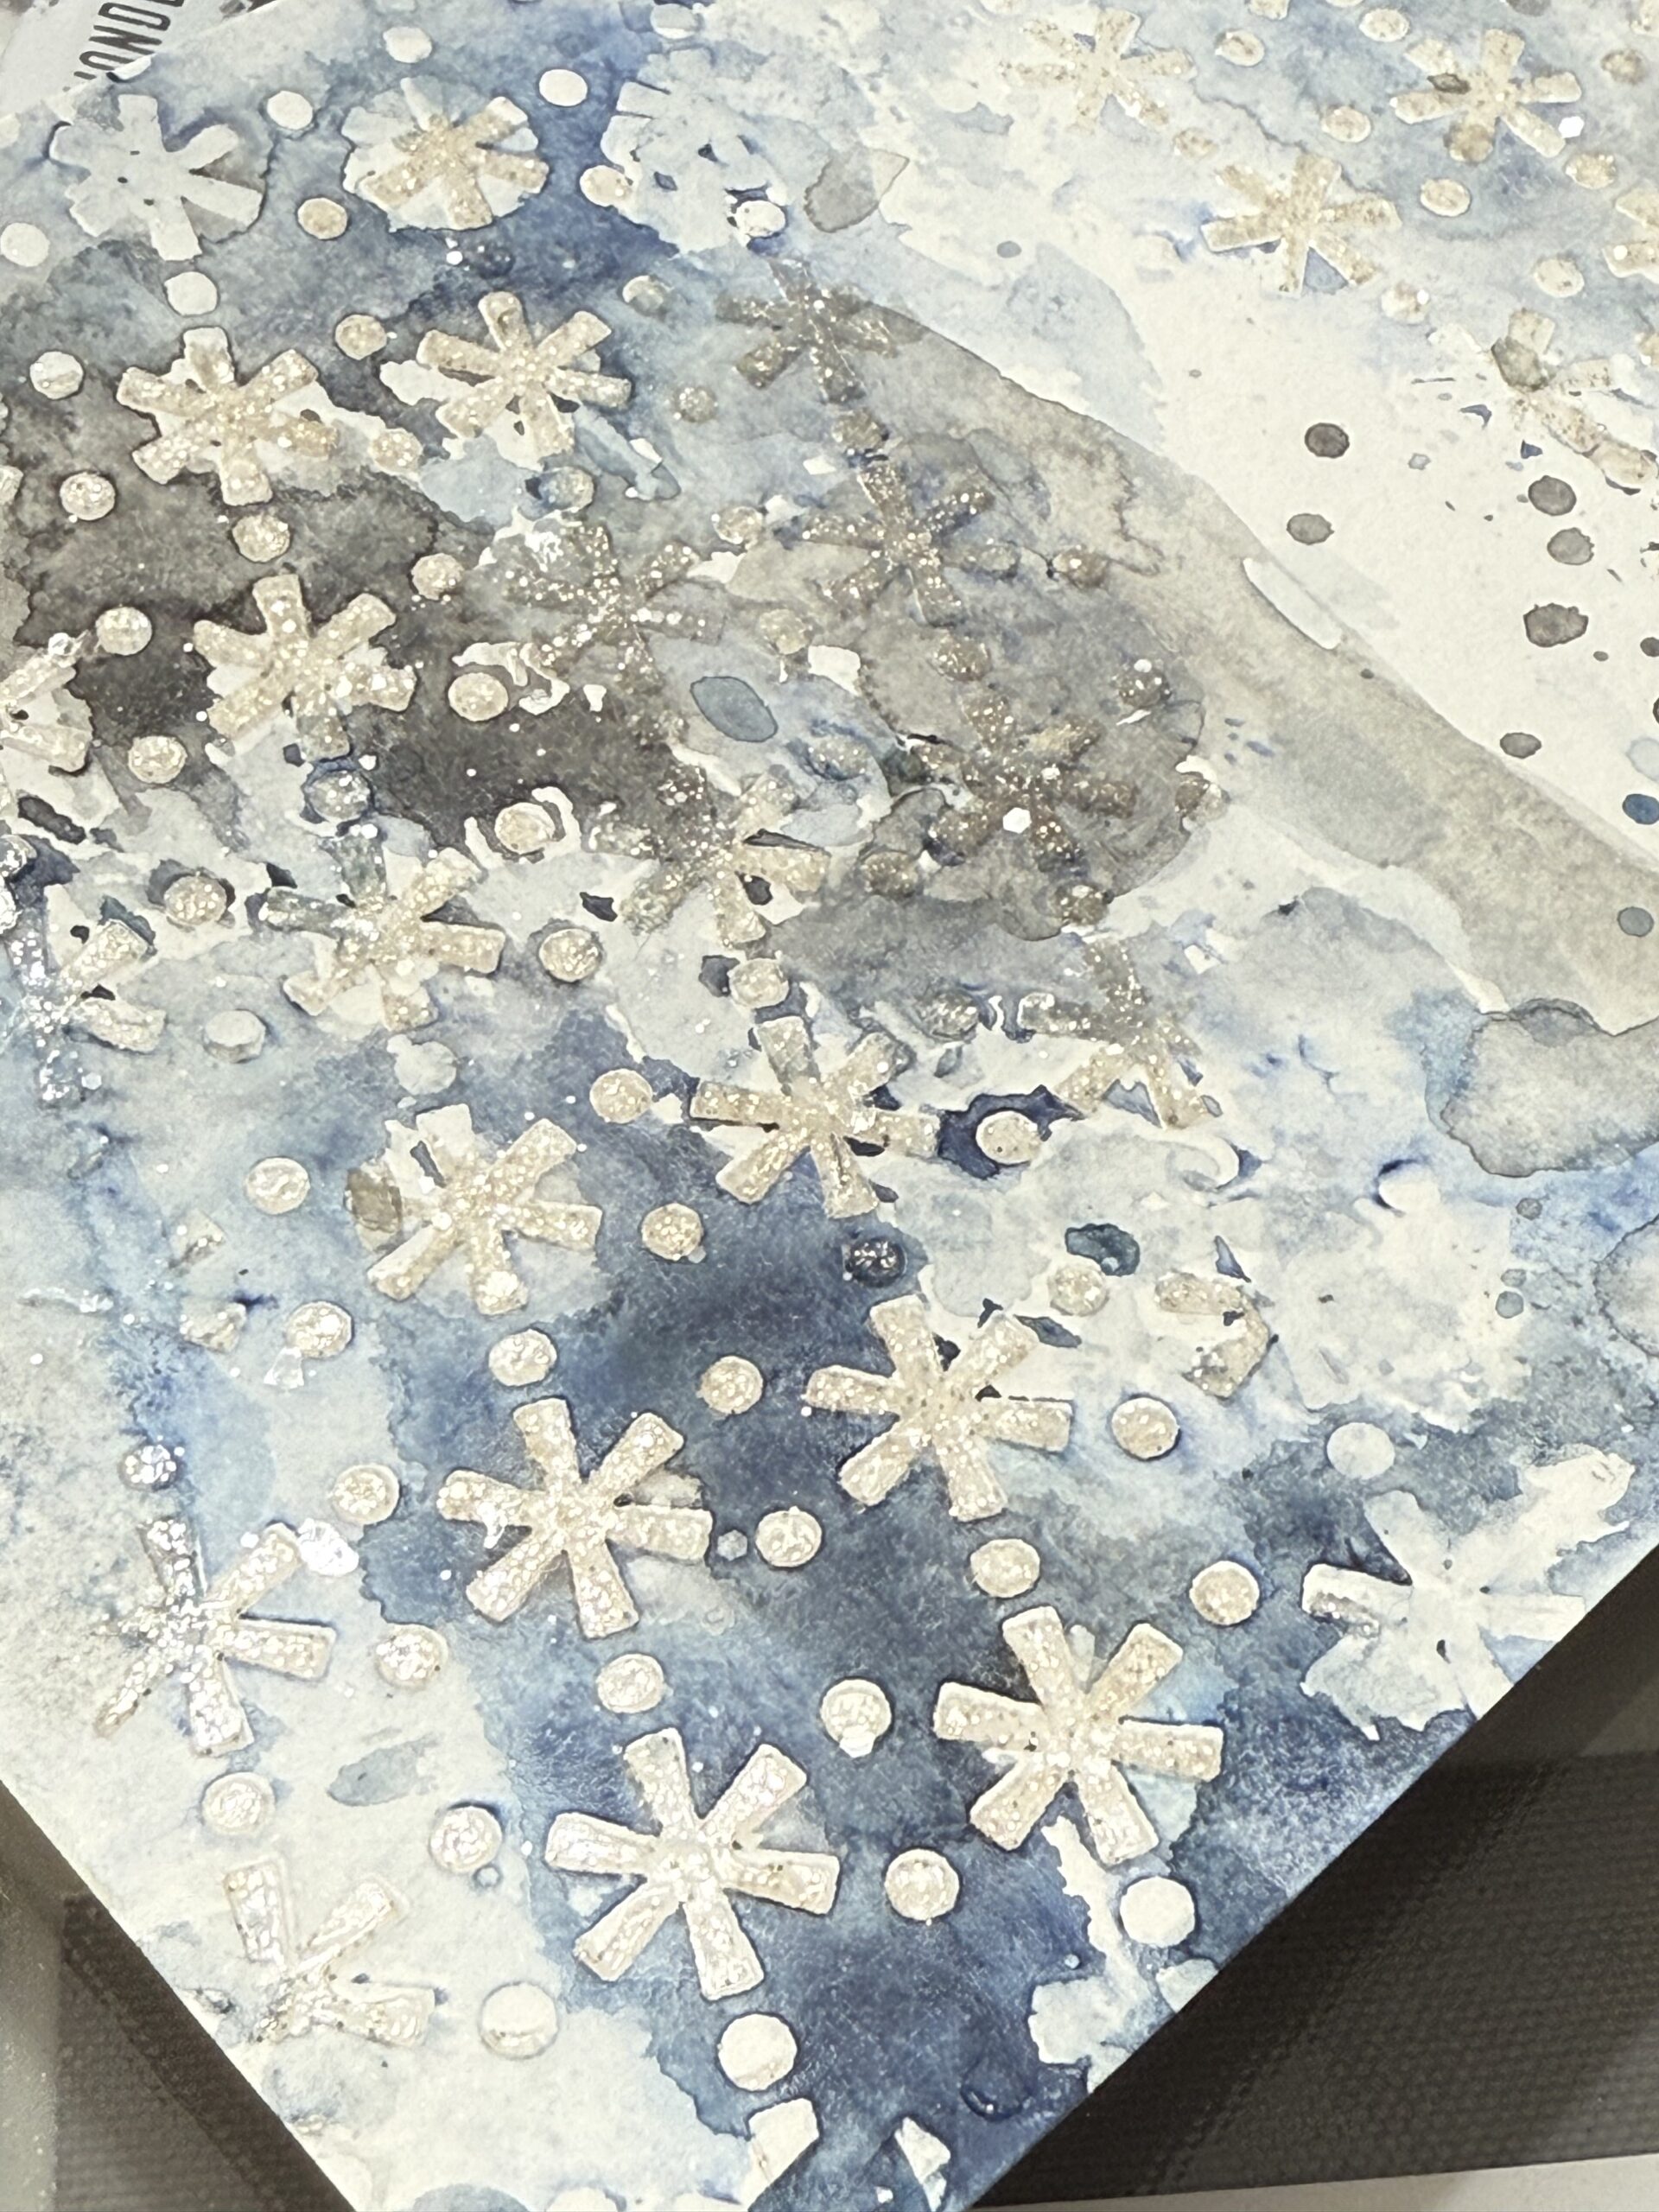
I used a combination of Distress Watercolor Pencils wet and scribbled them directly onto the stencil, then I spritzed some Distress Watercolor Paper and made a print. The print was dried, then I used Twinkle Texture Paste through the mini snowflake stencil to add sparkle. This was set aside to dry.
I colored up a snowman by using my Stamp Platform and Black Soot Archival Ink. I stamped him then dried him with my heat tool, leaving the stamp and paper in place in the platform. I used wet watercolor pencils to color the snowman and his features, then dried him with a heat tool and restamped the image over the coloring to darken the outline of the image. Then I cut the pieces out to create the card. I stitched around the edges of the snowman and card front using my sewing machine, then layered the pieces together to create the card. I stamped a phrase from the set onto a scrap of paper, then cut it out into a tag shape and tied it to the folded side of the card with some inky ribbon.
Holiday Botanical CMS503 – This card was created by creating a background paper first.
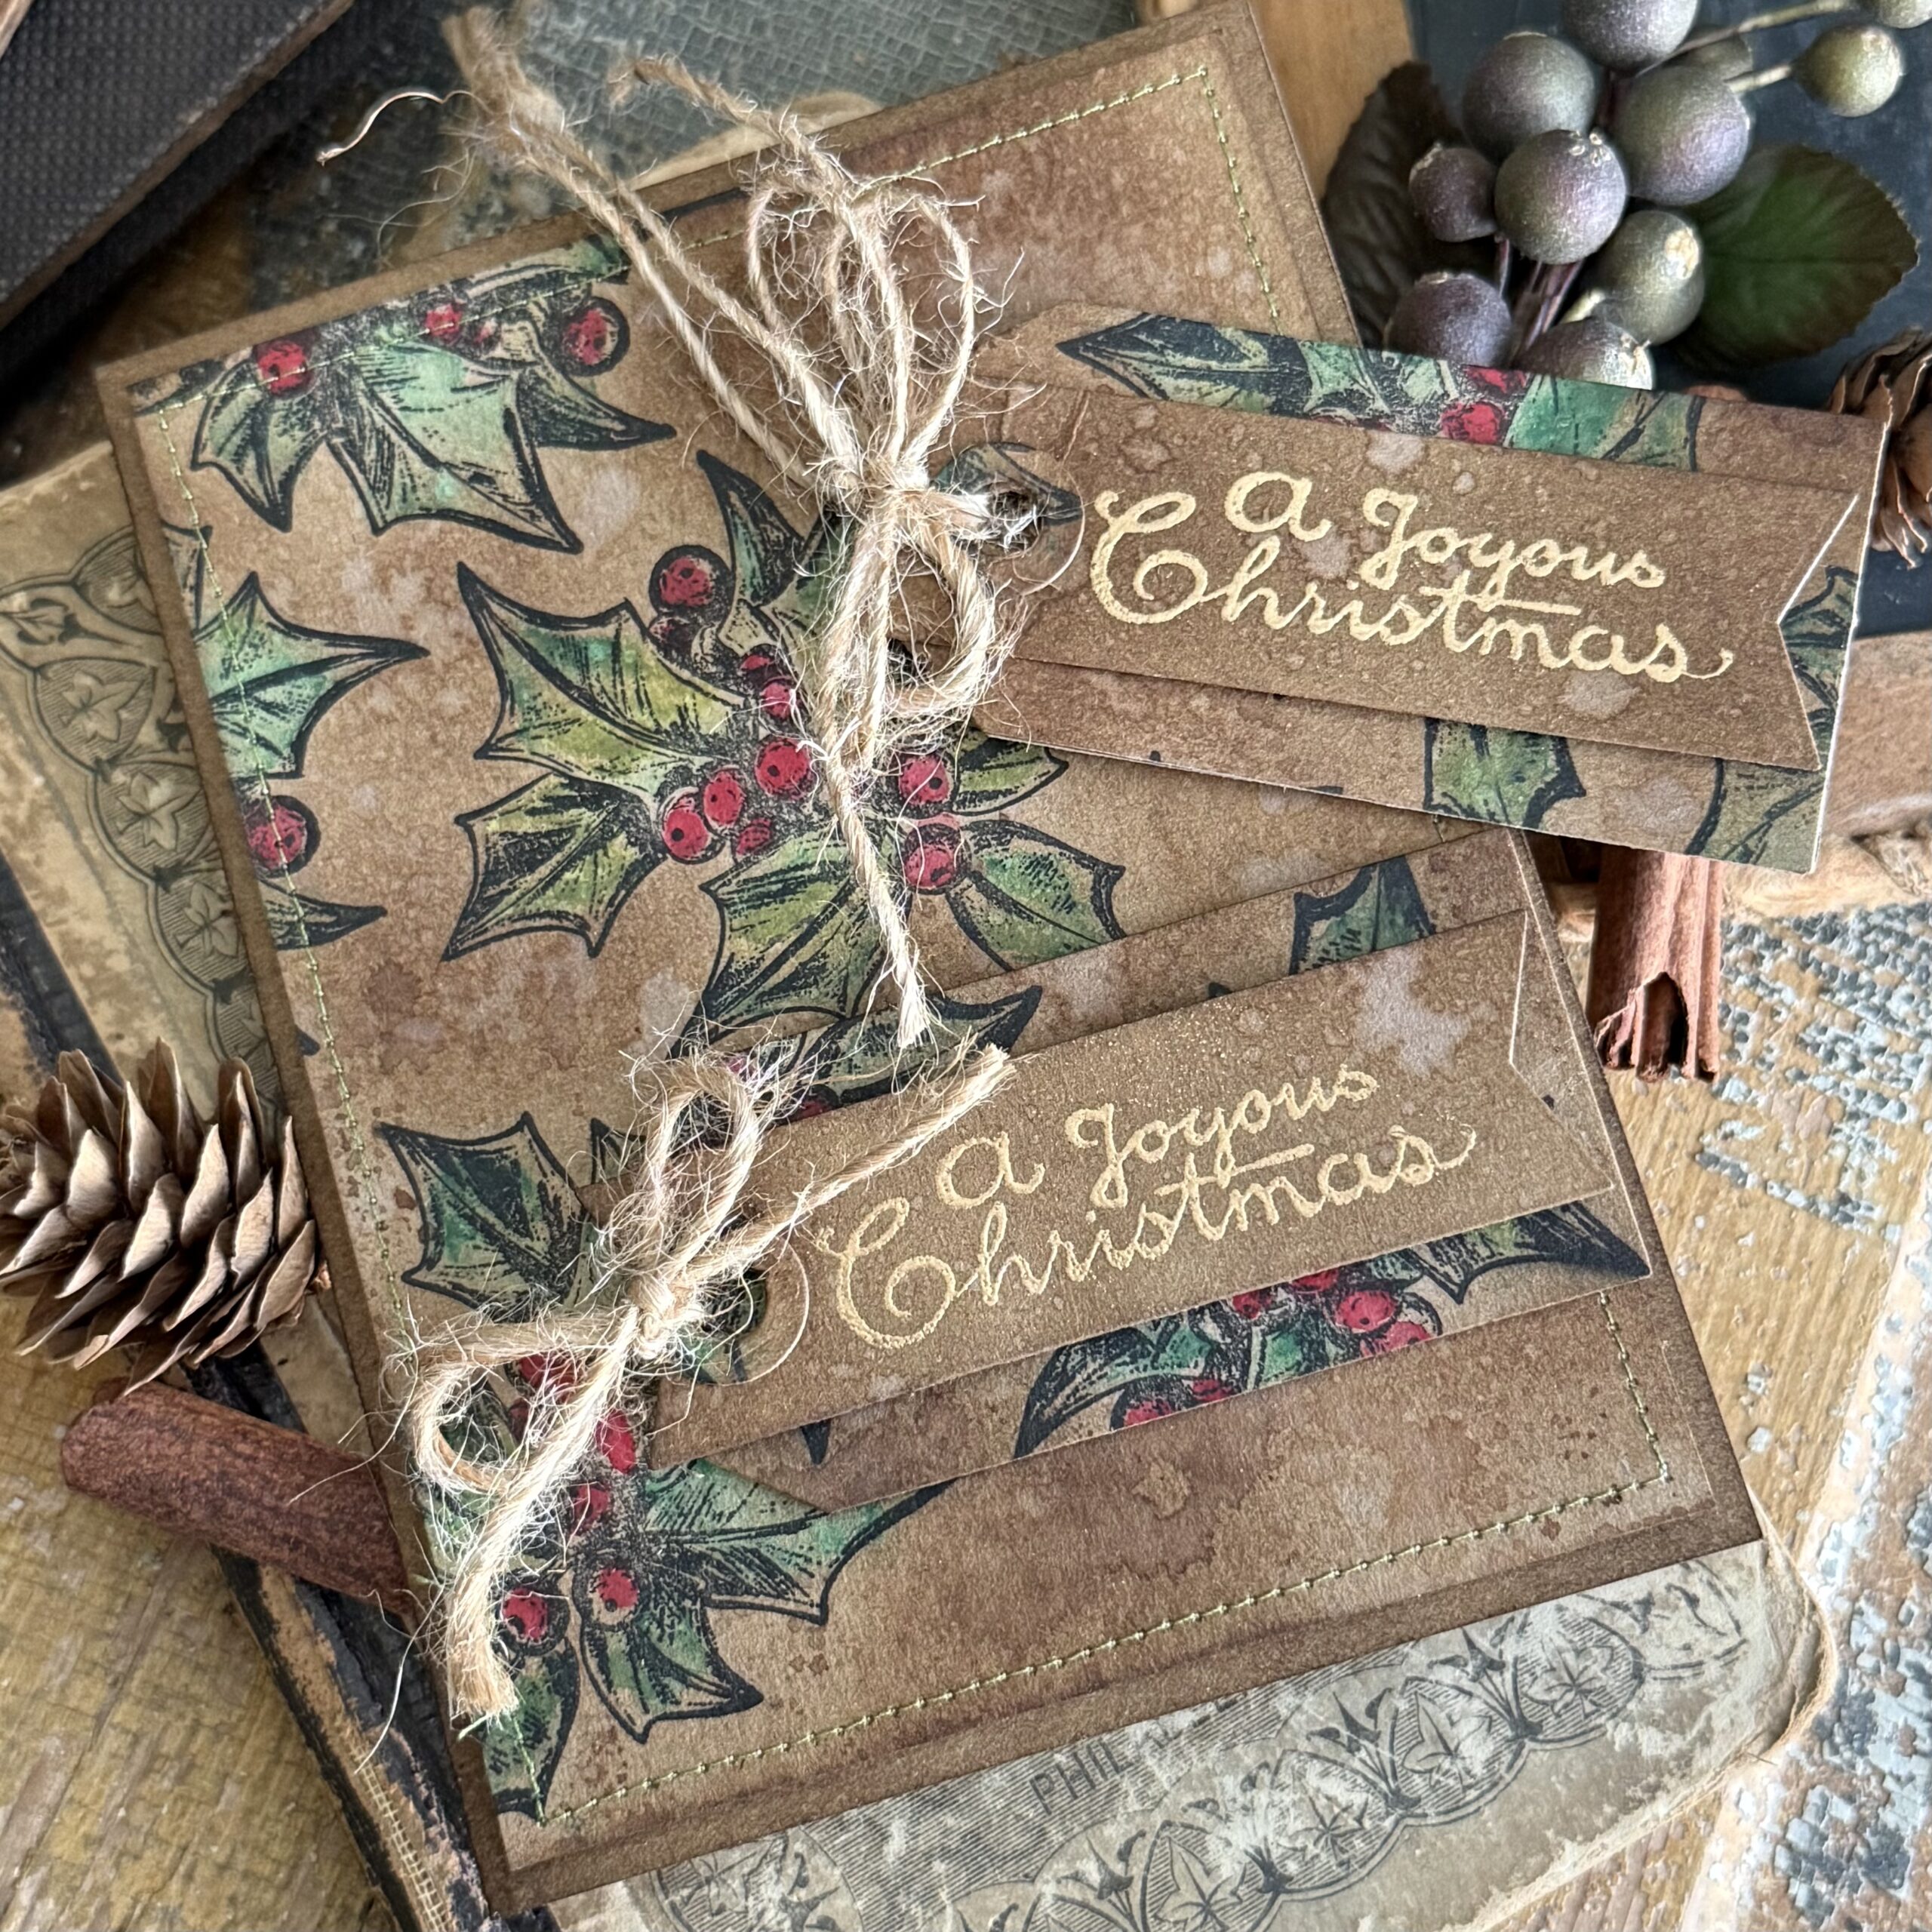
I stamped a piece of Distress Kraft Heavy Stock using my stamp platform. I stamped the first image, colored it with the Distress Watercolor Pencils, dried it, then restamped the image over top of the coloring, then I moved the image into another location, stamped it, colored it, dried it, restamped it, then moved it again. I did this until I had several images in the background in the spaces that looked right. I used Black Soot Archival Ink because it is permanent ink and one that doesn’t run when it gets wet.
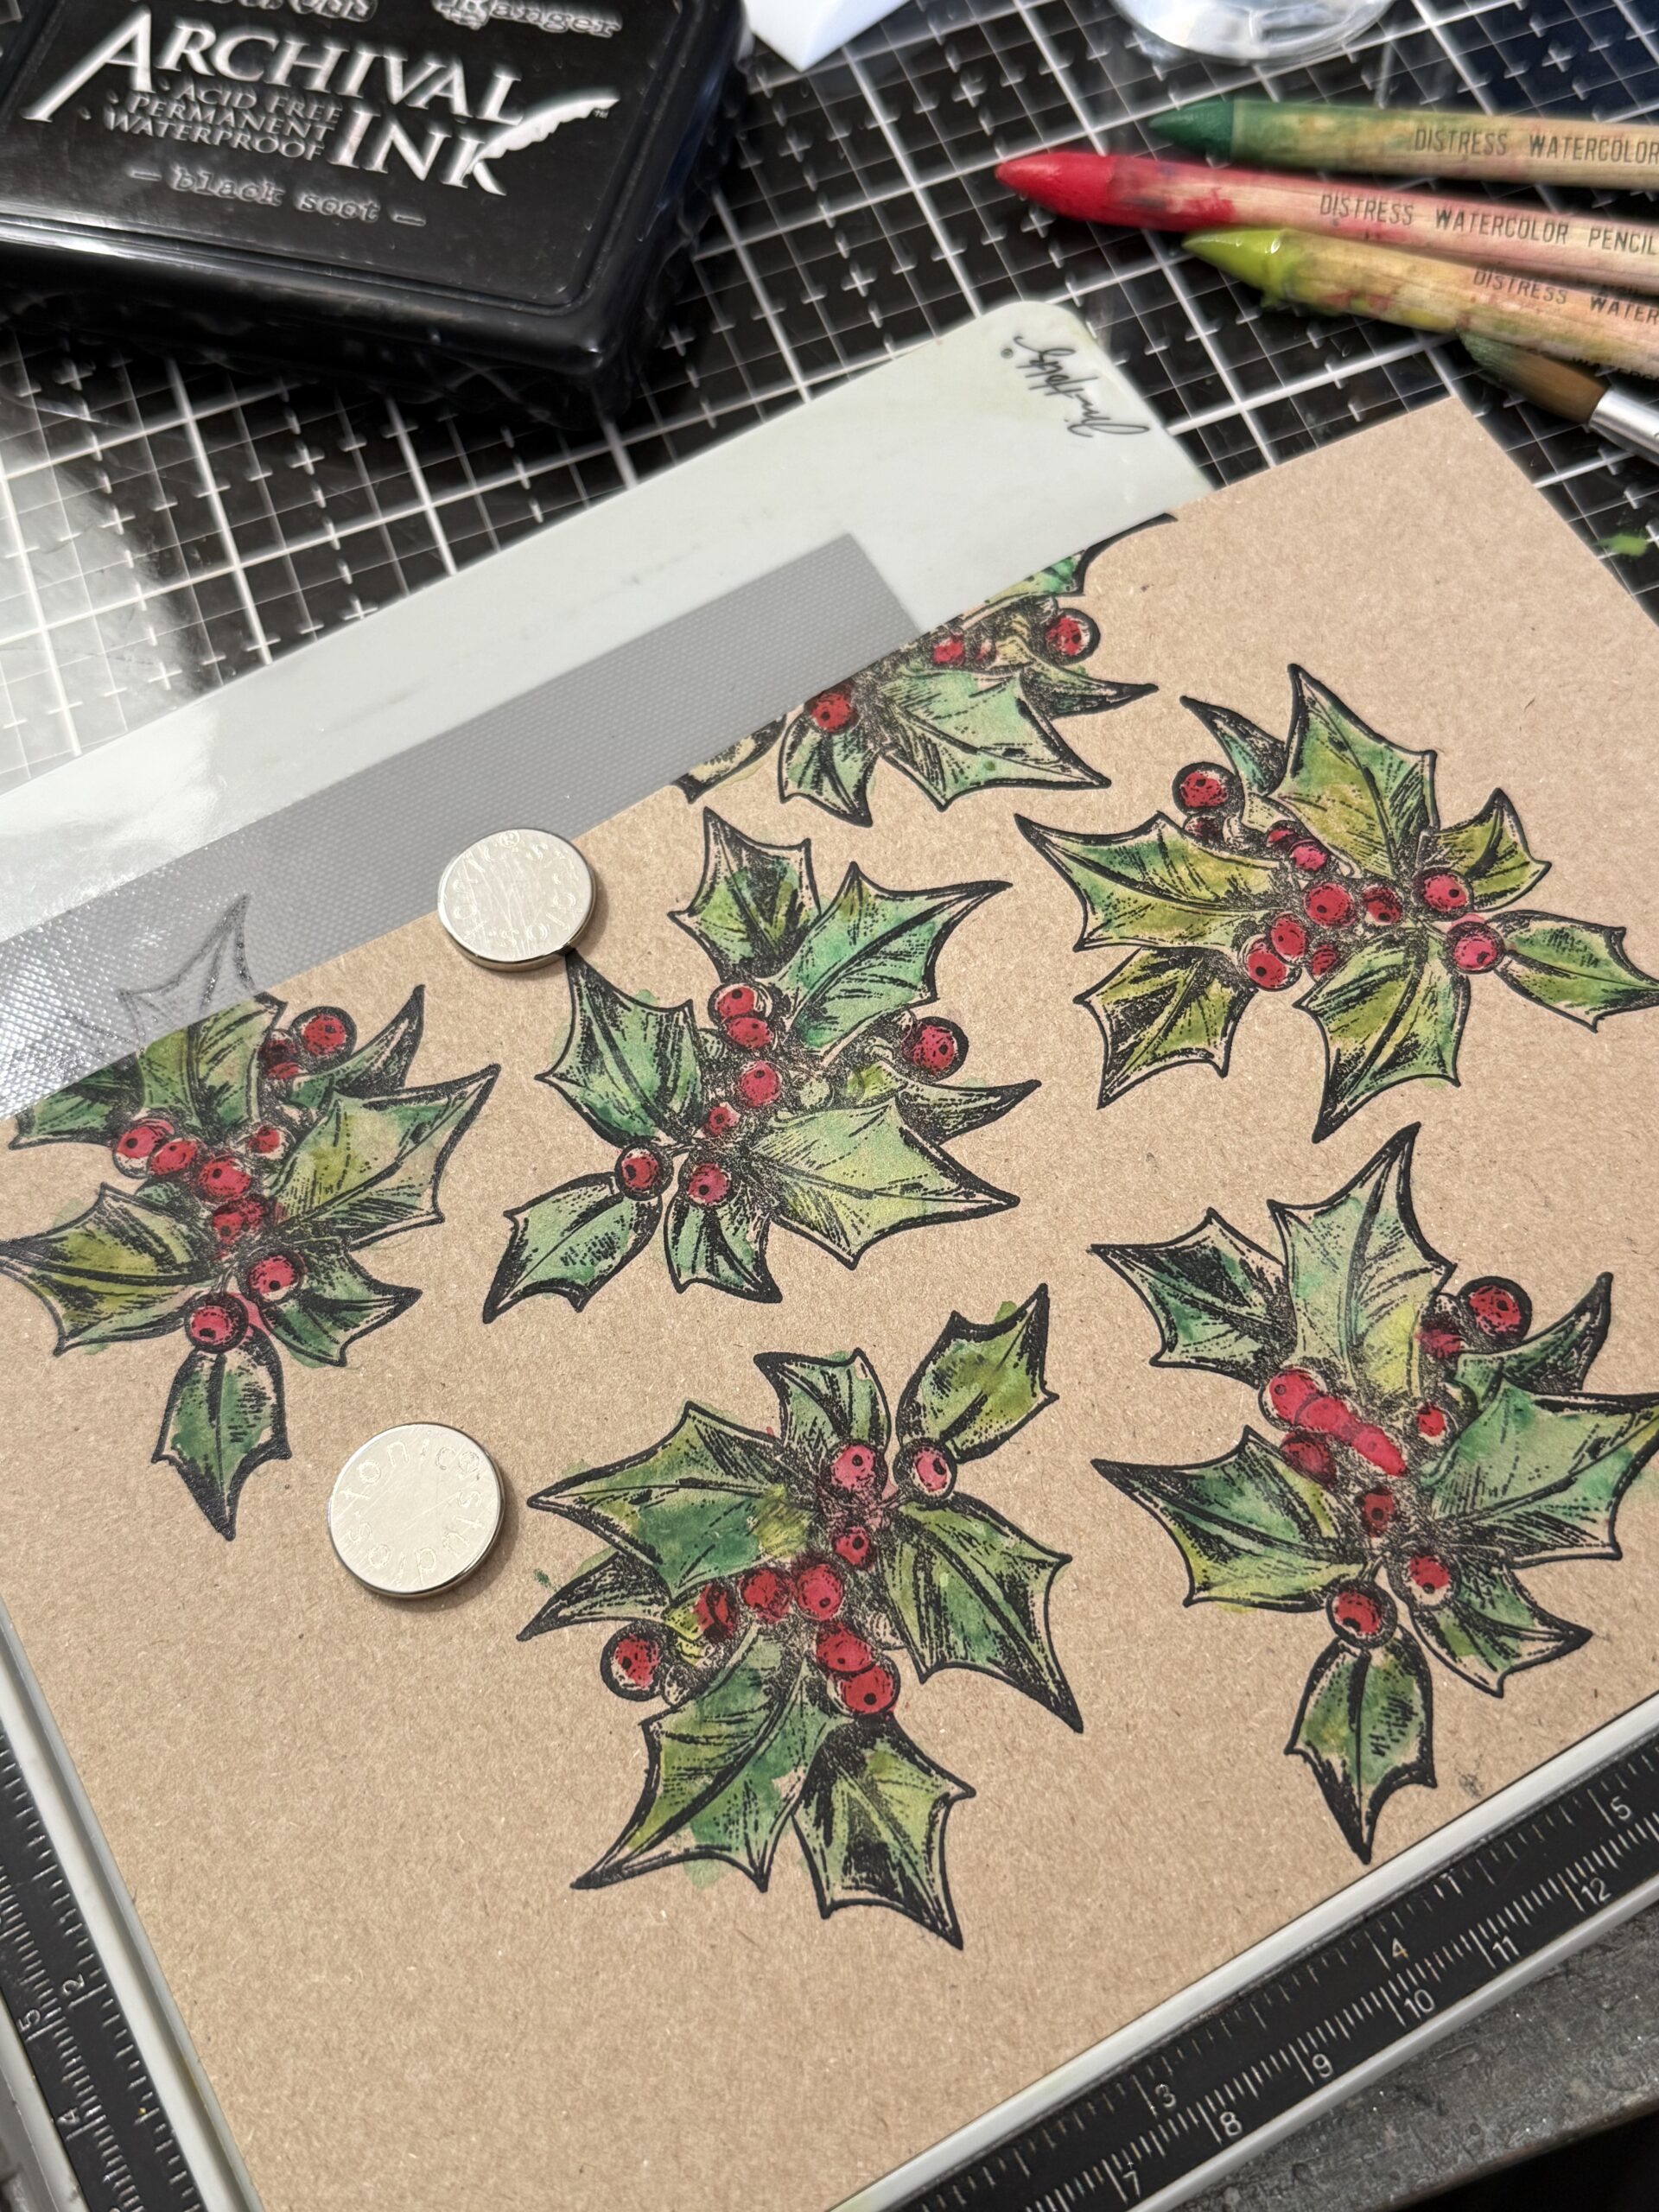
Once I had all the Holly images stamped, I removed the paper from the platform and rubbed the paper using a blending tool using a combination of brown inks. After they were applied, I spritzed the paper with ink, dried some of the wet spots using my heat tool and sopped up the rest of the water droplets with a cotton towel. This created the distressed and aged look that I was going for. This paper was used to cut out the background paper and also a tag for the front of the card.
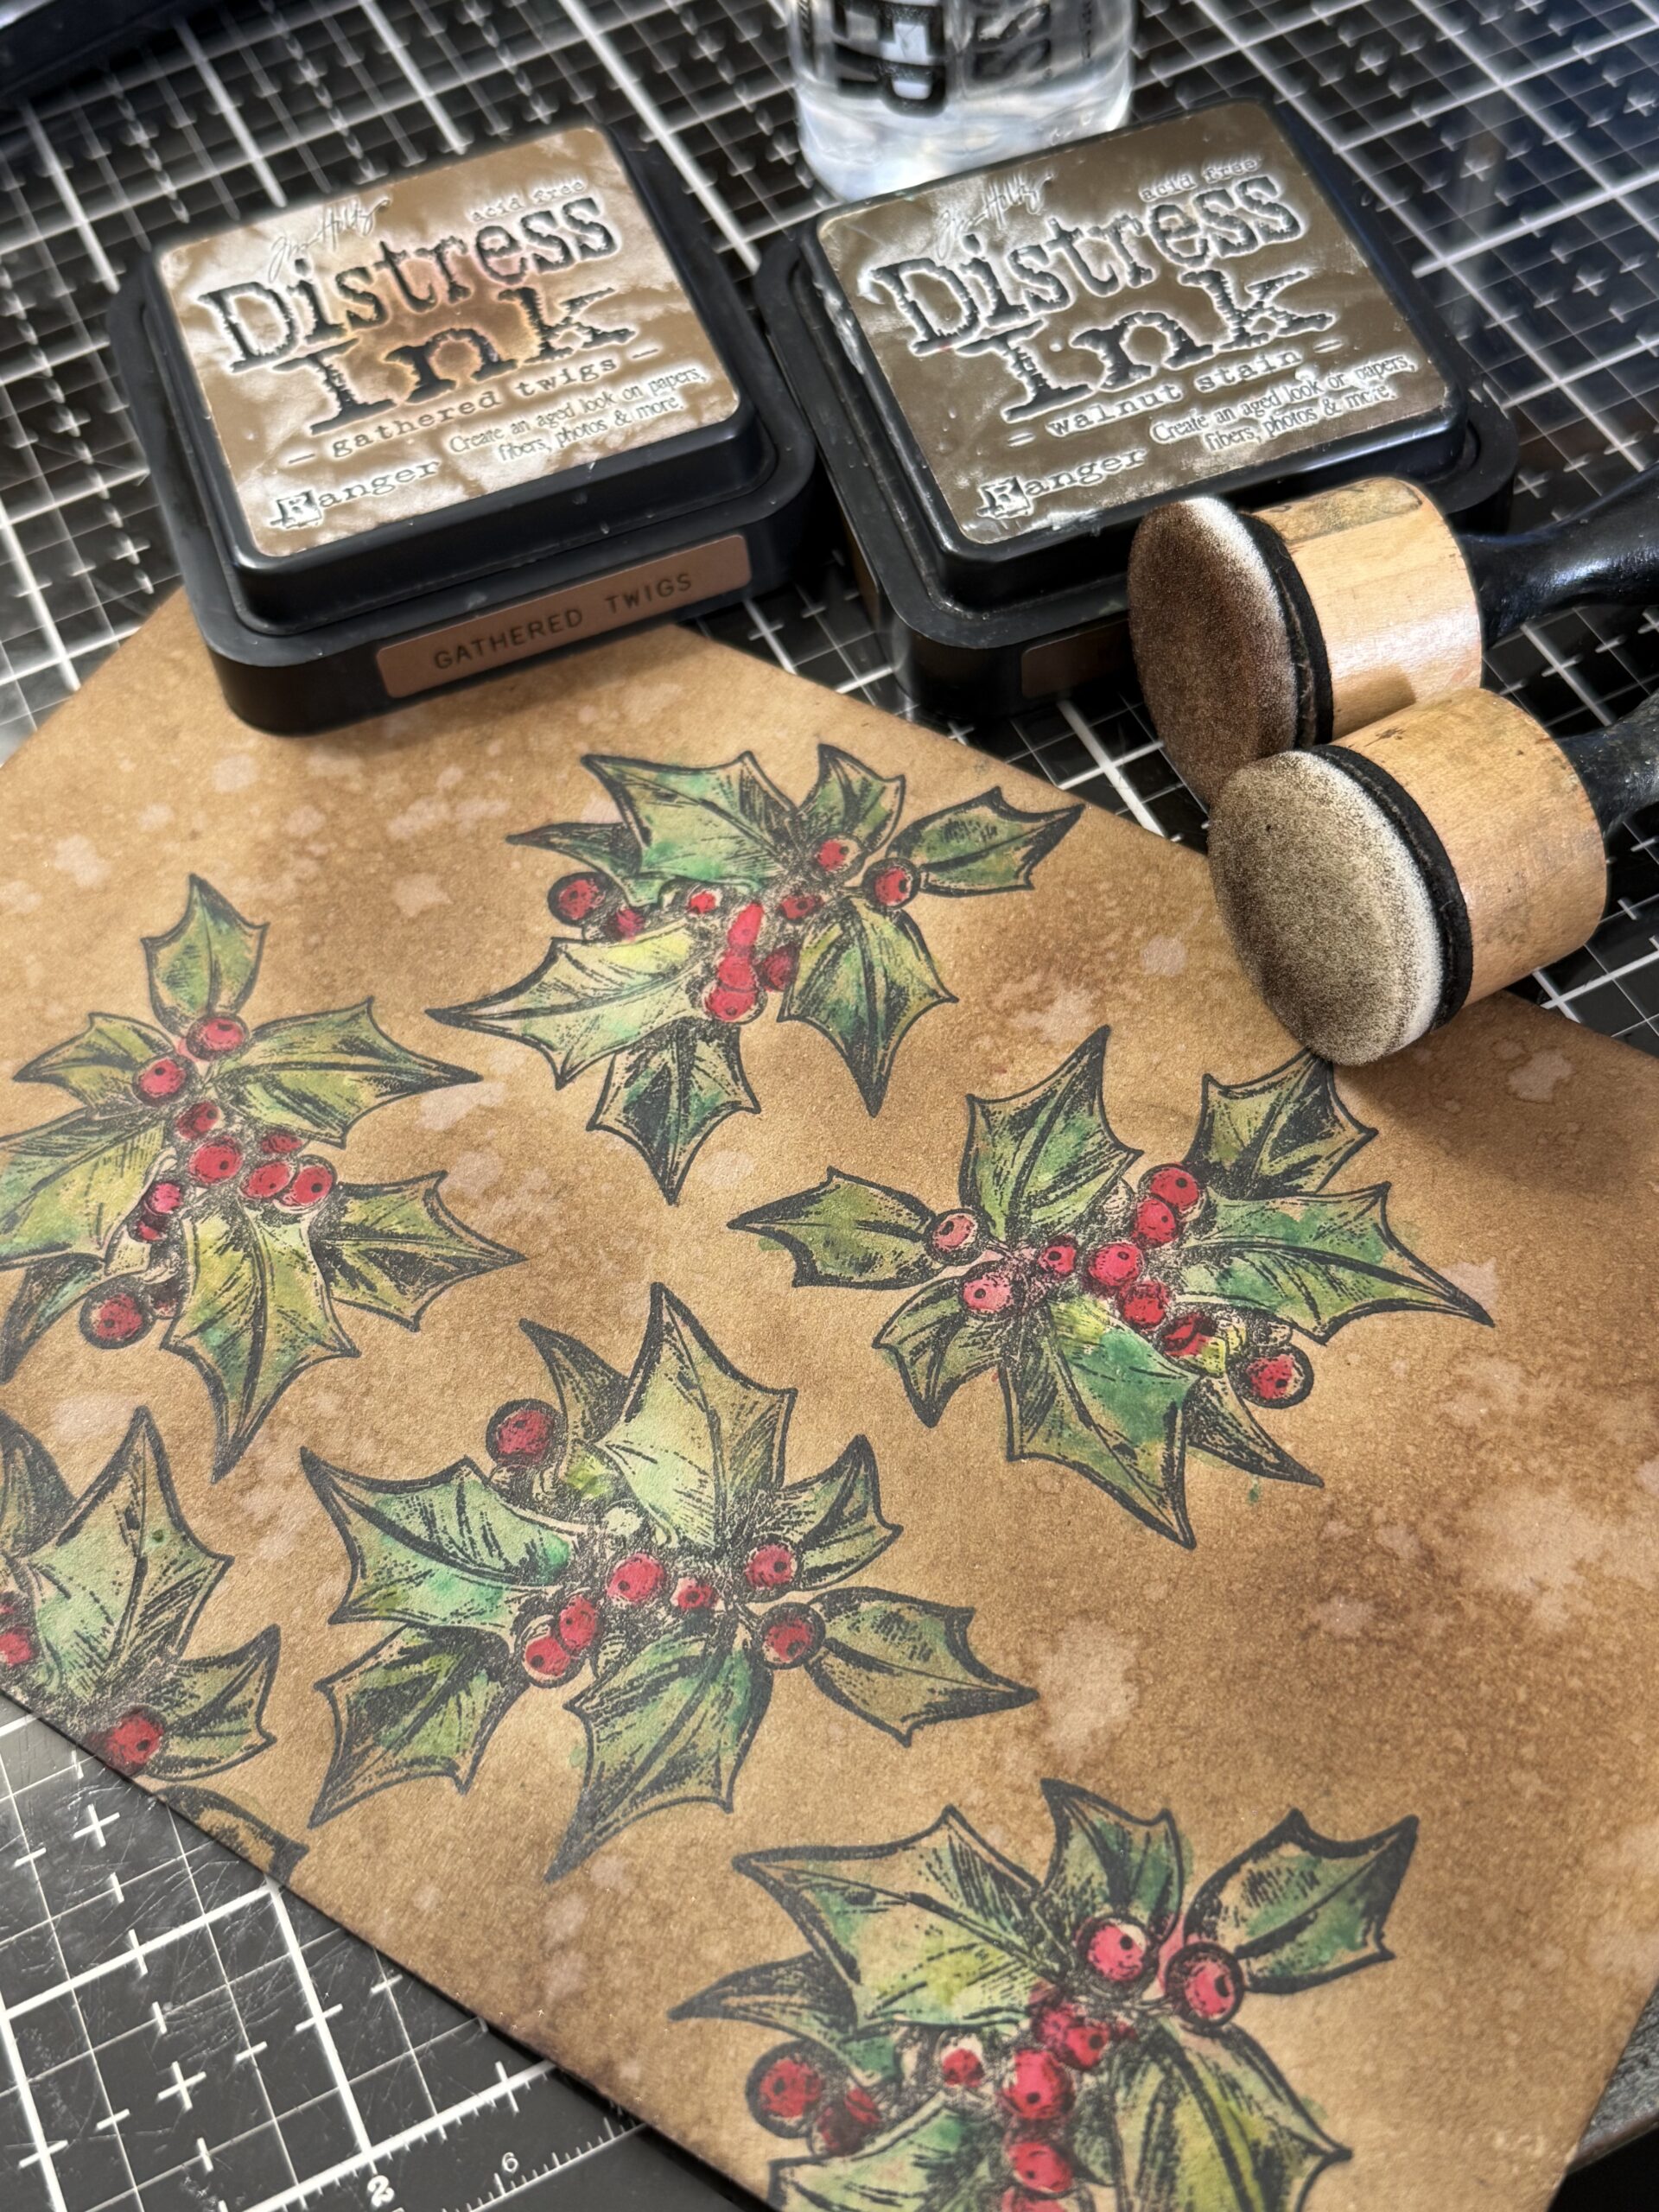
I stamped a phrase on a scrap of Kraft Paper, embossed it with some gold embossing powder and cut it into a tag shape. This was added to the front of the card front. I stitched around the edge of the card front then tied some jute onto the tag, then the pieces were adhered together using foam adhesive..
Christmas Doodles CMS505 – For this card, I colored up several of the little images in the set using Distress Watercolor Pencils and a paint brush.
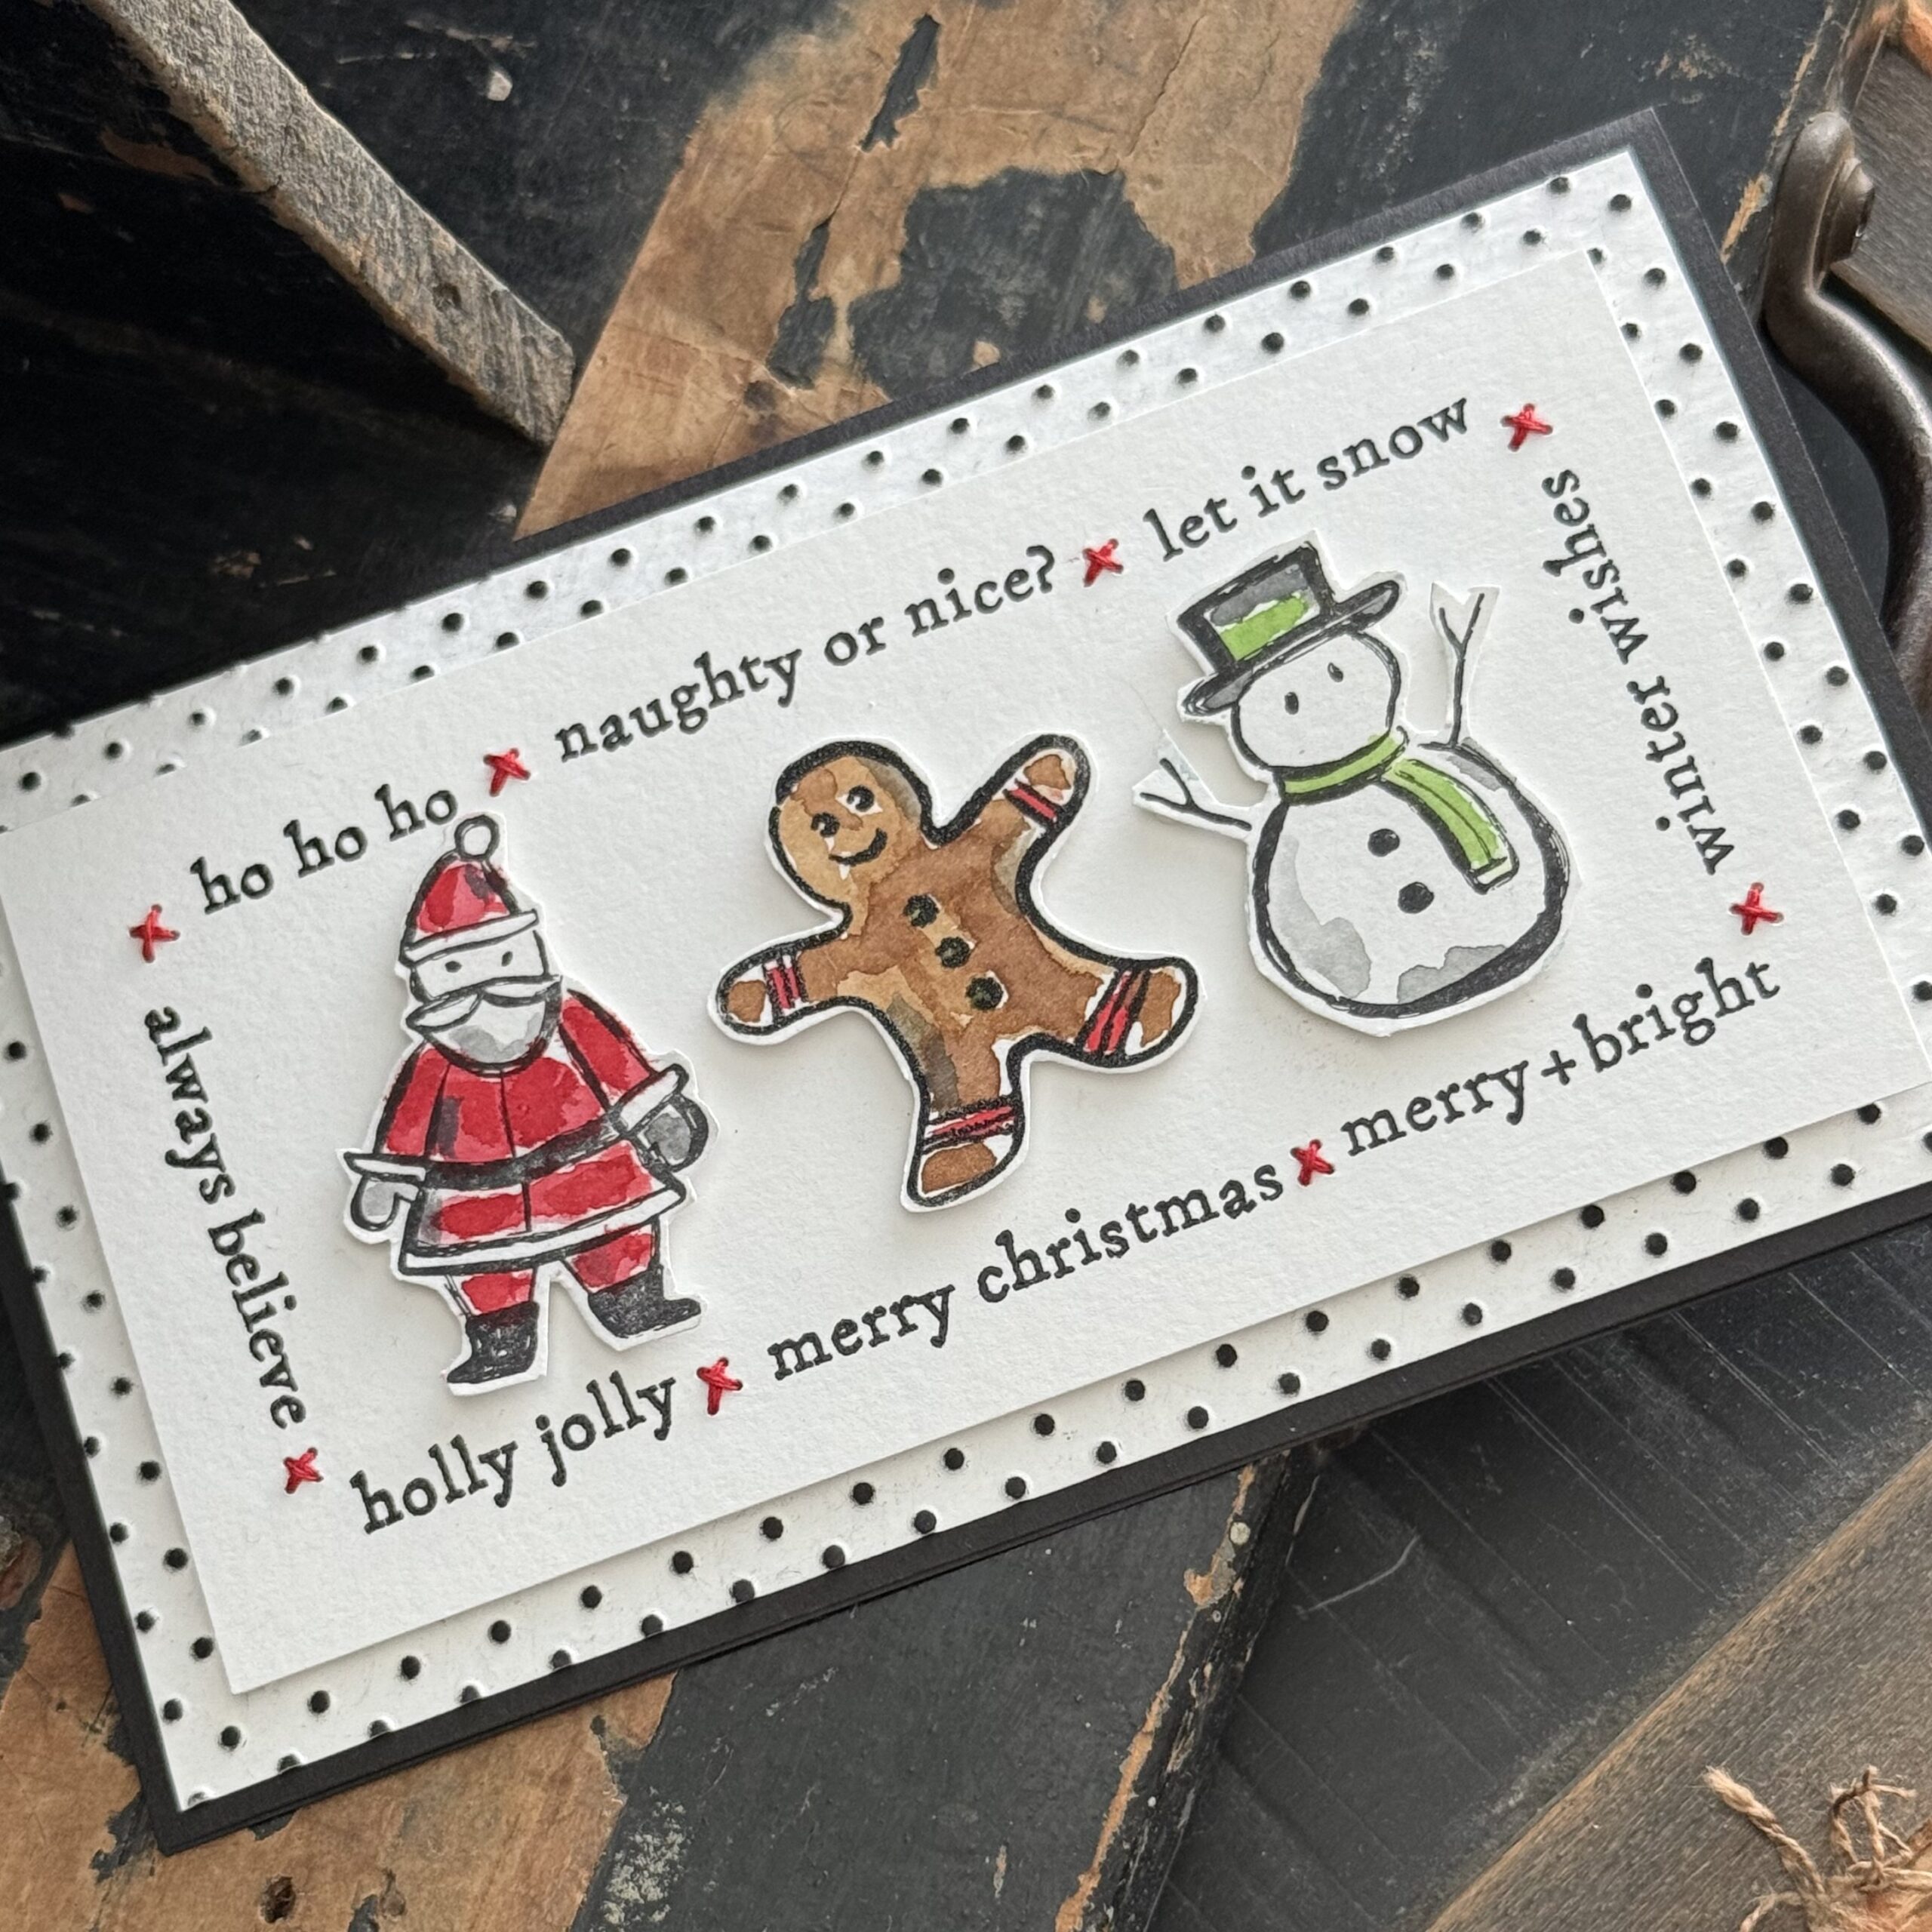
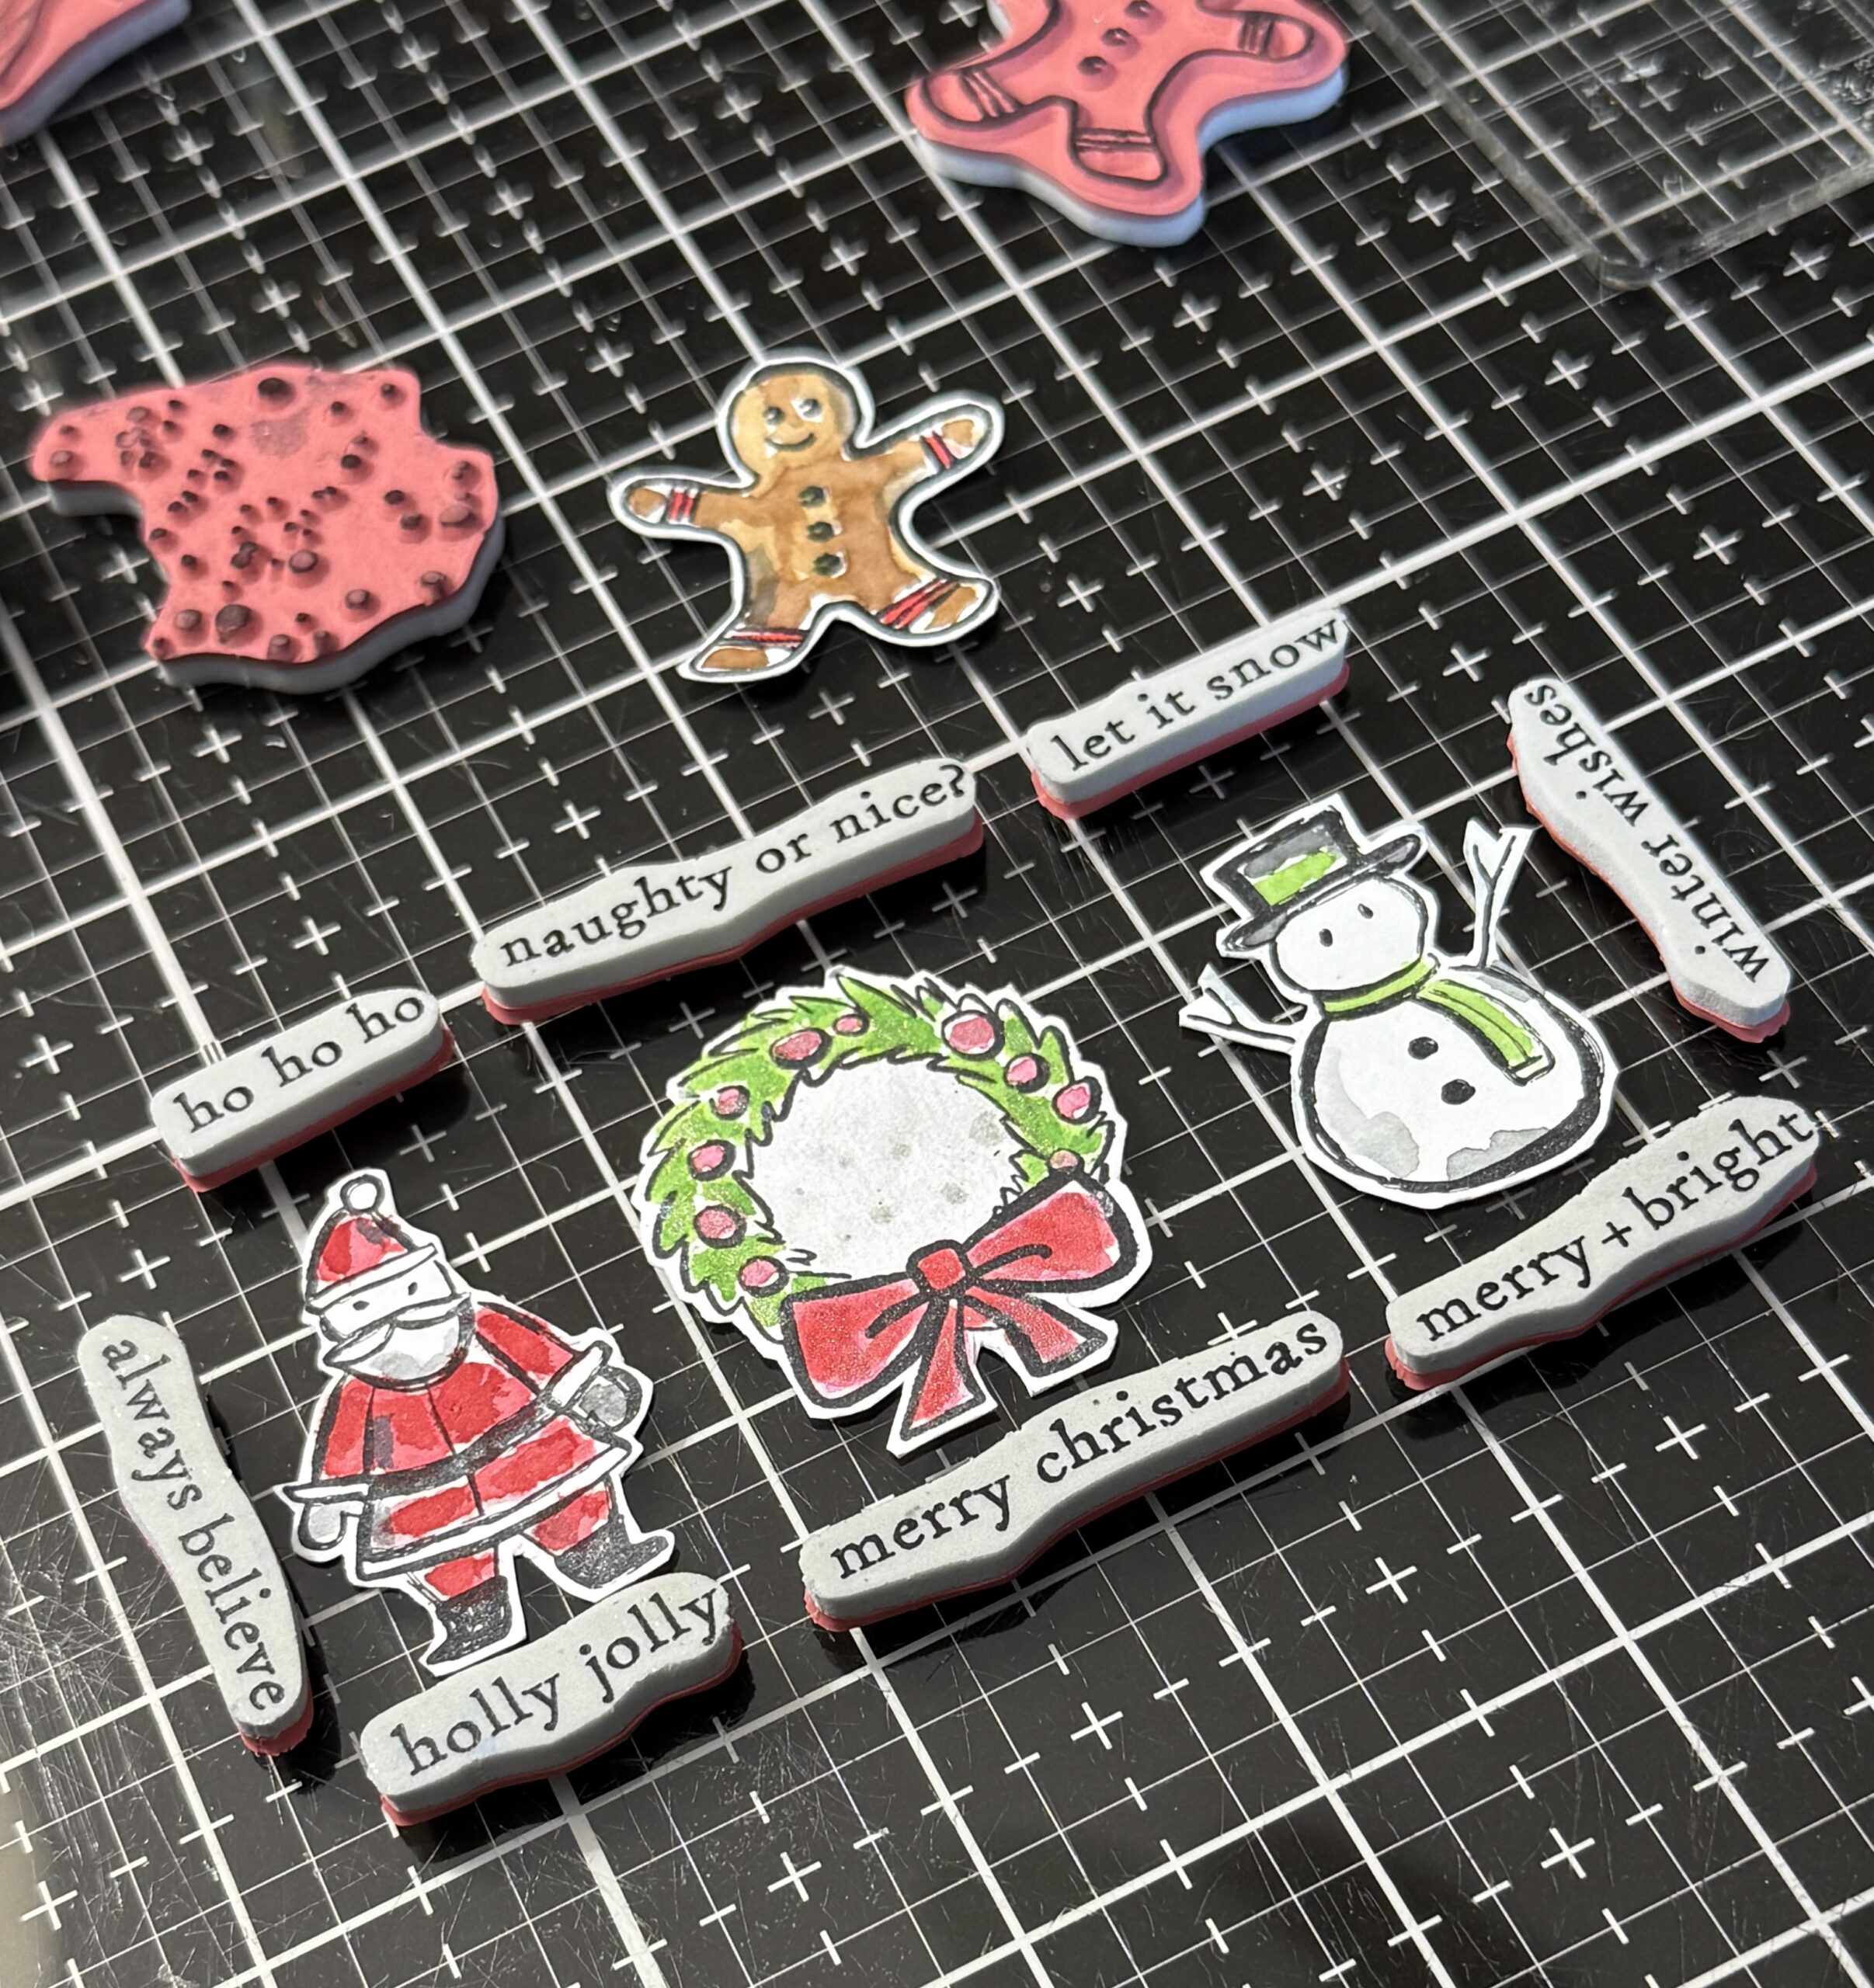
I stamped the images using Black Soot Archival Ink using my stamp platform, then used Distress Watercolor Pencils to color the images, then restamped them once they were dry. I used scissors to fussy cut the images out of the paper, then began arranging some phrases from the stamp set. Then I arranged the little images inside the “word frame”. I arranged the phrases onto a stamp platform using the little shapes as a guide for the spacing.
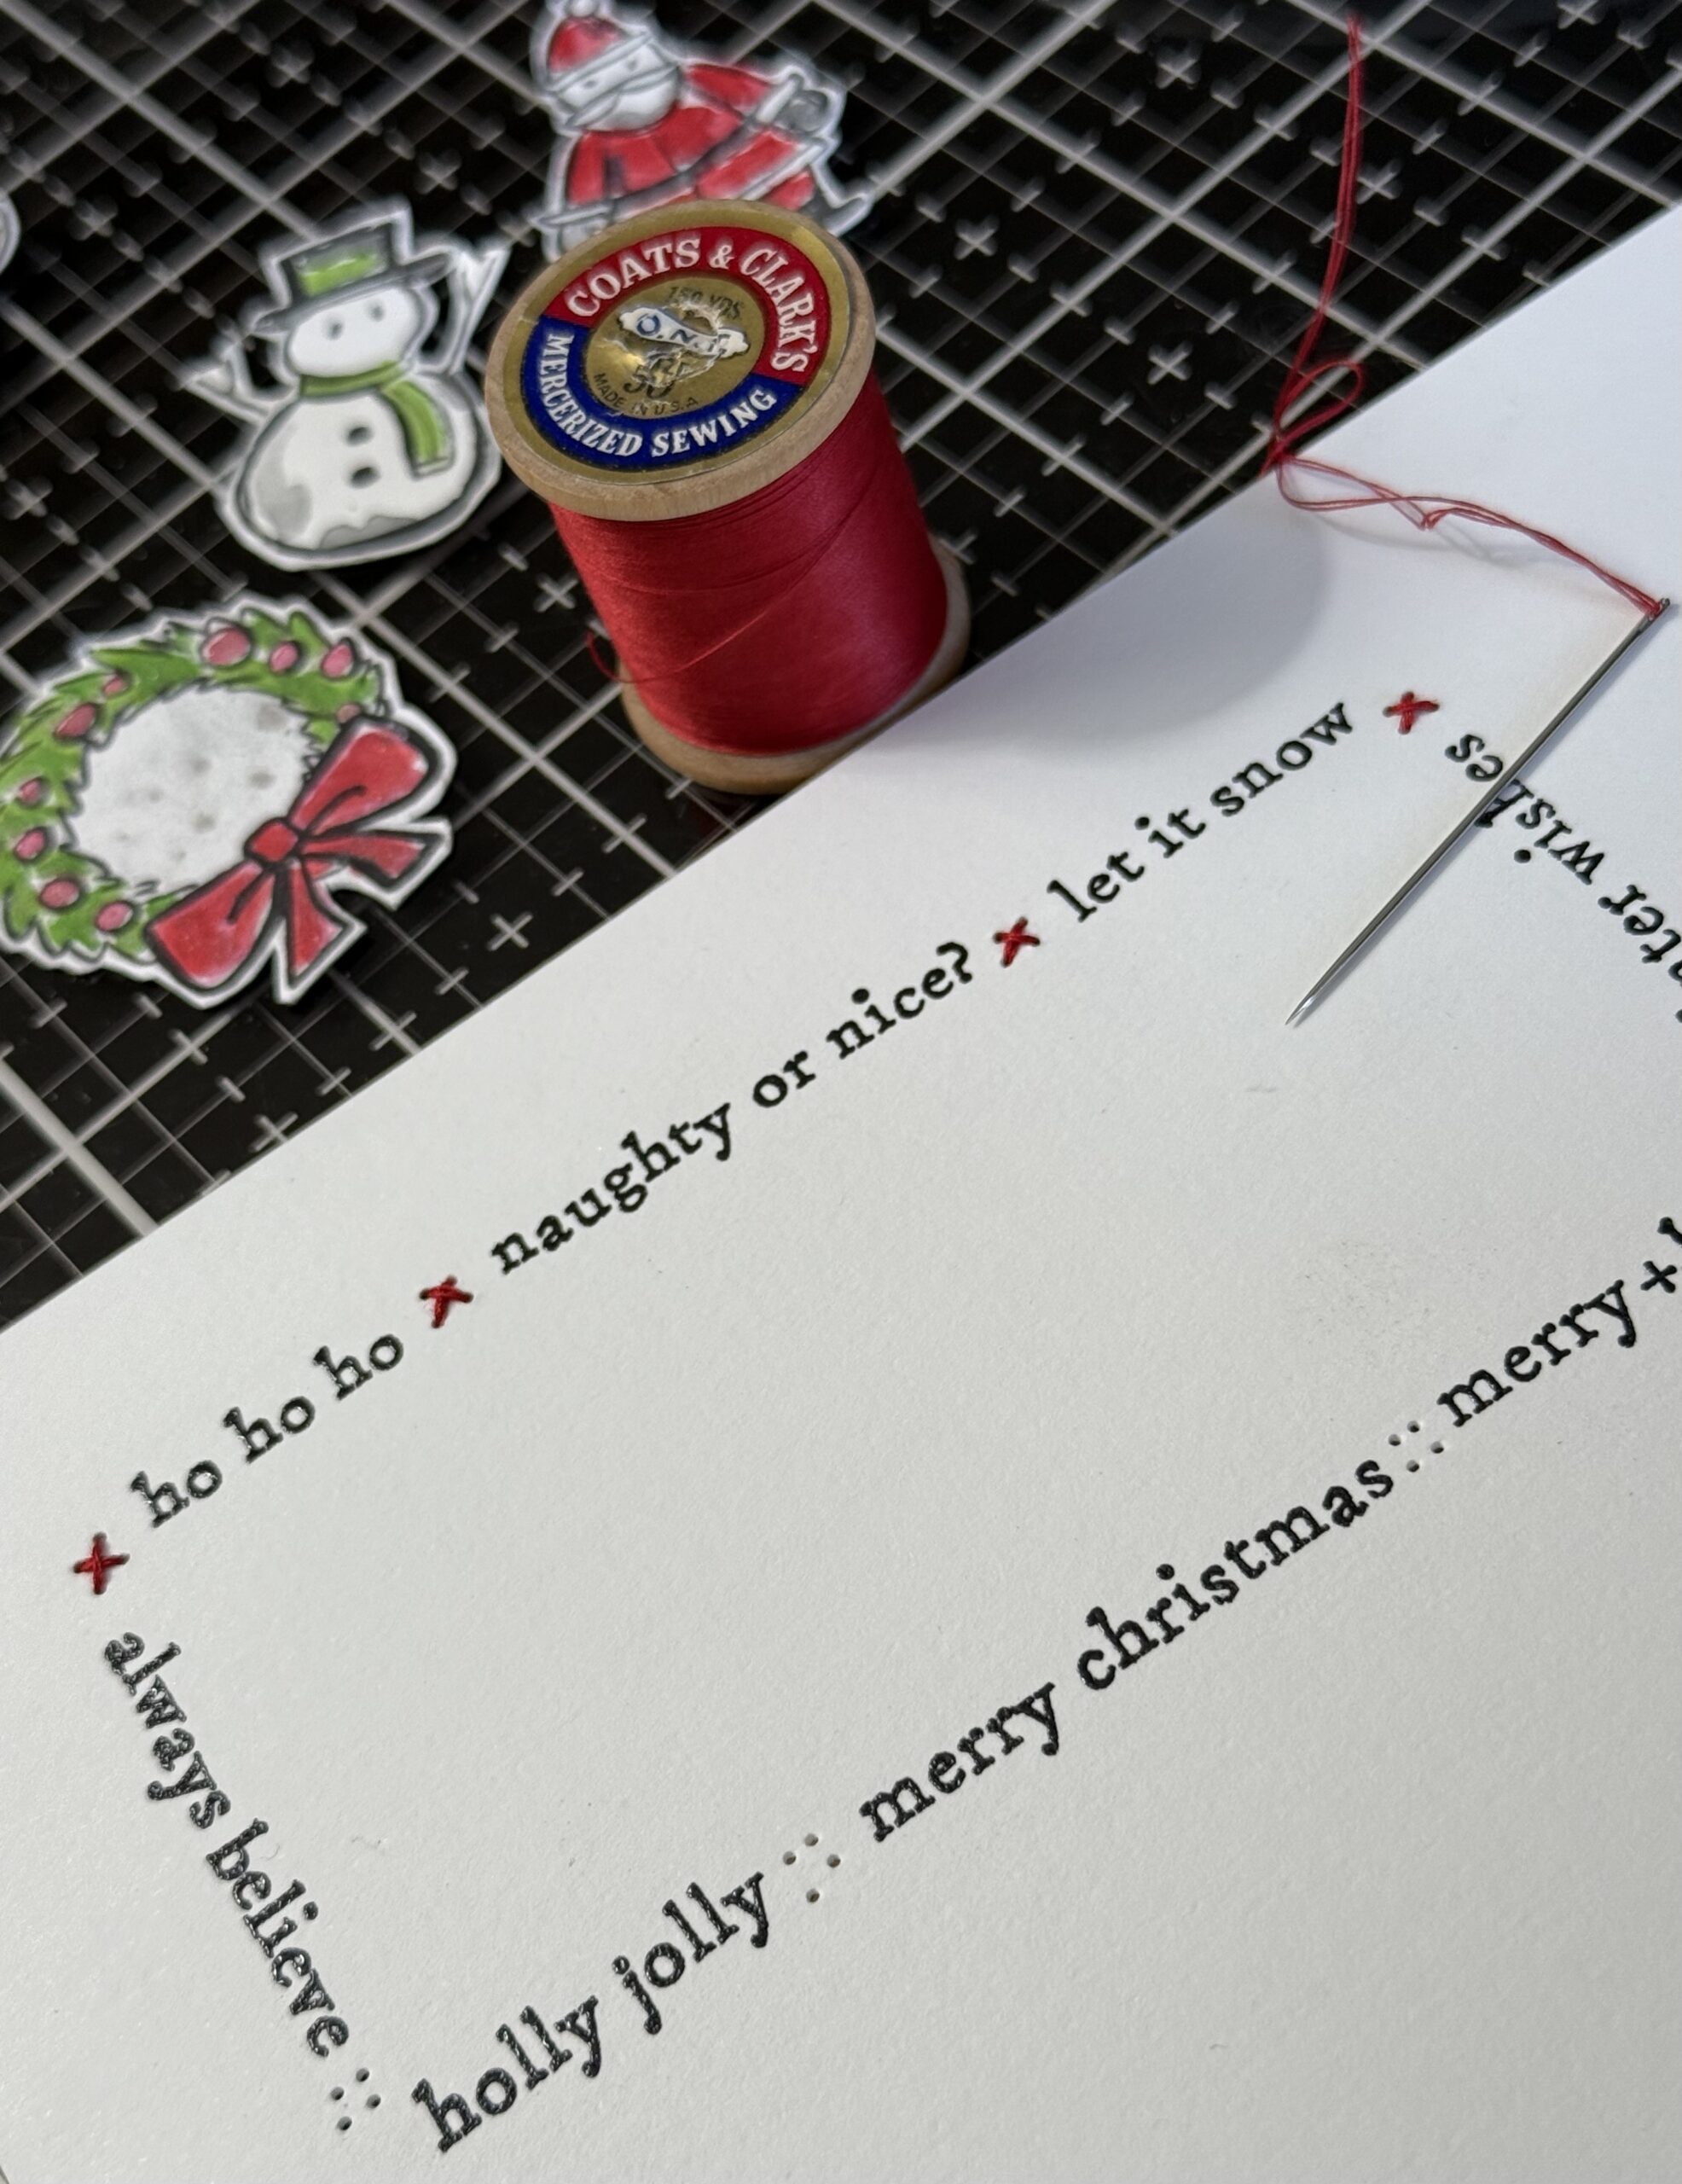
After the phrases were stamped, I used a needle tool to create pokes for some cross-stitches, then I used a needle and some red thread to stitch the little cross-stitches into place. I stitched these little cross-stitches in-between each phrase around the frame. once done, I used a couple piece of tape on the flip-side of the paper to hold the last stitch in place. I added the cut-out shaped to the front of the phrase layer using foam adhesive. I trimmed the paper using my paper trimmer leaving approximately a 1/2″ border.
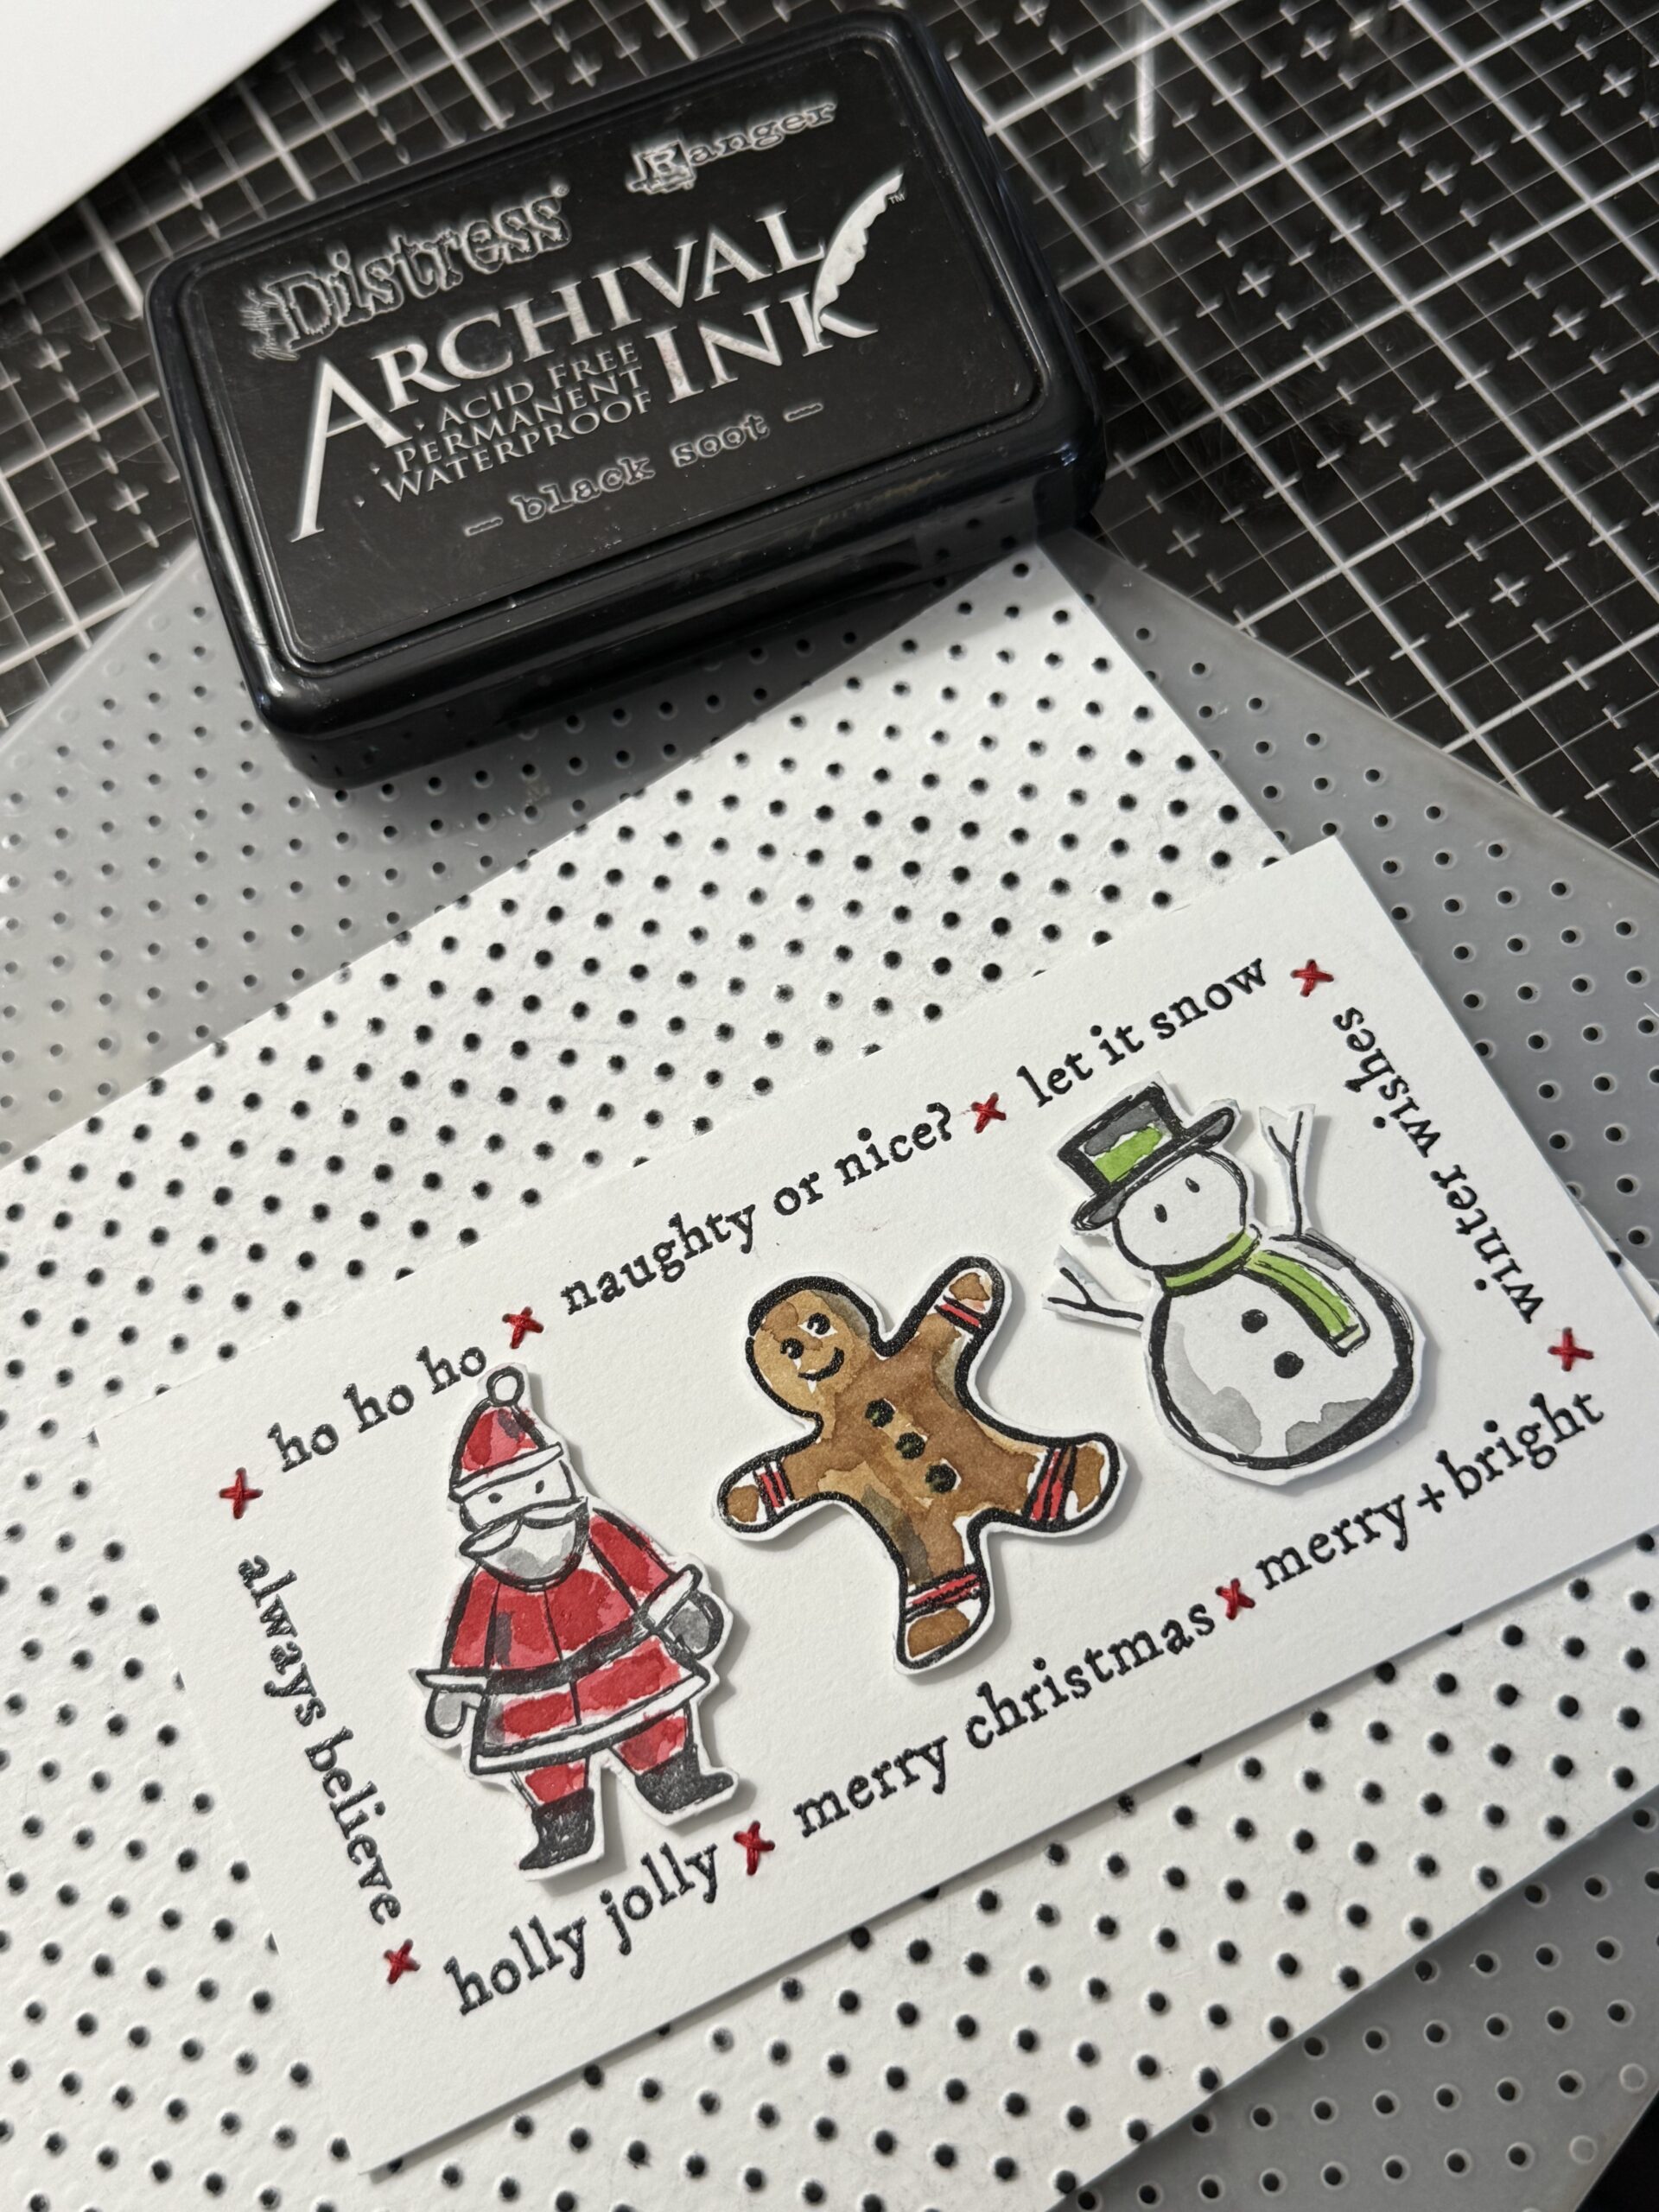
I used the Tim Holtz large Polka Dot Embossing Folder and some Distress Watercolor Paper and embossed some dots onto the paper, then I used the Black Soot Stamp Pad flipped over, pad size down and added the ink to the dots, then I dried the polka dot paper and added it behind the stitched paper to form a card front.
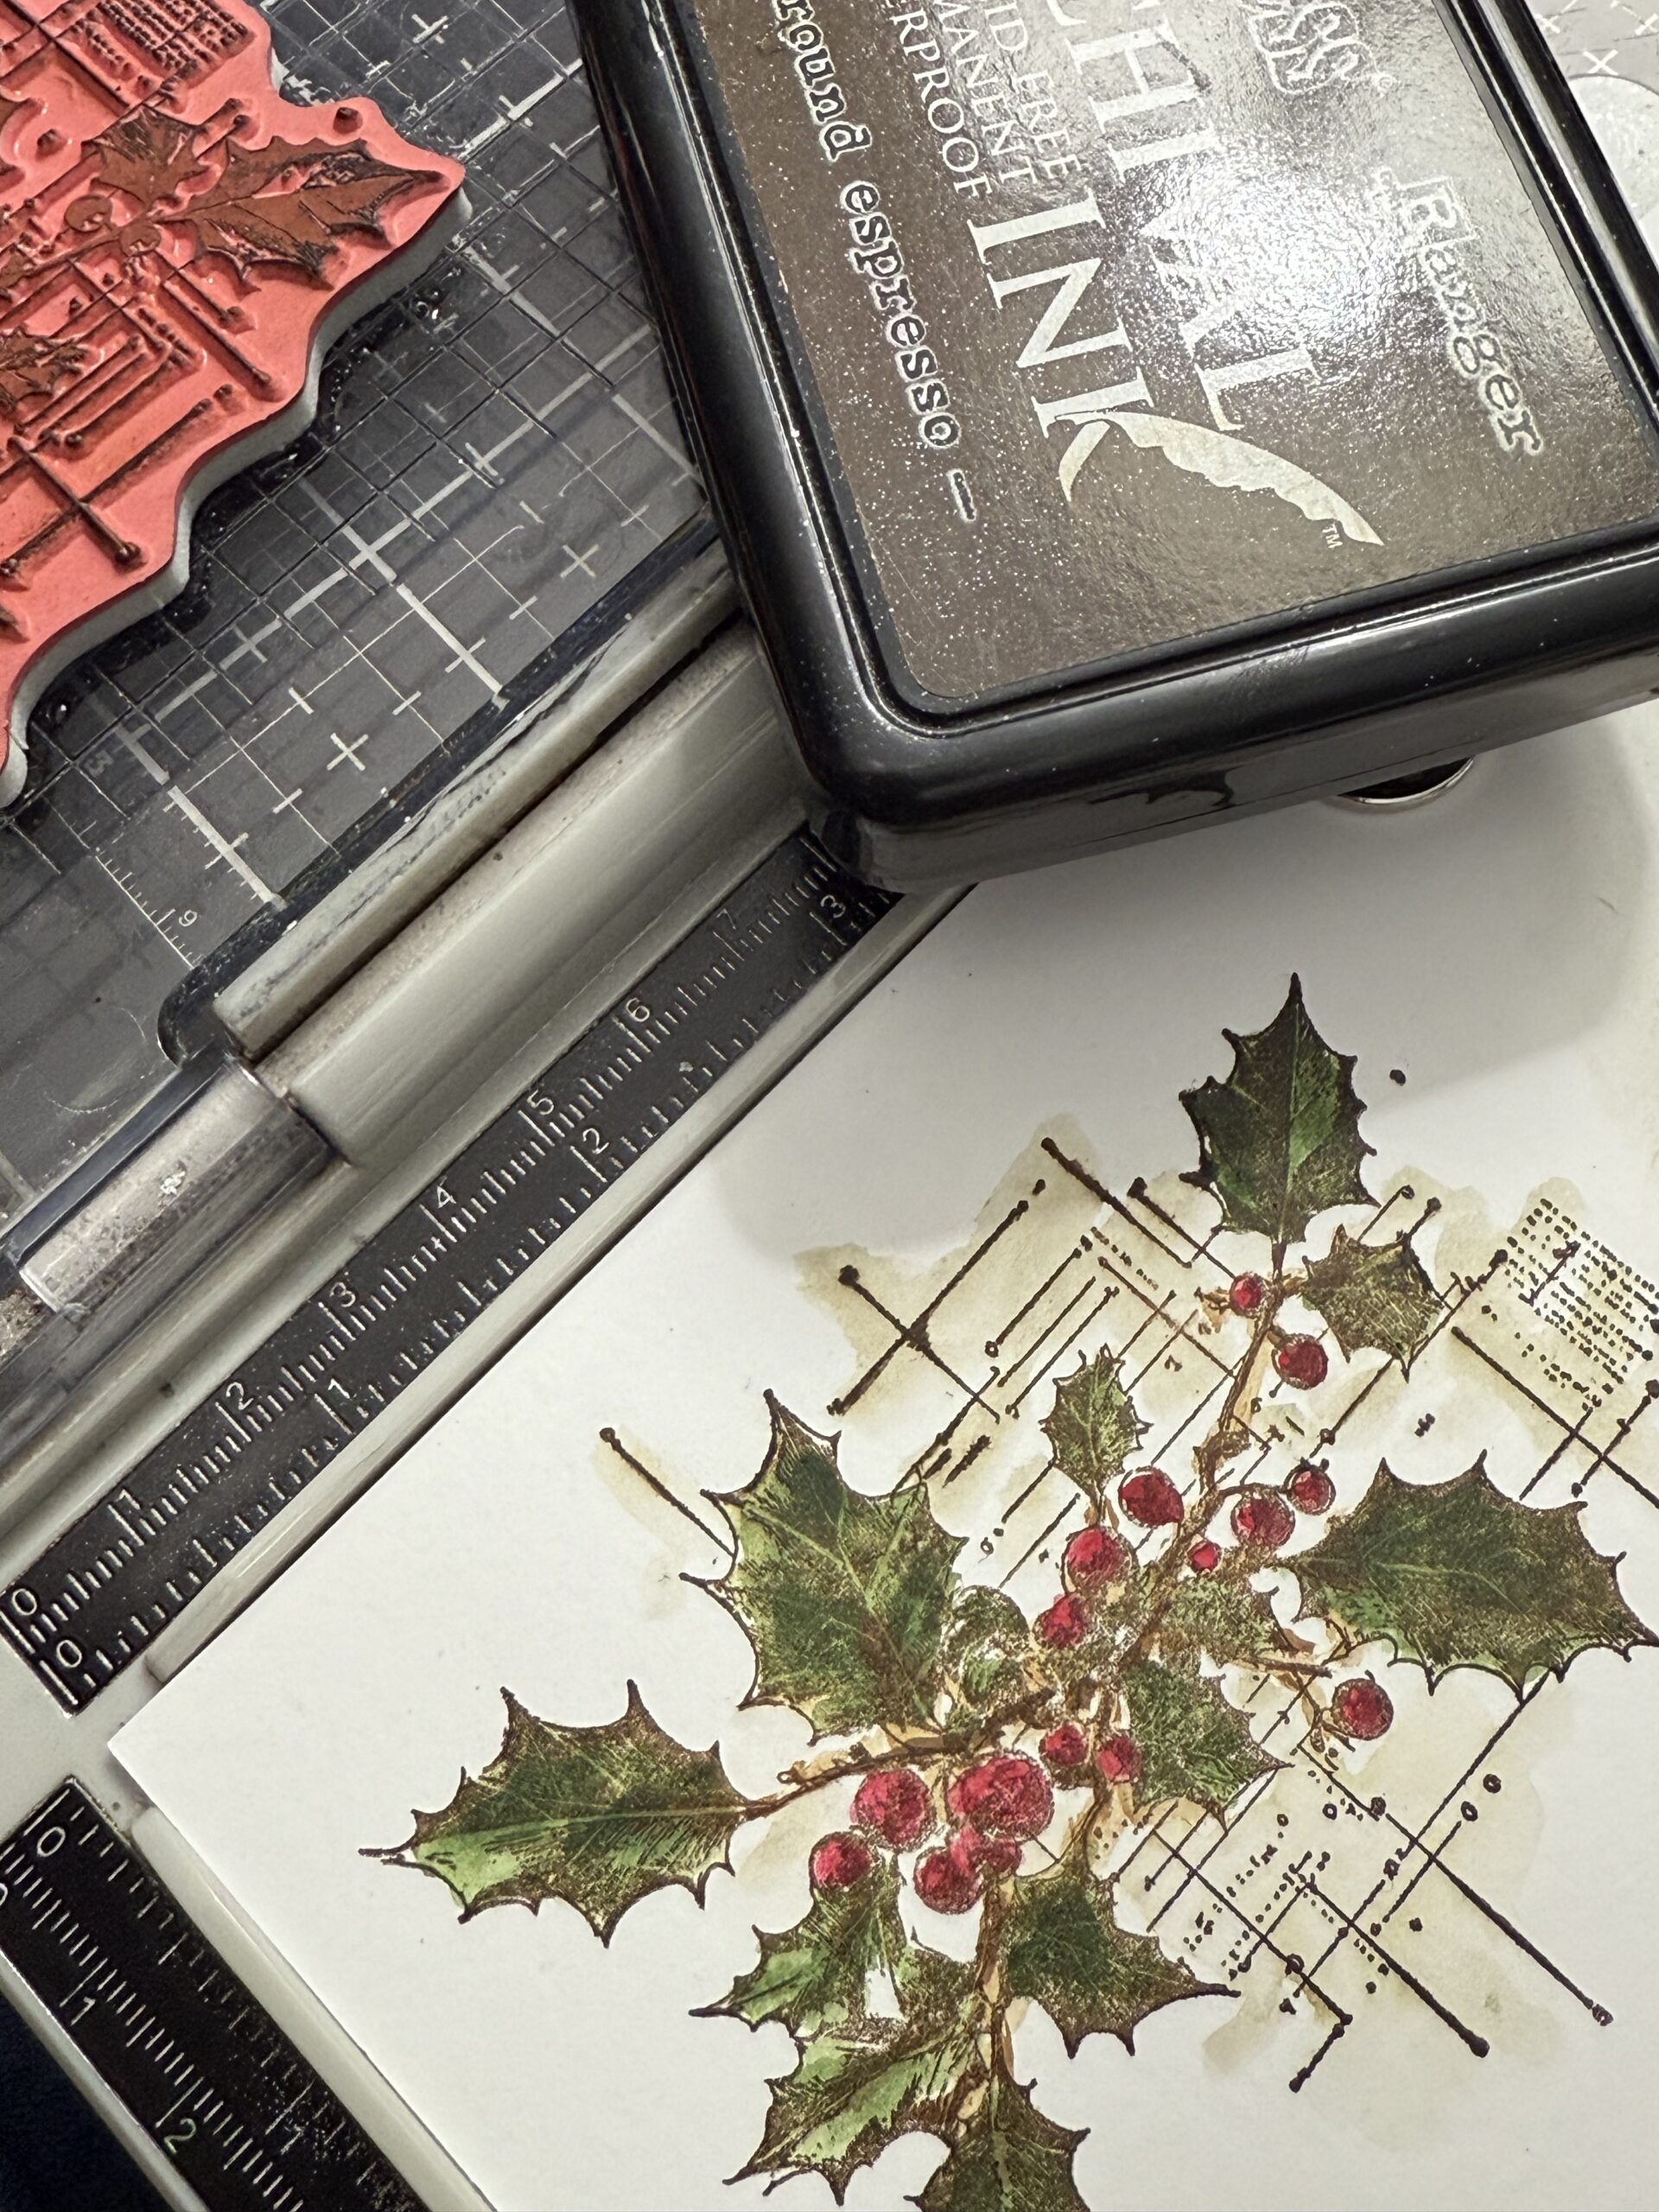
Festive Schematic CMS502
This card was created using Distress Paints. I have always loved igirlzoe.com ways of coloring detailed stamps and I decided to give that process of coloring a try. I can’t remember which particular project she had done the technique to in the past, but I specifically remember it was used on a more detailed stamp.
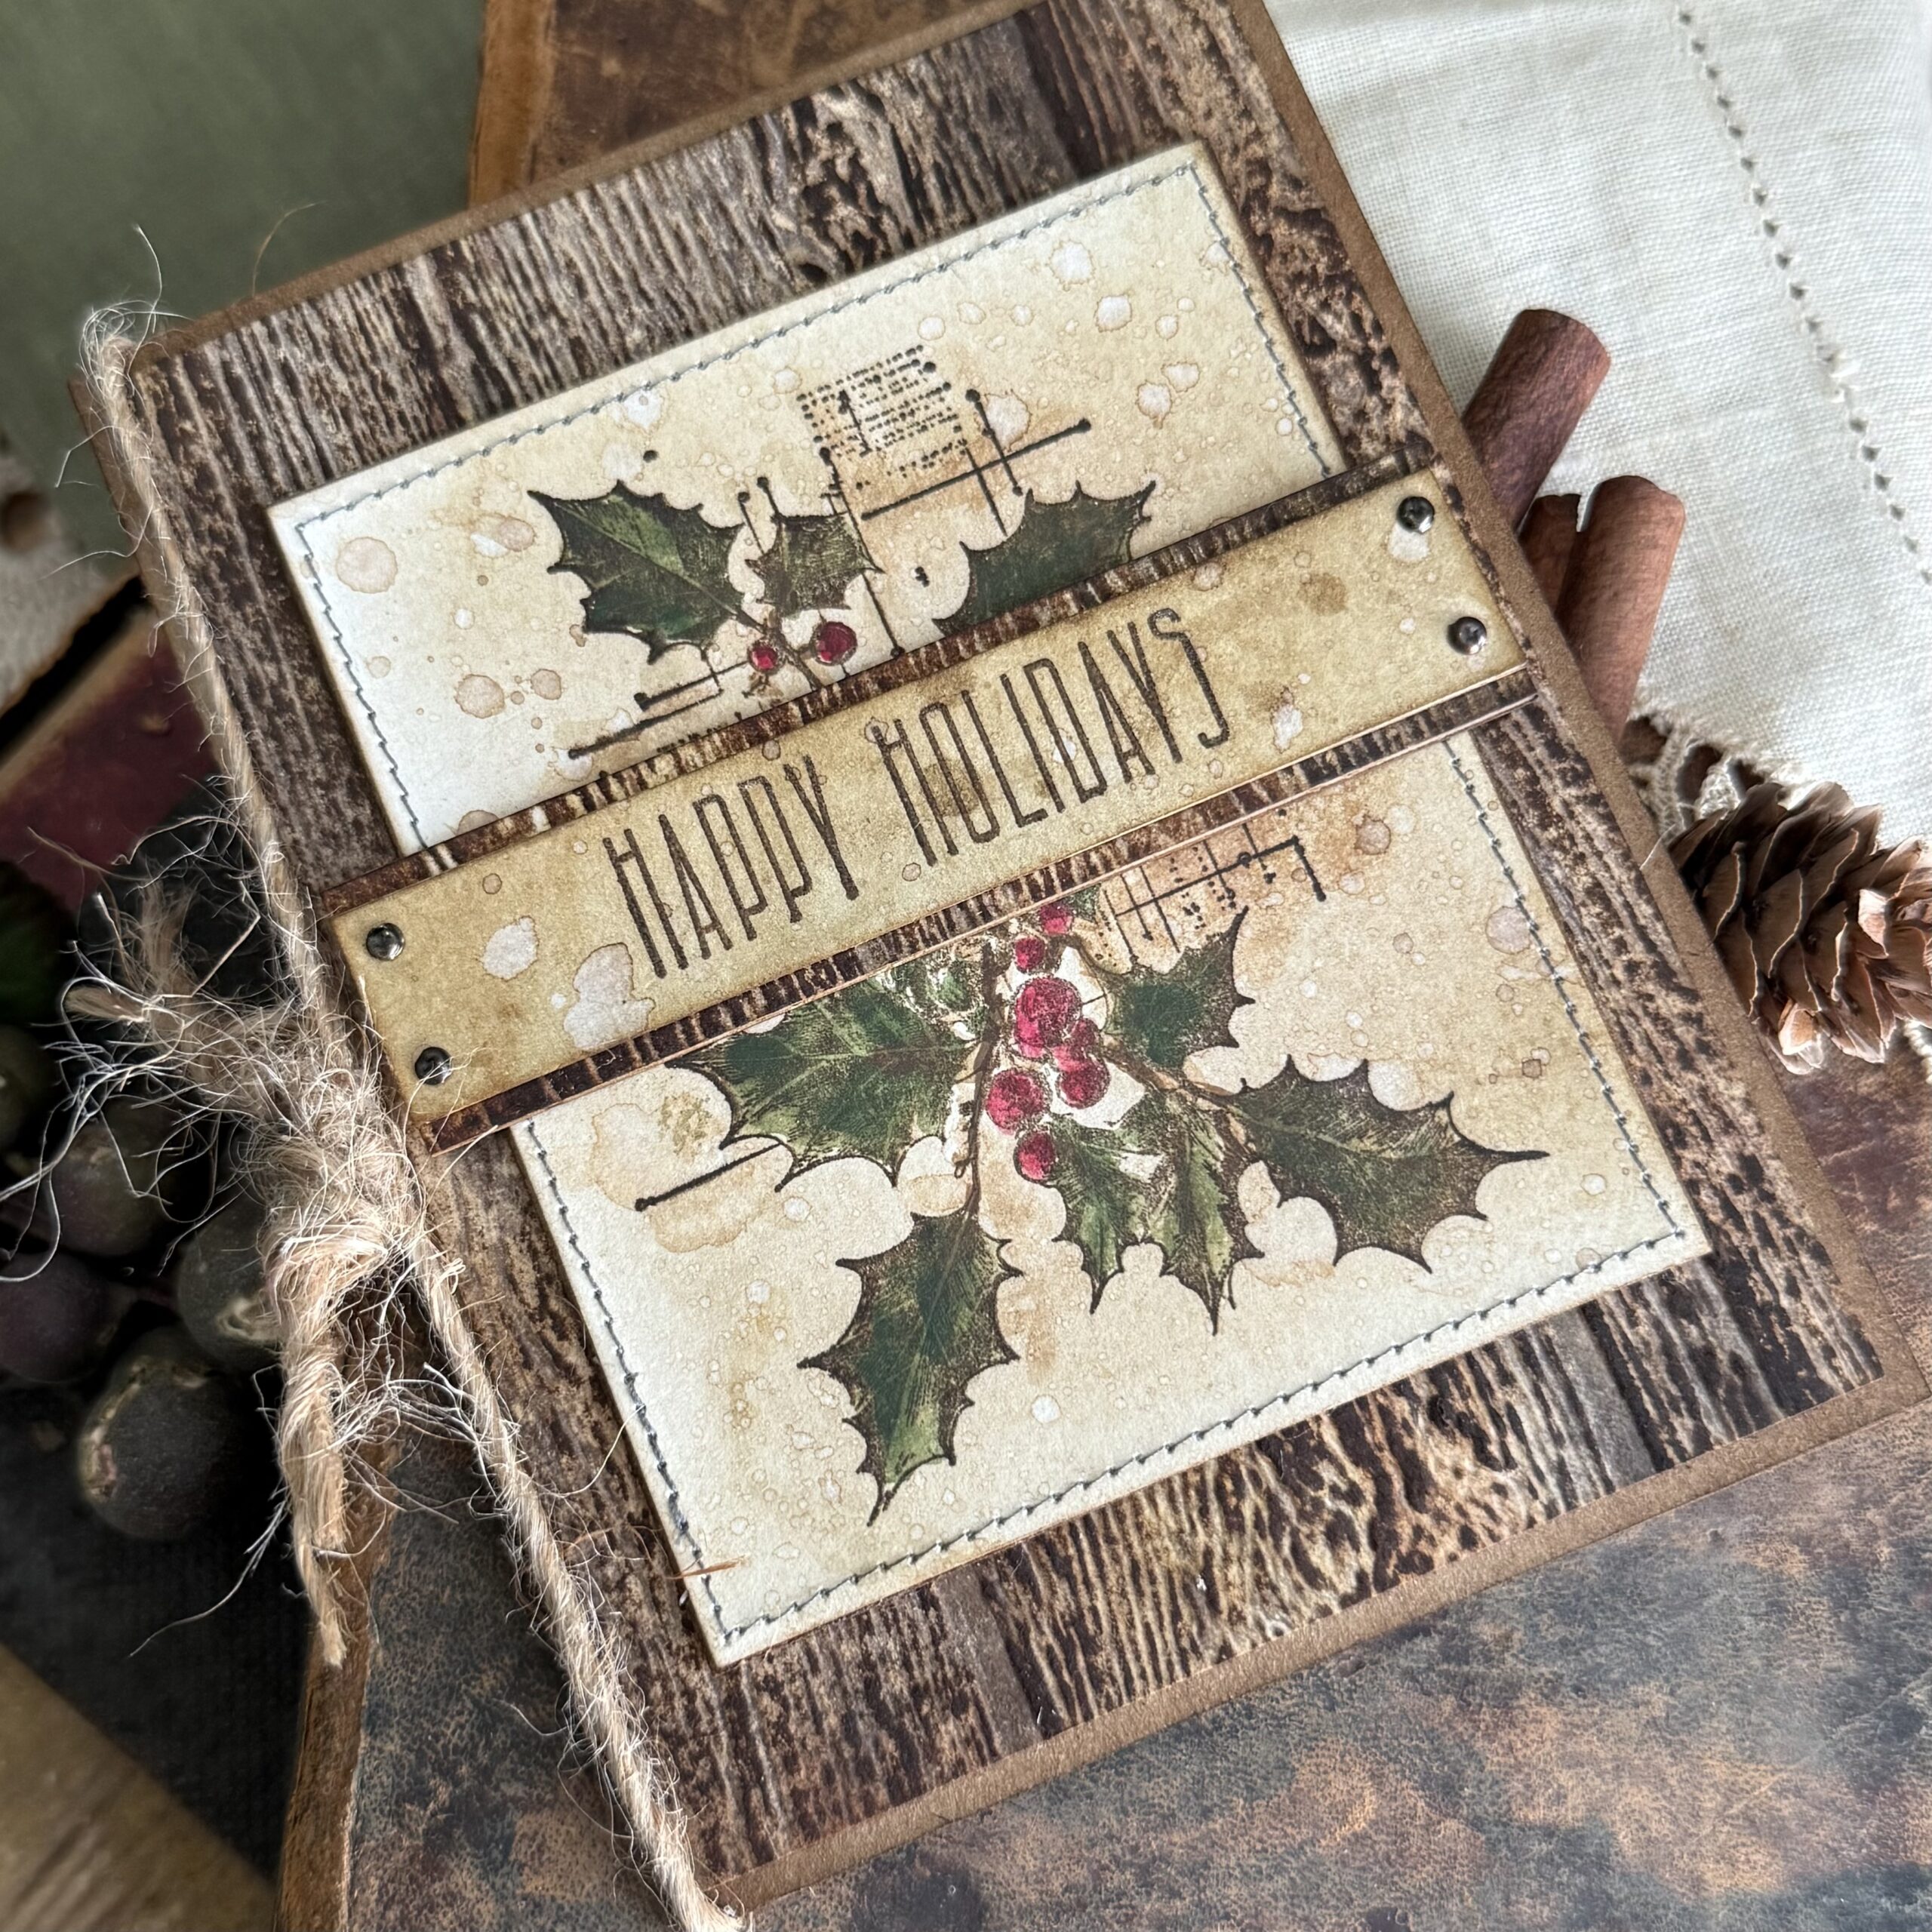
Using a lighter colored Distress ink in my case, frayed burlap), and a stamp platform, you stamp your image, then, leaving the paper in the platform, you use distress paints to color in the image. You dry the image using a heat tool, then re-stamp the image using a darker Archival ink, either Black Soot or Ground Espresso are my favorites for this technique. In the photo below, you can see that the image was stamped using distress frayed burlap, then colored using the paints. The distress ink blends into the paint color leaving a nice colored area with out the detail.
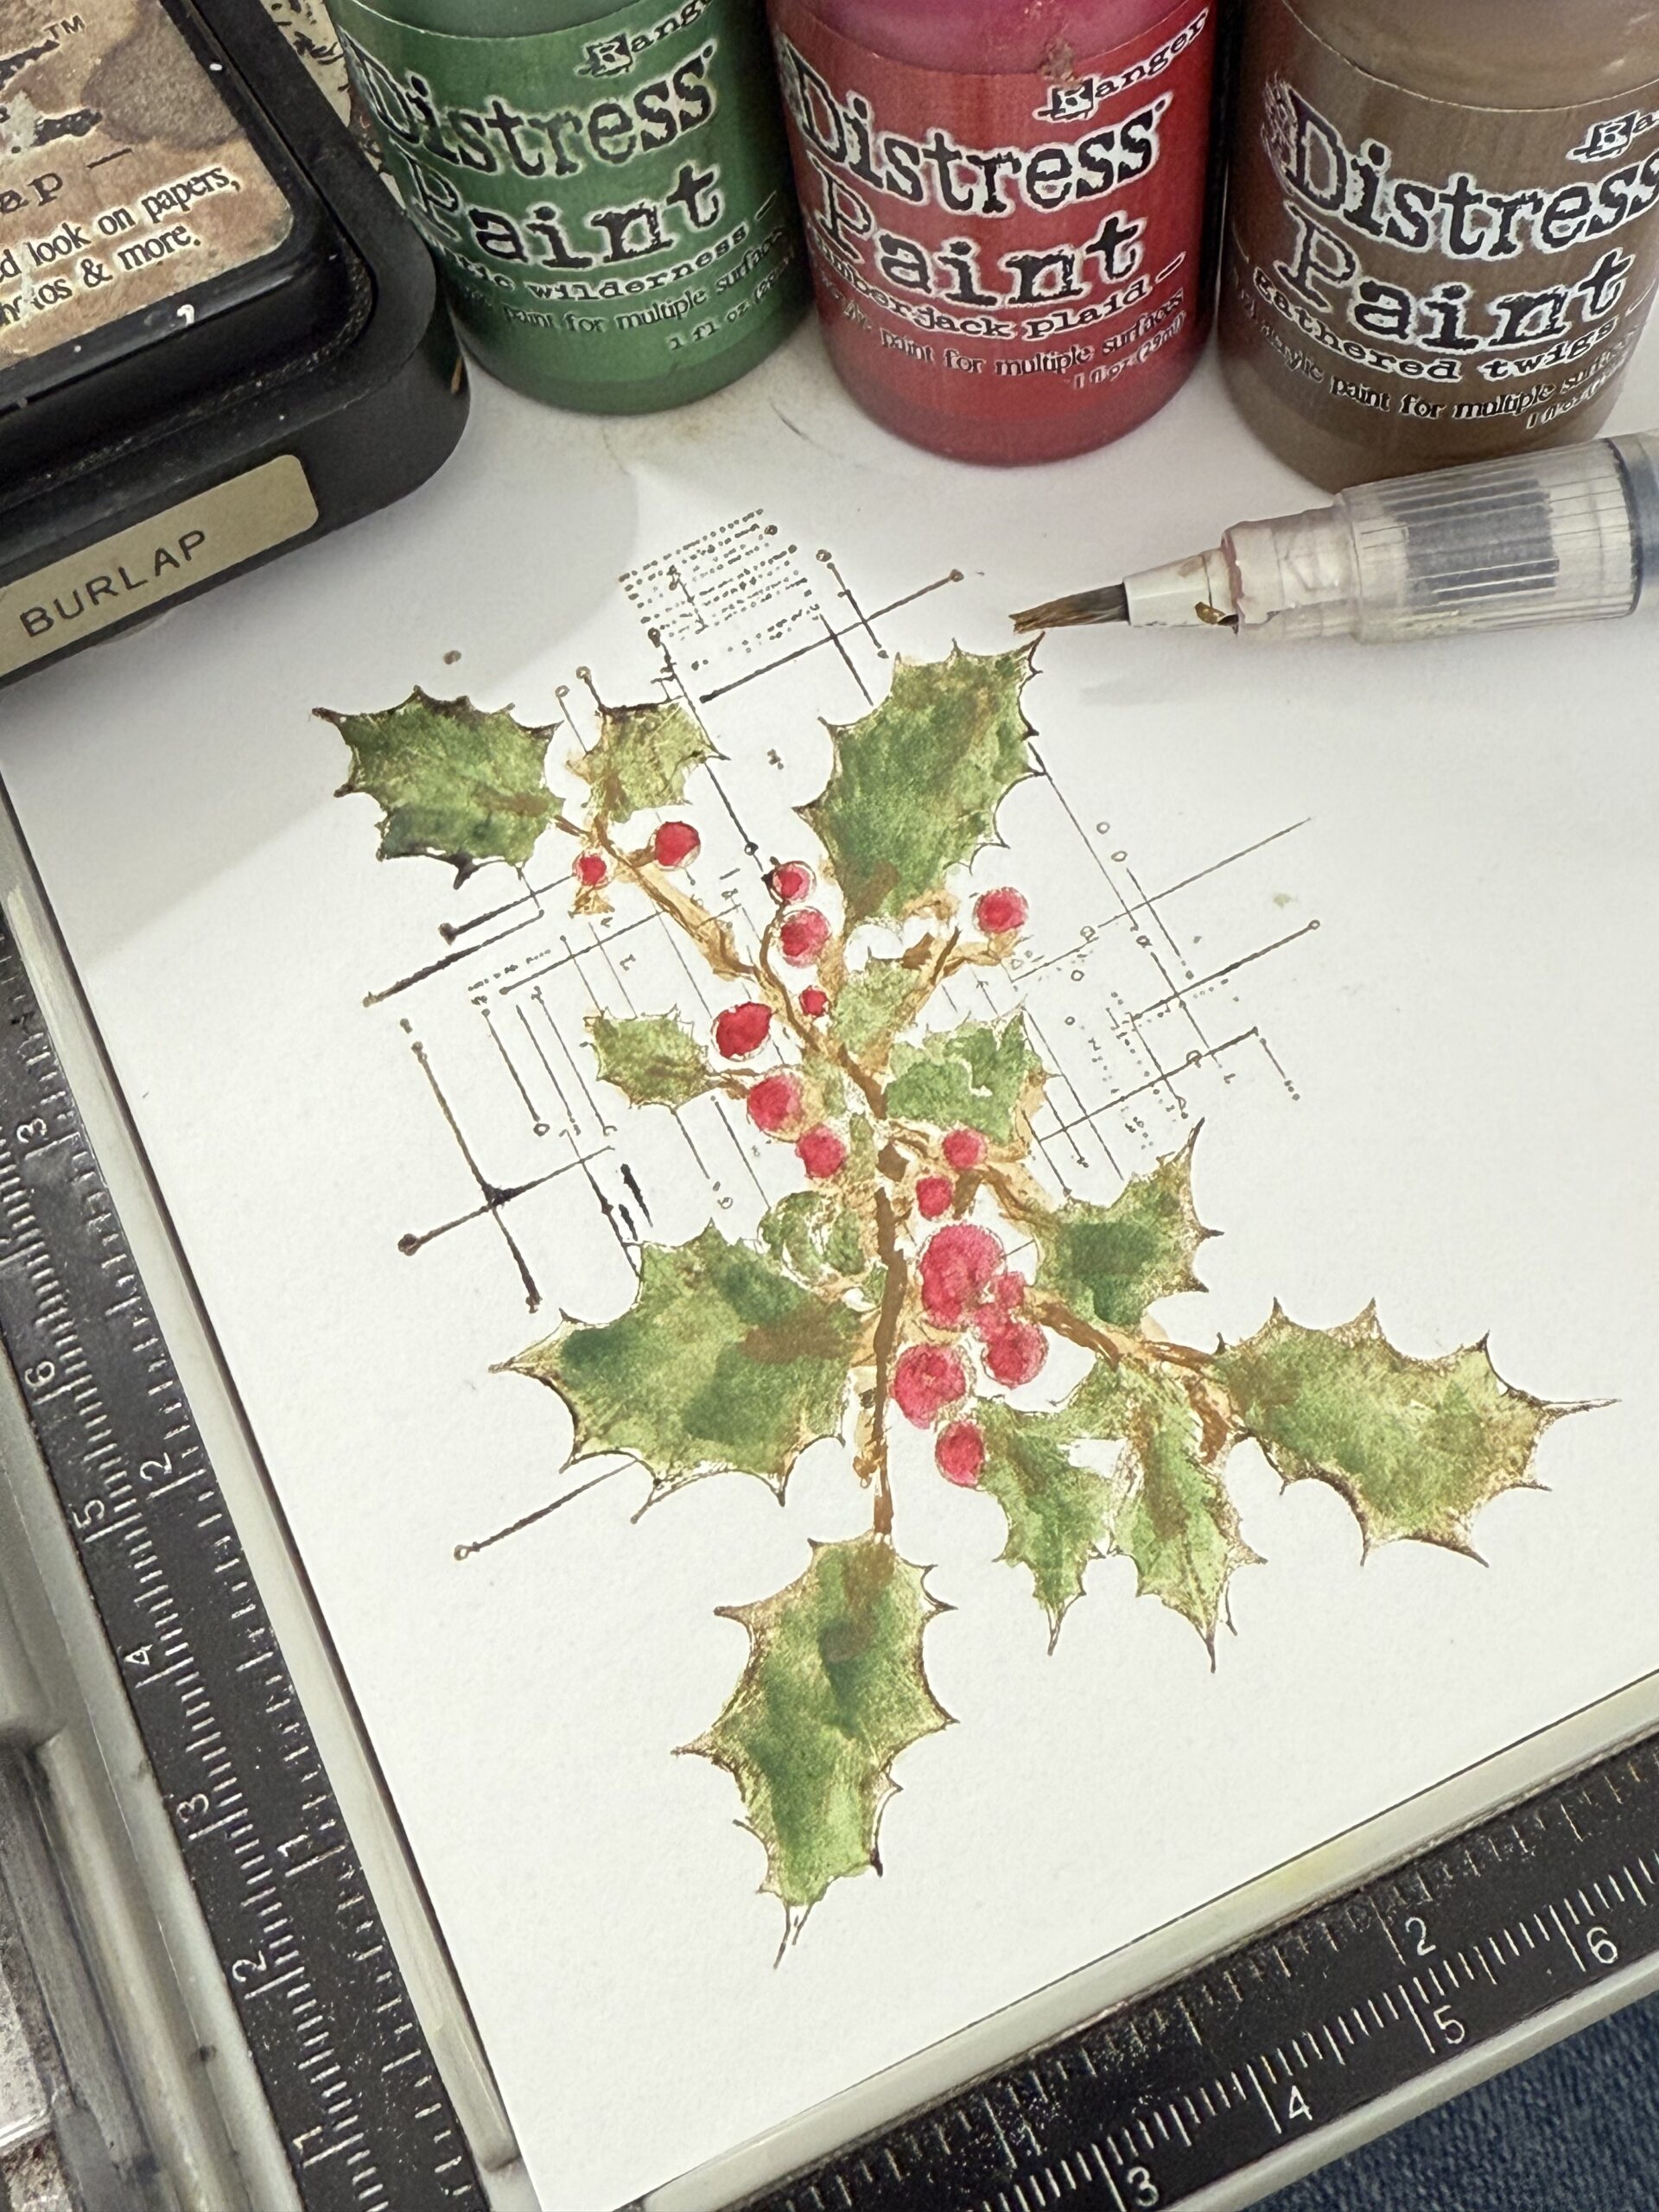
I used a little water and the paint brush to color out the distress ink that was in the schematic pattern in the background.
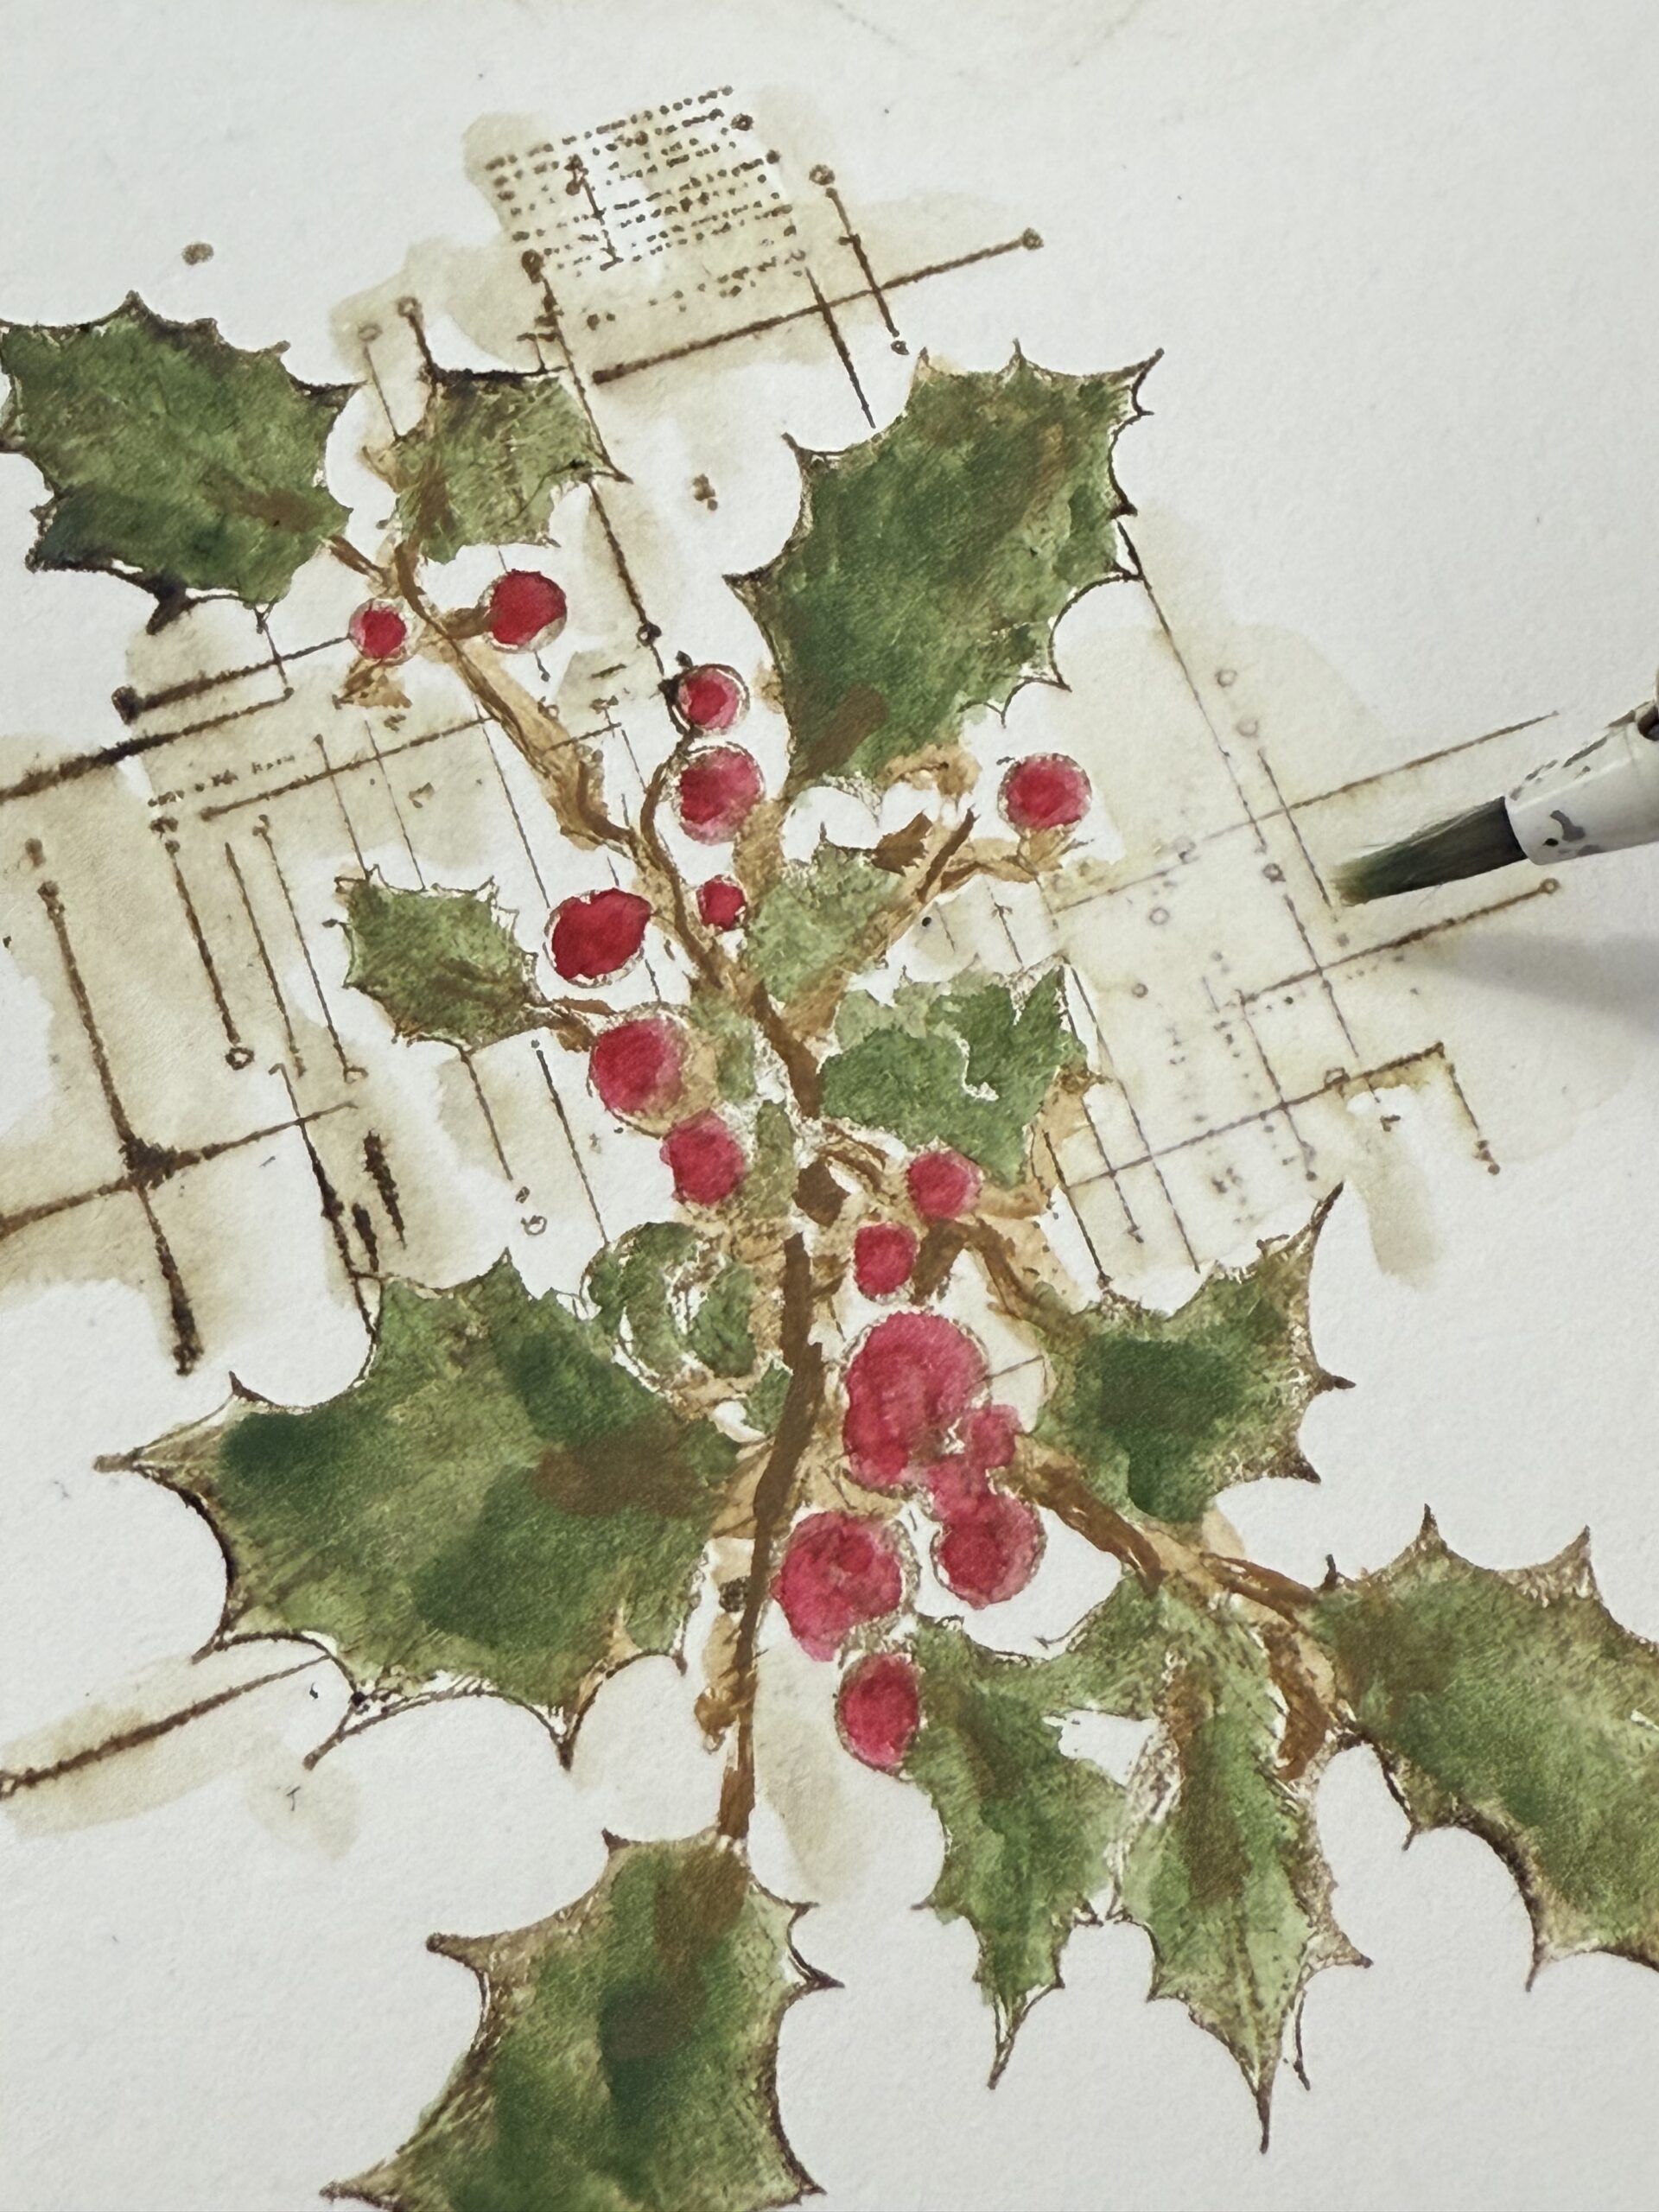
Then I used Ground Espresso Archival Ink and re-stamped the image over the distress painted area once it was dry. That’s what left the detailed area of the stamp over the color.
This techniques works so well for detailed stamped because Distress Paints are opaque, meaning, they are not see through and perfect for keeping a detailed stamp color bold. I blended some brown distress inks over top of the stamped and colored images, then cut the background out and created the card. I used Wood Embossed paper in the background and stamped the phrase for the front, these were all brought together to create the card.
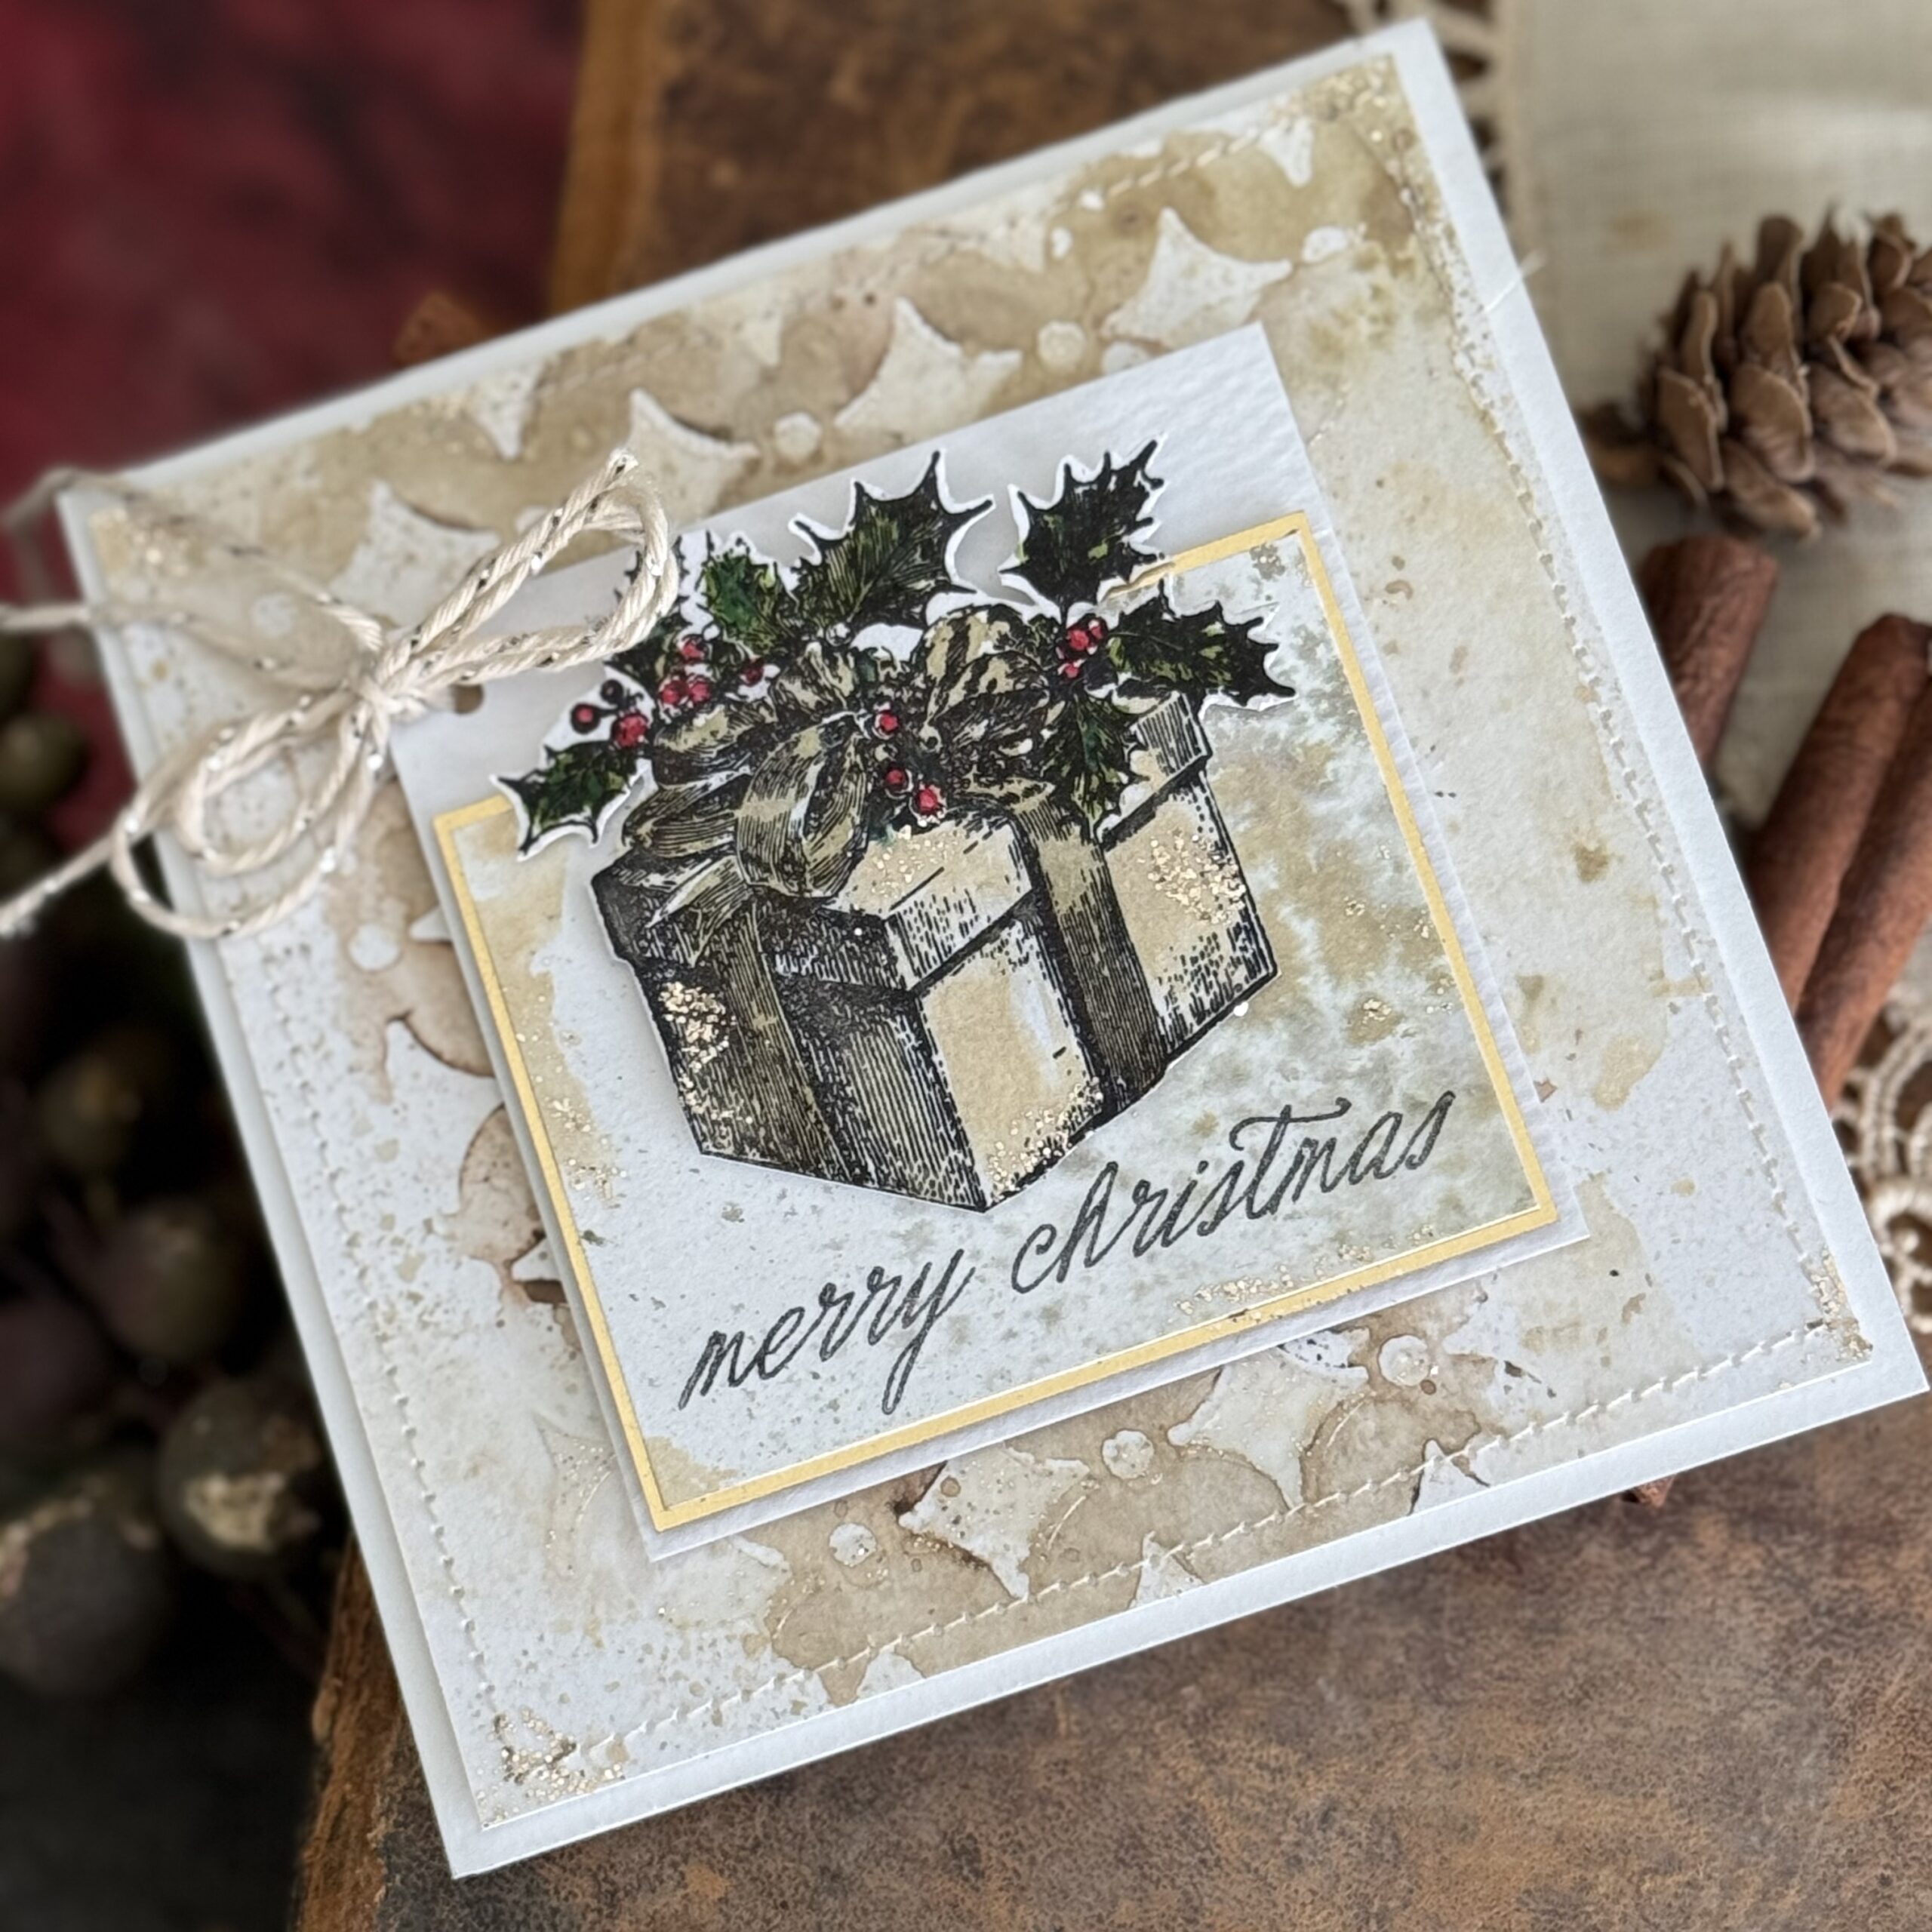
Christmas Spirit CMS501 – And finally, the present card… I stamped the present image using Black Soot Archival Ink and my stamp platform. I colored up the present using Distress Watercolor Pencils and a paint brush. I fussy cut out the present and then stamped the phrase on a separate sheet of paper.
I created the background using the diamond mini stencil, then added some Sparkle Texture Paste using a palette knife. I set it aside to dry. Once dry, I cut the background paper to the size of my card front. I punched a whole into the corner of the front mat and then stitched around the edge of the cardstock then adhered the card together using foam adhesive.
After it was all adhered together, I used some of the new Tim Holtz Liquid Tinsel (in Antique) to add some more sparkle here and there.
With that, all of my cards were complete…be sure to check out the entire release of these Christmas Stamps and Stencils!
Creatively yours,
Stacy
Shop Simon Says Stamp by clicking on this link. Thank you! I appreciate you for supporting me.
What is an affiliate program, and why should I click on the link and buy through you?
When you shop via the affiliate link on this blog, I receive a small commission from the affiliate provider (Simon Says Stamp) at no extra cost to you, whatsoever. These commissions help me to cover the hosting fees and other costs to run my blog and be able to provide you with FREE inspiration. If you shop the links, THANK YOU! I truly appreciate being able to share my love of creating with you.










Leave a Reply