Hello friends! Welcome!
I hope you are all well…I have another Halloween tutorial for you that uses a couple of the new Shifter Layering Stencils that Tim Holtz and Stampers Anonymous released back in August. The Shifter Stencils are a new product and are very easy and fun to create with. The owl stamp that I used on the card is included in the Mr Bones Stamp Set (CMS345).
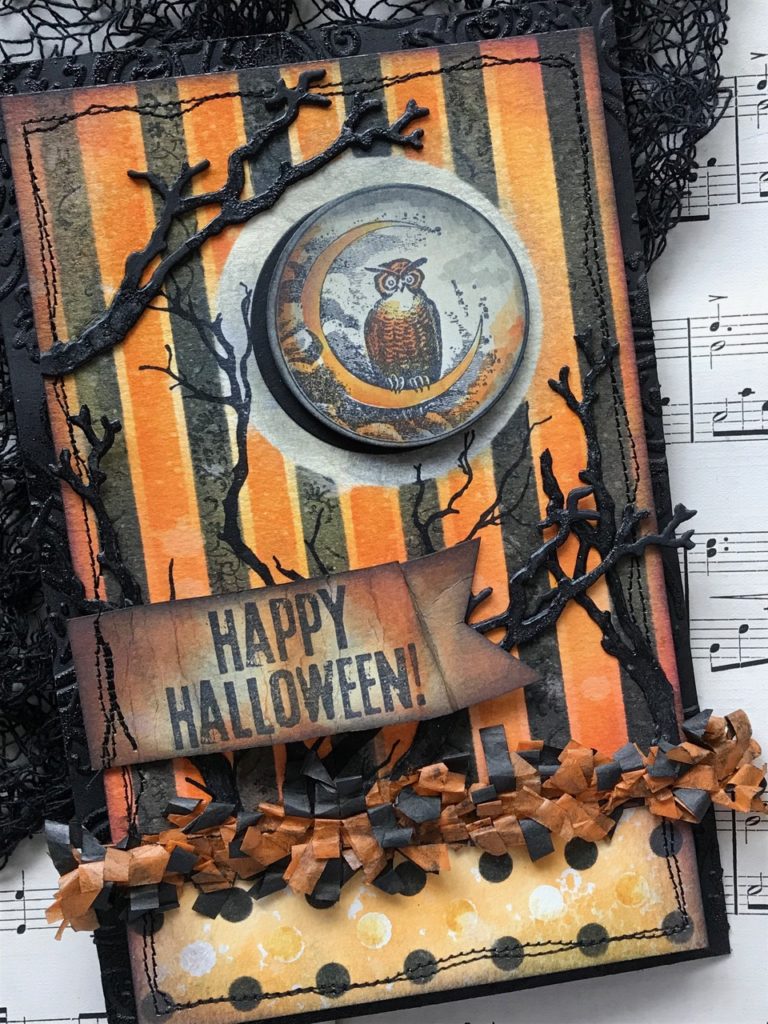
I decided to go with a classic black and orange Halloween combination and was inspired by vintage Halloween decor and illustrations.
Let’s Begin!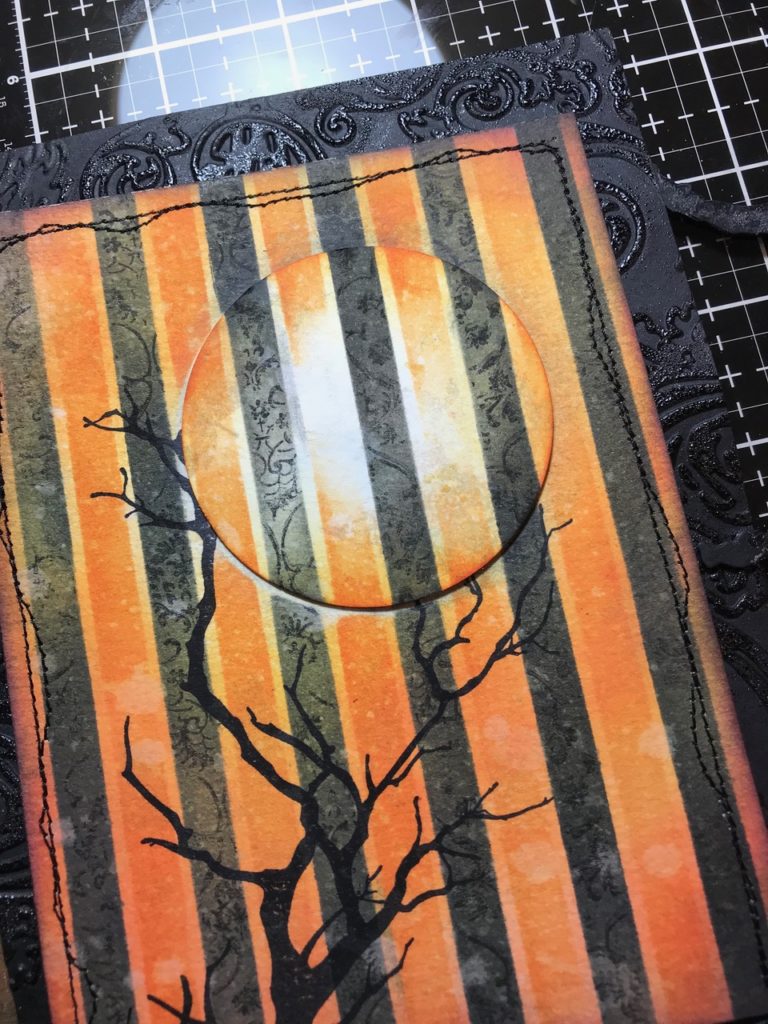

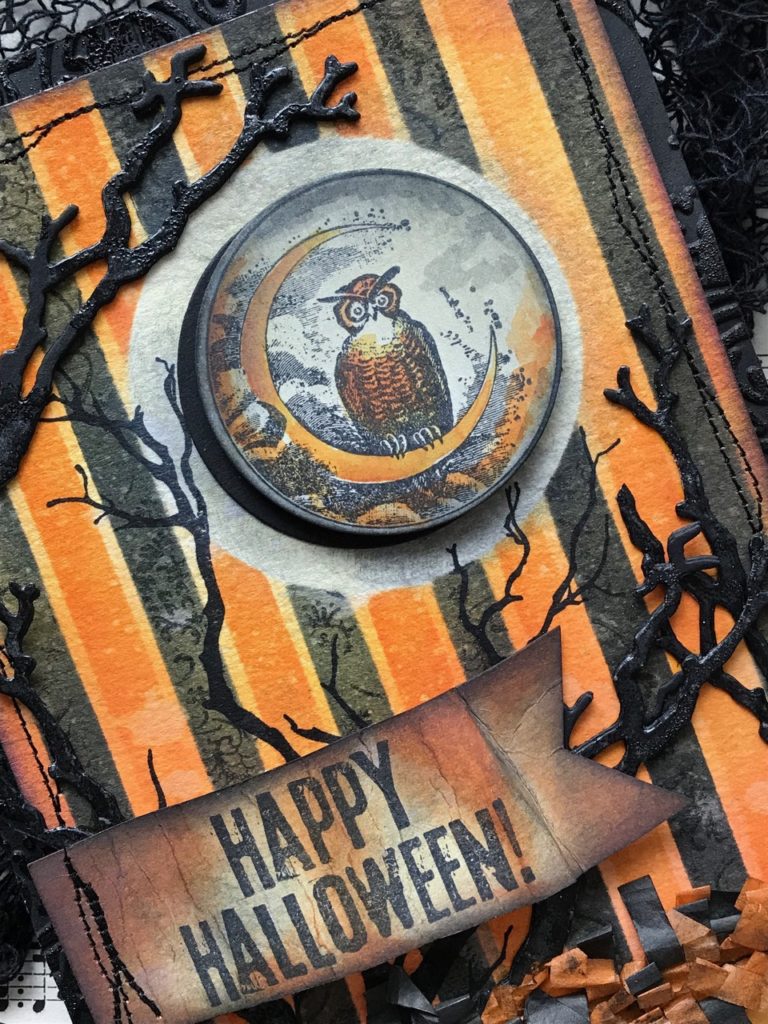
I started by stamping the owl in Black Soot Archival Ink, onto a piece of watercolor paper. I made a mask from a scrap piece of paper with a circle die, then covered the owl. I blended some distress inks and oxides in a variety of oranges and black with the Shifter Stripes Layering Stencil. When the stripes were done, I inked up the Ornate background stamp (CMS348) with Black Soot Distress Ink and stamped it through the stencil onto the black stripes. I removed the mask and then stamped the creepy branch in Black Soot Archival Ink onto the bottom of the background.
With my sewing machine, I stitched some messy stitching around the edge.
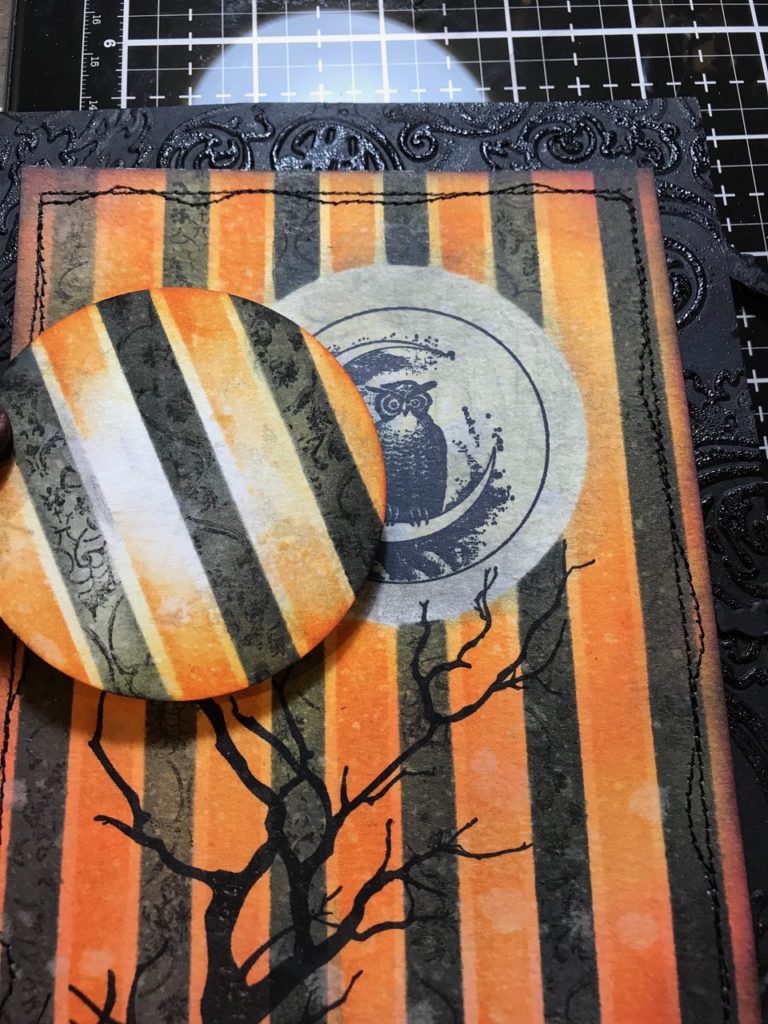

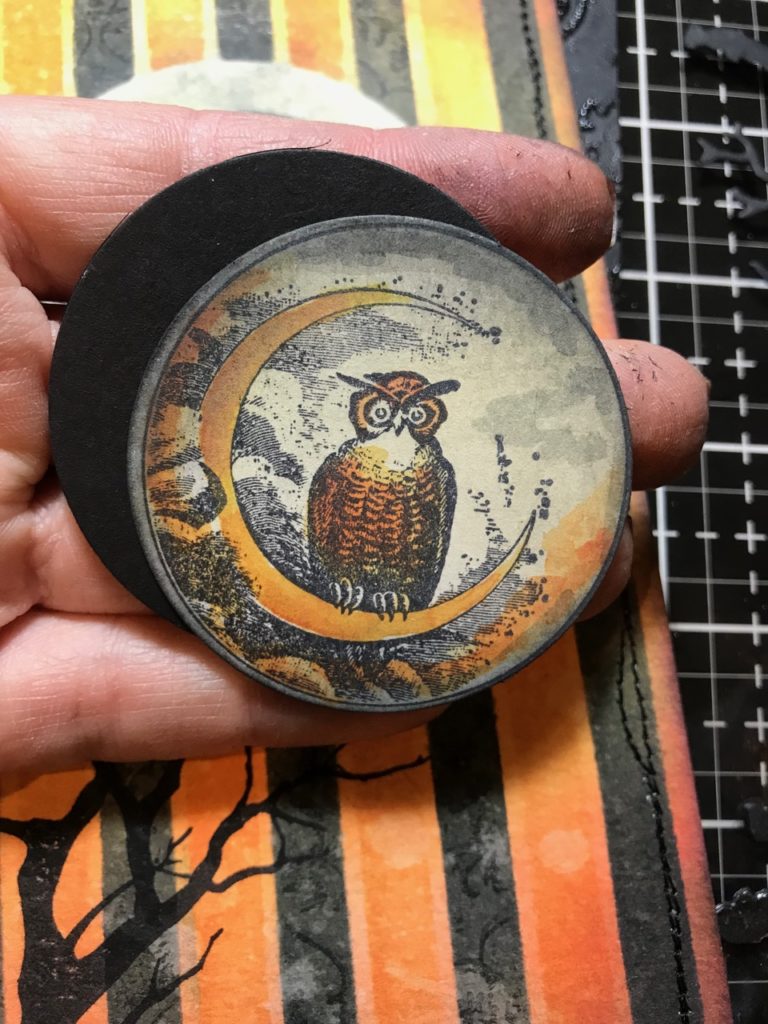
I stamped another owl and colored him with a Detail Water Brush and some distress inks. Then I cut him out with a circle die and cut an additional black circle to mat the moon onto.

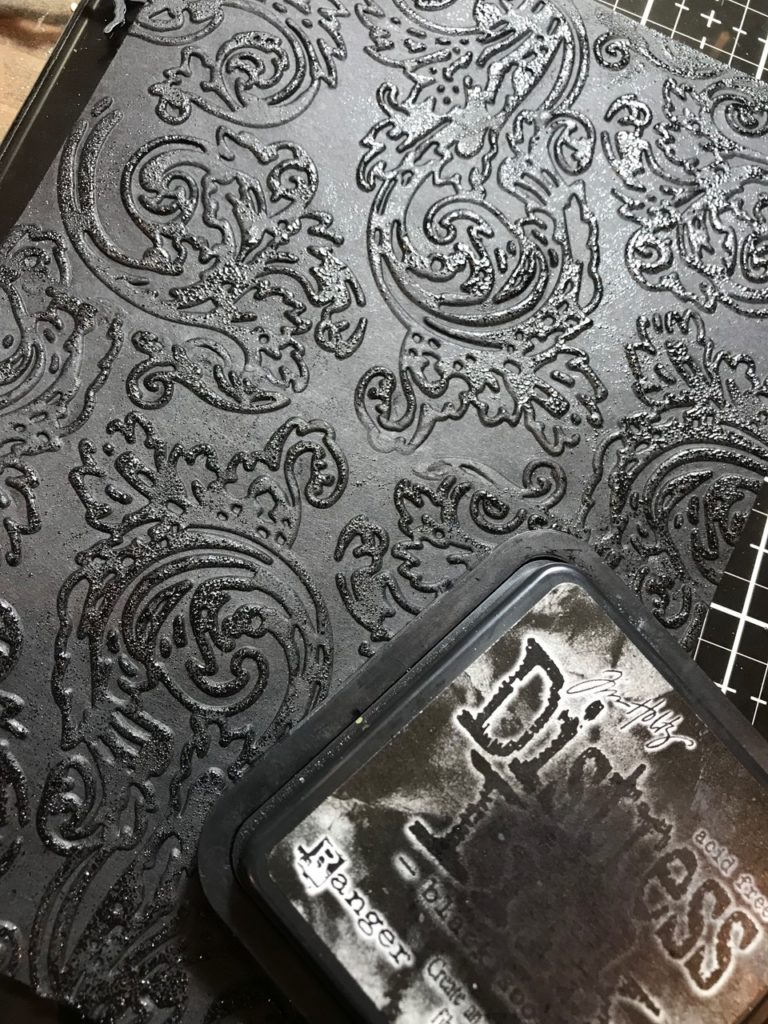
I embossed a piece of black cardstock with the Damask Texture Fade, smooshed it with some Black Soot Distress Ink, sprinkled it with Clear Embossing Powder and heat embossed it.

I then created the polka dot pattern for the bottom of the card. I smooshed Carved Pumpkin Distress Ink onto the Shifter Dots Stencil, sprayed it with water, flipped it onto a piece of watercolor paper and then dried it with my heat tool. I then filled in the dots with the stencil, a blending tool and Black Soot and Spiced Marmalade Distress Inks.
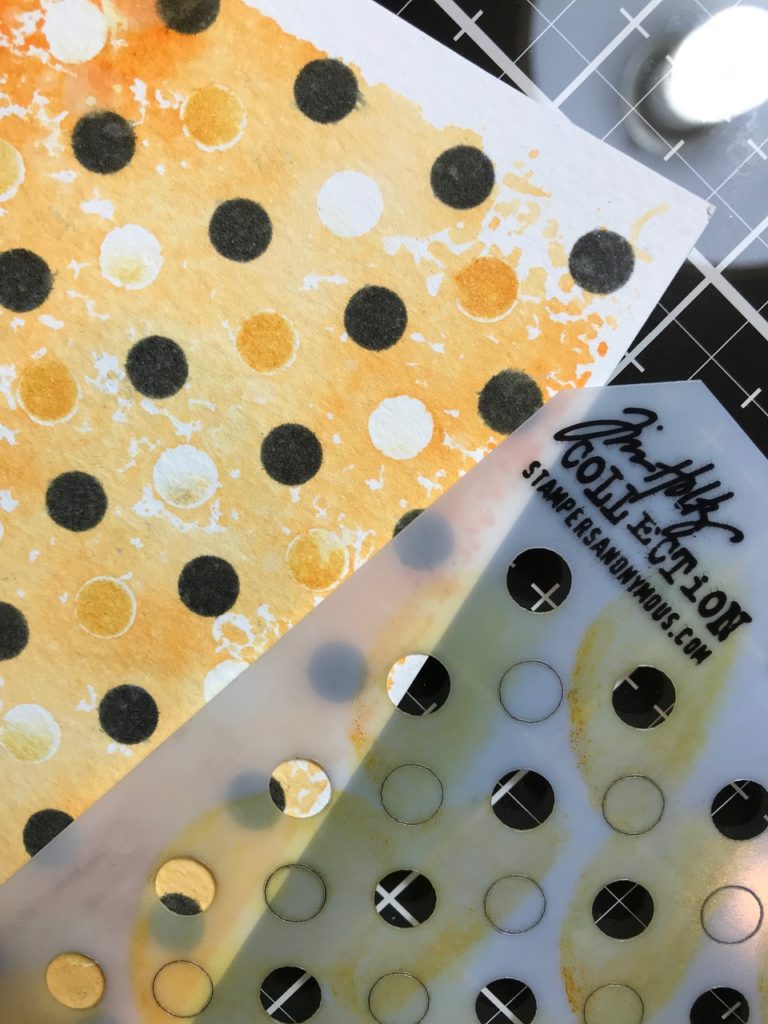

I cut a piece of the polka dot pattern to fit at the bottom of the card and stitched around the edge in the same way as I did for the striped. (the polka dot part was a total add on, I wanted to use some of the Halloween Paper Fringe and needed a paper to add to the bottom of the card. LOL! Sorry for flipping around on this one, sometimes you never know where your creativity is going…)
I matted the stripe and dot papers together onto the background paper. I adhered a piece of paper fringe onto the card and stamped a piece of scrap paper with the “Happy Halloween” phrase included in the stamp set. This was then cut into a banner shape and stitched.
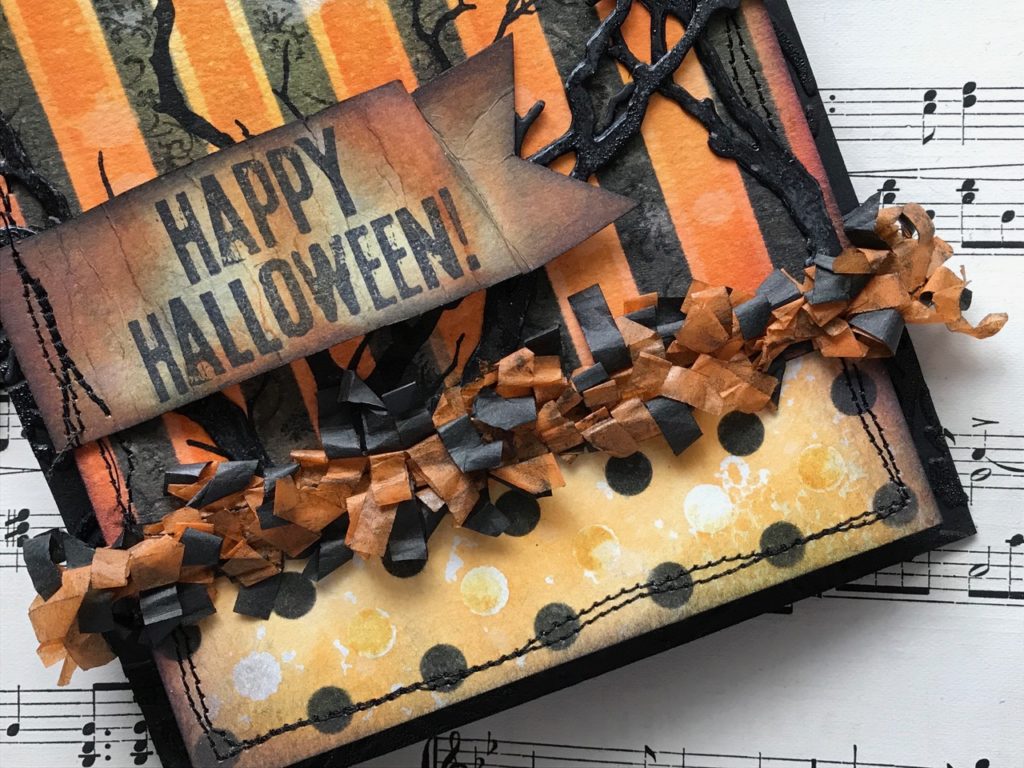

I cut and embossed a couple tree branches from the Small Tattered Florals Die Set and added them to the front of the card. The owl and black circle mat were adhered with pop dots, to finish the card.


Thank you so much for stopping by today and have a wonderful day!!
Creatively Yours,
Stacy
What is an affiliate program, and why should I click on the link and buy through you?..
When you shop via the affiliate link on this blog, I receive a small commission, from the affiliate provider (Simon Says Stamp), at no extra cost to you whatsoever. These commissions help me to cover hosting fees and other costs to run my blog and be able to provide you with FREE inspiration. If you shop the links, THANK YOU! I truly appreciate being able to share my love of creating with you.
Gather your supplies-
Tim Holtz/Stampers Anonymous- Mr Bones (CMS345), Ornate and Lace (CMS348), Shifter Stripe Layering Stencil, Shifter Dots
Tim Holtz/Distress Oxide and Inks- Black Soot, Carved Pumpkin, Ripe Persimmon, Wild Honey
Tim Holtz/Sizzix- Damask Texture Fade, Small Tattered Florals
Tim Holtz/ Idea-ology- Halloween Paper Fringe
Tim Holtz/Ranger Ink- Black Soot Archival Ink
Distress Tools/Mediums- Distress Sprayer, Media Mat, Heat it Heat tool, Blending Tools, Detail Water Brush, Watercolor Paper, Clear Embossing Powder, Embossing Heat Gun, Black Cardstock
Other- Sewing Machine, Circle Dies


Another adorable card. Love love love
I love it all my friend. So gorgeous xox
You astound me over & over…beautiful & clever
Lovr it!
Really gorgeous. You are a very talented lady. A real pleasure to look at all your amazing creations.
WoW Stacy! I just love what you did with the shifter stencils and colours. Awesome, I LOVE it!! xx
WoW Love this card. Thank you for your idea and information. Greetings from Chantal, The Netherlands
Oh my … this is so amazing, love the stitching and your work with the shifters !
This looks so awesome with the striped background…love that! Just a gorgeous fun make!
WONDERFUL Halloween card with lots of great techniques with the shifter stencils. I particularly love the dots, since monoprinting is a favorite technique. I have thought of using these stencils with that technique, but sadly they haven’t even made their way out of the package! Stacy,you have created such a beautiful vintage Halloween card! I bet your home is looking pretty spooky by now, too! Sending hugs!
I pinned your card when I first saw it because I loved it. Now after making a version of this card, it amazes me how many steps are actually in the making. Love how it turned out. thanks as always for sharing.
I just happened upon this on Pinterest and it’s awesome!!