Hello friends! Welcome back…it’s been a bit!
I’m sorry for the brief interlude, but I took a little summer vacation from my blog and was working on some things behind the scenes, playing in my garden and finishing up some projects around the house that were waiting for some warm weather. But, I hope to be back now for a bit here and there with some more inspiration and creativeness.
I hope that you all have been well and enjoying your summer!
Today, I’m sharing a set of small cards created using the recently released Stampers Anonymous everyday stamp sets. The two new sets that the cards feature are the Floral Trims CMS461 and the Note Quotes CMS463.
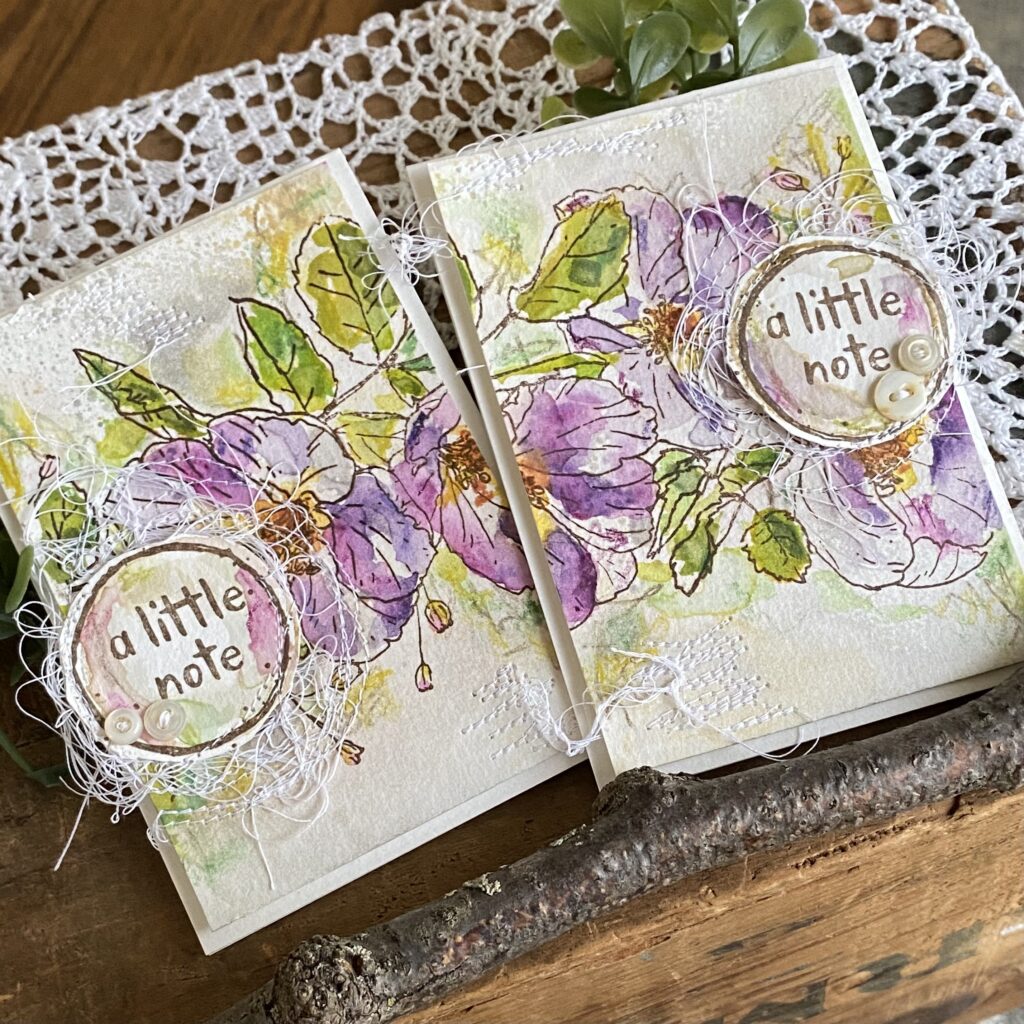
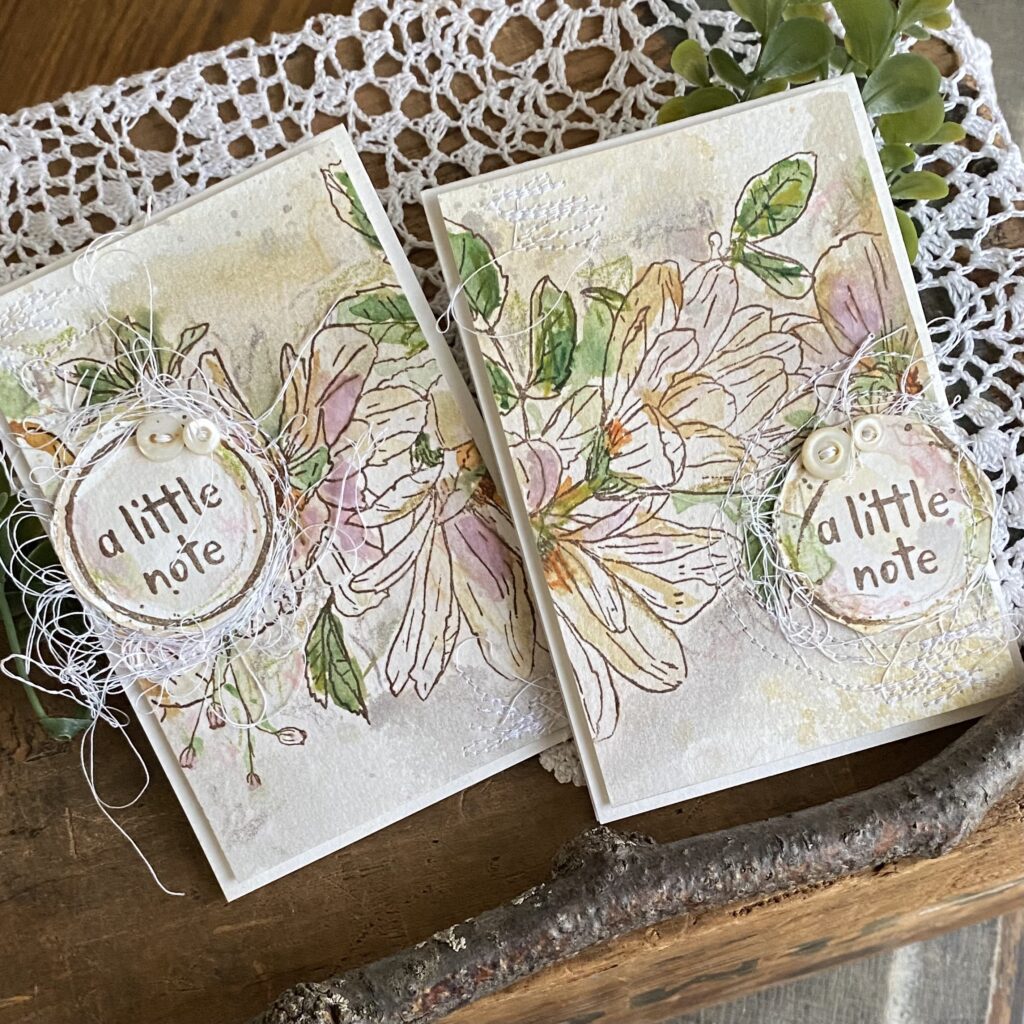


The Floral Trims is a beautiful new set that is perfect for anyone that loves to color using any and all sorts of mediums. I enjoyed creating these using my Distress Ink Refills, a paint brush and to add a bit of whimsy…the new Distress Watercolor Pencils.. (Can you see the scribbles and pencil markings in the background…I just love the effect that they bring to the table because they can be used both wet and dry!)
So, let’s get to it!
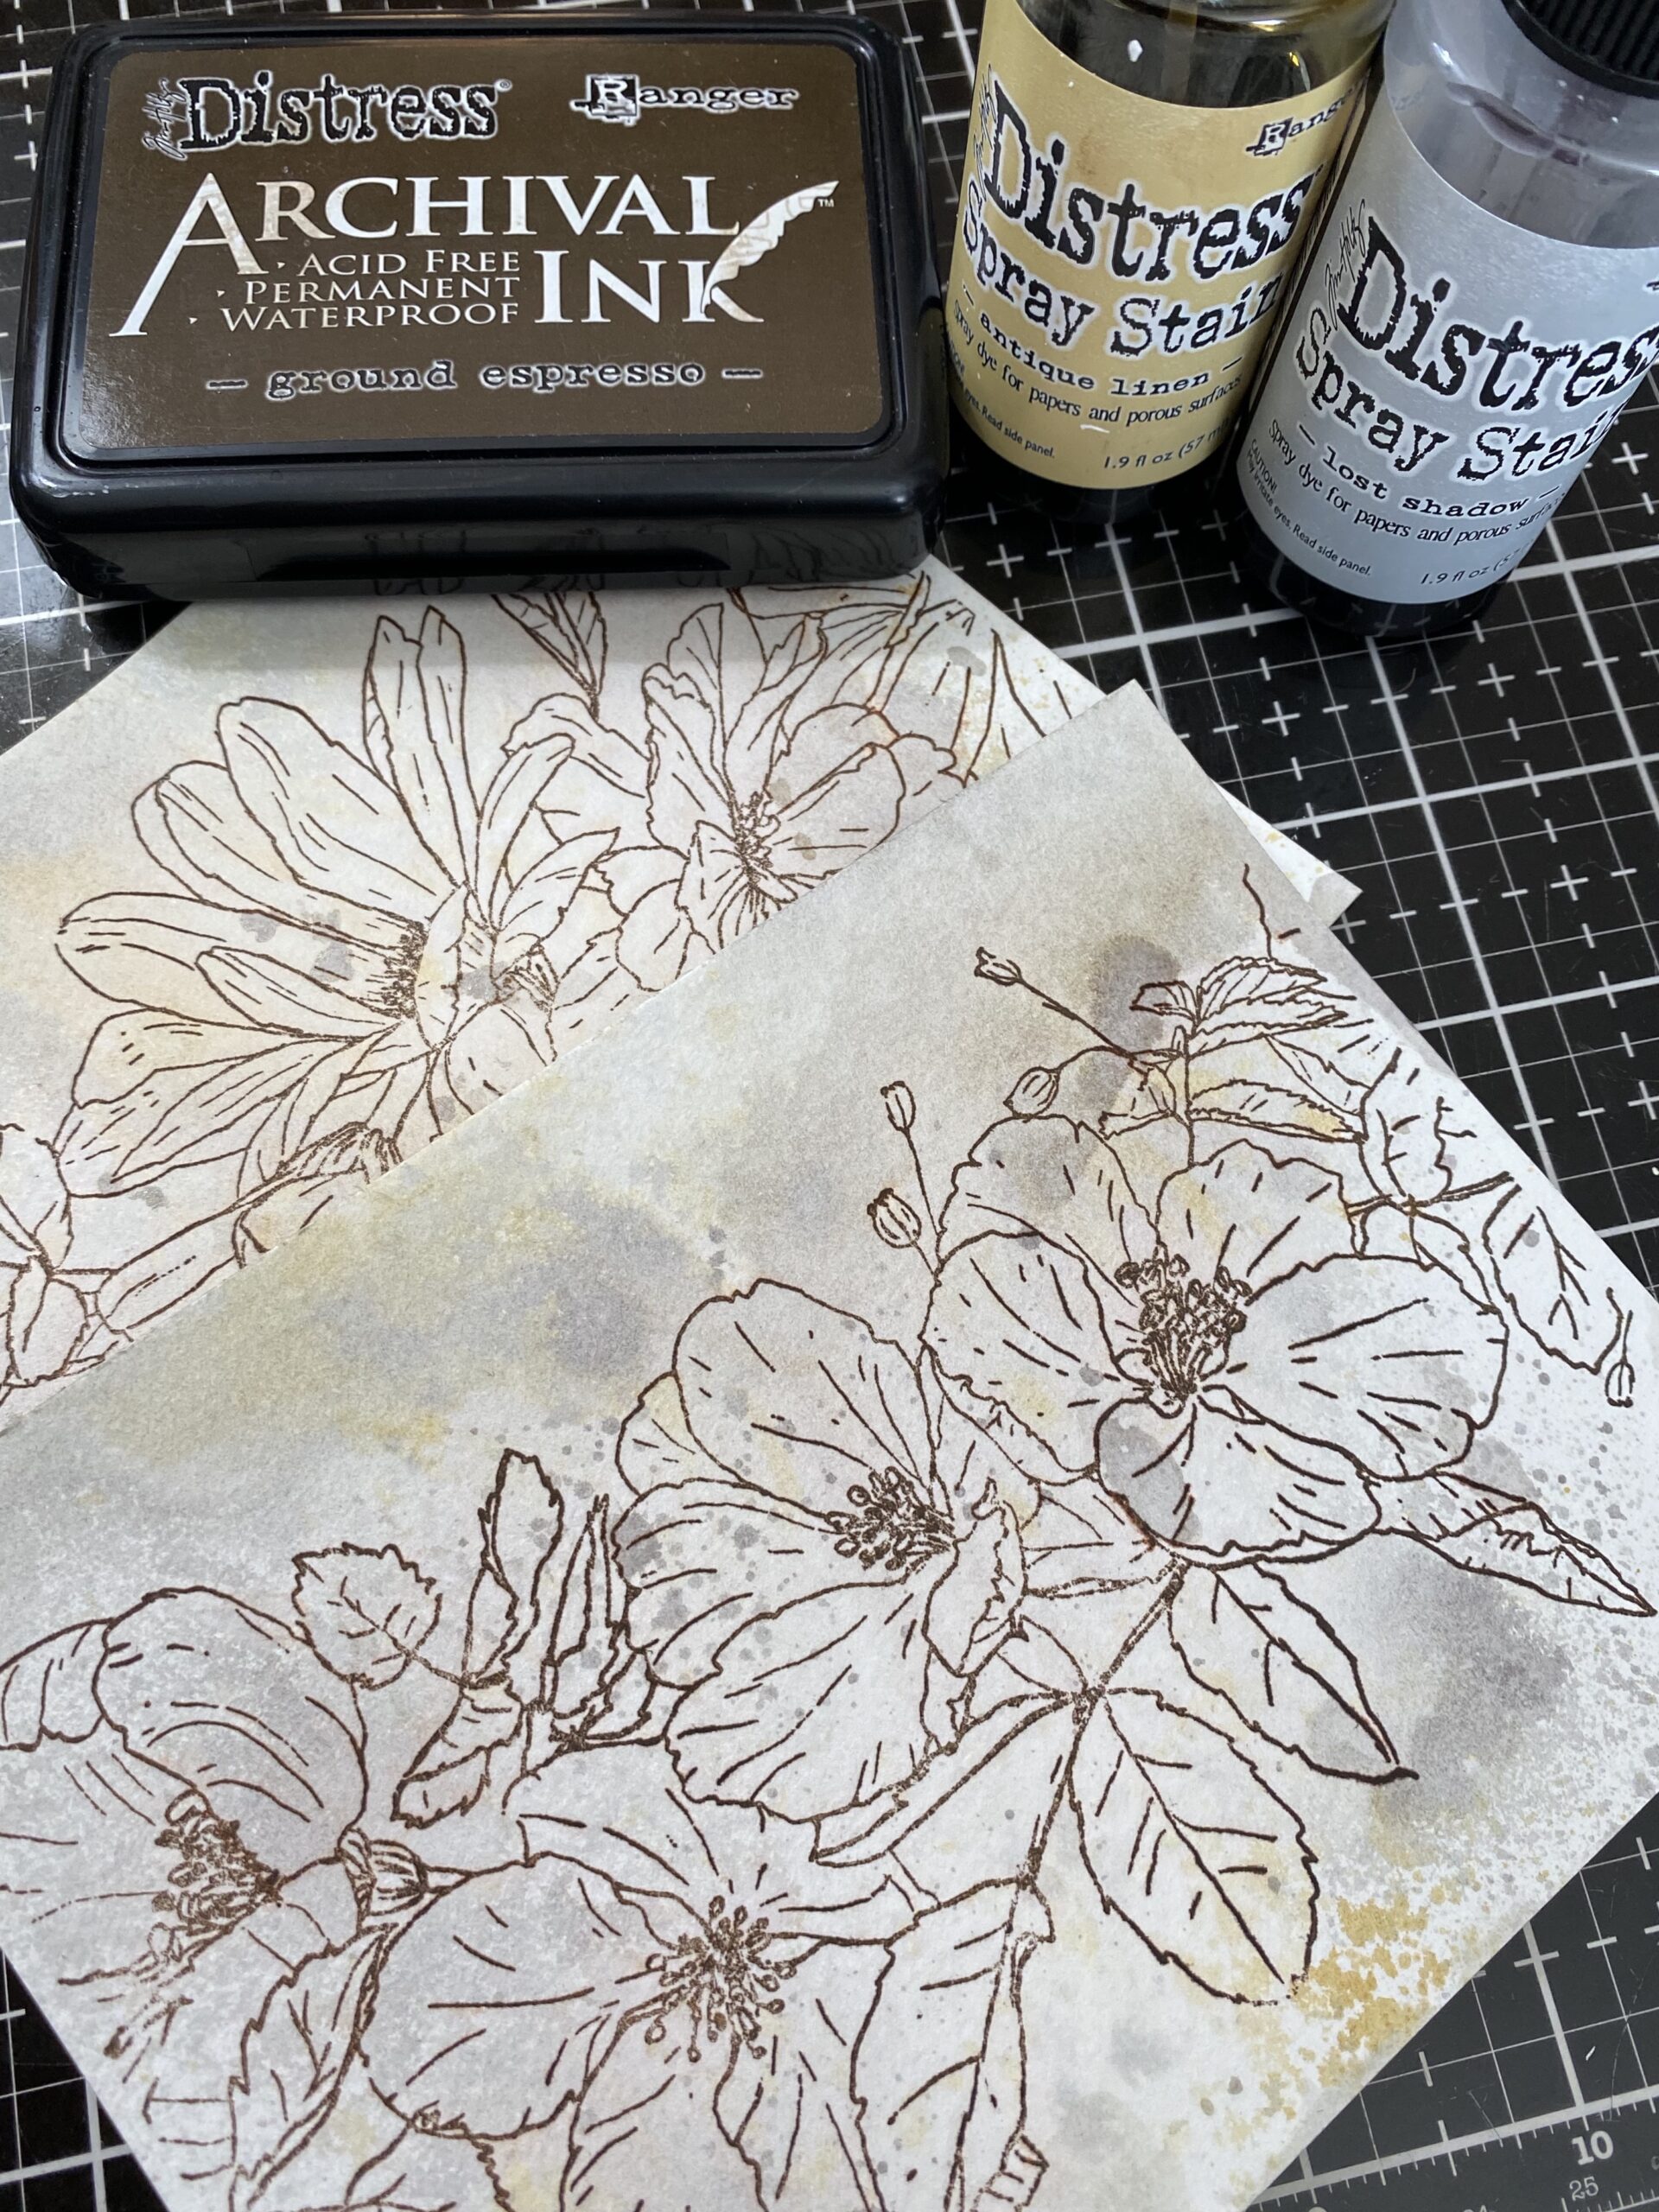
I started by trimming 2 pieces of watercolor paper approximately to the size of the Floral Trims Background stamp (4″x6″). I stamped the images using Distress Archival ink in Ground Espresso, then dried them with my heat tool. I spritzed the stamped papers with water, then spritzed them with a combination of Antique Linen and Lost Shadow Spray Stains, then dried the papers again. This gave the images a light wash of color and a good vintage looking background. Then I moved on to watercoloring both images using a paintbrush, water and Distress Ink refills.

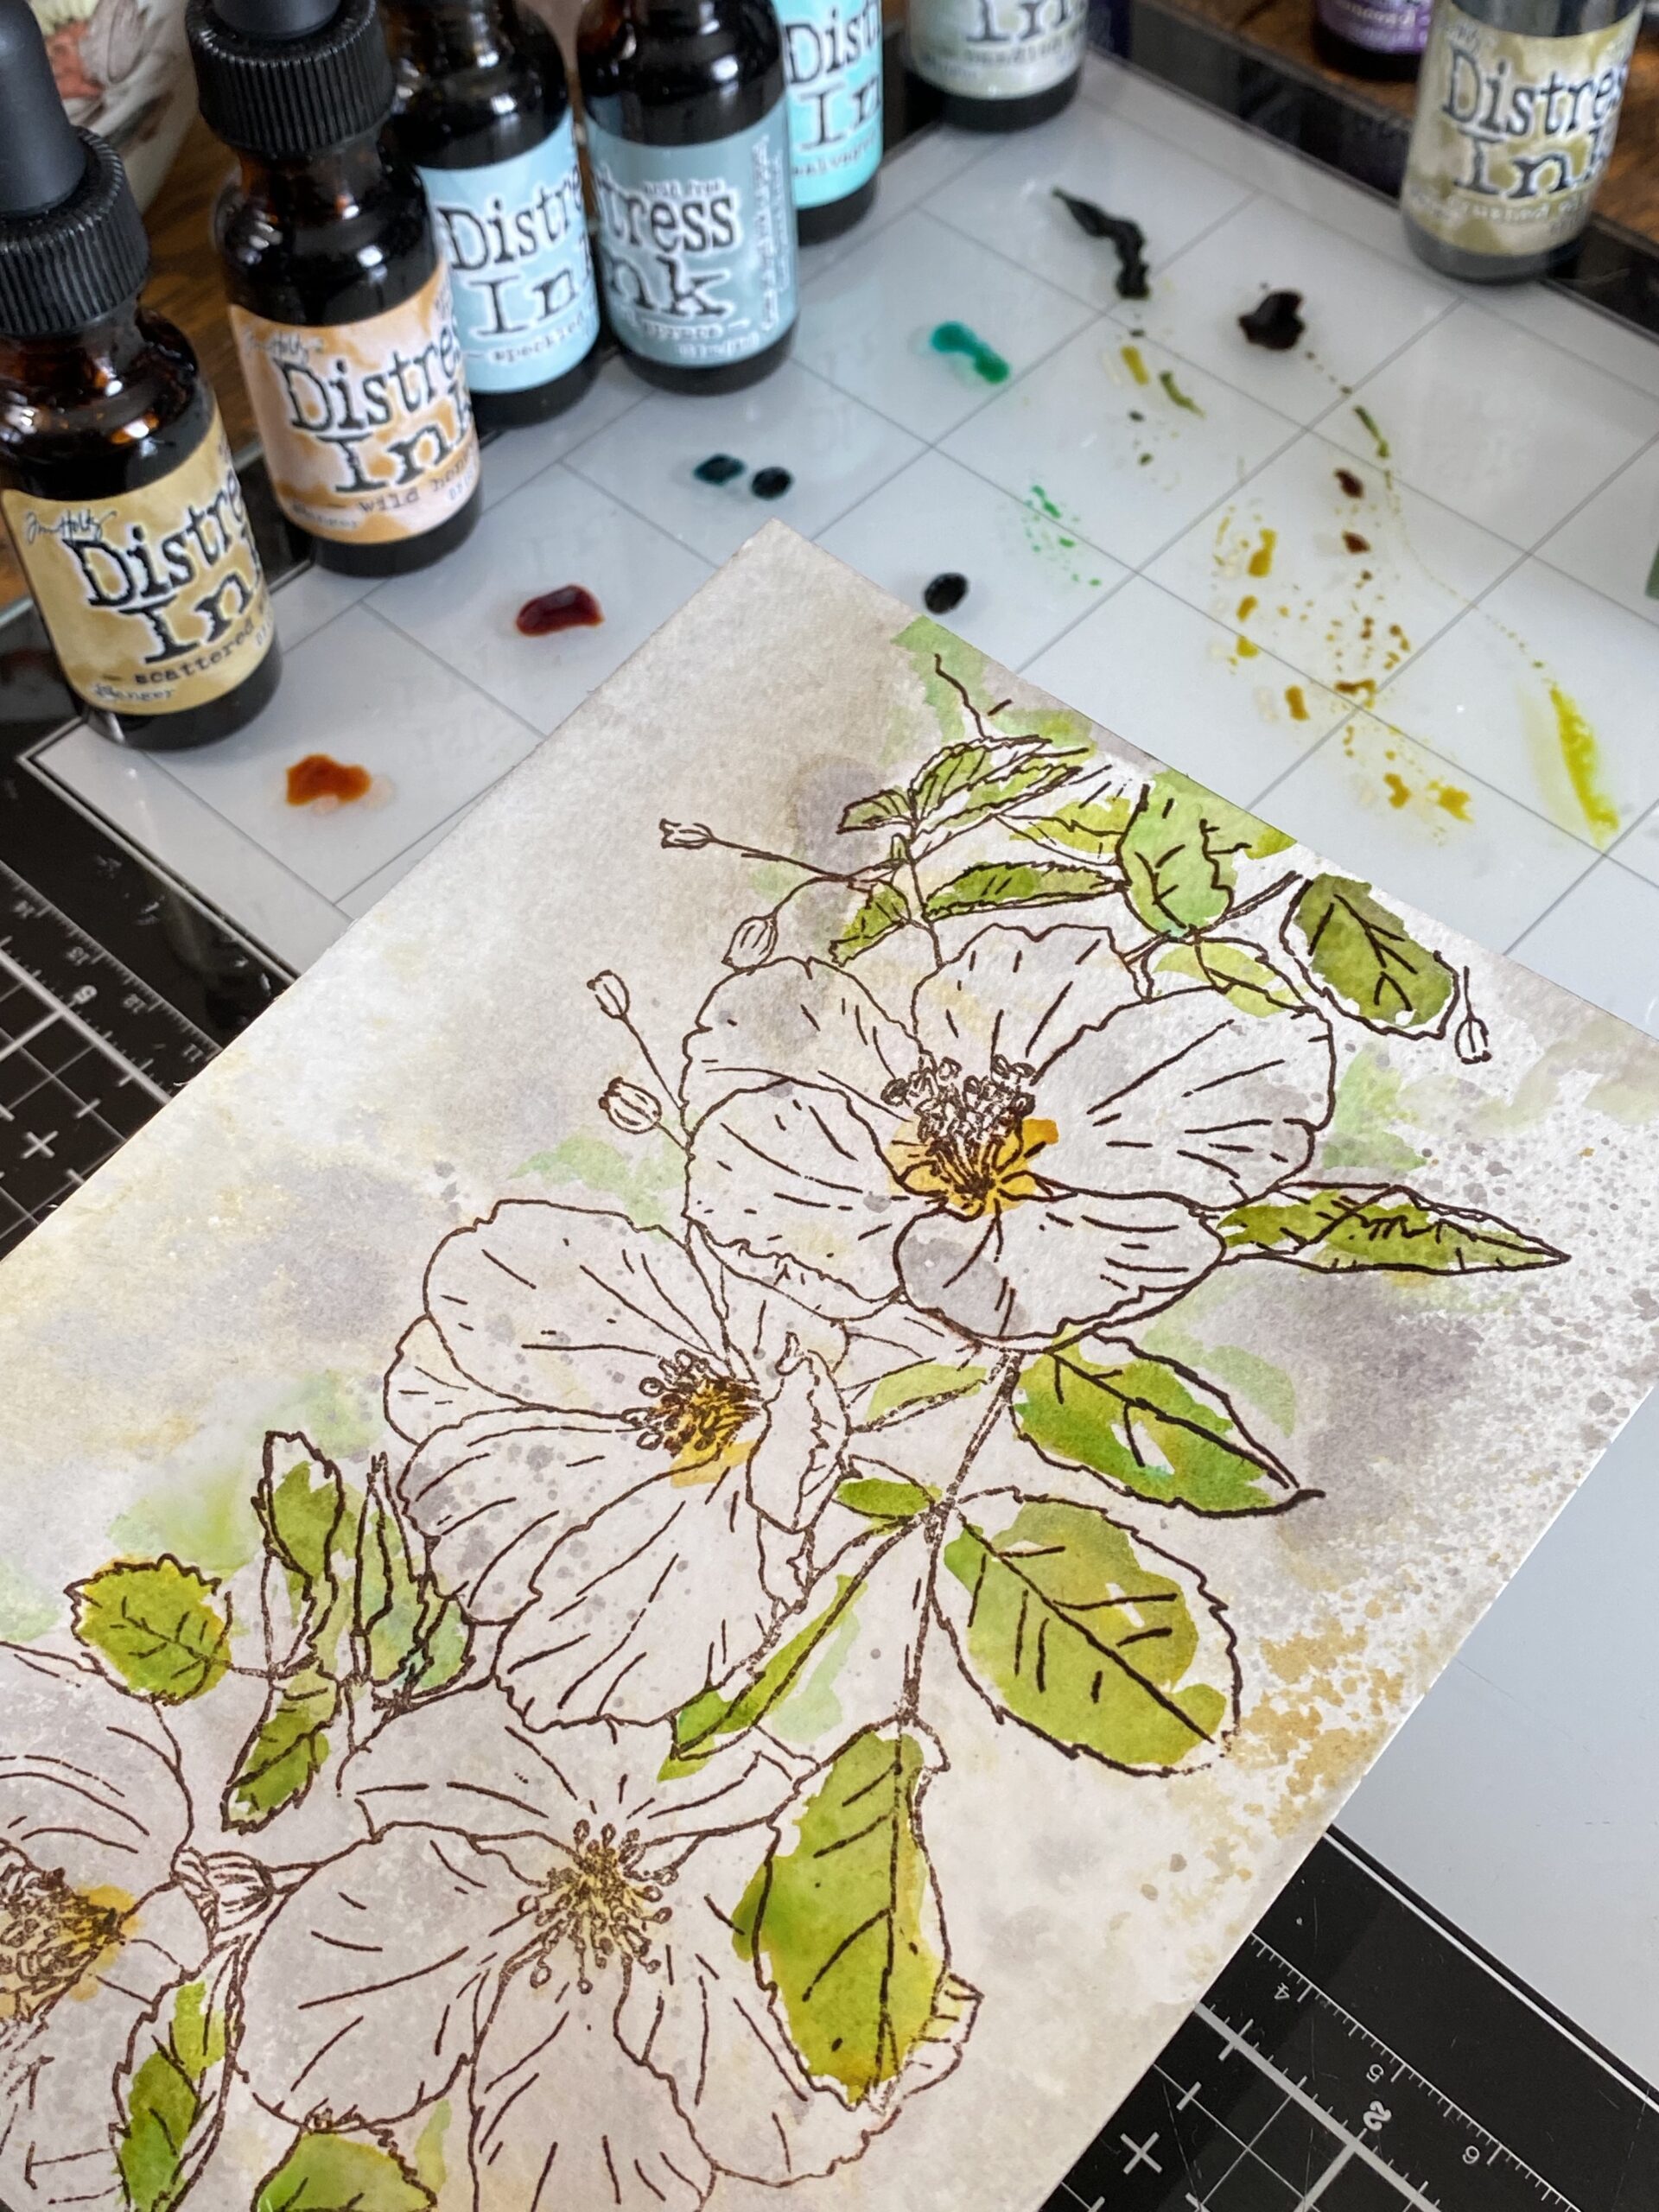
I dropped a few drips of color from my distress ink refills onto my glass craft mat, then dipped a paint brush into water and lightly water brushed color into the image. To blend colors of ink, for example, pick up a shade of green, then color in a part of your image, then while the colored area is still wet, pick up another shade of green and add it to the previously green colored area. This creates the blended and shaded effect that you see in my examples. The wet inks, once blended, were then dried using a heat tool.

Once I had the green and yellow areas of my floral colored and dried, I added shadings of purples in a blended and shaded way as I had done with the greens, then dried the image with y heat tool.
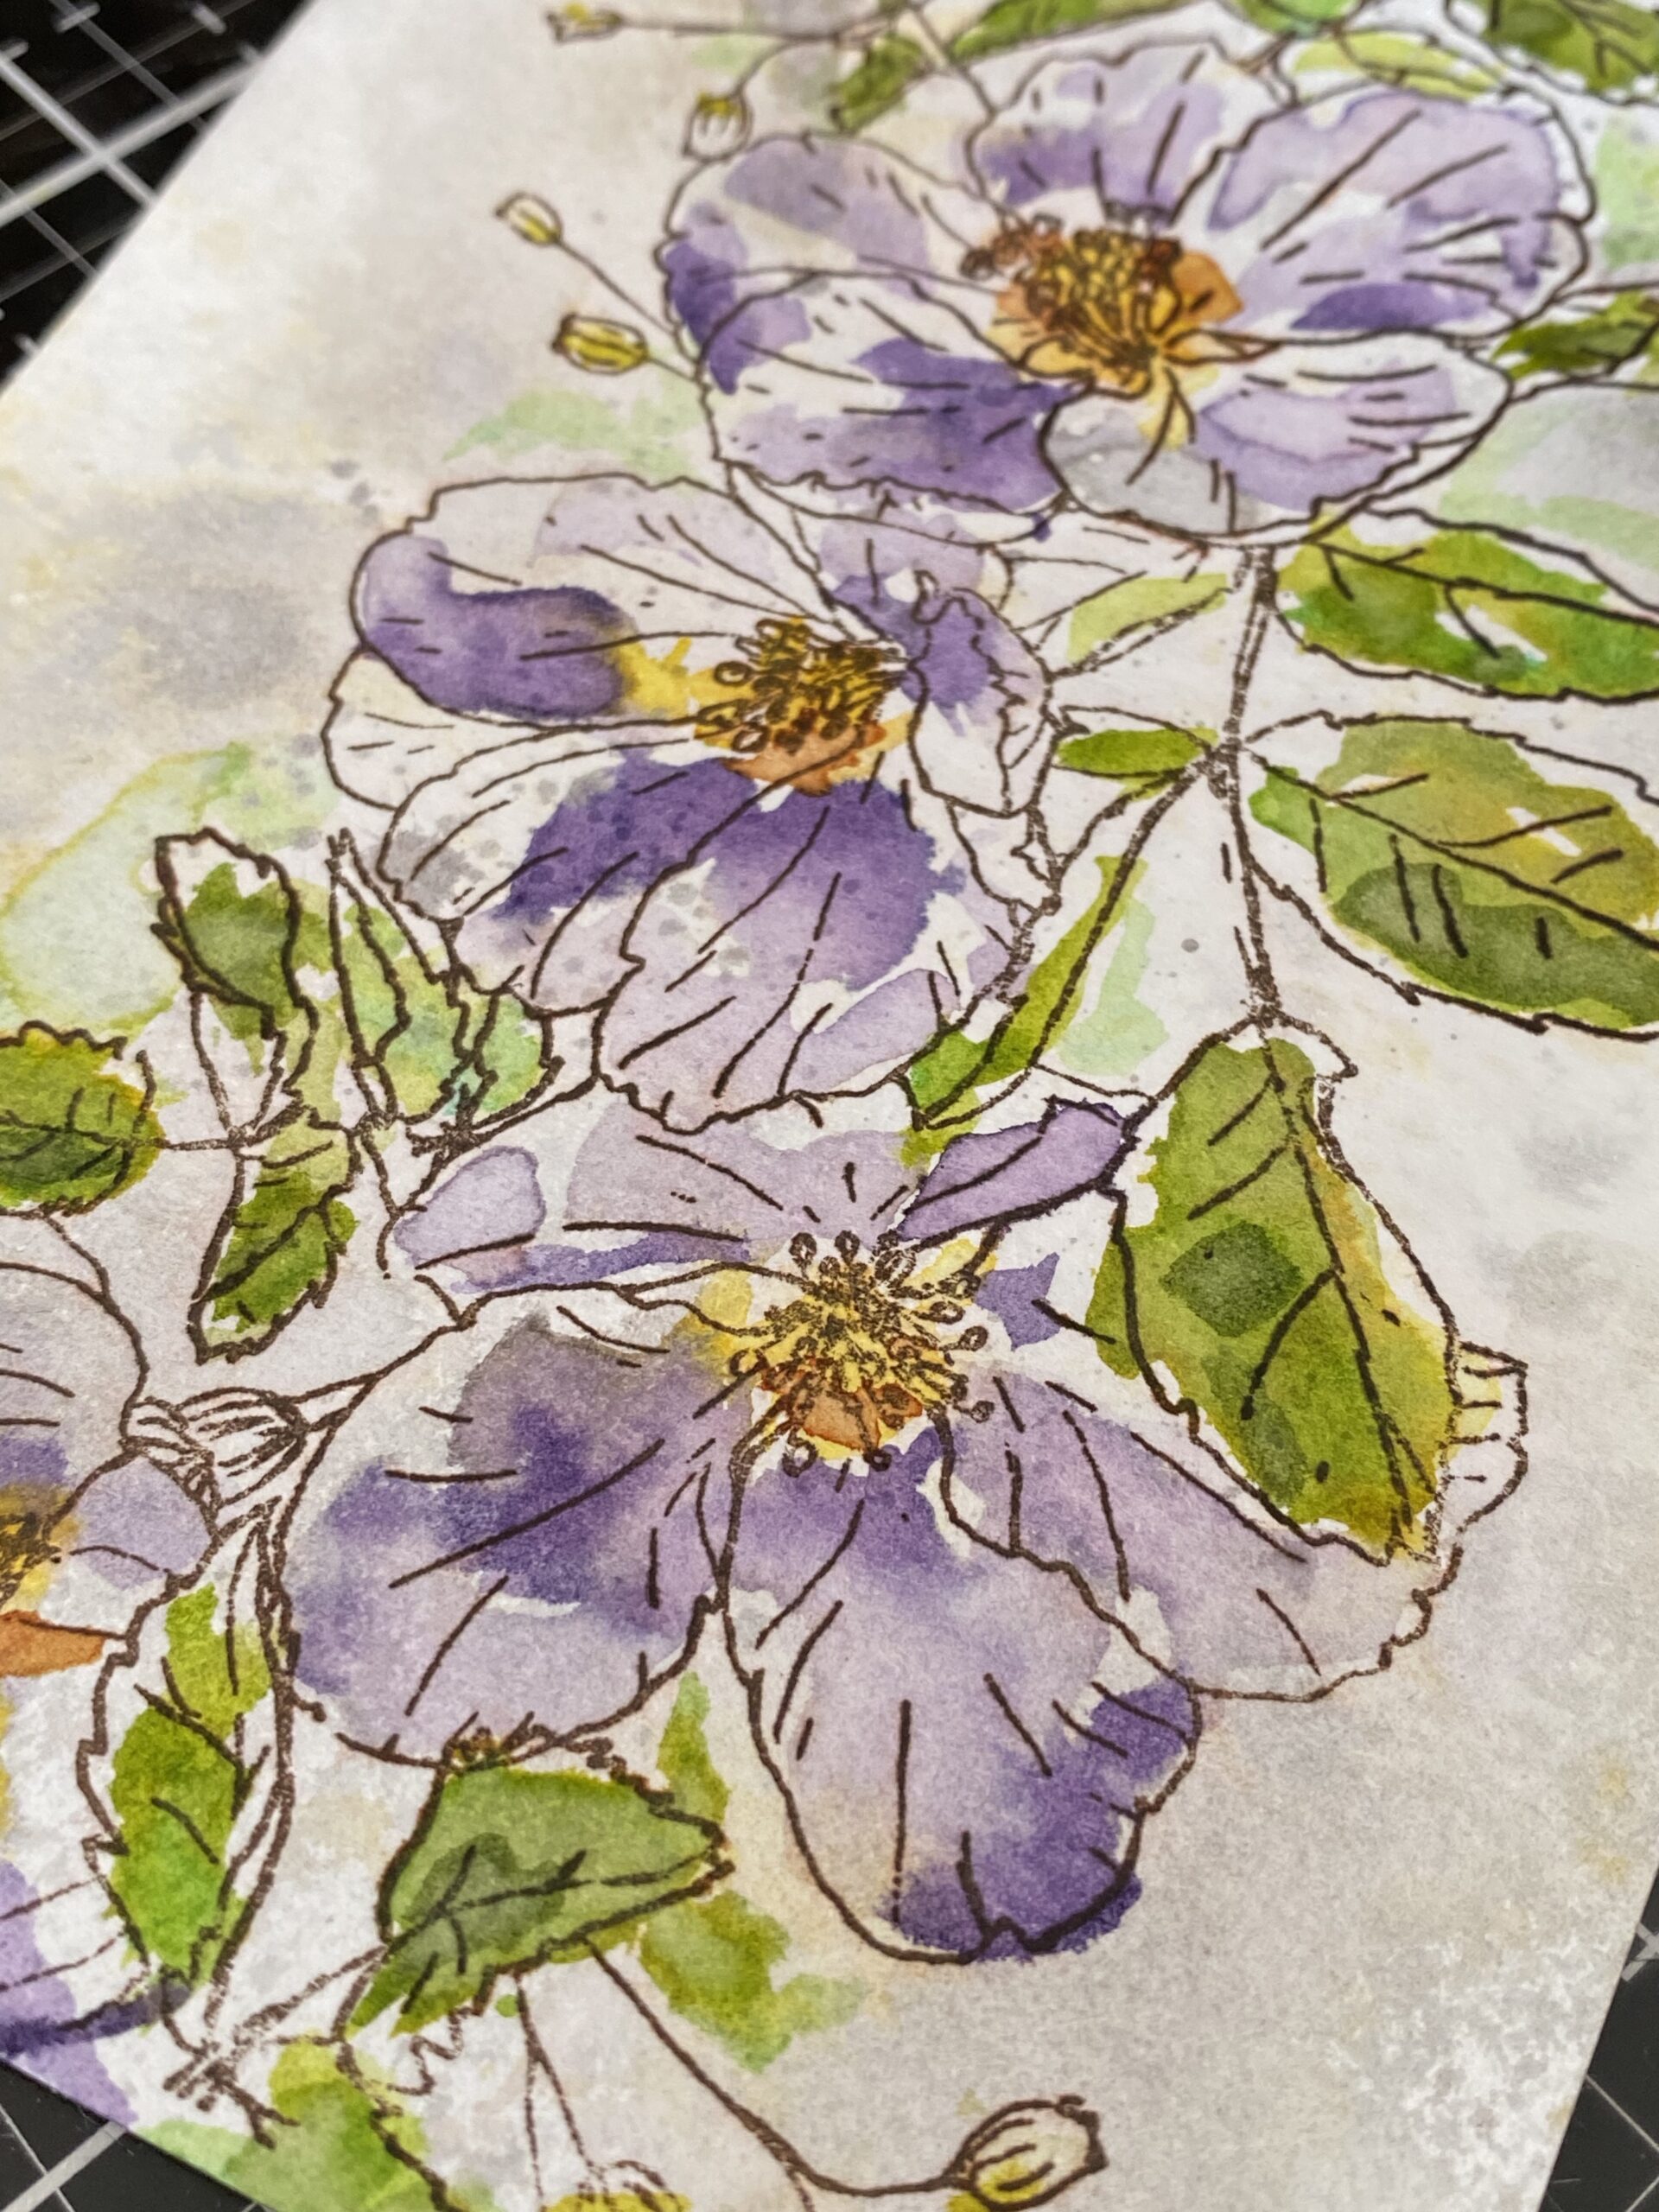

I trimmed the watercolored piece right down the center to create 2 backgrounds. But once I did that, I decided that the backgrounds might need some more shading and whimsy…so I grabbed my Distress Watercolor Pencils and began adding some more shading.
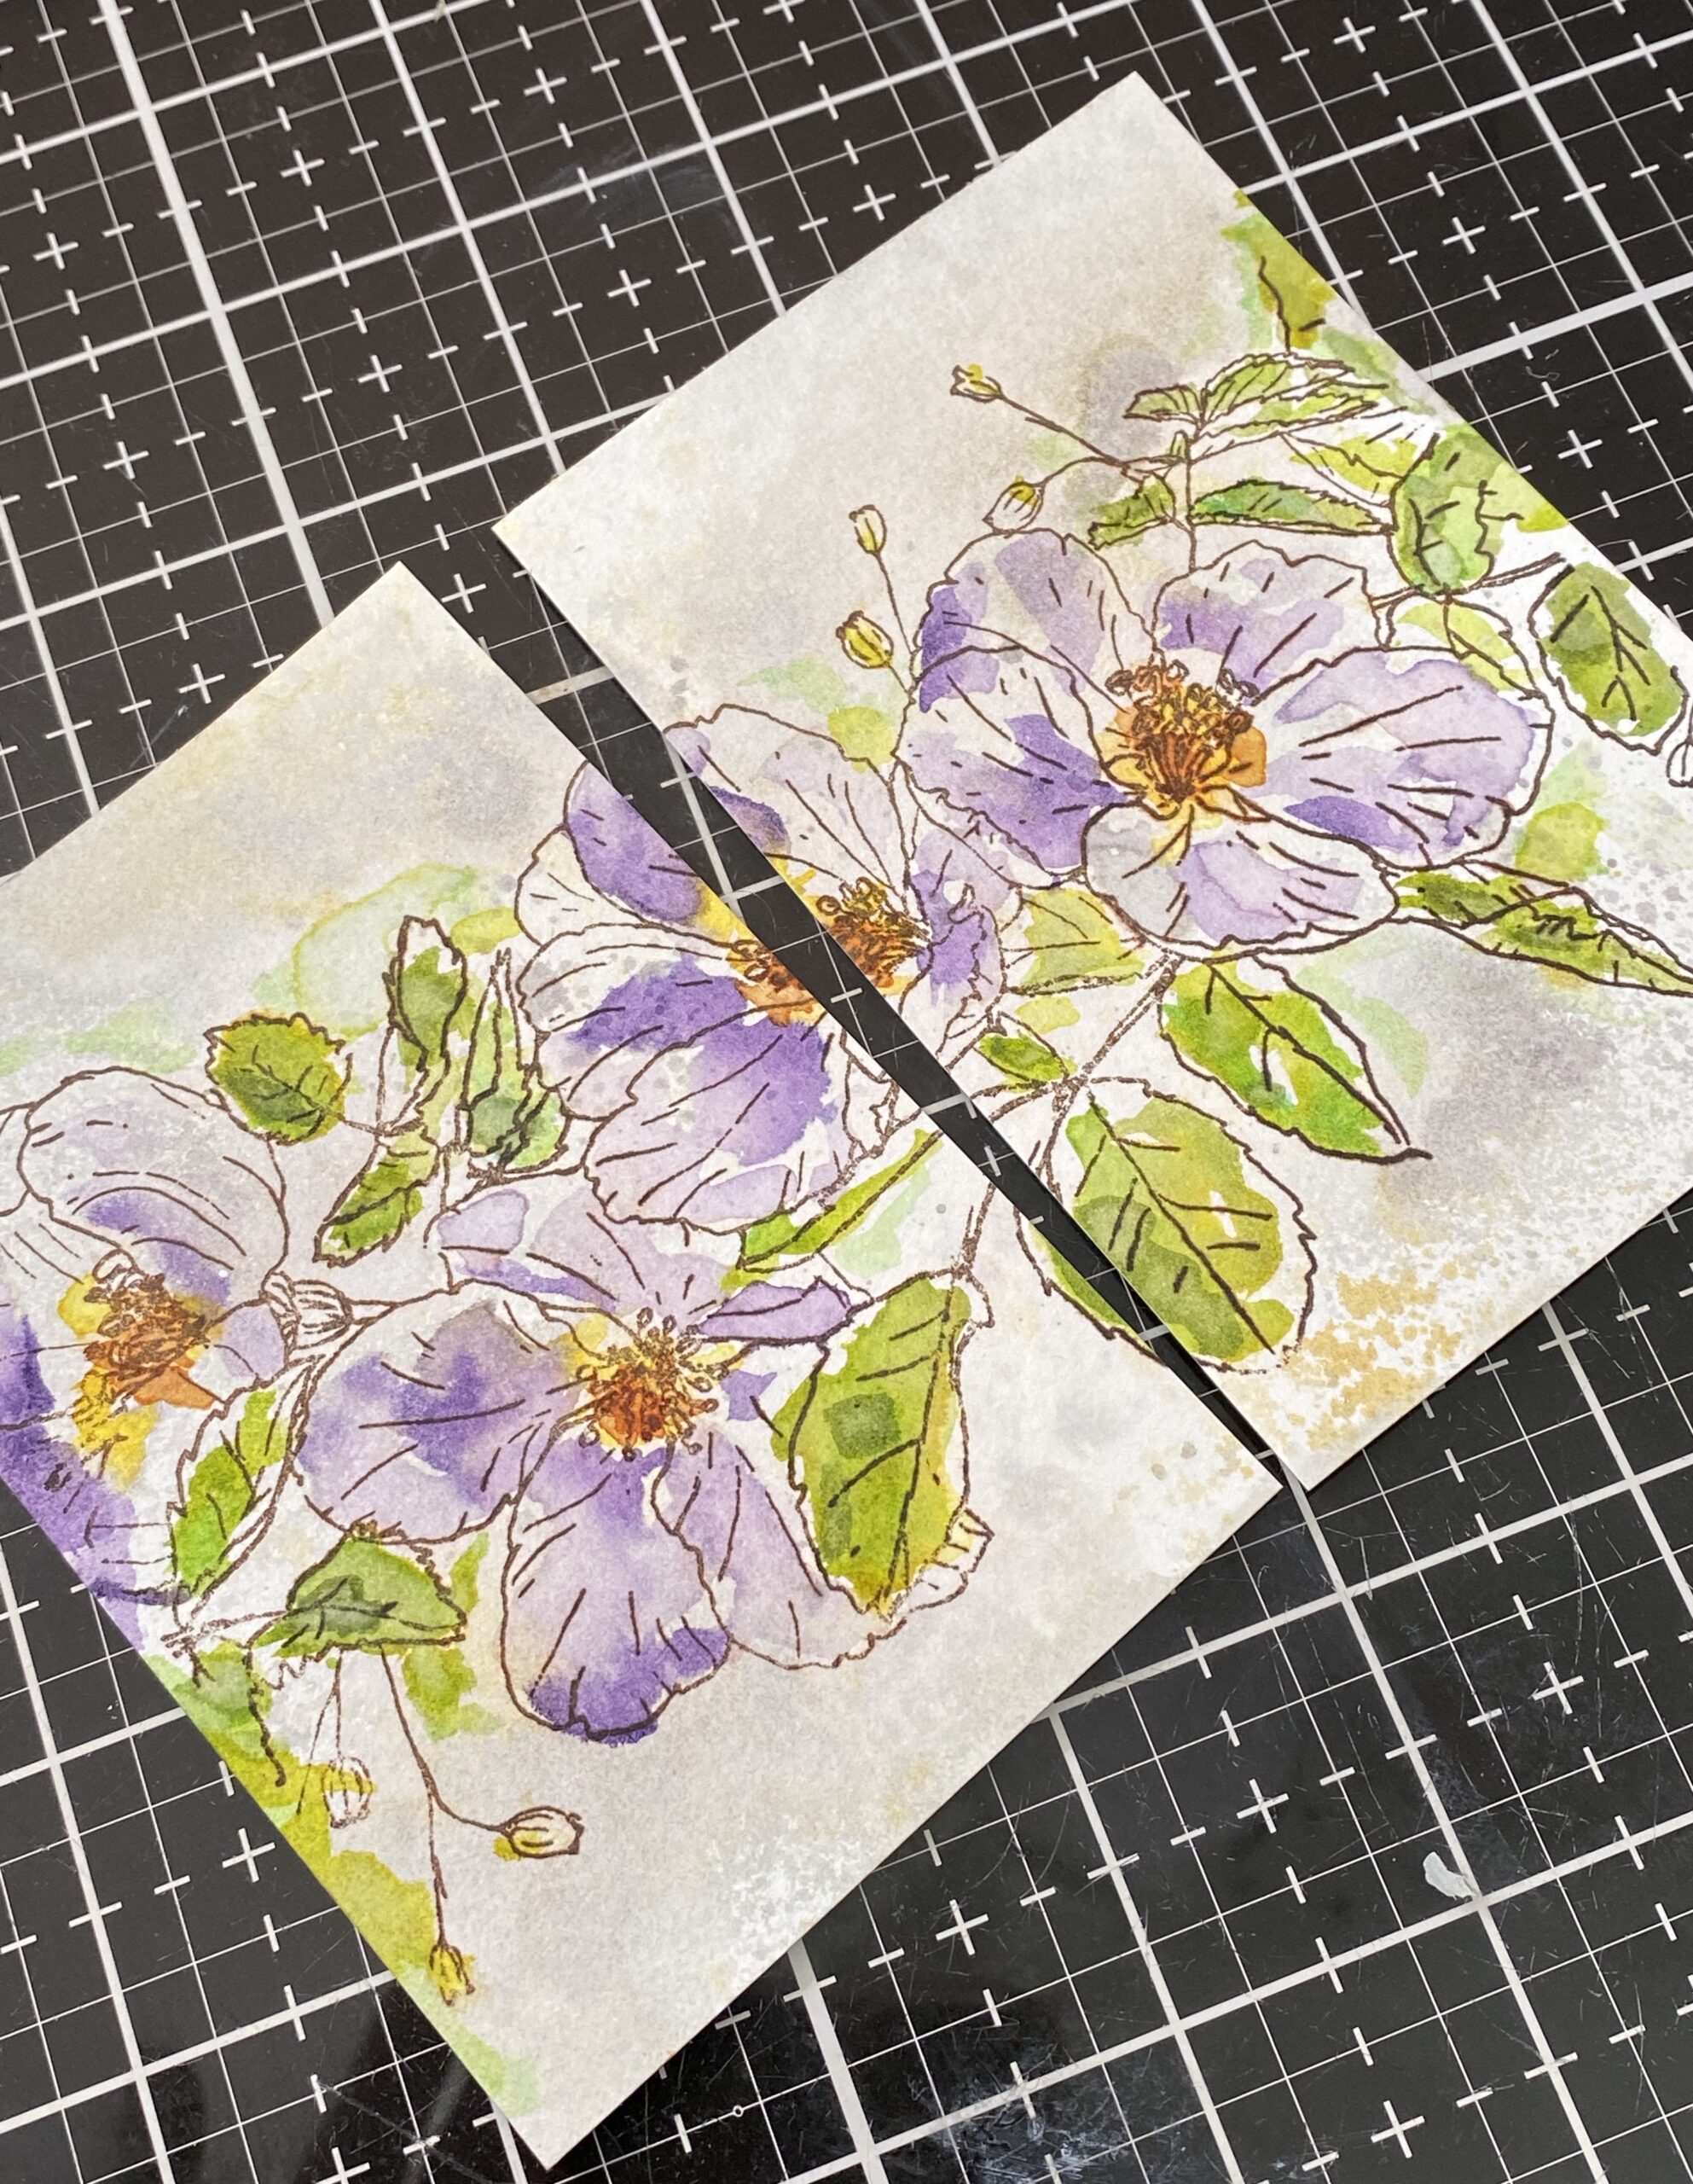

The Distress Watercolor Pencils are a creative new way to add color to images. They can be used dry by scribbling or coloring images or they can be used wet, by dipping them into water to activate the pigments and create a more watercolored look.
In the sample below, you’ll see that I scribbled some areas on the flowers, leaves, and stamens using colors and shading where in my mind I thought they might go. This was done VERY randomly and scribbly…which is the reason I love the Distress Watercolor Pencils so much. They do NOT need to be done in a precise way, just scribbled here and there.
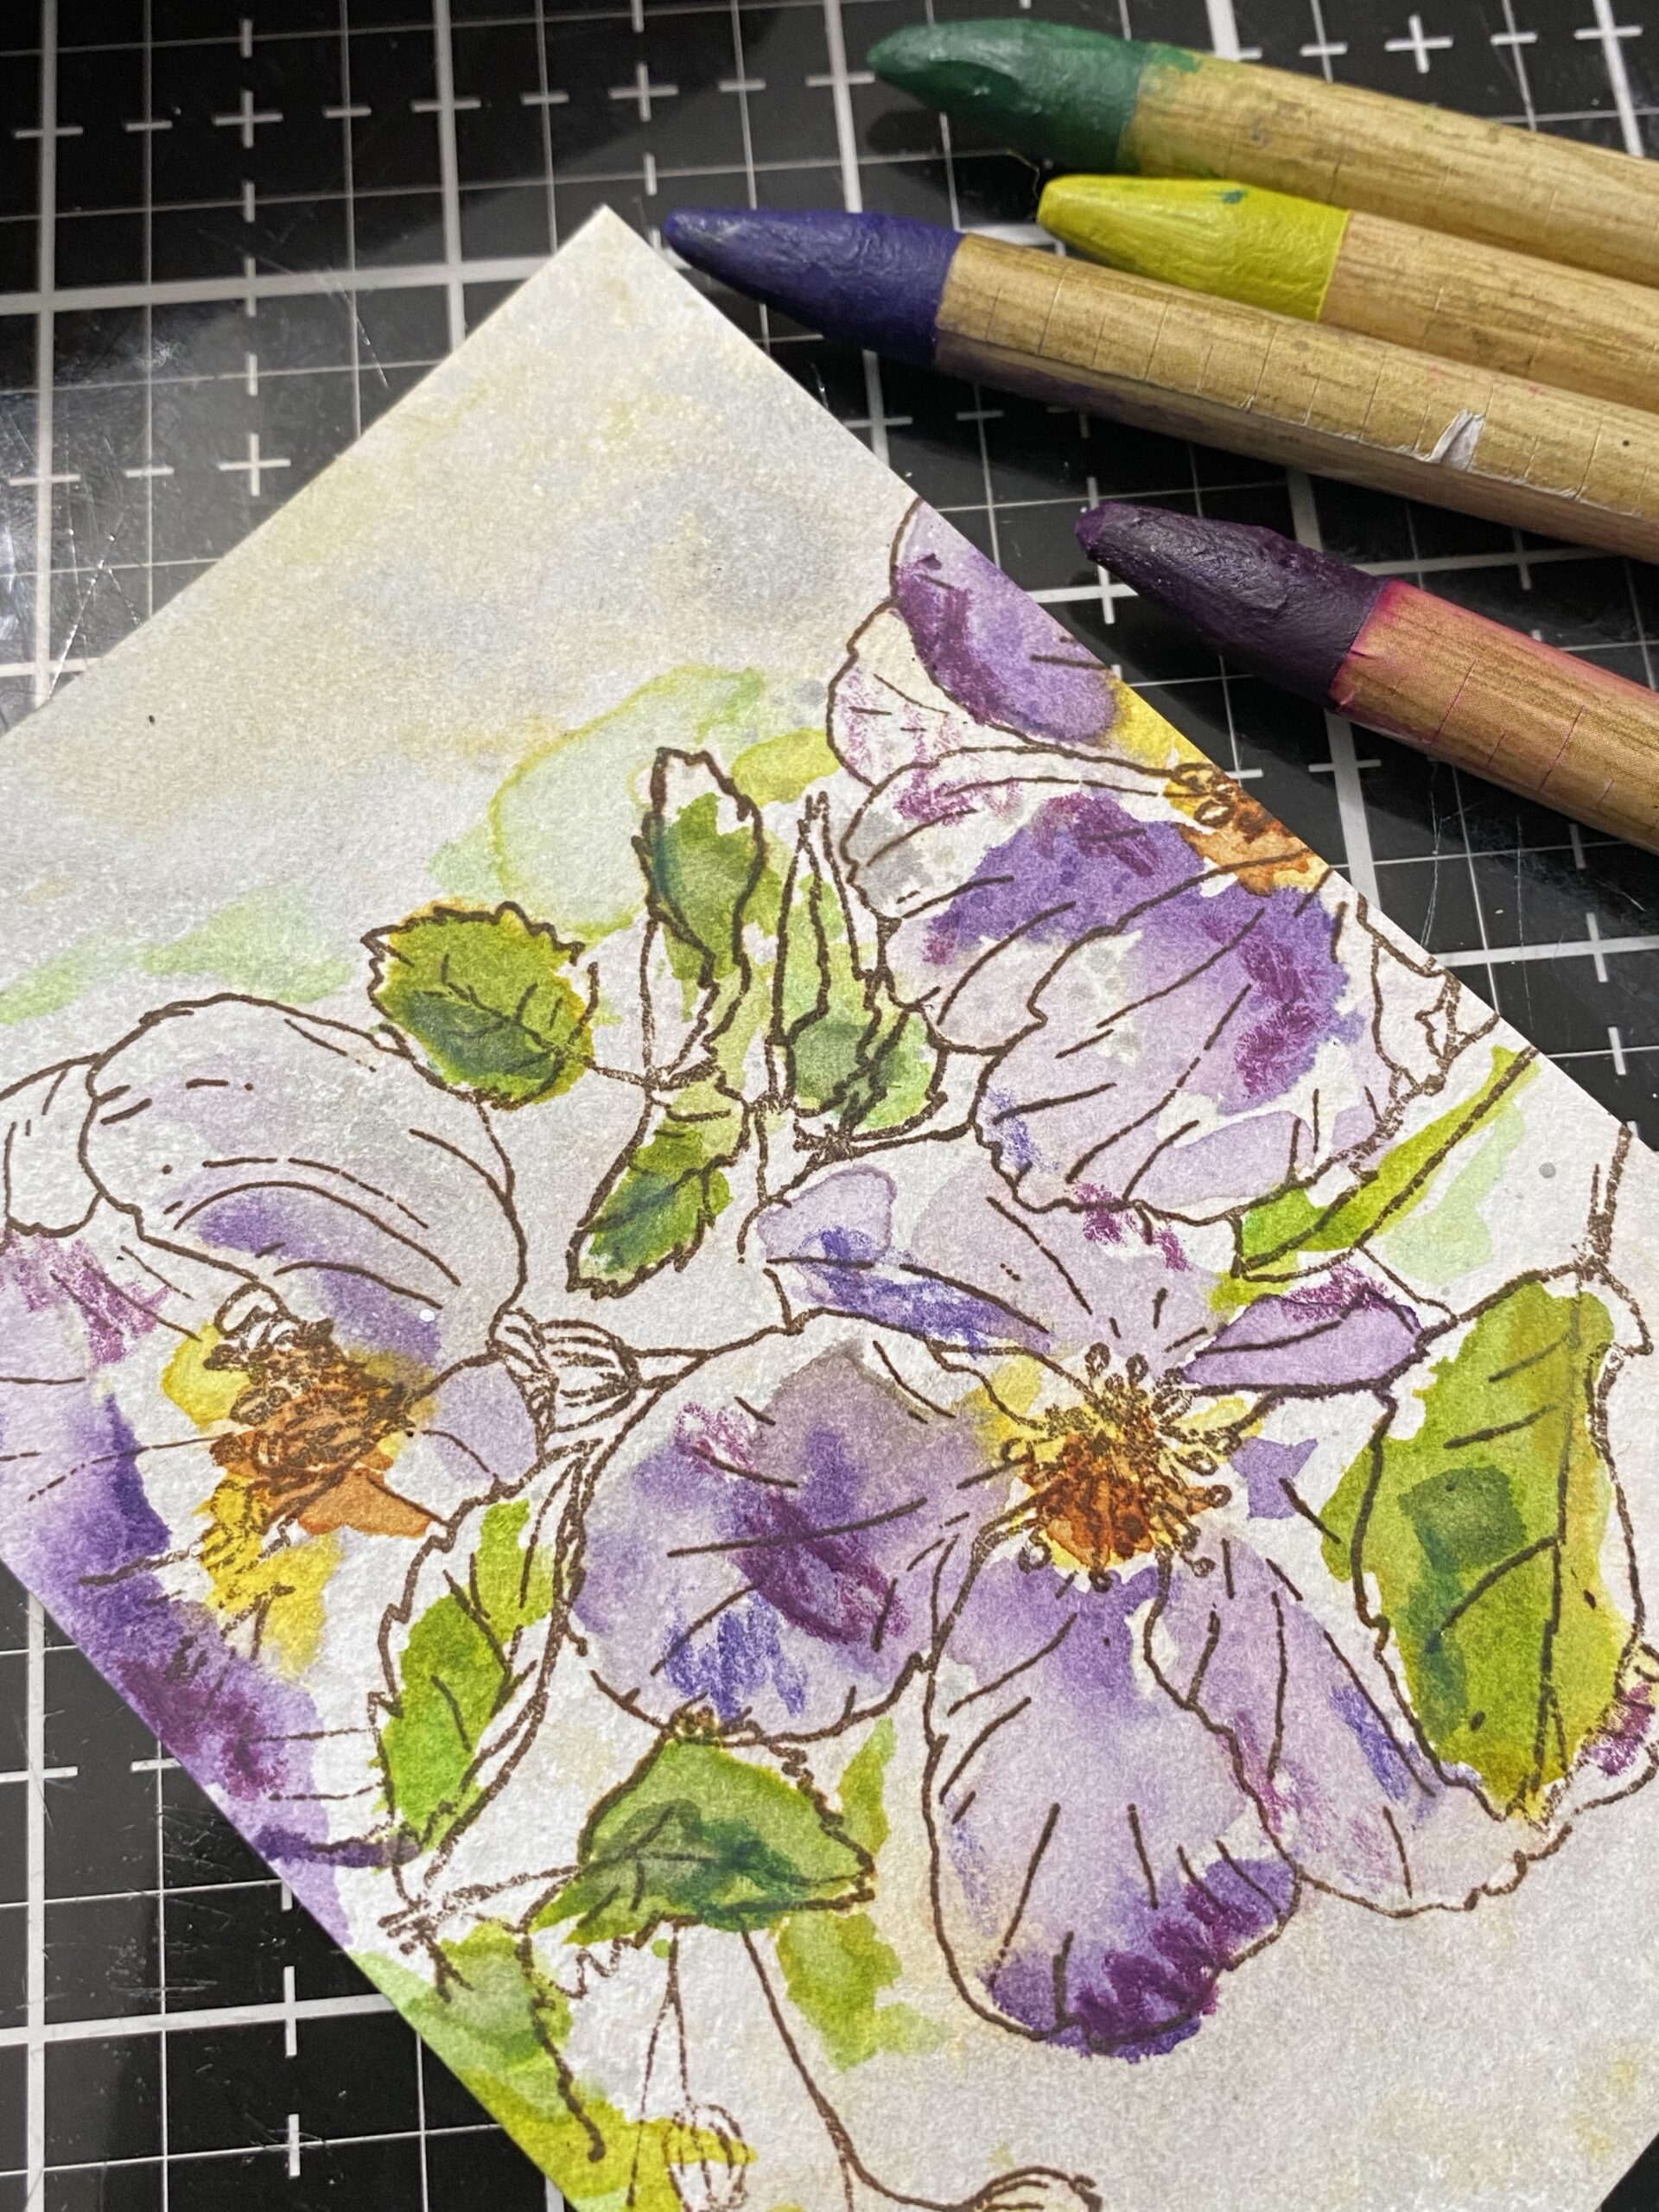

I chose to activate the pigments a little with a paint brush, then dried them with my heat tool. The image below shows the differance between using the watercolor pencils (the bottom card background) or not using them (the top card background) I love how the pencils added more colorful interest and highlights, and continued to add more color to all of the backgrounds using them.
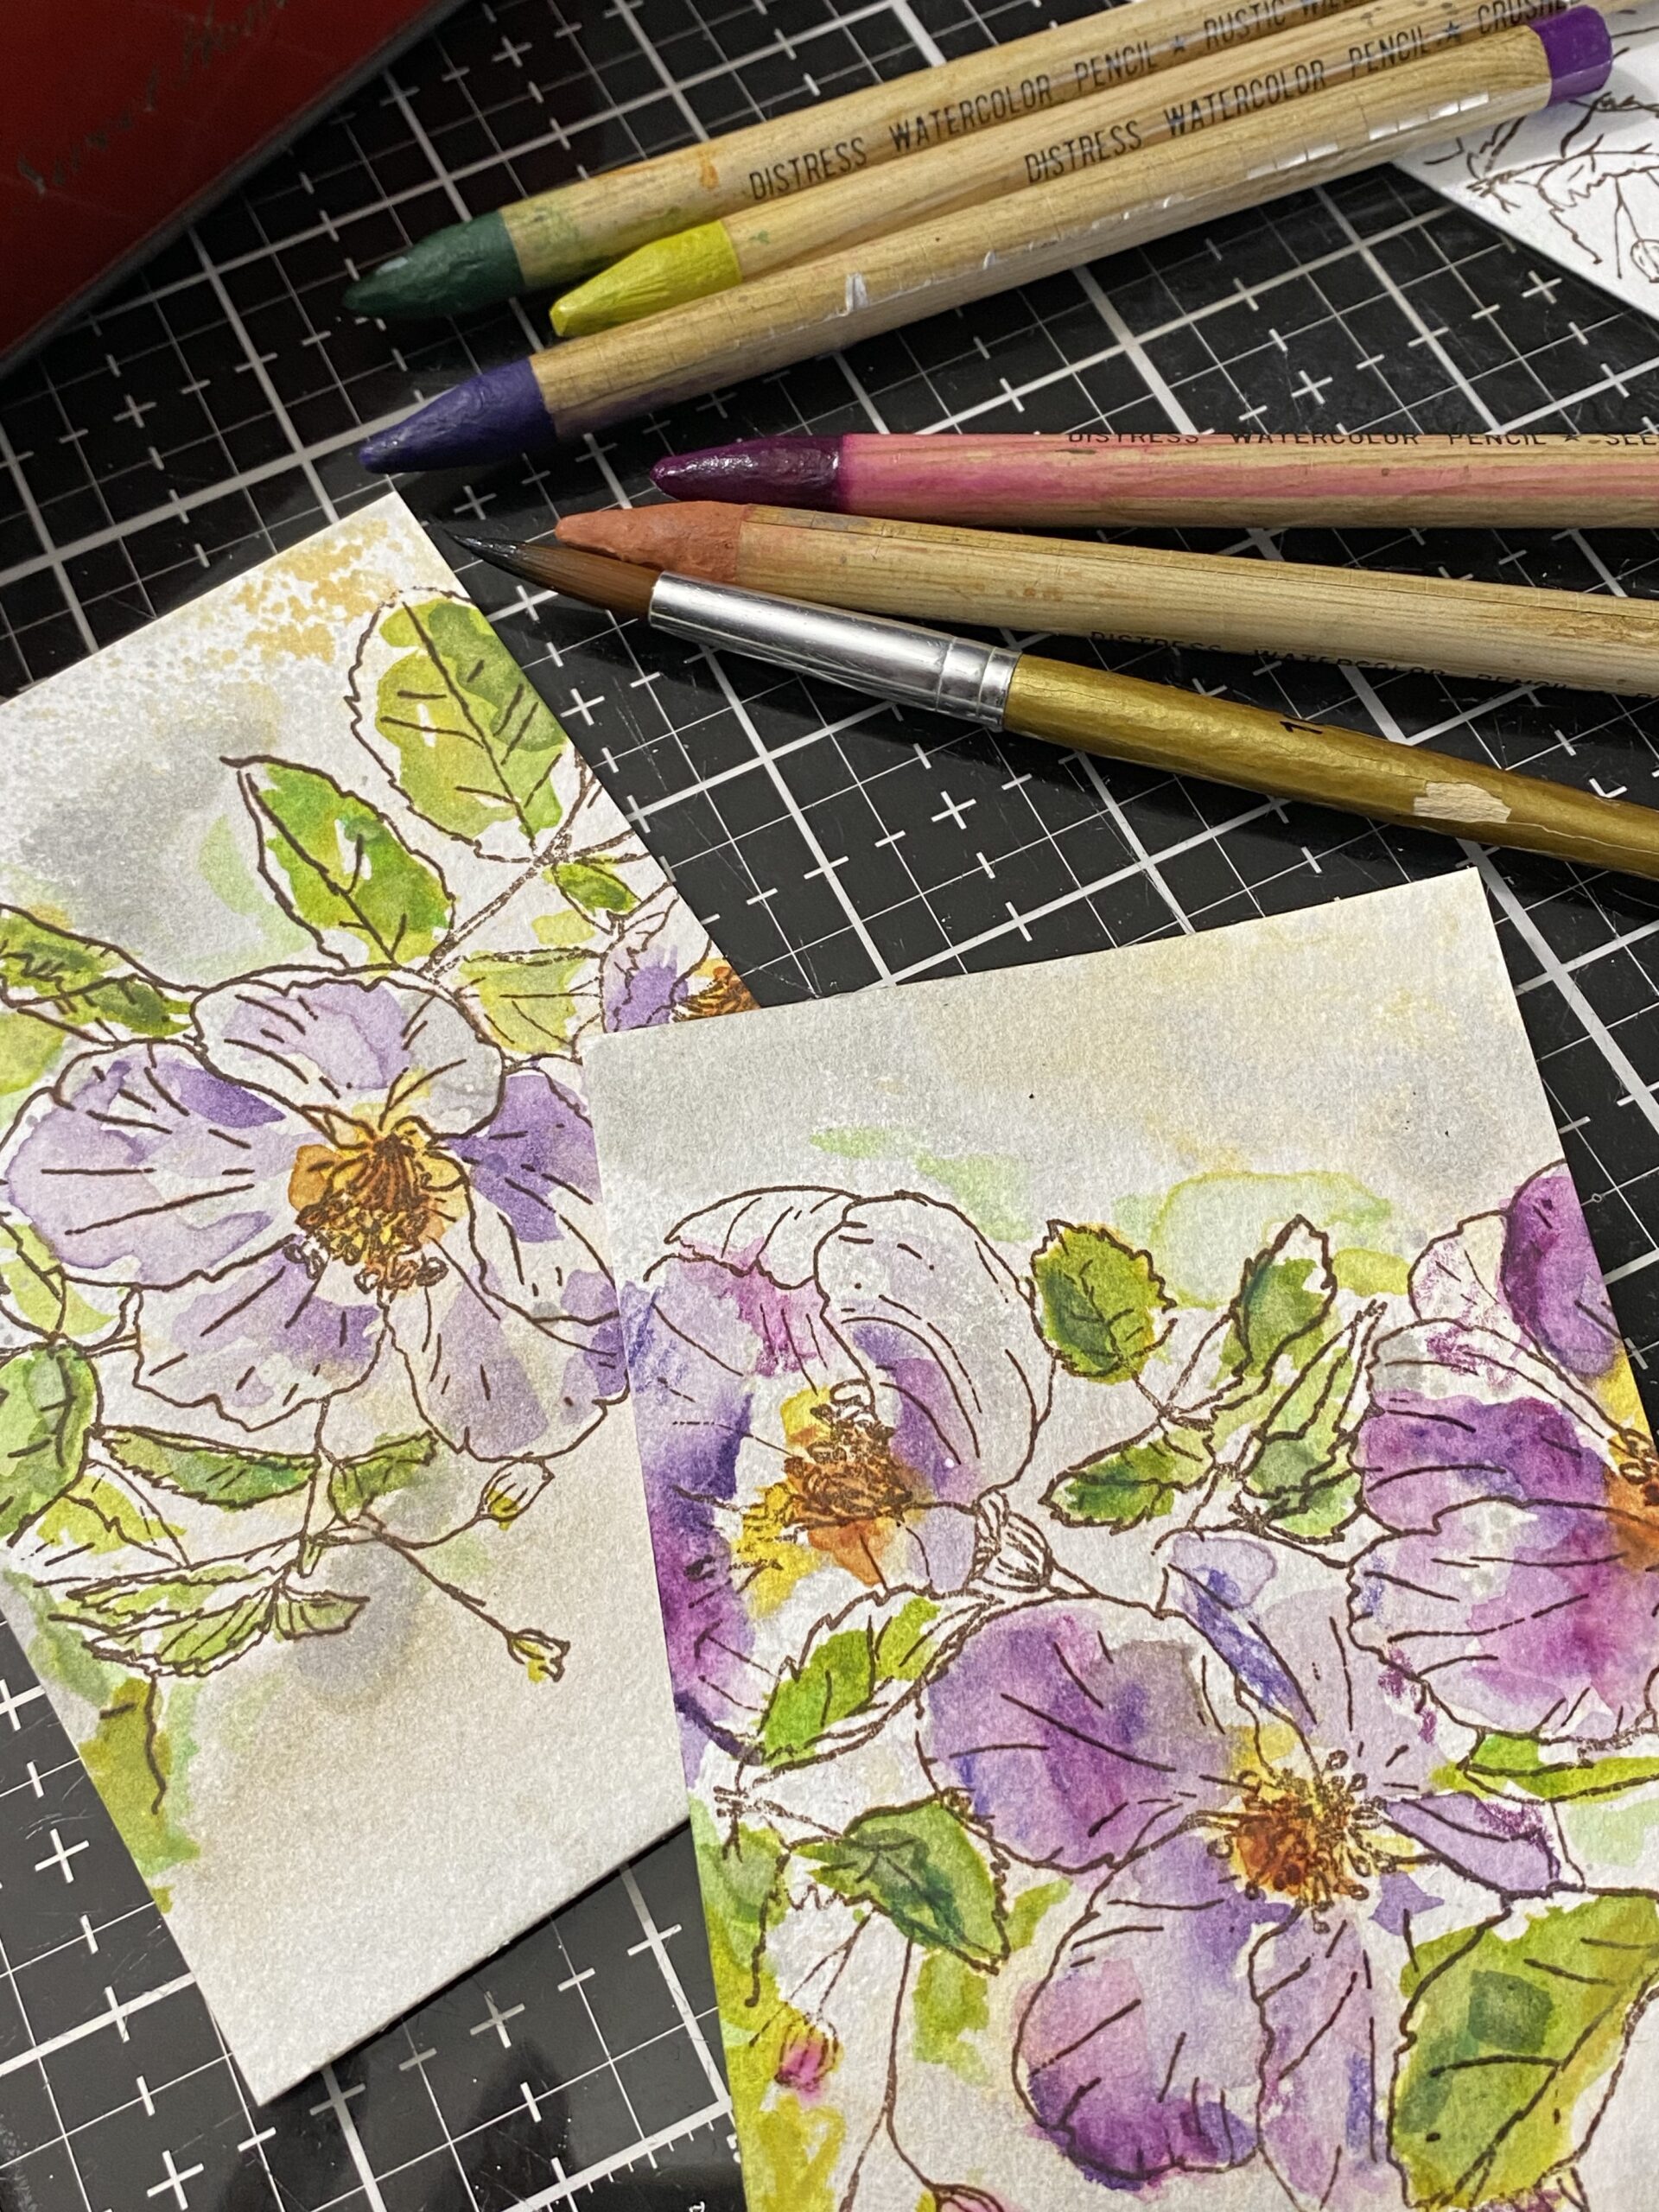

Once the images were all colored, I added scribbled markings into some of the background areas then chose not to watercolor them…I love scribbles!
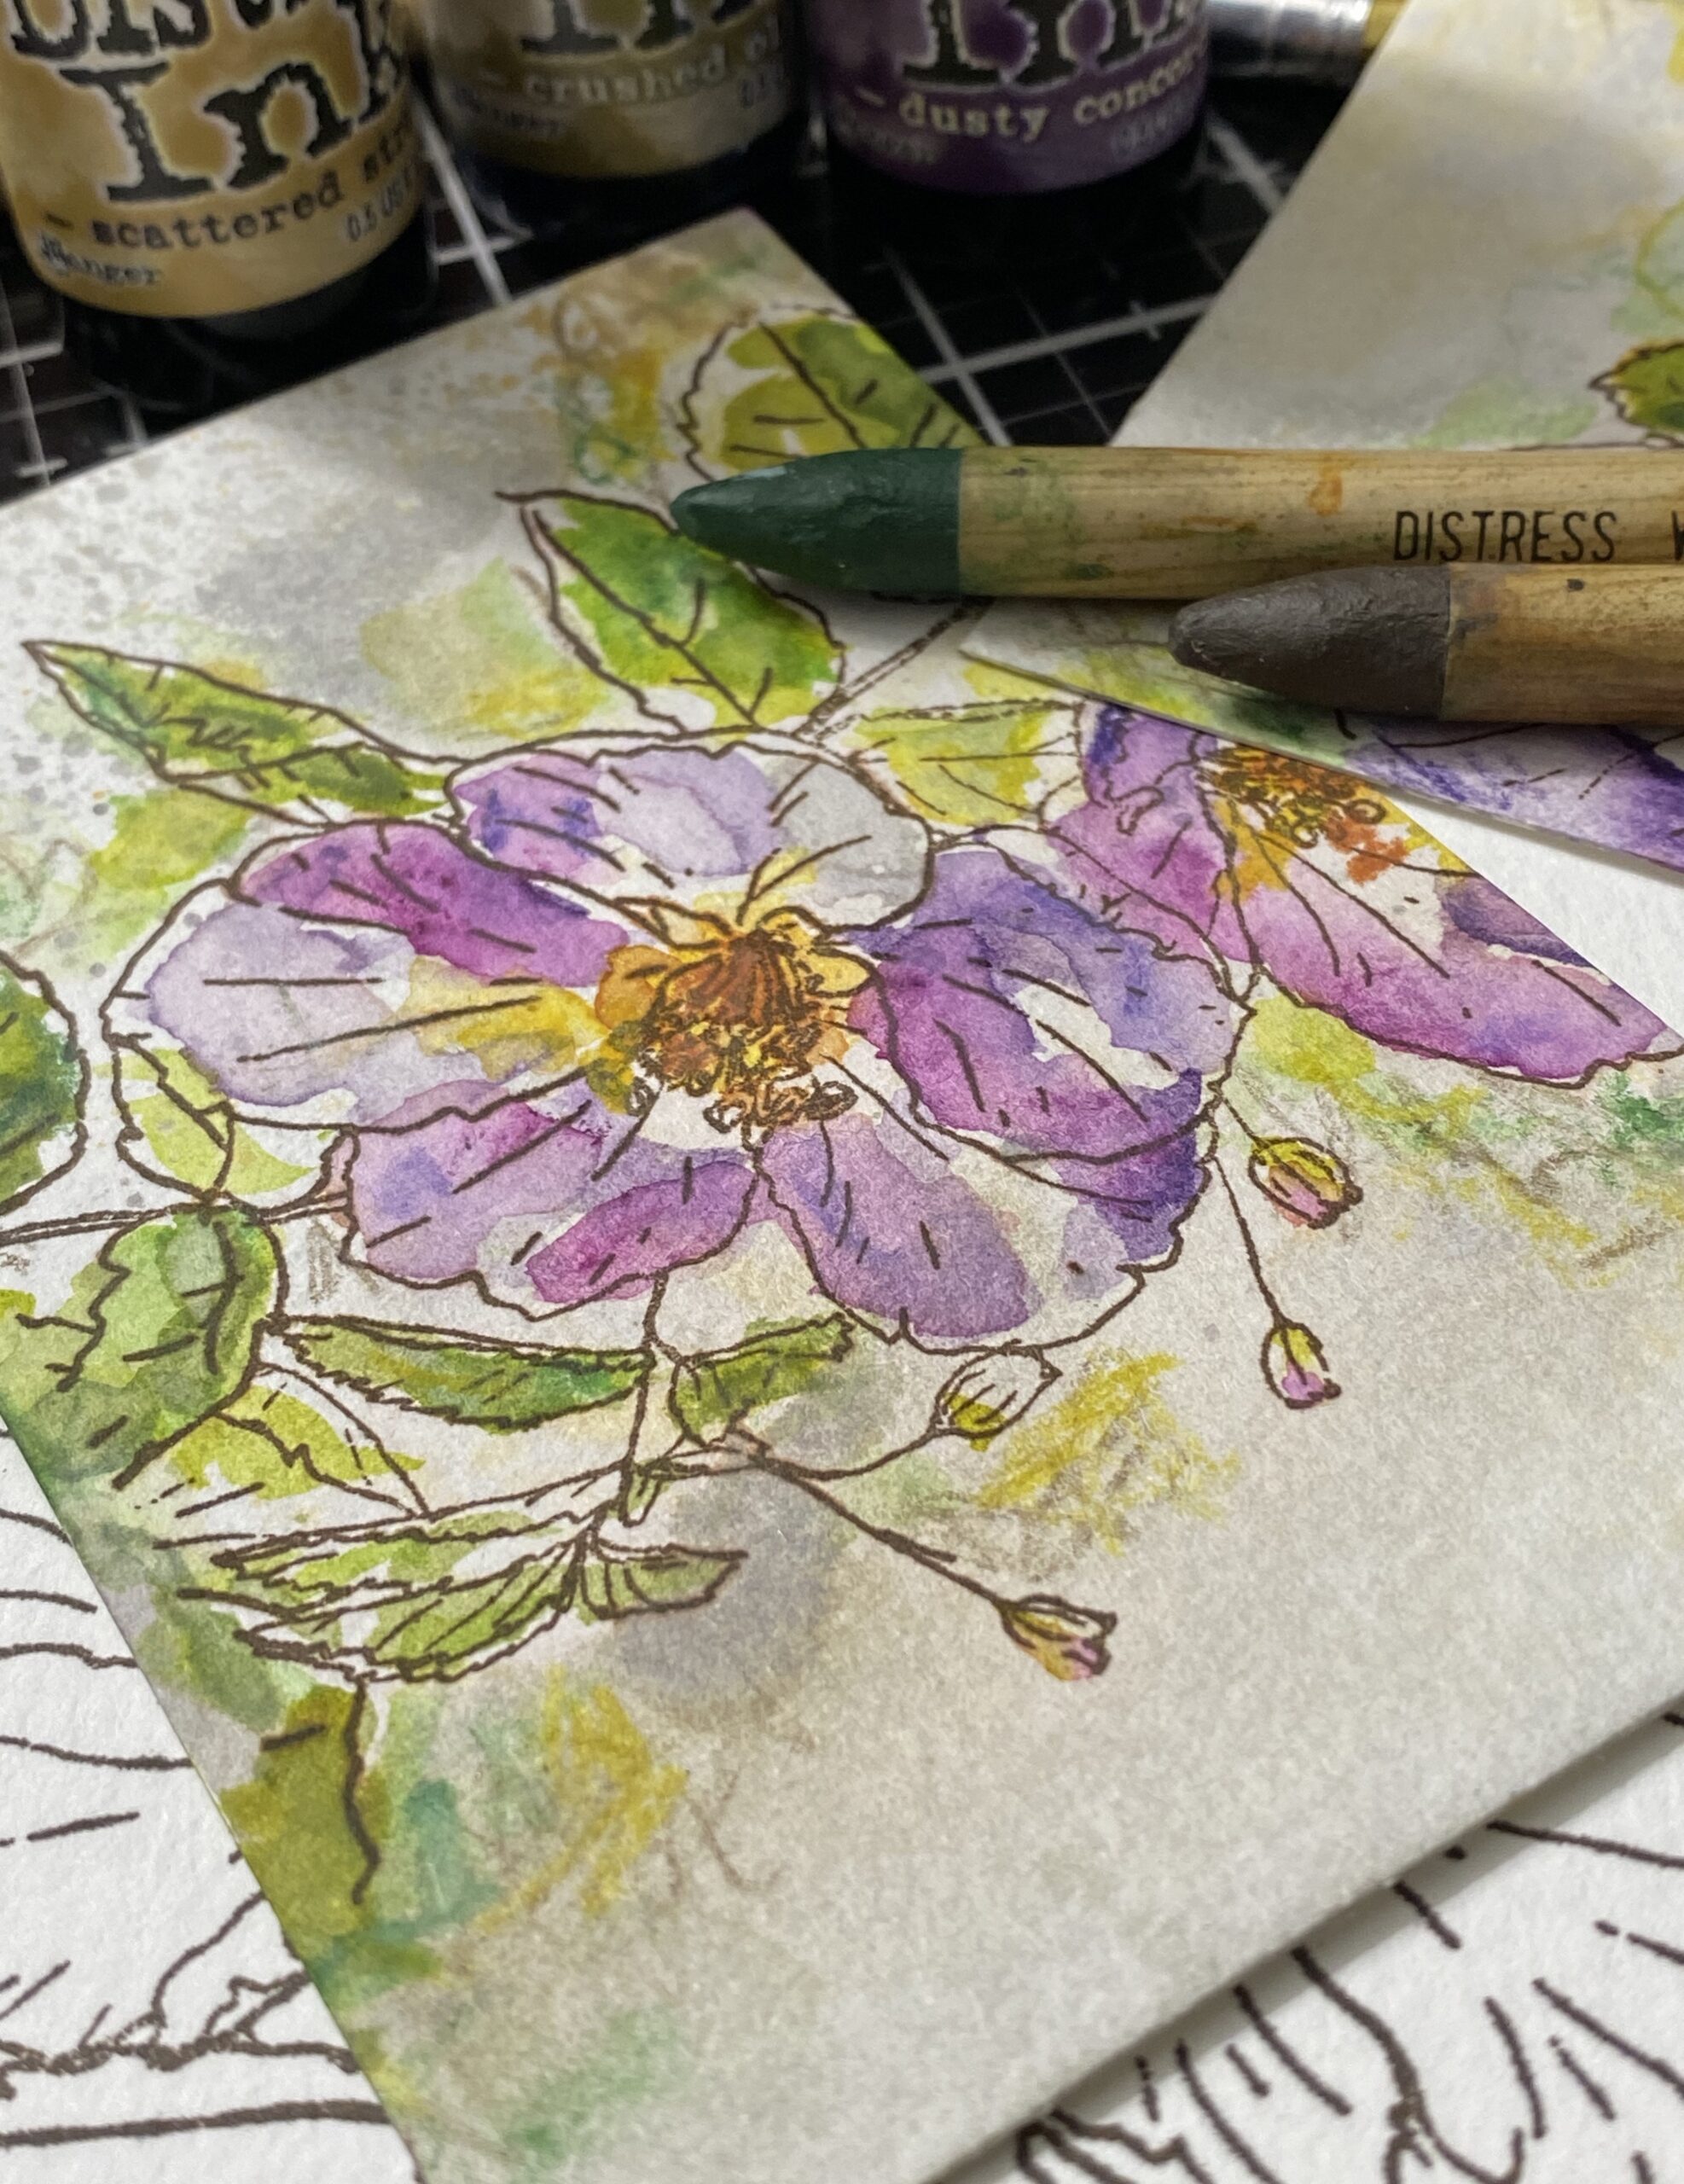

I then began doing the same techniques to the next floral background but changed it up by using a few other Distress colors.
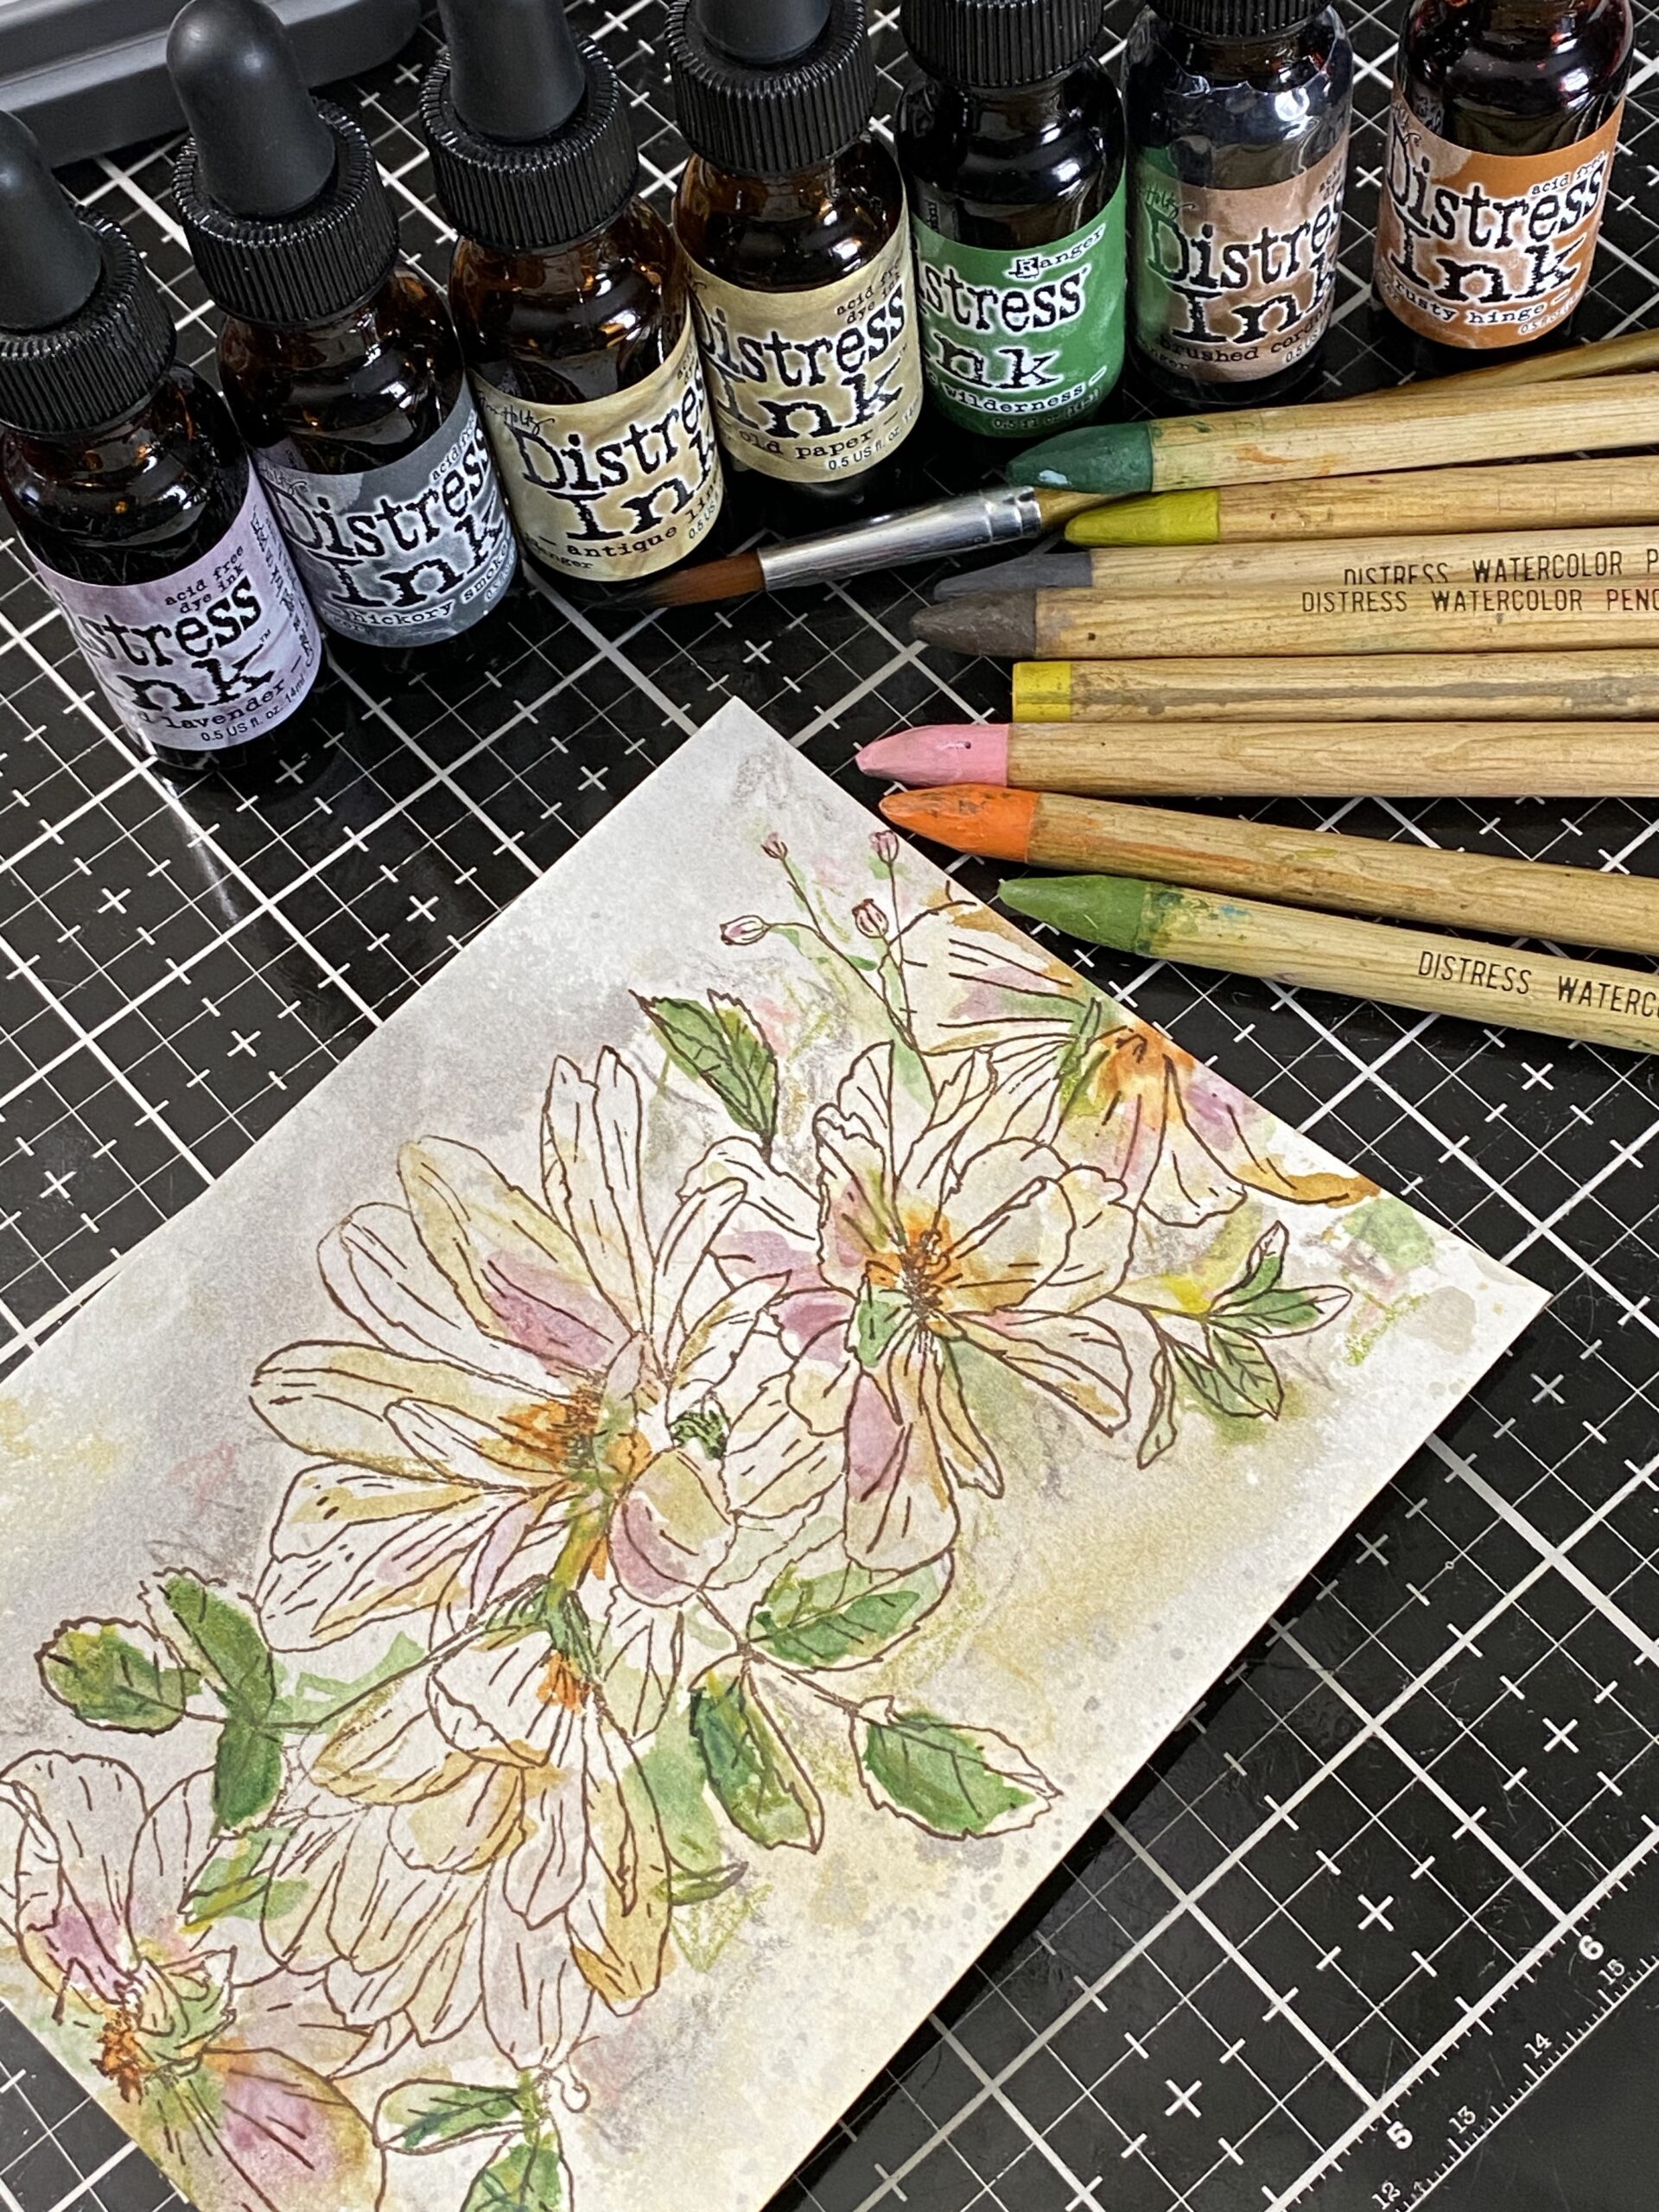

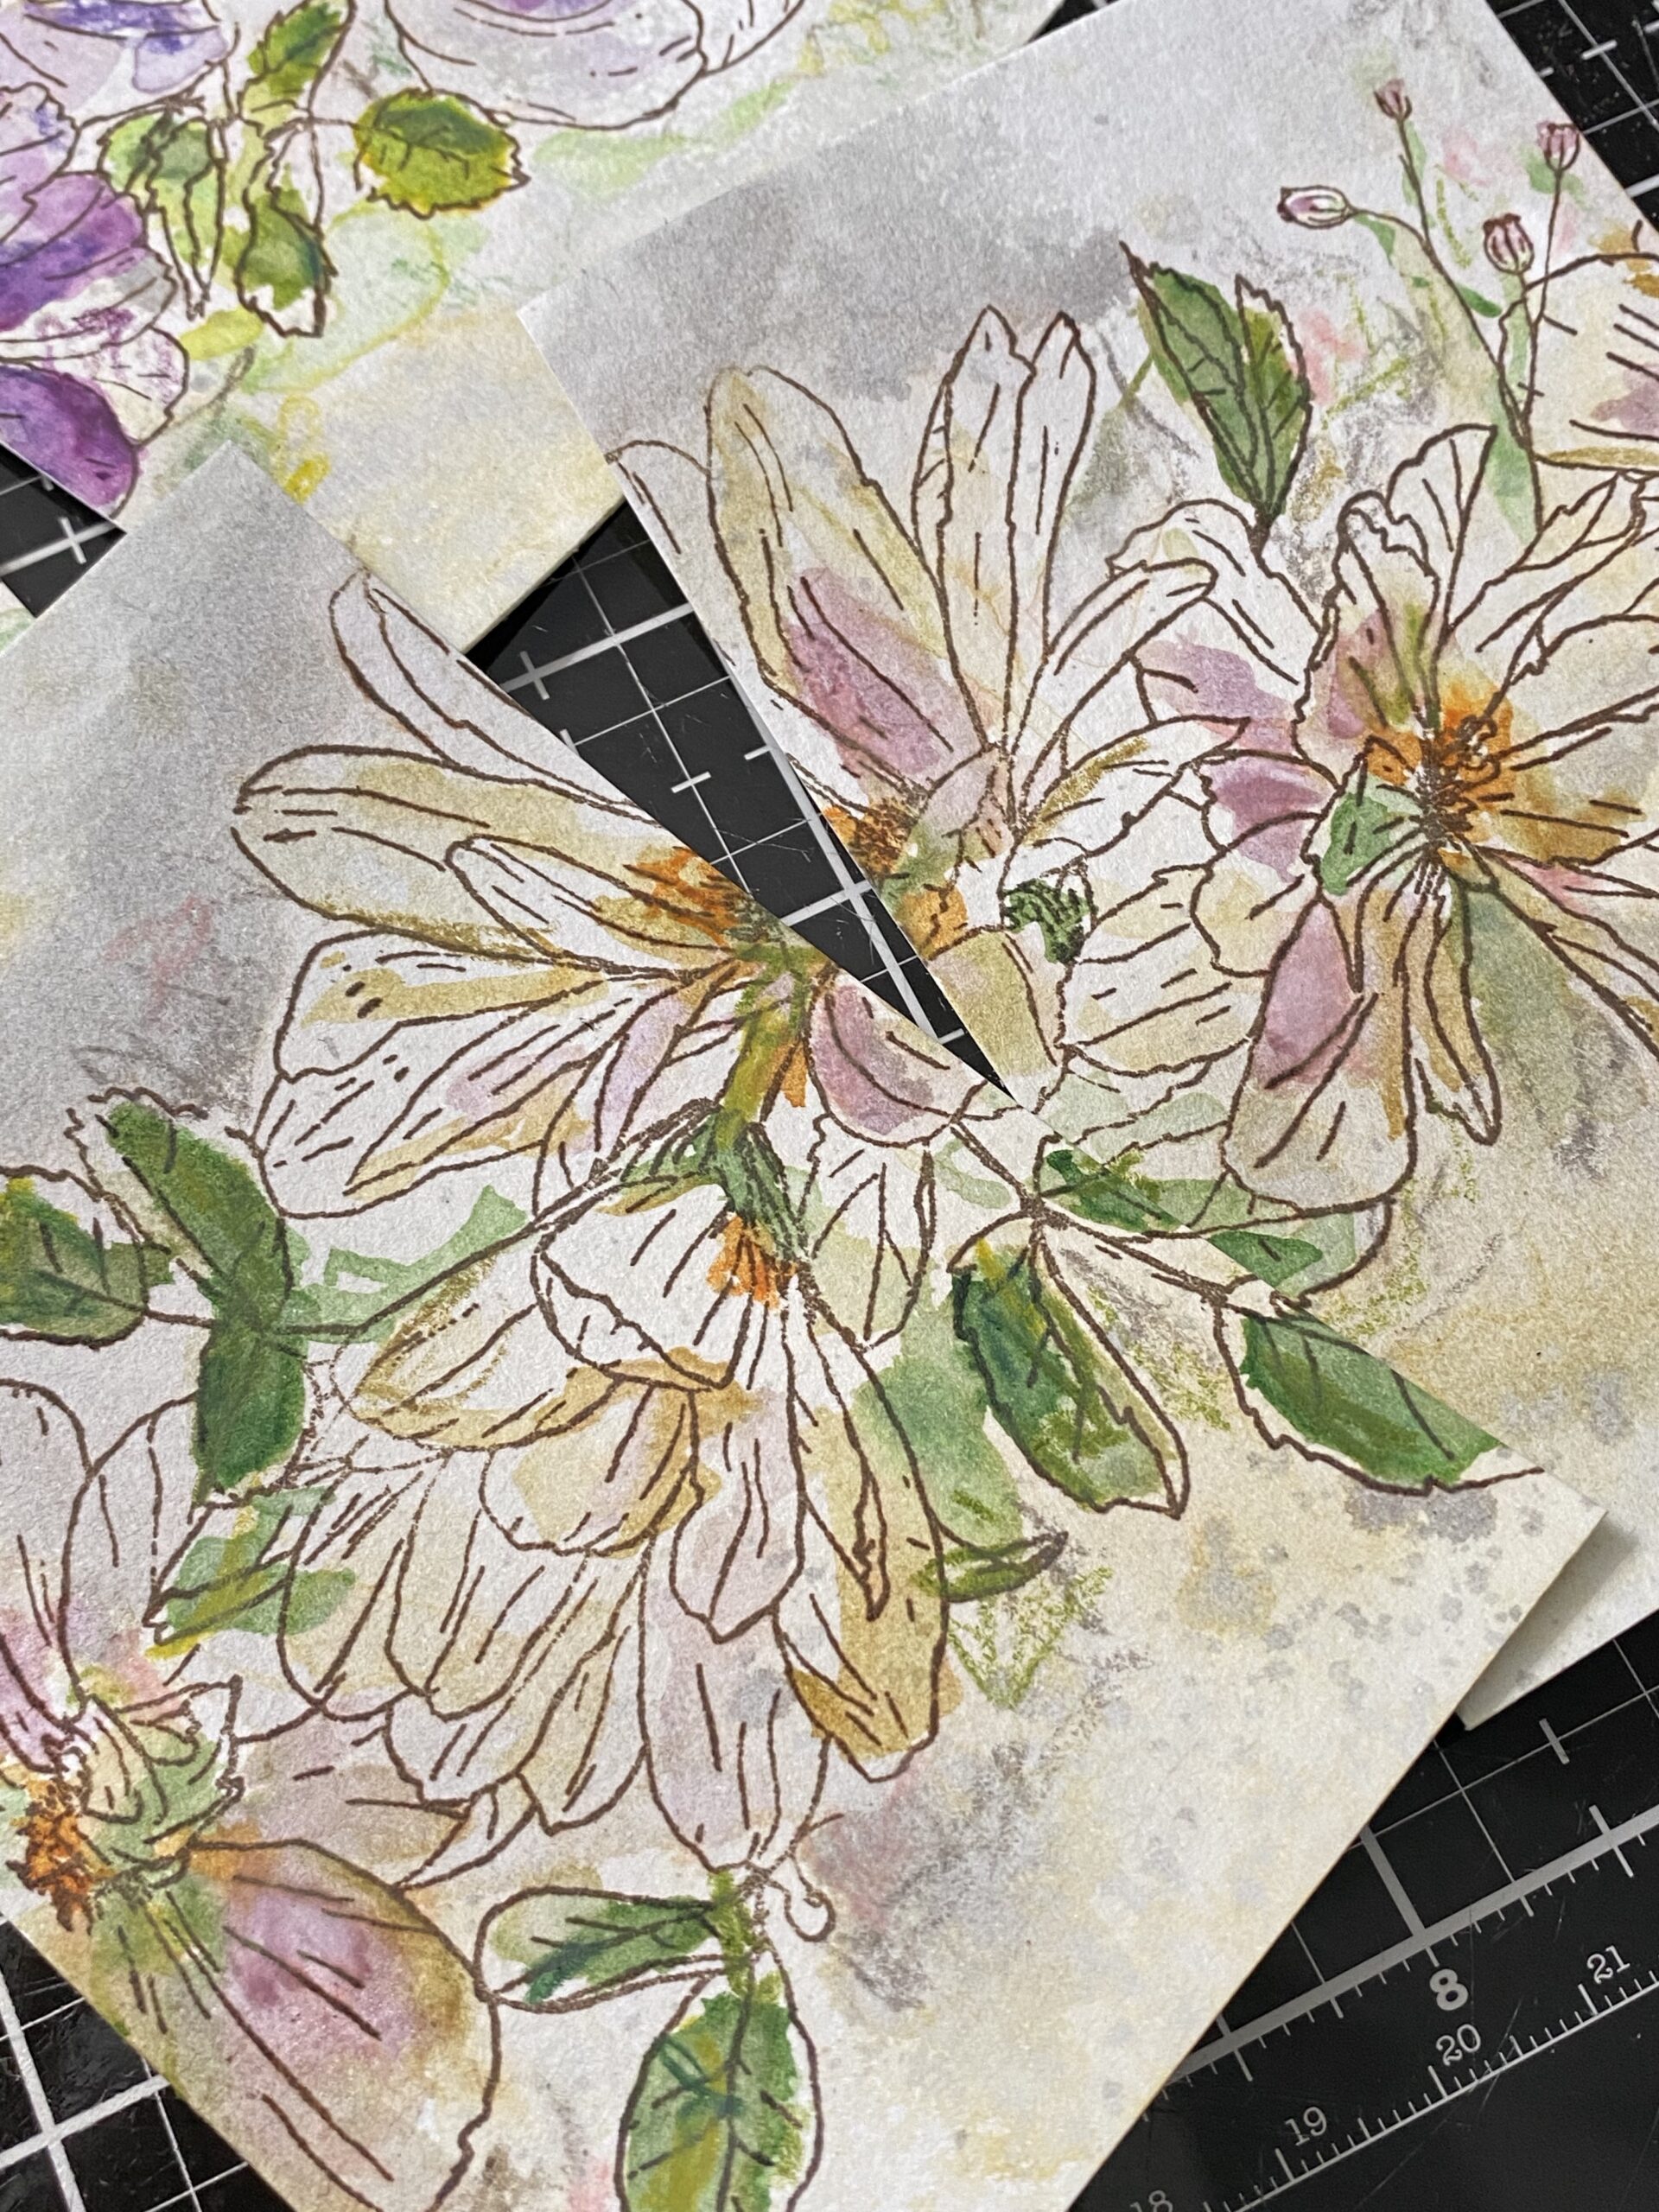

Once I had the backgrounds complete, I stamped a circle and phrase from the Note Quotes Stamp Set onto a scrap of watercolor paper using Ground Espresso Archival Ink, then began scribbling the watercolor pencils onto the circles and activating it with a paint brush, then dried it with a heat tool. (you might notice that there are some scribbles on the circles too…I just couldn’t stop!)
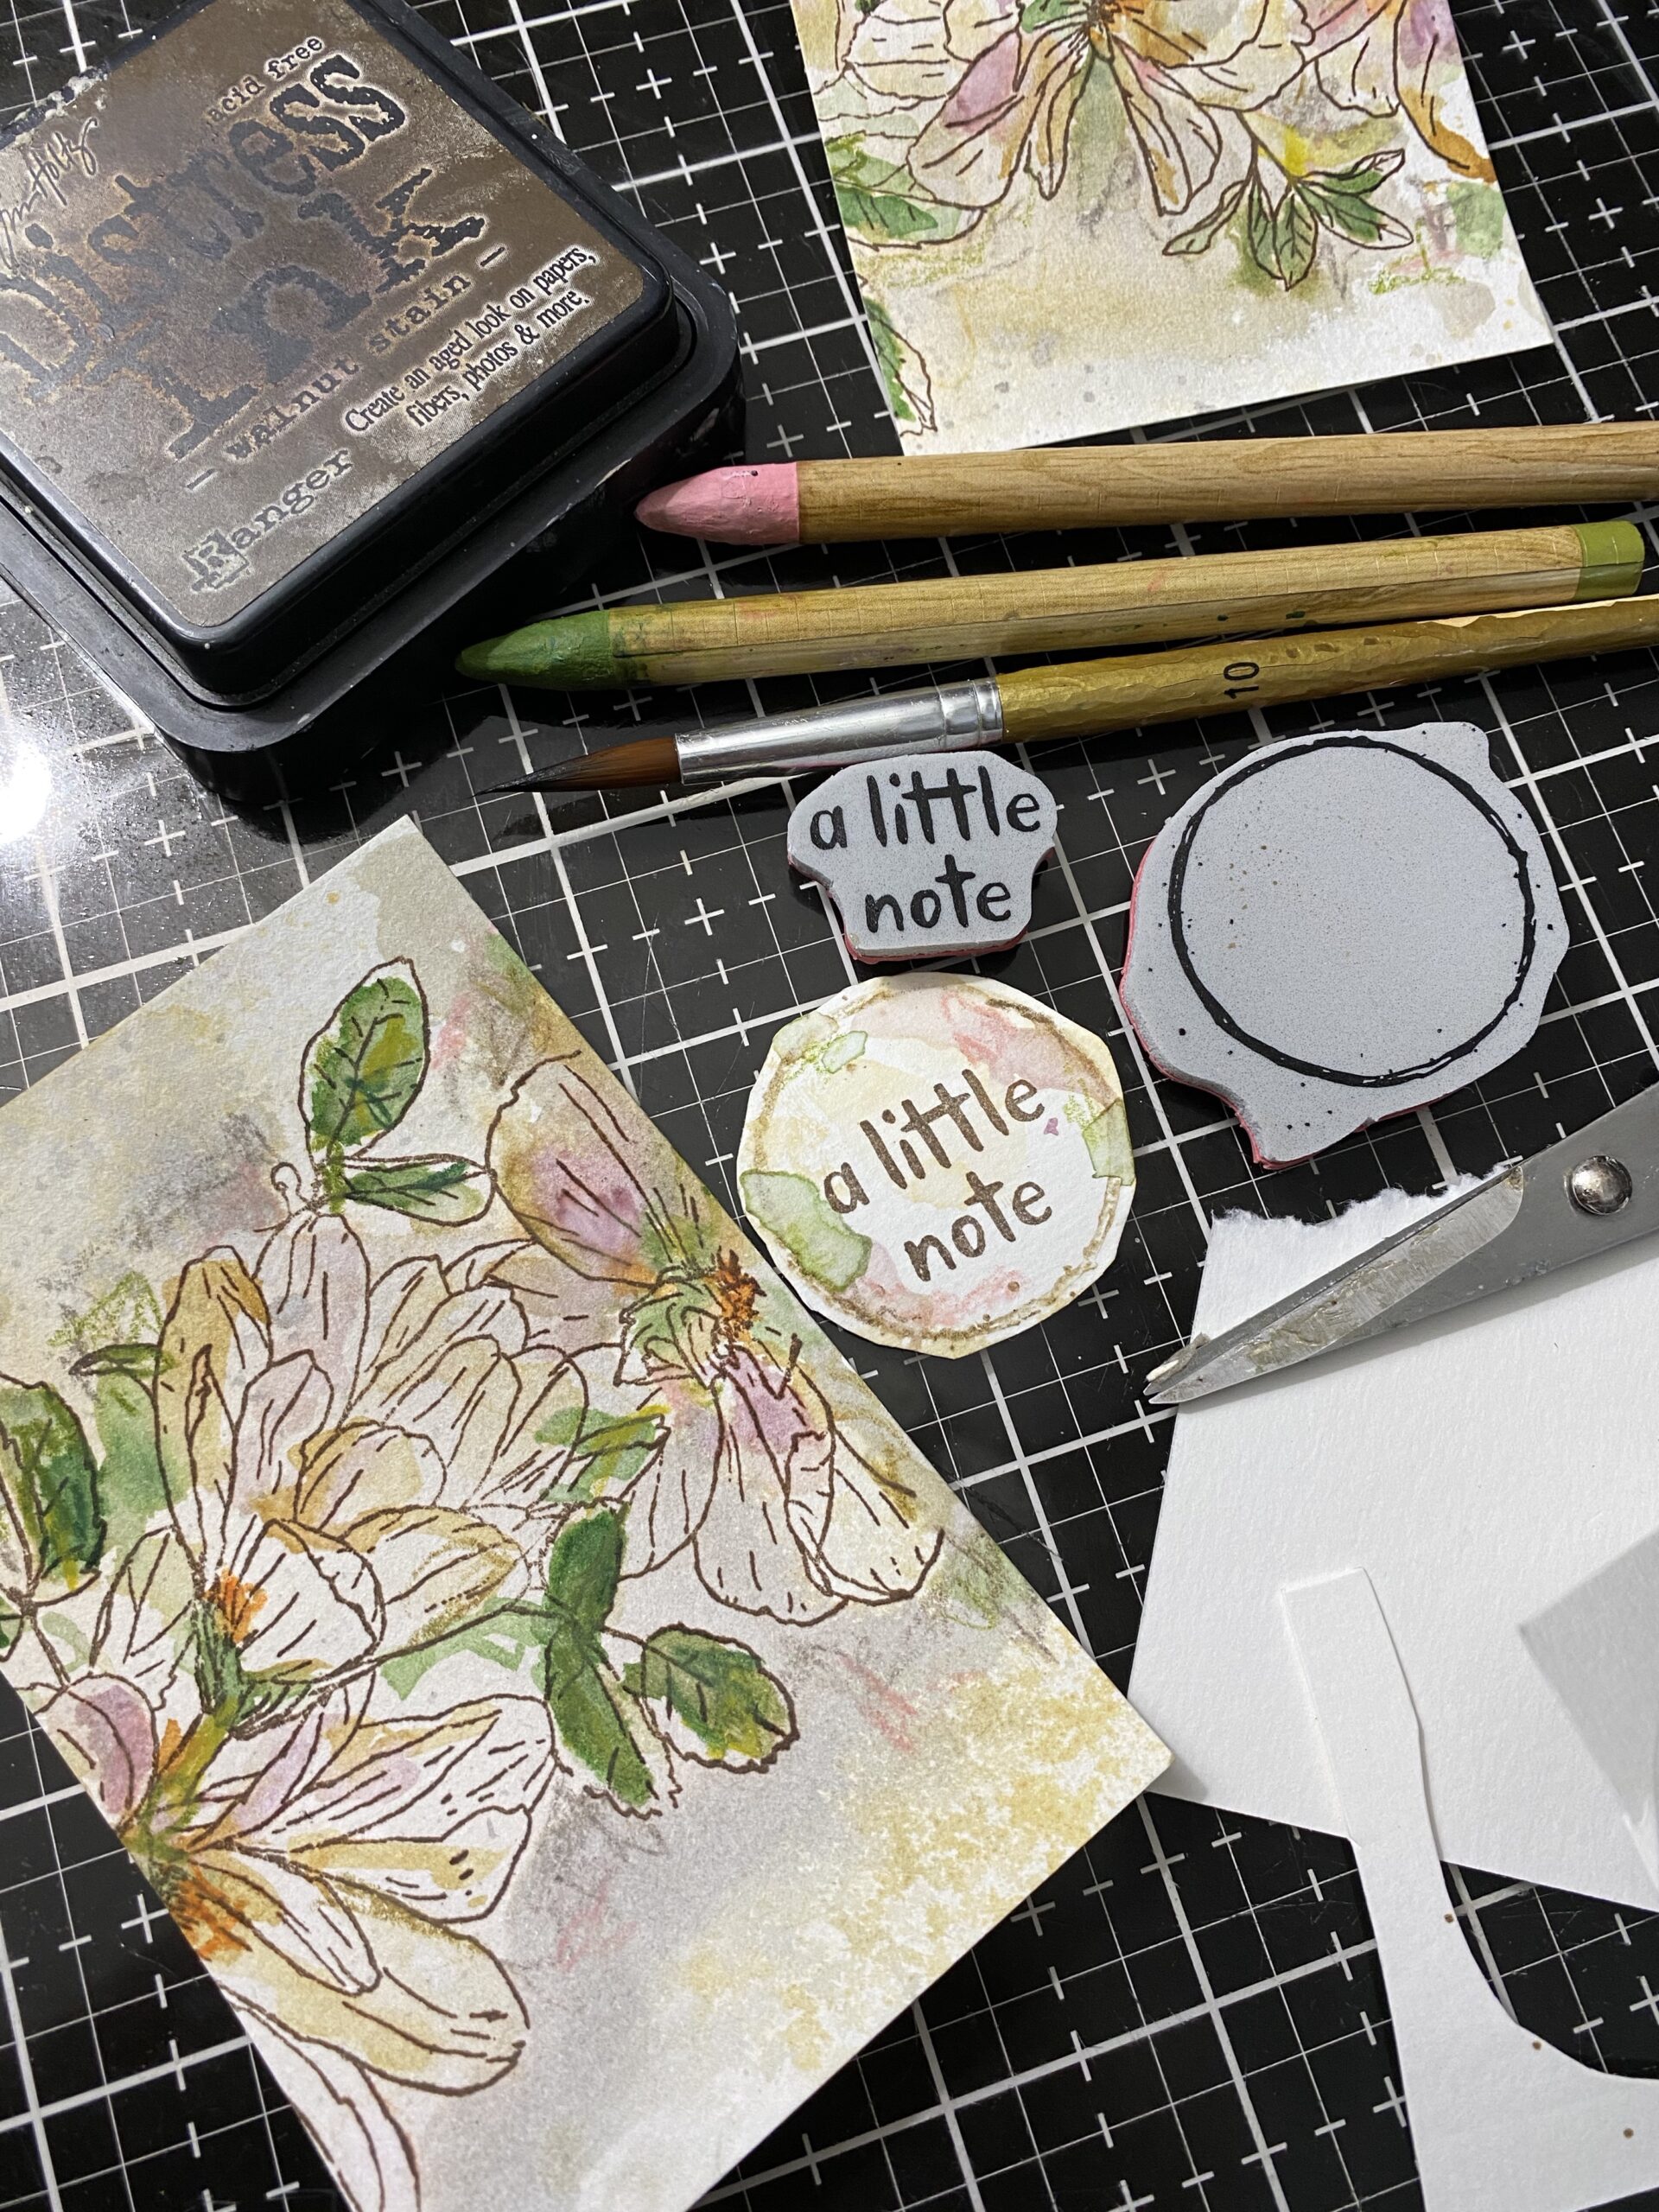

I cut the circles out using a pair of scissors. Behind each circle phrase, I stuffed a small bit of white thread, then adhered the circle to the front of the background.
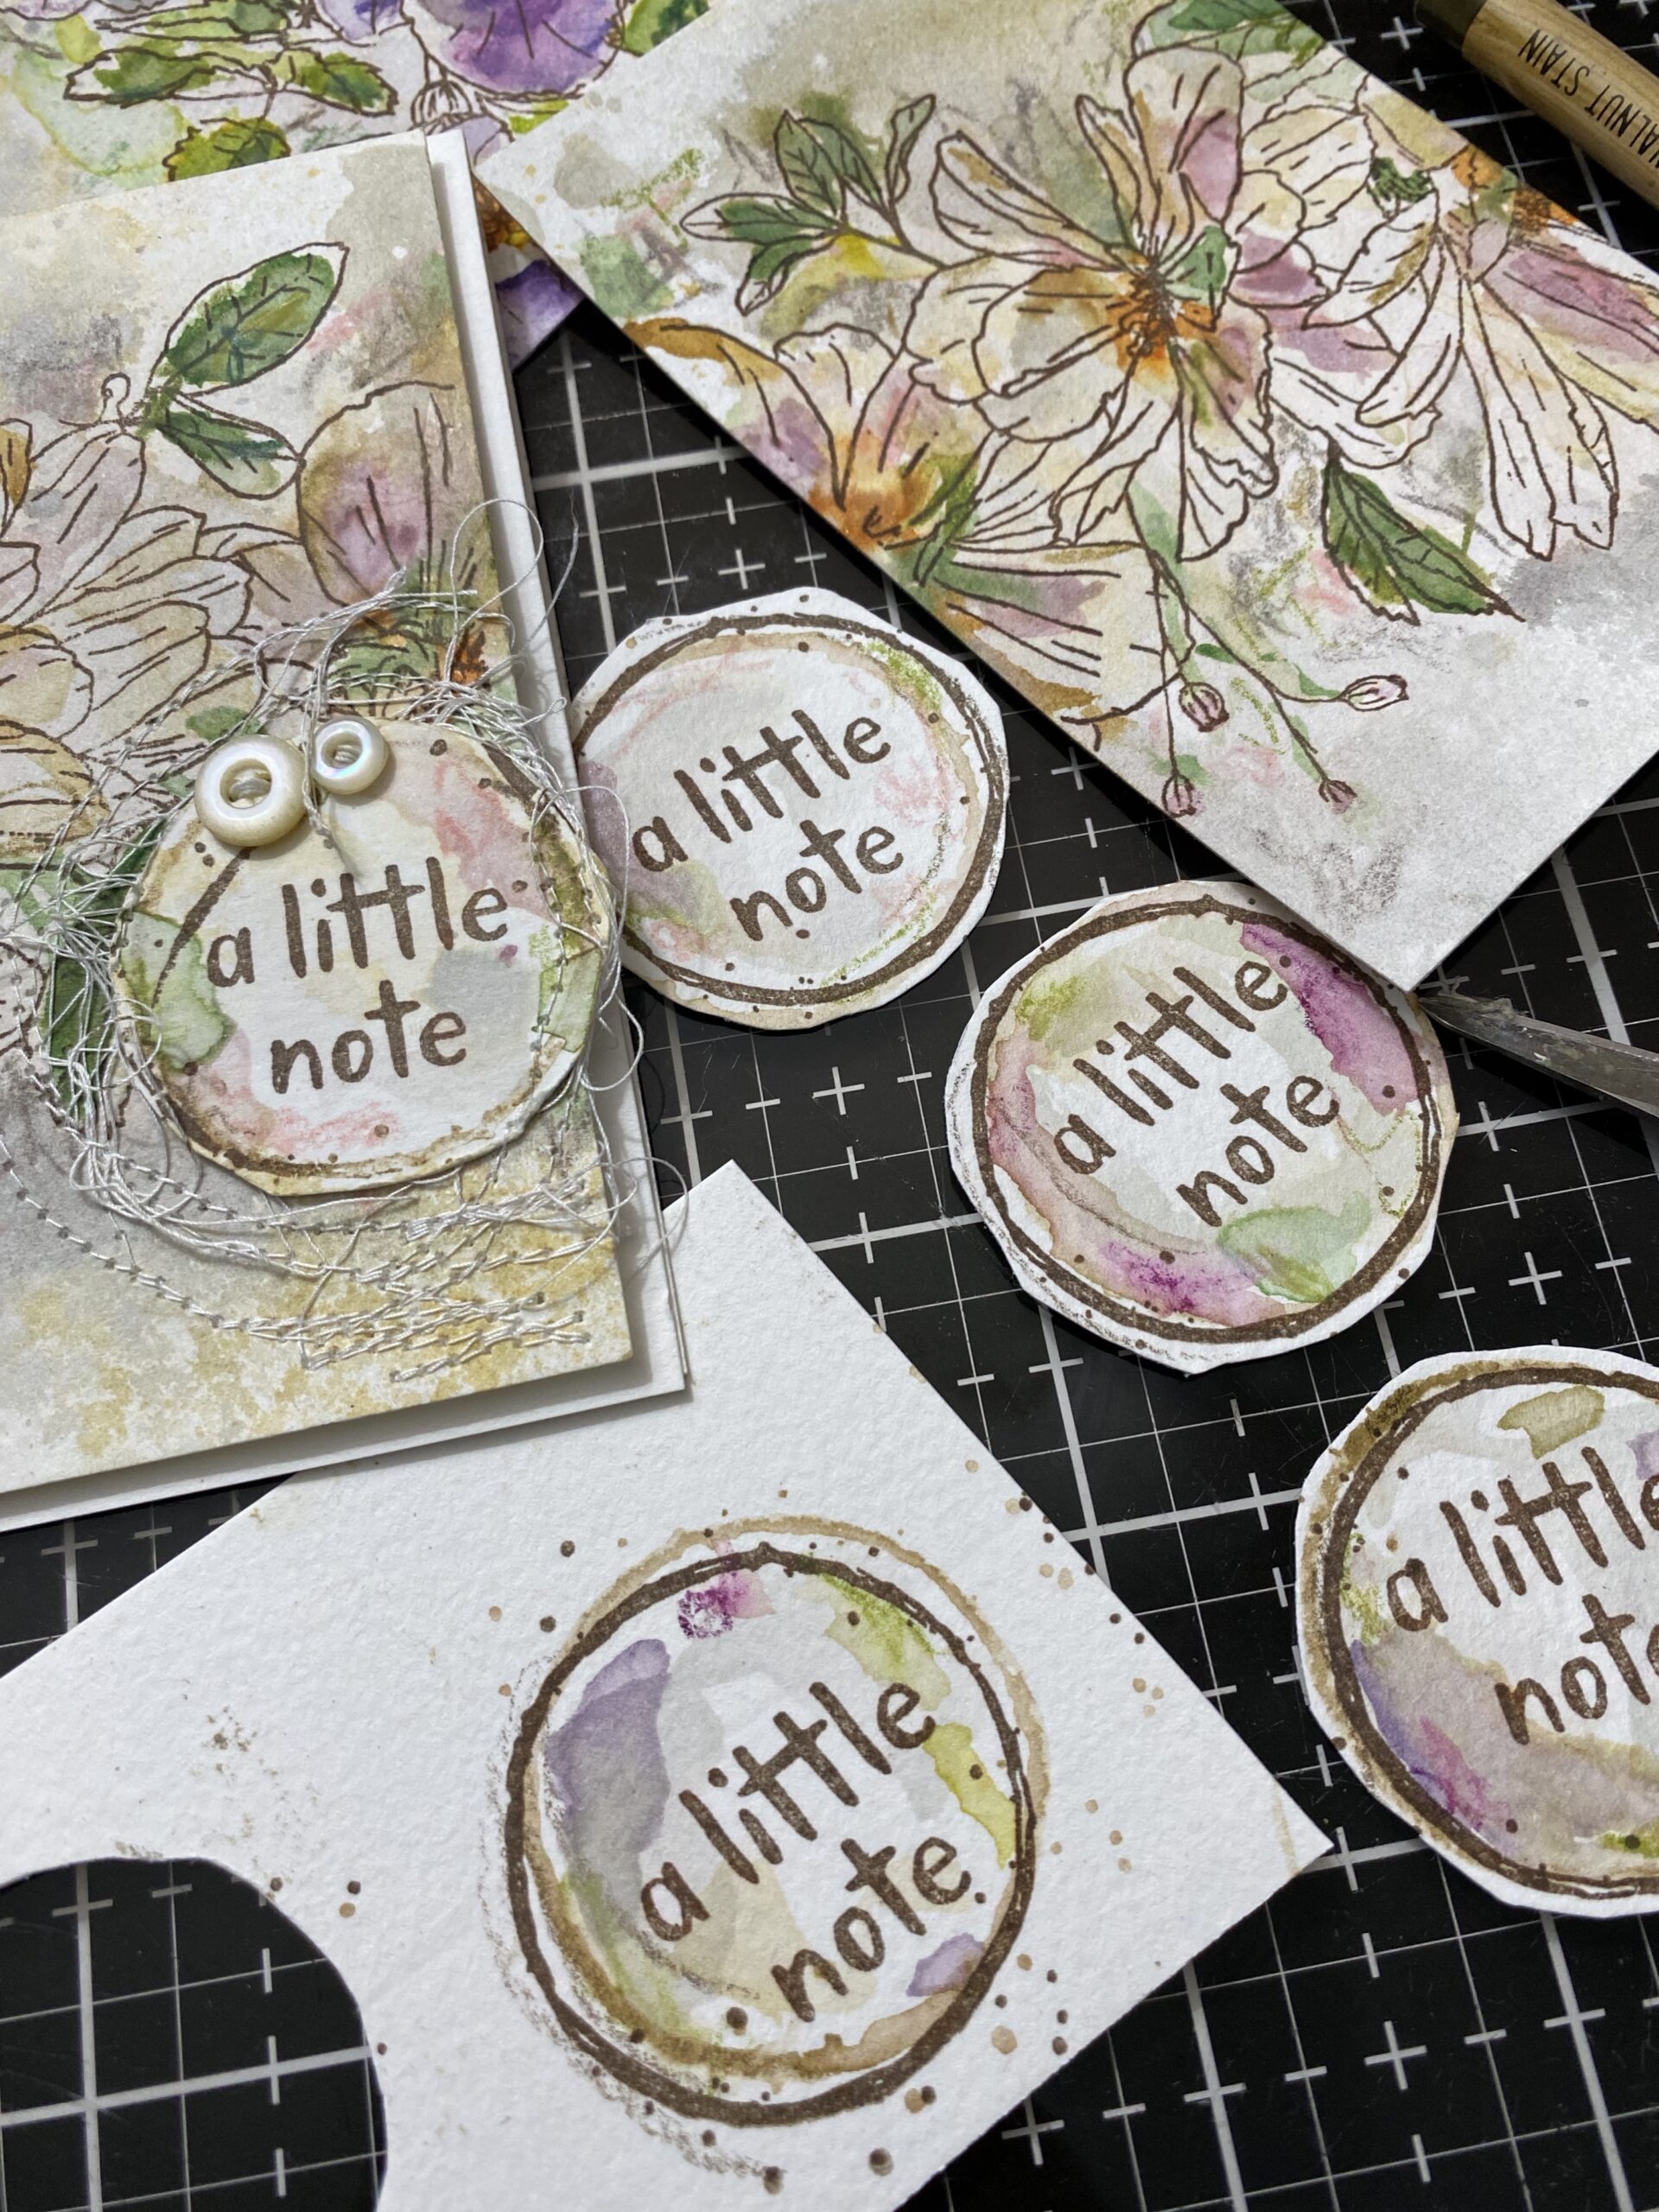

Using my sewing machine and white thread, I haphazardly stitched around and around the phrase and in random areas, then stitched on a couple white pearl vintage buttons using a needle and thread.
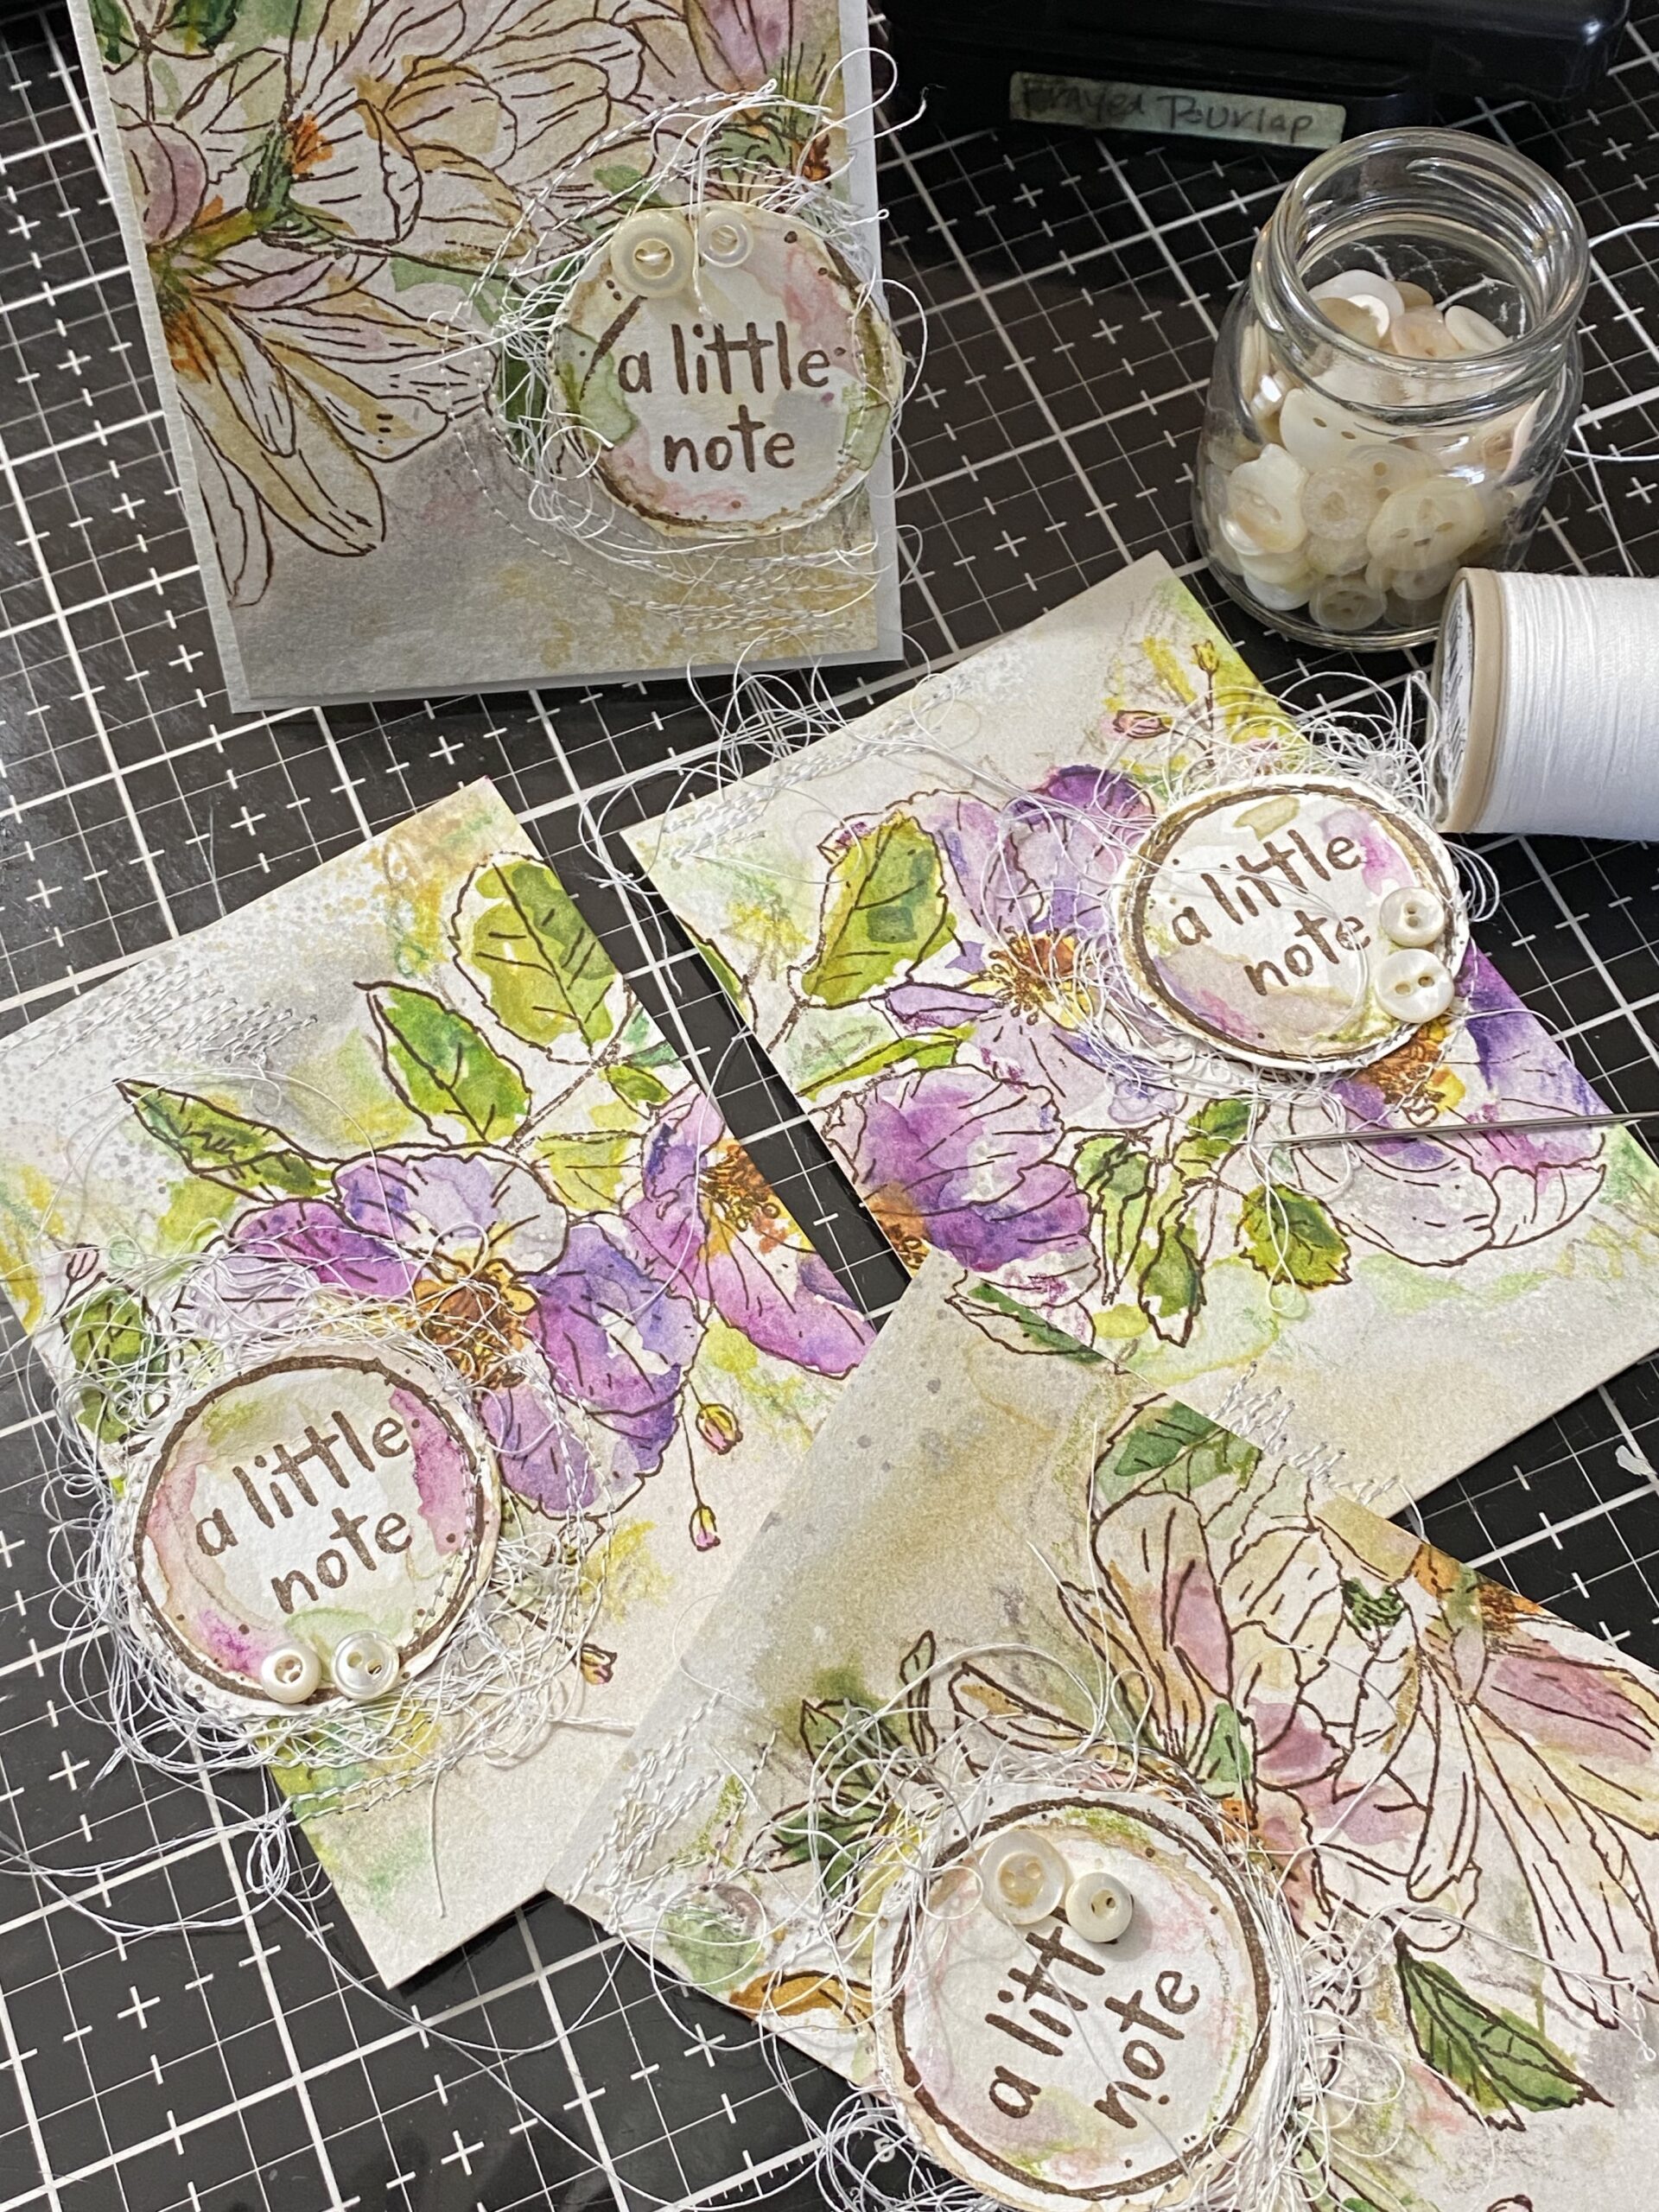

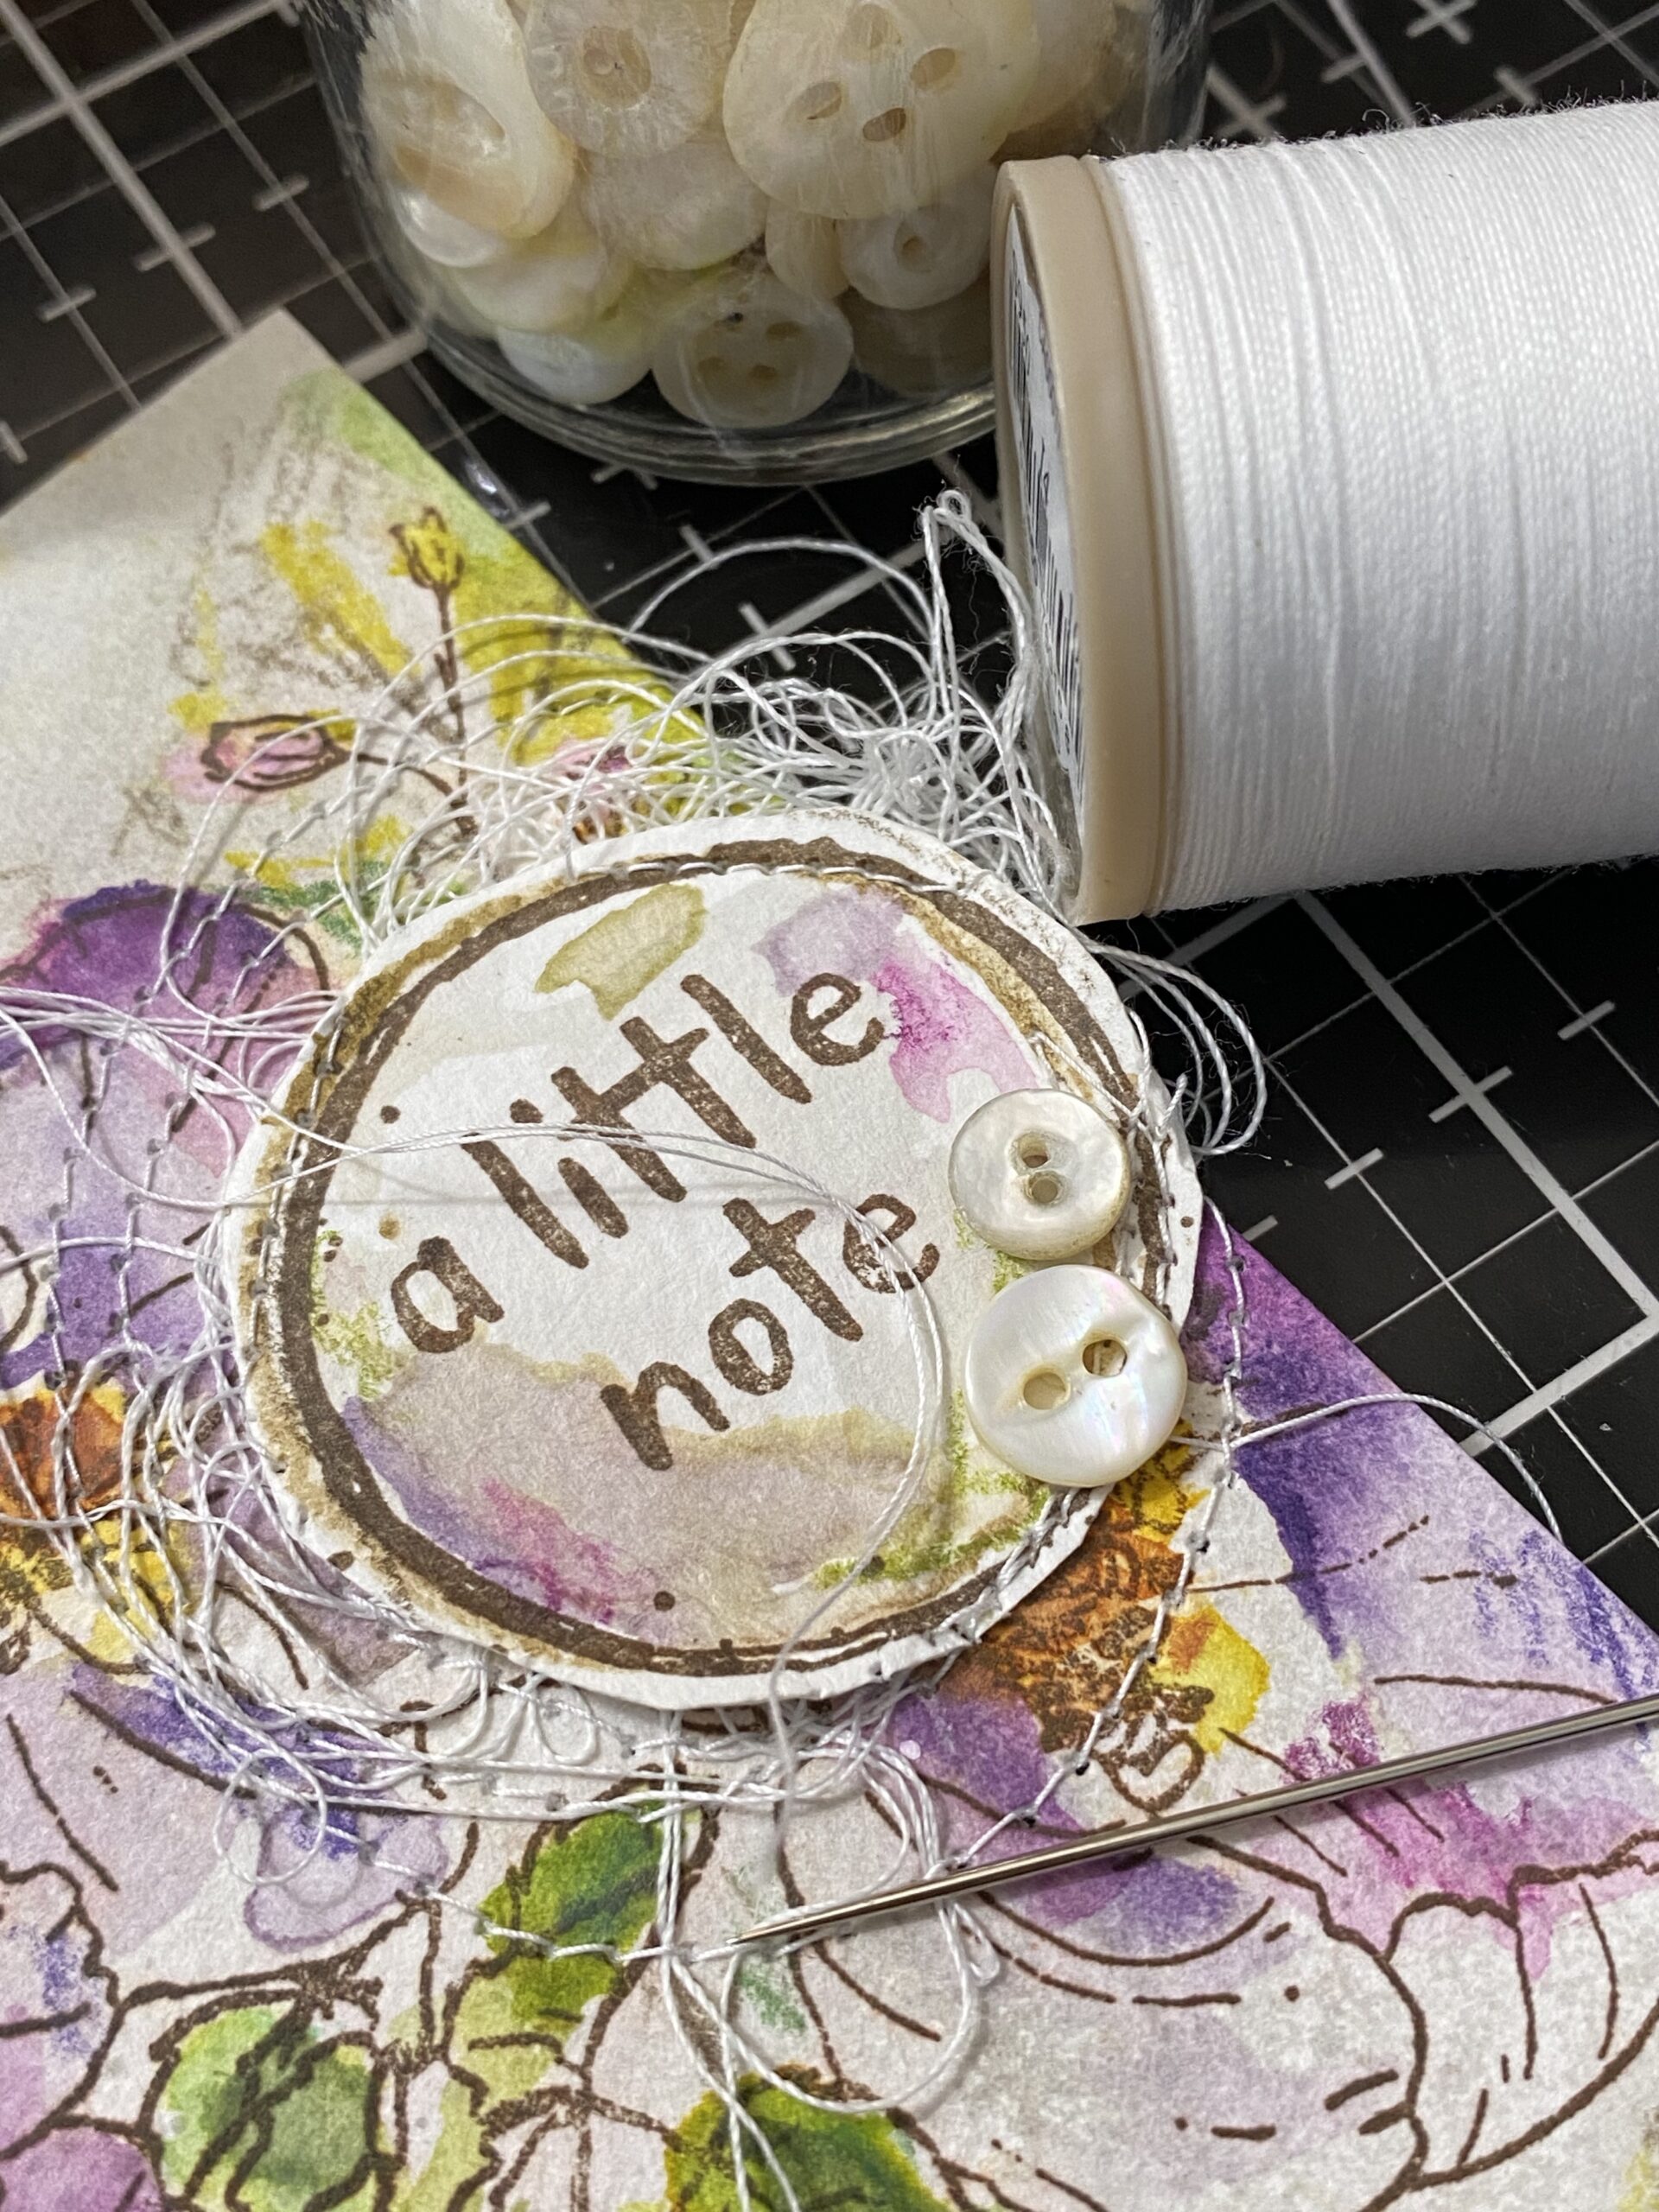

I left a little edge framing each card front to the card base and applied them using foam adhesive.


With that, my set of small cards was complete!


Thanks so much for stopping by today! Enjoy your day!
Creatively yours,
Stacy
Some of the products used are listed below…
To shop at Simon Says Stamp CLICK HERE
To shop at Scrapbook.com CLICK HERE


What is an affiliate program, and why should I click on the link and buy through you?
When you shop via the affiliate link (linkdeli) on this blog, I receive a small commission from the affiliate provider (Simon Says Stamp & Scrapbook.com) at no extra cost to you, whatsoever. These commissions help me to cover the hosting fees and other costs to run my blog and be able to provide you with FREE inspiration. If you shop the links, THANK YOU! I truly appreciate being able to share my love of creating with you.


See, this is what bugs me about you. (And I say this with a smile! LOL You know I absolutely adore your work and have a great admiration for every post you make!) You whip out that dang sewing machine of yours and go to town with it like it’s nobody’s business and I STILL can’t figure mine out! I’ve had my machine for nearly a year now and everytime I have attempted to sew anything, either the thread gets jumbled up, or I don’t have it threaded properly, or SOMETHING happens that makes me what to use it as a doorstop. I’ve watched YT videos until my eyes bled and I still can’t get the dang thing to work and what’s even more frustrating is you were the reason why I bought it! LOL I showed my husband your blog and said, “See? I want to be able to sew on my art the way Stacy sews on hers!”
*sigh* Lo and behold, that has yet to happen. LOL
Anywho… Gorgeous projects, as always, you never cease to awe me with your talent!
Sarah….sewing machines can be frustration and it seems that every brand works just a bit differently. If I were you….and really wanted to sew(I have, but sometimes would rather take out a needle and thread, rather than the machine)….I would find a store that sells machines and can offer a class, or at least show you how to use your machine. There are also quilting shops and I feel sure there would someone there who could help. You might even try one of the larger Joann’s that sells machines.
Good luck,
Rachel
That’s a great idea!! That definitely sounds like a wonderful winter project! Thank you so much for the idea, Rachel!!
Rachel,
OOPS… you can read my lengthy comment below… LOL. I didn’t realize Sarah had already answered your concerns, saying basically the same thing I did (in fewer words too…LOL).
I apologize.
Kathy
Sarah,
These are just my ideas… no insult or anything other than help is intended.
If you’re having problems working with your sewing machine, it could be that it’s not you that is the ‘problem’ . I was horrible at sewing when I first got my machine but there were so many creative things sewing machines were being used for (I too watch my favorite creative crafters & artists online, etc.) I just had to have one too. AND, there many little parts of the machine that have to be considered.
My first suggestion would be to call or go back to the place where you purchased it and ask them to give you a free demonstration on how use, thread it, the do’s and don’ts, tips and tricks. Most places/companies will be happy to do that. You can call them first to set up an appt., explaining to them that you purchased it there a year ago, seem to have problems and haven’t been successful using it, and would like some help.
Many times, even if you purchased it online or something, local stores will still help. Like JoAnn’s, for example, may not let you bring in your machine, but will let you come in and they will give you a ‘lesson’ on one of their similar machines.
The only other suggestion (or thought, if you will) could be that your machine is the issue and not you. There could be a defect in the machine. After a year, it’s probably not still under warranty unfortunately, and a “check-up” so-to-speak, that you’d probably have to pay for, would probably cost more than an inexpensive new machine. BUT, after a little ‘lesson’ on the machine, you’d know if it’s just ‘beginner-user’ error or the machine itself.
Hope this helps. Have a great day. Kathy
Absolutely stunning! I’m going to try this!
(Sew) adorable!!! I have this stamp set and have yet to use it, but I agree with the 1st commenter I CANNOT use my darn sewing machine and I get extremely frustrated!
ooooooh! thanks for the stitching inspiration, and your wonderful tips in the step-by-step tutorial! I love your watercolor techniques and the fun abstract stitching!
These cards are gorgeous….love the watercolors and the floral stamps.
You do Tim Holtz proud!
Rache
All I can say is I’ve sure missed you! But these note cards were worth the wait : ) . I’ve been trying to catch up on outside work too but I sure miss making cards. I asked my husband yesterday if it was fall yet! I’m ready to be back in the craft room.
Ooh, I love these so much! Thanks for your continued inspiration.
I really LOL’d when I read these comments, especially the 1st one-Sarah’s. I too am sewing machine compromised. But I love the look-especially Stacy’s. Sew,..I have tried many sneaky ways to try for the look without a sewing machine. As mentioned, needle & thread- thru the button holes knot in back & glue down…Another is scrunching a bunch of thread into a ball pulling it apart & tucking it behind the raised greeting circle with a bit of glue. My fav are the many half-way messy “stitching” stamps out there, including a good one by Tim. You can search them. But I haven’t seen a crazy CIRCULAR stitching stamp yet.
Thank you, Stacy, for another fantastic project. I’ve been wanting to get the “Note Quotes” Stamp Set. I will definitely be going to your affiliate program as I have in the past. Can’t wait to try these techniques. Thank you for sharing your “Delicate Grunge”.
Welcome back…We all need a little down time. Love your projects. Thanks for sharing this one. You are so inspiring. Nothing I make looks anything like you make, but I love trying…Keep up the good work…
Sarah,
Welcome back, I’m glad you were able to take some time for yourself… we all need it now and then, and we never take it enough.
These are beautiful cards… you are so creative and inspiring. I so enjoy seeing your work and watching you create. You’re detailed and explain things so nicely. I really like that you hand-cut the sentiment circles out because it gives it a much more rustic feel, and compliments the watercolor so well. The thread and buttons are a fabulous addition. TFS
Ooh Stacy, these are beautiful! And your timing is perfect; I just received my floral trims stamp set today!
This is so lovely! Very cute cards!