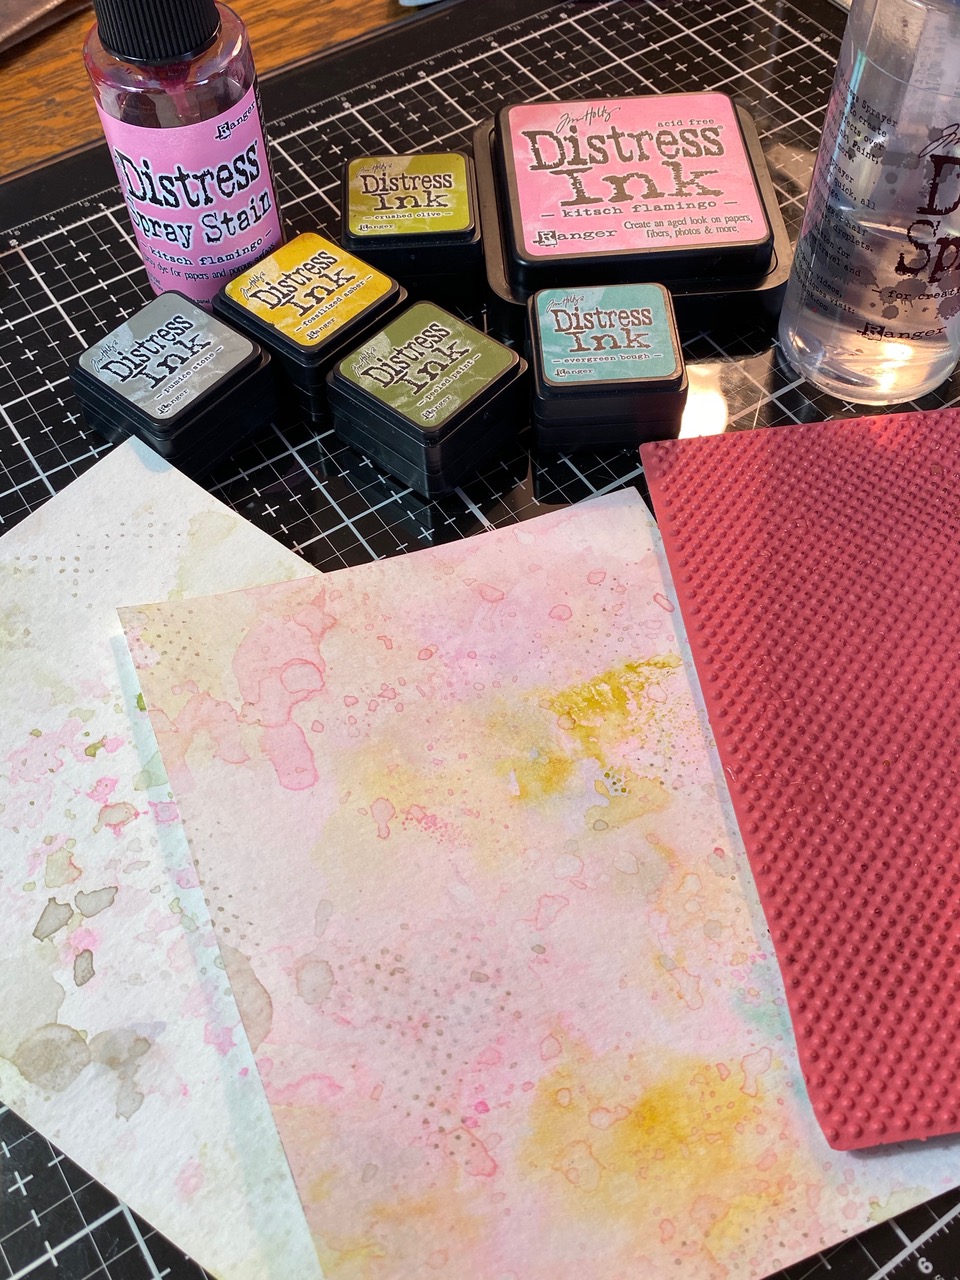
Hello friends! I’m back today with a new project that I created for the new distress color release that Tim shared over on his youtube channel yesterday.
It’s called Kitsch Flamingo…a beautiful pink inspired by those kitschy pink flamingo yard ornaments, that some might say are tacky but also so lovable and fun. Now, some of you might think, “how is that shockingly pink color going to work in my vintage and shabby chic loving heart?” Well, let me show you the way…
One of the most beautiful reasons that I love distress, is that one color has the amazingly awesome ability to morph into several beautiful shades. I chose to walk on the lighter side of the color, but you can also see drips and drops of the full flamingo in a couple areas of my projects.
So, let’s get to it…
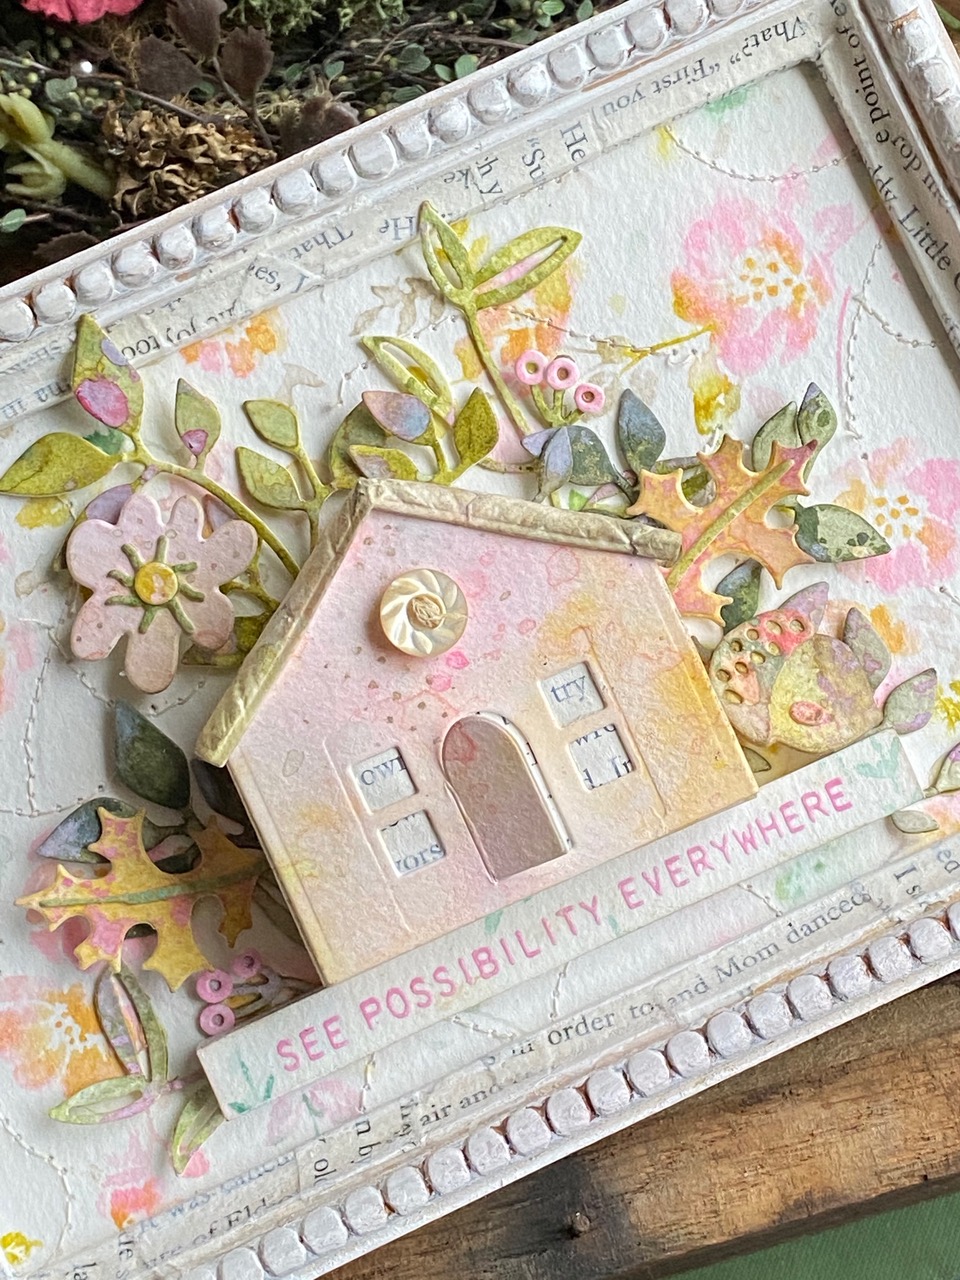
My first project that I’m sharing is the small vignette I created using the new color and a mix of Sizzix thinlets.
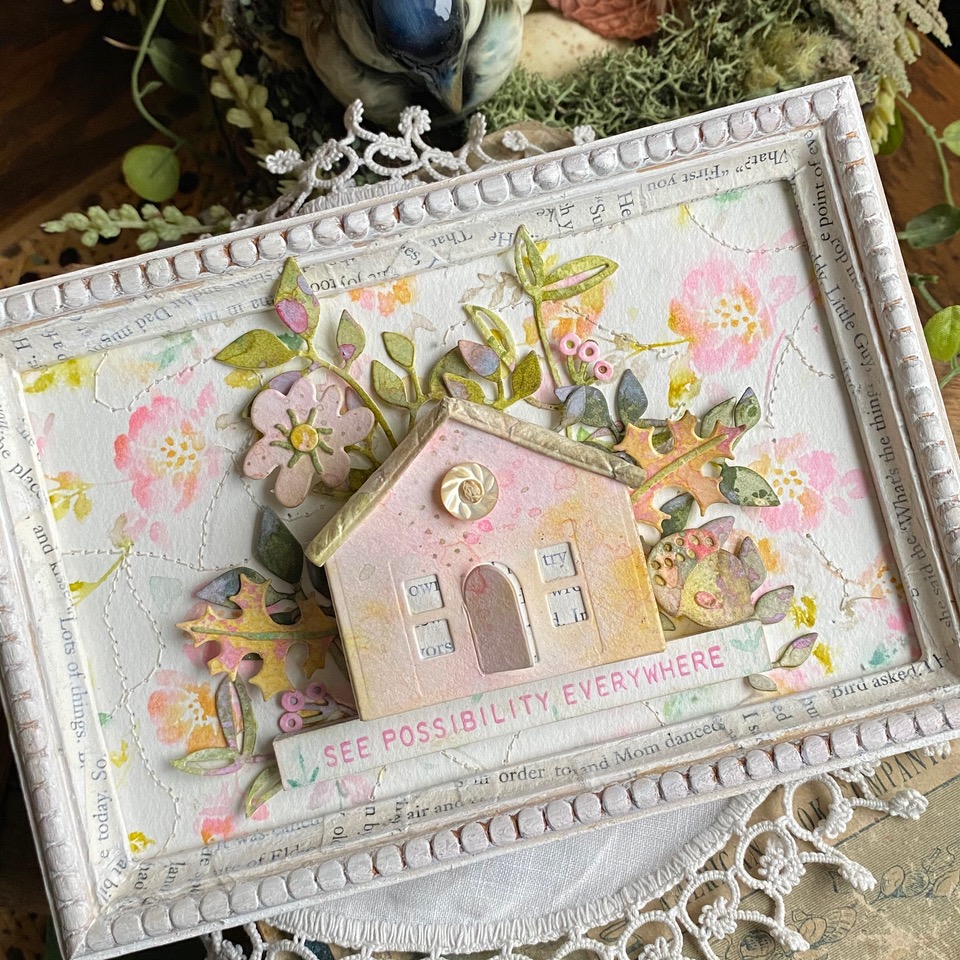
I started by creating a few background papers and then cut out the house, using the Paper Village Thinlet set, one of my absolute favorite sets from last years holiday release. It is so versatile and can be used for more than Christmas!
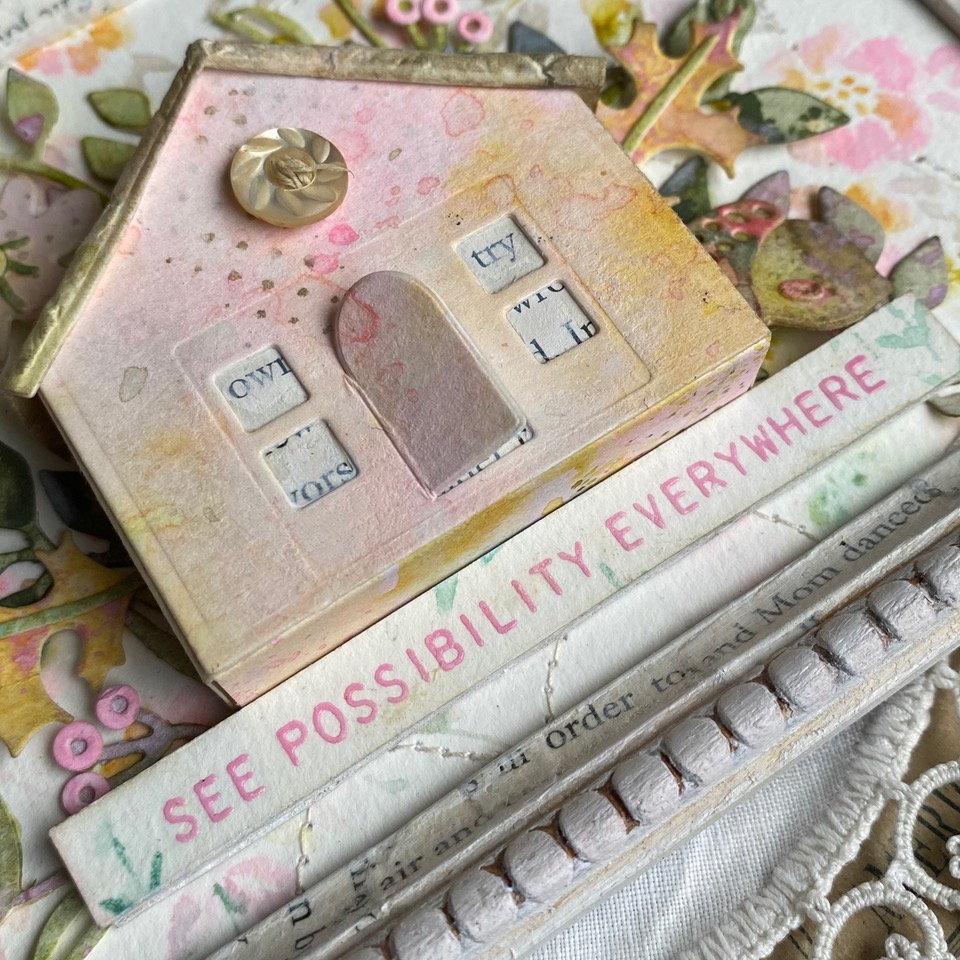
I created my own mini quote chip by stamping the phrase from the Tiny Text Stamp Set (CMS394) with the Kitsch Flamingo Oxide ink, then embossing it with clear embossing powder. Underneath the phrase I added two layers of chipboard that had been painted with a mix of Picket Fence Distress Paint and Dina Wakley White Gesso. This is the same combo that I used on the frame to create the shabby look.
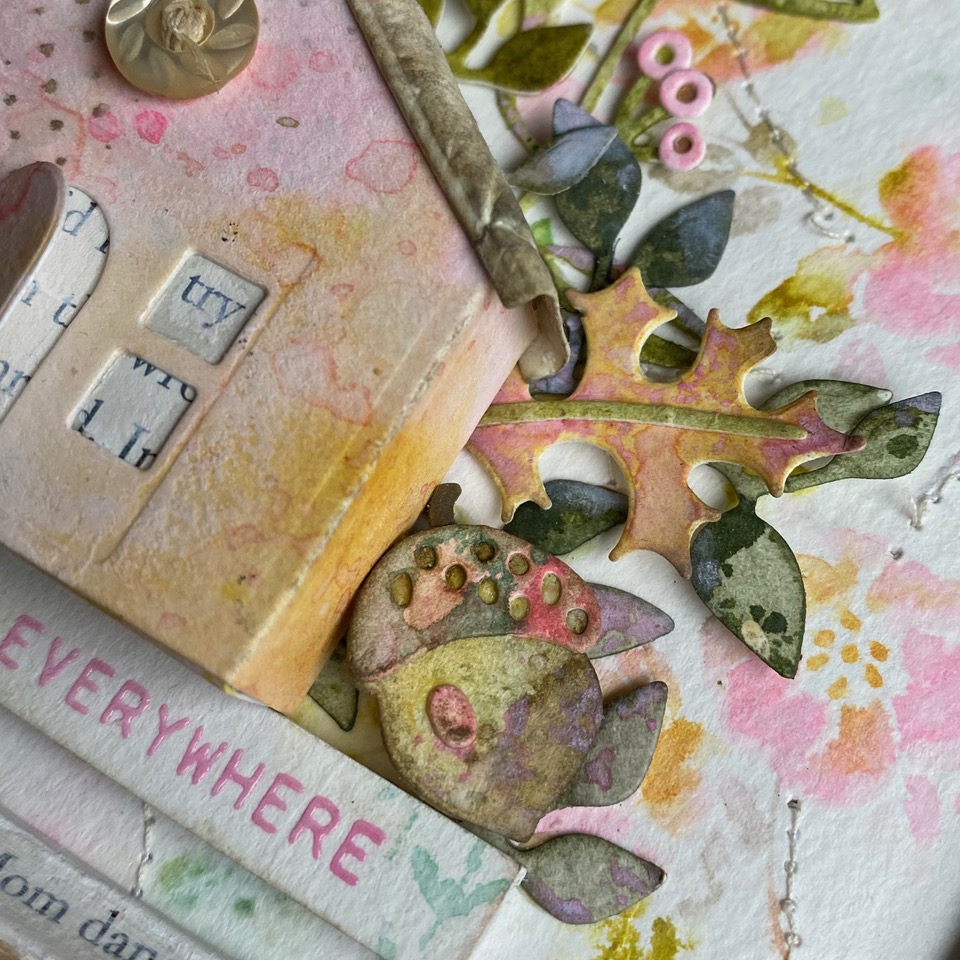
The greens were all cut from papers that had been inked and sprayed with various distress inks and sprays. After the individual leaves and flowers were cut, I dipped them into drips and drops of Oxide Kitsch Flamingo that had been mixed with a few drops of water.
Check it out how the yummy pinks, purples and blues that they made on the various pieces.
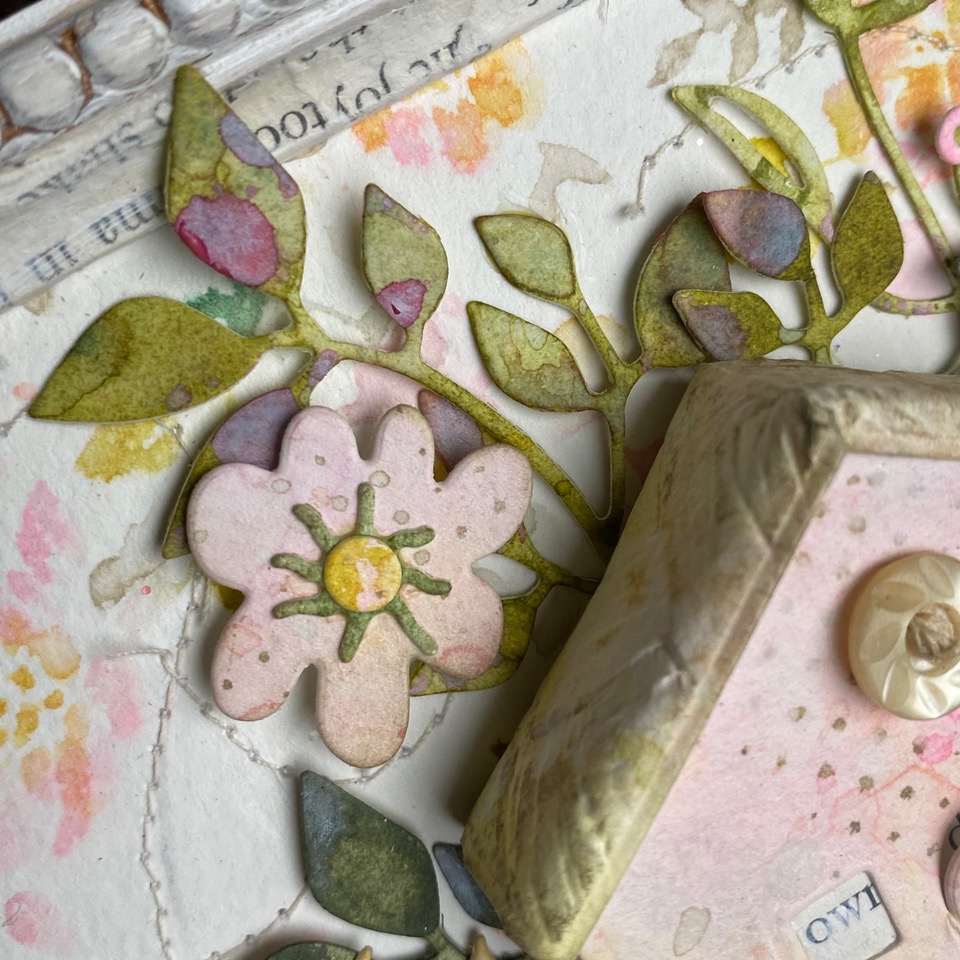
I particularly LOVE the whimsical tiny acorn and yellow leaves… makes me so happy!
The backgrounds…
I inked up the entire floral background stamp (Vines and Roses CMS298) with Kitsch Flamingo distress ink then lightly dabbed on a little Fossilized Amber, Crushed Olive, Pumice Stone and Evergreen Bough. This was done by directly applying the tiny ink pads to the stamp in random areas. For instance, I aimed the Fossilized Amber Pad towards the center of the flowers and the other colors towards the leaves. When I was done, I lightly spritzed the stamp with water, stamped the image onto my paper, then dried the background with my heat tool. The paper used was the smooth side of Distress Watercolor Paper. See how the colors blended to make a beautiful watercolored background?

The next background for the house was made using the same colored inks plus Peeled Paint, but this time to create more of a pink wash, I spritzed a piece of watercolor paper with water and then spritzed it with Kitsch Flamingo spray stain. I then added some green and yellow drips and drops that were picked up from my craft mat. Then added some Pumice Stone tiny dots using a background stamp. (Dots and Floral CMS220)
With my sewing machine, I randomly stitched around on the background paper, then trimmed it to fit the frame. Tiny torn words were ripped from an old book, applied with collage medium, then rubbed with a bit of Picket Fence Distress Paint.
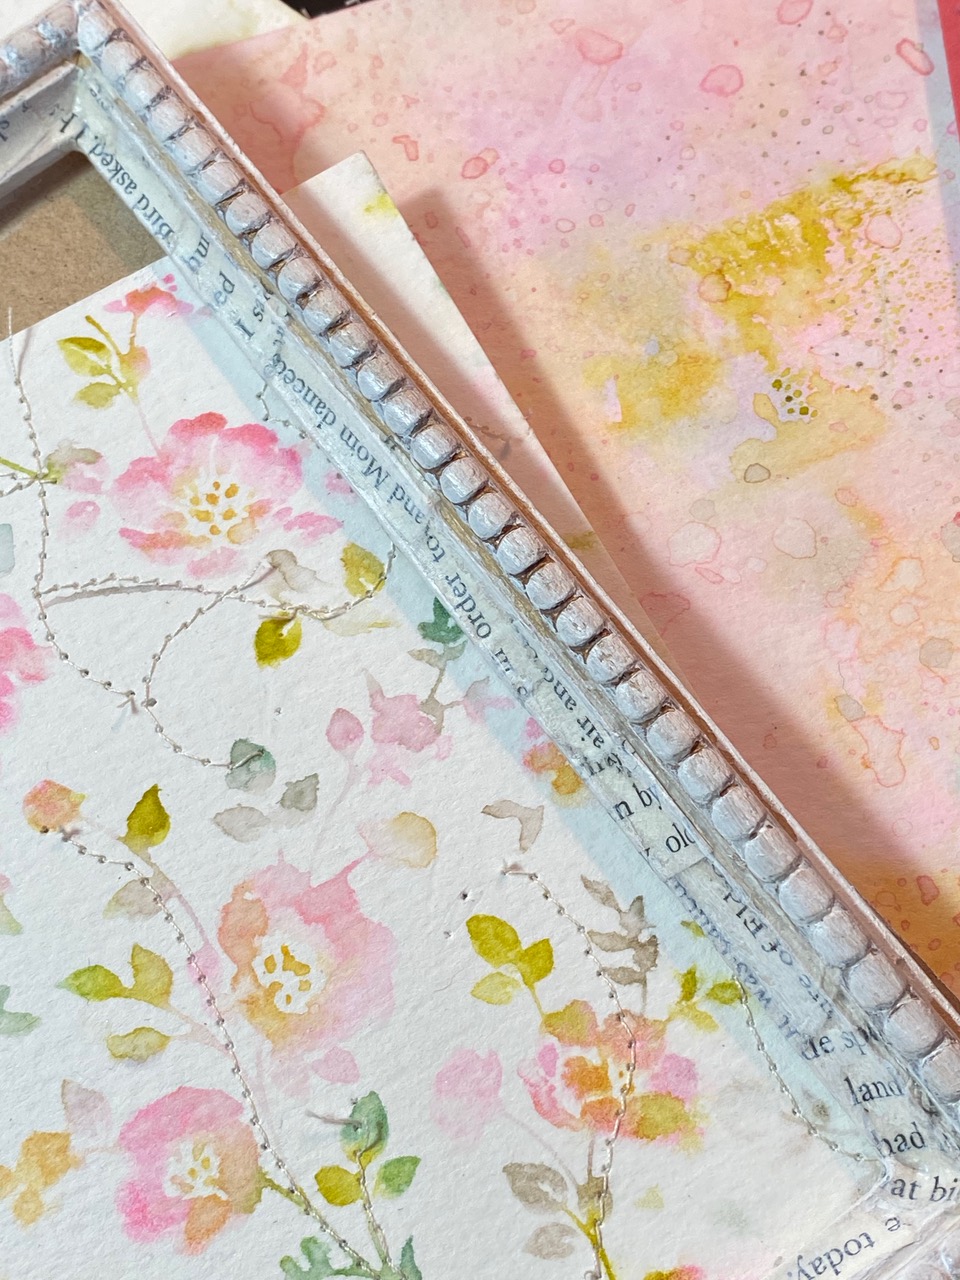
Look at some of the words that I found in the book to use…I love you, Mom danced, Lots of things…I had fun looking for random happy home typewritten words!
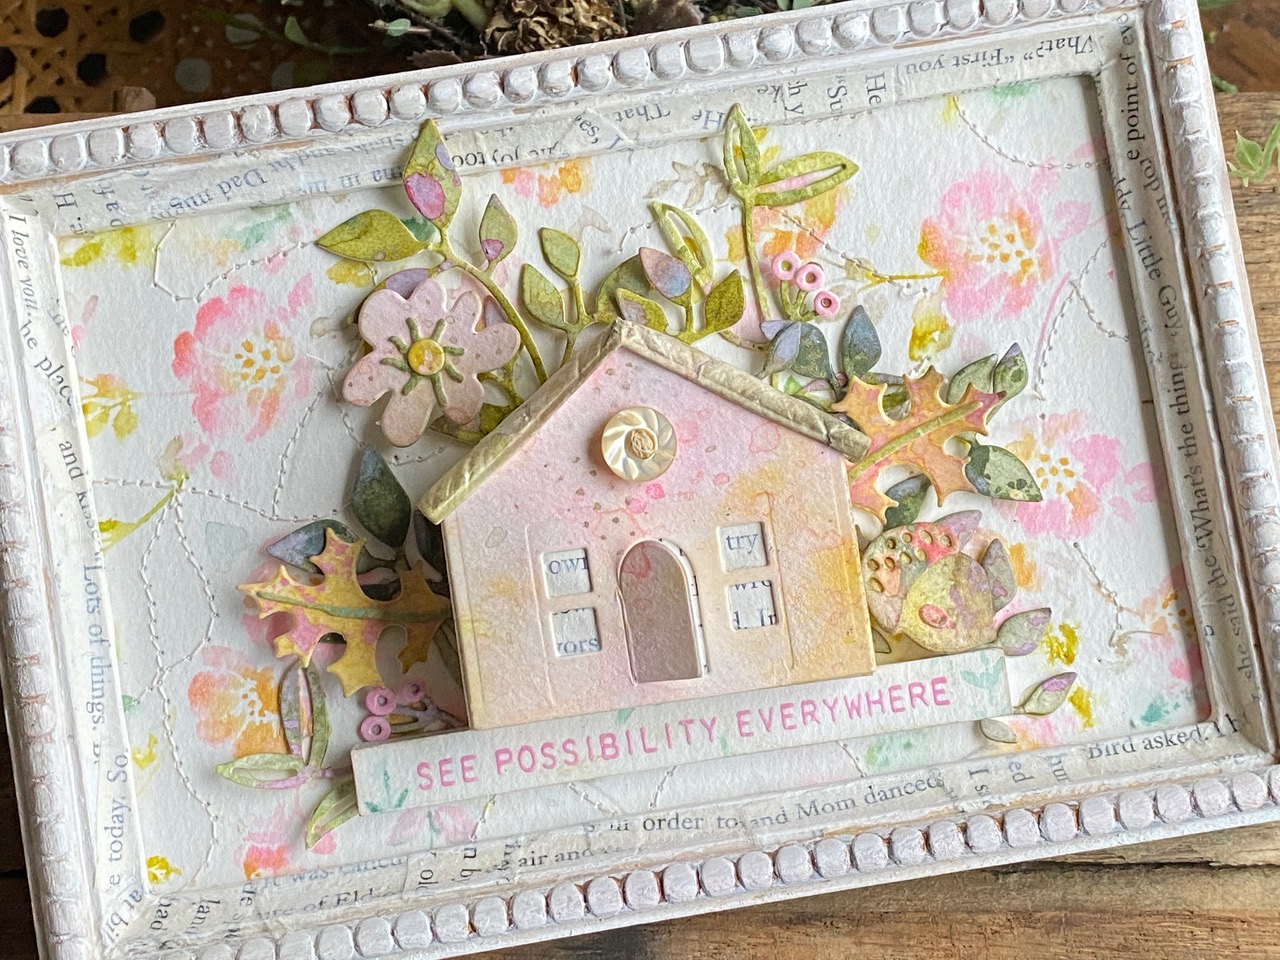
I cut out both a front and a back for the tiny house, then trimmed off about 1/4″ of both of the sides. This made it so the house didn’t come out as far on the frame.
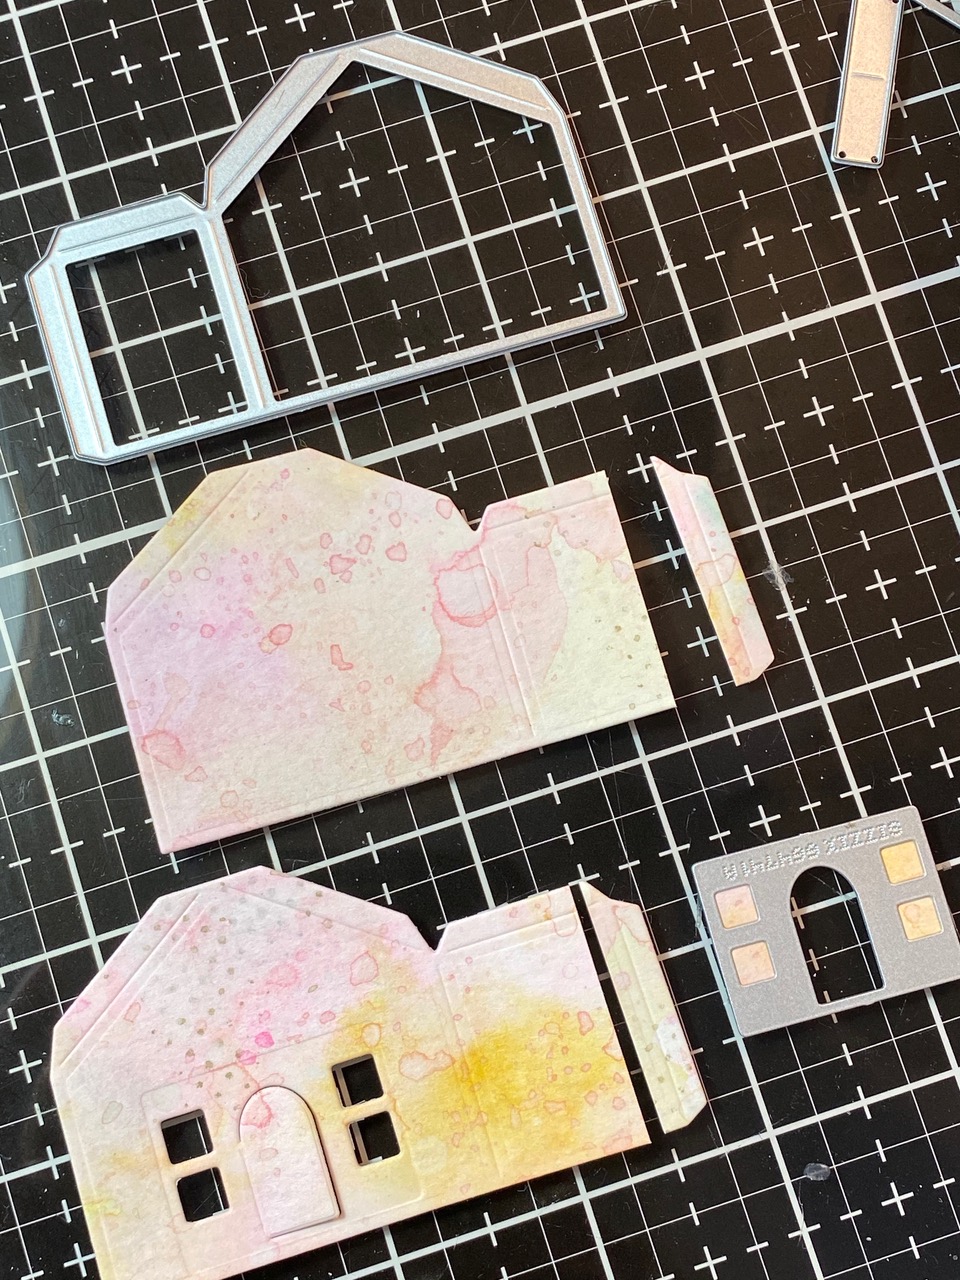
Then I scored a new line and trimmed off a tiny bit to make a new clean fold at the top.
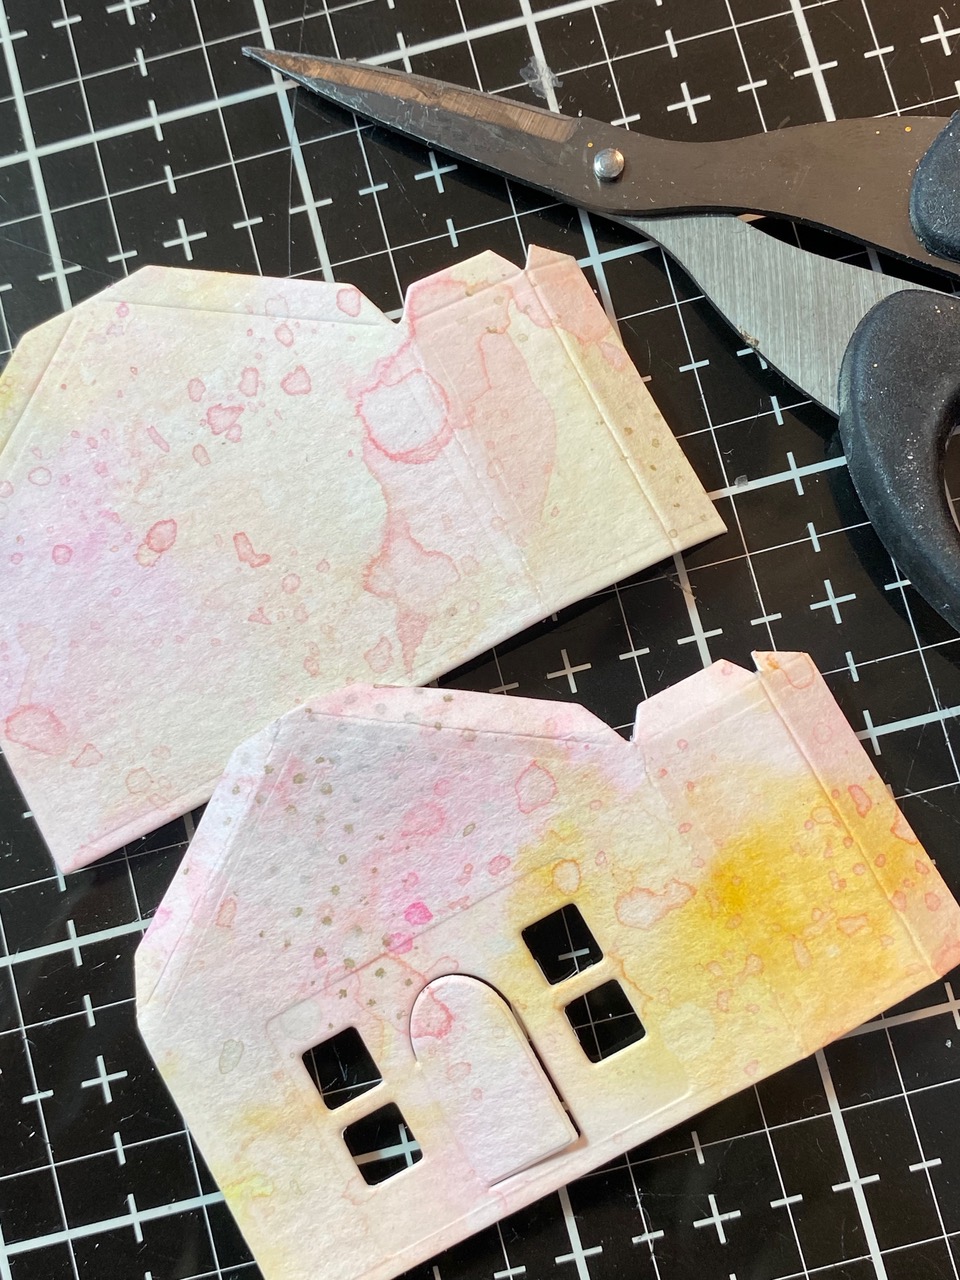
I cut the roof for the house using the coordinating roof die from the set, then rolled the edge of the paper to create a tiny over hang. A small piece of book page was adhered with in the house to cover the windows and door.
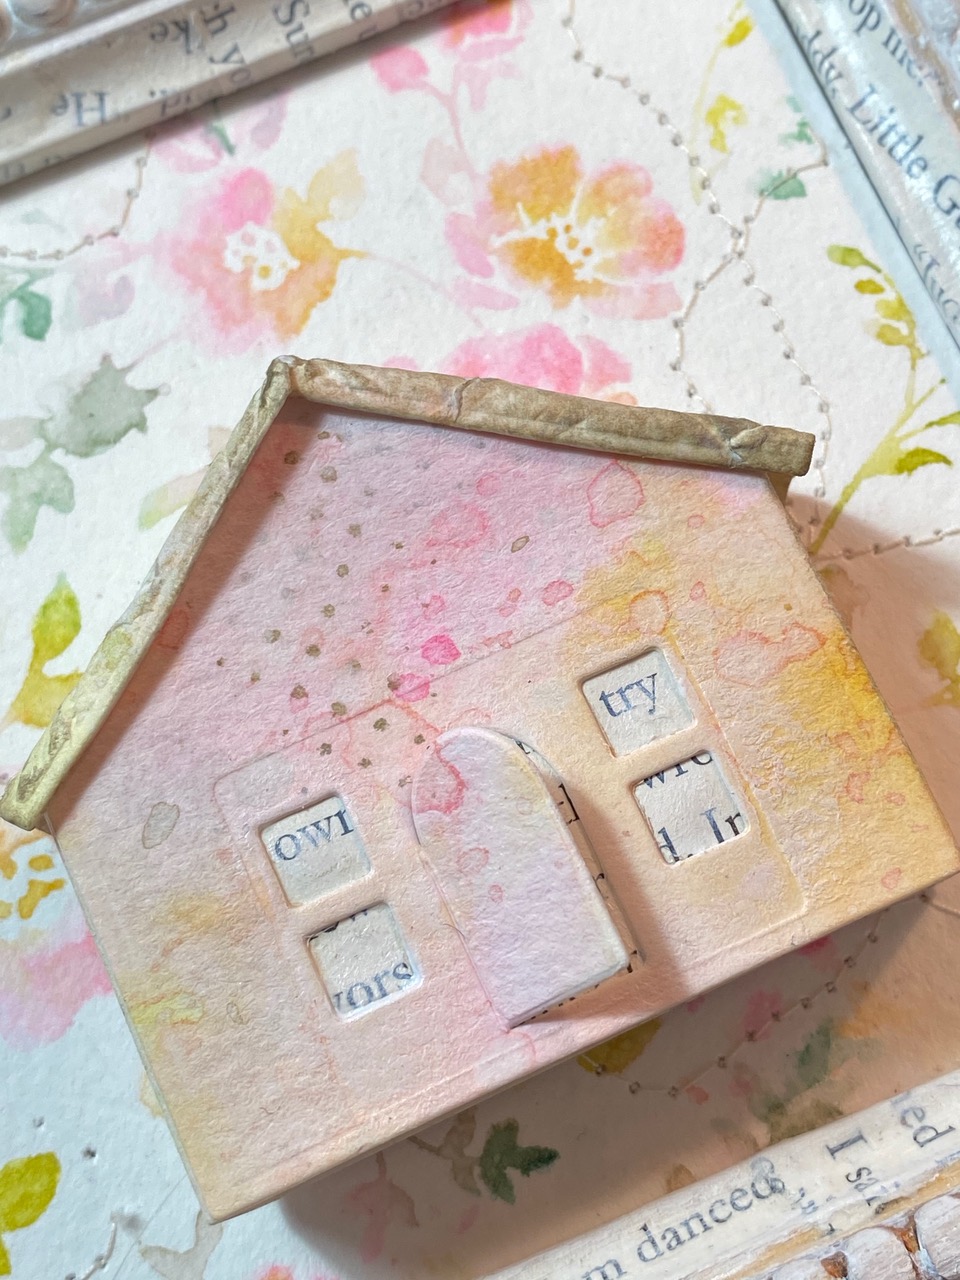
I cut a small piece of the house background paper to finish the bottom the house and adhered it with collage medium. A tiny pearl button was added to the top to create the perfect vintage touch…you know I had to add one! 😉
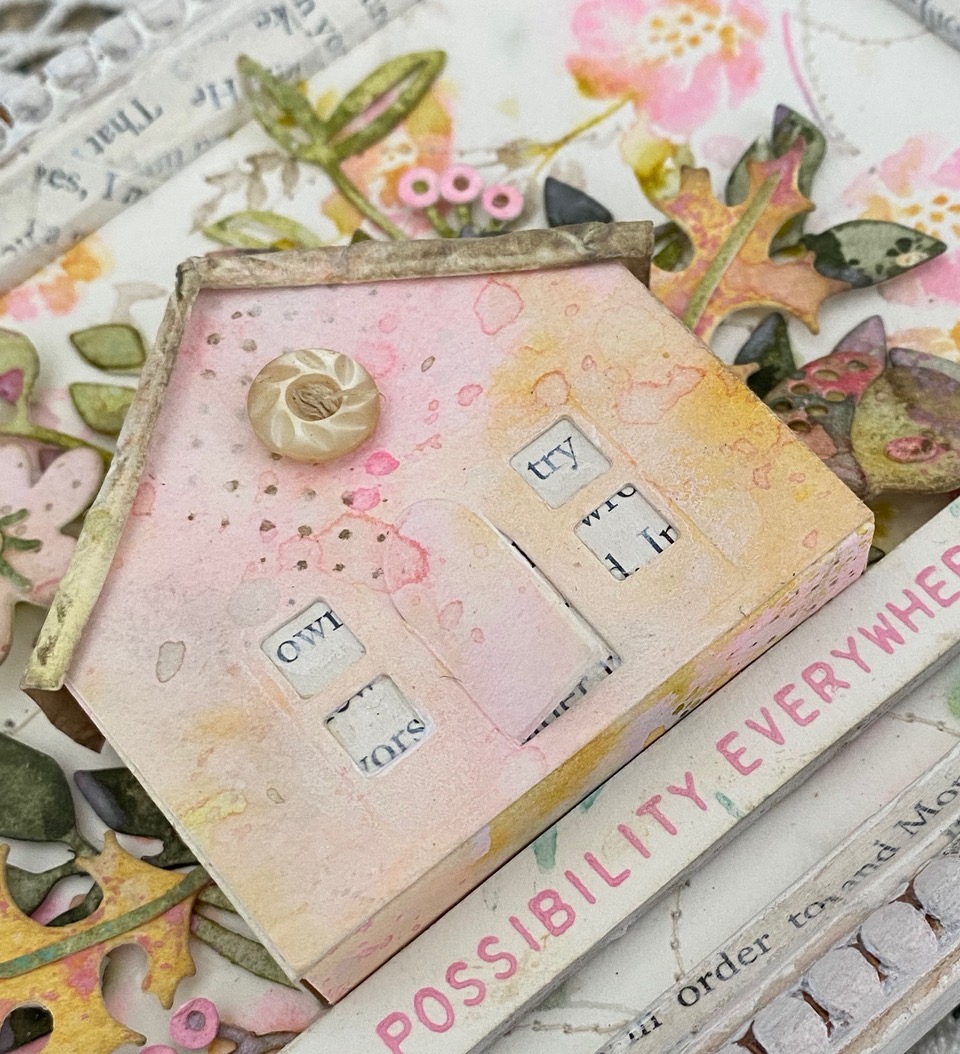
I cut out all my leaves and florals using the Garden Greens and Funky Foliage Thinlet sets and my Sizzix Sidekick, and began arranging the pieces.
All the tiny florals were adhered using collage medium and thin foam dots to create dimension.
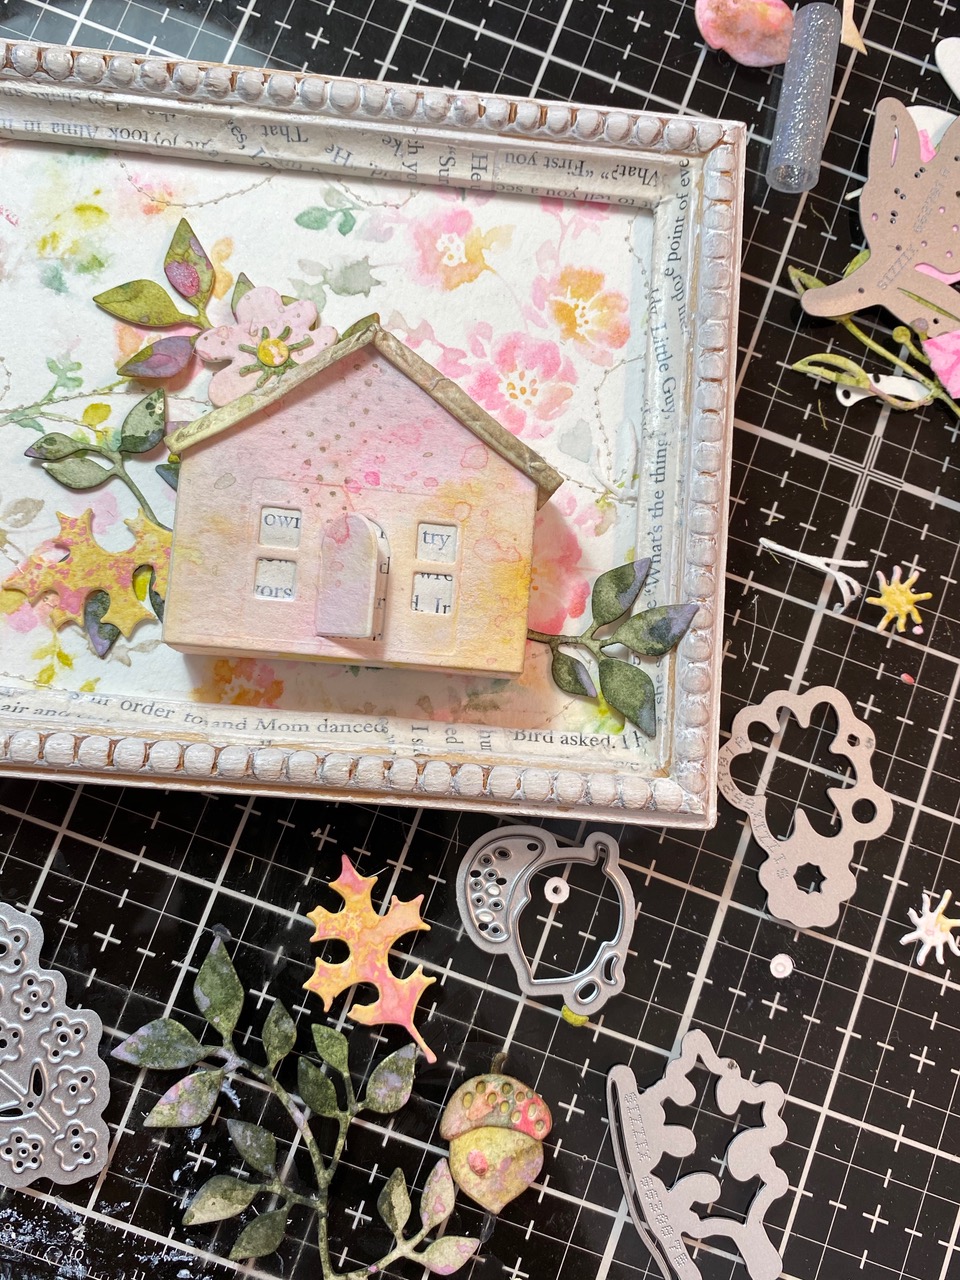
And with that, my tiny house vignette was complete…
Thanks so much for stopping by today…I hope you give the Kitschy Flamingo a try! Have a great day!
Creatively yours,
Stacy
Recipe for this project…
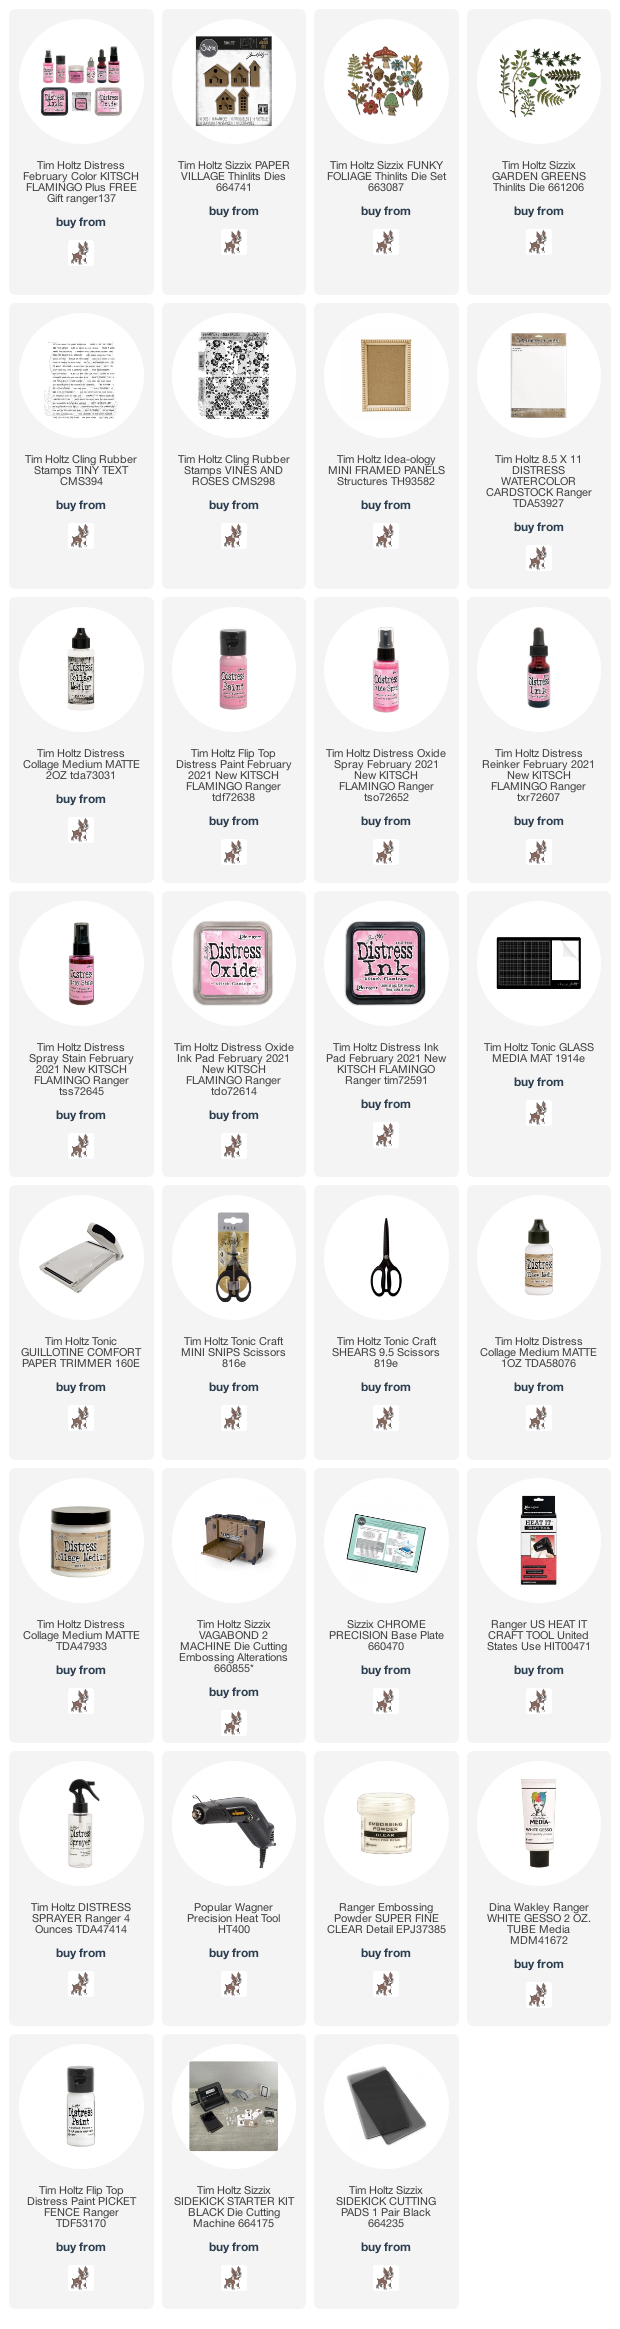
Distress Watercolor Paper, Vines and Roses Stamp Set CMS298, Dots and Floral Stamp Set CMS220, Kitsch Flamingo Distress Inks and Sprays, Tiny Text Stamp Set CMS394, Small Framed Panel, Picket Fence Distress Paint, Dina Wakley White Gesso, Distress Collage Matte Medium, Paper Village Thinlet Set, Garden Greens Thinlet Set, Funky Foliage Thinlet Set, Sizzix Sidekick, Old Book pages, Vintage Pearl Button, Chipboard
What is an affiliate program, and why should I click on the link and buy through you?
When you shop via the affiliate link on this blog, I receive a small commission from the affiliate provider (Simon Says Stamp) at no extra cost to you, whatsoever. These commissions help me to cover the hosting fees and other costs to run my blog and be able to provide you with FREE inspiration. If you shop the links, THANK YOU! I truly appreciate being able to share my love of creating with you.


When I saw this on Tim’s reveal I was enchanted. I love all your creations but I love the use of lighter colors here. I think I’m correct that you made the little note cards too. They are so sweet. Thank you Stacy for all your inspiration.
What a lovely project! It is beautiful! So much detail!
Beautiful make Stacy. Love the softness of the new colour. Love it 💗💗
So, so love this project…love your Shabby Chic style and Kitsch Flamingo fits right in…beautiful color…we needed this Pink…love it!
Just love it, so soft and pretty. Thanks for sharing!
I just love everything you make ❤️ This is such a sweet vignette—all the background papers you made are so charming and dreamy. Can’t wait to see more of your makes with this latest release.
Wow, Stacy, this is beyond adorable. The new colour is FAB and the way you have used it is brilliant!
Beautiful project Stacy! I love that background and all those beautiful flowers and leaves
Your makes are incredible. There’s so much thought and detail and you do the absolute BEST job of showing us so we can recreate the whole project or the pieces and parts we want to cas. You’re a wonderful teacher and you do a magnificent job of showcasing Tim’s products. Love,love,love your style,Stacy.
Thank you for the recipe! 😍
I absolutely LOVE everything you create ❤️!
Beautiful project Stacy! You are truly appreciated for the hard work you put into writing & creating these detailed tutorials. Thank you for sharing your gift of creating!
Beautiful!! Love the backgounds and how you altered the size of the house and that rolled roof!! So creative, as always!!
You are my go to designer! I am very new at this and I just gush over everything you do. You have my style to the max! You take your designs that extra step up always. Thank you so much for sharing with us!!
Gorgeous I love the way you did the background with that stamp, cute project!
That vines and roses stamp and the way you applied the colours is just magic! This make ticked so many boxes for me I absolutely love it! Such a feminine project.
Gorgeous and shabby good! LOVE the stitching!