Hello friends! Well…have you heard the news? There’s a new distress color in town and DANG, it is AWESOME! When I say that I love this color, it is a complete understatement, in fact, I know that I have said this with each new color that has been released, but this one, I think, is my favorite favorite! 🙂
If you didn’t have a chance to check out the YouTube live that Tim hosted today, you can click here and follow the link to his YouTube account. You’ve got to see this color in action and the beautiful makes that were created to show it off. I am so grateful that I got the chance to play with it ahead of the release and can’t wait for you to see the fun inkiness that I had with it.
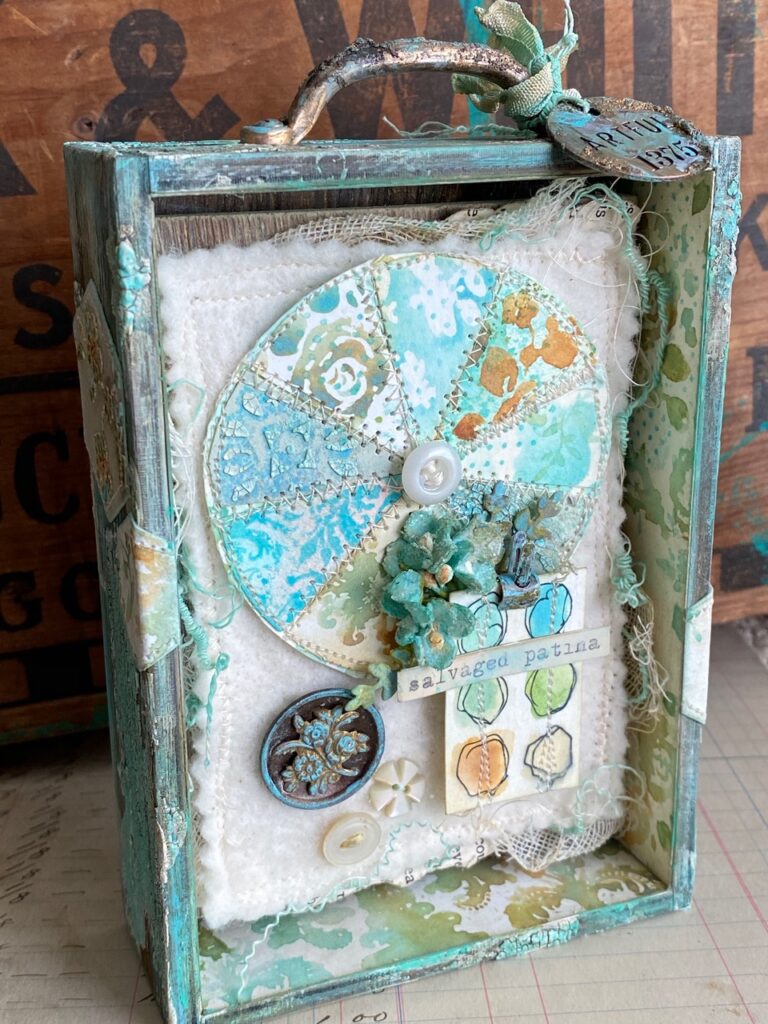
My first project was inspired by the first inky color combo that I mixed to create a bunch of backgrounds, plus the various “color wheels” that I’ve been seeing on social media lately. You know that I am a sucker for vintage and stitched things and as I’ve been seeing color wheel inspiration, I thought it would be fun to put my own vintage spin on one… 😉 sorry, couldn’t resist!
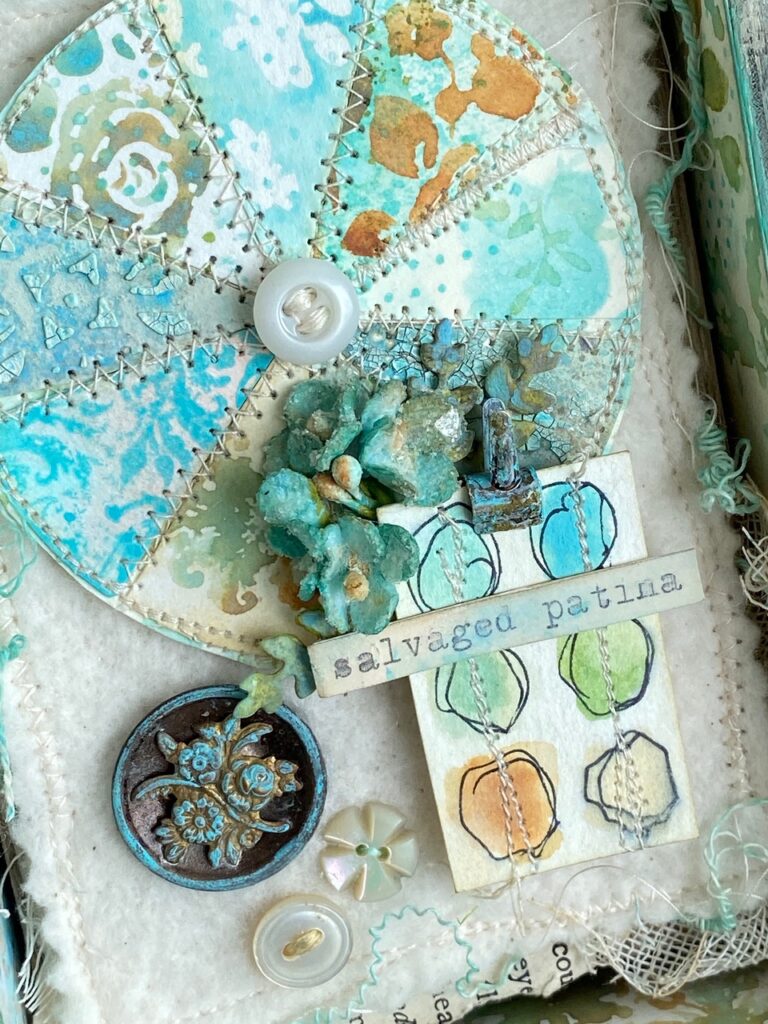
Anyways, mine looks a little quilt-ish with the added stitches, buttons and threads and I LOVE it..in fact as I was making it I thought it’d be cool to make several of these to hang in my studio displaying some of my favorite distress ink combos. I just can’t wait to make more of them!
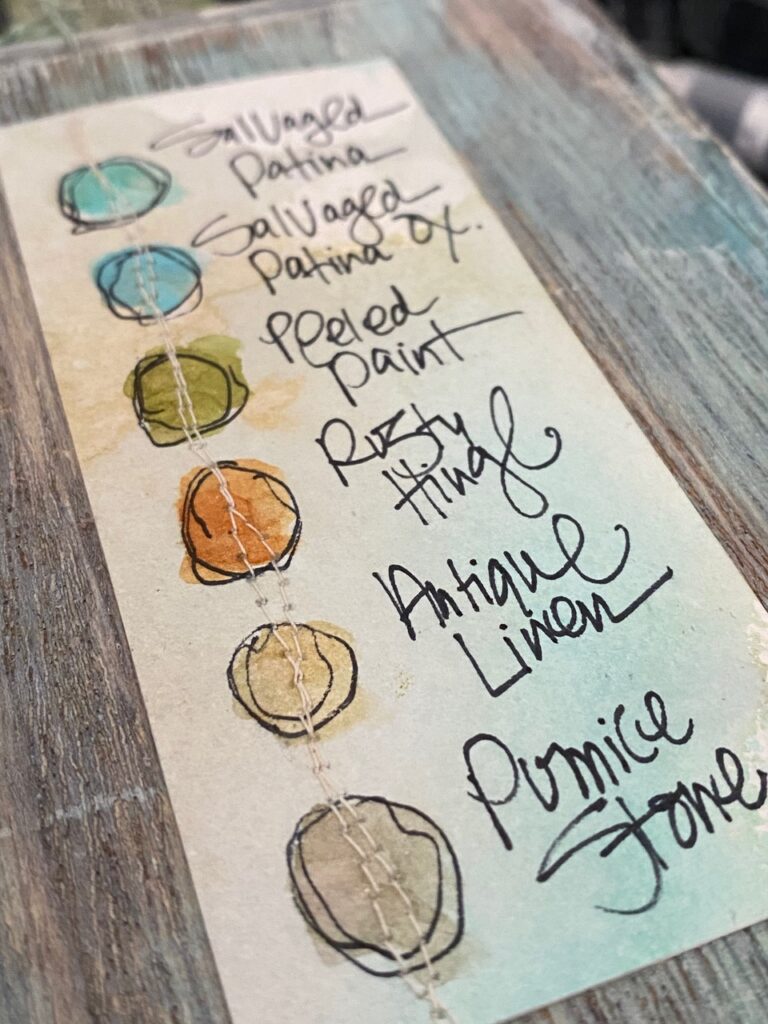
When Salvaged Patina arrived at my door step, as with each of the past new distress colors, I sat down and made a bunch of backgrounds. Because playing with inks without a specific outcome is THE BEST! I ended up with a pretty good size stack of backgrounds and discovered that my favorite combo on that first day, was created using Salvaged Patina Ink and Oxide with Peeled Paint, Rusty Hinge, Antique Linen and Pumice Stone.
Here’s a little peek at my stack…
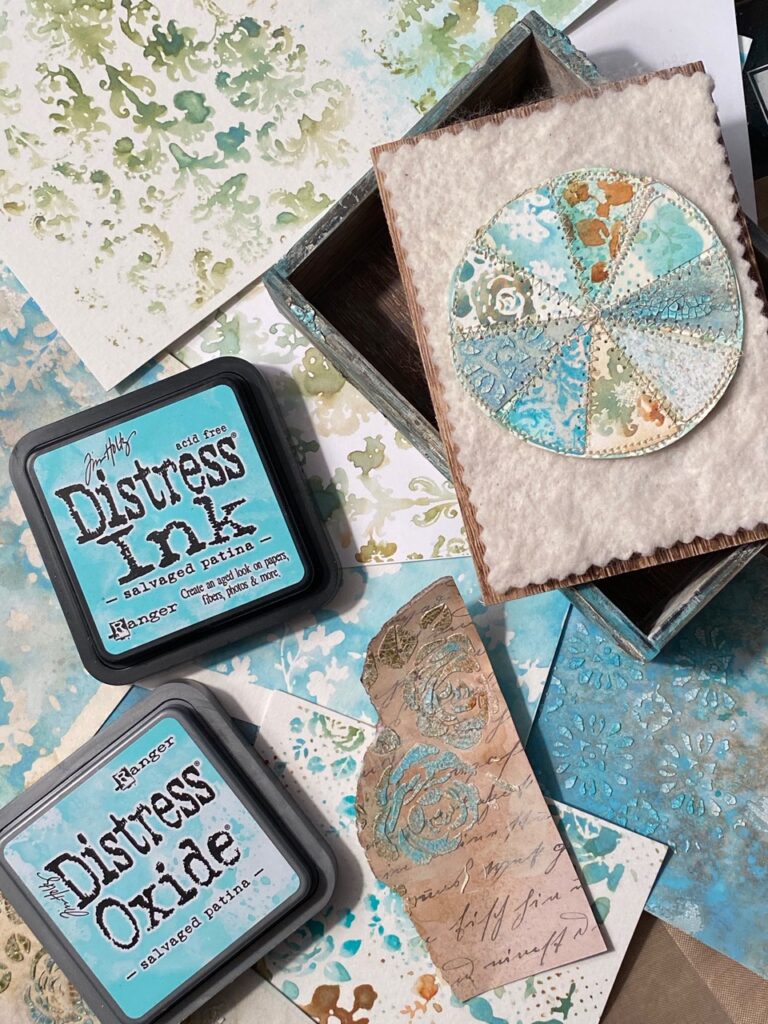
I used each and every product in the new color to make them which included the Salvaged Patina Ink Pad, Oxide Pad, Spray Stains, Distress Paint, and Embossing Glaze. So if you choose to buy one or any of the products in this release, they all have big inky and magical possibilities. I smooshed, smeared, sprinkled, spritzed and stamped my way through them on both watercolor paper and Distress Heavystock.
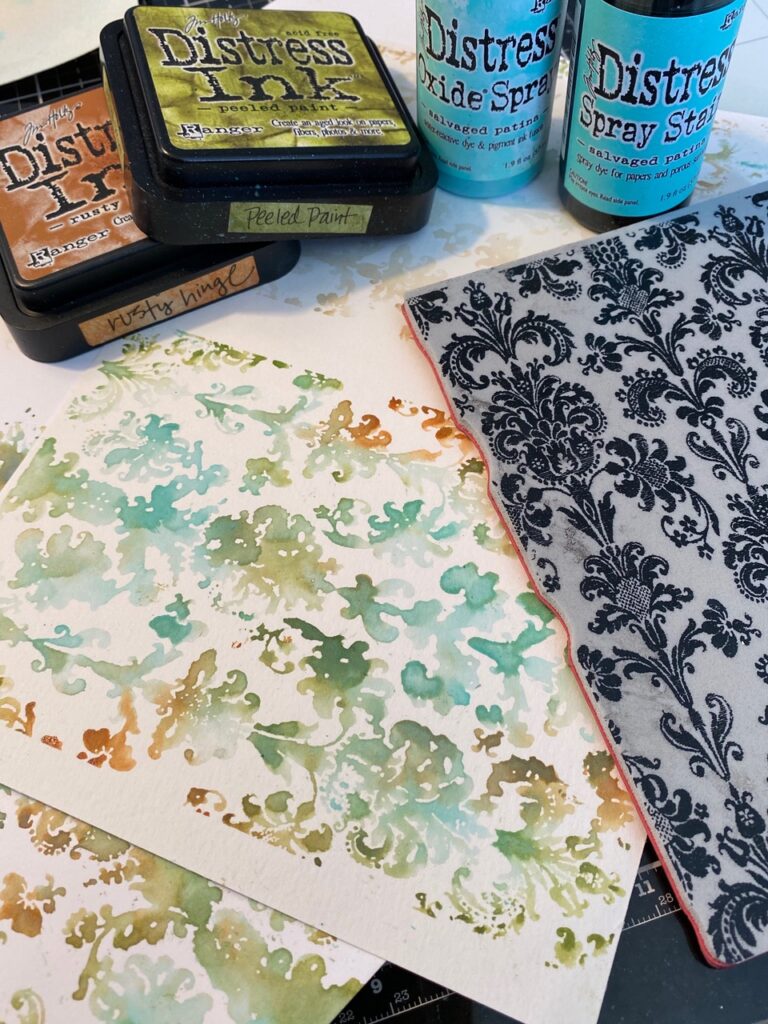
Here are a couple, I randomly inked up the Tapestry Background Stamp (CMS414) with Peeled Paint and Rusty Hinge Distress Ink. I then spritzed the stamp directly with both Salvaged Patina Spray Stain and Oxide Spray, spritzed it with a couple quick mists of water and stamped it onto my paper, then it was dried with a heat tool.Check out below how the oxide of the salvaged patina mixed with rusty hinge to create a yummy green/brown combo…oh my goodness, all the heart eyes!!
Next, I decided to do one of my favorite techniques using Distress Crackle Paste and Embossing Glazes.
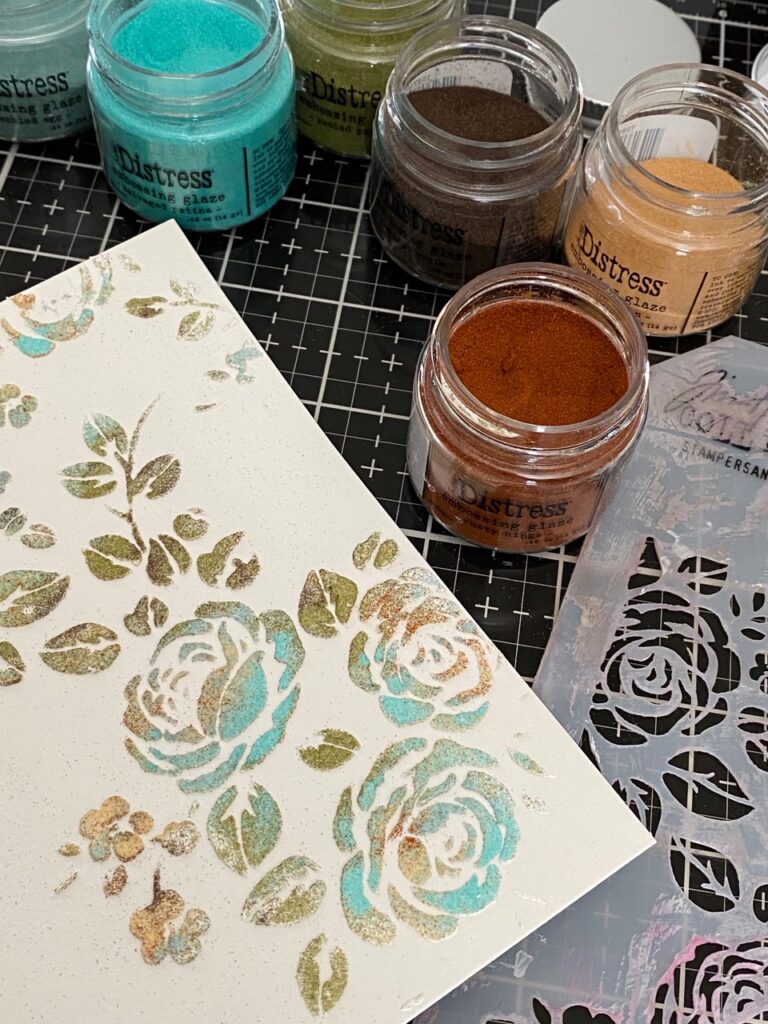
I spread the texture paste through the Roses Layering Stencil (THS075) then while it was wet, sprinkled it with a few pinches of Salvaged Patina, Antique Linen, Walnut Stain, Peeled Paint, Speckled Egg and Rusty Hinge Embossing Glazes. I tapped the bottom of the paper to distribute the powders, tapped of the excess, then set it aside to dry and crackle. Once it was dry, I embossed the glazes using my heat embossing gun.
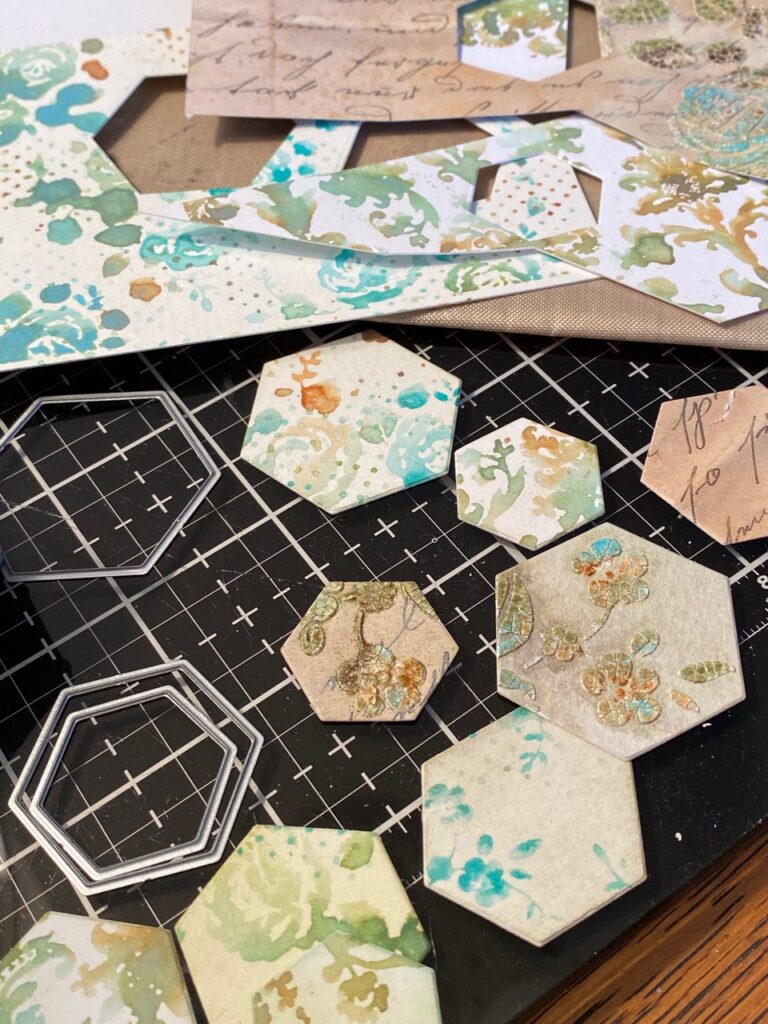
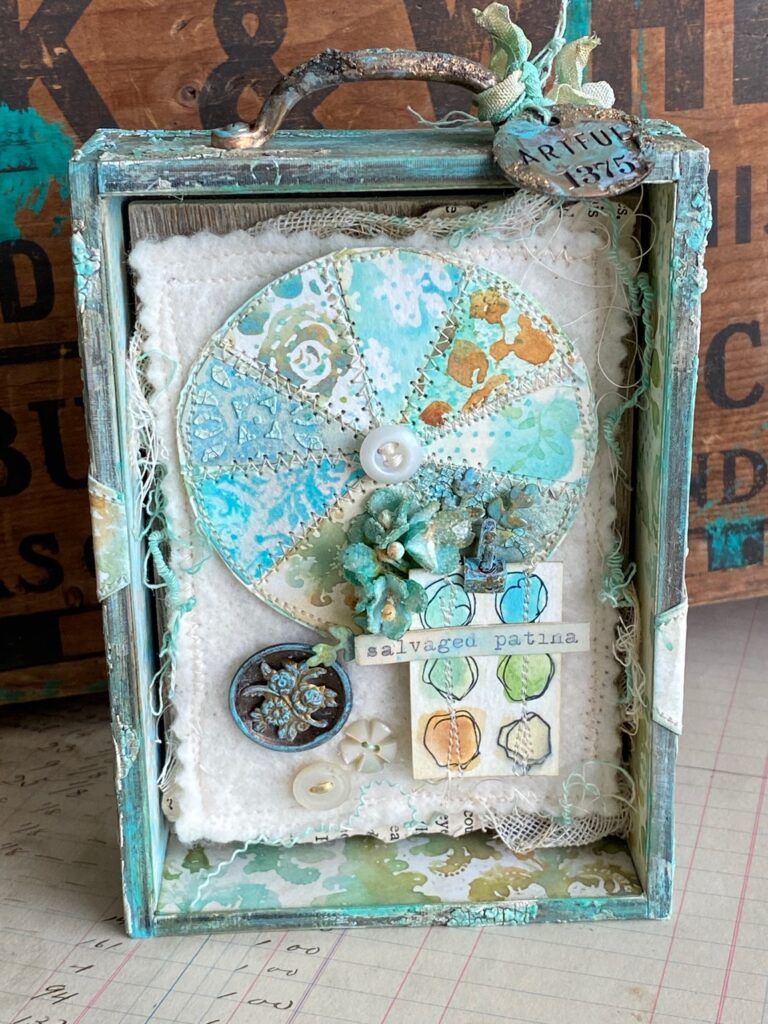
I went to town creating more and more backgrounds using various layering stencils and stamps, then a few of the backgrounds were used to cut a few of the stacked hex thinlets. These were then used to embellish the outside of my vignette box.
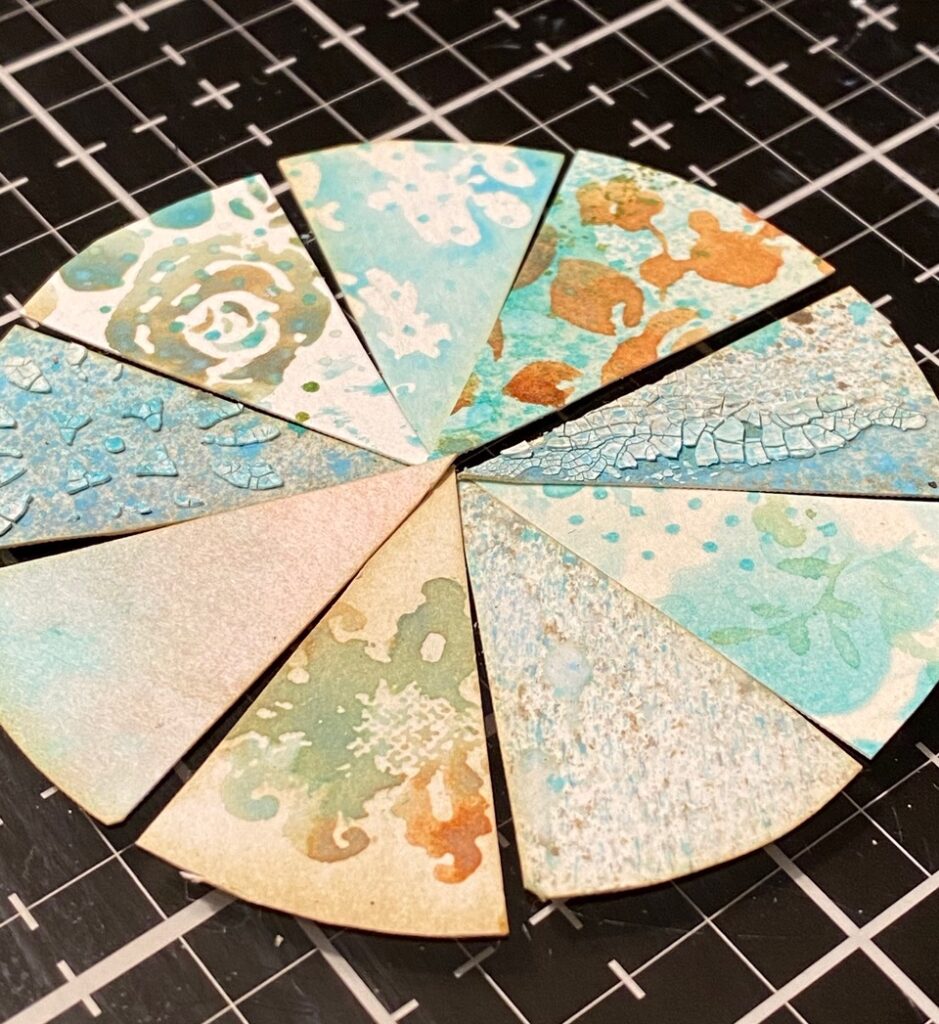
Using several of the backgrounds, I trimmed color wheel pie pieces using a pair of scissors. These were all randomly trimmed and are not perfect, which, in my opinion, adds to the charm of it.
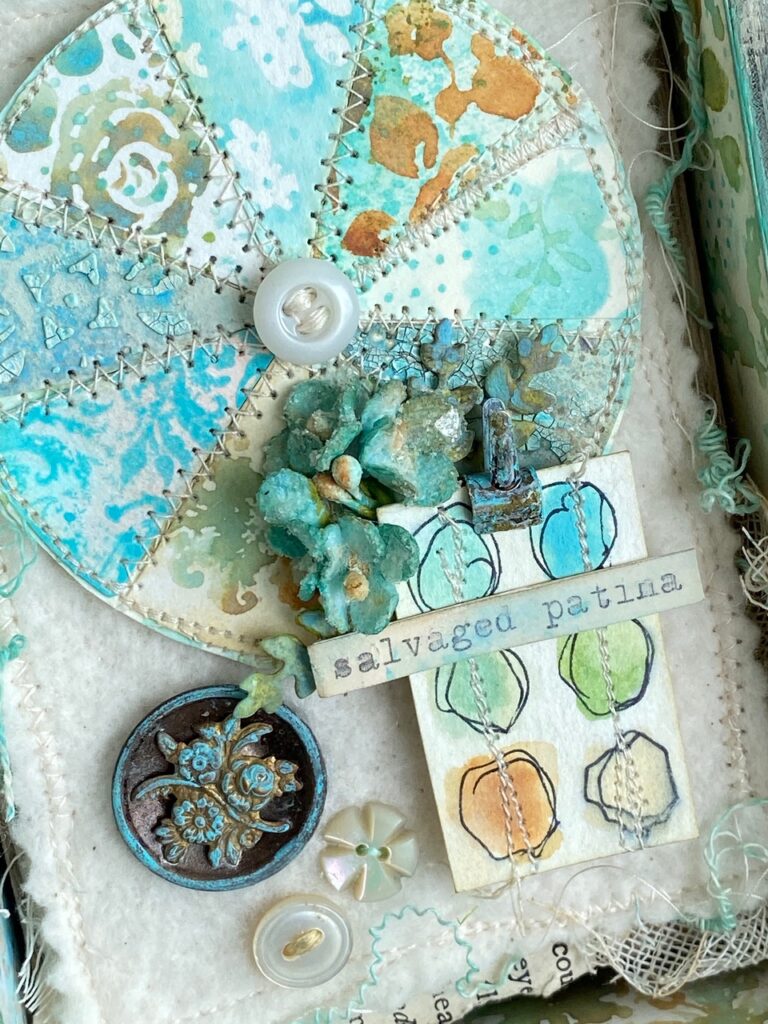
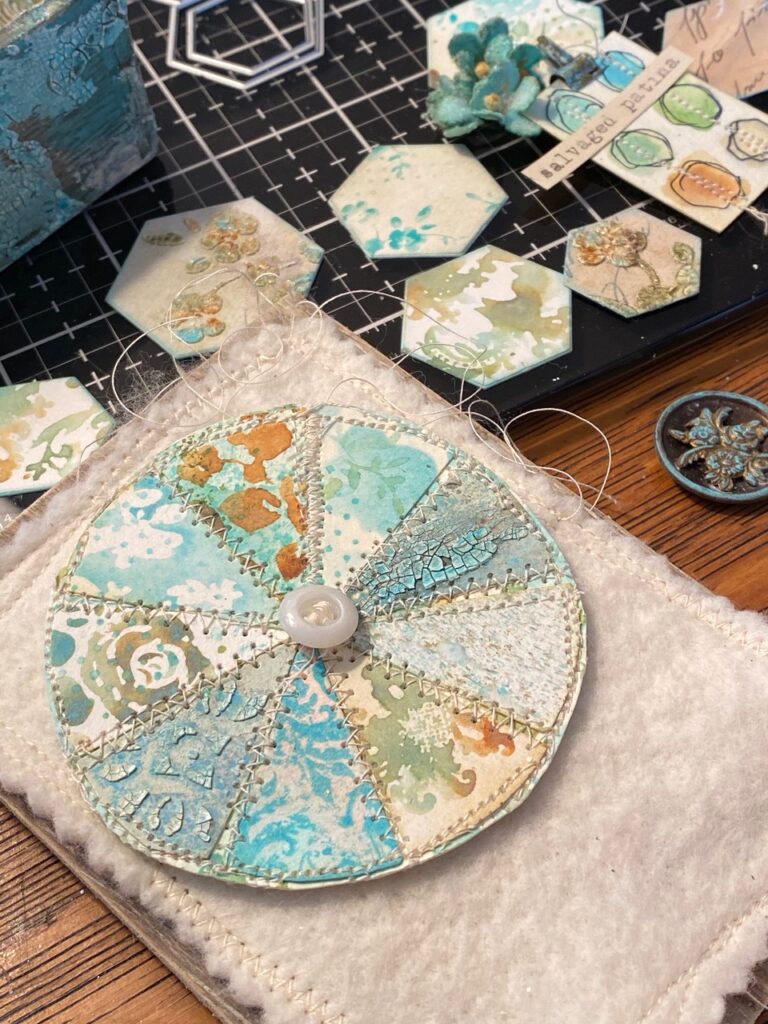
On a scrap of paper, I laid out the color wheel, adhered them to it then trimmed out a circle, then I messy stitched around it very haphazardly..again, messy charm! 🙂
I trimmed a piece of quilt batting to fit on the front of a wood vignette panel that fit into my vignette box.
I chose a variety of the backgrounds to line the inside of the vignette box and adhered them inside with collage medium.
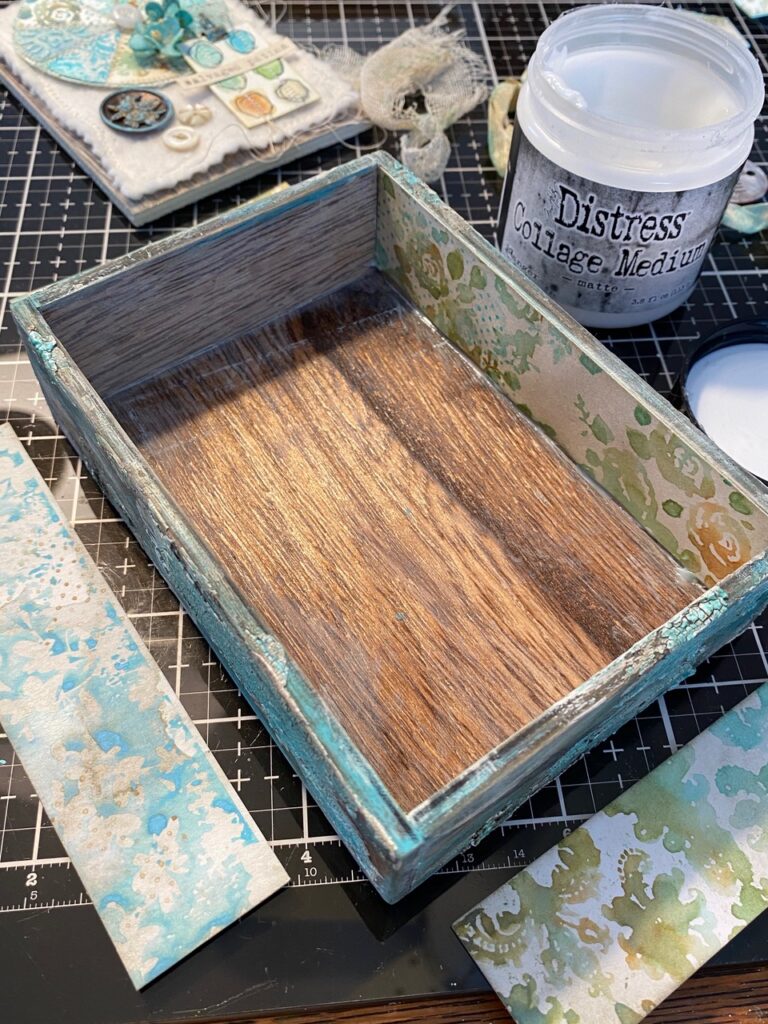
the vignette box…
The vignette box was painted with both Antique Linen and Salvaged Patina Distress Paint…not heavily, just lightly, then using my sanding block, I sanded off a little to give it a worn look.
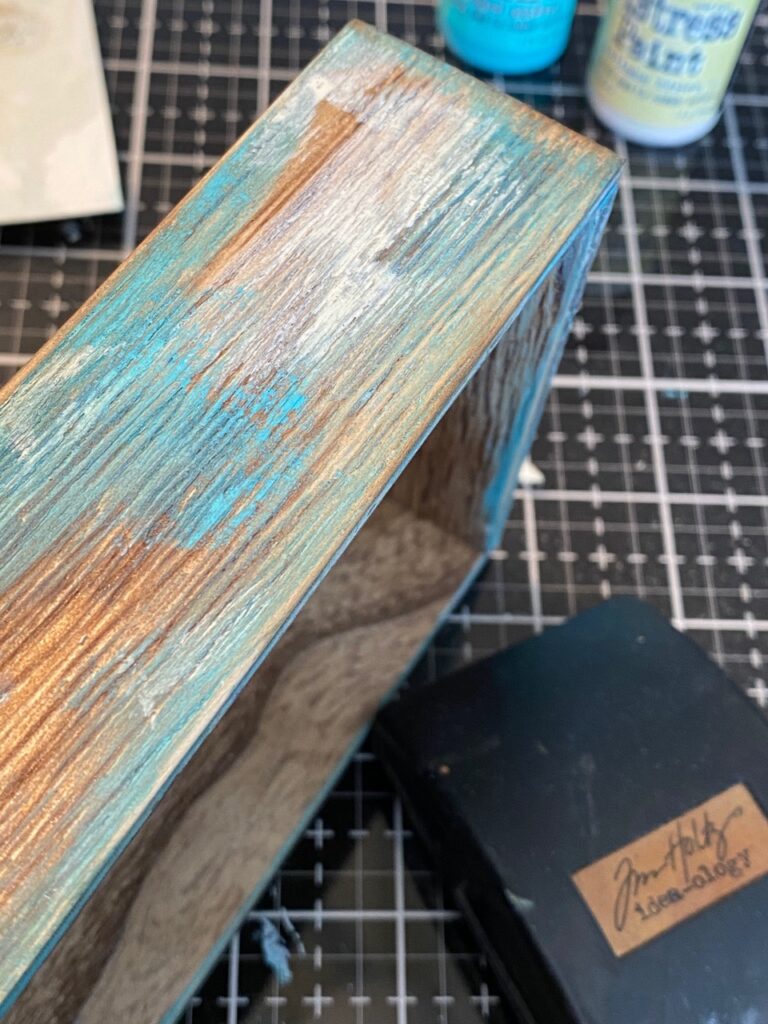
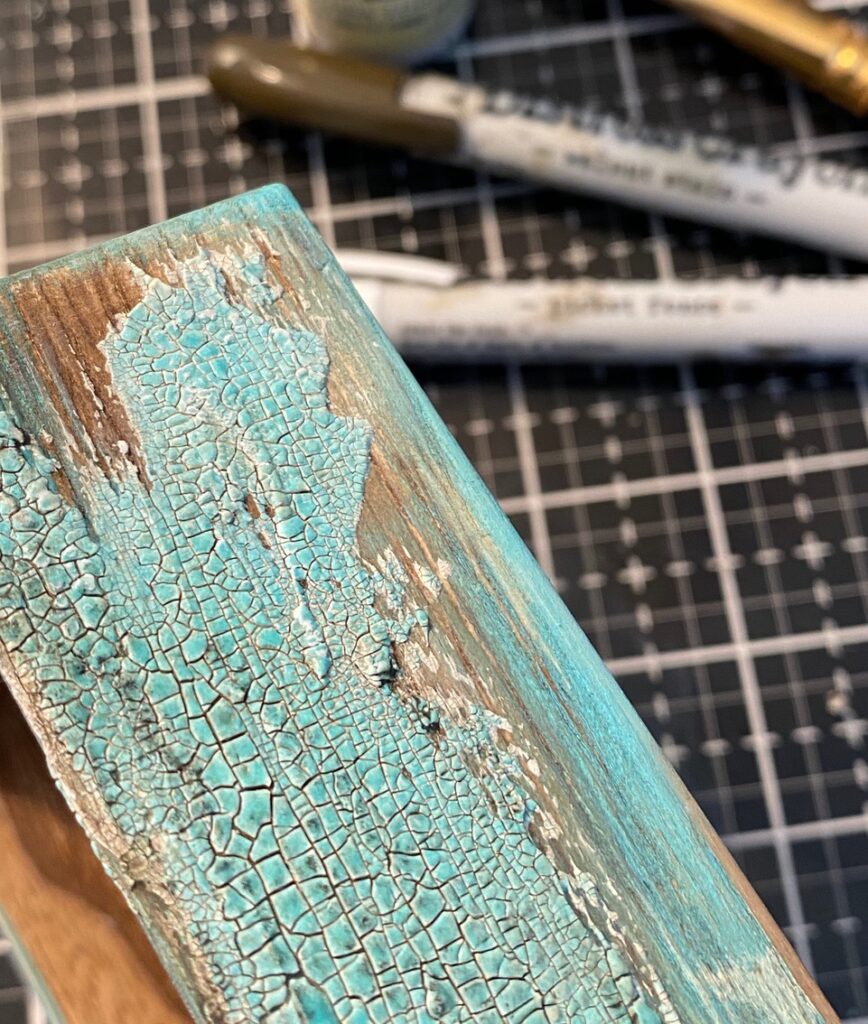
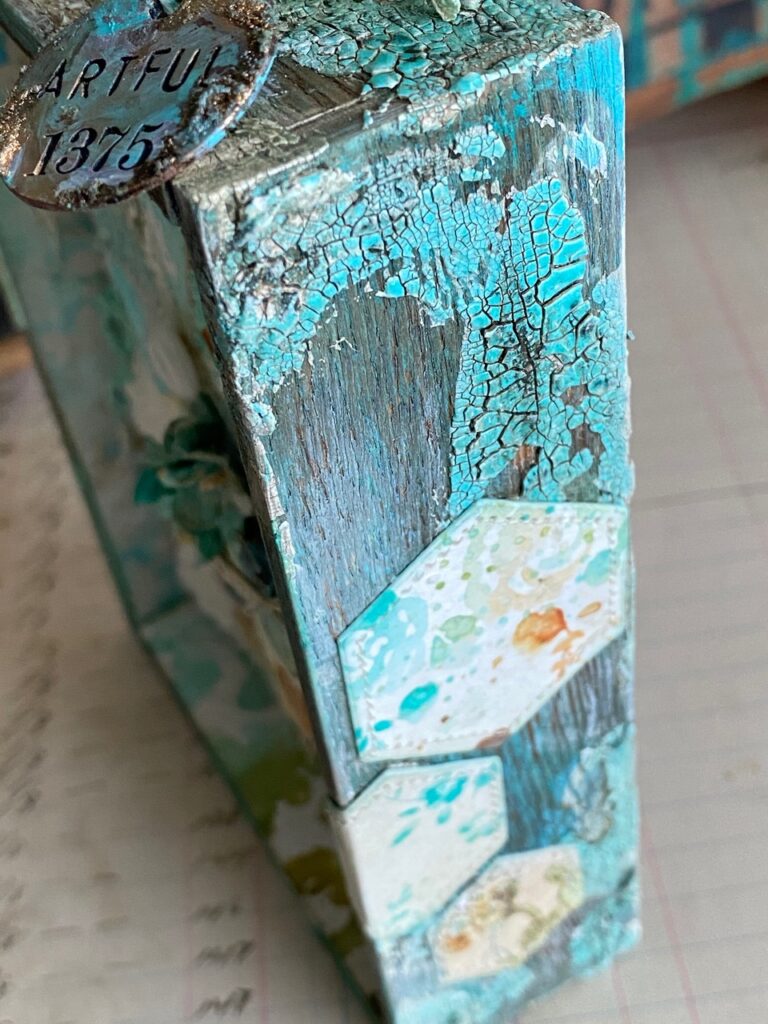
After it was sanded, I brushed off the dust using a dry towel and applied some crackle texture paste using a palette knife. While the crackle paste was still wet, I dumped a good amount of the Salvaged Patina Embossing Glaze over the paste (on all the sides) and set it aside to dry and crackle. Once crackled it was embossed with my heat gun, scribbled with Walnut Stain Distress Crayon and blended in with a damp paint brush. (to get the grunge into the cracks)
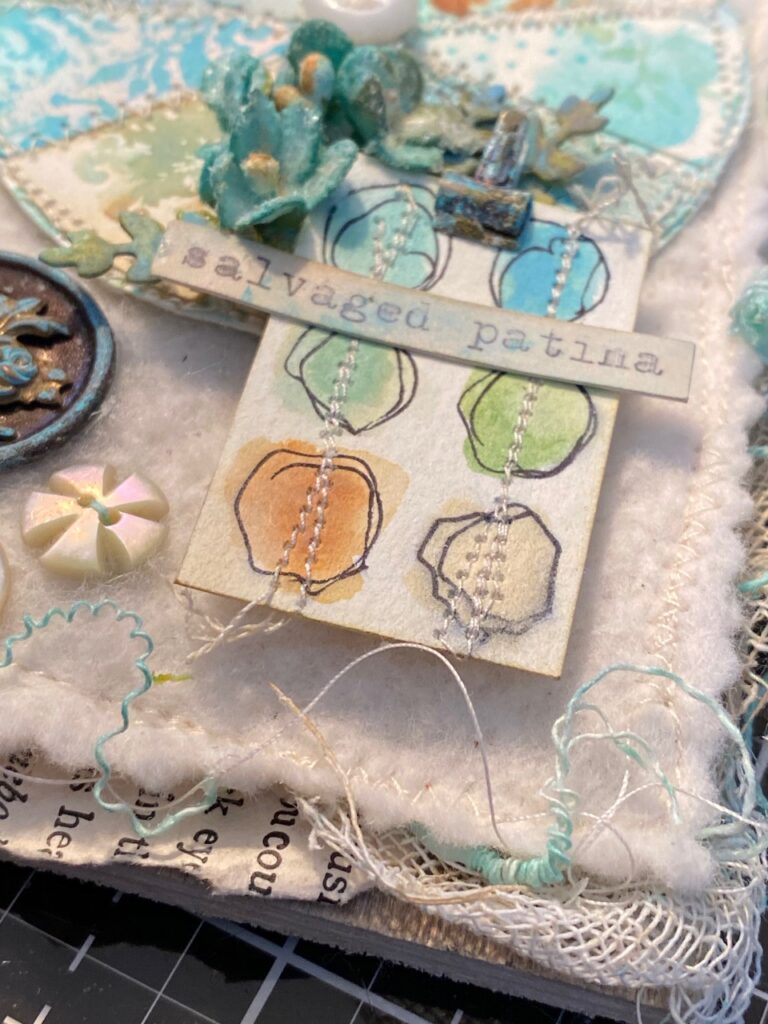
I created a tiny swatch sheet using a scrap piece of watercolor paper, a detail water brush and distress inks. The swatch colors were outlined using a fine tip permanent marker, then I stitched randomly through the circles. Using a vintage typewriter, I typed out the color and applied it to the front of the swatch.
Vintage button was rubbed with some Salvaged Patina Distress Paint and dried.
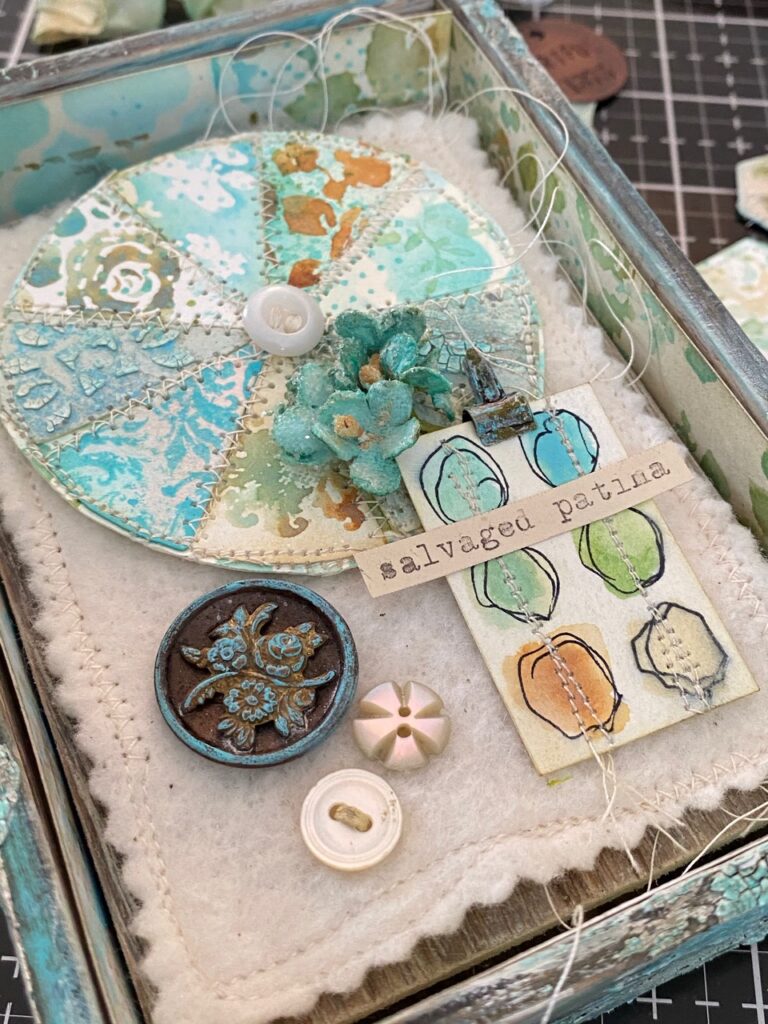
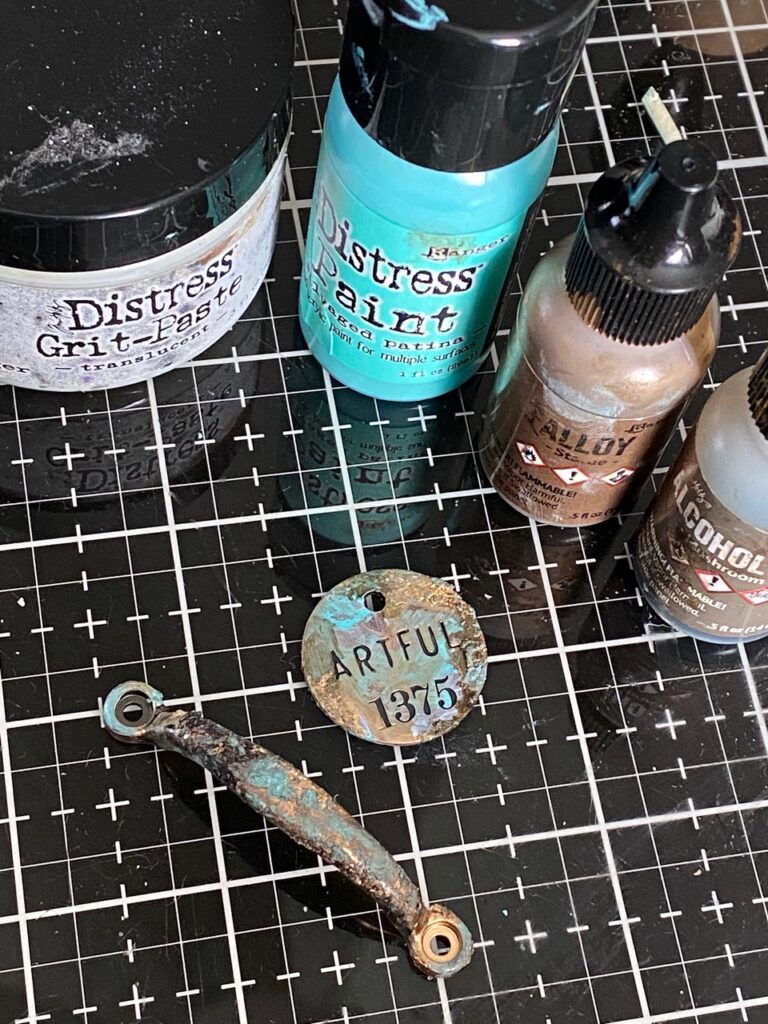
Both the idea-ology Mini Hardware Pull, Philosophy Tag (and tiny clip) were rubbed with Antique Linen Distress Paint, dried, then rubbed with Translucent Grit-Paste, then set aside to dry. Once set, they were rubbed with Salvaged Patina Statue Alcohol Alloy and Mushroom Alcohol Ink.
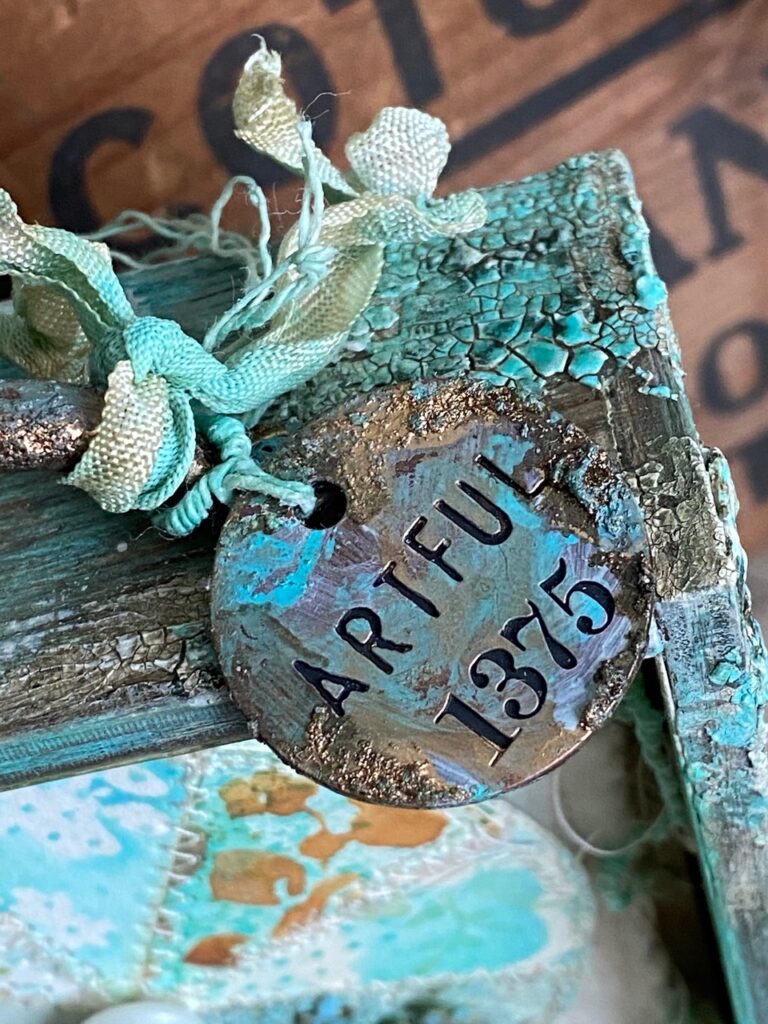
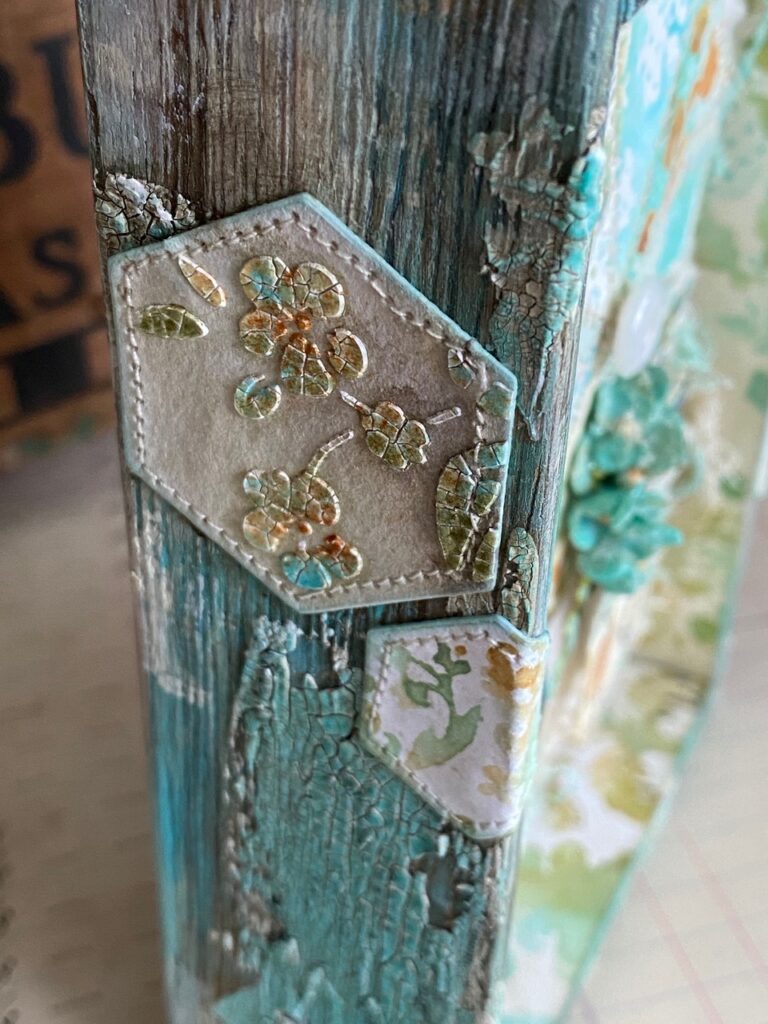
The hex pieces were stitched using my sewing machine and cream thread and applied to the right and left sides of the vignette box.
I found some scraps of tattered and torn vintage book pages in my scrap bin along with scraps of mummy cloth then stitched them to the back of the quilt batting piece. I dyed a piece of crochet cotton string using both water and the Salvaged Patina Spray Stain, then it was dried with my heat tool and pulled apart to create the swirly and scrunchy thread pieces. These were stuffed behind the batting and stitched to the edges.
I dyed a bunch of idea-ology bouquet flowers using the sprays and paints, then dipped them in clear rock candy glitter. Some tiny leaves from the Funky Nature Thinlet Set were inked with Peeled Paint Distress Ink then dipped into tiny drips of Salvaged Patina Oxide Ink and water. These were then placed behind the bouquet. The patina tiny clip was clipped to the swatch and then the whole vignette panel applied within the vignette box using foam tape.
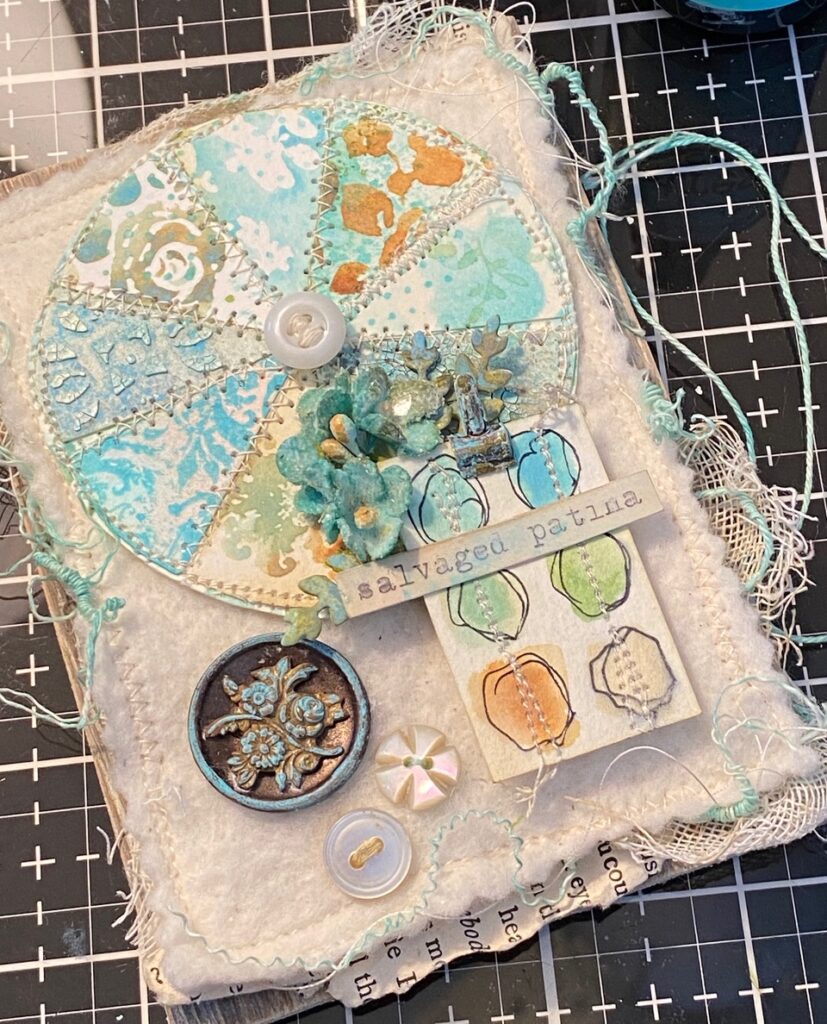
This one right here in the photo below at the bottom is my favorite one..all scrunchy, swirly and twirly!
To complete the project, I made another swatch sheet using a scrap of watercolor paper, and applied it to the back of the project listing the colors of inks that were used…that way I can always go back to it and know the exact color combo that I used!
With that, my Salvaged Patina project was complete.
Thanks so much for stopping by today and be sure to keep an eye out for more inspiration for Salvaged Patina coming soon!
Have a great weekend!
Creatively yours,
Stacy

Products used to create this project- Salvaged Patina Inks, Sprays, Paint and Embossing Glaze, Vignette Boxes, Vignette Panel, Watercolor paper, Distress Heavystock, Various Distress Inks, sprays, paints, embossing glazes, and crayons, Distress Crackle Texture Paste, Distress Translucent Grit-Paste, Statue Alloy Ink, Mushroom Alcohol Ink, idea-ology paper bouquet, mini clips, mini hardware pulls, philosophy tags, mummy cloth,Stampers Anonymous Tapestry Background Stamps CMS414, Roses Layering Stencil THS075, Sizzix Stacked Hexagons, Funky Nature Thinlets, quilt batting, crochet cotton string, vintage buttons, book pages, sewing machine, thread, typewriter


This is beautiful! I cant wait to see it in other colors!! Thank you so much for the details of the make.
gotta love this new color and you make it look so good. thanks as always for sharing.
WoW Stacy! I loved how you created the colour wheel using backgrounds with the new colour. When I saw the live, I thought it was fabric. This is mind blowing xxx
Thank you for sharing, you make it look so easy. I really do like the new colors and can’t wait to try them once they get here.
Thank you Stacy for continuing to WOW us with all your makes. As usual, you knocked my socks off, AGAIN.
I love this! Love every little step. The stamped image is stunning!! The new color is perfect, I mean who need how much it was needed. Can’t wait till my order gets into my hands.
Stacy, so many tips and techniques in one little project! And that new color, fabulous♥️
I can see you use this NEW color all the time!
Went to sleep last night after watching Tim’s Live & woke up this morning to your post!! Wow! I can feel the enthusiasm that both you & Tim communicated! It’s a fabulous new color & green IS my favorite color, need I say more?! Your idea with the color wheel & little hexagons is absolutely genius & I hope you will make others for your studio (& share them with us!) I really appreciate your careful instructions & great photos, I can hardly wait to get mine to play with! Thanks for sharing!!
Love the new colour and just love your gorgeous creation! So many fabulous details and the embossed glazed crackle is to die for!!! ❤️❤️❤️
Stacy, you are such an inspiration for me! Love this new color, mine is preordered so can’t wait for it to come. Also loved the cards you made for the “Savaged Patina” new color release! Thanks for the great tutorials!
This is awesome. I do appreciate the detail information about how you created it. Your color combos are inspiring. Can’t wait to see more of these. Now I suppose I need to go place an order. Thanks for enabling
All of your work is amazing – like Tim says – you are the BEST for Shabby Sheek!
What an amazing make! And a genius idea to use it as a kind of moodboard and kind of color swatch. Jaw-dropping. Thank you so much for inspiring us!
Big hugs from Germany
Anka
a.k.a. HirschEngelchen
The results of your Salvaged Patina playtime are stunning – such a beautiful box full of textures, patterns, and colour combinations. Pumice Stone is generally my first port of call with any colour, and combining S.P. with rustiness has to be good! So looking forward to playing when mine arrives. Gorgeous inspiration.
Alison x