Hello friends!
I’ve been up to all sorts of things secretly making for upcoming releases and one of those releases is the new Distress Watercolor Pencils that Tim announced this past Saturday on his Youtube LIVE. If you missed it, CLICK HERE to see the replay where he explains many details and demos them. Tim explains all the basics of how they are similar but different than other watercolor pencils, how they came to be and how to use them with other Distress products. They are pretty cool and a definite medium that the Distress Line has needed. I was so happy when he announced to the makers that there was a new distress product on the horizon, and so grateful and excited to share some of what I discovered with my early playtime.
Today, I’ll be sharing how I teamed them up with some of the Tim Holtz Sizzix 3D Embossing Folders. As I was first playing with them I noticed the awesome way that when they were dipped slightly into a cup of water and scribbled on paper, they distributed a bunch of pigment, which got me thinking about the ability to add them to a textured surface. You know I love texture and depth of color and these deliver it with ease!

So, let’s get to it!
I started by embossing a few of the 3D Embossing Folders onto Distress Watercolor Paper. I spritzed the papers as I normally would to get a good impression, embossed them with the 3D folders using my Sizzix foldaway, then dried the paper with my heat tool.


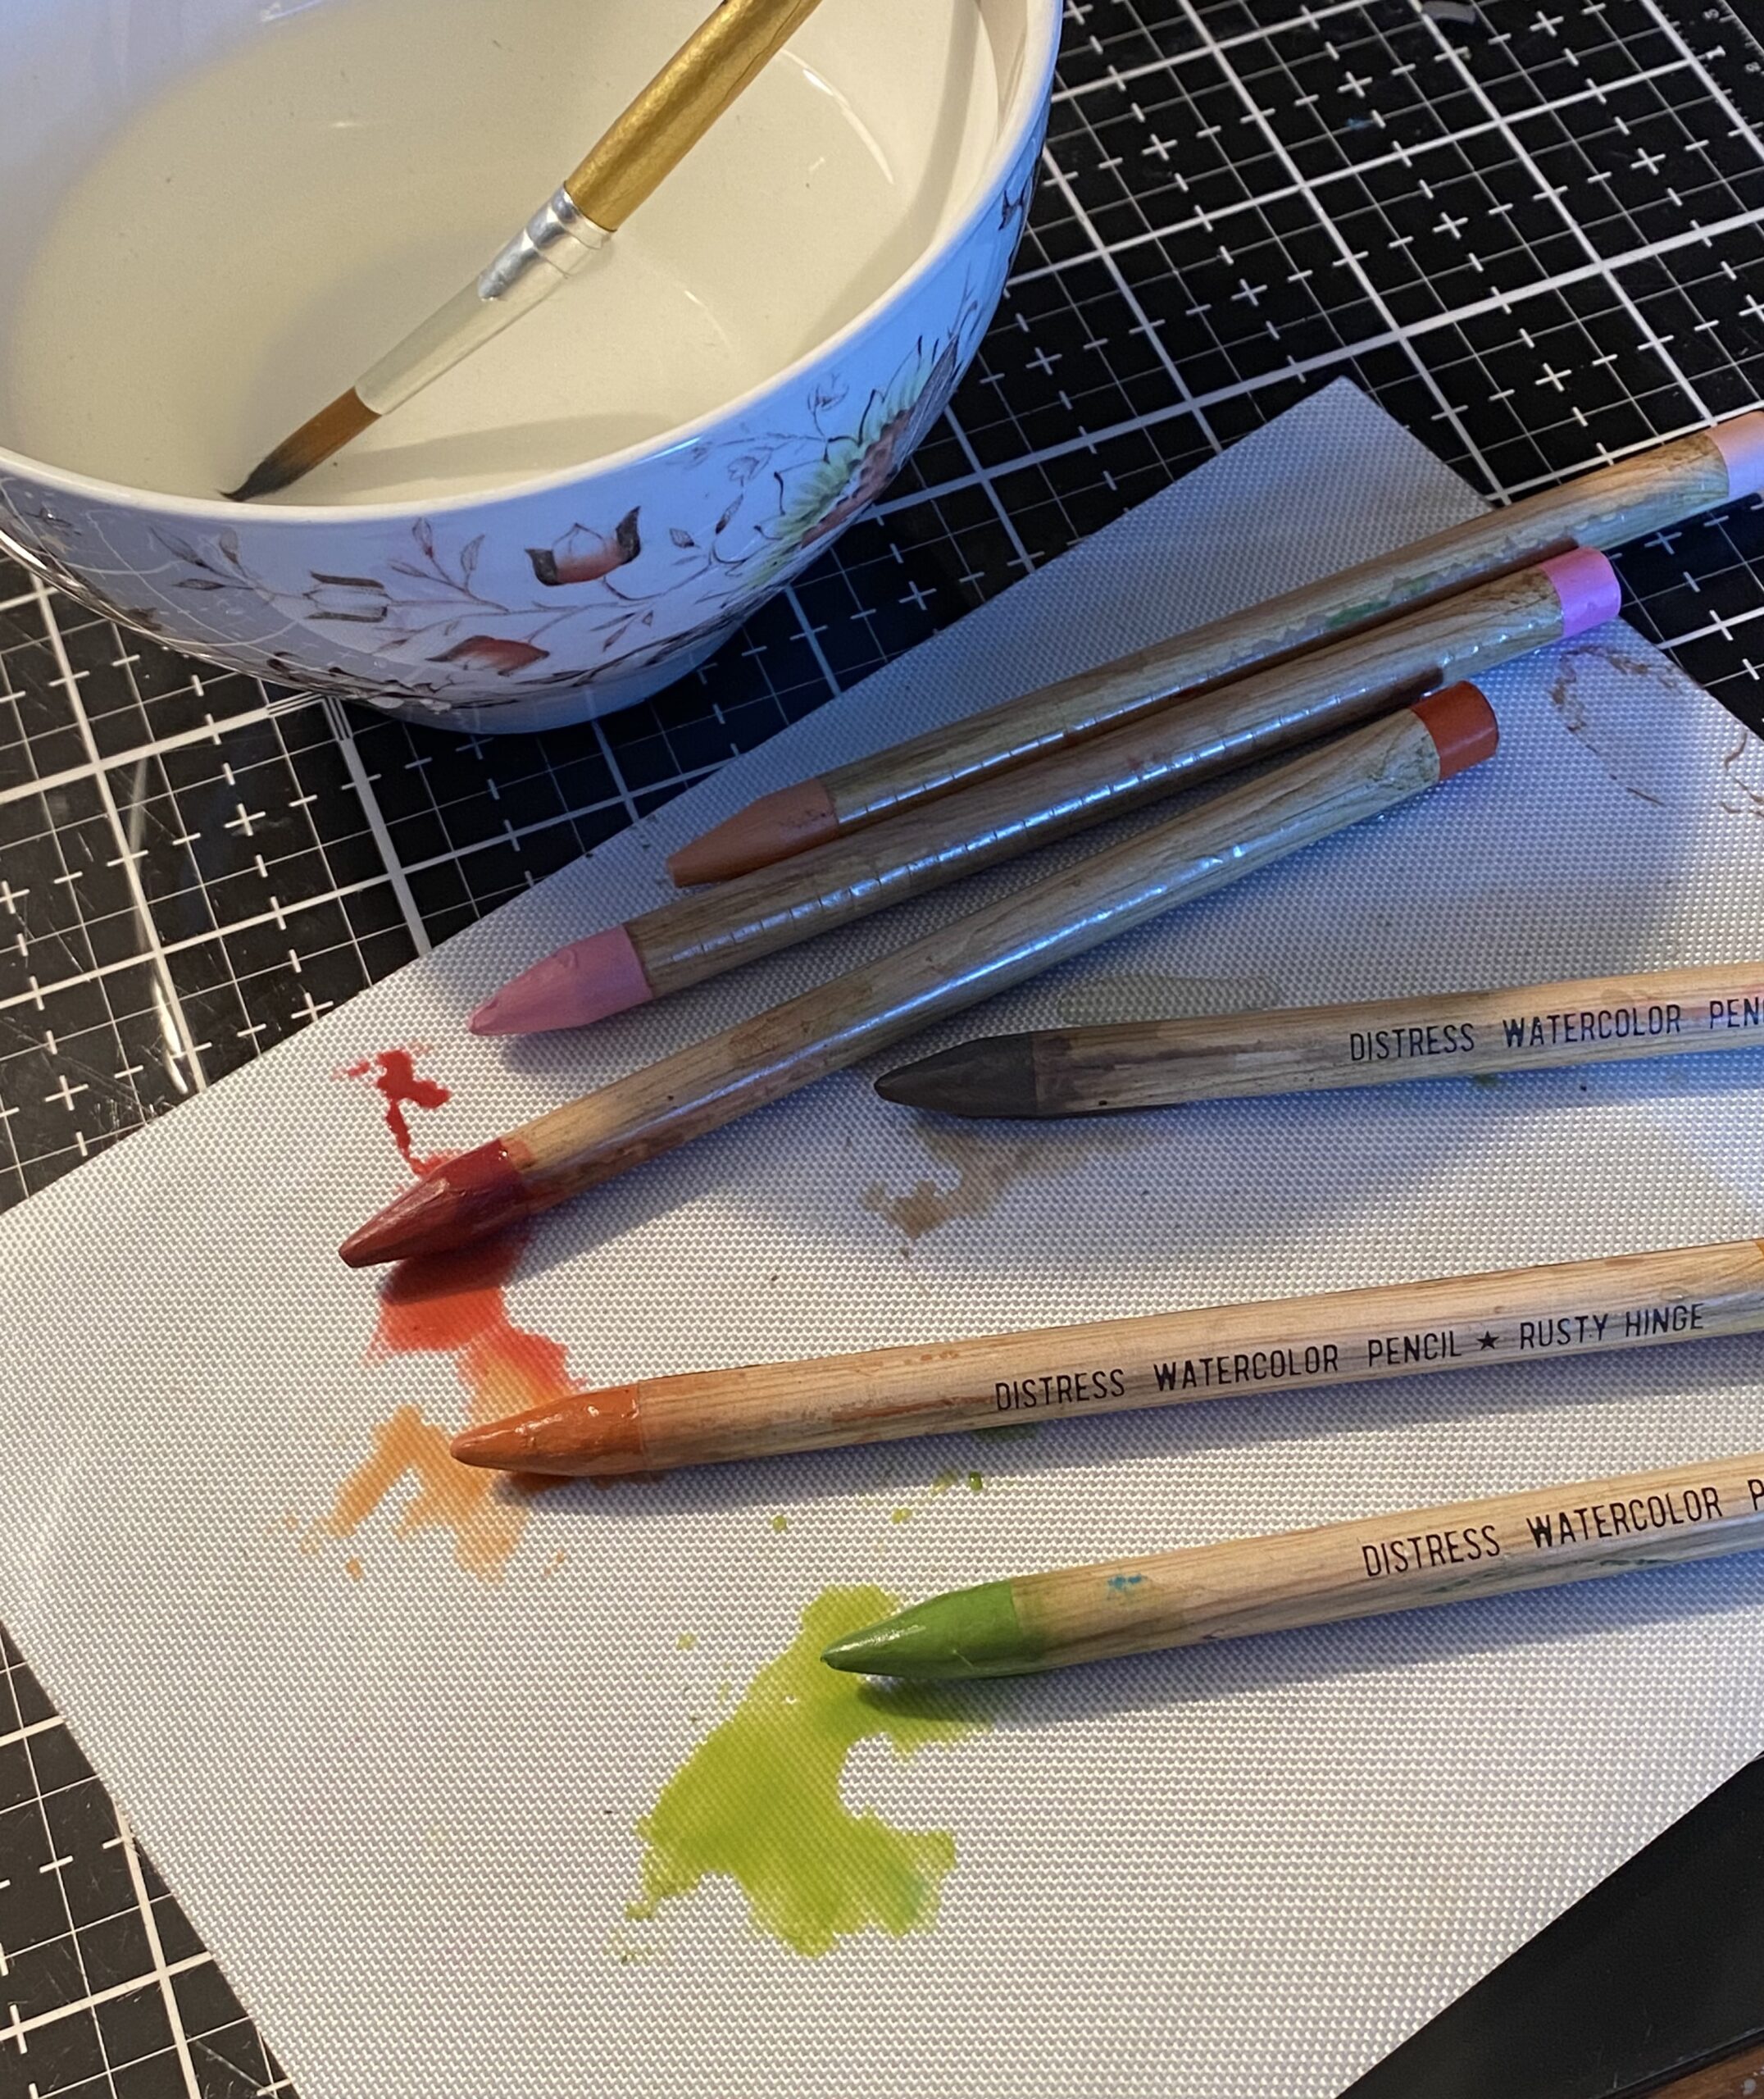
Here’s a list of supplies I had at the ready, a round paint brush, a cup of water, a cotton towel, a variety of Distress Watercolor Pencils, my heat tool and craft mat.
I chose my colors then dipped them into my water bowl prior to using them on my 3D embossed paper. The watercolor pencils don’t have to be in the water for too long to activate them, just a couple seconds. Once they were dipped, I daubed the pencil onto my craft mat to create a little puddle of pigment, both to activate the pigment and to remove some of the water. You can see in the photo below to see what my craft mat looked like as I started coloring.


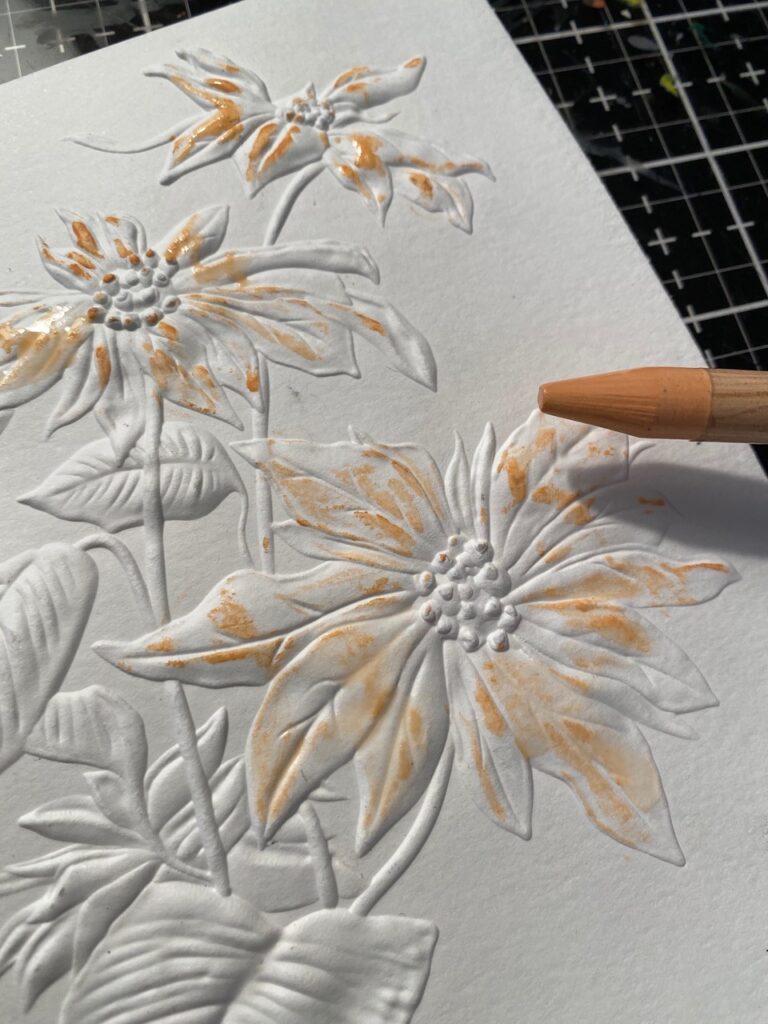
Let’s start with the poinsettia…I dipped the Tattered Rose pencil into my water then using the edge of the pencil tip, rubbed it onto the embossed areas of the paper. Because the pencil is wet, the pigment will glide across the embossed area leaving the wet pigment behind. Then I grabbed my paint brush, and distributed more water to the pigment and it ran into the cracks and crevices of the embossed area. Then I dried the area with my heat tool.
You’ll notice as you’re adding the color that the pigment starts very wet, then slightly dries and creates more scribble marks. Scribble marks can be left, or wet with a brush to wash them out. I chose to leave them in areas, but you’ll see that as we go along.


Next, I dipped other colors into the water, one by one, scribbled them onto my craft mat, then added the color onto the flower and stem…I used Peeled Paint, Tattered Rose, Kitch Flamingo, Rusty Hinge, and Vintage Photo. I added the colors, then used the paint brush to distribute the colors, and dried with a heat tool.


I dipped the Vintage Photo pencil into the water, then rubbed it onto the centers of the flowers and some random areas of the stems, then, as the pencil was drying, scribbled some areas of the background.


I washed the Vintage Photo scribbled areas with the paint brush, then while it was wet, scribbled some areas with the Walnut Stain pencil. Next, using the brush, I slightly washed out those areas.


The leftover puddles of watercolor were too yummy to waste, so I grabbed a handwritten background stamp, dipped it into the puddles, and stamped it into random areas of the background.


And here is the finished Poinsettia background… I decided to add more yellow to the centers and did this by dipping and watercoloring using the Fossilized Amber pencil, then dried with a heat tool.


Now, the rose…
I started with the stems and the background, using wet pencils starting with Peeled Paint, then adding Rustic Wilderness. I rubbed on the color, then washed it out here and there with the paint brush, and dried with my heat tool.


The roses were colored with a the Aged Mahogany pencil, I washed out some of the color with the paint brush then added darker highlights. Then I dried it with my heat tool.


After the background was dry, I rubbed the Crushed Olive pencil over the stem, then scribbled into the background in random spots. Sometimes my pencil was dry, sometimes it was wet… the best option, I found, was just to scribble and color, dip and see what would happen. I love how the scribble marks in the background of this one look!


To finish this one, I grabbed the Hickory Smoke pencil, dipped it, then ran it over some of the area to give it some darker shading, then I scribbled some littles areas lightly in the background.


And… here is the finished rose background.


The next backgrounds were created using the Acorn 3D Embossing Folder but started out with spray stained backgrounds, because I say…why not?!
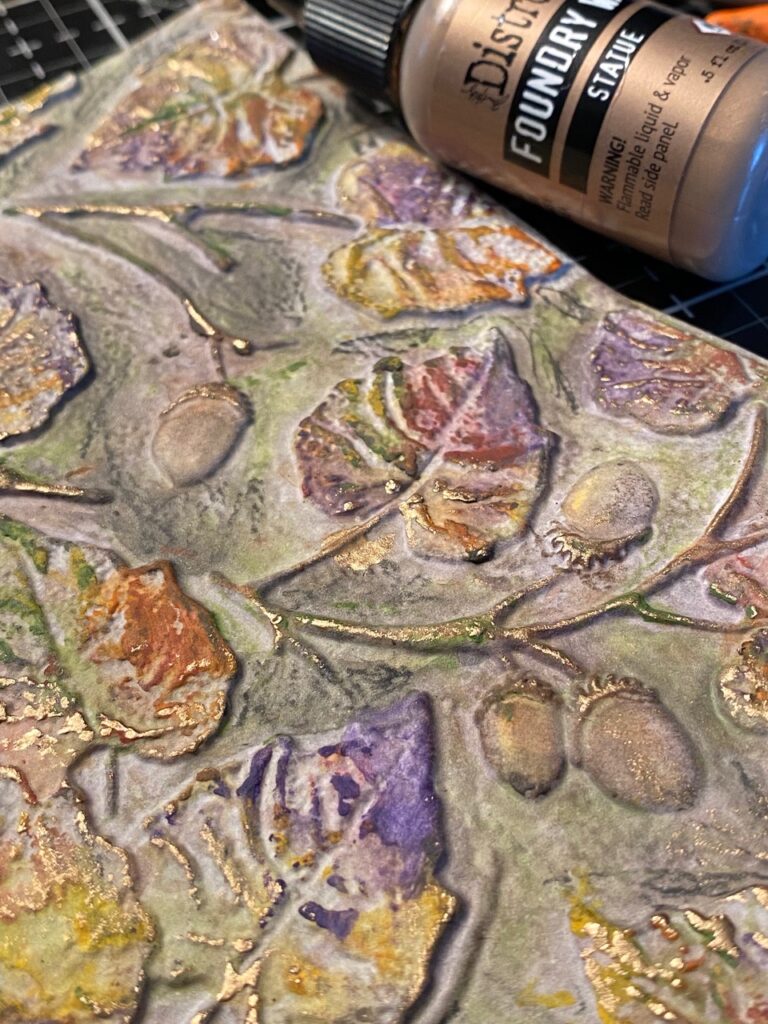
I decided I wanted to see how the pencils worked over top of a pre-inked up background… I spritzed the first one with Hickory Smoke Spray Stain, then dried it with my heat tool. I dipped, scribbled and dried here and there using the same techniques as I explained above, and once covered in color, dried with my heat tool. The colors I used were, Fossilized Amber, Rustic Wilderness, Villainous Potion, Aged Mahogany, Spiced Marmalade and Walnut Stain.


Once I had the leaves all colored, I scribbled the deep background with a dry Black Soot Pencil, then blended in some of the color using my paint brush and dried it with my heat tool.


This time, to finish the piece, using my finger, I lightly rubbed on some Statue Foundry Wax, then heated it up with my embossing gun to bring out the shine!


Thank you, Foundry Wax! The perfect vintage shine for a fall background!


The final background I’m sharing today was sprayed with Brushed Corduroy Spray Stain prior to being colored with a variety of watercolor pencils, again, the pencils were both wet and dry. I used Rusty Hinge, Rustic Wilderness, Walnut Stain, and Vintage Photo. Once the leaves were blended and washed with color, I scribbled the Black Soot Watercolor Pencil into the deeper background areas, washed out some areas with the paint brush, then dried it. Once dry, I decided to scribble in some Picket Fence pencil over top of the darker places…and with that, the background was complete!


I hope you enjoyed the tutorial today and can see what a great medium these watercolor pencils bring into the lives of those who love Distress. They are a huge necessity in my opinion and I’m looking forward to playing & discovering what else they can do!


Thanks so much for stopping by!
Creatively yours,
Stacy


What is an affiliate program, and why should I click on the link and buy through you?
When you shop via the affiliate link (linkdeli) on this blog, I receive a small commission from the affiliate provider (Simon Says Stamp & Scrapbook.com) at no extra cost to you, whatsoever. These commissions help me to cover the hosting fees and other costs to run my blog and be able to provide you with FREE inspiration. If you shop the links, THANK YOU! I truly appreciate being able to share my love of creating with you.


These are SO Gorgeous, Stacy! I appreciate the time you put into these blog posts/tutorials. You are a font of talent & inspiration.
Absolutely amazing…as always!! The way you transformed these embossed images is stunning. Thank you for sharing & inspiring. ☺️
Beautiful, Stacy. It’s amazing how you can take a simple tool and turn a piece of paper into a work of art. Thank you for sharing your skills.
Absolutely beautiful!! Your application of the colors is perfect, including the backgrounds and the foundry wax. I notice that you use the heat tool frequently between applications. Seems like a good tip to keep in mind. Thank you for the inspiration.
Love, love, love these…. especially the first leaves & acorns. Foundry Wax for the WIN!!! ;-))))
love this look, my pencils are ordered, this is encouraging to see these beautiful pages hopefully
will be happy with these pencils since I don’t care for my regular watercolors. Thank you