Hello friends…I hope that you all had a wonderful Easter weekend.
I am back today with another project that I created for the 2021 idea-ology release that Tim hosted a couple of weeks ago on his youtube channel. To check out the replay you can click HERE.
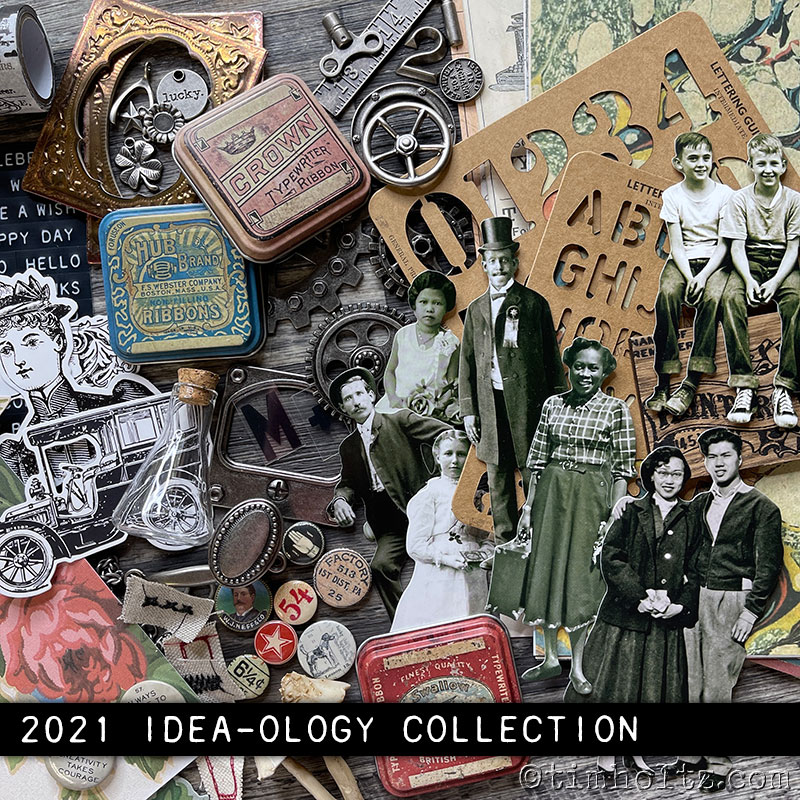

It is such an awesome release! I had an absolute blast creating for it.
I am always in awe, first, with the new products because Tim and Paula do such an amazing job dreaming them up, and then second, with all the inspiration provided by each and every AMAZING maker. Taking the new products and transforming them into each of their own styles is just AWESOME!
Anywhoo… that brings me to the project that I am sharing with you all today…as most of you know, I love to mix new things with vintage goodies that I have in my own supplies, things I’ve collected over the years from junkin’, and this project is the perfect example of that! I made a junk journal!
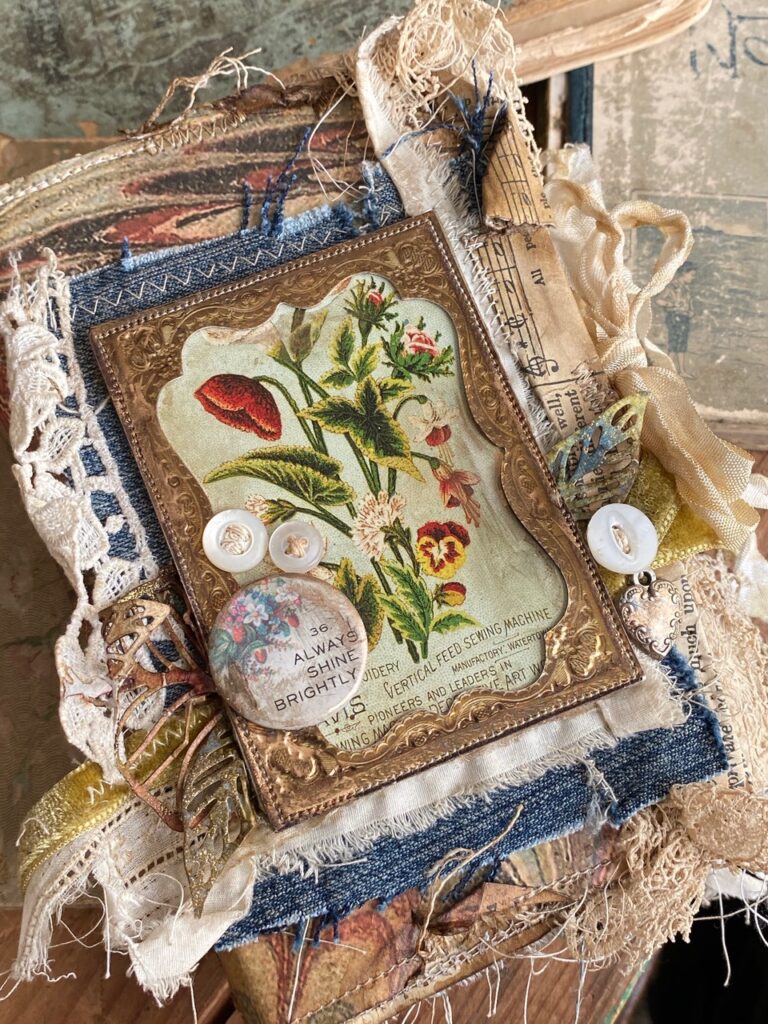
Here’s a look at the cover of it..I used one of the new Backdrop papers and wrapped it around the fabric journal… it was meant to be, it was the perfect size!
The backdrops are, hands down, my favorite new product. Both Volume 1 & 2 are LOADED with beautiful copies of actual vintage ephemera and, wait for it…they’re double sided!!!!
Woohoo!! Take my word for it, they are AMAZING! Some of the other new idea-ology on the cover included, Quote Flair, Heart Adornments, Velvet Trims, and Curio Frames.
This was the first sample that I created for the idea-ology 2021 release, and while I had a wonderful time creating it, I got lost in the process and only took a few step-by-step photos, so I decided that this tutorial was going to be a “look into my book and see what you can do” and not a full step-out tutorial post.
Sometimes it’s fun to just play with a new product and not have a destined idea..am I right??
When I started the book, I only knew that I wanted to combine several of the new idea-ology products and use parts and pieces of junk (i.e. lace, trims, thread, buttons, Sizzix pieces, previously dyed mummy cloth, denim fabric pieces, and bits and pieces of scrap paper) that had been collecting on my desk and in my “little scraps” basket, and I am happy to share that the idea-ology fabric journal became the perfect base for it.
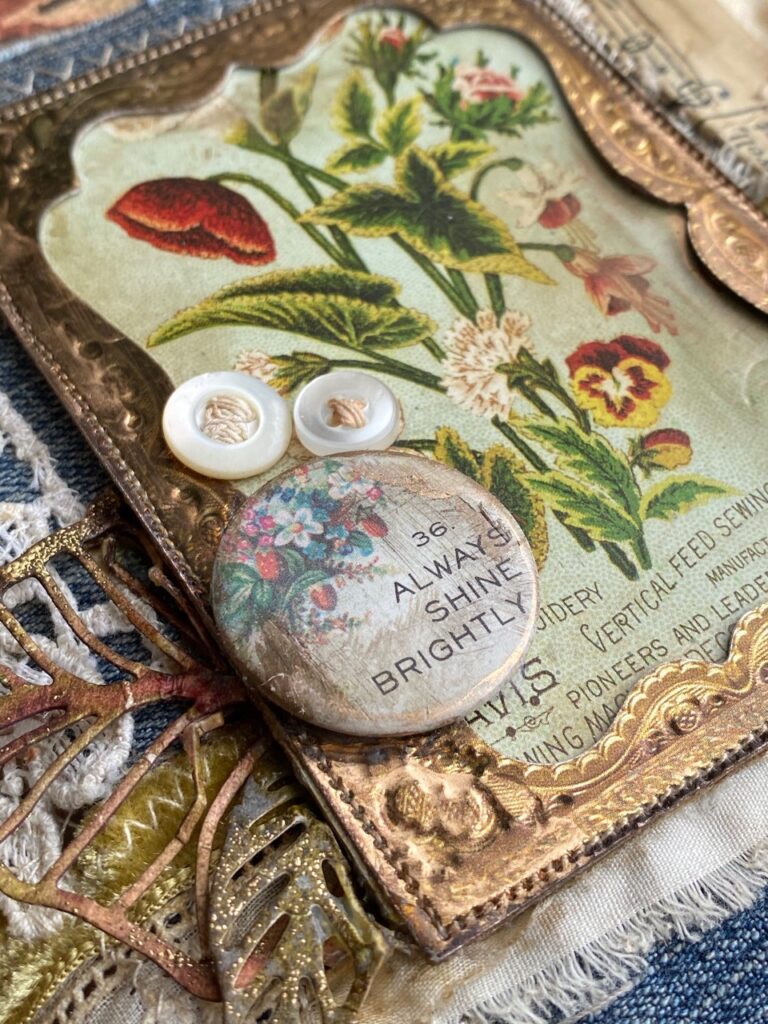

The new Quote Flair that I used on the cover was distressed by scratching it with some sand paper, then I added some age to it by rubbing on some Mushroom AI and Alloy Statue Alcohol Ink.
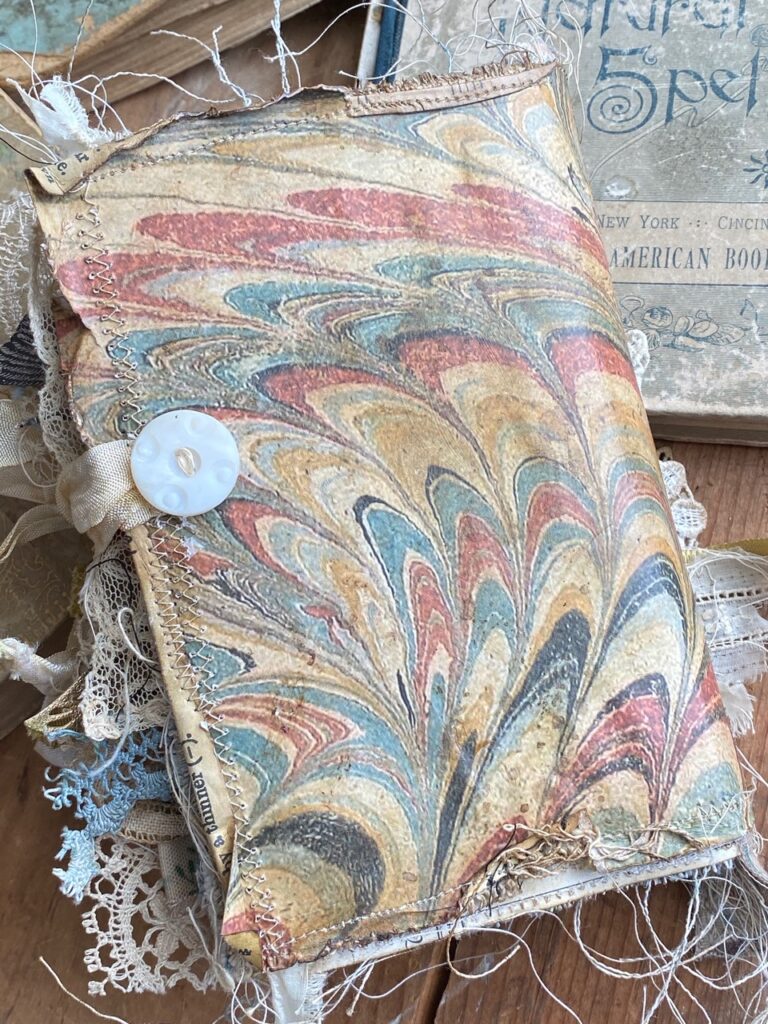

The back cover was messy stitched to the fabric book page and a vintage pearl button was added to hold the ribbon in place.
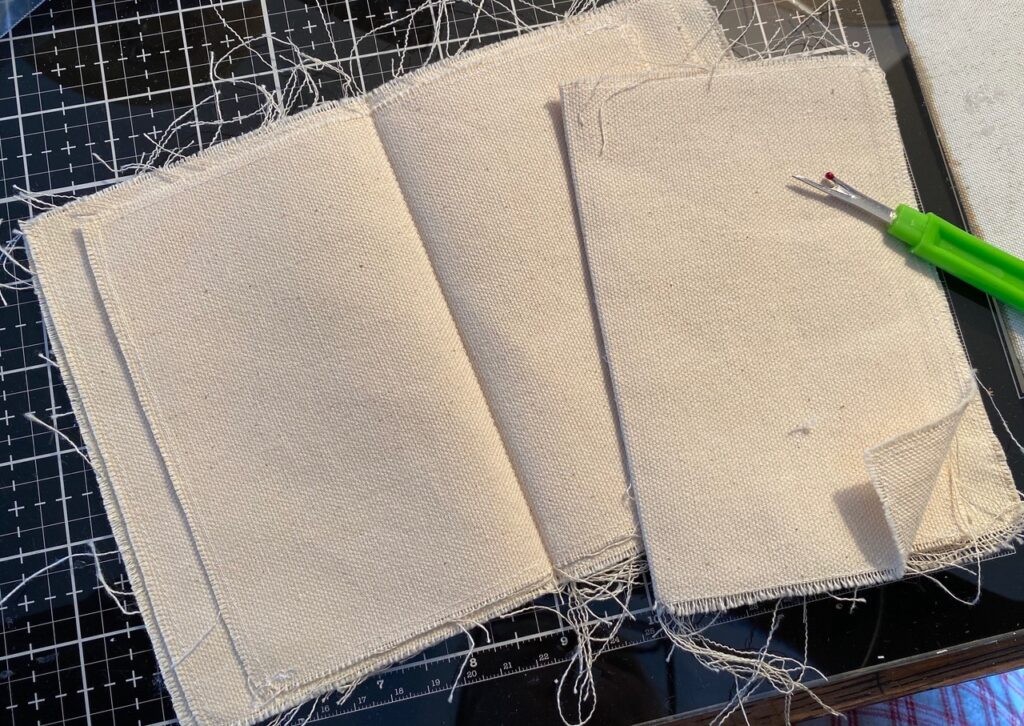
By the way…I am not a bookmaker, but a “jump-in-and-play-as-you-go” kind of maker. So, if you’ve been thinking on trying a journal, these little fabric journals are an easy way to get started. You can add or subtract pages, unstitch the pages with a seam ripper and work on them, then stitch the book back together once your pages and layouts are complete. What I just described, is exactly how I began.
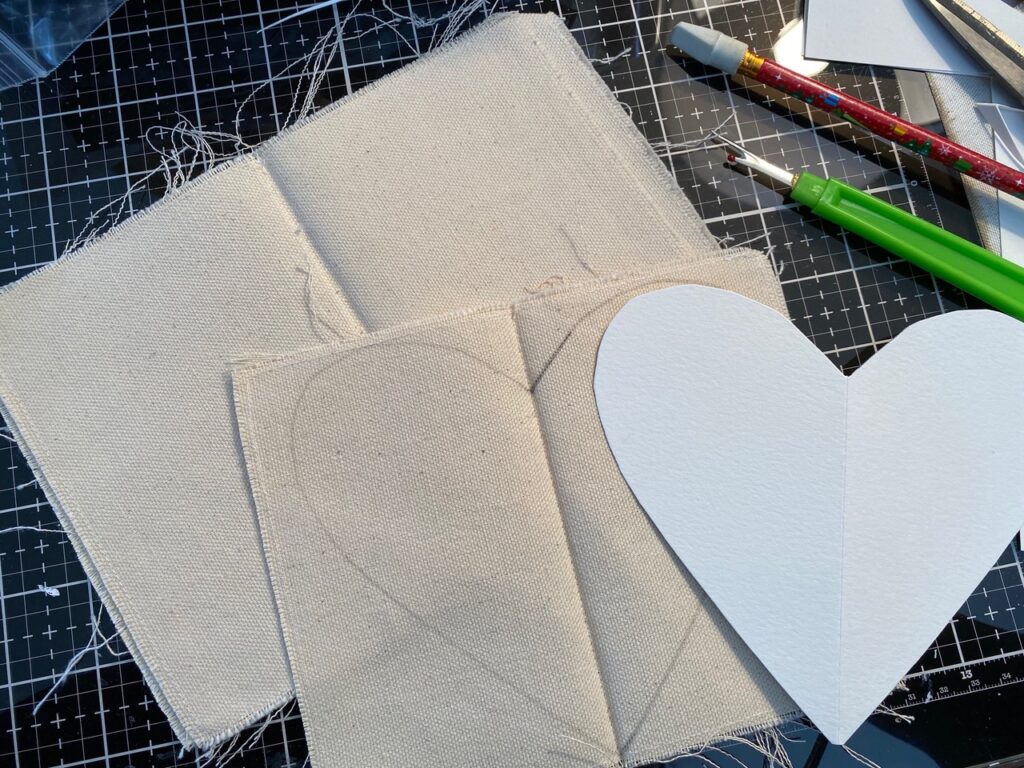
I used a seem ripper to take the book apart and built each page. After the layouts were complete, I carefully stitched them together using my sewing machine.
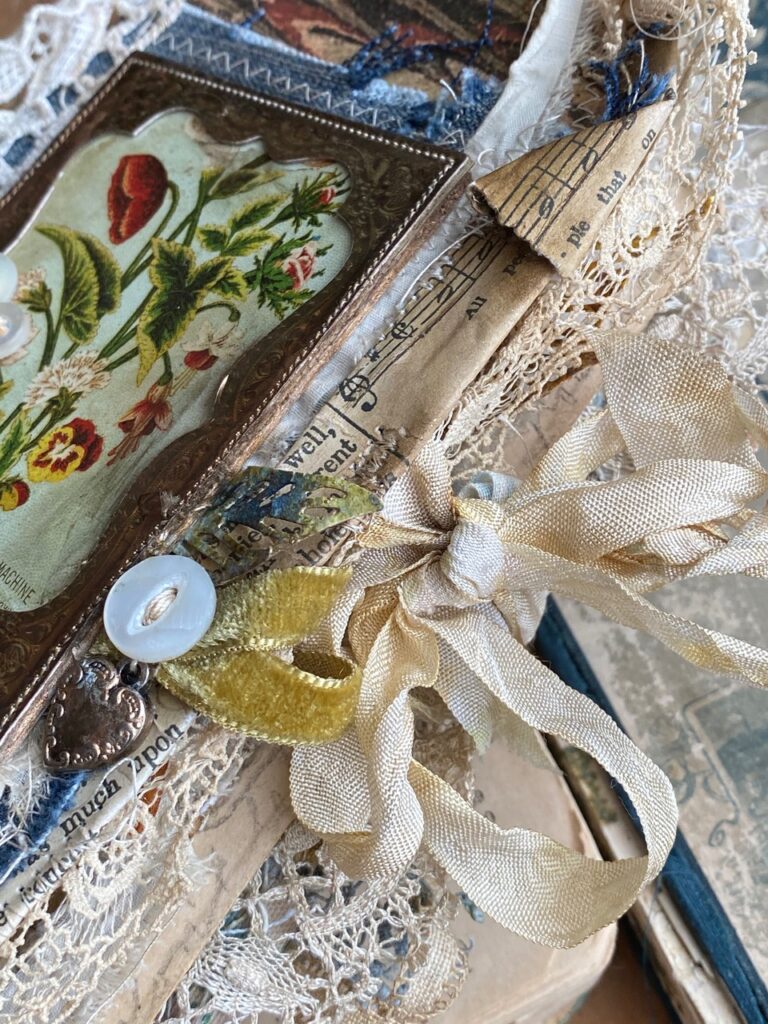

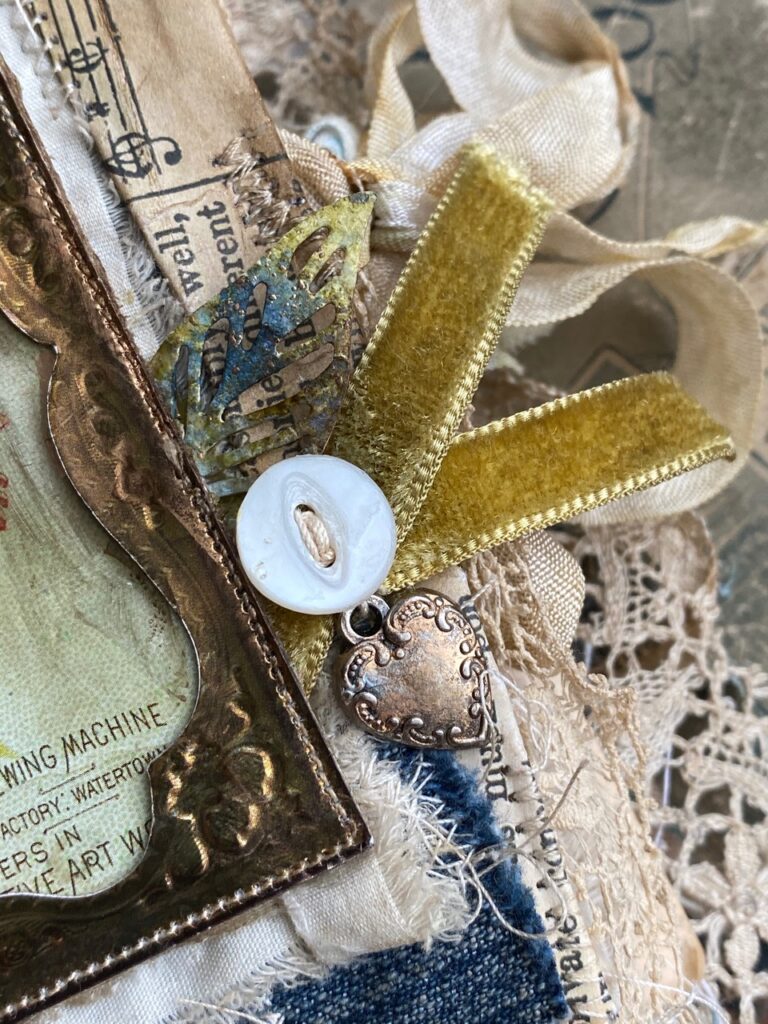
Here’s a side view of the front cover, I used some seam binding, dyed it with distress ink, then crinkled and dried it with my heat tool. This really gives it a loved and worn look.
The new Velvet Trims were a perfect add-on to the cover, it’s so vintage and yummy and can be distressed with ink and water then dried with a heat tool. The heart adornment charm added a bit of whimsy and charm to the cover once I stitched it right under a vintage button.
To create the first couple of pages I used a Photo Booth photo, Stitched Scraps 2, some cut scraps from the Backdrop papers, Metallic Sticker Book, Paper Bouquet, Mini Flair and combined them with junk that included vintage lace, trims, thread, denim fabric pieces, scraps of ribbon, buttons, Sizzix Skeleton Leaves.
The various pieces were stitched, distressed with ink and adhered within the book. The new idea-ology fabric tape helped to hold the pages together and the backdrop papers were a wonderful addition when stitched right onto the pages.
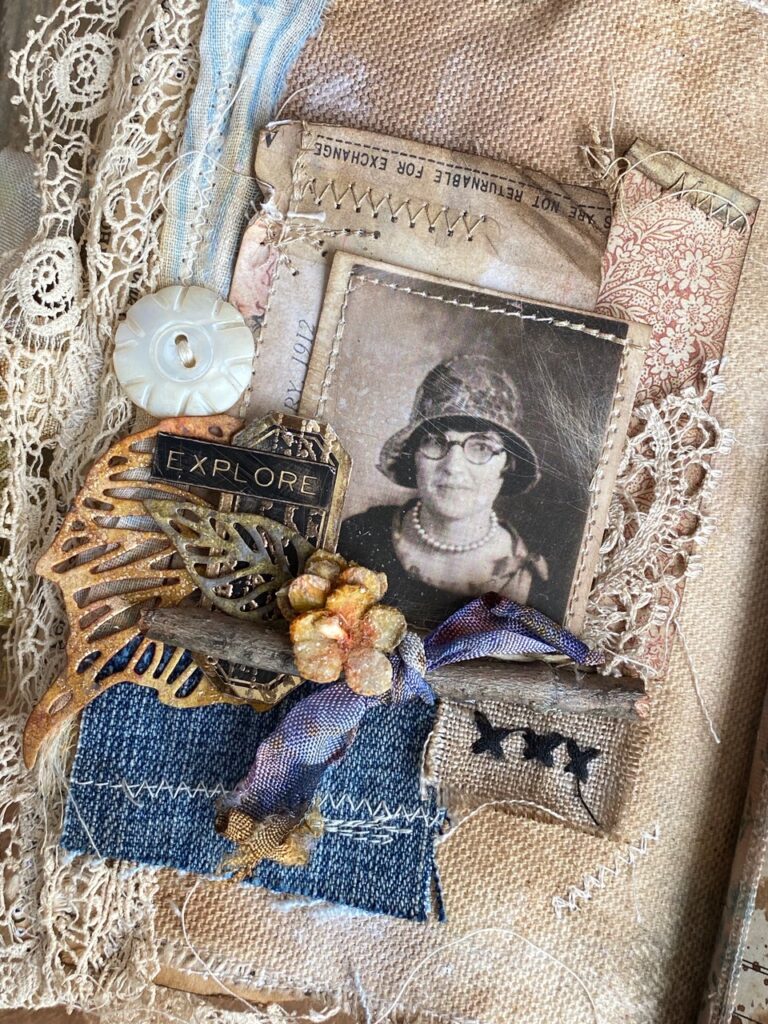

I stamped the metallic sticker labels with a handwritten stamp (Entomology CMS328) and embossed it using Gold Embossing Powder. Then both of the metallic phrases were rubbed with Sandpaper to add some age. The Sizzix Skeleton Leaves were extras that I had from a project that I had done in the fall, and that I thought fit the theme of my journal perfectly…and of course, I had to include a tiny stick! 😉
I used a piece of the Backdrops paper that was trimmed to size to fit the journal page. It was spritzed with various brown distress sprays, spritzed with water then dried. I added another Stitched Scraps 2, Mini Flair (with grunge added) Skeleton Leaves and a couple vintage buttons and scraps of fabric.

Some of the journal pages were rubbed with Dina Wakley White Gesso, dried with a heat tool, then spritzed with Faded Jeans and Frayed Burlap Distress Spray Stain. The pages below were stamped with Faded Jeans Archival Ink using the Ledger Script Stamp Set (CMS241). More new idea-ology goodies such as the little shamrock from the Lucky Adornments and Engraving Layers. To color the engraving layer bird, I painted it lightly with some watered down distress paint and distress crayons, then it was fussy cut.
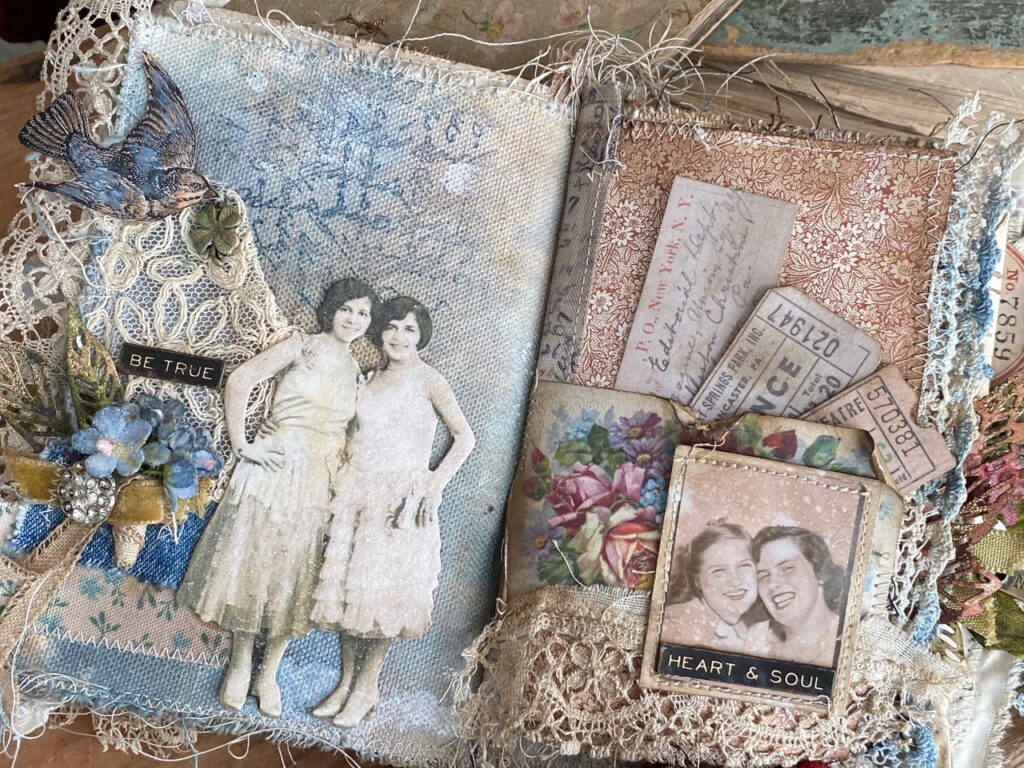


The paper dolls I used on the page were rubbed with a little Pumice Stone Distress Ink and colored with Distress Crayons, then it was sprayed with Distress Resist Spray. While the spray was still wet, it was sprinkled with some Clear Rock Candy Glitter that had been tinted with Mushroom Alcohol Ink…I always have that glitter on hand as it is a beautiful vintage slightly grungy color. It added a little “extra” to the paper dolls, don’t you think? Have you ever colored the clear rock candy glitter with Alcohol Inks?? If you haven’t you should check out this tutorial on Tim’s youtube and give it a try! Click HERE to get to the tutorial.
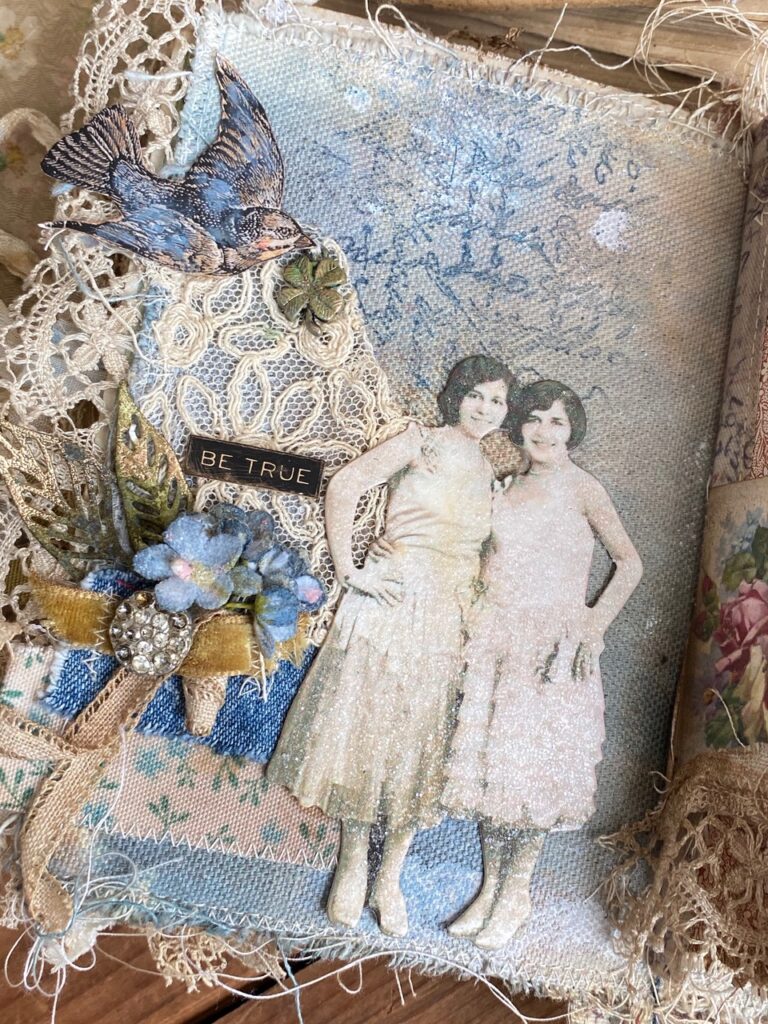

This page featured a piece of Ephemera from the Keepsakes Ephemera pack…I added age to it using inks, then stitched it to my page to create a pocket…then some other bits of Ephemera were slipped in. A cute photo booth photo was inked up, spritzed and dried, I stitched around the photo and added the cute phrase.
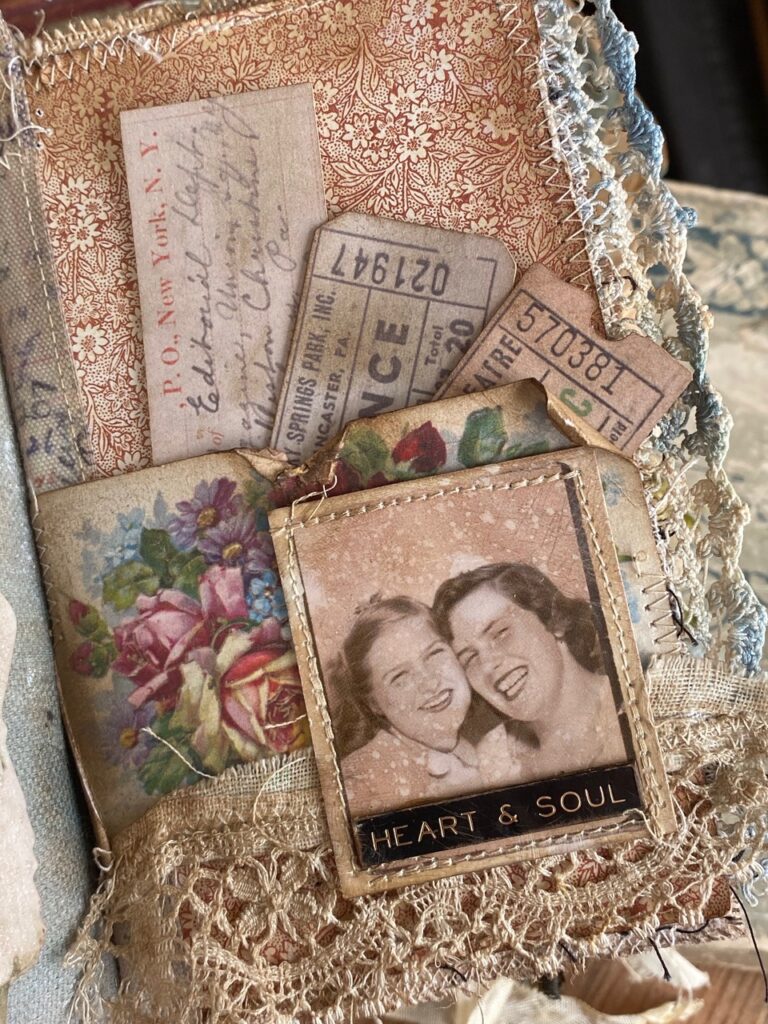

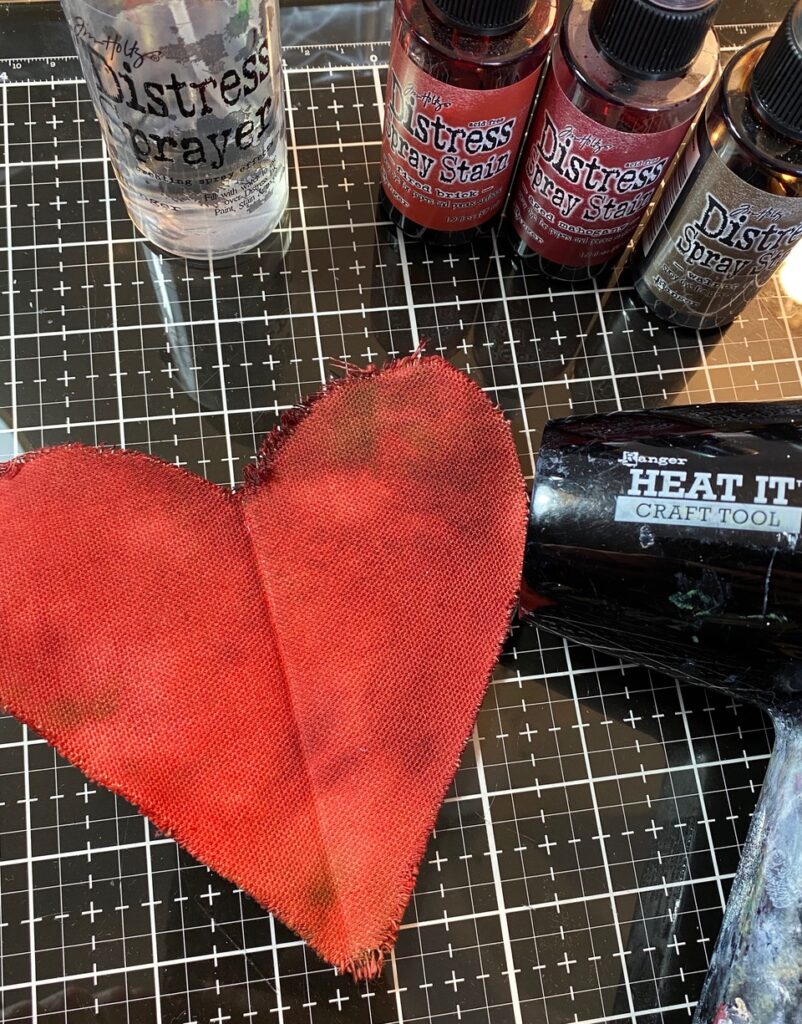
The next layout was made by using one of the journals’ pages. I cut it into a heart shape and then dyed the canvas with a combo of Distress Spray Stains. Spray Stain is the perfect medium to use when you want to apply a good consentration of color. Simply spray onto your desired fabric or paper and dry with a heat tool. Lickety Split, a beautiful result..but remember not to get it wet as the ink is NOT permanent, so don’t go licking or for a walk in the rain with it. 😉
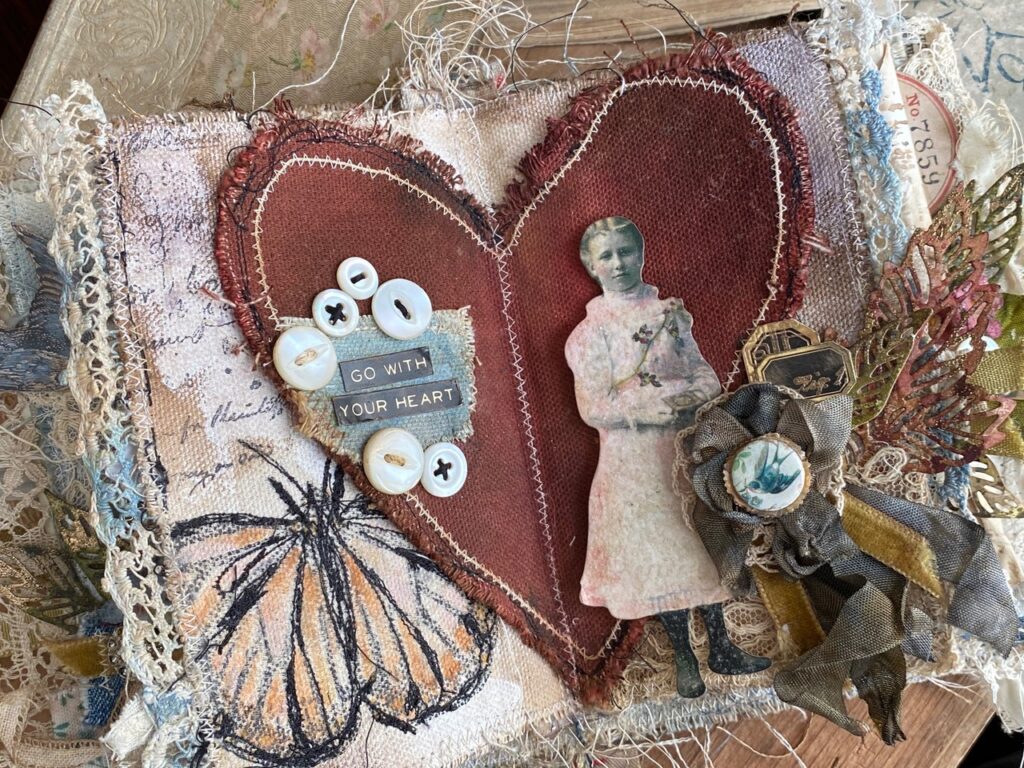




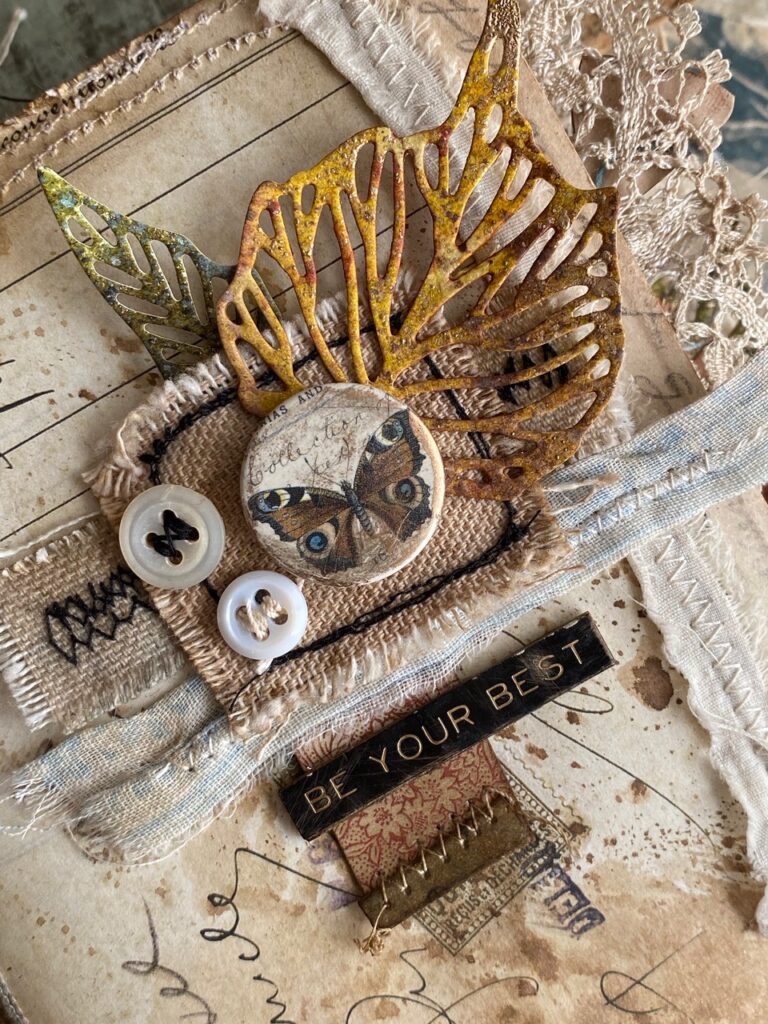
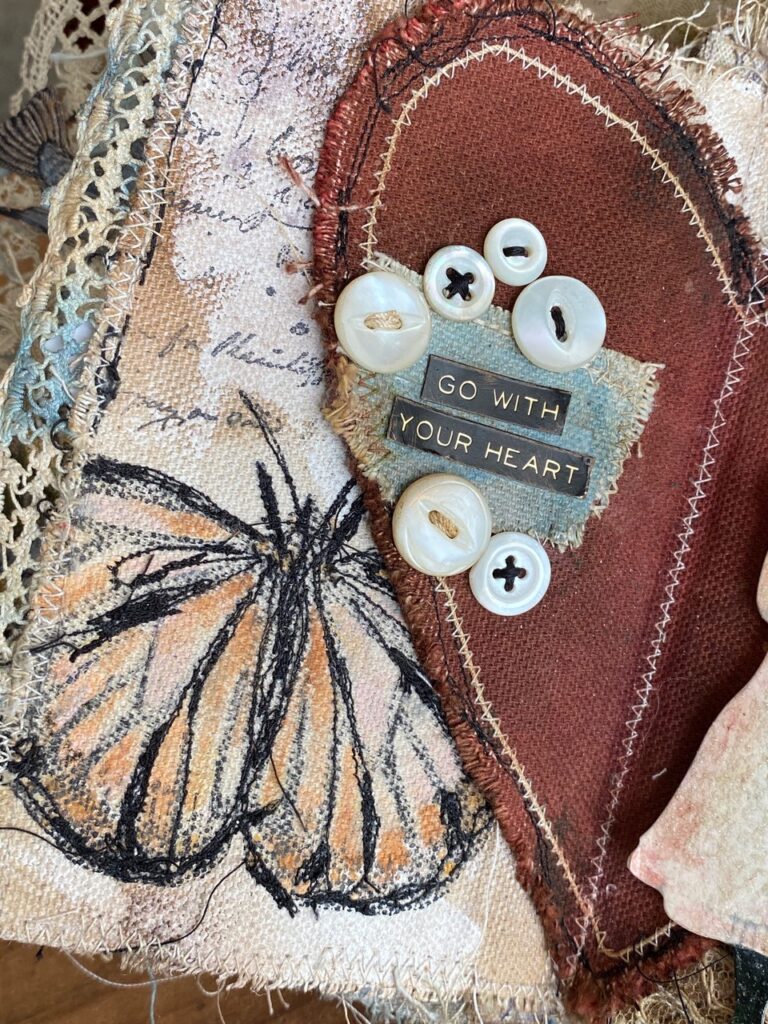
The background of the page was spritzed with distress spray, stitched, stamped with Ledger Background Stamp using Black Soot Archival Ink. The Butterfly was stamped using the same ink, painted with Distress Paints and messy stitched using black thread and my sewing machine. You’ll see that I stitched around the heart using both cream and black thread and embellished it with vintage buttons, a scrap of fabric and a Metallic Sticker Phrase.

I added more of the Metallic Labels, Sizzix Skeleton Leaves and added a “vintage” ribbon to look like an old prize ribbon. This was made by using scraps of ribbon and a bit of the Velvet Trims then a small crocheted round piece was added to the back. The center features an idea-ology small round metallic label and my most favorite Mini Flair, the bird! Don’t you just love it? Again, this was rubbed with a little sandpaper and then rubbed with Mushroom Alcohol Ink and Statue Alloy.
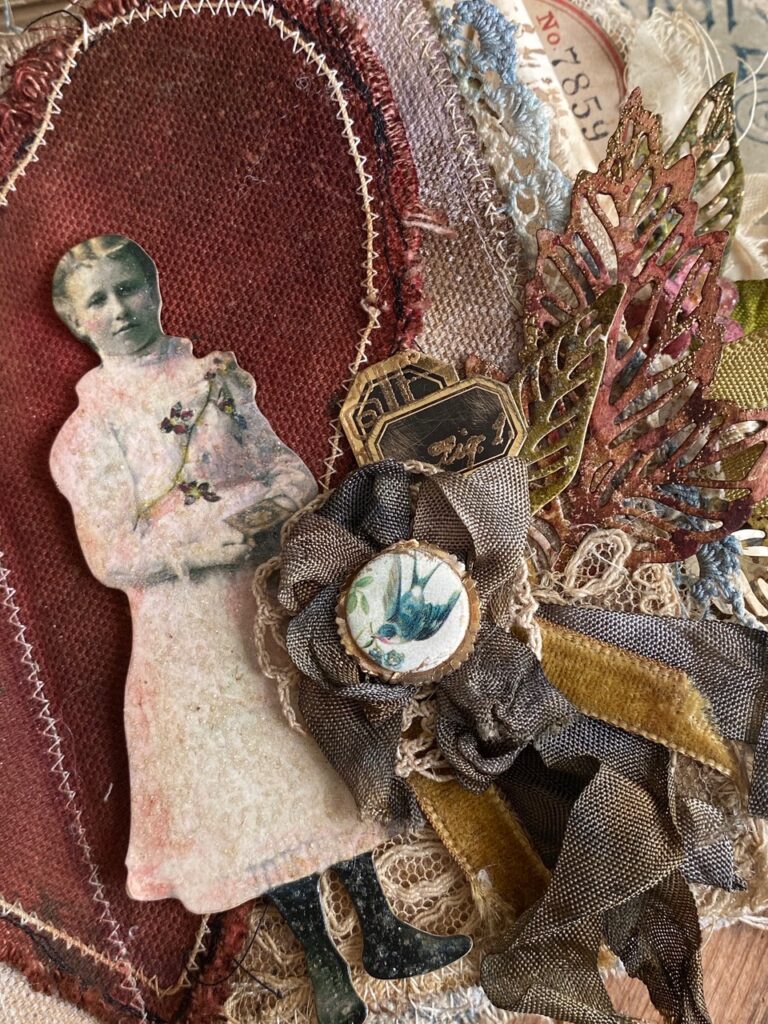

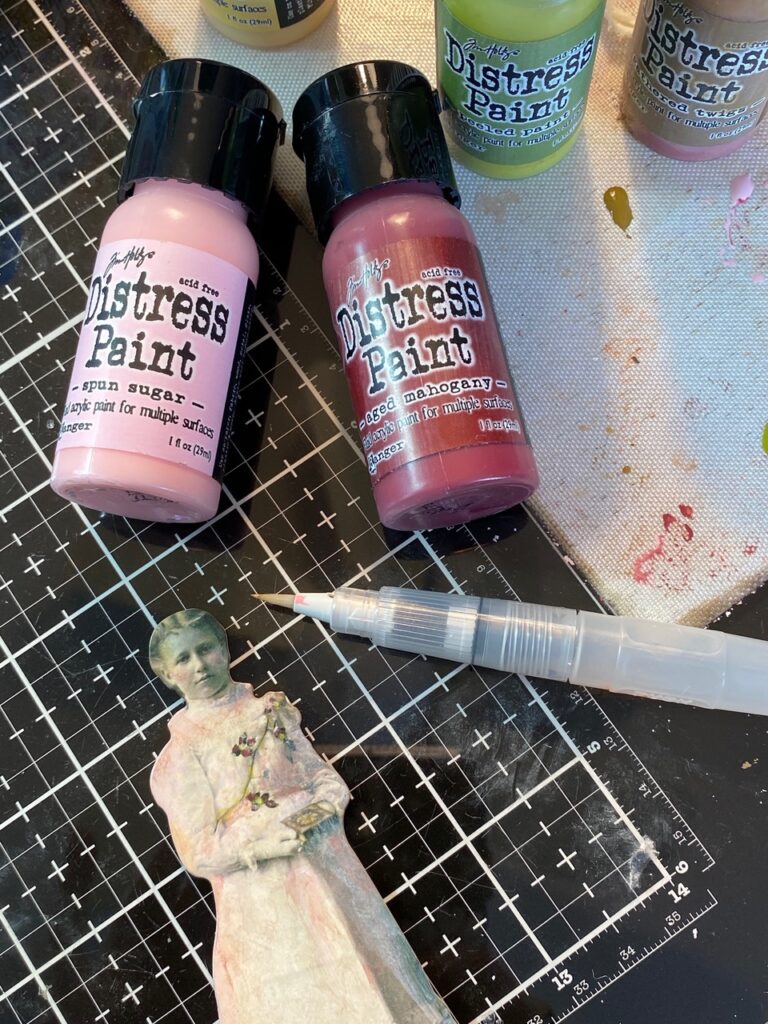
I colored the paper doll with Distress Paint using a detail water brush, then spritzed her with Resist Spray and sprinkled her with the Mushroom Rock Candy as I had done with the other paper doll.

The last pages features more of that delicious Backdrop paper and ephemera from the Entomology Ephemera pack.
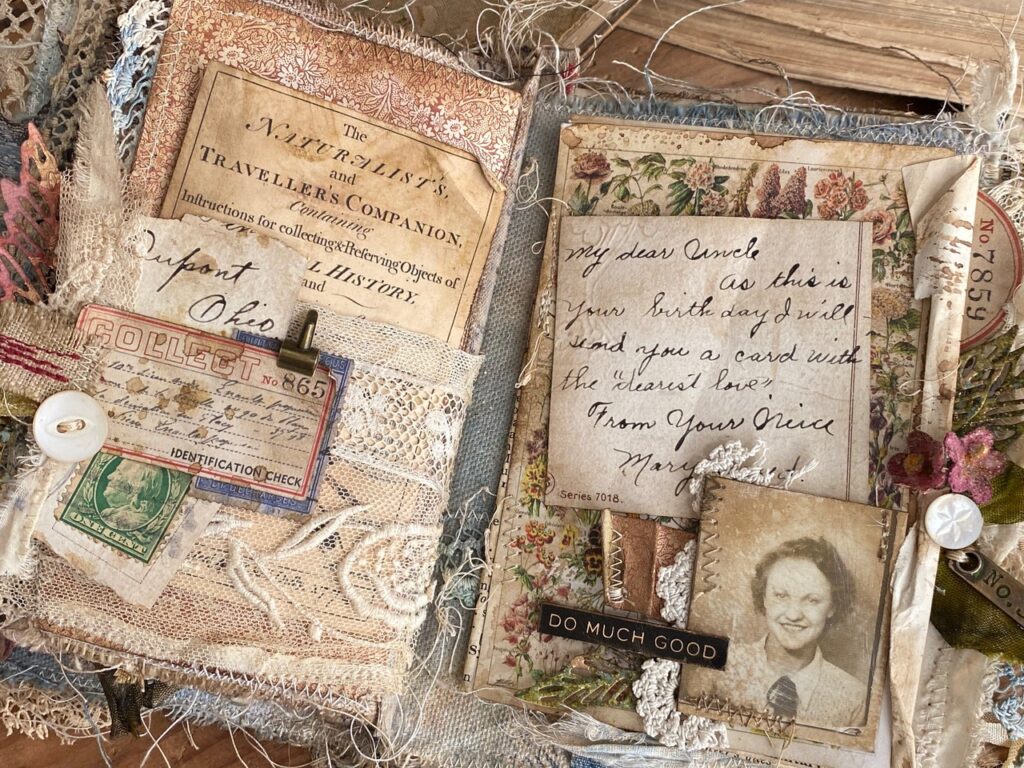


More old lace, stitching and buttons were added…
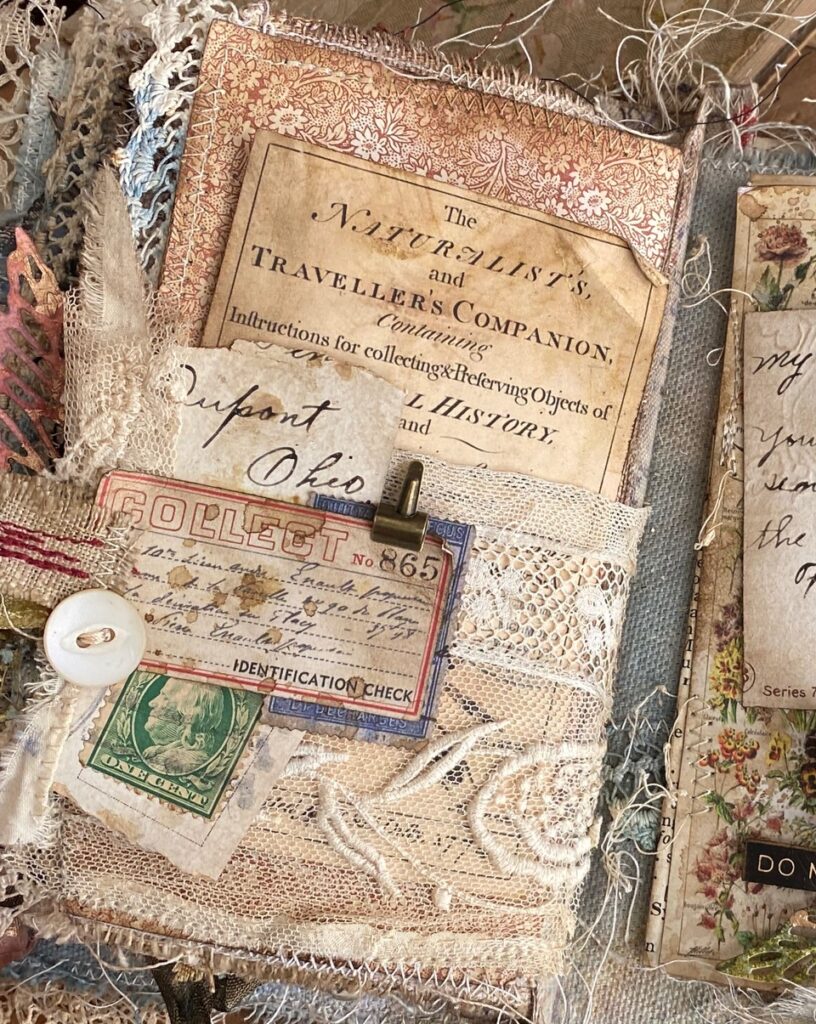

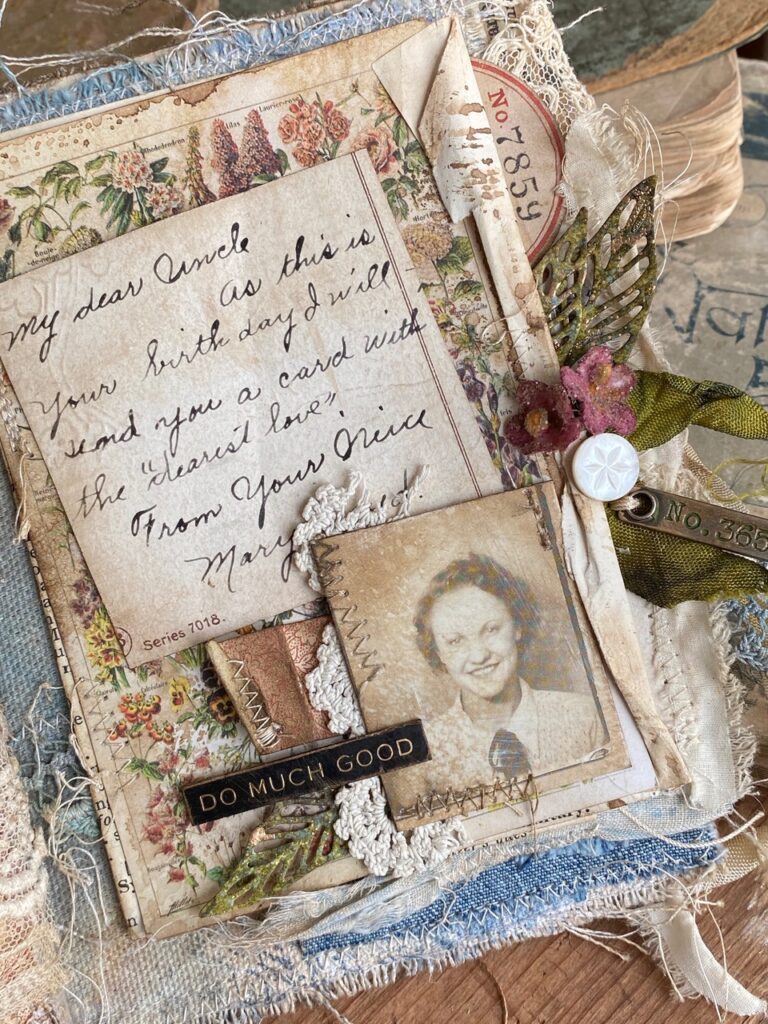
Plus, I added pieces of a vintage postcard that I found in my stash..isn’t the note on the postcard adorable? I thought it fit with my theme to “do much good” as Mary had written to her Uncle for his birthday with “dearest love”.
Some vintage paper was added to a large piece of the flower Ephemera to give the look that it was torn from a book. I added drips of ink and stitching and tucked more ephemera some dyed paper bouquet flowers and leaves behind.

Finally…did you catch the theme of my book?
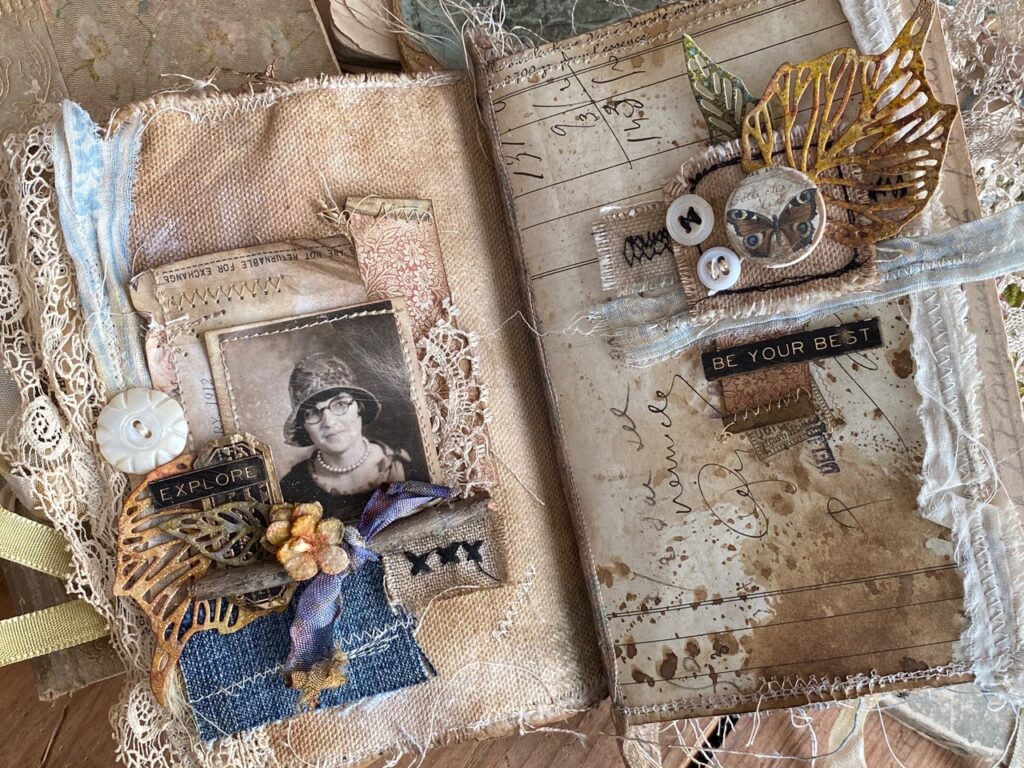
My junk journal started with the Quote Flair Button, “Always Shine Brightly”, then I used the Metallic Phrases from the sticker pack. It’s so cool how just by reading through the idea-ology stickers and embellishments, a theme can just fall into place. Take a peek through the photos and follow the words and phrases on each page…see how cool that is?
ALWAYS SHINE BRIGHTLY- explore, be your best, be true, heart & soul…go with your heart, do much good. The little Story Stick tied on at the end of the book is a nod to do it all year long!




I hope this post inspires you to give the idea-ology fabric journal a try! The possibilities are endless, so many choices, so little time…so, give it a try and PLAY! I’m sure you’ll have a blast!


Thanks so much for stopping by!
Creatively yours,
Stacy


Products used to create this project- idea-ology Fabric Journal, Backdrops Volume 1 & 2, Curio Frames, Quote Flair, Velvet Trims, Fabric Tape, Mummy Cloth, Metallic Sticker Book, Paper Dolls, Photo Booth, Heart Adornments, Mini Flair, Field Notes Ephemera, Keepsakes Ephemera, Lucky Adornments, Engraving Layers, Stitched Scraps 2, Tiny Clips, Paper Bouquet. Stampers Anonymous Ledger Script CMS241, Specimen CMS410, Sizzix Skeleton Leaves, Ranger- Distress Resist Spray, Clear Rock Candy Glitter, Mushroom Alcohol Ink, Statue Alloy, Vintage things included- buttons, lace, fabric pieces, seambinding, sticks, postcard, and more…


Stacey,
The details in this book are amazing. I love the theme and how it all came together.
Beautiful work of heart! ❤❤❤
What wonderful ideas for a journal, just beautiful! ♥️
Beautiful, so creative. Before I even looked at the detail, I knew it would be magnificent, which it is. You certainly put your heart and soul into. Love everything about it.
The composition, the details, the layering, the textures!!!! OMG this is so amazing. I love every single inch of this.
Breathtakingly wonderful – as much delight for the fingertips as for the eyes, with all that texture and layering. Beautiful.
Alison x
Absolutely stunning … every detail. I also love reading your tutorials as well. Clear, crisp, easy to follow.
Now this is a masterpiece work of art…I love everything about it, plus is always a pleasure to read through your tutorials…..now to go back though and read it again…LOL.
Wanted to add, what a fabulous idea to take the canvas journal apart to work on and then sew back together when finished…would definitely make it easier for machine sewing…
My favorite piece from the whole reveal, it inspired me to create my own. I too got lost in the project and enjoyed creating it so much. Thanks for your inspiration!
As always Stacy, a gorgeous creation! There’s enough inspiration in this little book to keep me going for months. Thank you for your tutorials, even shorter ones are appreciated by all; they help us see a use for Tim’s products we otherwise might not realize. You are so very talented, please keep it up.
Absolutely Fabulous!! Every single page is perfection.
Stacy, I love this journal! You are so meticulous and make such detailed and beautiful pages! I love all of Tim Holtz products but sometimes don’t know what to do with them unless I see your posts or watch a demo that he does of them. Thanks for your beautiful work!