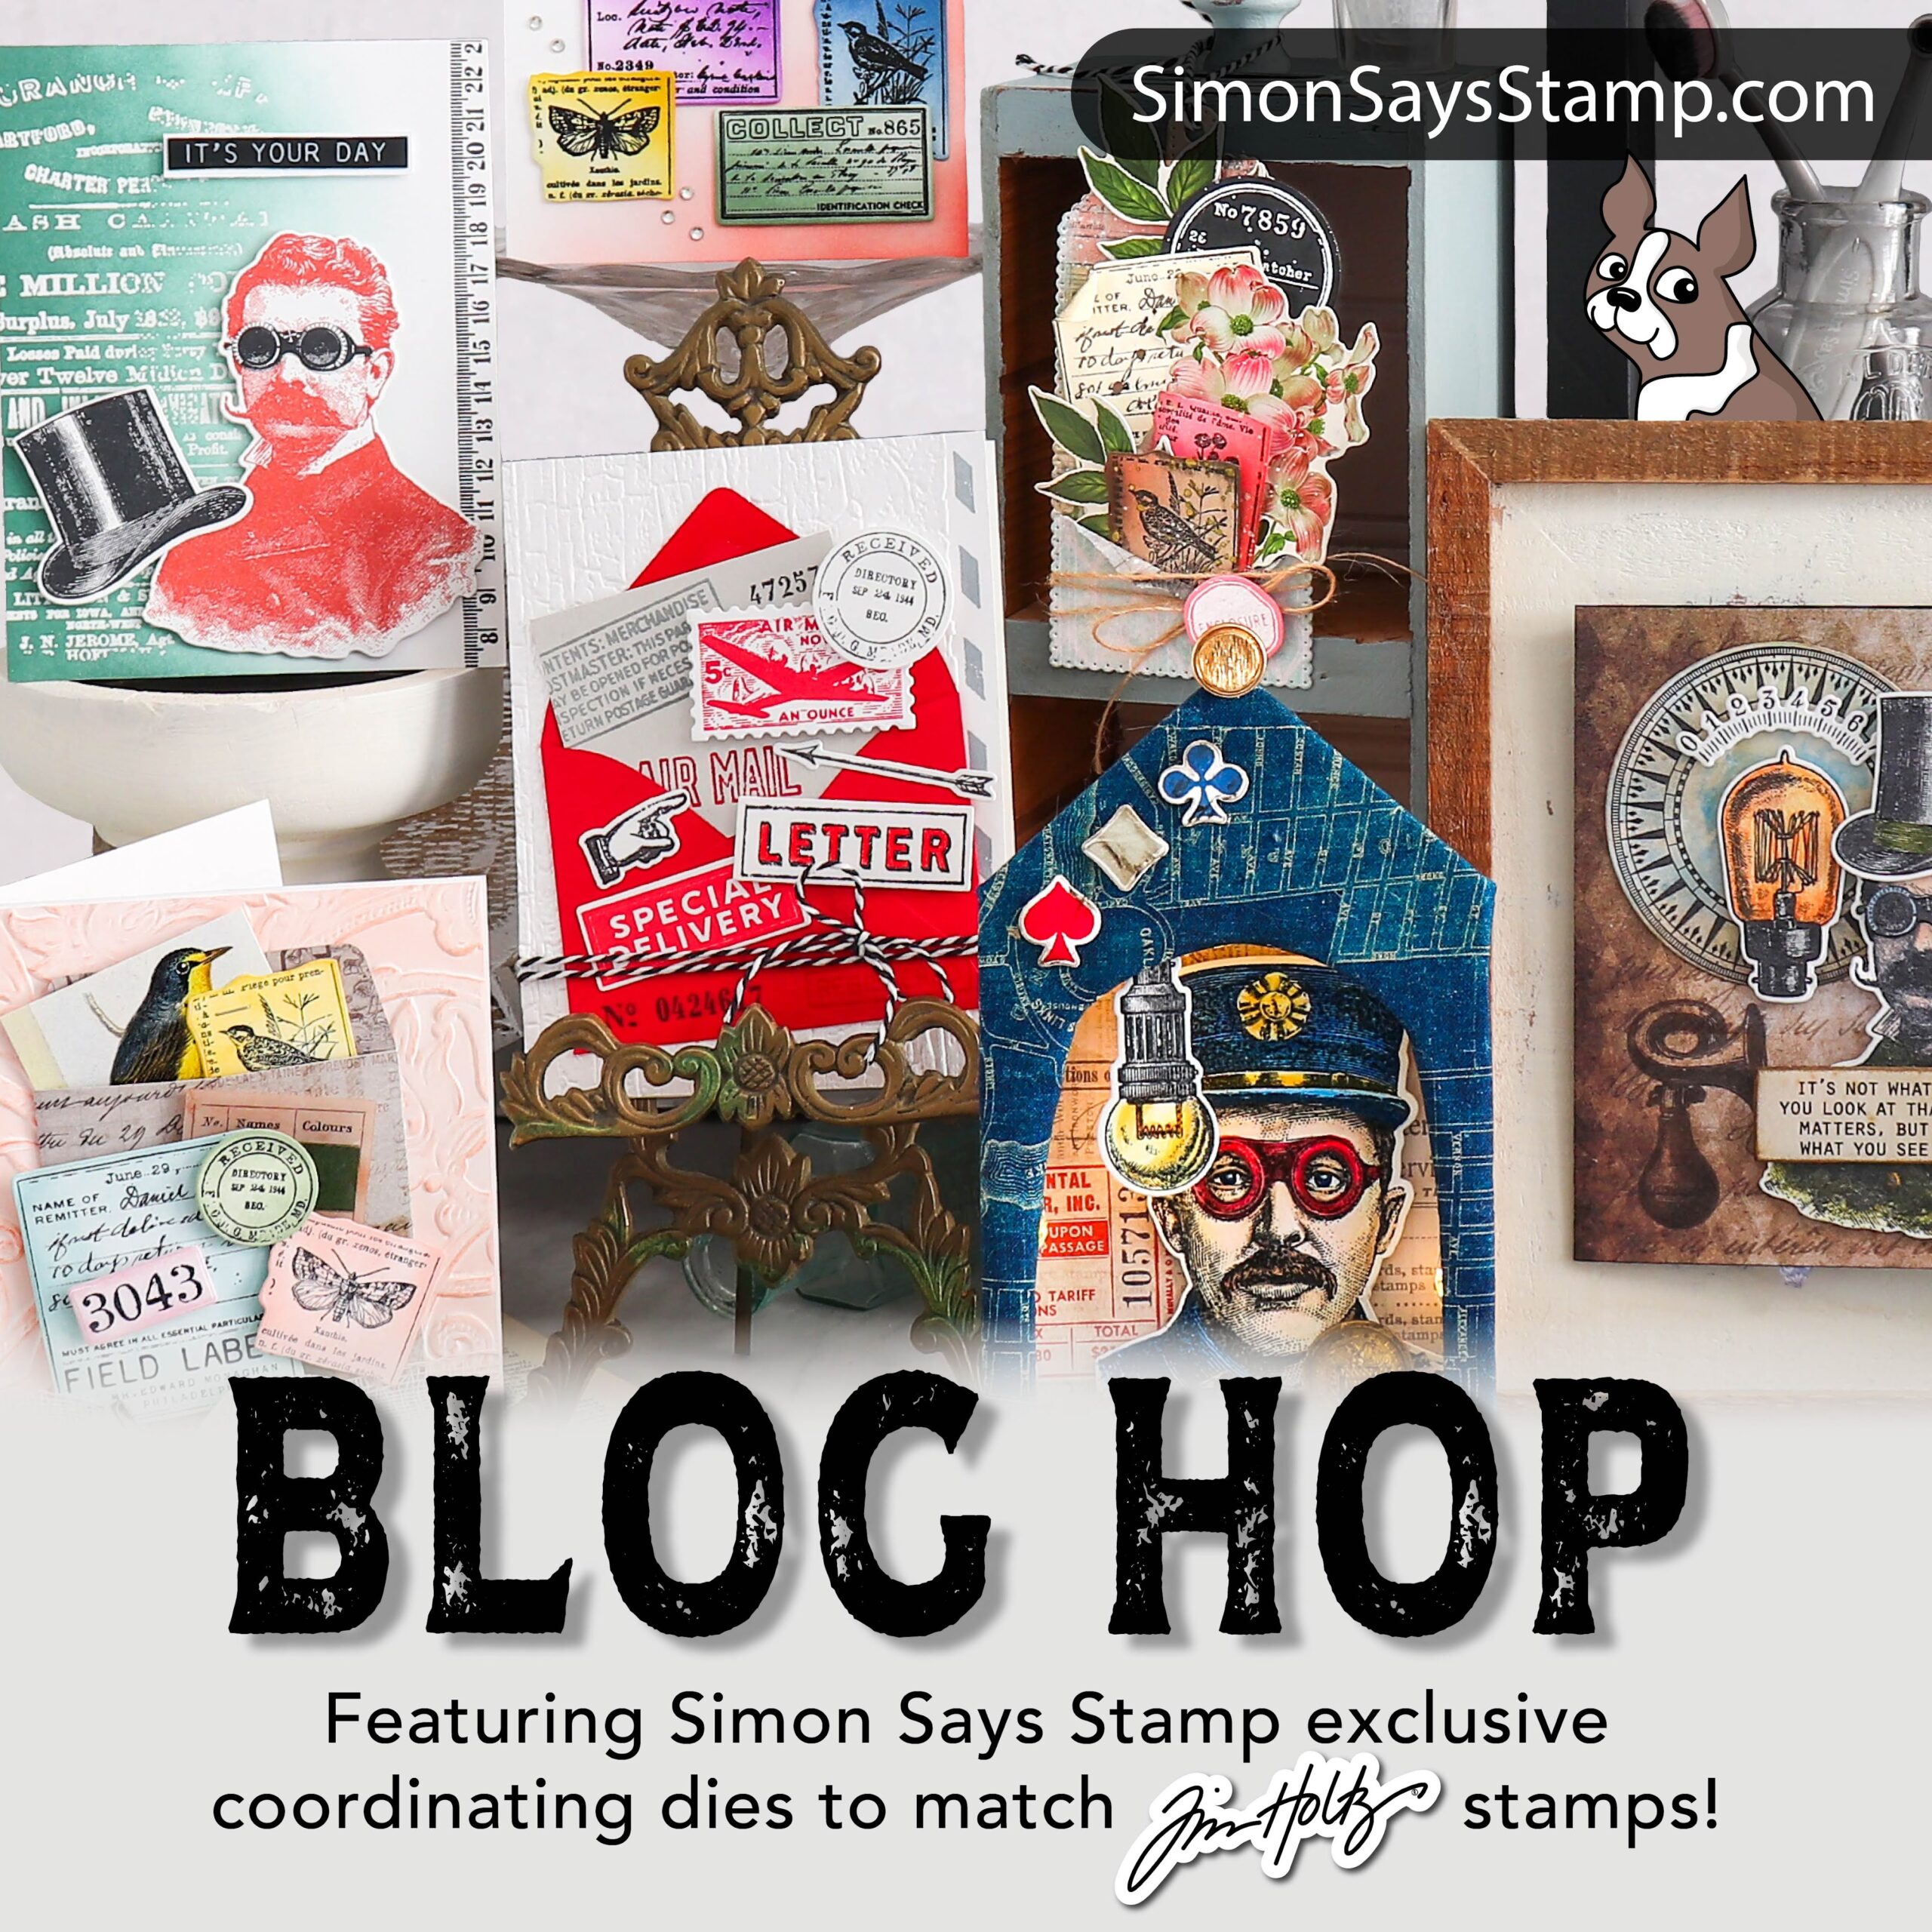
Hello friends! Happy New Year! I’m so excited to be creating with you today and starting off the year of making ahead with Tim Holtz and Simon Says Stamp. They have been at it again and making wafer dies to match previously released stamp sets by Tim Holtz and Stampers Anonymous, which means, more creative opportunities…YAY! I was asked to participate in a Blog Hop using one of these sets and am happy to be joining several other makers to celebrate the release..what could be better!
Yesterday they launched some new sets of wafer dies made to match these Tim Holtz and Stampers Anonymous Stamp Sets that include, Correspondence CMS225, Field Notes CMS396, The Inspector CMS465 and one set which includes dies for The Professor 1 & 2, CMS373 & CMS395.
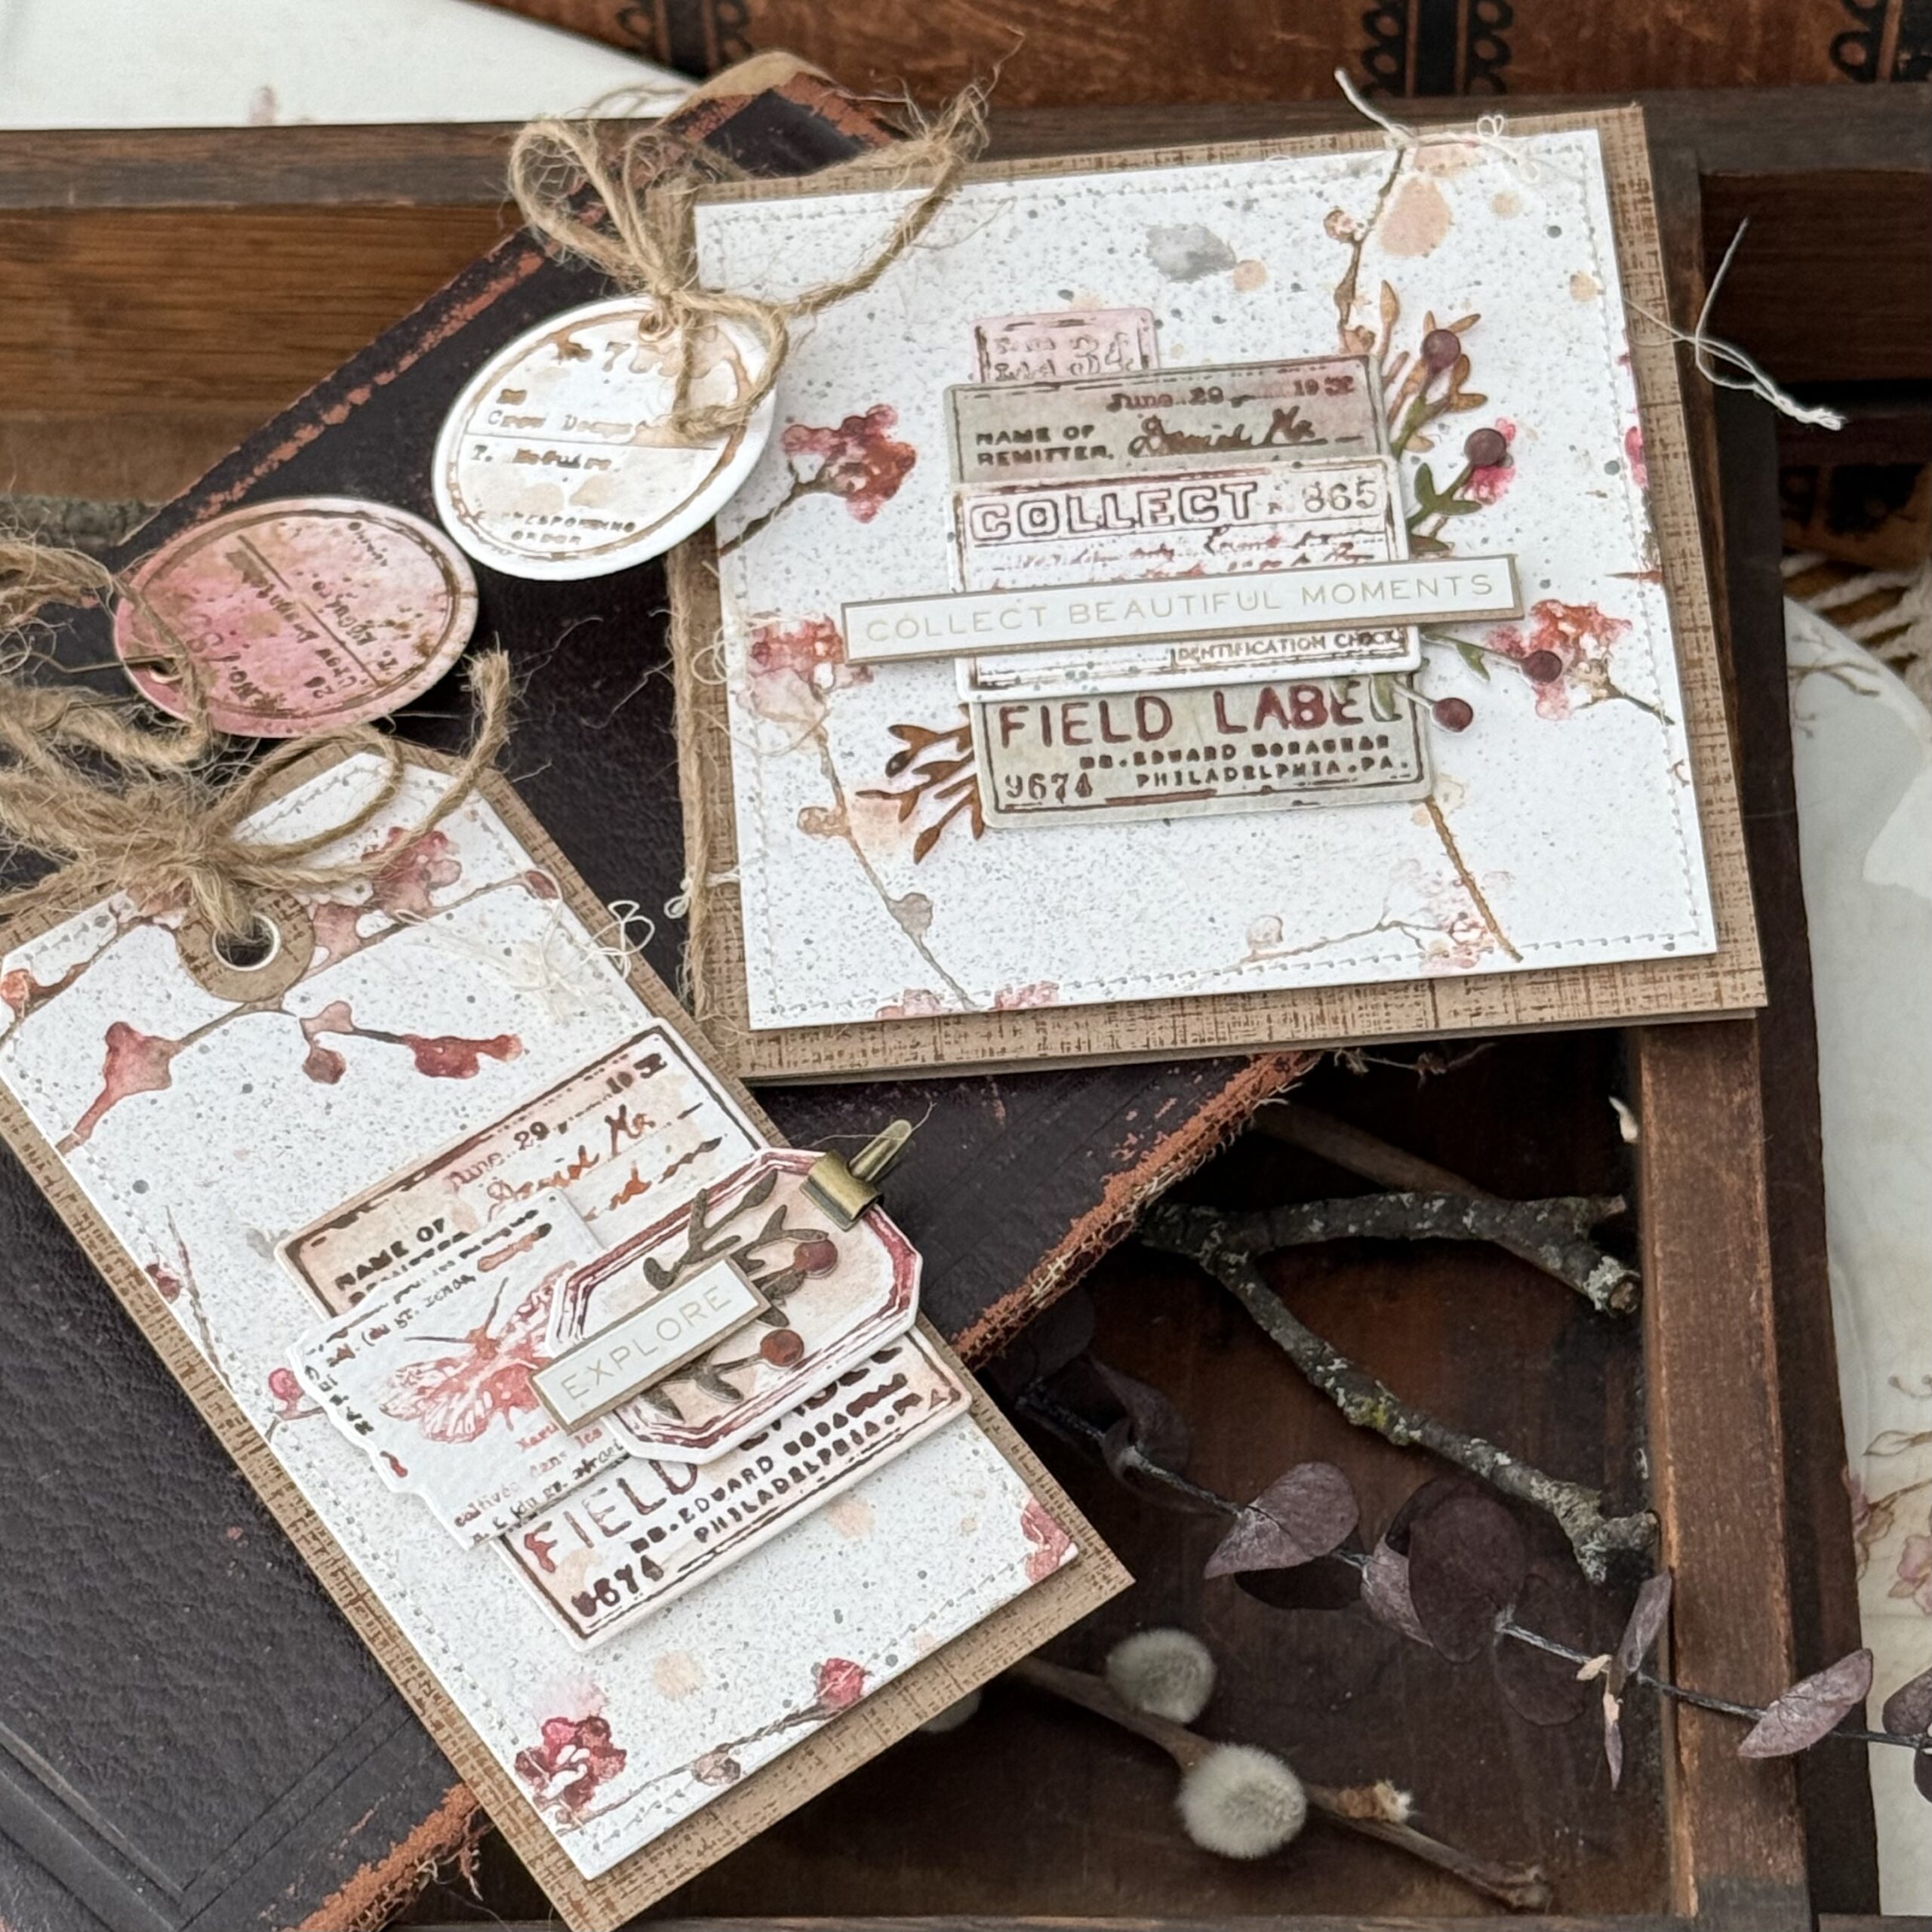
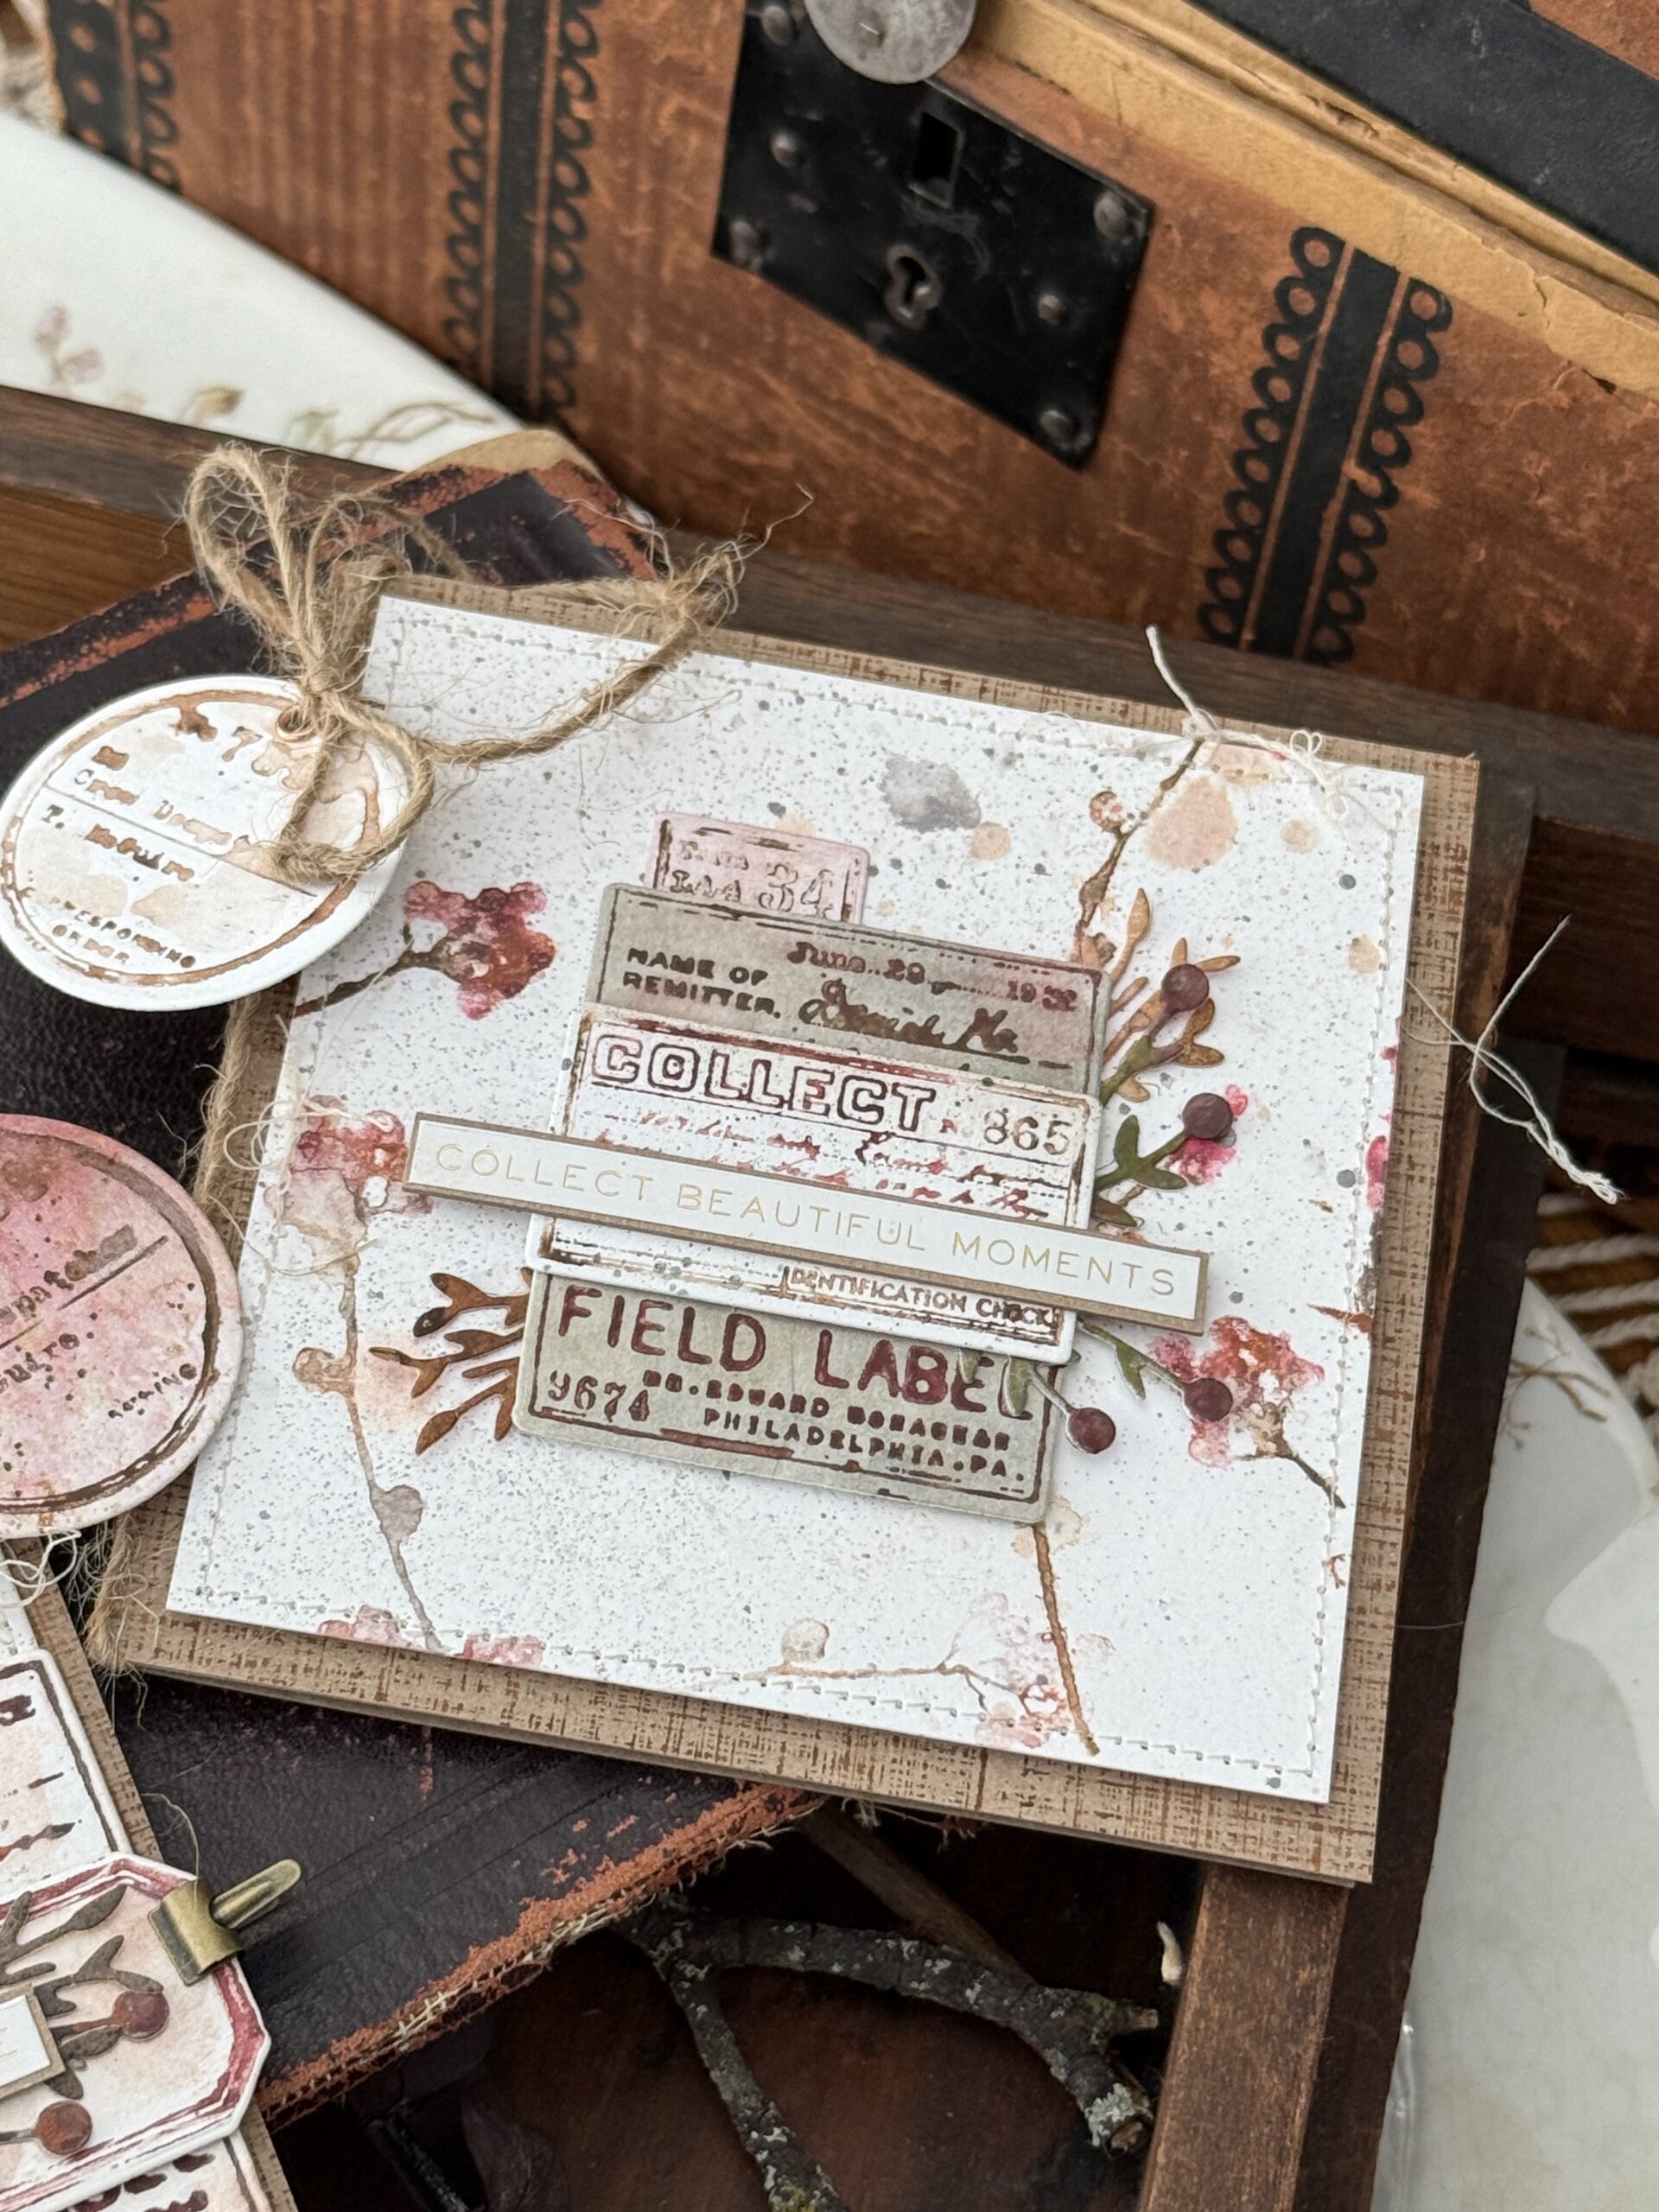
Today, I made samples using the Field Notes Stamps CMS396 and matching wafer dies. I also used the Tim Holtz Winter Watercolor 2 CMS443 to make the background paper.
Be sure to visit all of these talented makers in the Blog Hop by clicking on their names using the links to them. Your next stop from here in the list would be to head to Jean Doeringsfeld.
Simon Says Stamp Blog, Nina-Marie Trapani, Cheiron Brandon, Heather Hoffman, Stacy Hutchinson (you’re here), Jean Doeringsfeld, Tami Bastiaans, Barb Engler, Emma Williams, and Jenn Shurkus.
Let’s get making…

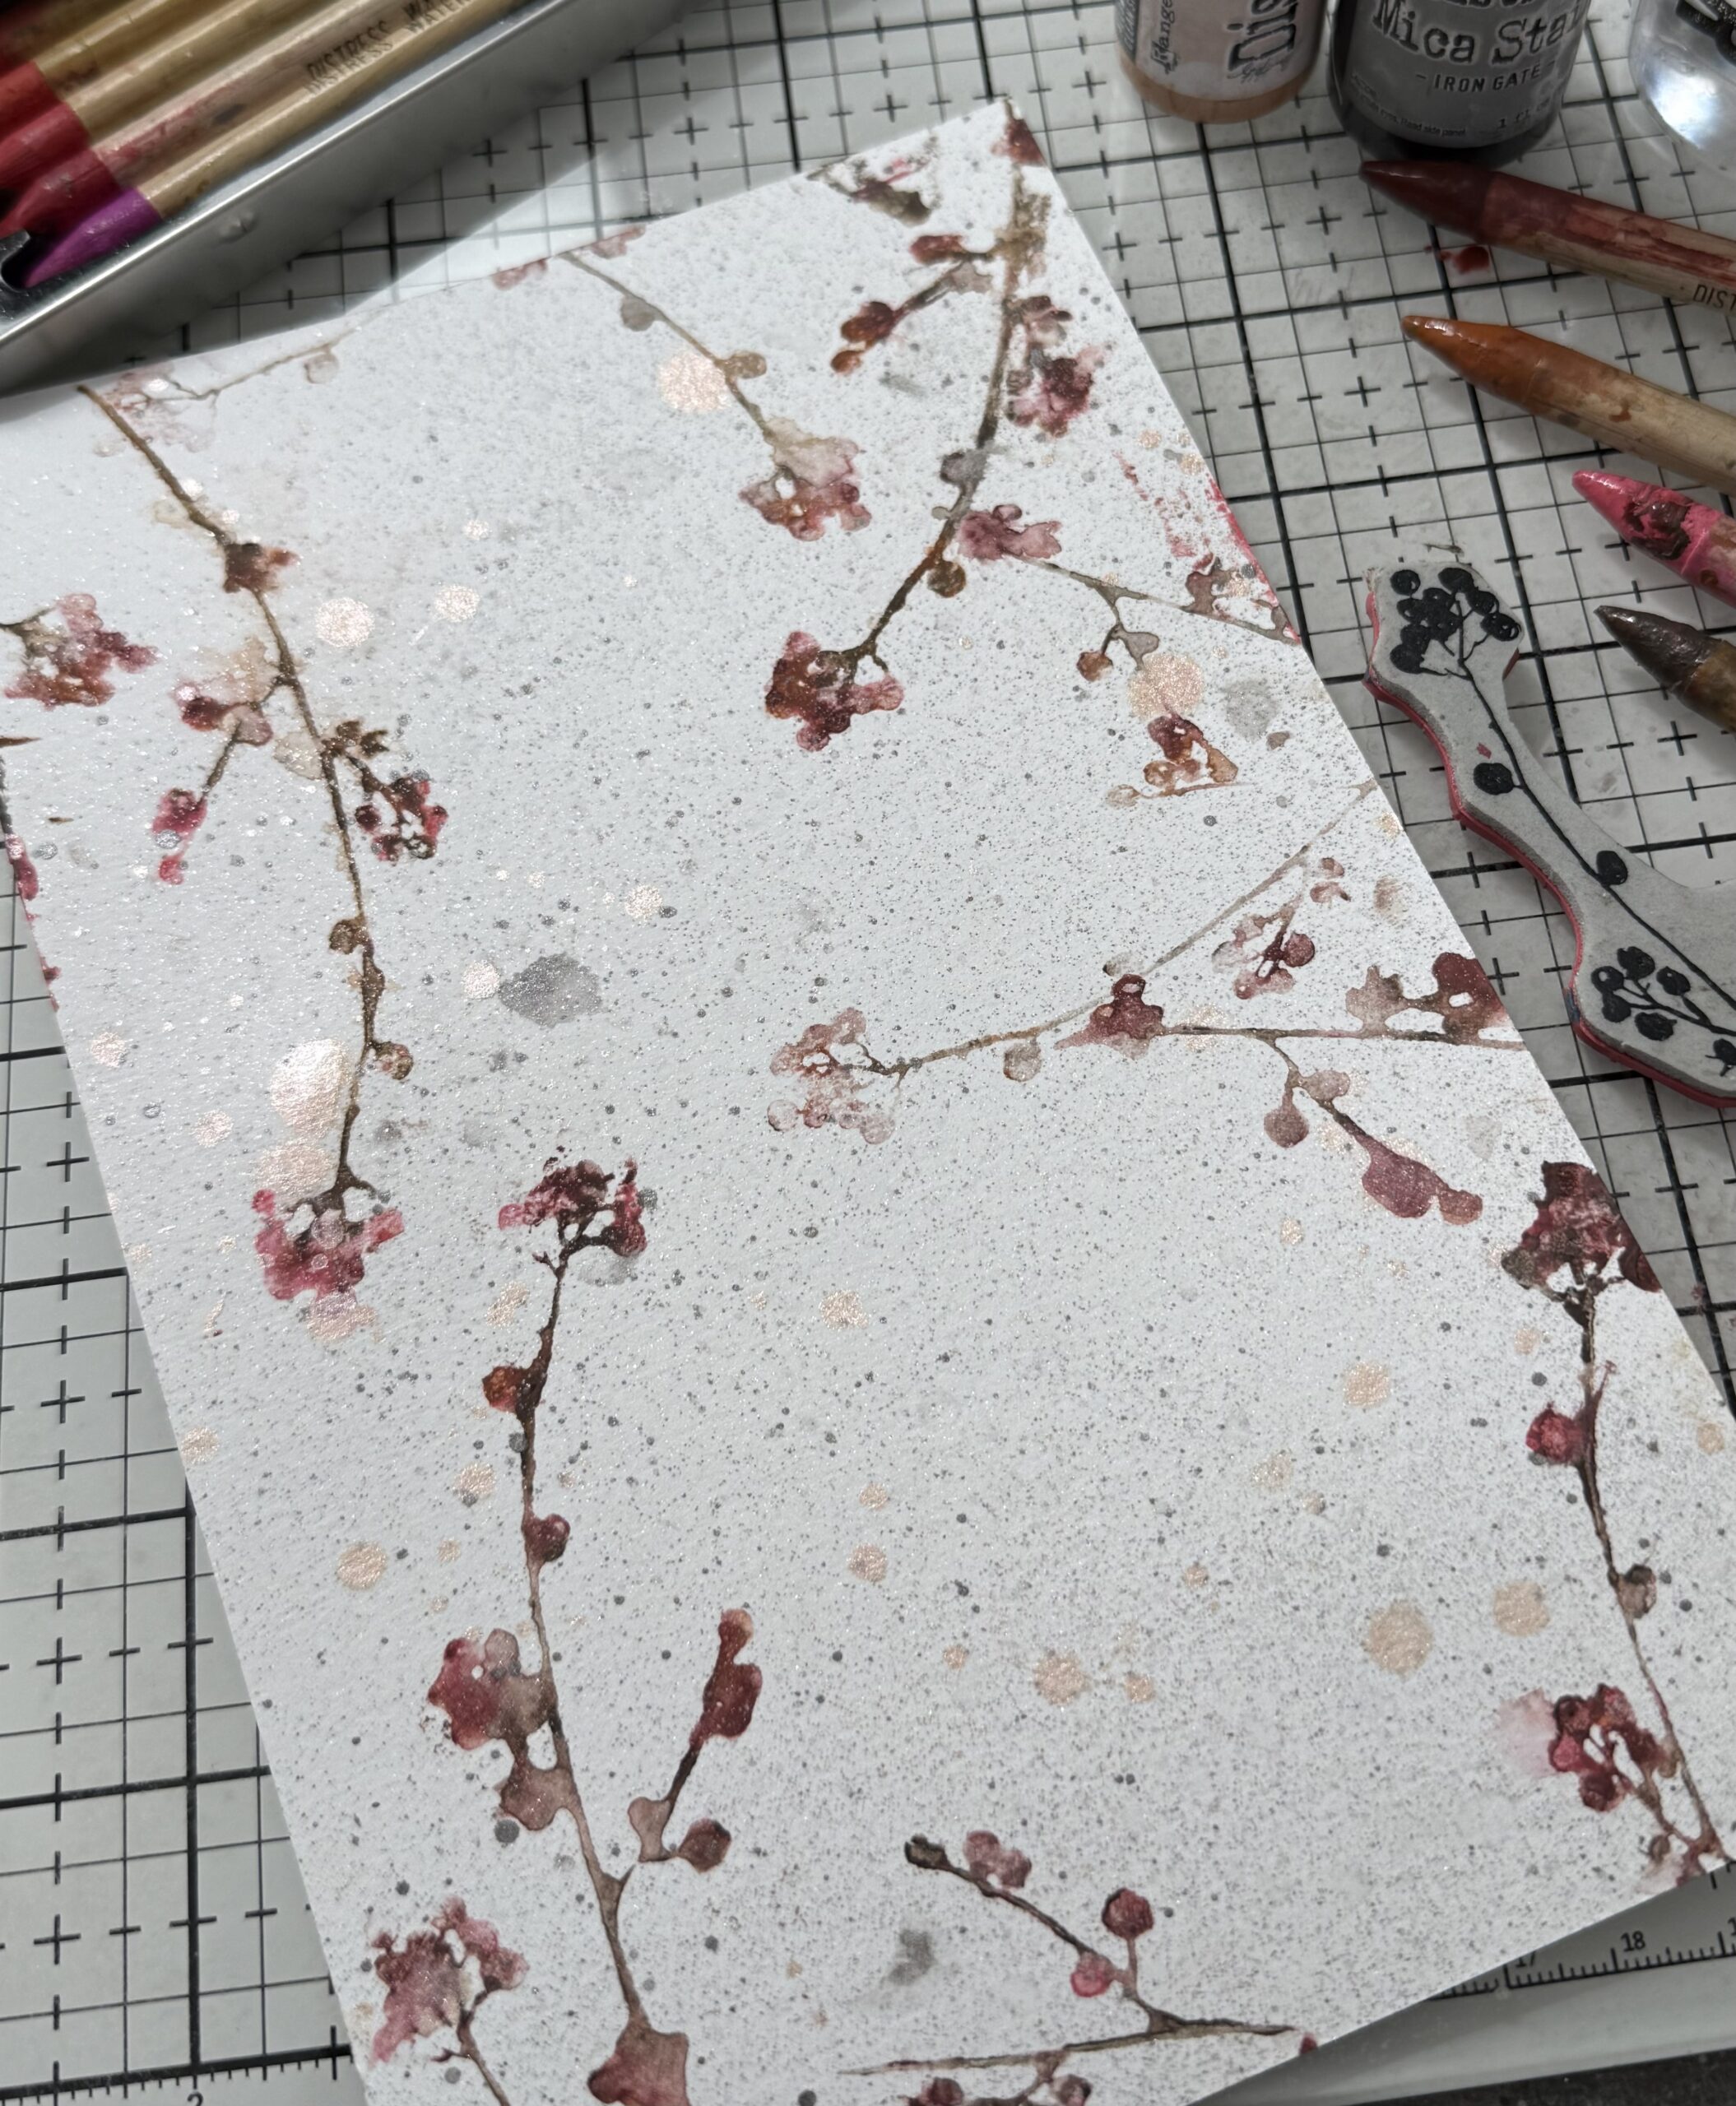
I started by creating the background paper using a few Distress products that included Distress Spritz in Tattered Rose and Iron Gate Mica Spray. I spritzed a half sheet piece of Distress Watercolor Paper with water, then added some spritzed bits of the sprays, then I dried the areas using my heat tool. Once the background was dry, I used a few different colors of Distress Watercolor pencils and colored them directly onto the berry branch stamp from the Winter Watercolor 2 Stamp Set.
To do this, dip each watercolor pencil into some water to activate the pigment, then color the stamp using a variety of colors until the stamp is covered in your desired color combo. I used Aged Mahogany, Walnut Stain, Rusty Hinge and Worn Lipstick. Once the stamp was colored I did a quick mist of water over the stamp and stamped it randomly onto the paper, sometimes after stamping it, I sprayed it again with a mist of water to use up the leftover pigment on the stamp.
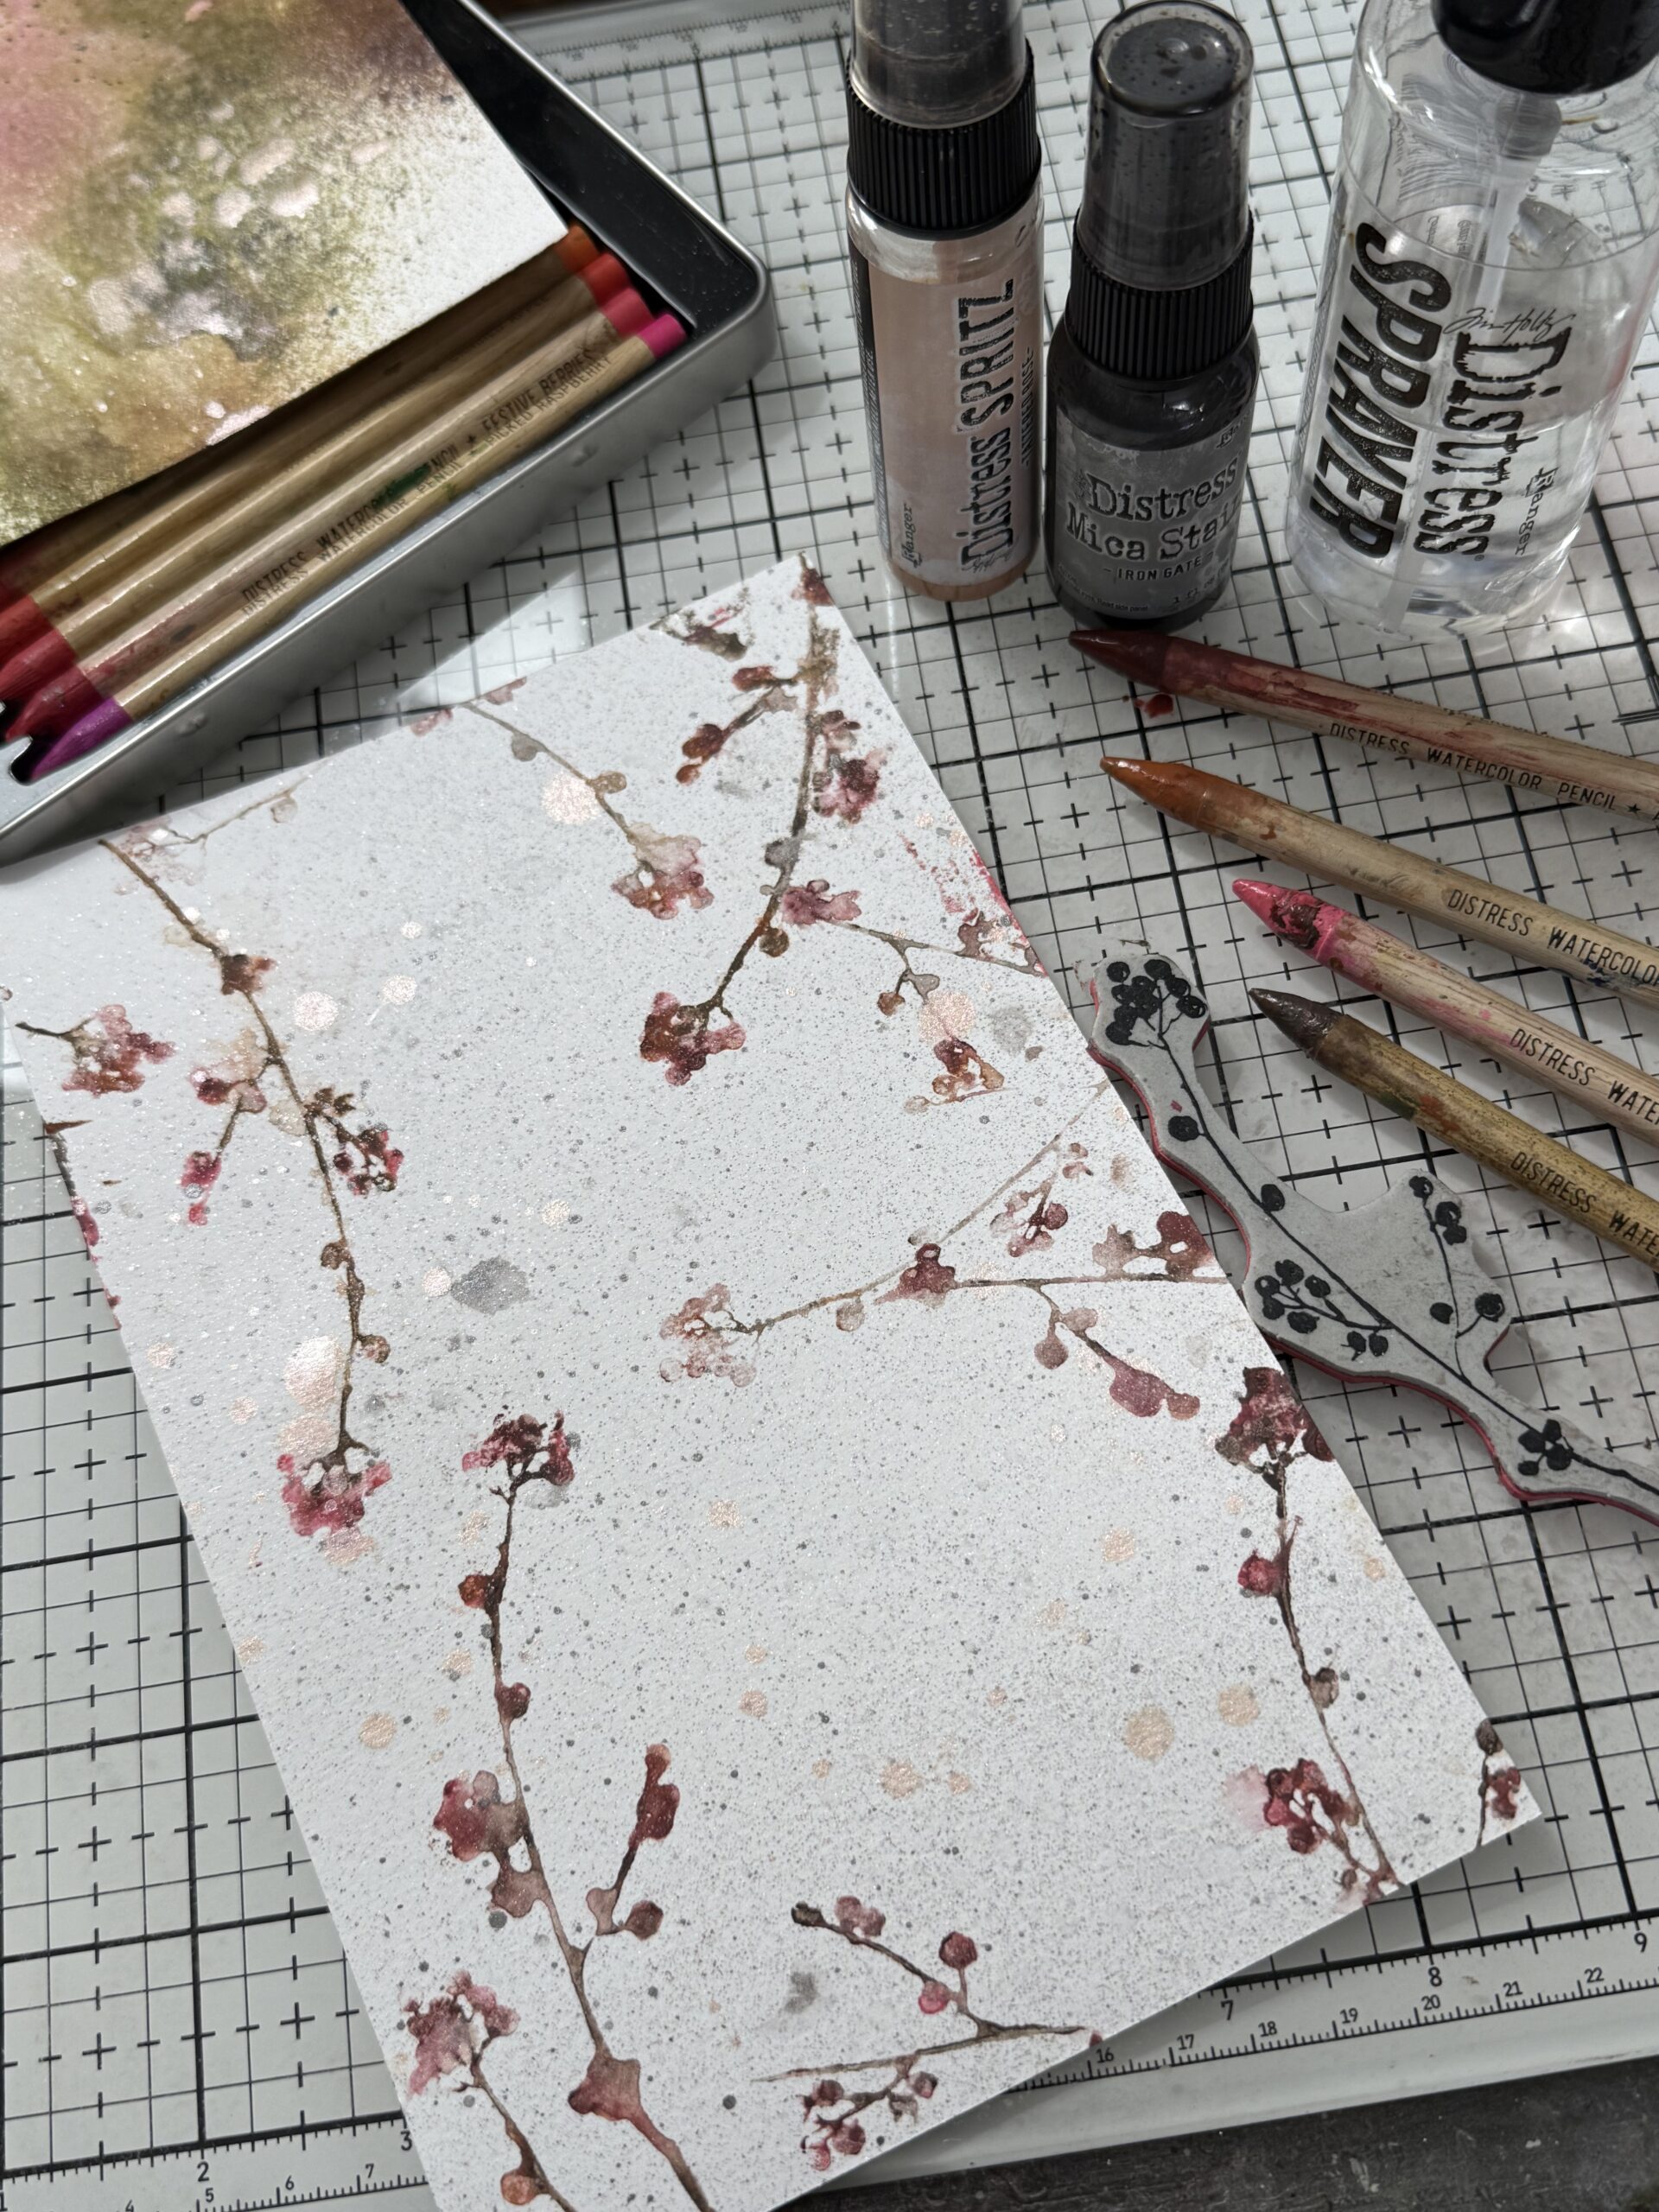
That gives you some color variations on the berries and branches.
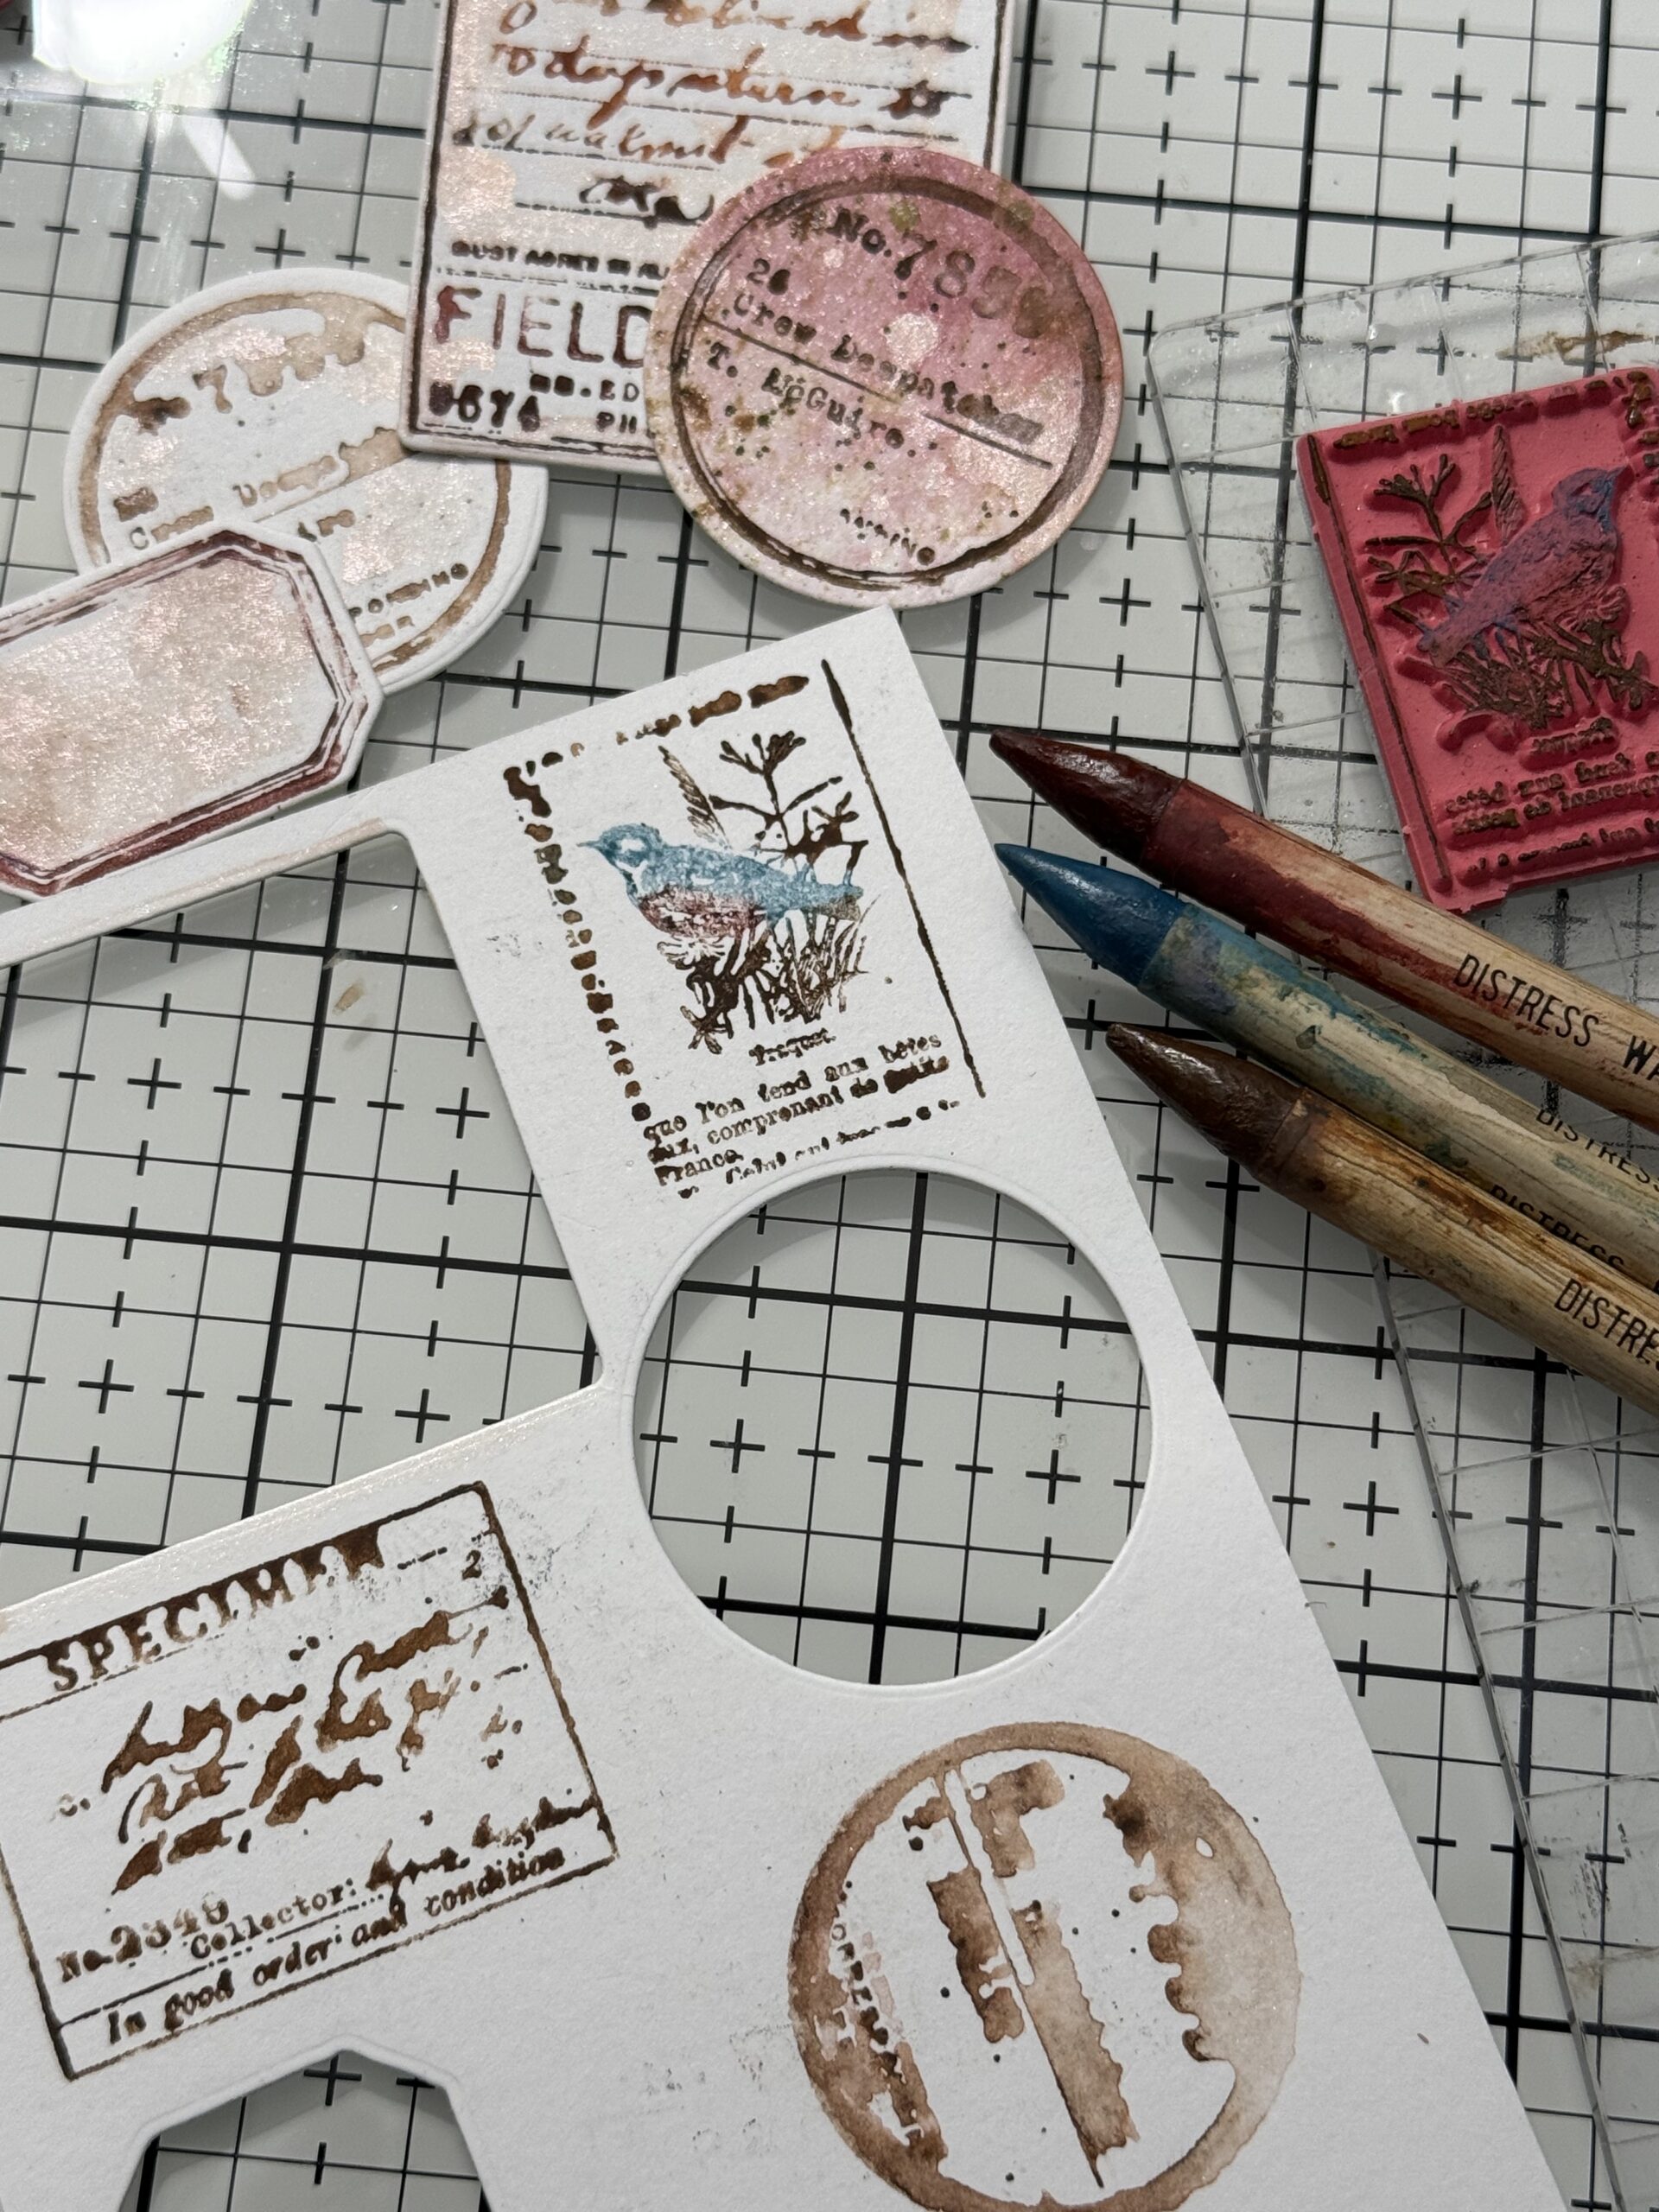
Next, I began creating the ephemera pieces using the Field Notes Stamp set and wafer dies. To create the color variations on the images, I used the same colors of Distress Watercolor Pencils that I had on the background. I used the same technique and colored directly onto the stamp, then stamped the images onto various paper scraps. I colored some of the images by using a paint brush that was wet, then picked up color from the pencils and/or some of the mica spray that was spritzed onto my mat. Then I dried it with my heat tool and cut them out using the coordinating dies.

Once I started coloring and stamping, I couldn’t hardly stop…so I am keeping some of the pieces that I cut for future makes!
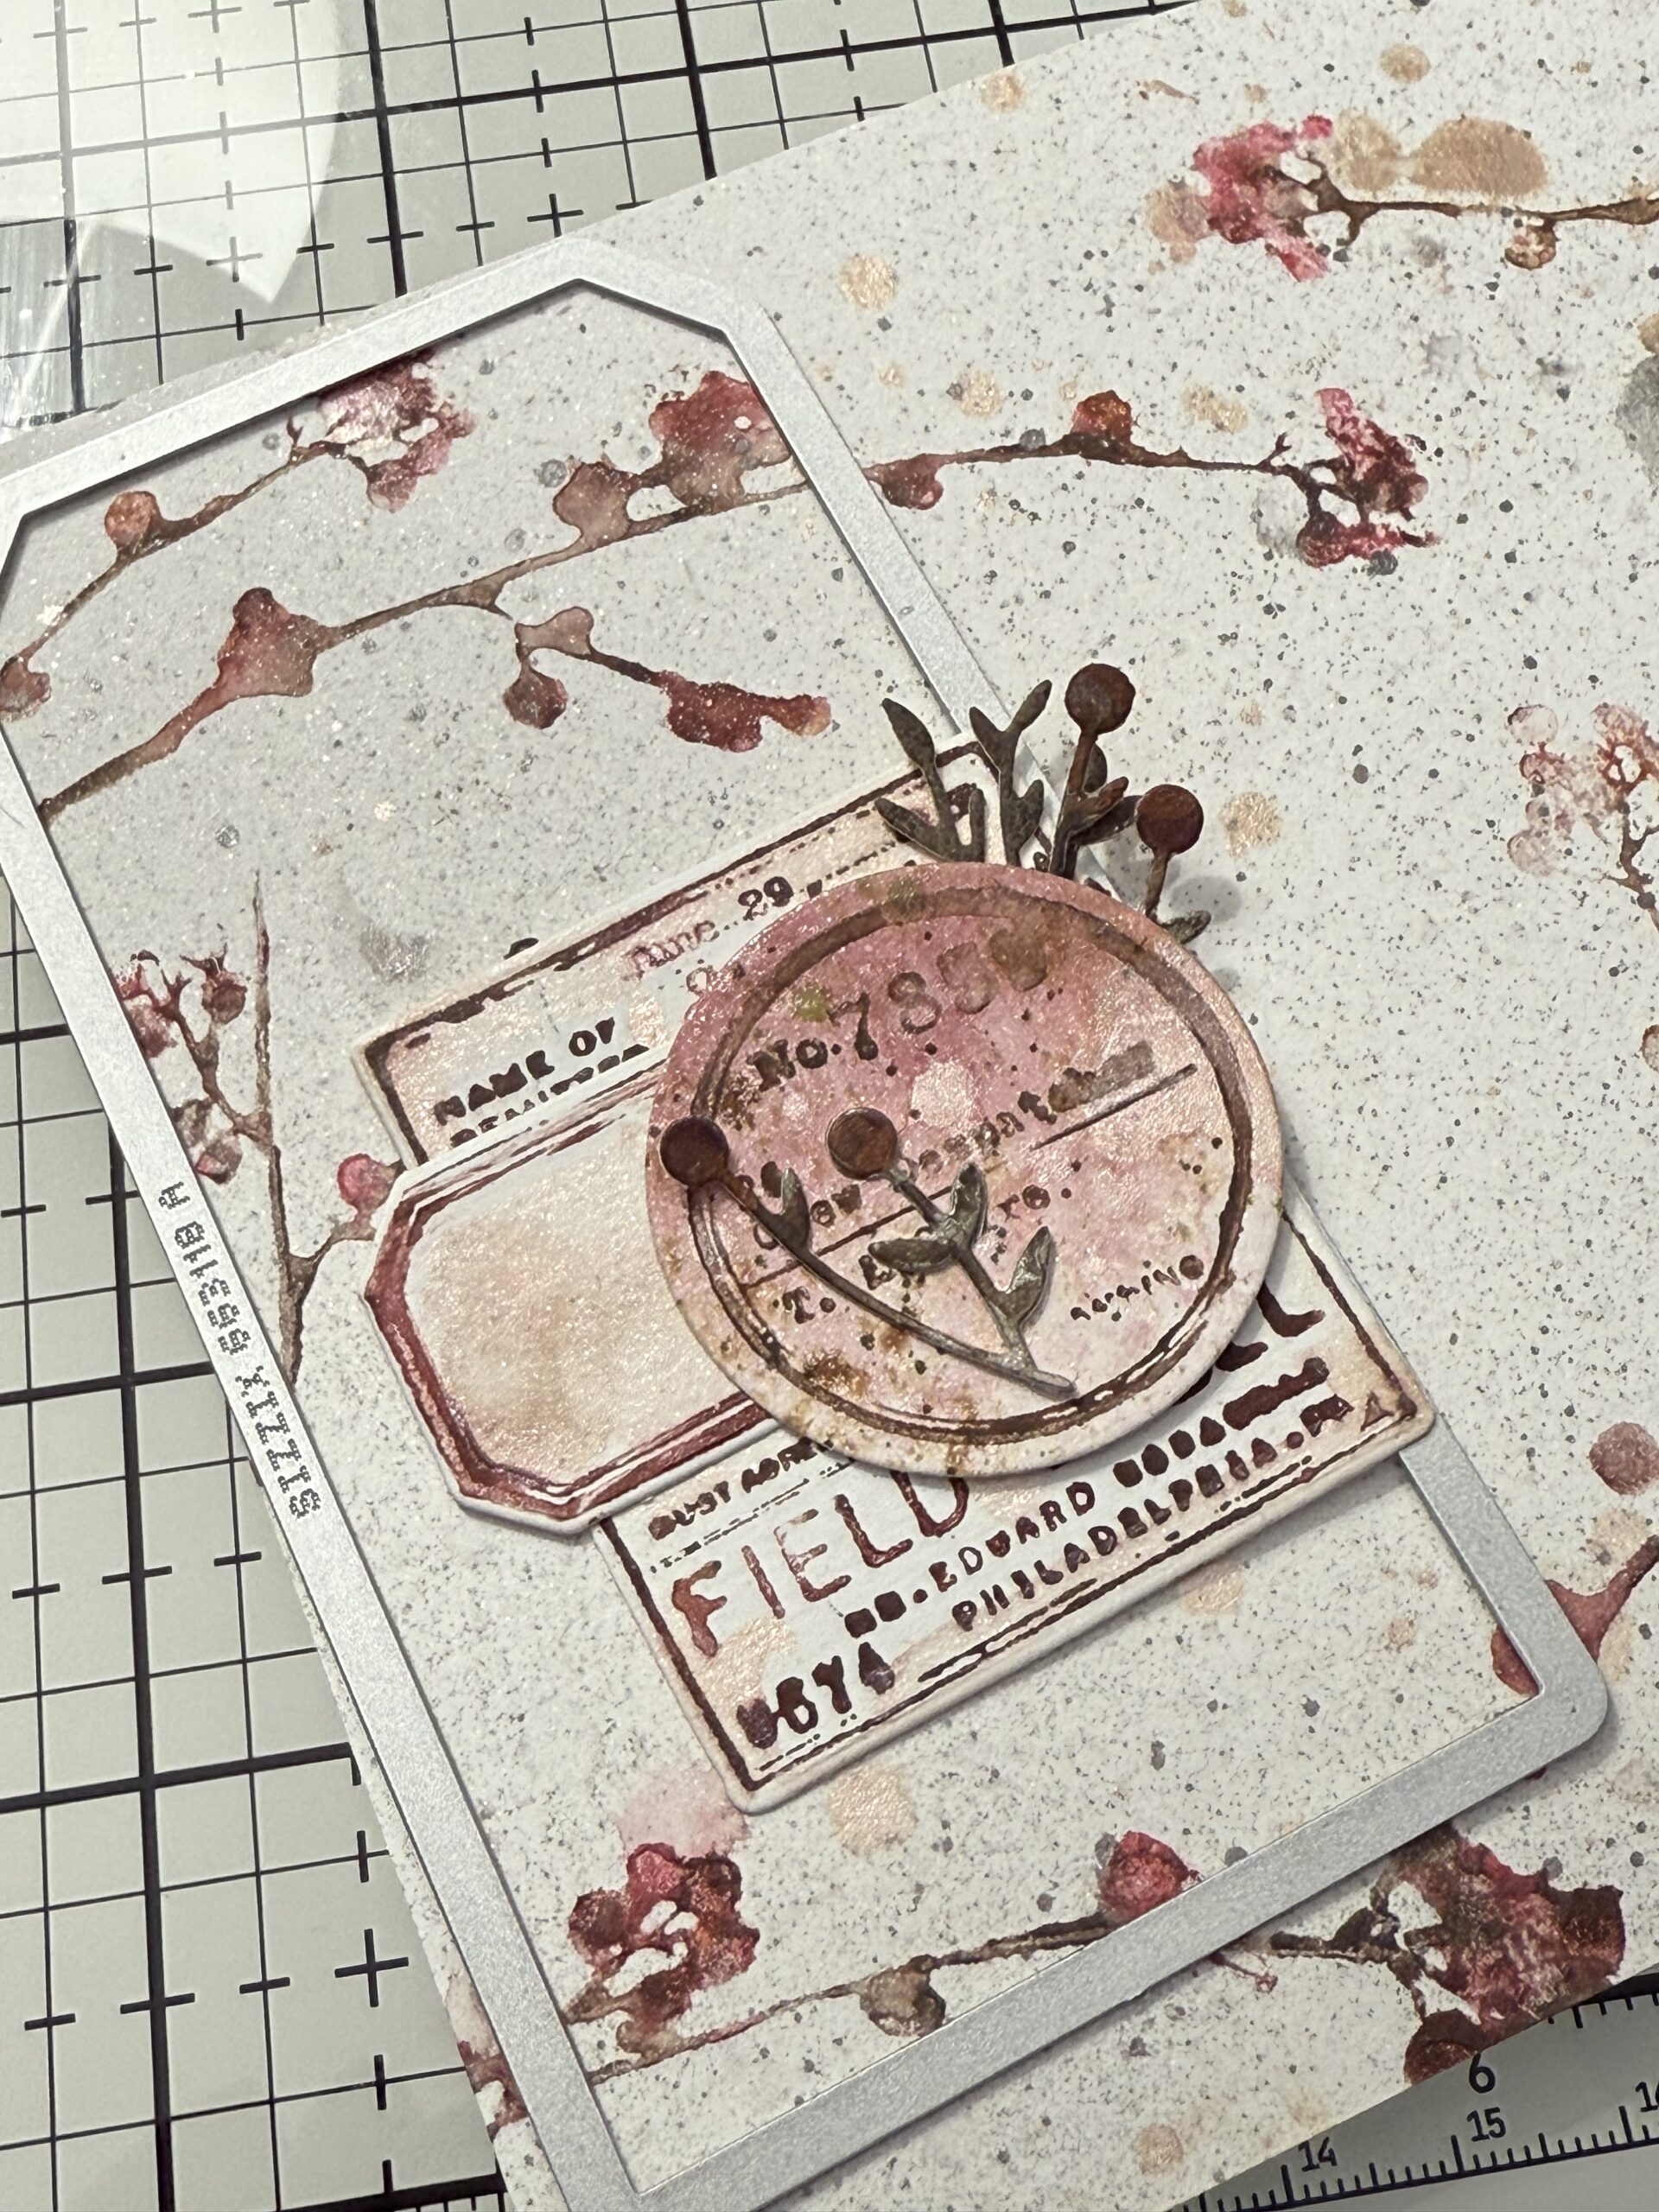
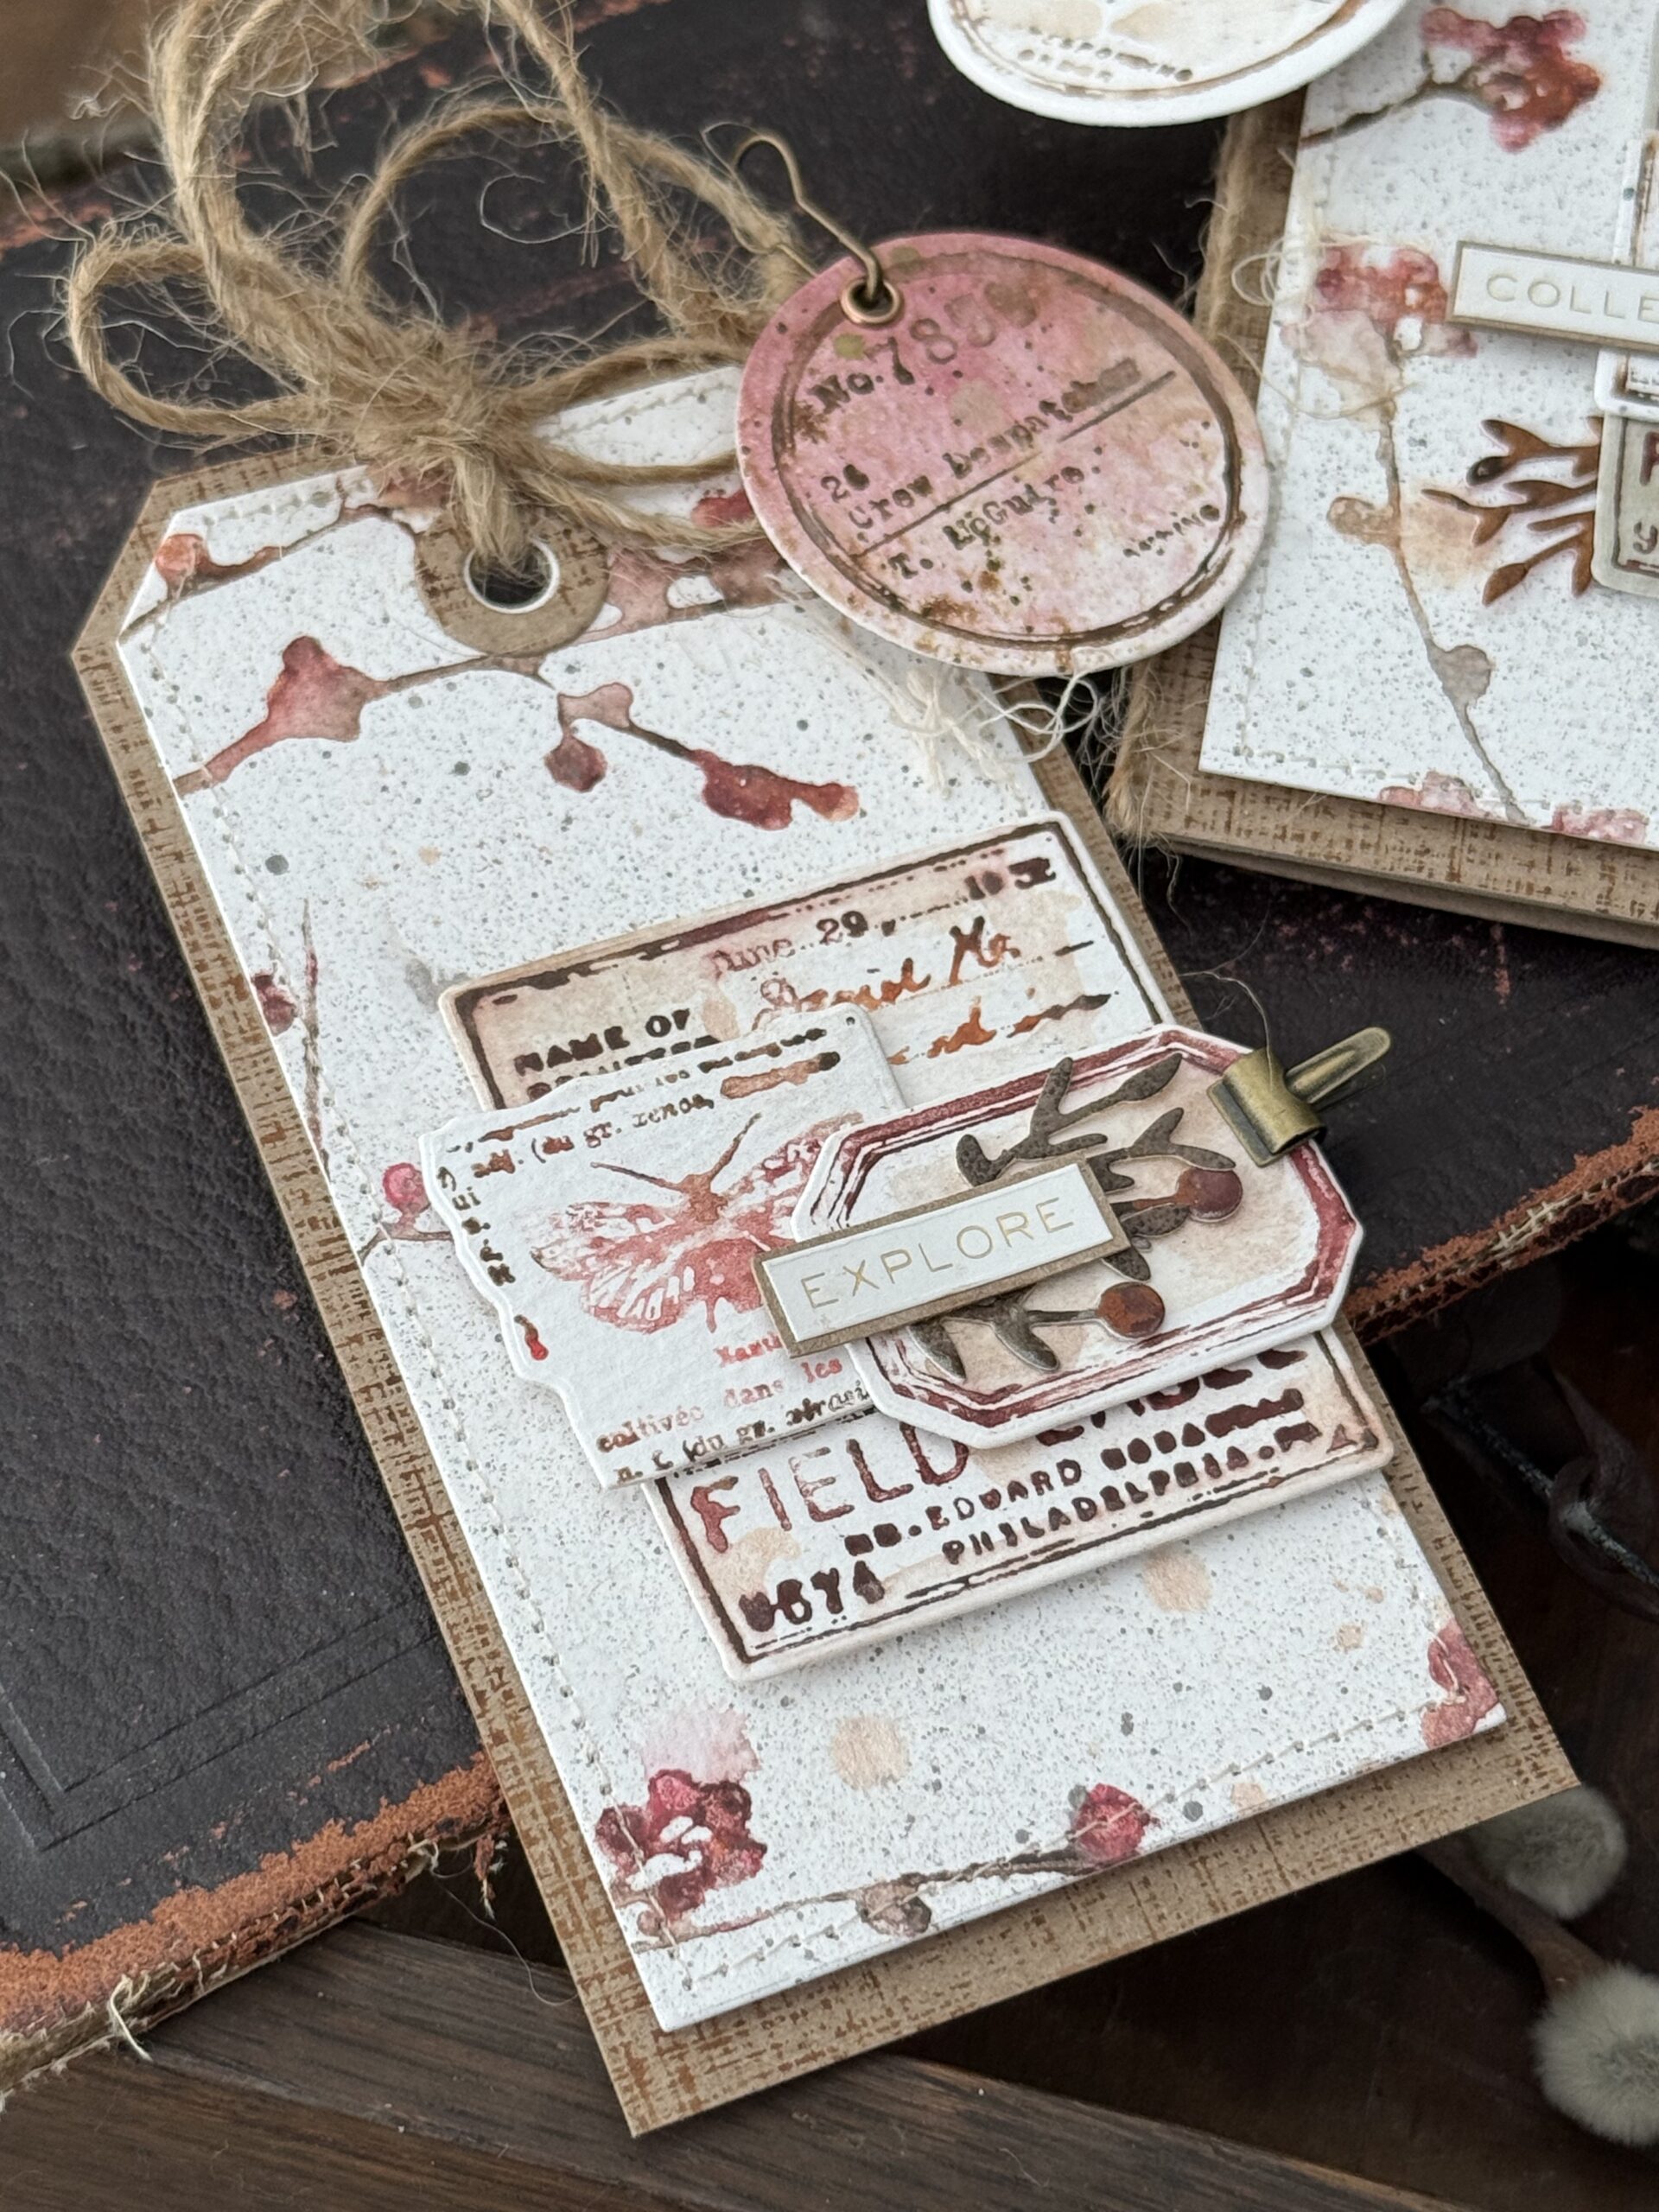
I cut one portion of my background paper into a tag shape, then began layering some of the pieces to create an embellished tag. I also cut some little branches to embellish the tag and card using the Tim Holtz Vault Funky Floral Wreath, but any type of floral die set would work. I chose these because they blended well with the berry and branch background.
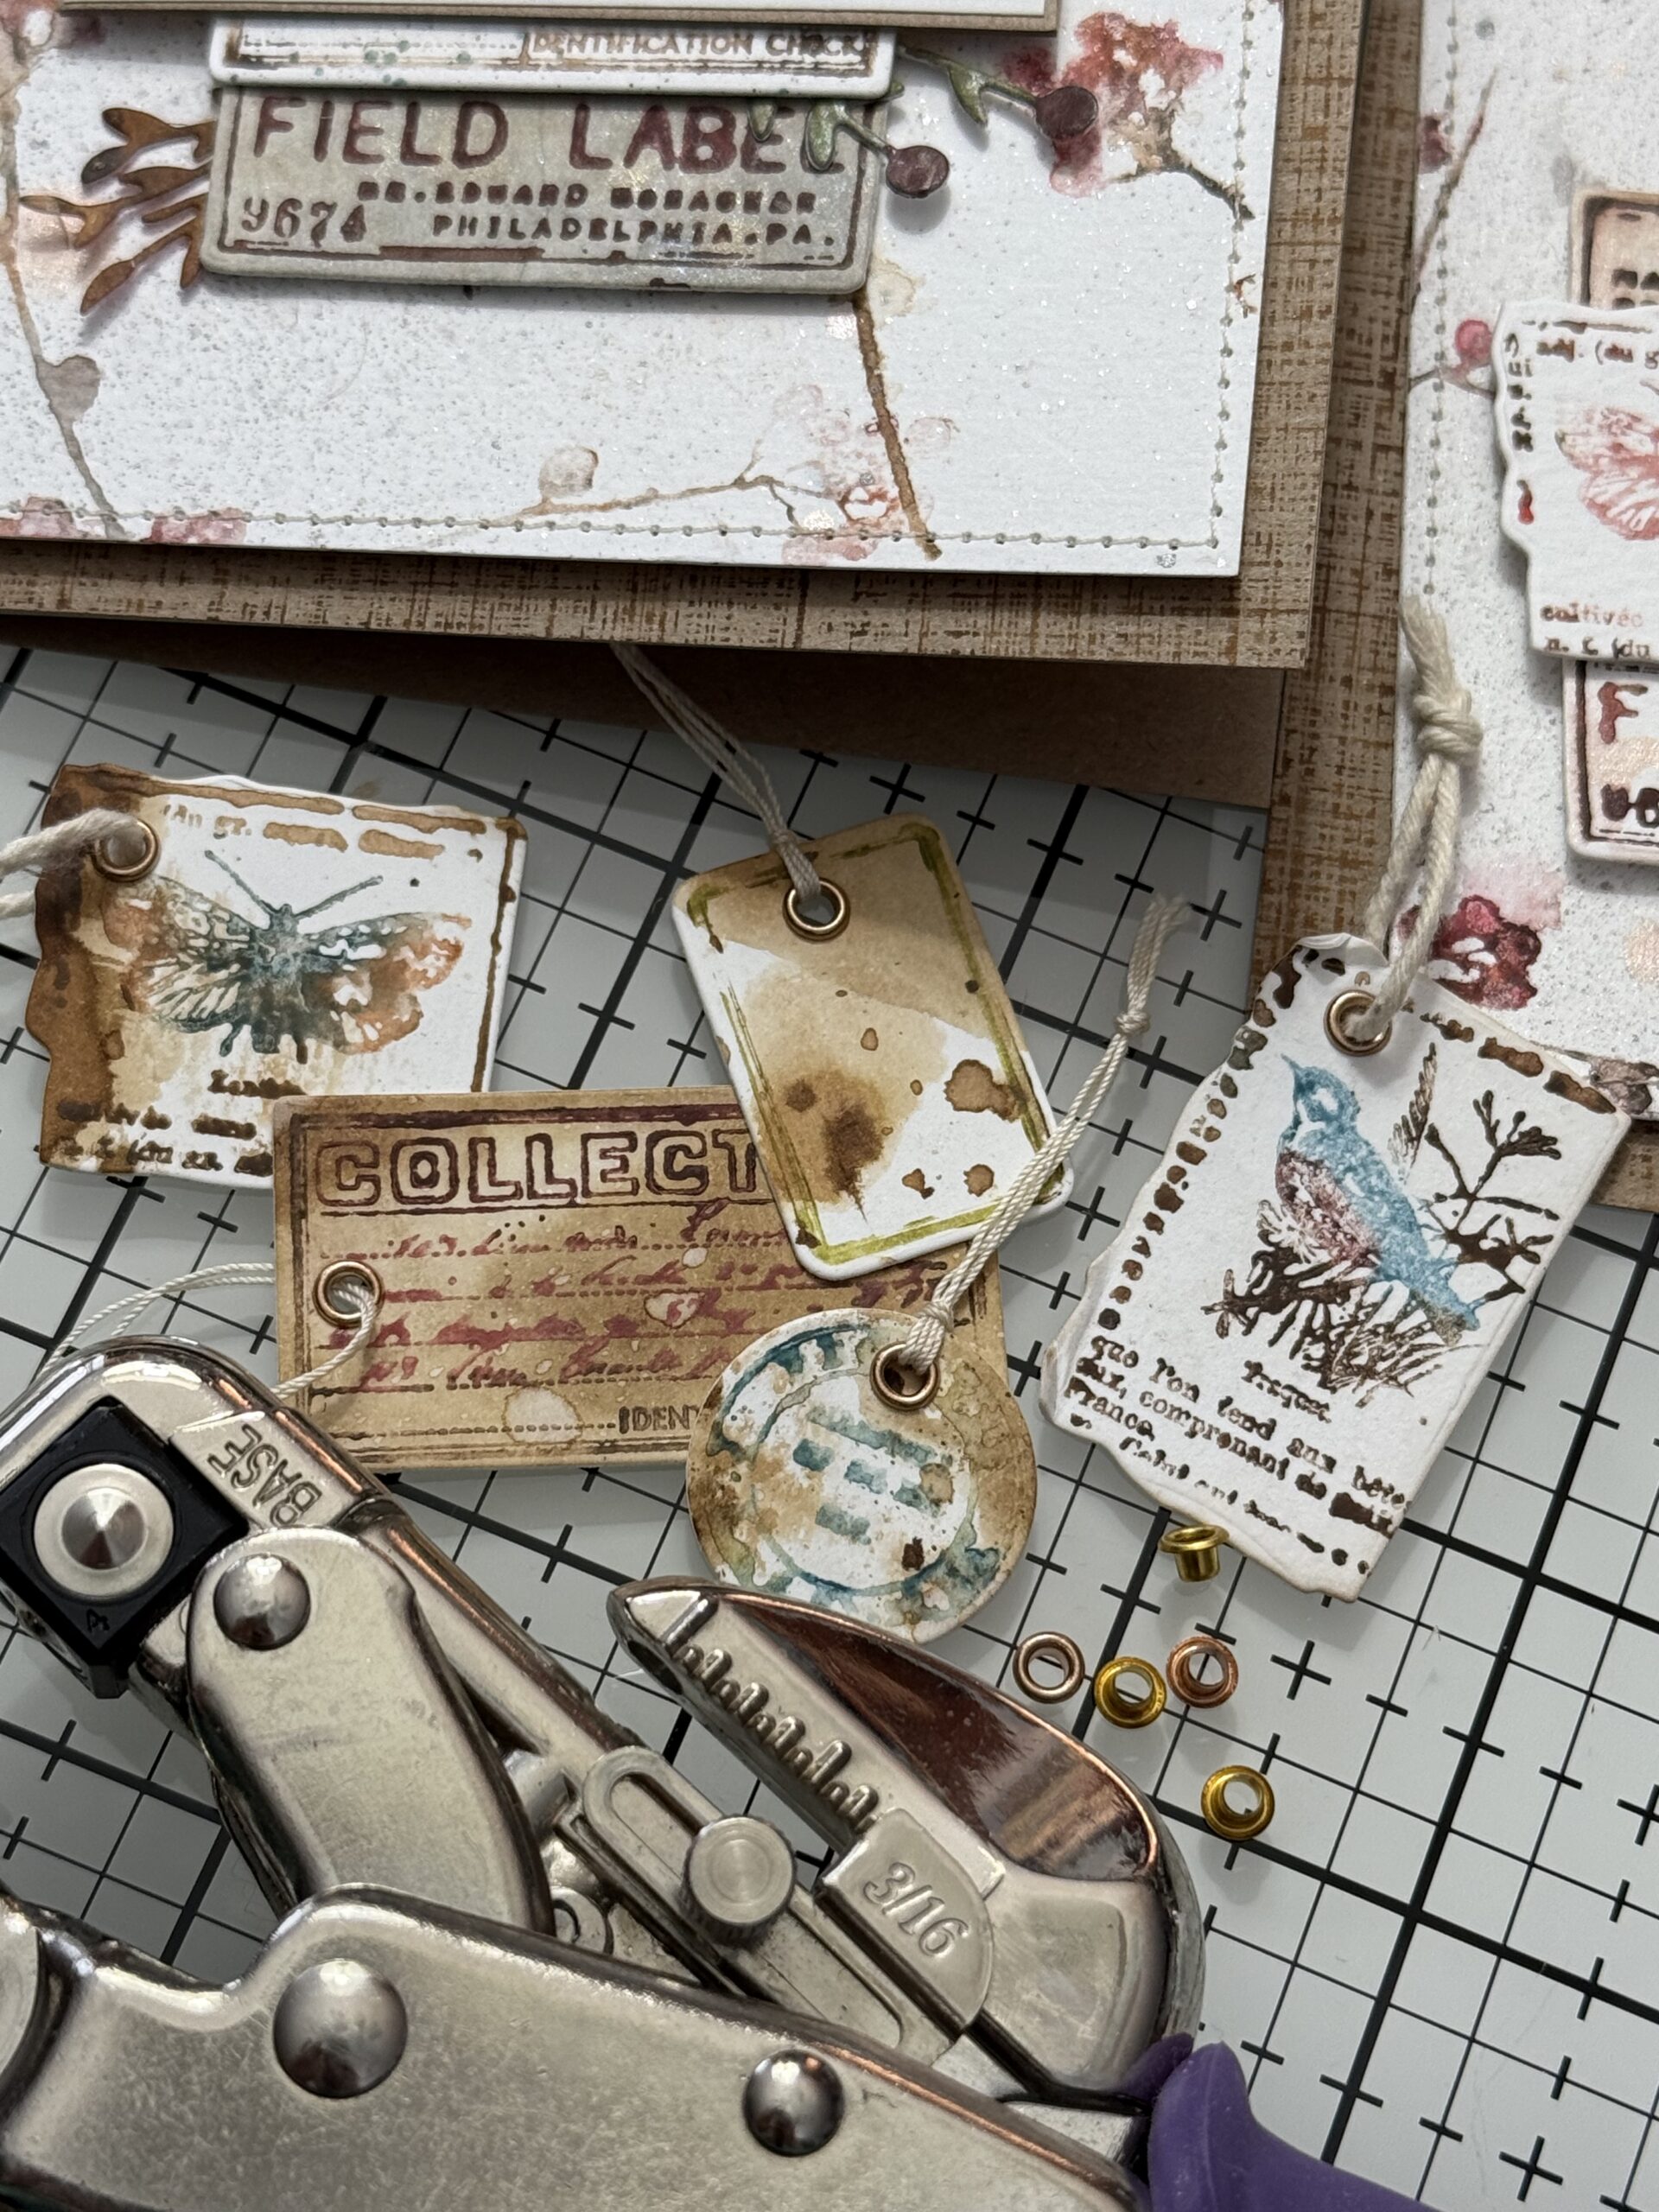
Here’s a little collection of ephemera pieces that I made into tiny tags to use on some future projects, they were punched with a small hole and I added some small eyelets to them…they’re so cute and perfect for future embellishing!
Here you can see my final layout of the tag… I finished it using several of the Field Notes pieces, then added some stitching around the tag, added a piece of Distress Kraft paper behind the tag that had been previously stamped using the Linen Background Stamp CMS221. I added an eyelet to the round little tag and clipped it to the jute at the top of the tag, and pinned it with a loop pin. I added the word “explore” to the front of the tag from the Tim Holtz Metallic Sticker Book.
The card front was finished in a similar way but, using the leftover stamped paper, I cut it into a square shape and arranged the ephemera pieces in the center. I layered the pieces using foam stickers and added a longer phrase to the front of the card from the same Metallic Sticker Book. I tied a piece of jute around the left edge of the card and tied it with a bow and added a round tag to the edge with the jute.

With that, my card and tag was complete…thank you so much for stopping by today, and be sure to hop on over to Jean Doeringsfeld’s blog by clicking here.
The products used to create this project are listed below with links to Simon Says Stamp. Thank you so much for supporting me through shopping through them. I appreciate it so much! – Creatively yours, Stacy

What is an affiliate program, and why should I click on the link and buy through you?
When you shop via the affiliate link on this blog, I receive a small commission from the affiliate provider (Simon Says Stamp) at no extra cost to you, whatsoever. These commissions help me to cover the hosting fees and other costs to run my blog and be able to provide you with FREE inspiration. If you shop the links, THANK YOU! I truly appreciate being able to share my love of creating with you.


Love the colors and watercolor. I didn’t have this stamp set, now can’t wait to play with it and the new dies.
Thank you for the inspiration.
The berry branch set was the perfect background for field notes! You really show off the watercolor pencils so well!
Beautiful – love every element, as well as the finished result.
Alison
So gorgeous! I love that background paper you created. Such inspiration. Well done!
I’m so glad you used this stamp and die set. I ordered it and love seeing great ideas like yours and Nina. Thank you! Now on to see what the other have created.
Field Notes is my favorite. It makes me want to go to a National Park and start writing. What a great set you made. Love your stitching and watercoloring. Looks like a lot of texture going on with that Mesh and Linen. Love it. Wish I had it.
Wonderful distressing with Field Notes.
Love the color combos & the use of water colors. Fabulous make!
Love the feel created by the background – looks like delicate cherry blossom branches. Your work is stunning! So dainty and gorgeous!
Lori S in PA
Amazing work. Love all the layering work
love the watercolor effect, so beautiful
Wow! Love your card and tag! Great idea using the watercolor techique, just beautiful!
This is just lovely!! The tags are simple yet pack a beautiful punch.
I like the use of crayon to color!
Your makes are beautiful! Love the colors and techniques. Thanks for sharing.
Love the distressed look. Beautiful
I love that you chose pastel colors for your tag – such an inspiration! Thank you for sharing your talent!
Beautiful! Thank you for sharing. I love those tiny tags.
Love the natural natural colors! Perfect for so many occasions.
I adore your color palette here. It is just gorgeous, especially when combined with the elements you created and put together.
Such a soft and stunning palette and finish. This is so so pretty Stacy! Love the soft effect you got with the watercolour pencils. A beautiful tag and card. Both so lovely xoxo
I loved that you included pictured of the procedure you used. I love the vintage feel of you card and tag – they are both beautiful
I love your the water color technique. So beautiful card and tag
What an artistic make! Like the techniques used and saved for inspiration! Thanks for sharing!
Beautiful job! I love the colors & the softness of your design!
Love the gorgeous mixed media tag and card! Both are just beautiful!
Beautiful tone on tone masterpieces and plenty of more ephemera to layer more!! Gorgeously done and loving the color inspiration!