Hello friends…welcome back!
I hope you are well and enjoying some cooler weather. We’re still waiting for the fall cool down, but the heat hasn’t stopped me from getting my Halloween on! Halloween is my favorite, and creating for it is THE BEST!
Today I am sharing a small idea-ology Halloween Card File with you using the new Tim Holtz Halloween release and a card file. I haven’t used the card file to create in for awhile, and while trying to decide what to make, I wondered if it would work as a vignette base but, also combined with some tags and ephemera as an actual card file…and guess what? I managed to do just that…with the help of some idea-ology Wood Planks that I found in the idea-ology Halloween Baseboards.
The new Tim Holtz idea-ology collection is available now! It is a wonderful collection of classic pieces from Tim Holtz that has been reimagined and changed up for the 2025 creating season. CLICK HERE to check out the entire collection.
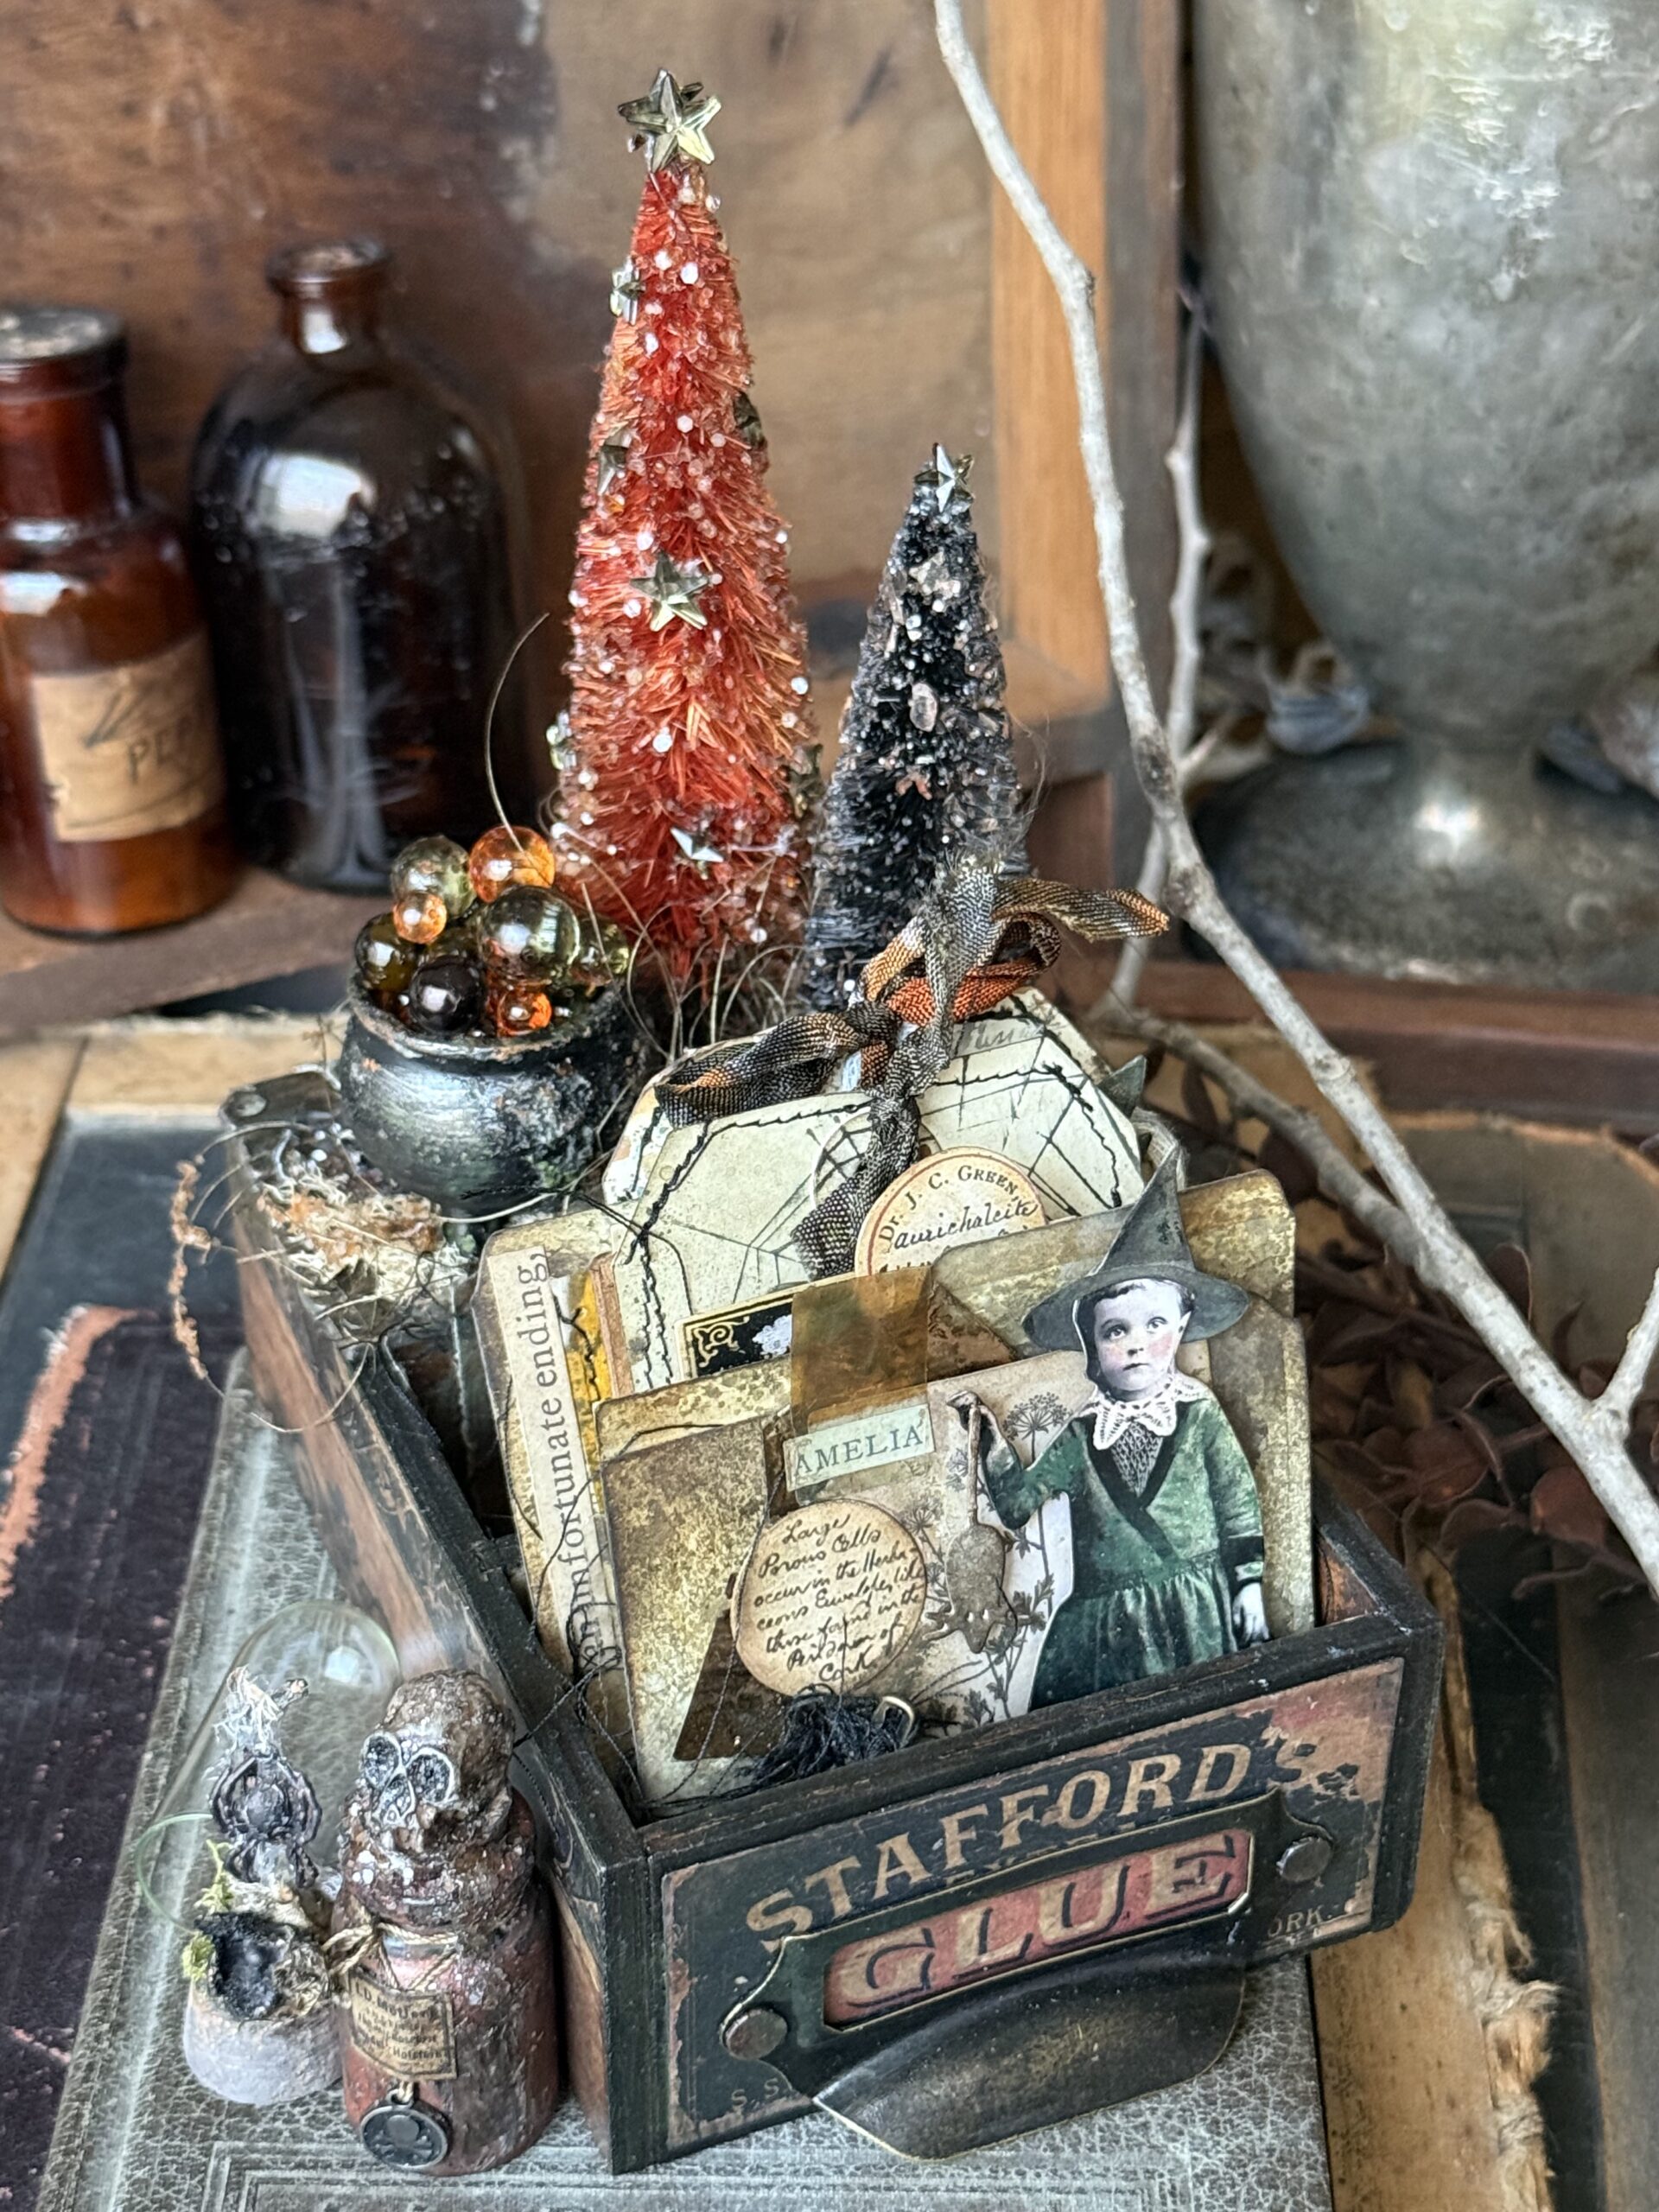
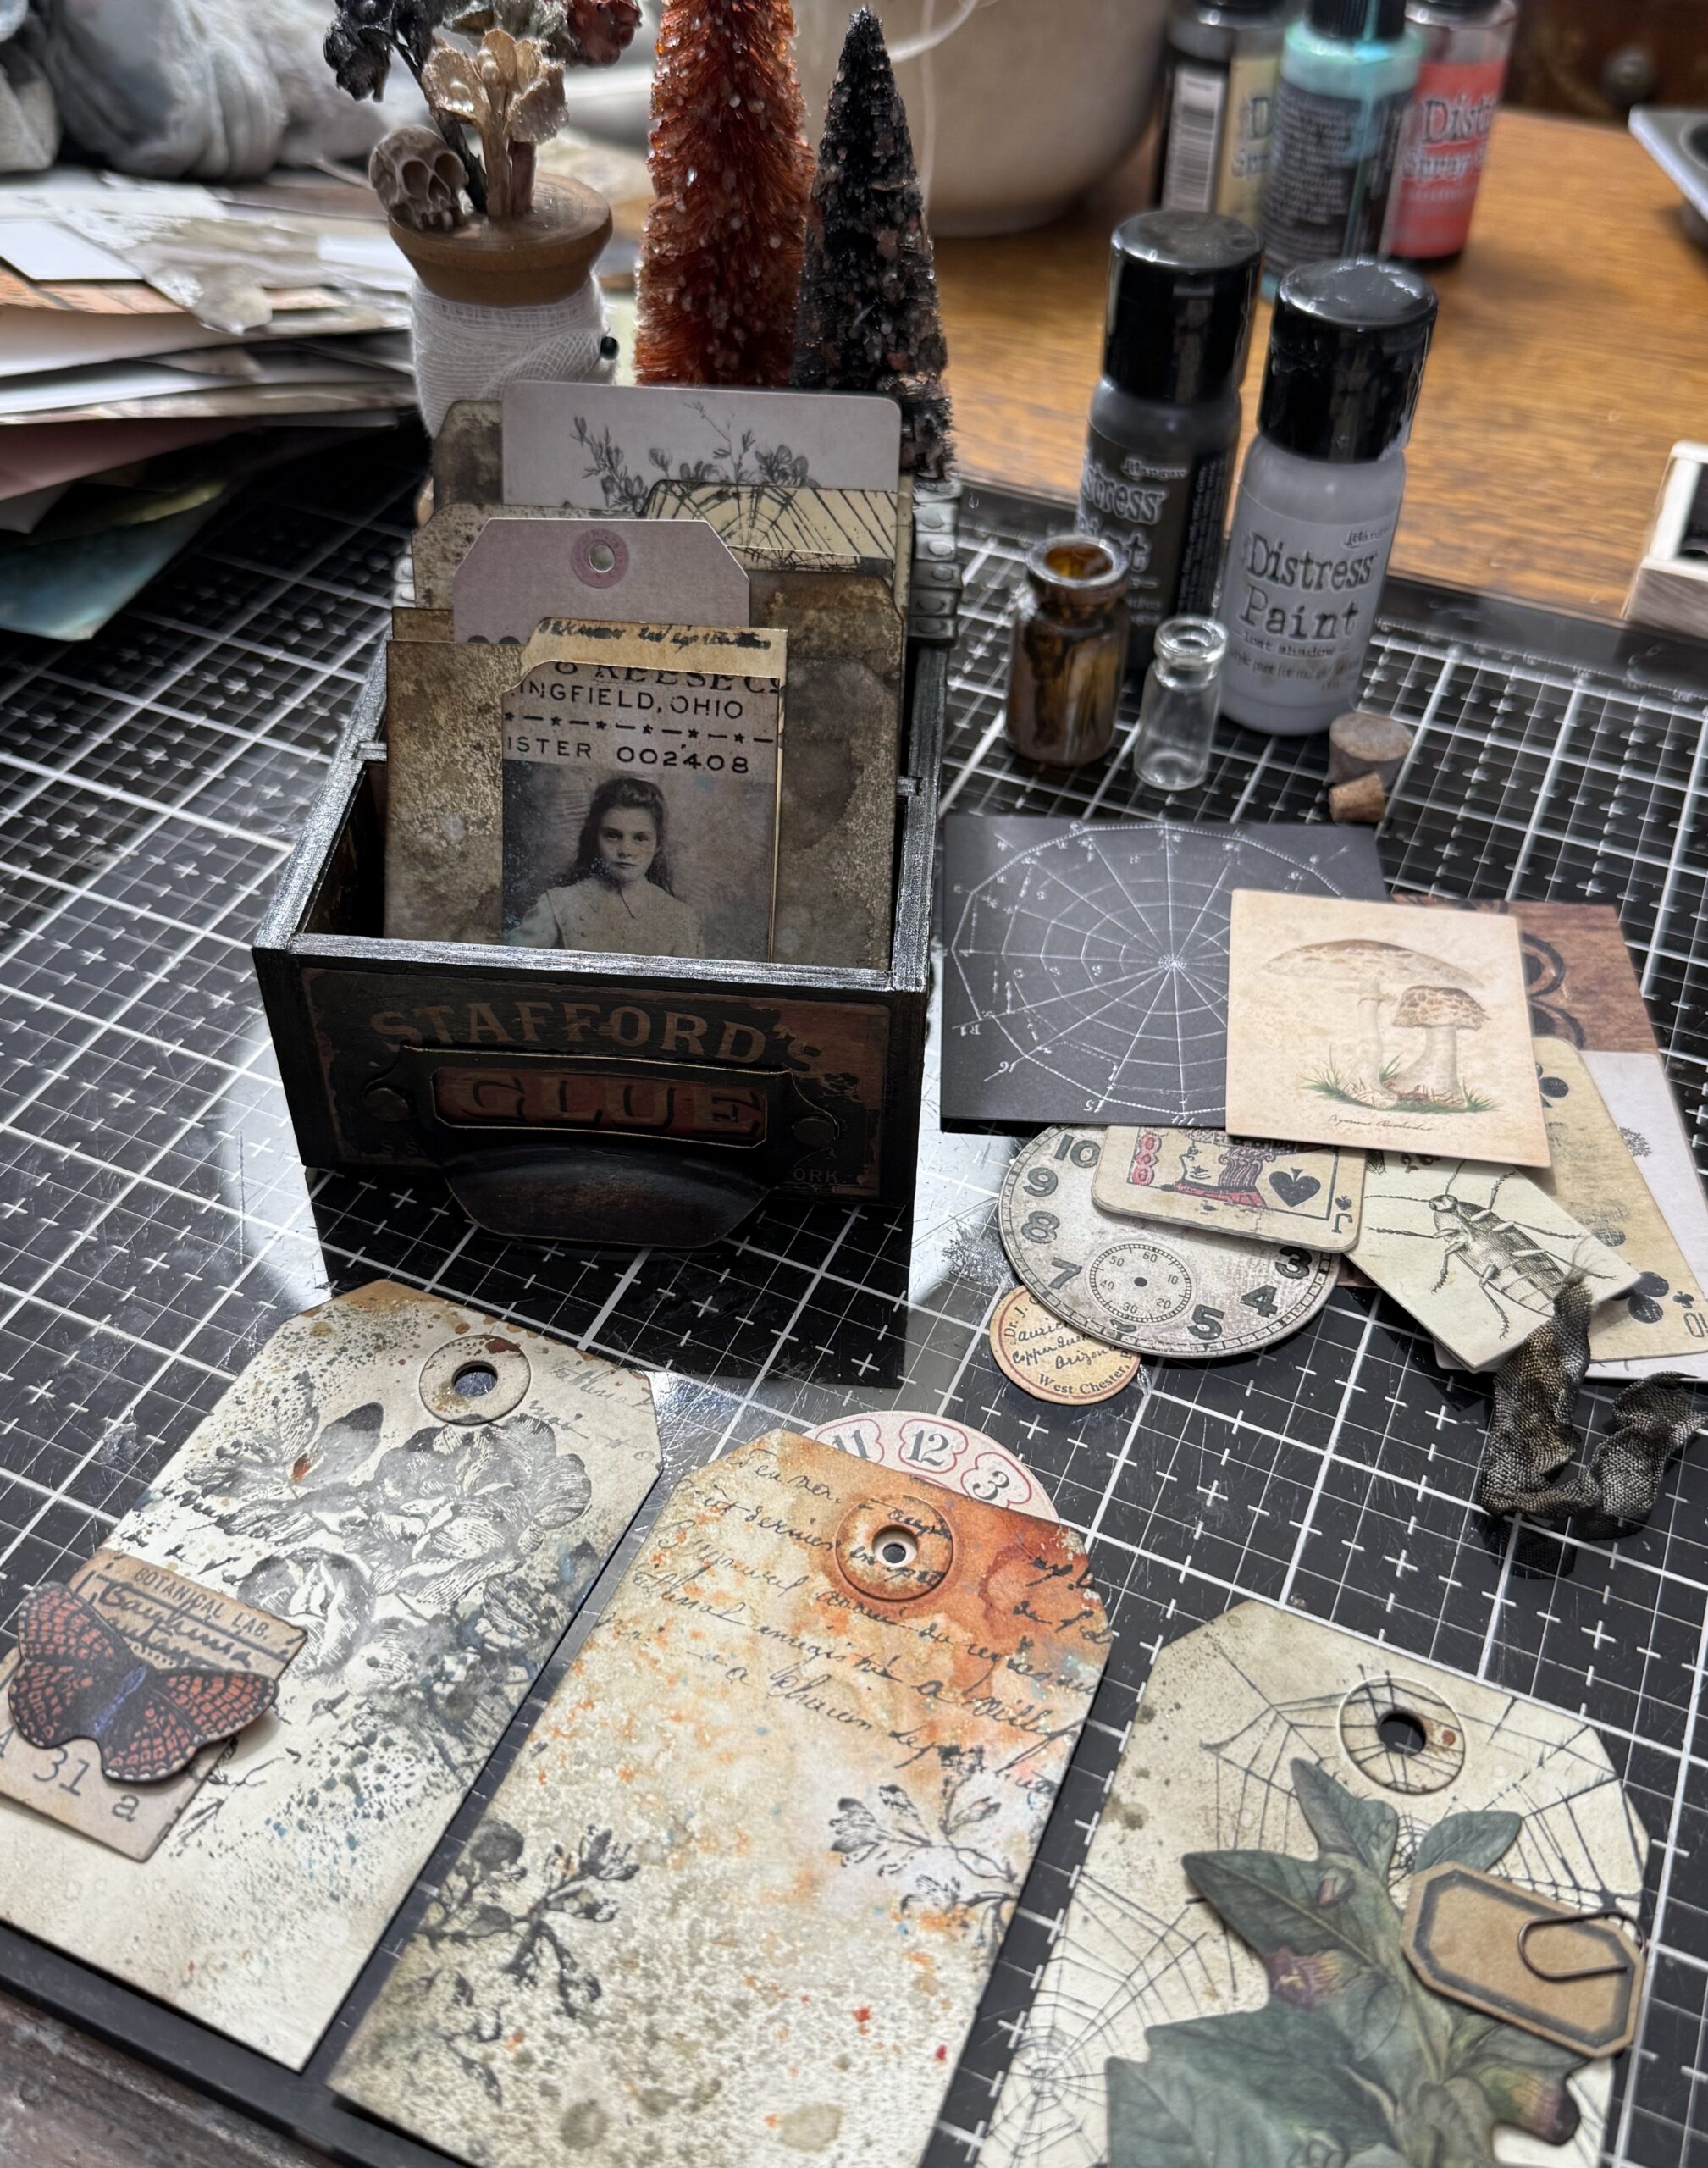
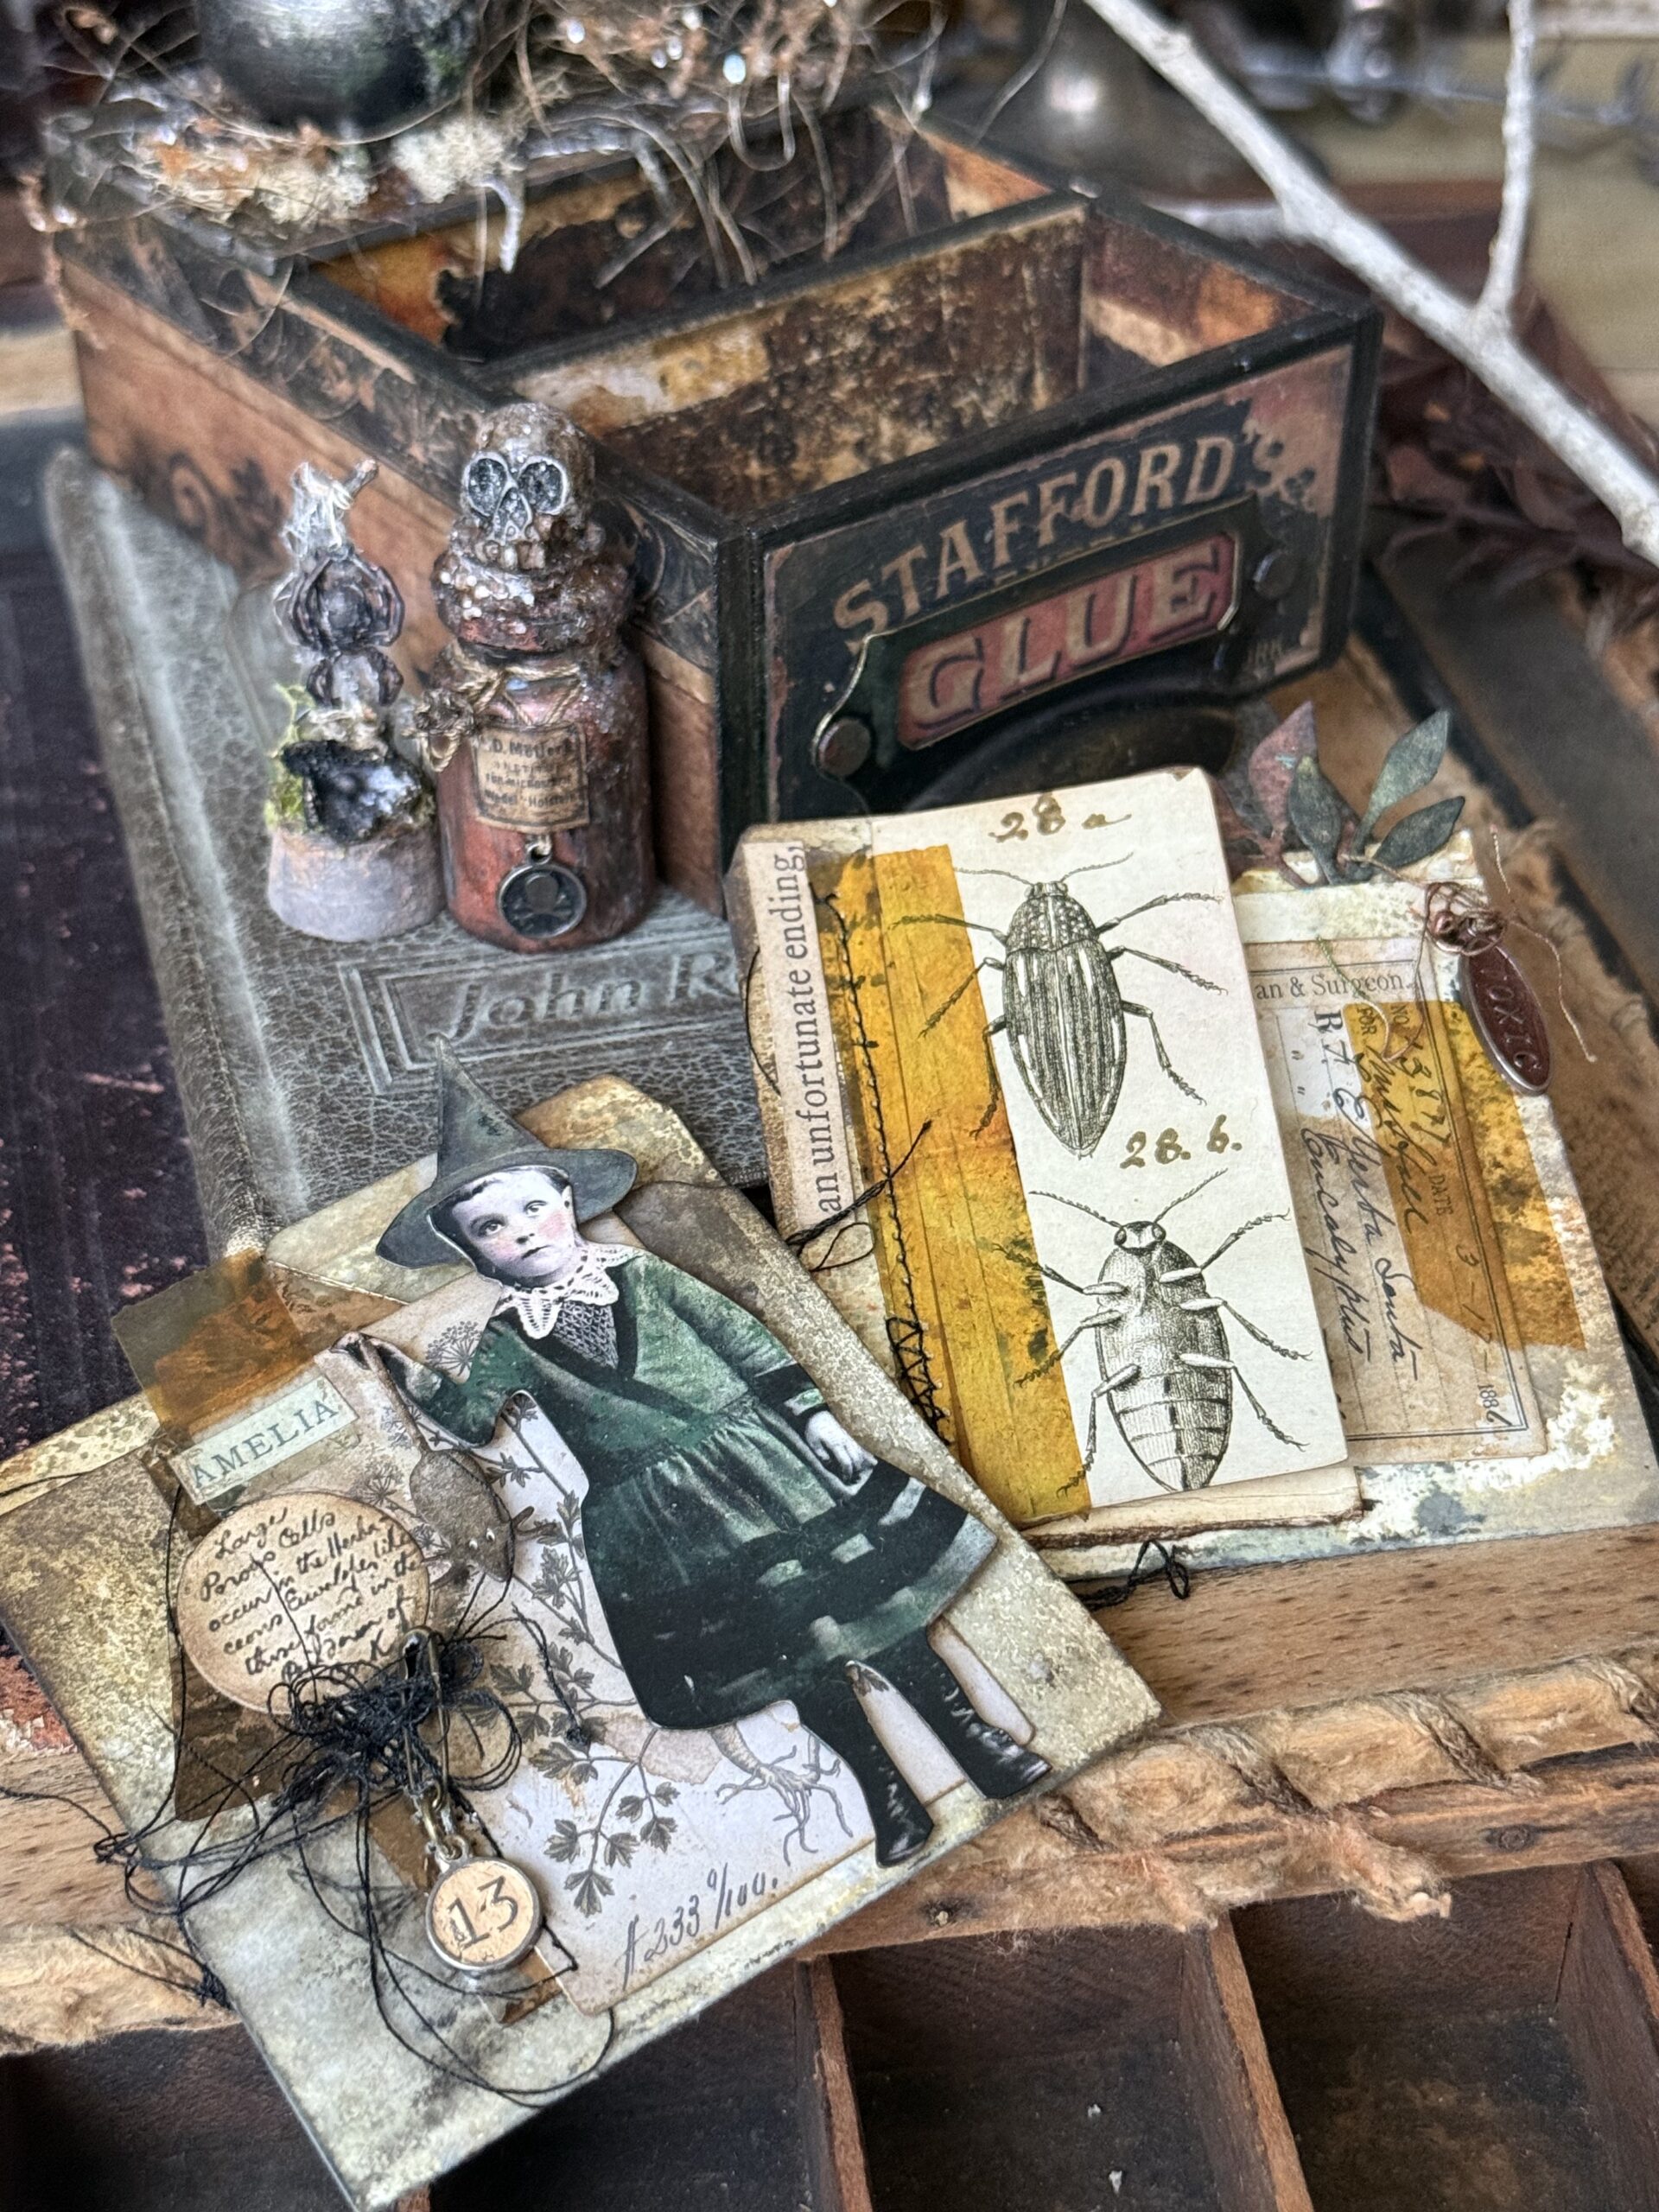
The idea-ology Card File is a great little spot to collect small Halloween tags, cards or little files for display. The little display area at the back was fun to create a little vignette for my themed collection. Here’s a look at all the little goodies I made for inside, I am planning on adding a tag or little file piece here and there throughout the making season…then in the end, I’ll have a cute little collection all displayed for myself!

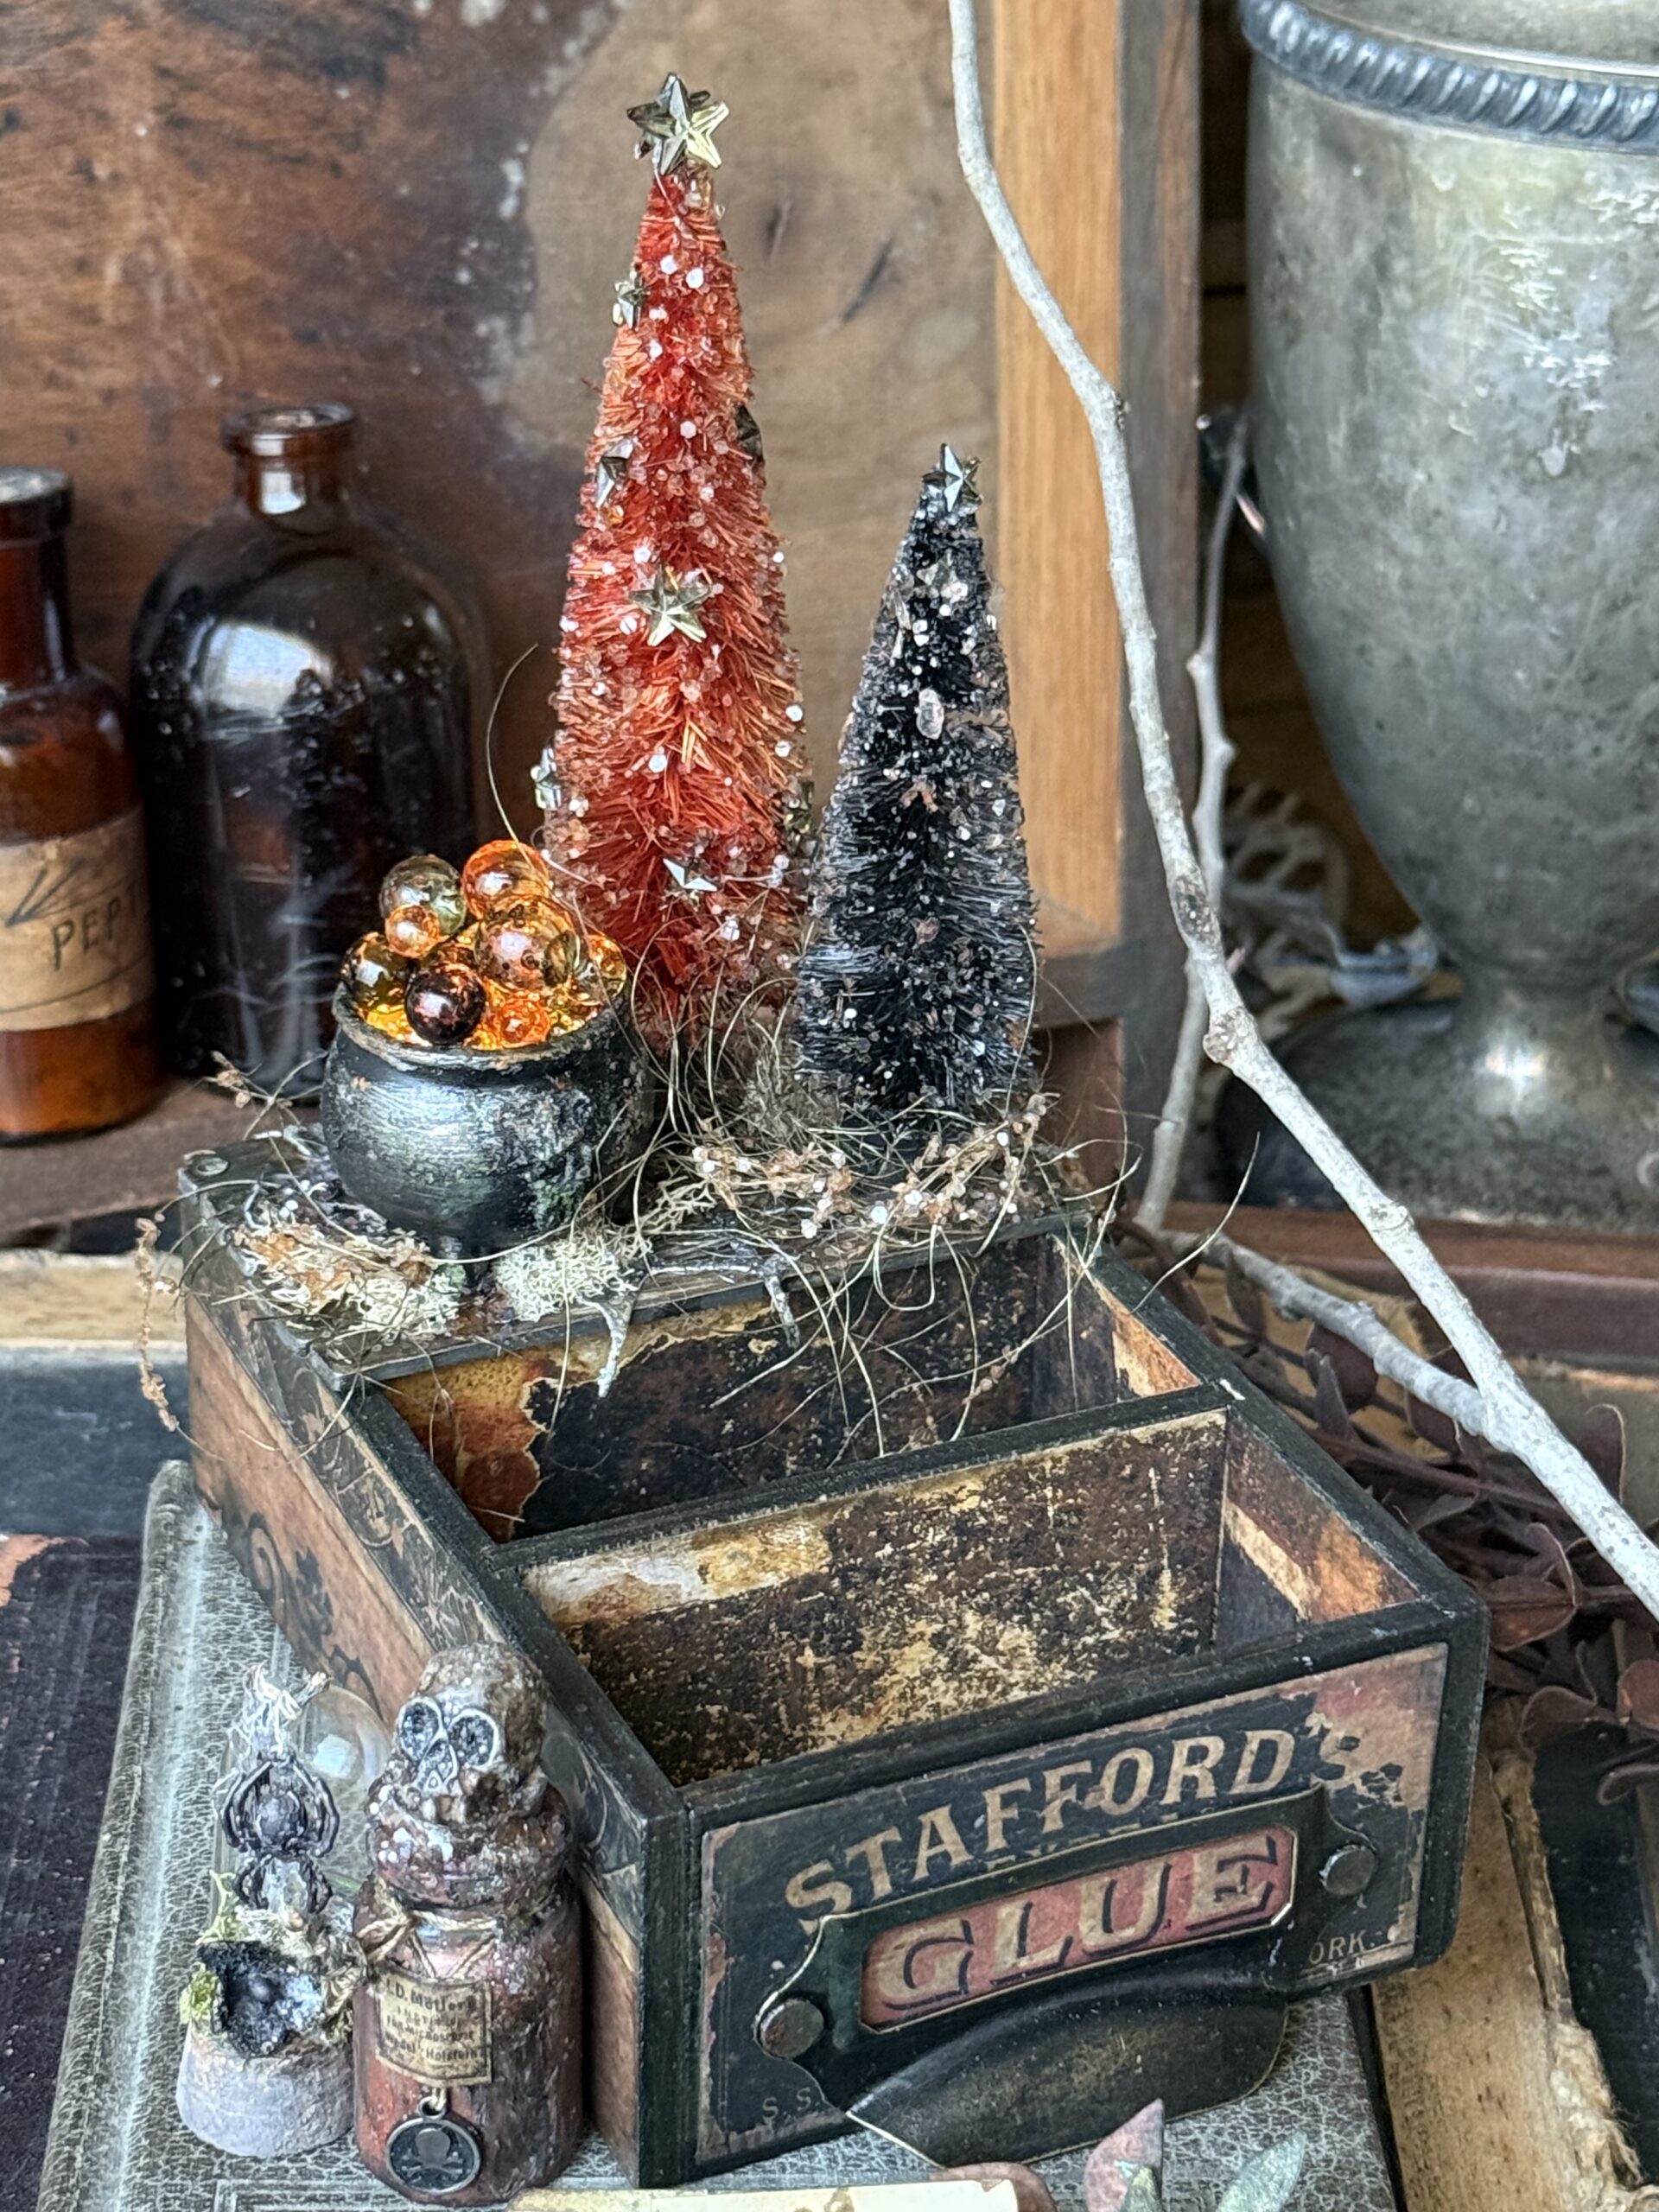
Here’s a look at the little vignette that I created at the back of the card file without the cards inside…it even has some tiny lights inside the cauldron to add to the festive feel!

Let’s take a look at how it all came together!
I started by painting the Card File with Black Soot Distress Paint, then dried it with my heat tool. I didn’t paint the inside of the file because I chose paper from the Halloween Backdrops to cover the two front portions of the box and the outside sides.
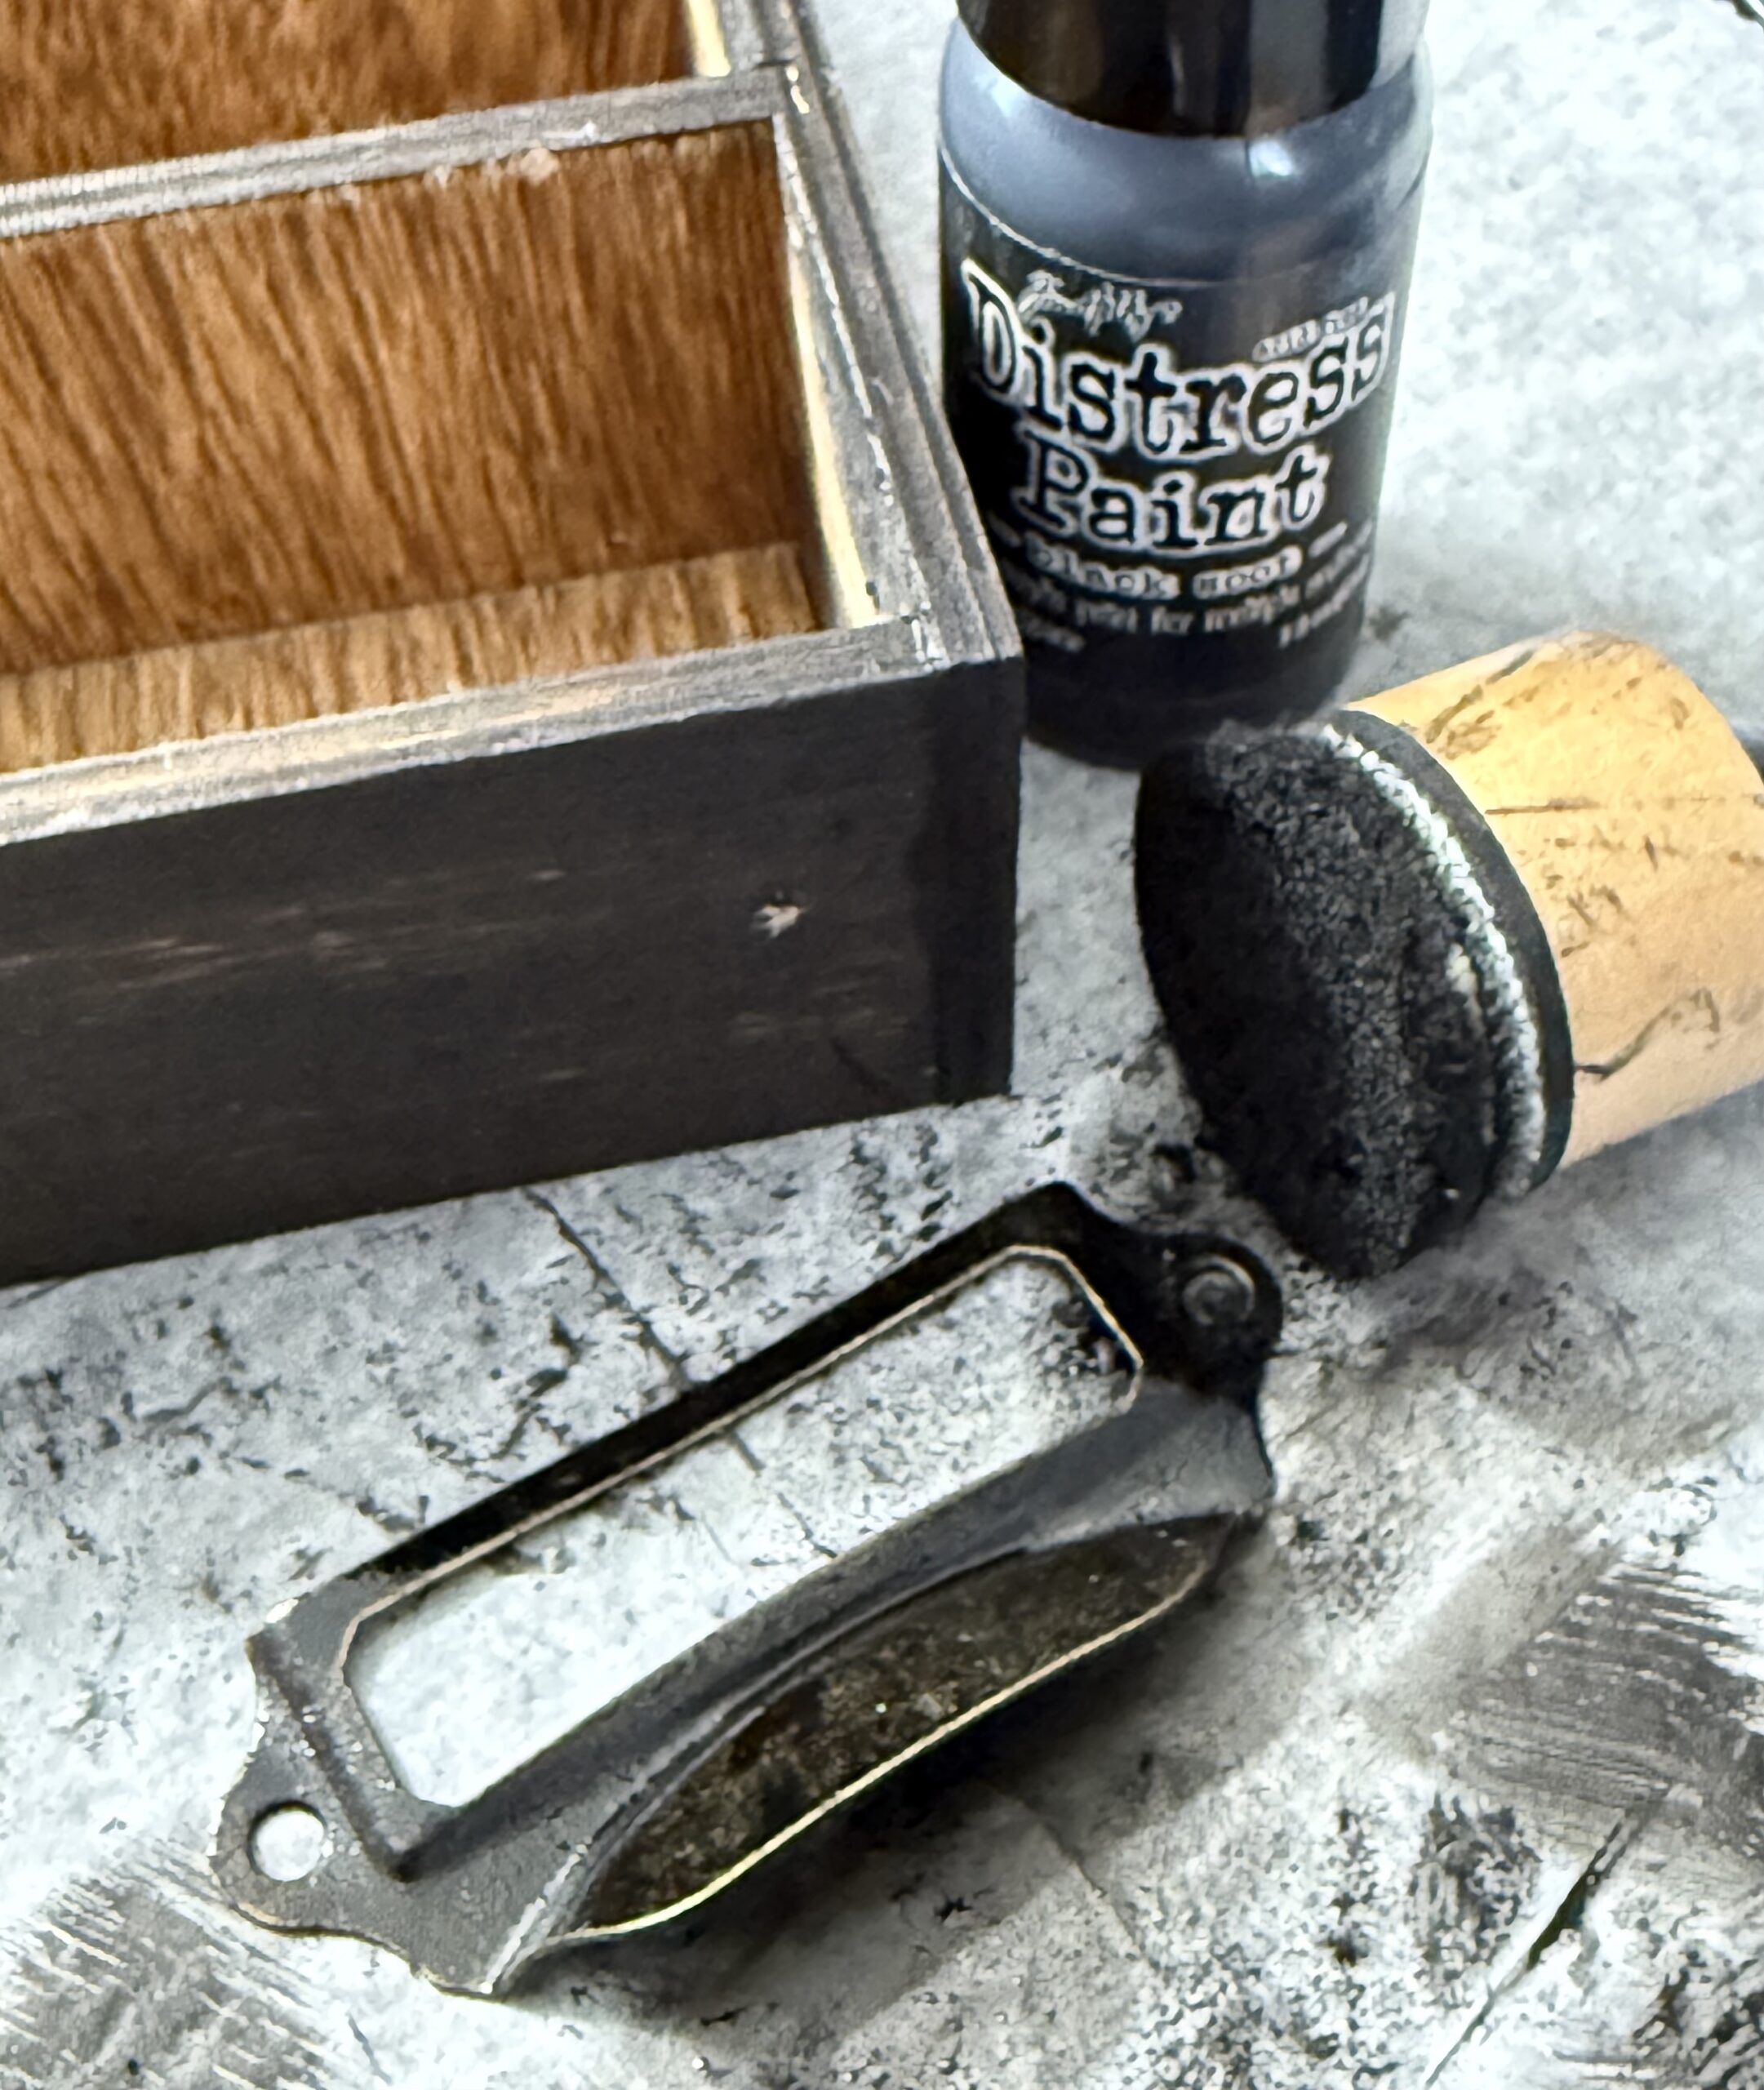
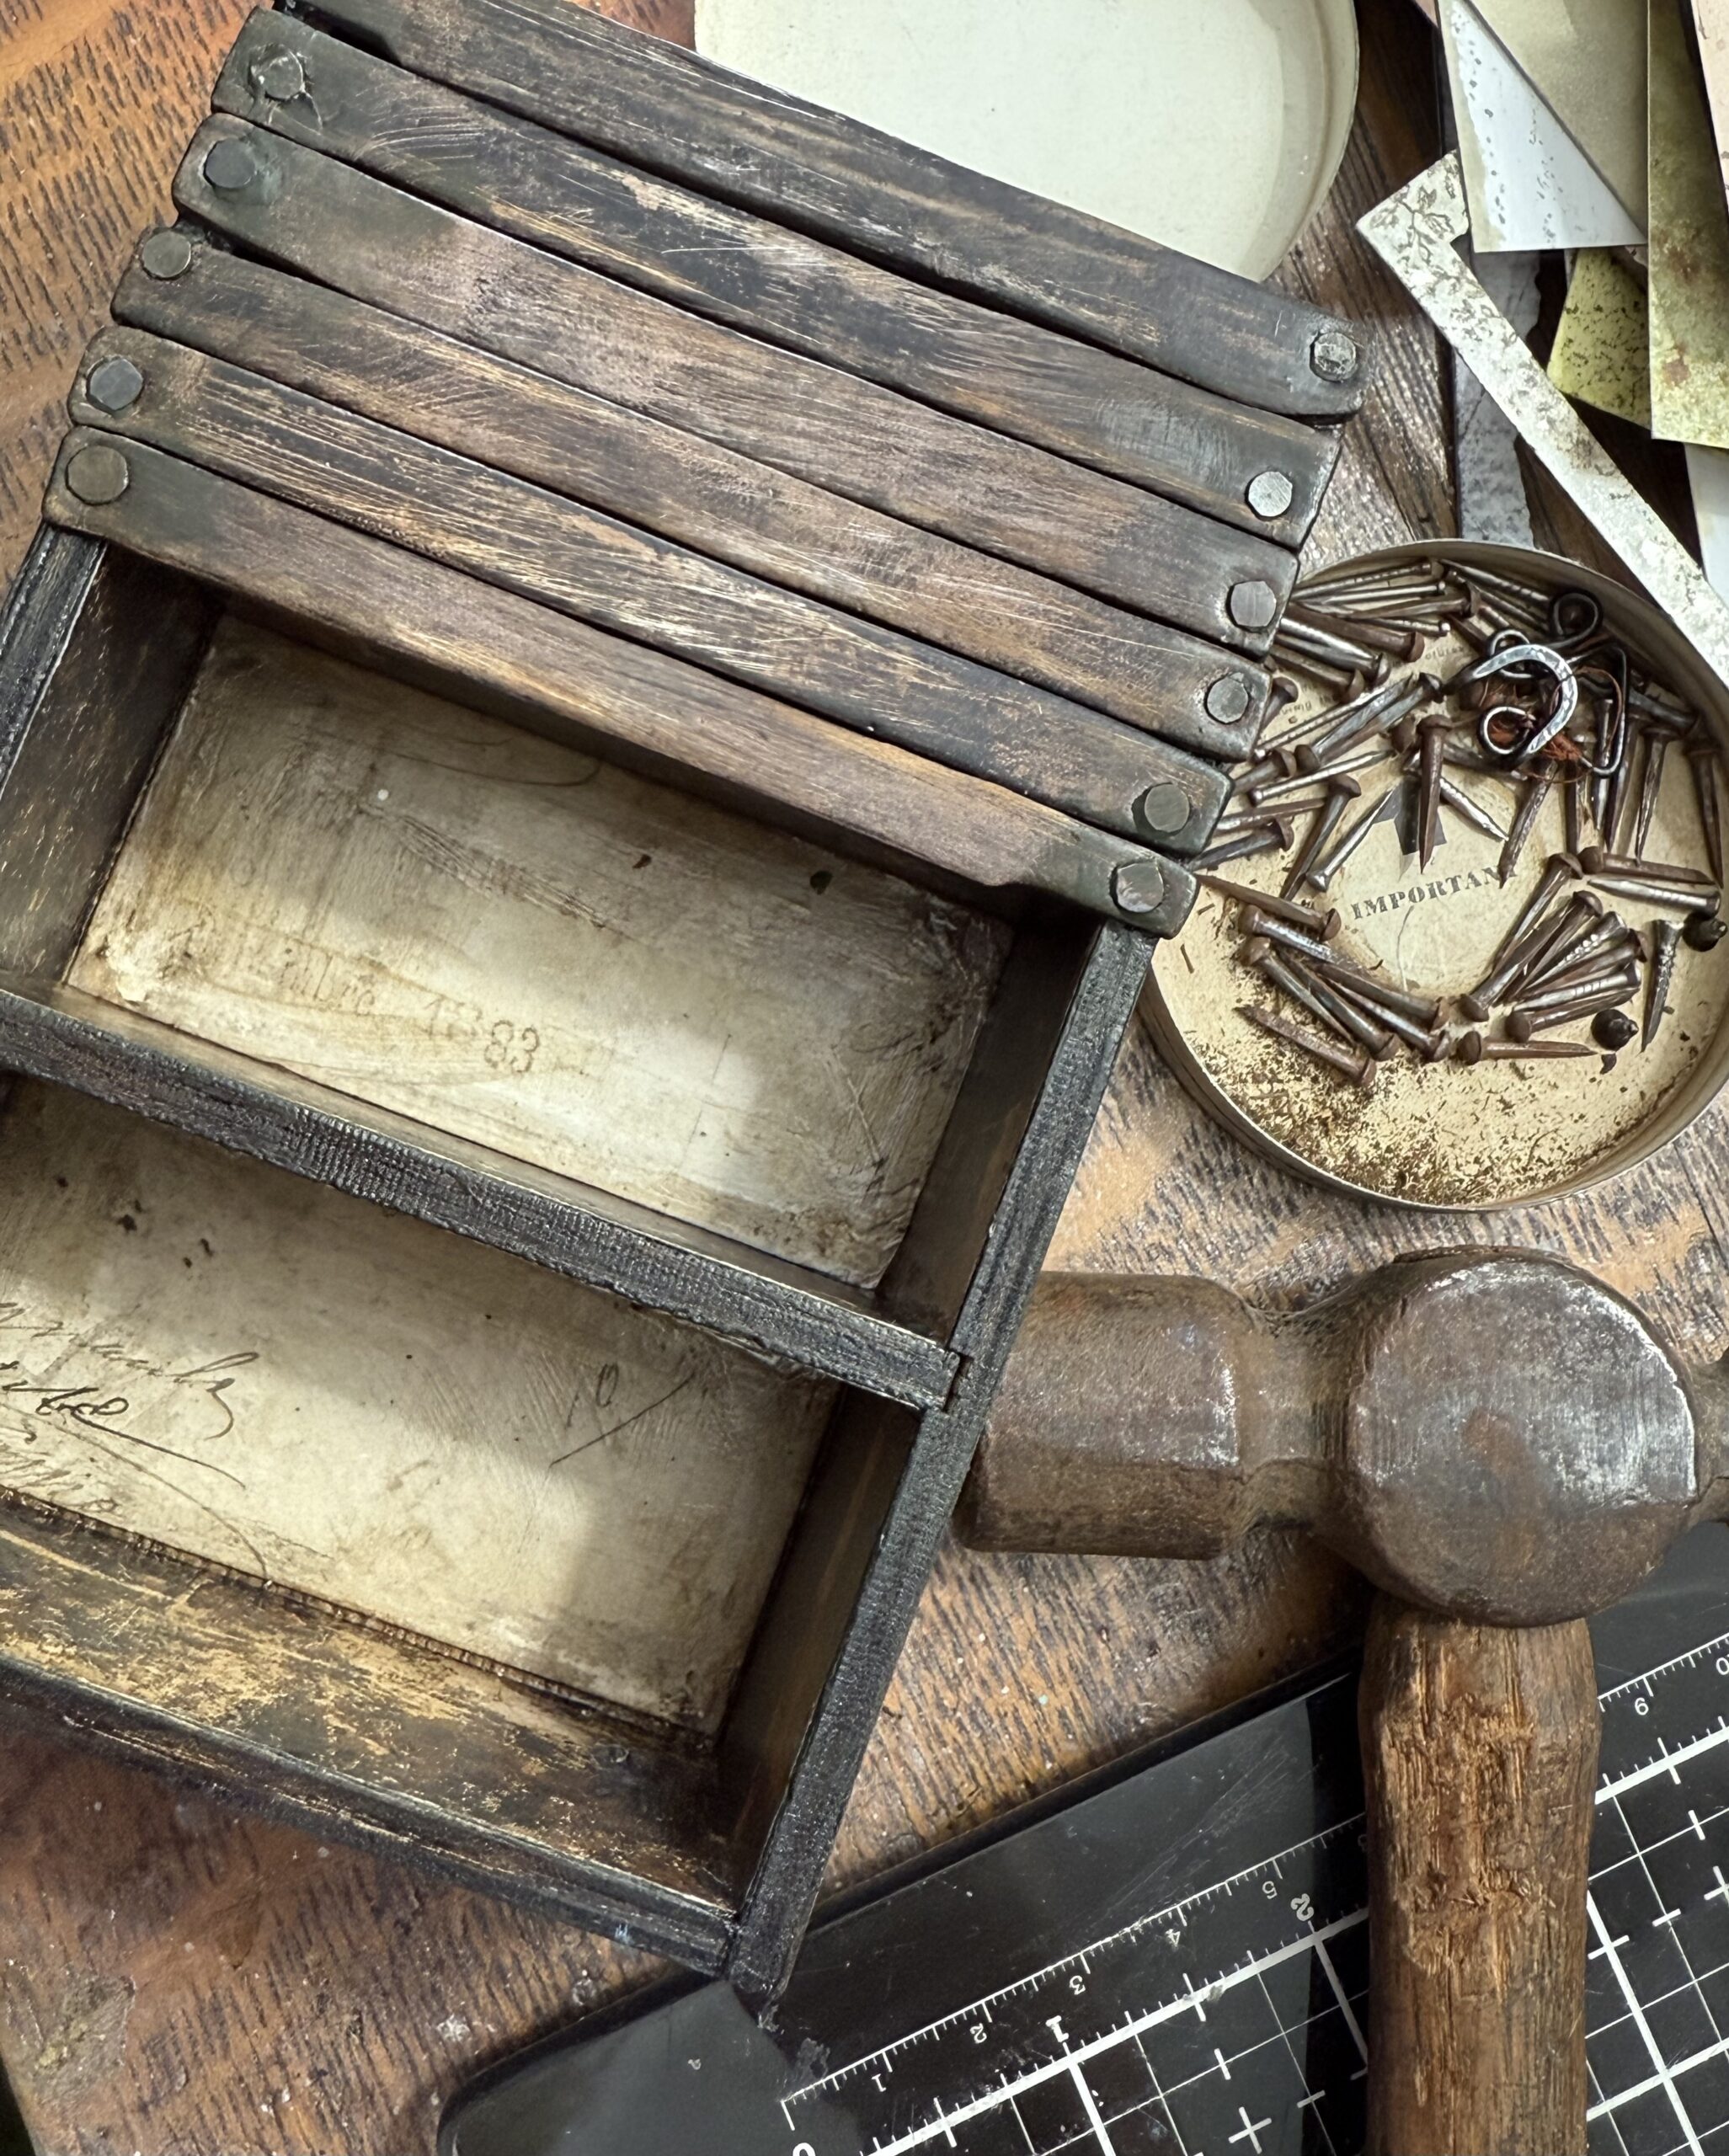
I chose 6 of the wooden planks from the Halloween Baseboard pack. I painted over top of the planks with Back Soot Paint, then dried them with my heat tool, as soon as the planks were dry, I used my sanding disk to sand down and create scratches, then using a blending tool and Gathered Twigs Distress Ink to fill in and fill in some of the white scratches created by the sanding disk.

Next, I adhered the planks in place using distress collage medium. I also picked out some papers for the insides and outside of the card file, mine were from the Halloween Backdrops and the front piece from the Halloween Ephemera pack. Those were then trimmed to fit all the sides, then adhered to the box using collage medium.
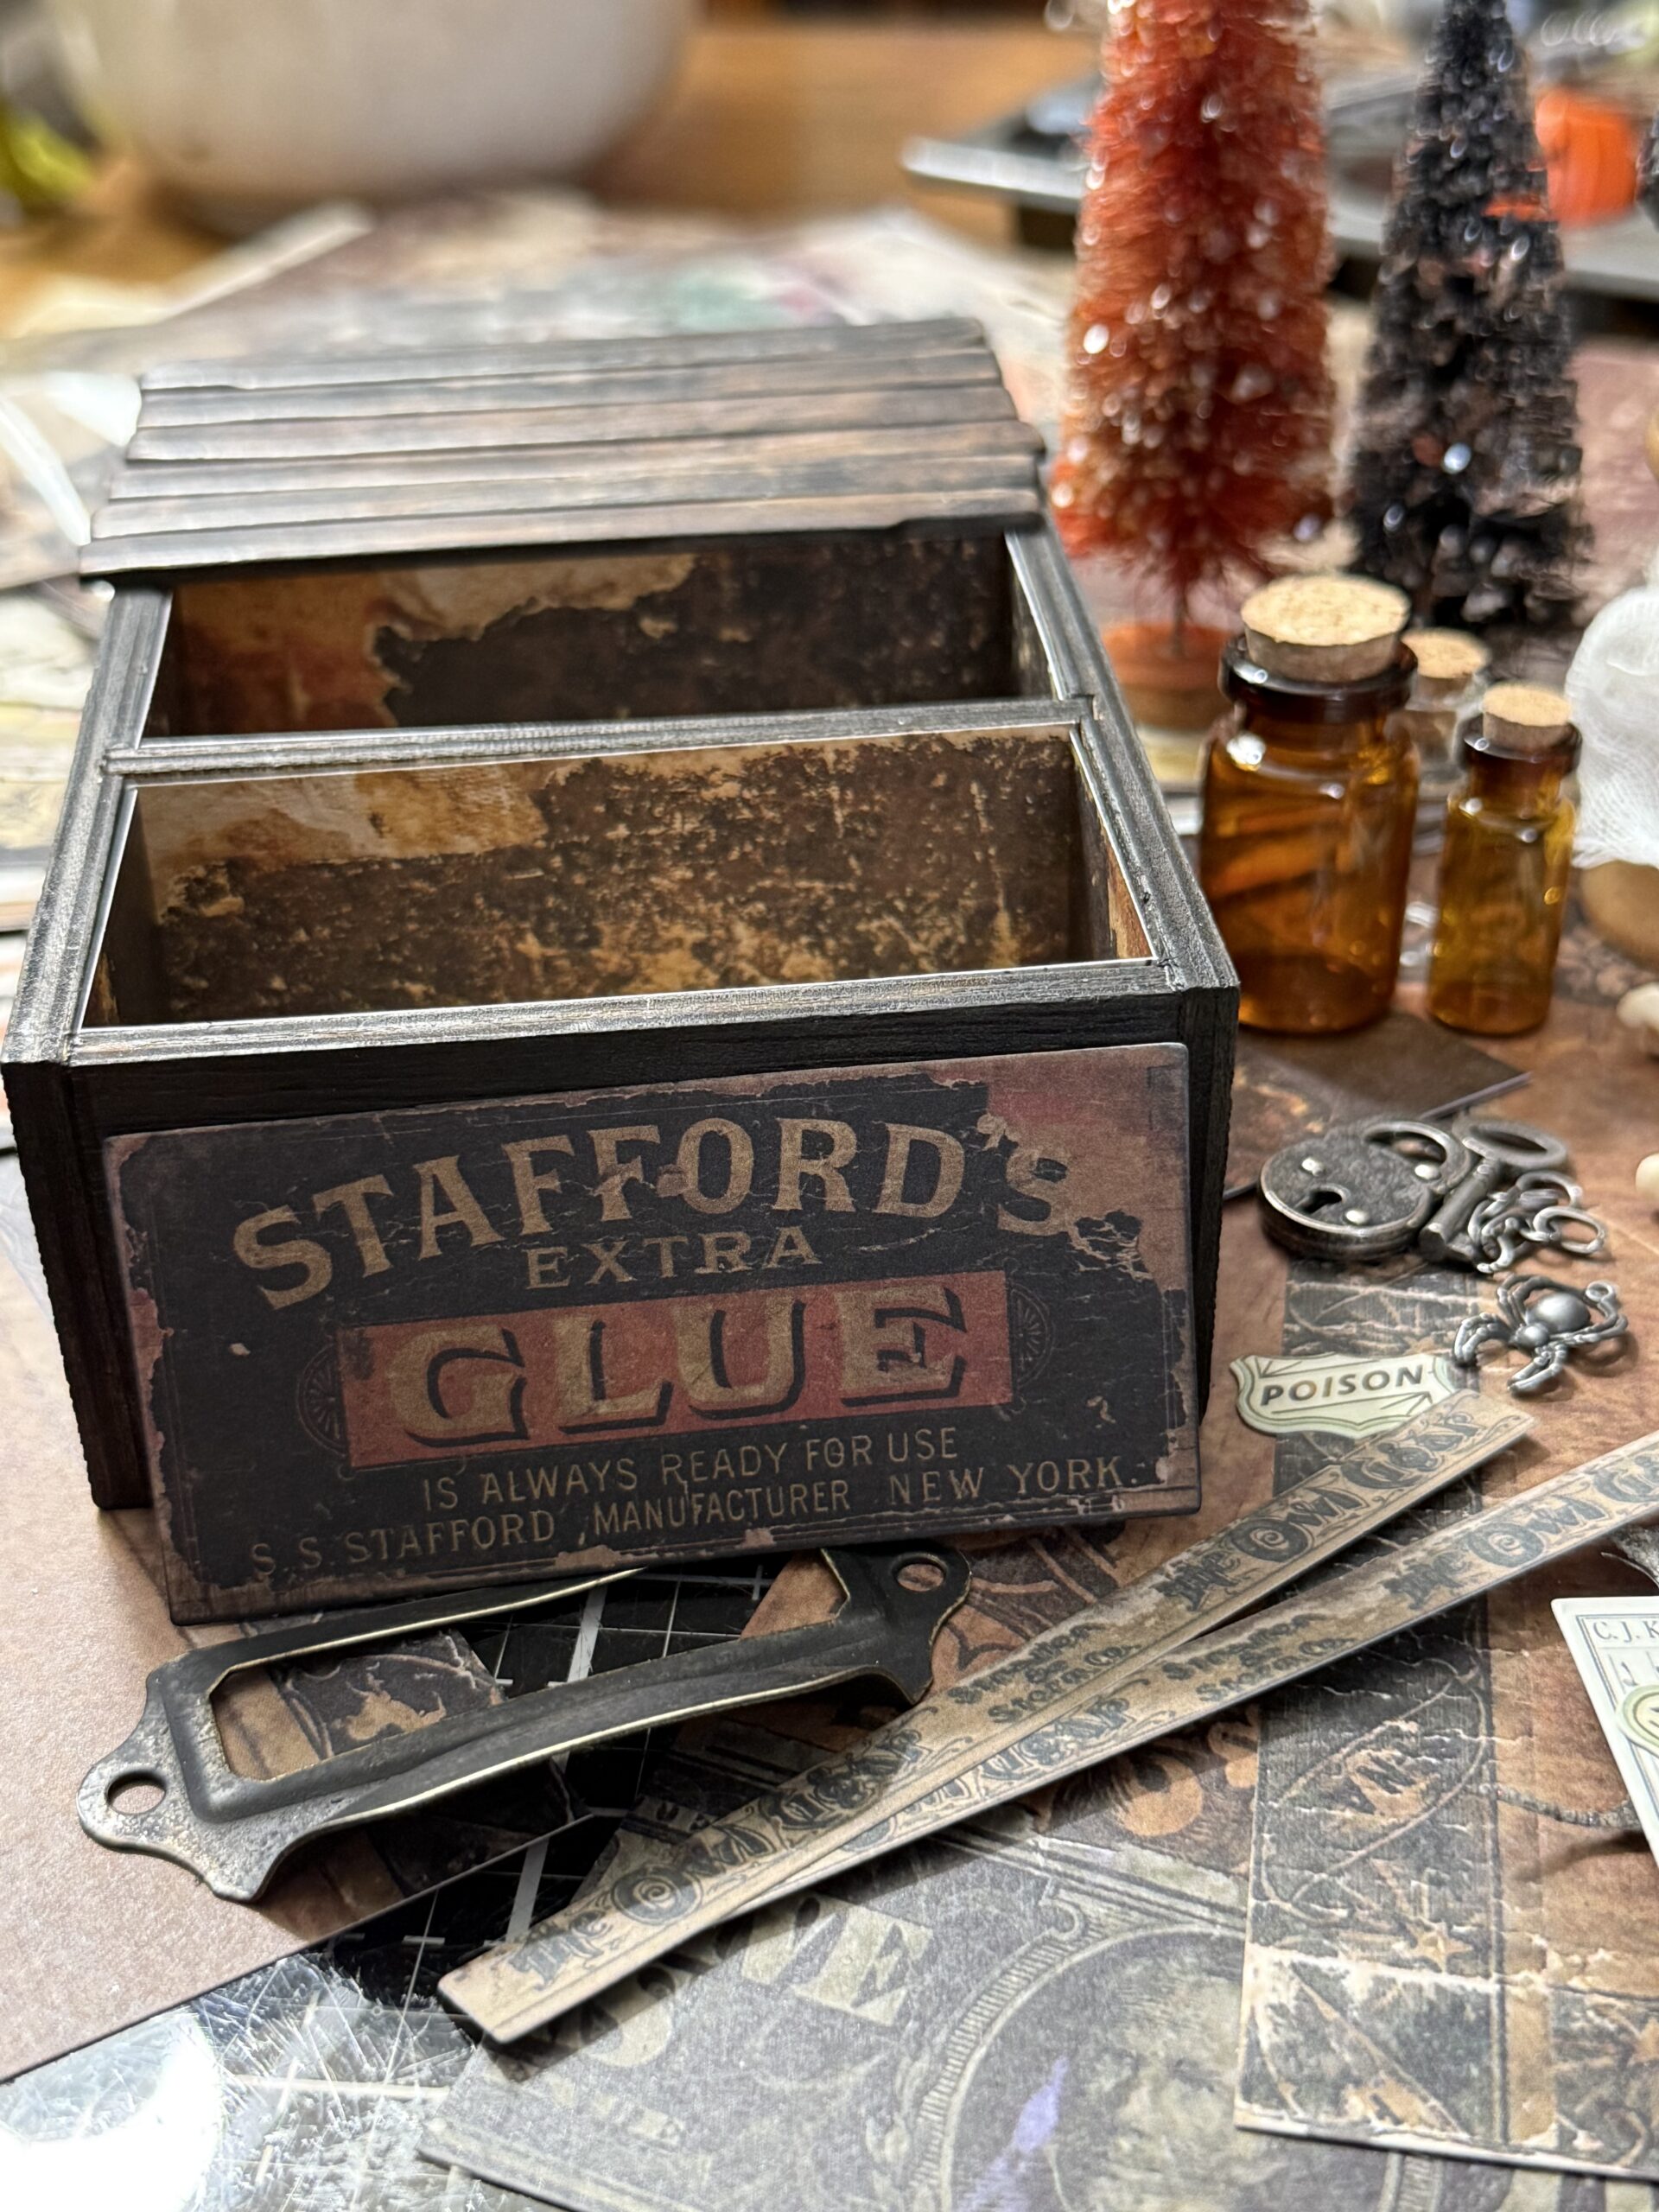
I hammered the wood planks using some vintage nails and a hammer, and instantly I have a surface for a vignette. Next, I made the tags and files.
Quick Note: As I started my project, I didn’t know that I would eventually want to add tiny lights inside a cauldron, so, I didn’t preplan and had to add holes with a dremmel tool after the flooring was in place. So, if I were doing in again, I would have decided where the cauldron would be and would have punched a hole in one of the planks, and added a hole at the back of the box to lace in the tiny light string and place the cauldron. So, my directions I am writing for this project today, reflect how I did it. 🙂
The tags and files were made using Distress Mixed Media Paper and Distress Mini Mixed Media Tags. I trimmed the tags a bit shorter so that they would fit in my box and would be short enough to see a little vignette at the back. The little file folders were made using the Sizzix File Folder from the Specimen Die Set. I cut them, then trimmed the size down to fit within the file section. I used a variety of sprays to color the backgrounds and tags and stamped some Halloween images using a variety of Tim Holtz Stamp Sets.
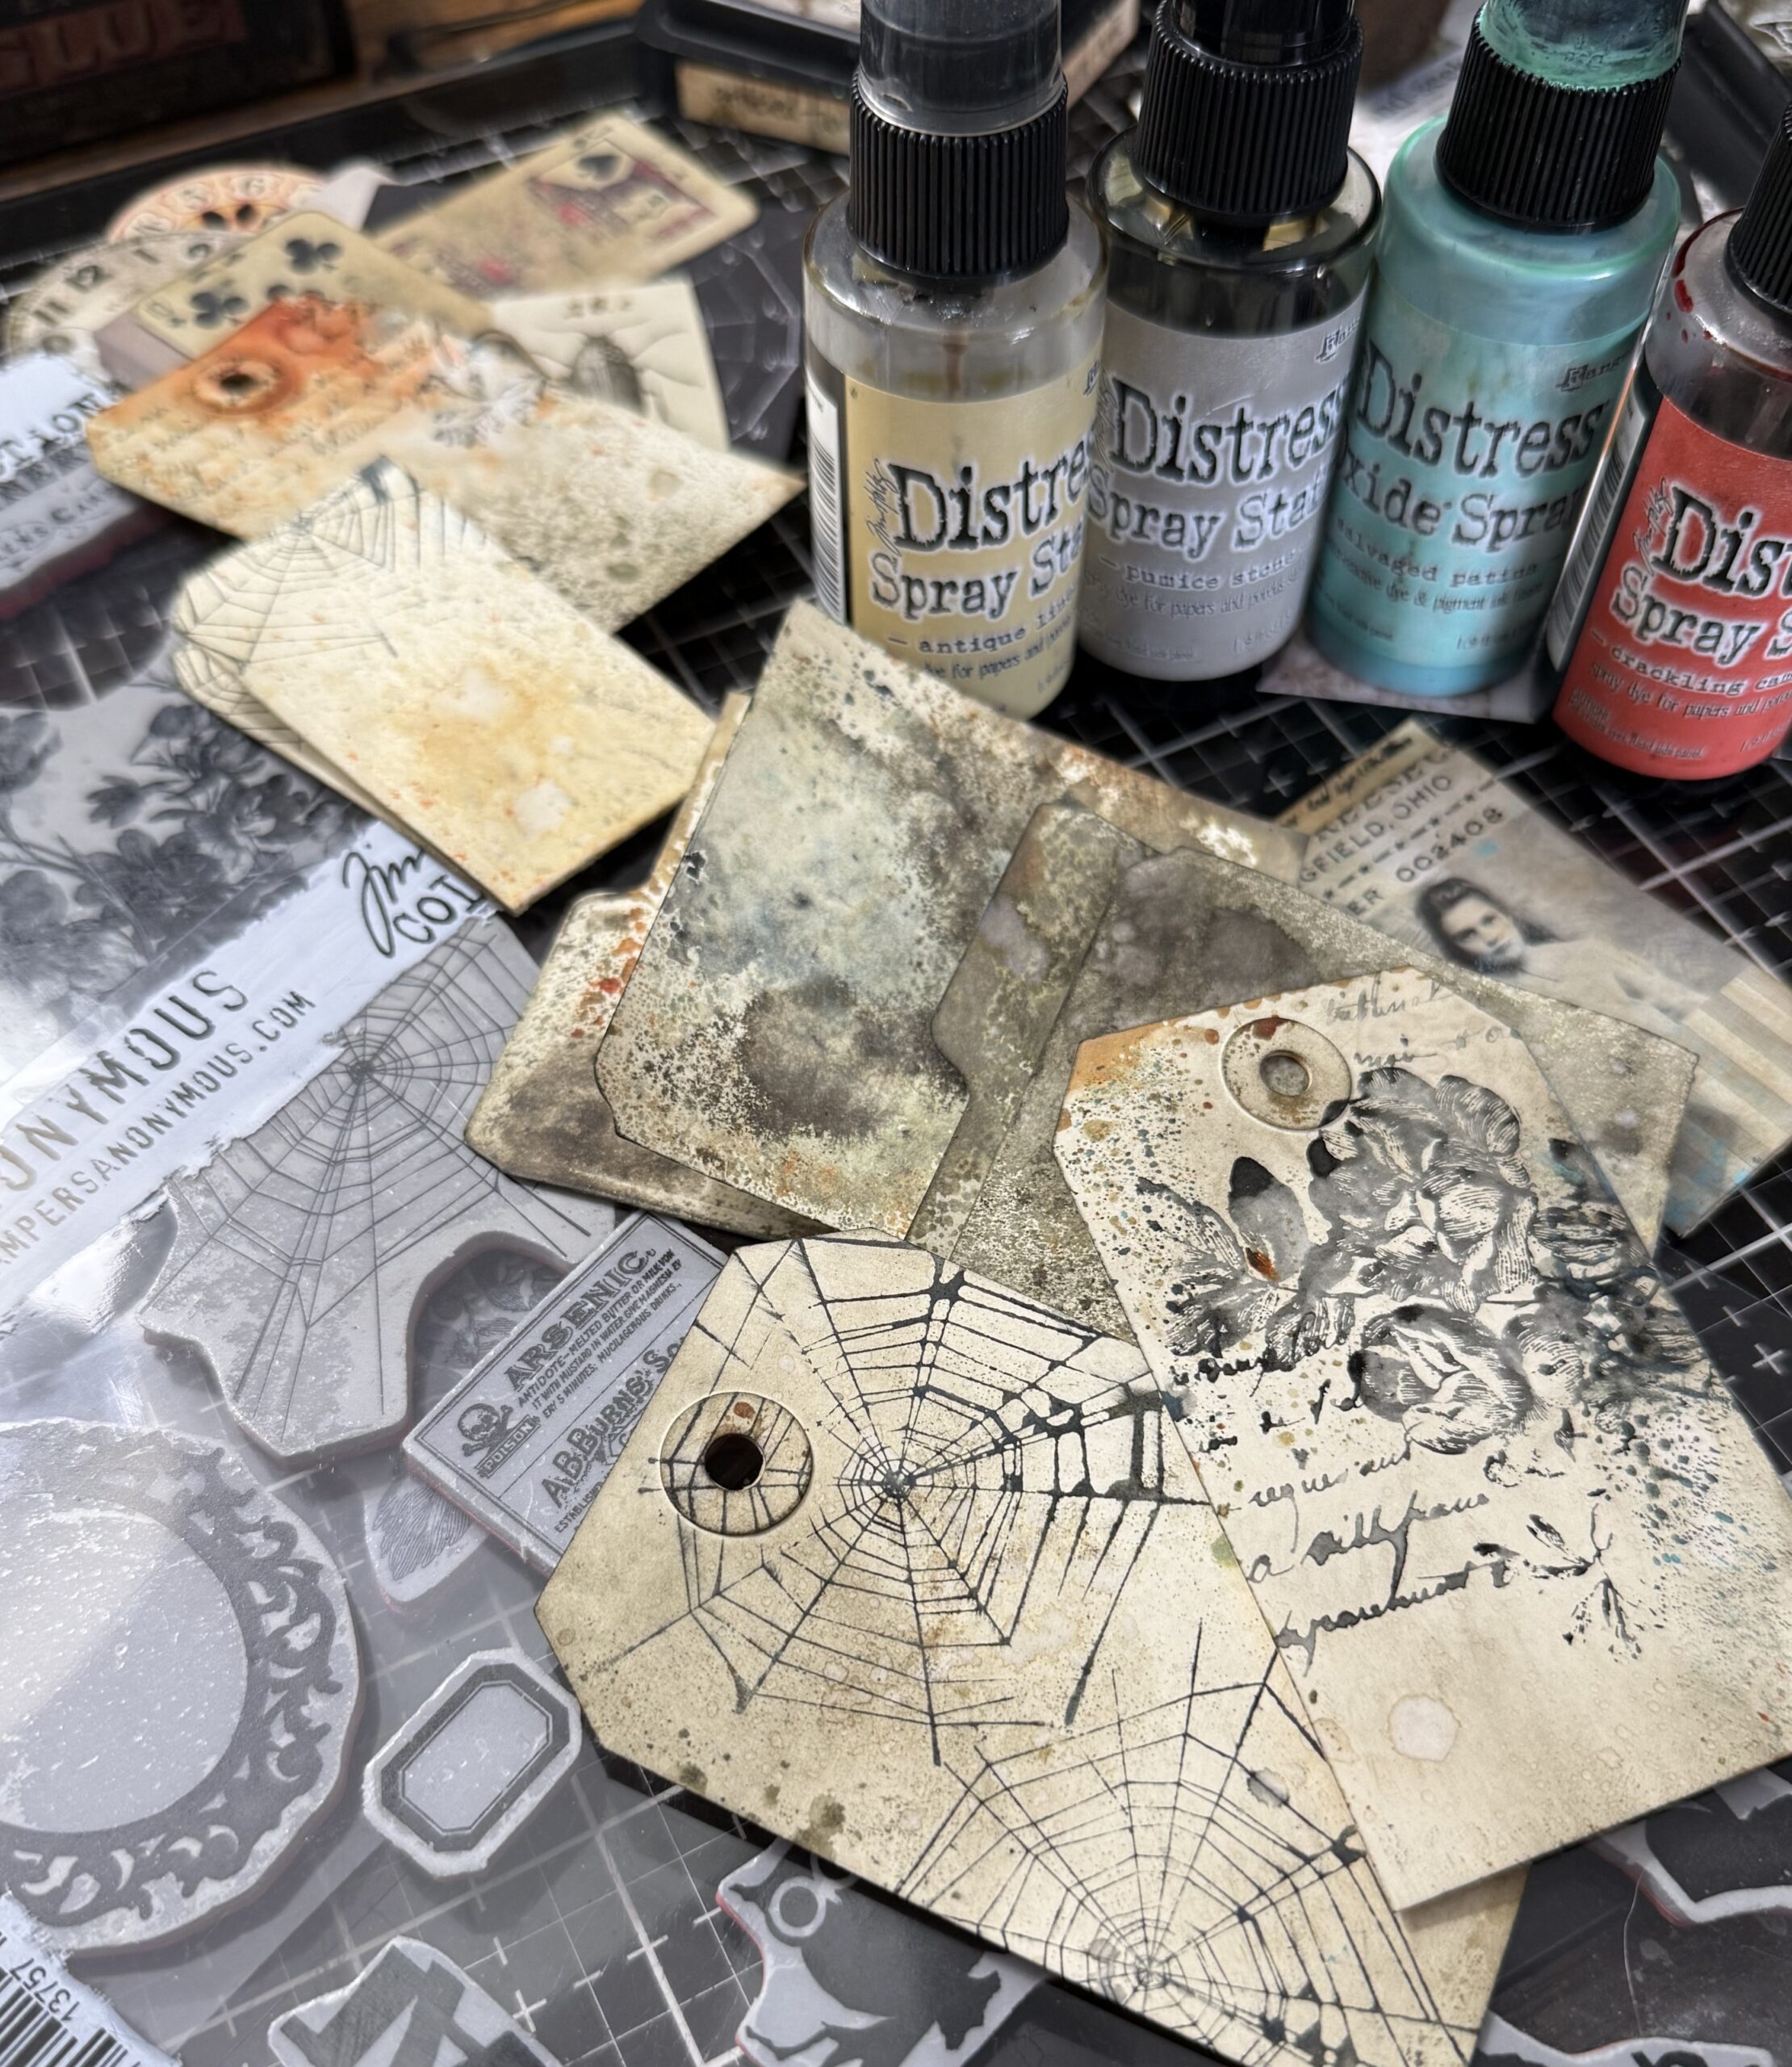
I sorted through the Halloween Ephemera packs and pulled some of my favorite pieces, not knowing whether I’d use them or not…I just picked the ones I really liked. Some I used, some I didn’t..you do you and pick the ones that are your favorites.
My tags above went from those, to the finished pieces below… I stitched black thread around each of the stamps using my sewing machine and added a variety of ephemera, clipping stickers, mummy cloth, ribbons and cello tape.
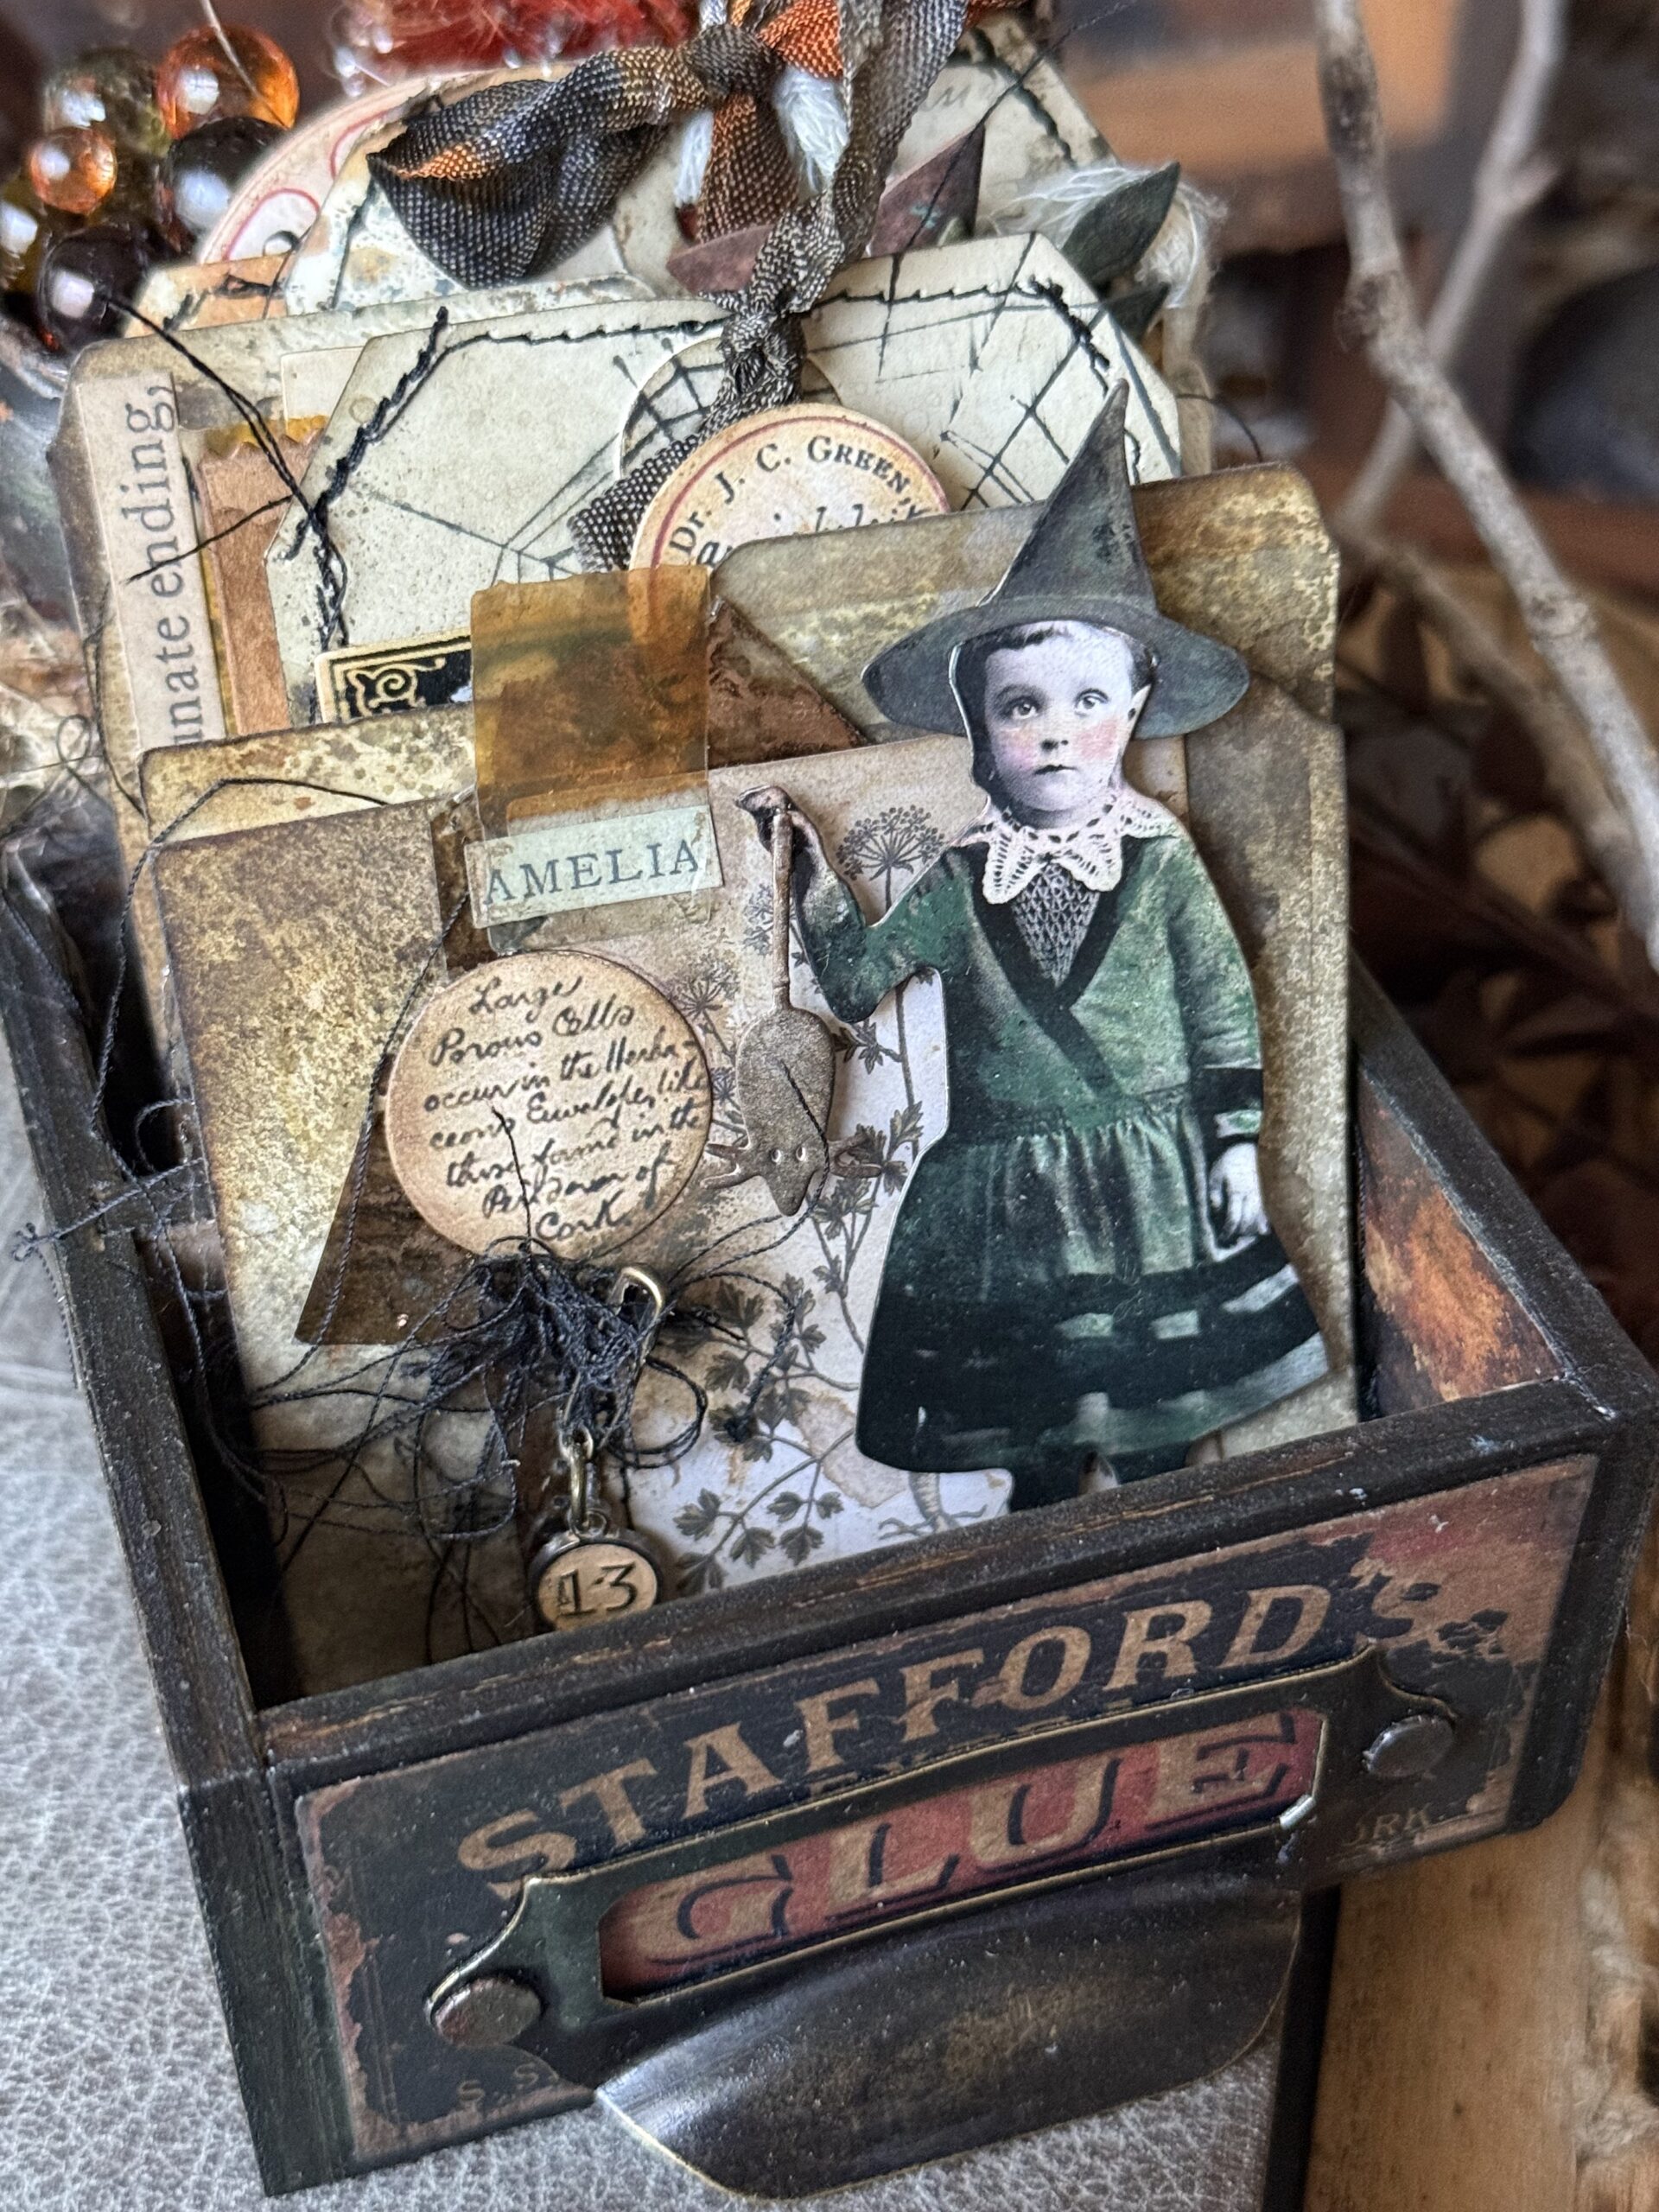
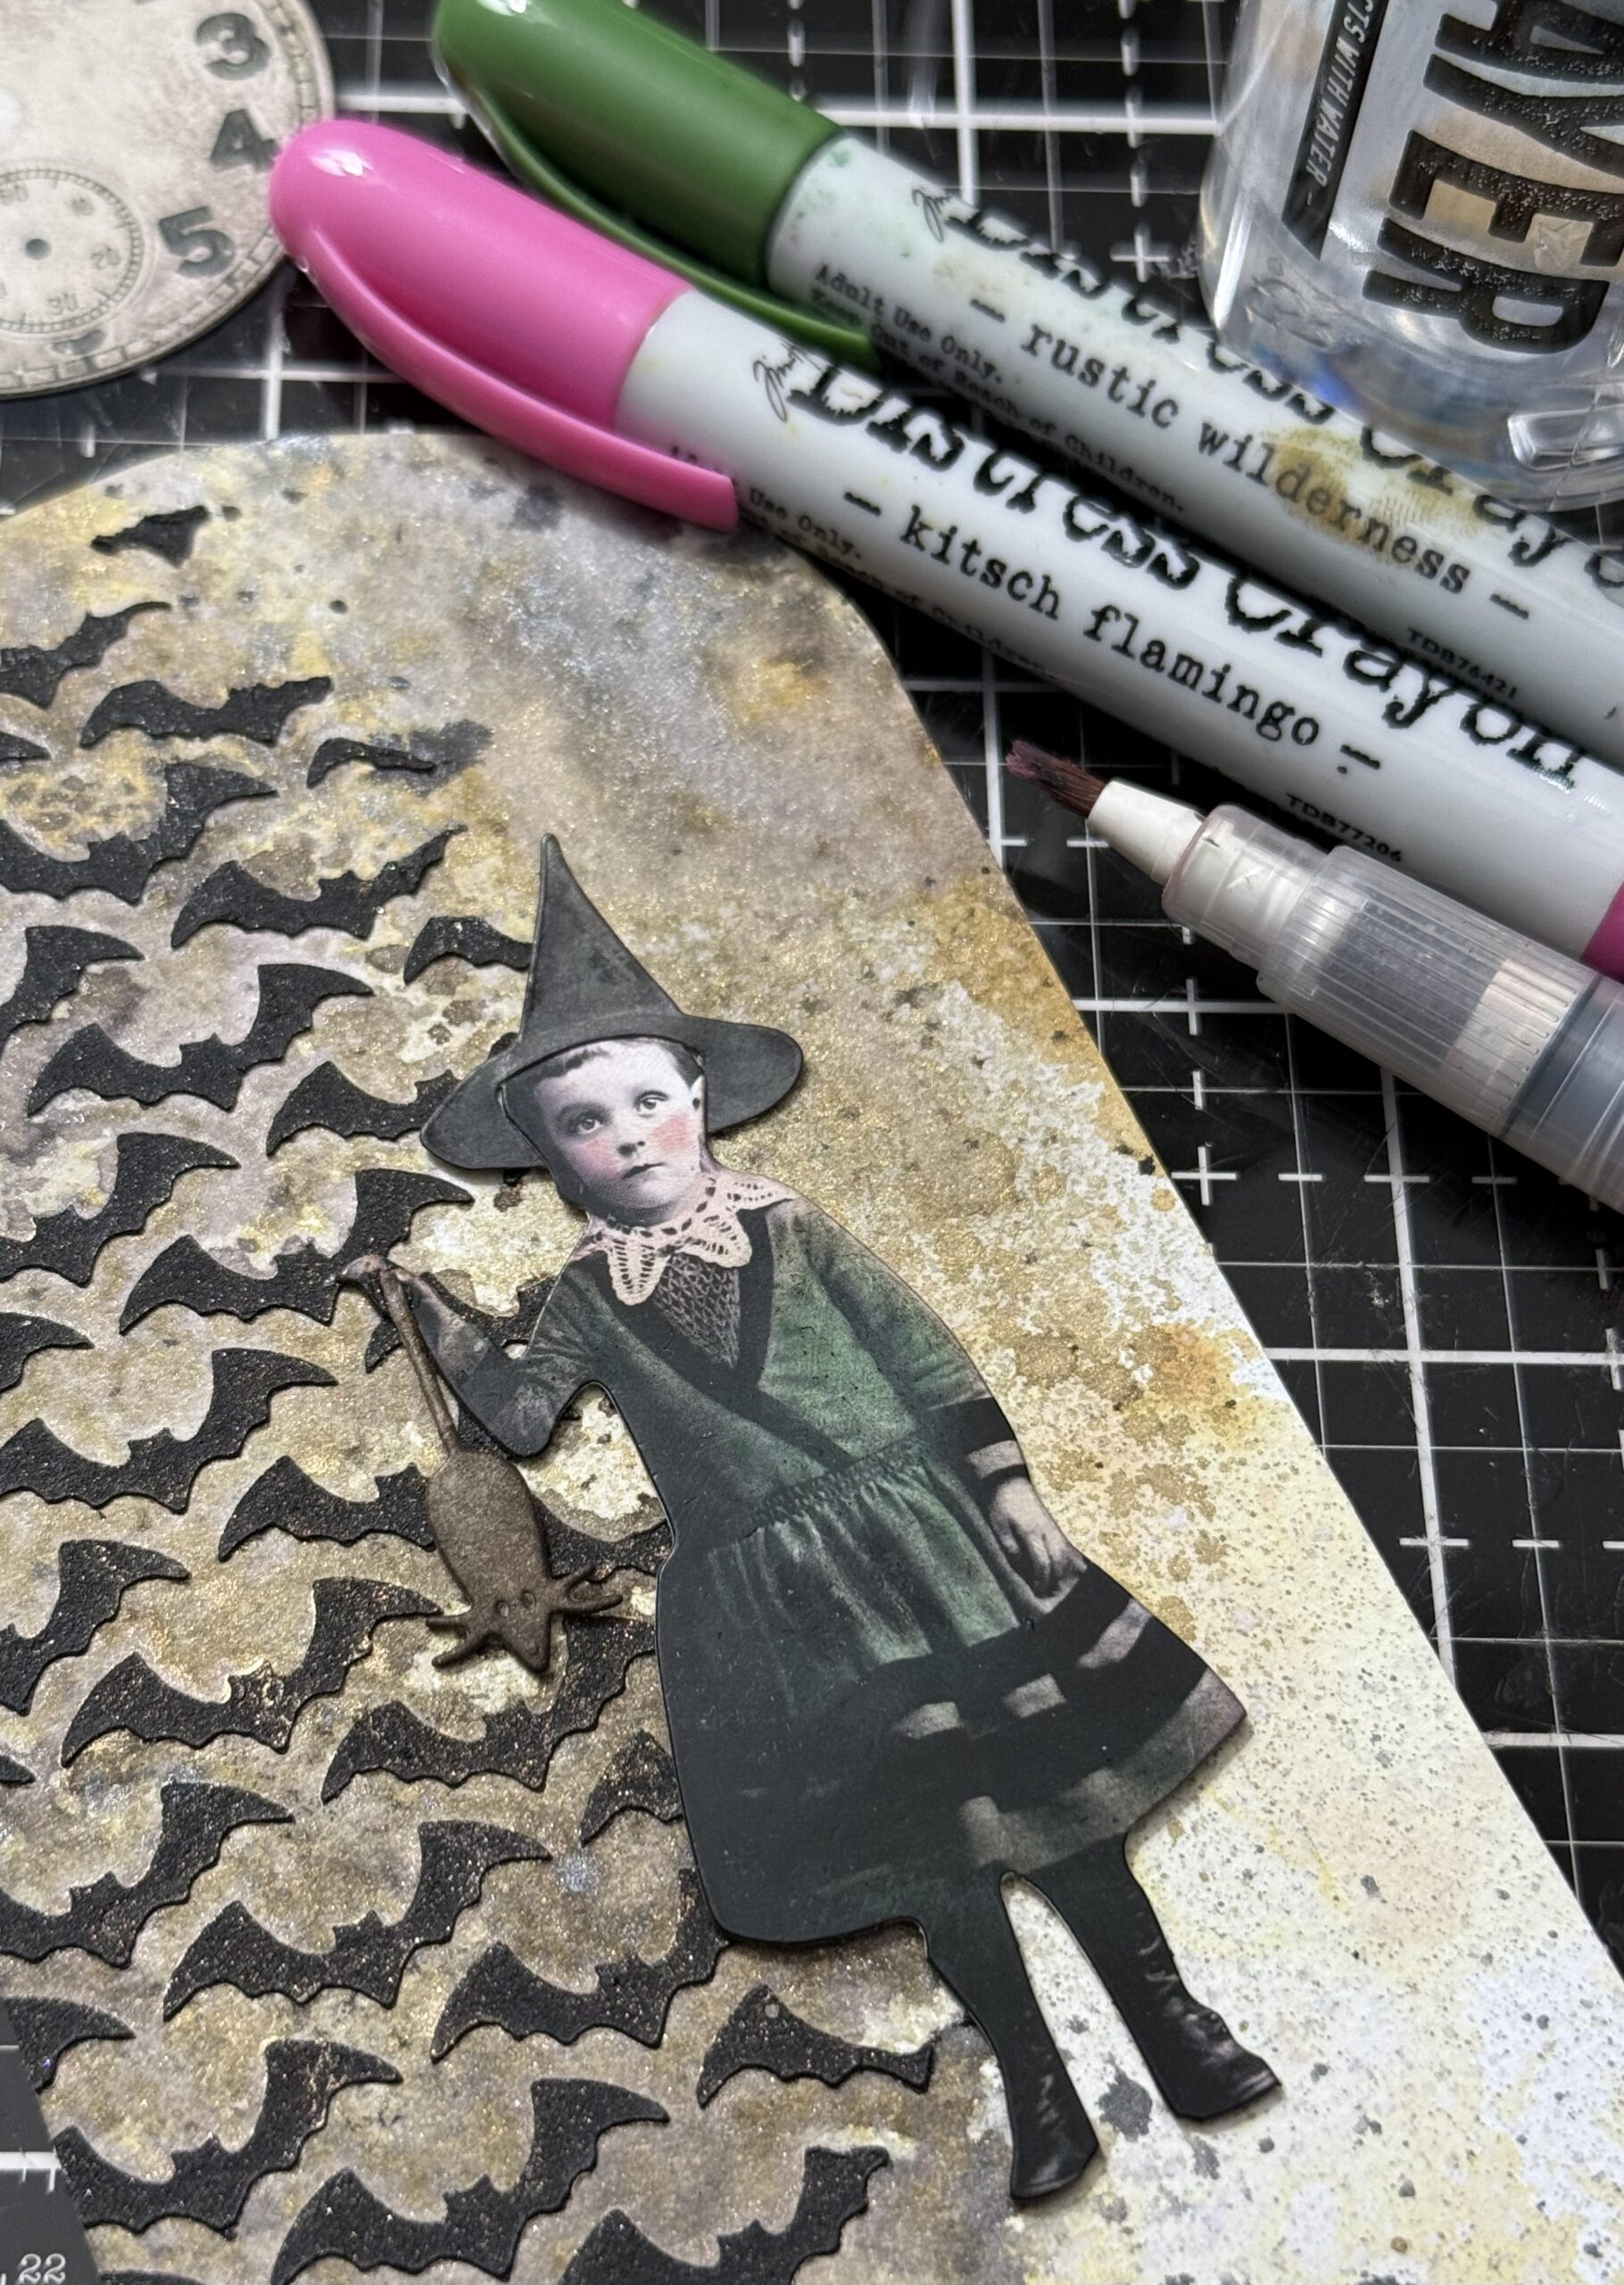
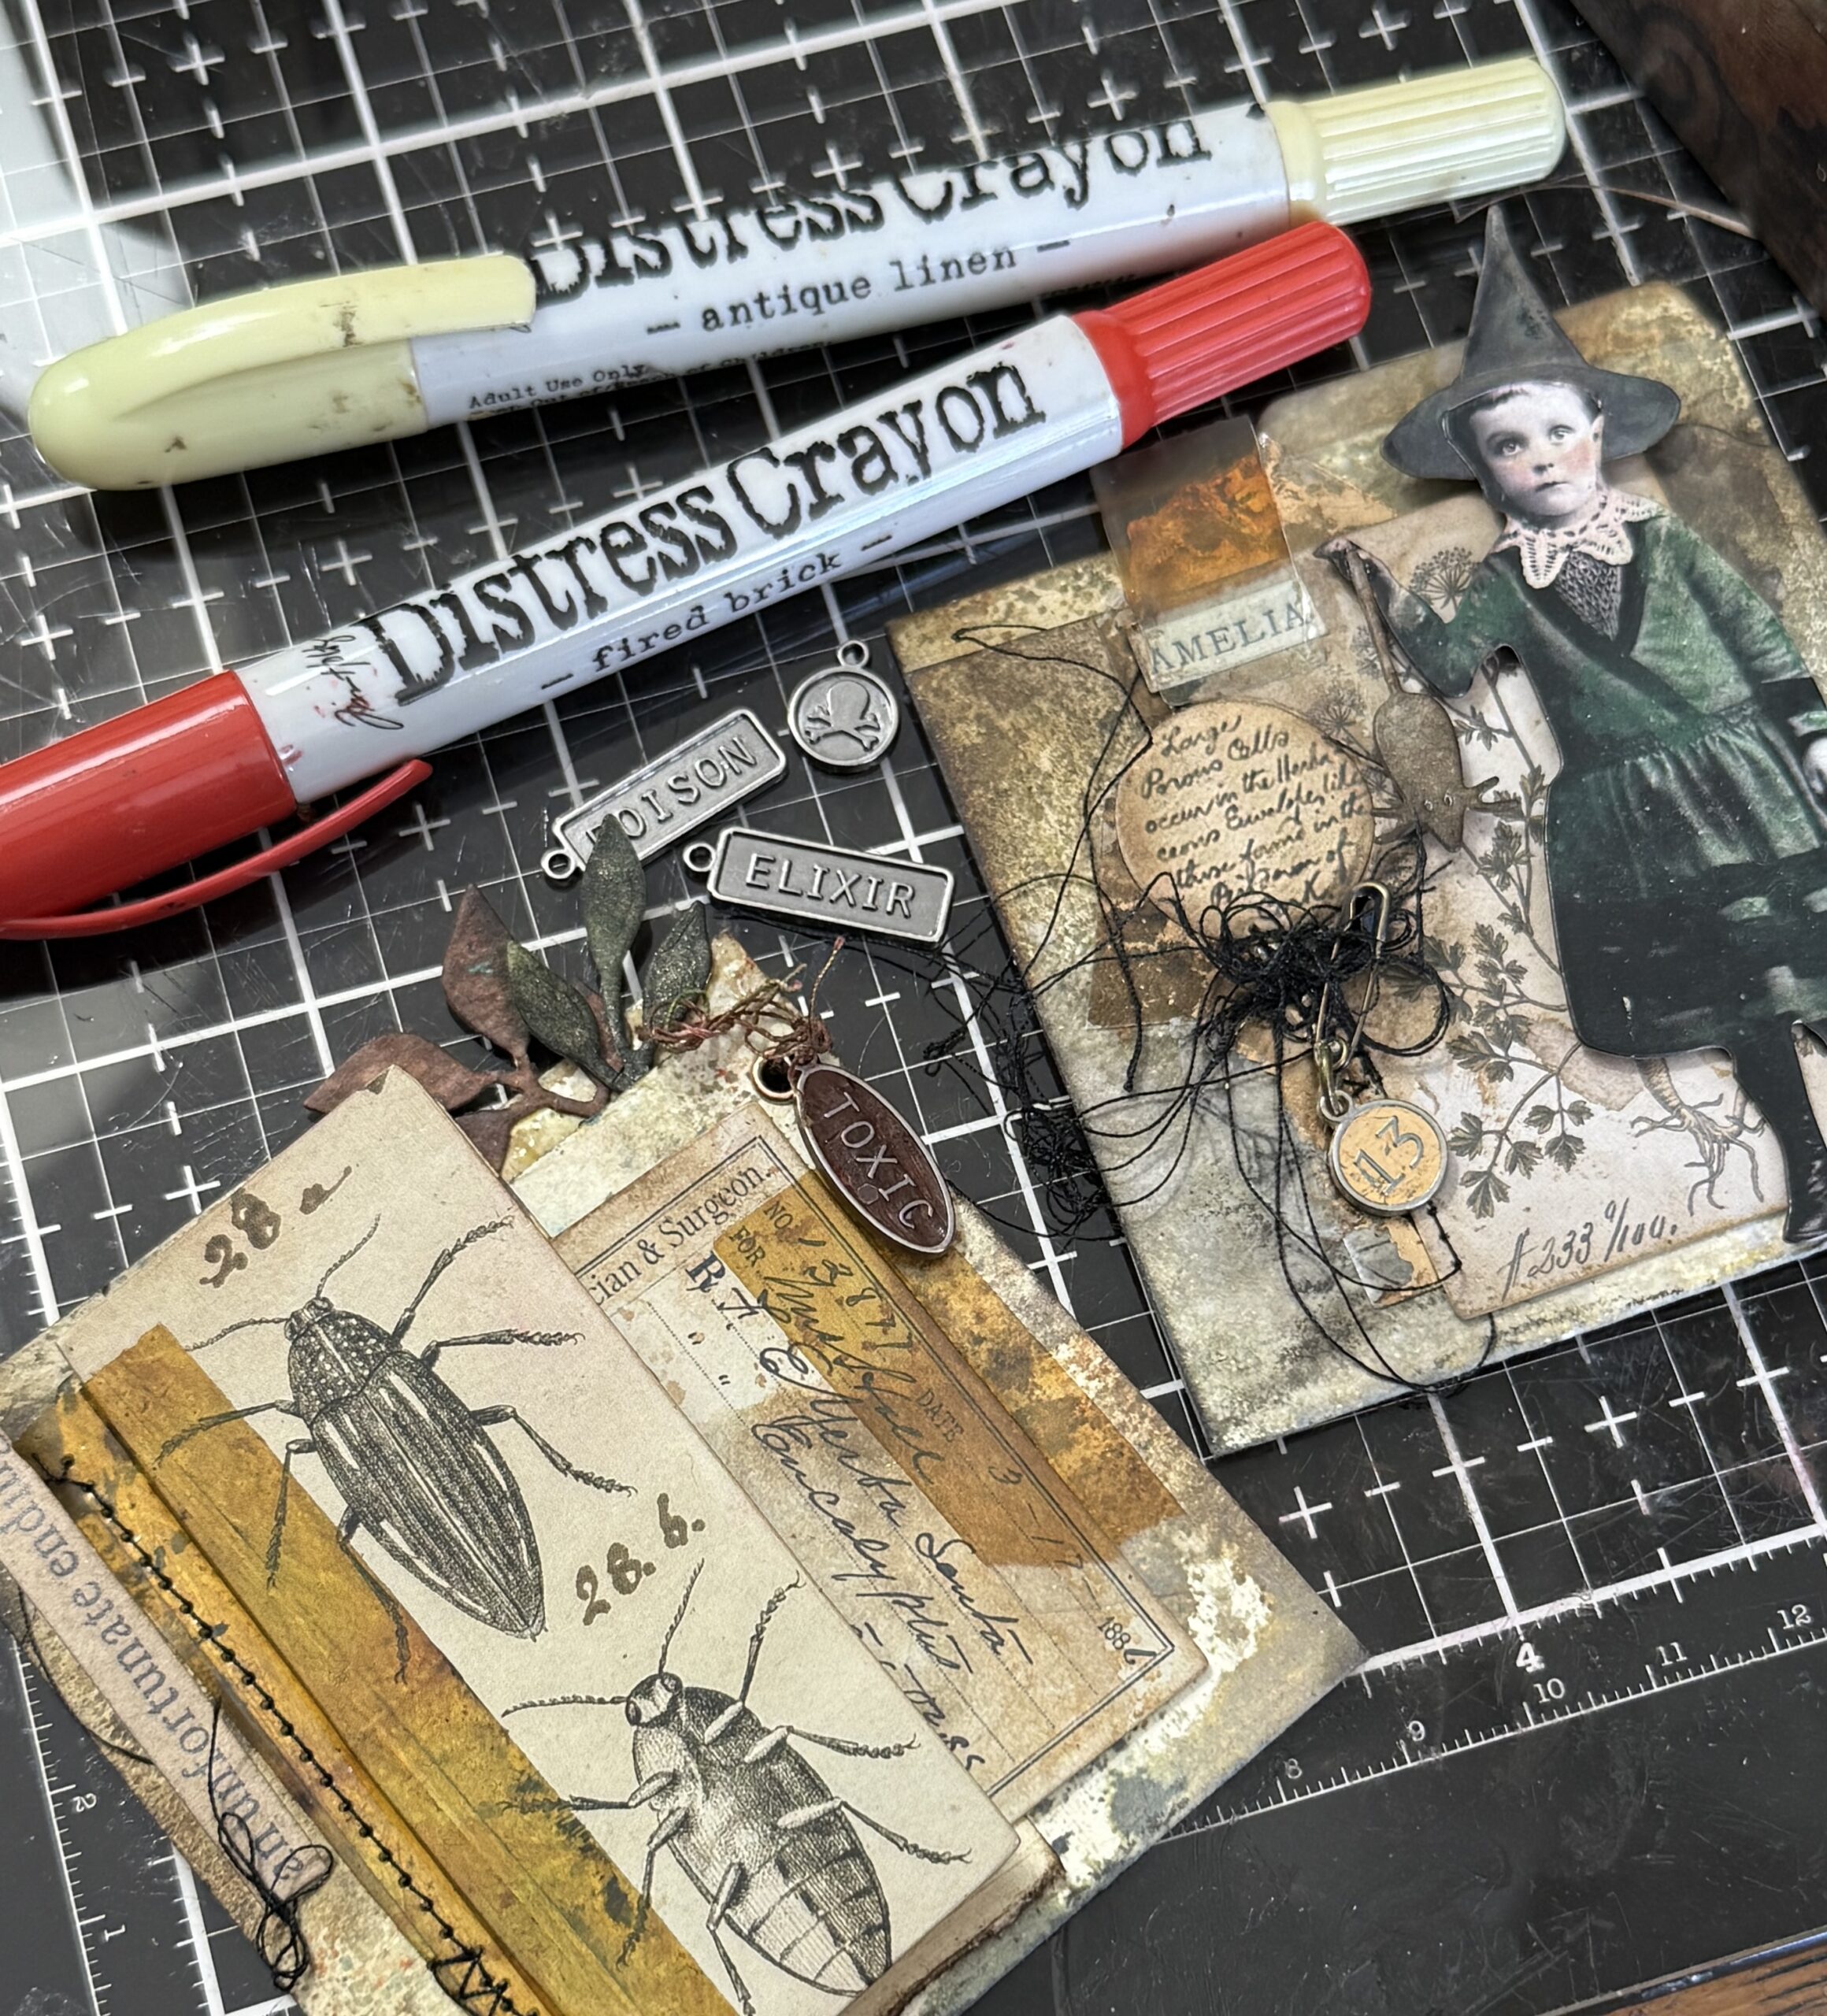
I picked out a paper doll that spoke to me and colored her up using Distress Crayons. I added a little witch hat from the Halloween Sticker Book and added a tiny mouse (from the Wicked Vault Sizzix set) that I cut fro a piece of scrap paper.
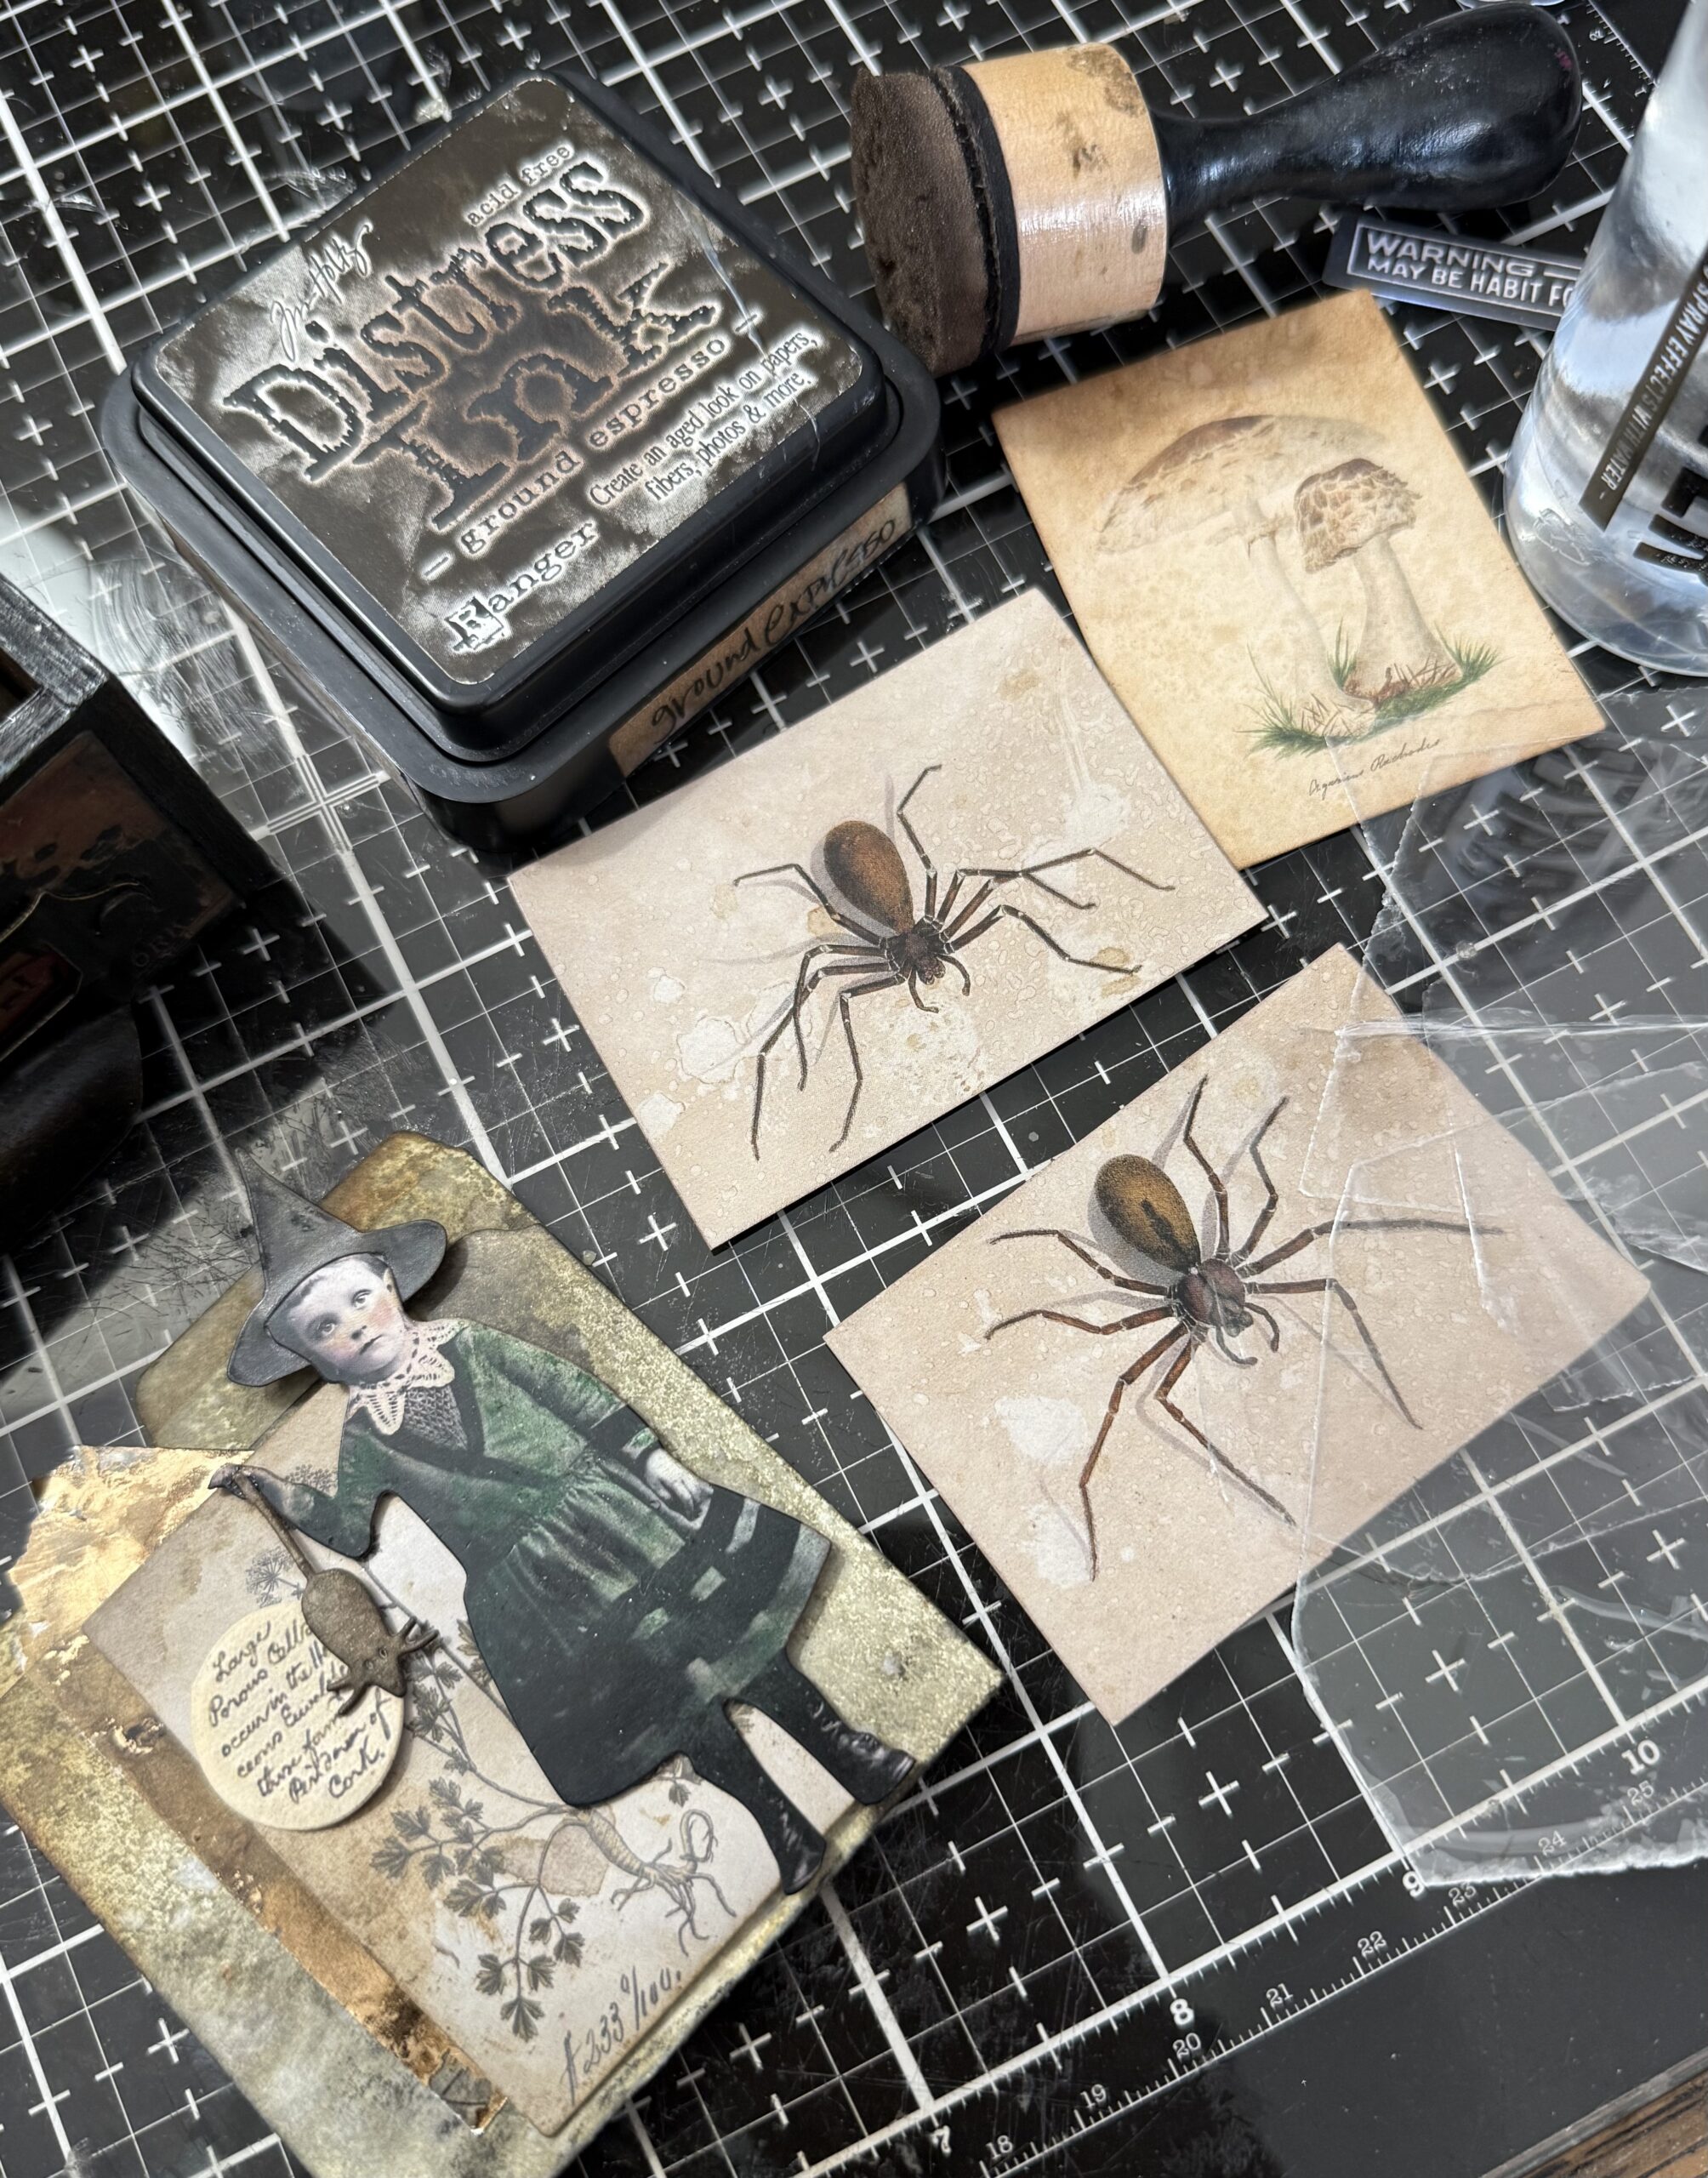
There was a piece of Layers Ephemera that has two spiders on it, I cut it in half, blended some ink onto them to add age, then placed some mica tiles over top and behind to create a “slide” type of piece. Then I stitched randomly around the edges using my sewing machine.
I also arranged the little file folder using my little witch and a variety of ephemera pieces. All of the pieces were rubbed with some ink (ground espresso) and sprayed with water, then dried with a heat tool.
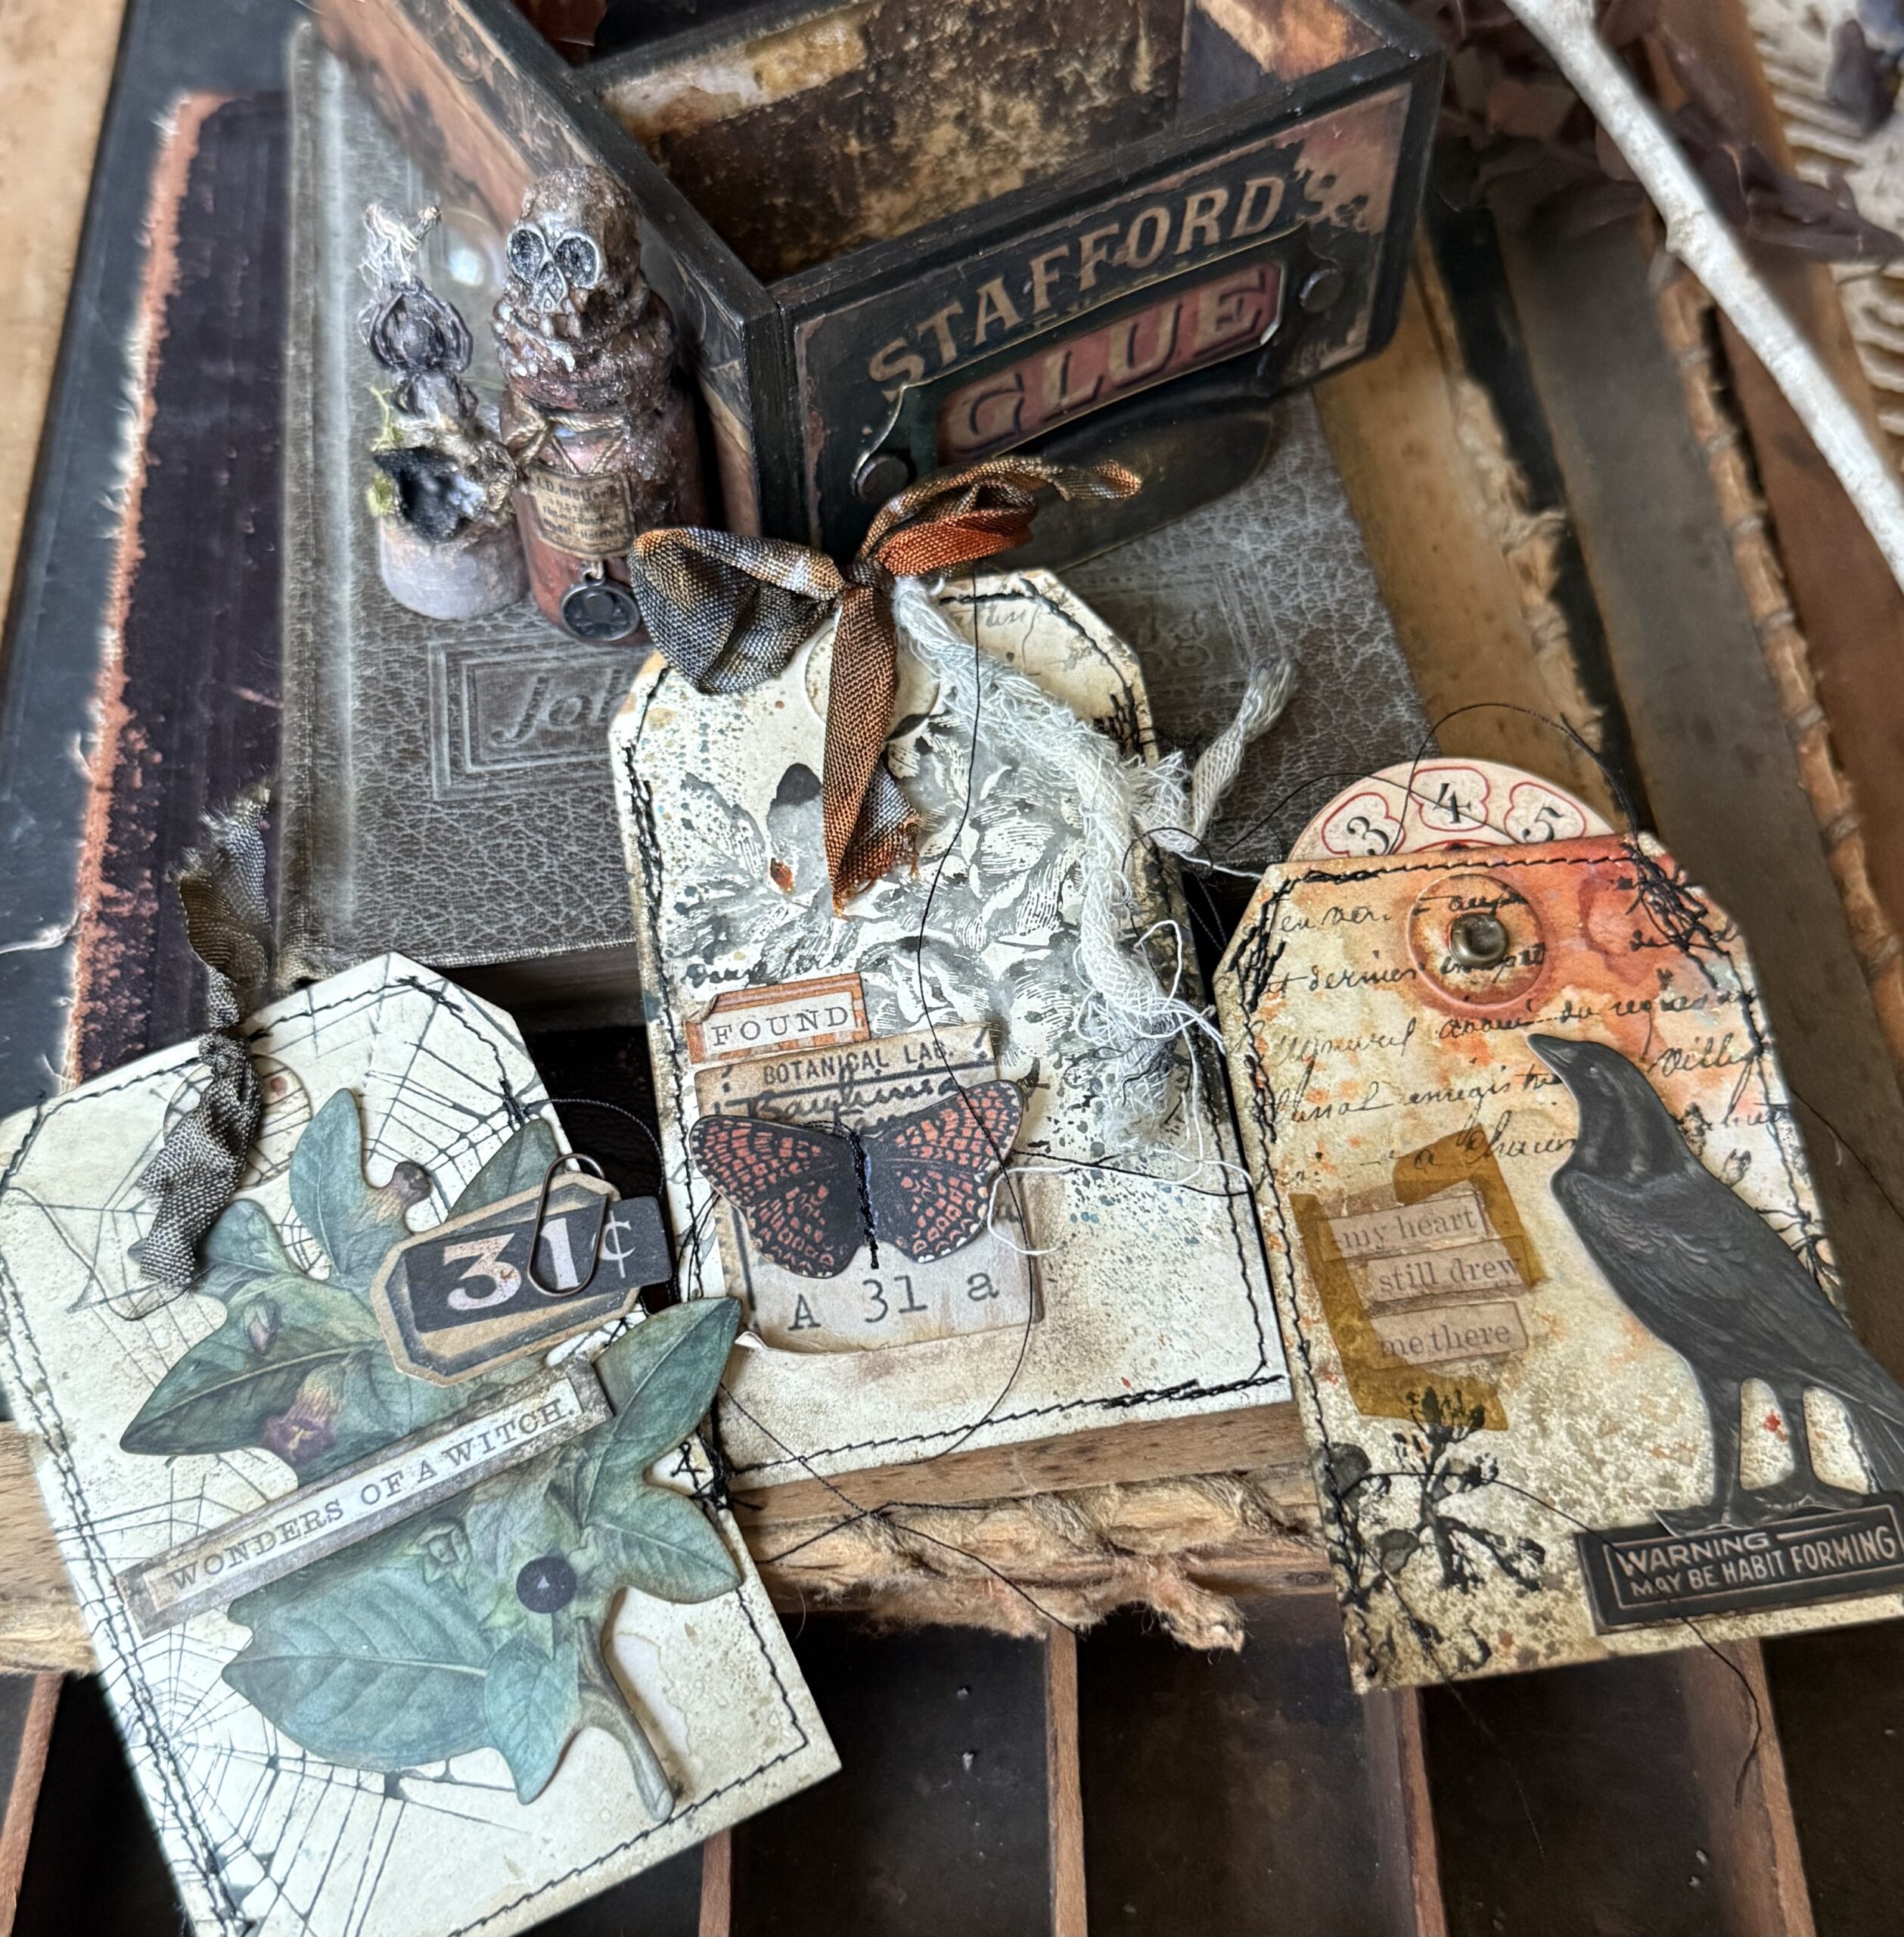
Here’s a look at the final pieces..I added some phrases from the sticker book at the tops to go with the story of the vignette.
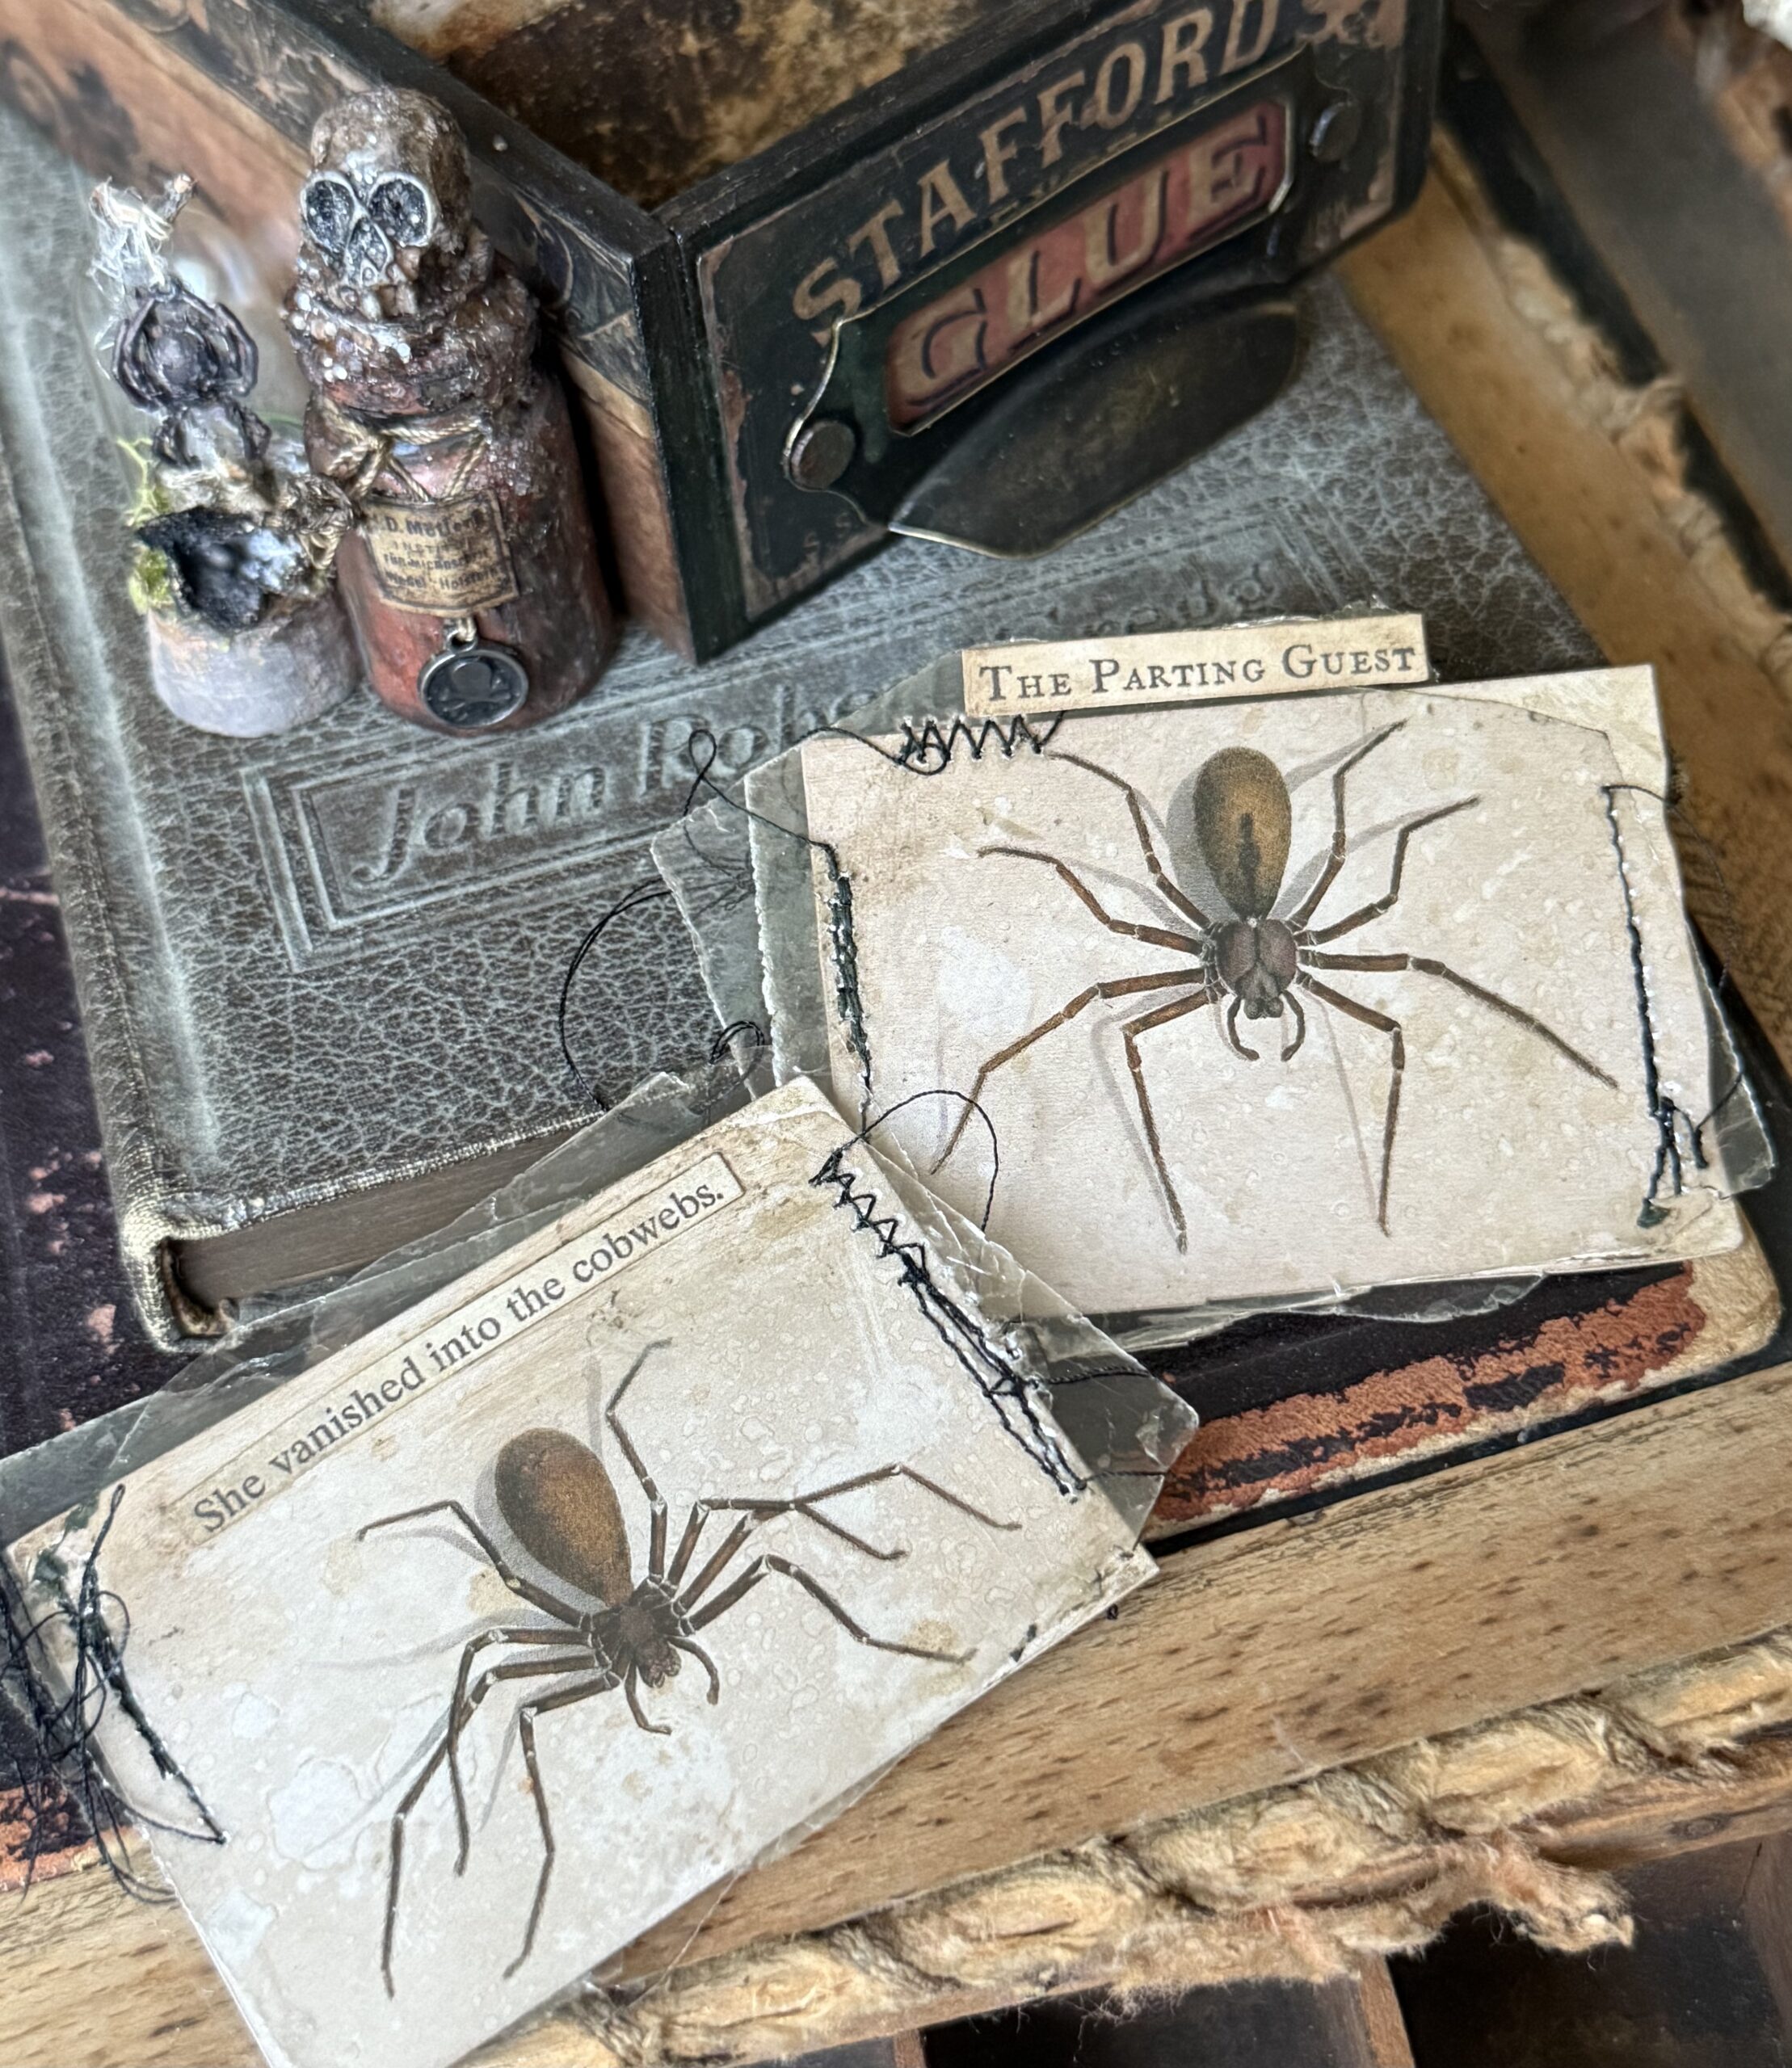
The two little collaged file folders were assembled using a variety of the ephemera pieces I had previously chosen, and treated with some distress blended inks to add age. Then I used some idea-ology cello tape over top of some pieces because cello tape is too good not to use, LOL. I just can’t get enough of it…it adds so much to a project and is super simple. You’ll see I used it to create a couple flaps that open on the buggy file and as a tab over top of her name on the witchy one! Simple, yet big impact, I LOVE idea-ology Cello Tape!
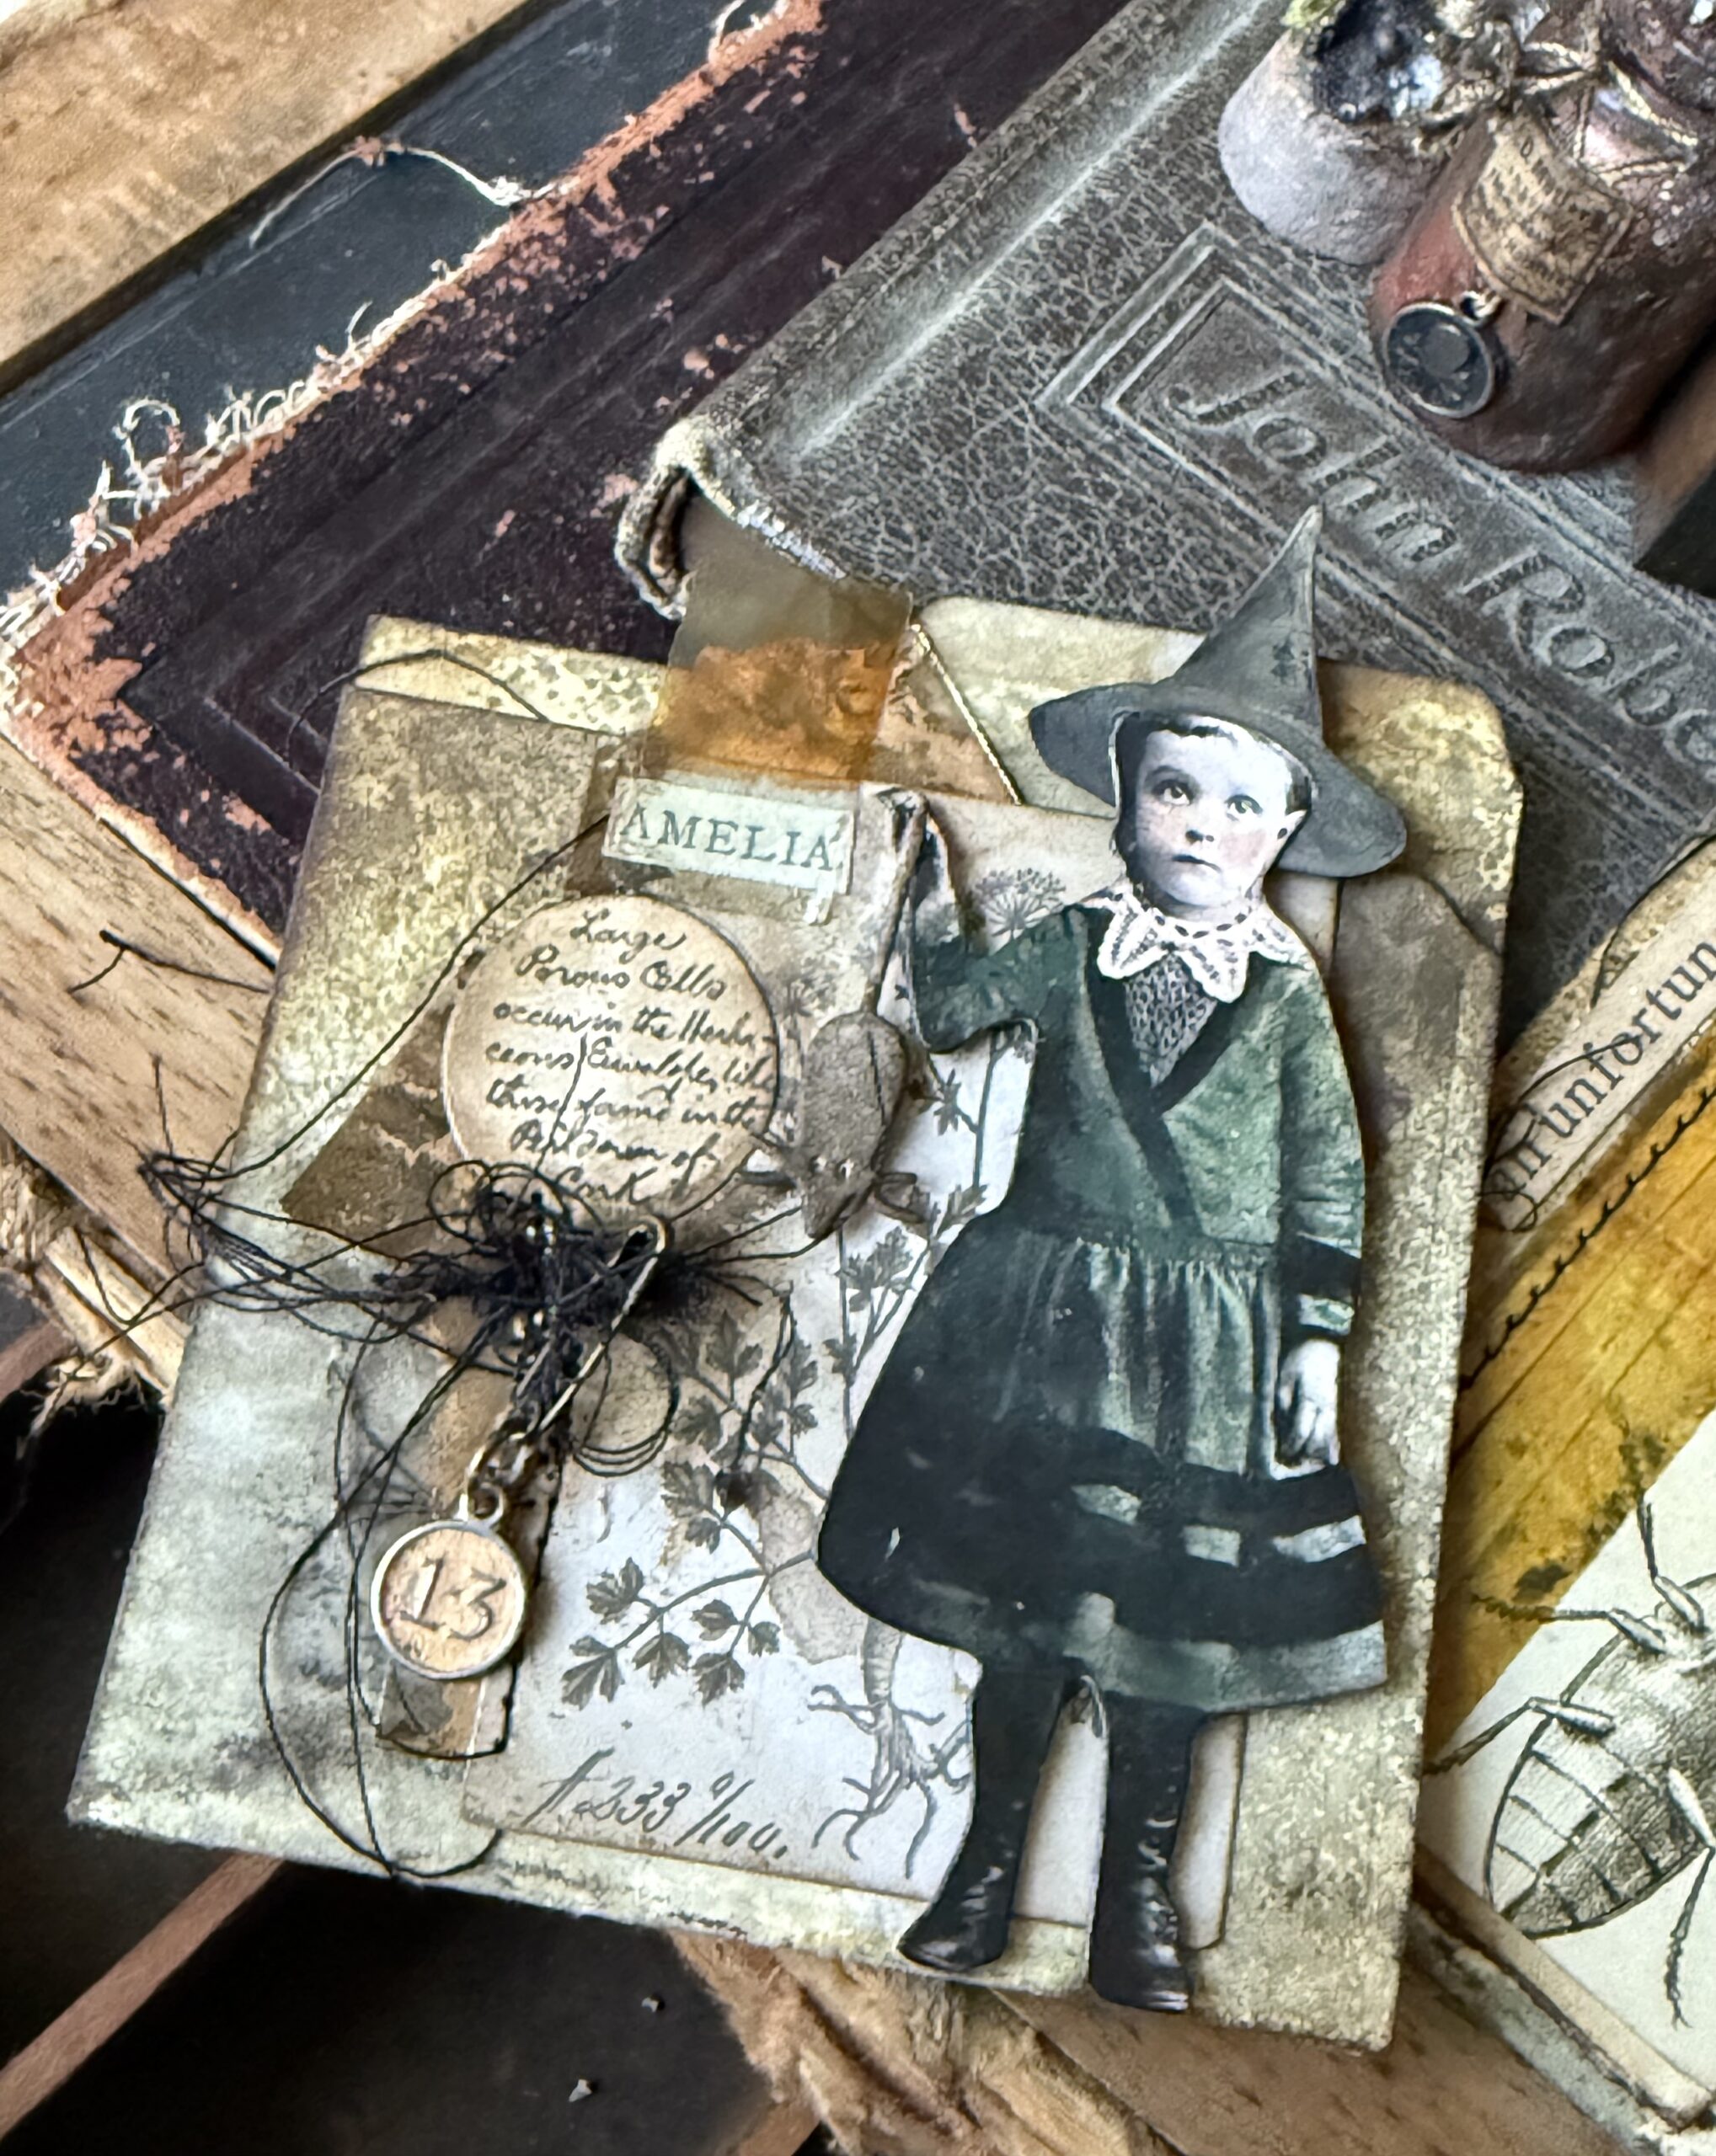
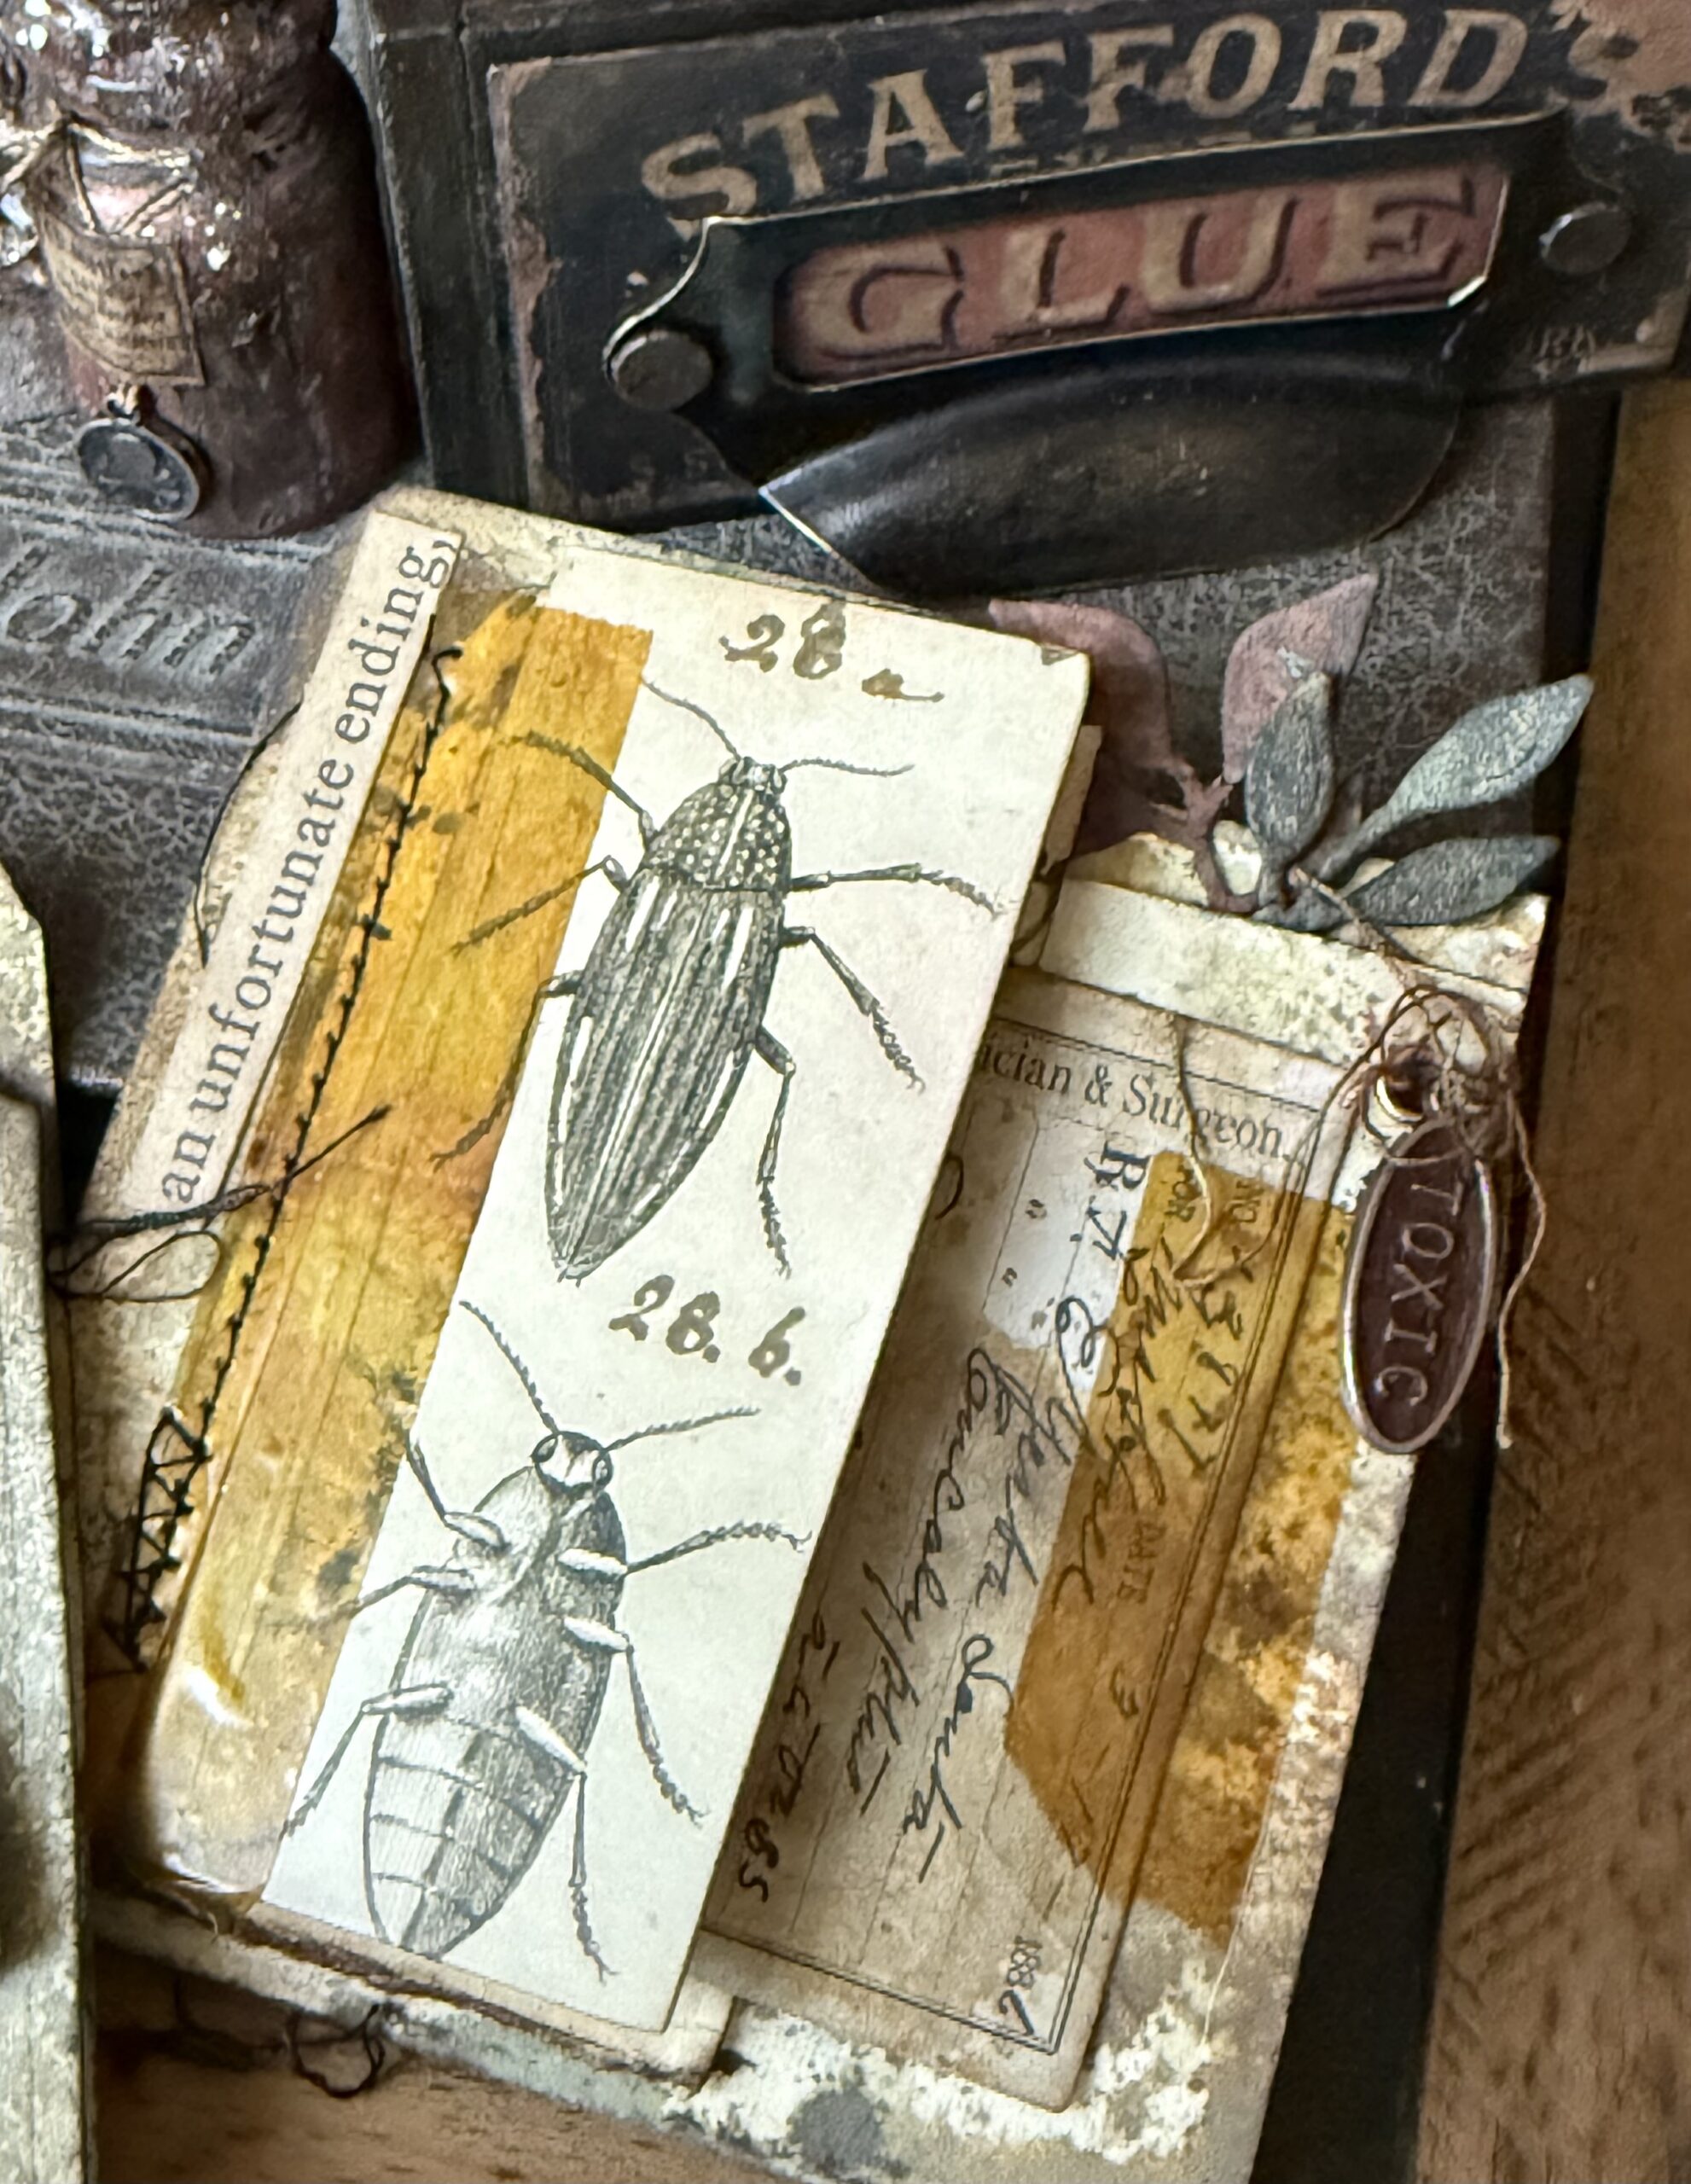
The files were then stitched using my sewing machine. I also attached a couple of the tiny word charms on each of the folders. For the witch file, I rubbed the “13” charm with some Antique Linen Distress Crayon, and the buggy file, the “toxic” charm was rubbed with Fired Brick Distress Crayon. Simply scribble or press some of the crayon into the recessed background of the charms and using a dry cotton towel or paper towel, rub lightly to reveal the pattern on the charm.
I added the “13” charm using a small safety pin, and added the “toxic” charm by adding a small eyelet, then tying the charm using string.
Here’s a look at the finished pieces!
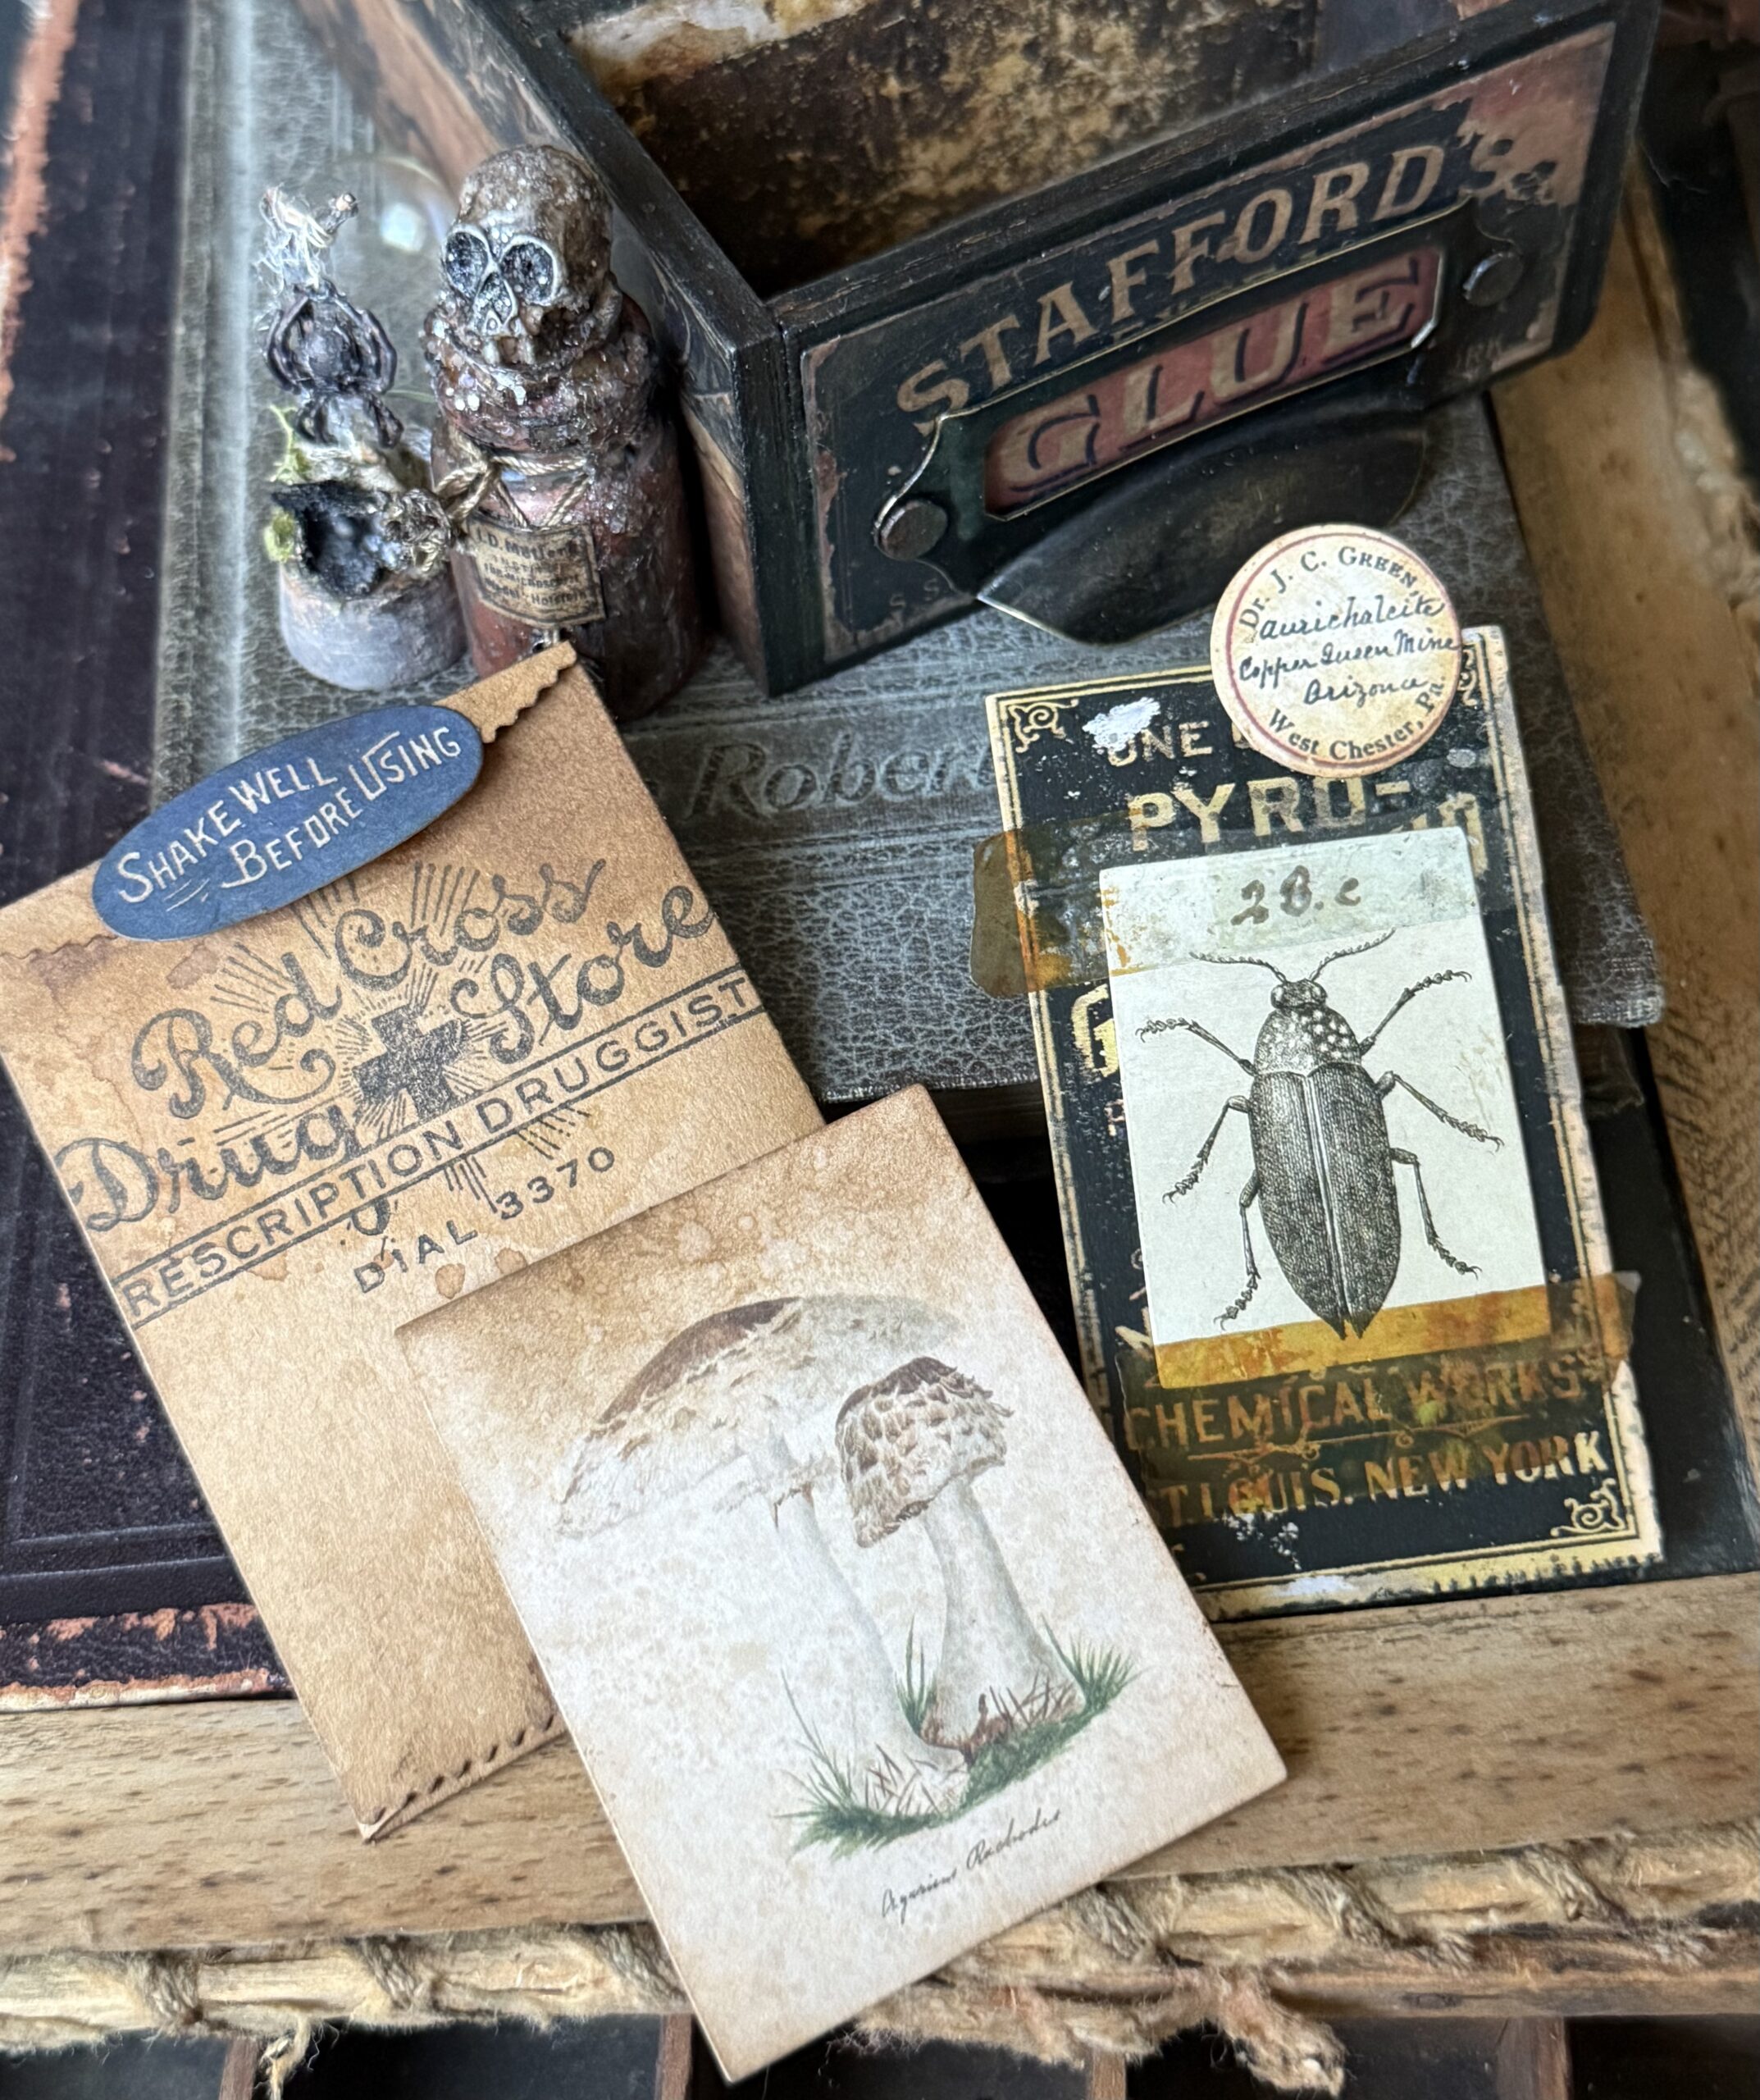
I had a couple other random pieces that I made and added to the file. They included one made with a small “bag” from the Sizzix Pillow Box and Bag set. I cut the pieces out using brown paper (like grocery sack paper) then adhered it together. I stamped a phrase to the front and added the little label at the top. A small bug piece was taped to another piece of ephemera using…you guessed it, Cello Tape, then I adhered another label at the top, like a little file tab. The little mushroom ephemera piece was rubbed with ink, spritzed with water and dried using my heat tool. These fit the theme of my make so perfectly.
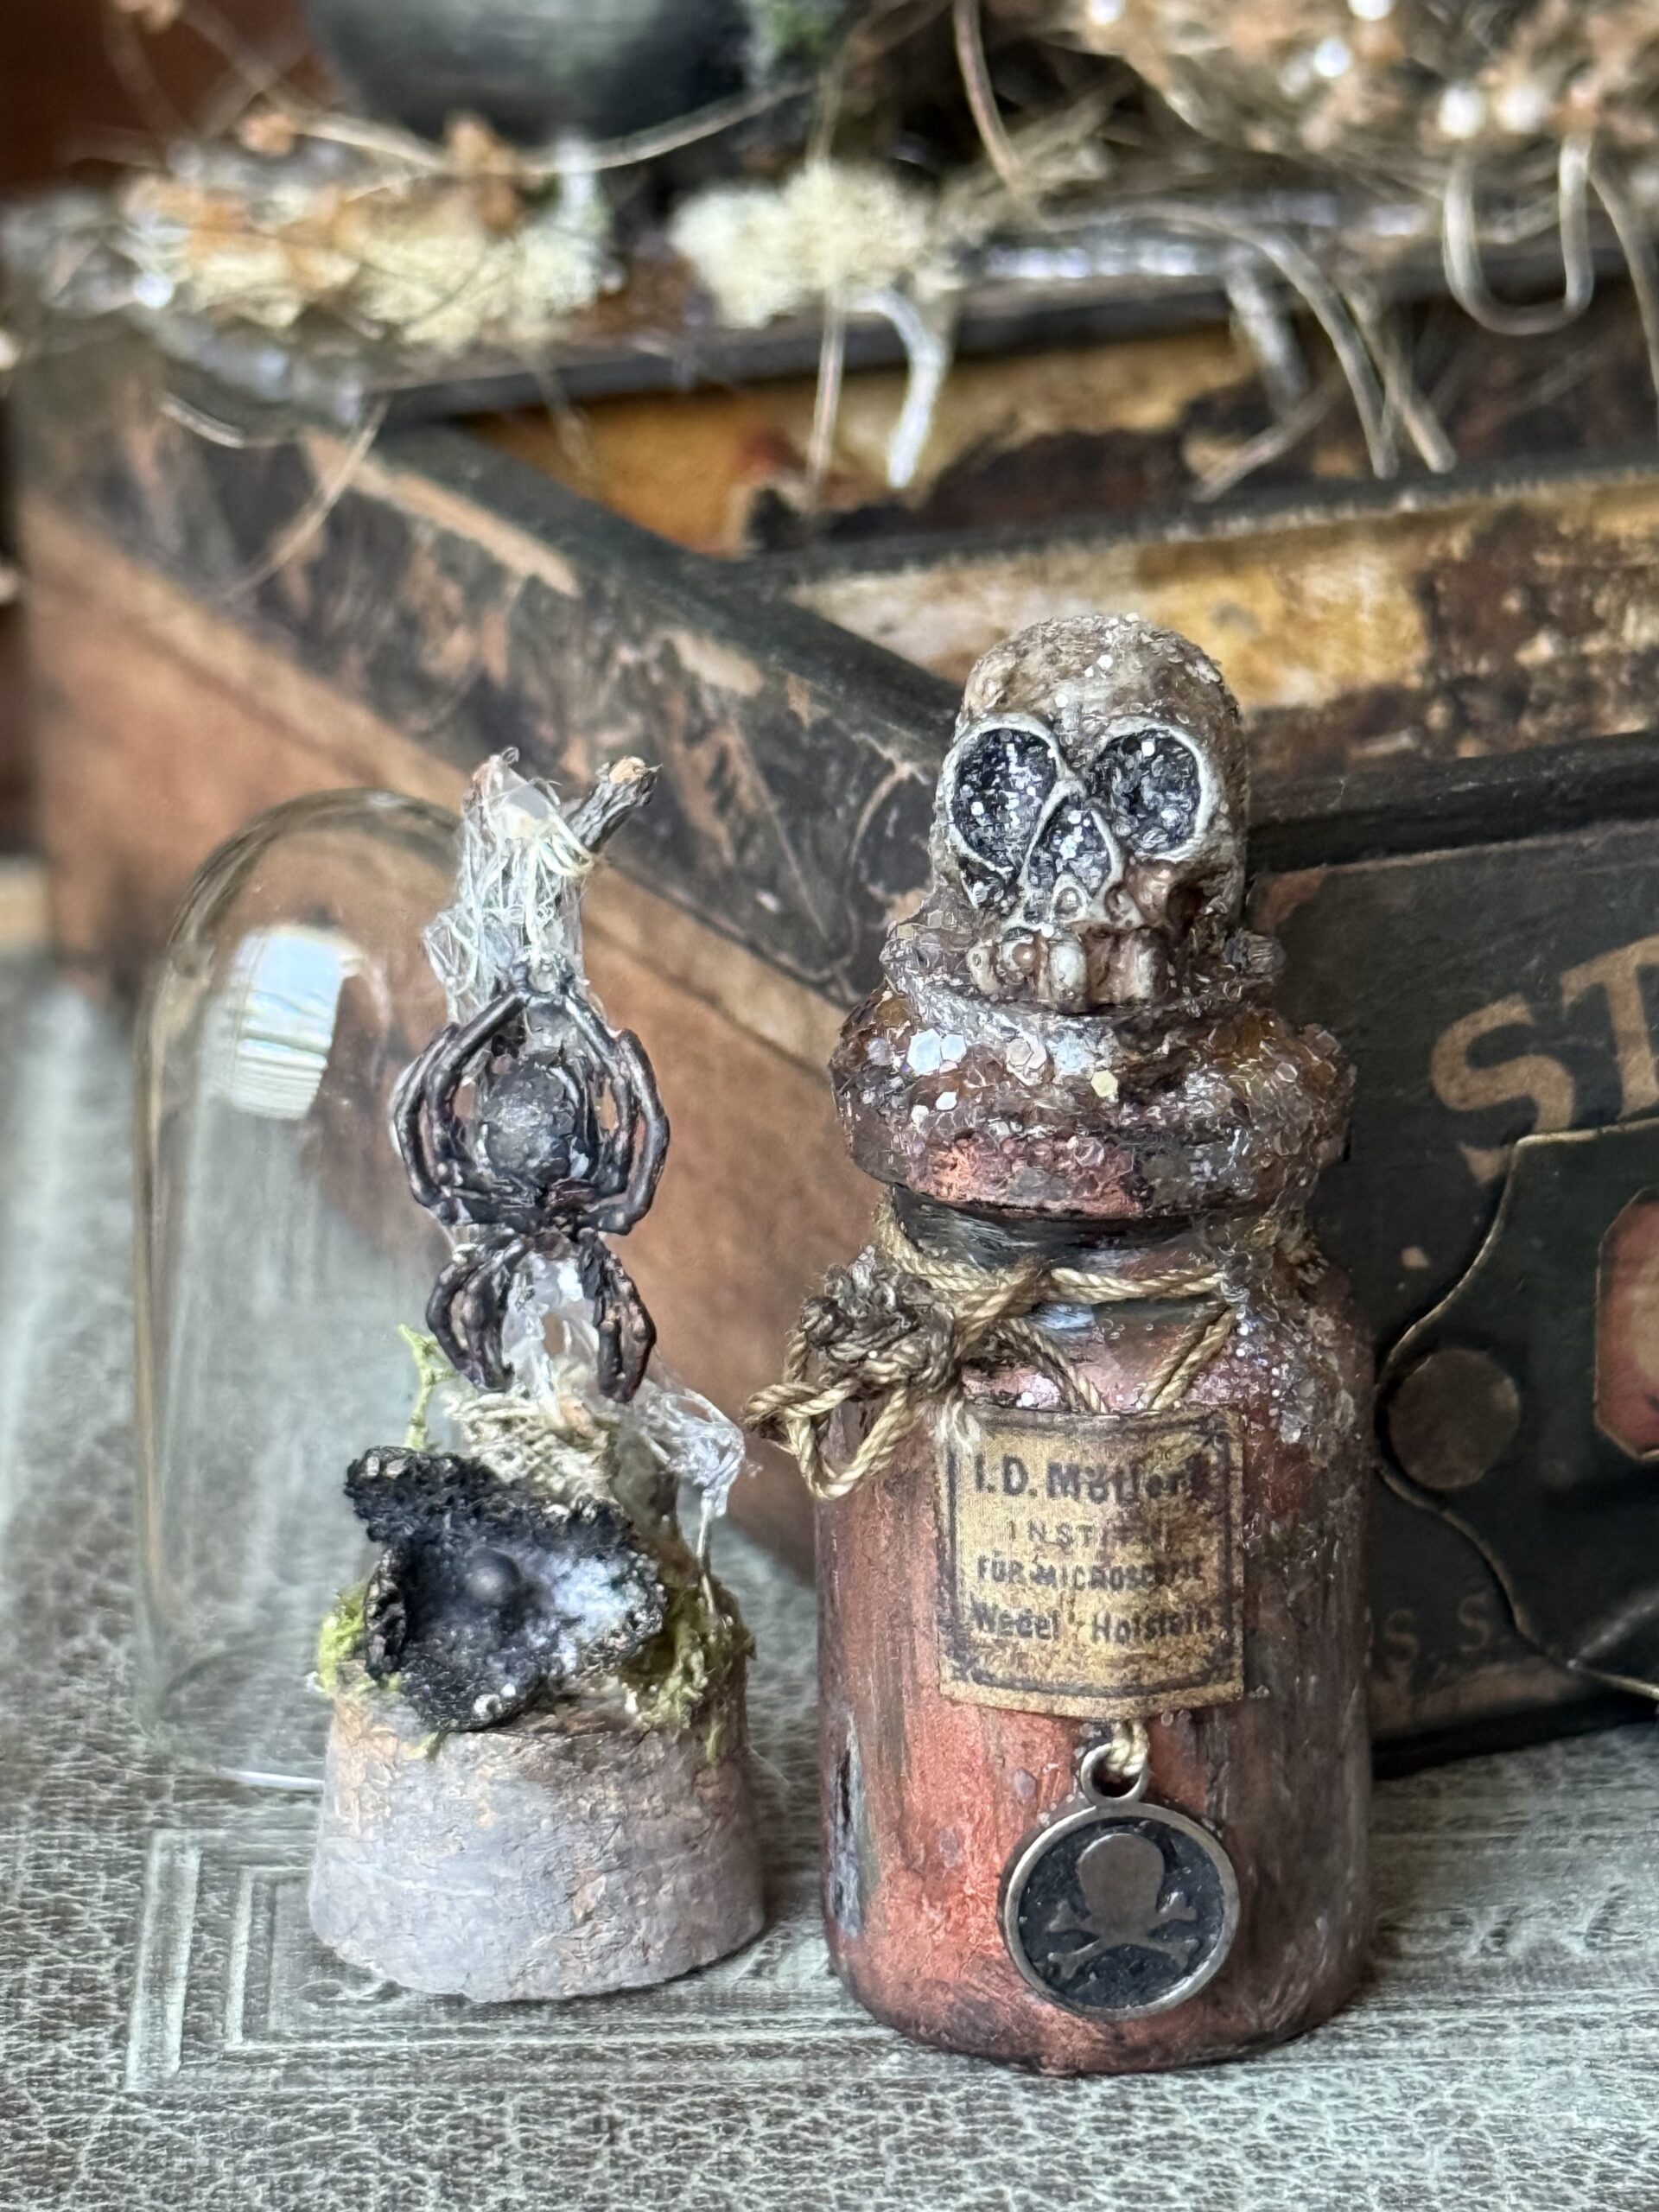
After I made all the files and tag I felt like the vignette needed some little display pieces that I could display with the card file. I chose to make a little Spider Habitat using a small idea-ology dome and a spider charm, plus some bits of floral moss, scrap of lace and a small paper flower. I also decided that a creepy little jar of a sparkly potion was a necessity for a little witch, so I added that too.

The jar was created using an idea-ology apothecary vial. I rubbed the vial with Antique Linen Distress Paint, then let it dry and rubbed it with Mined Foundry Wax and set it using a embossing tool to bring out the shine. I then rubbed the jar with some Crypt Grit Paste and let it dry. Once dry, I rubbed Black Soot Distress Paint around to create grunge. I rubbed the cork using my really dirty finger and viola! a grungy cork for the top! One of the benefits of grungy fingers!
I rubbed in some Black Soot Distress Crayon into the little poison charm and tied it to the jar with some string, then adhered a small label from the idea-ology snippets ephemera using some collage medium.
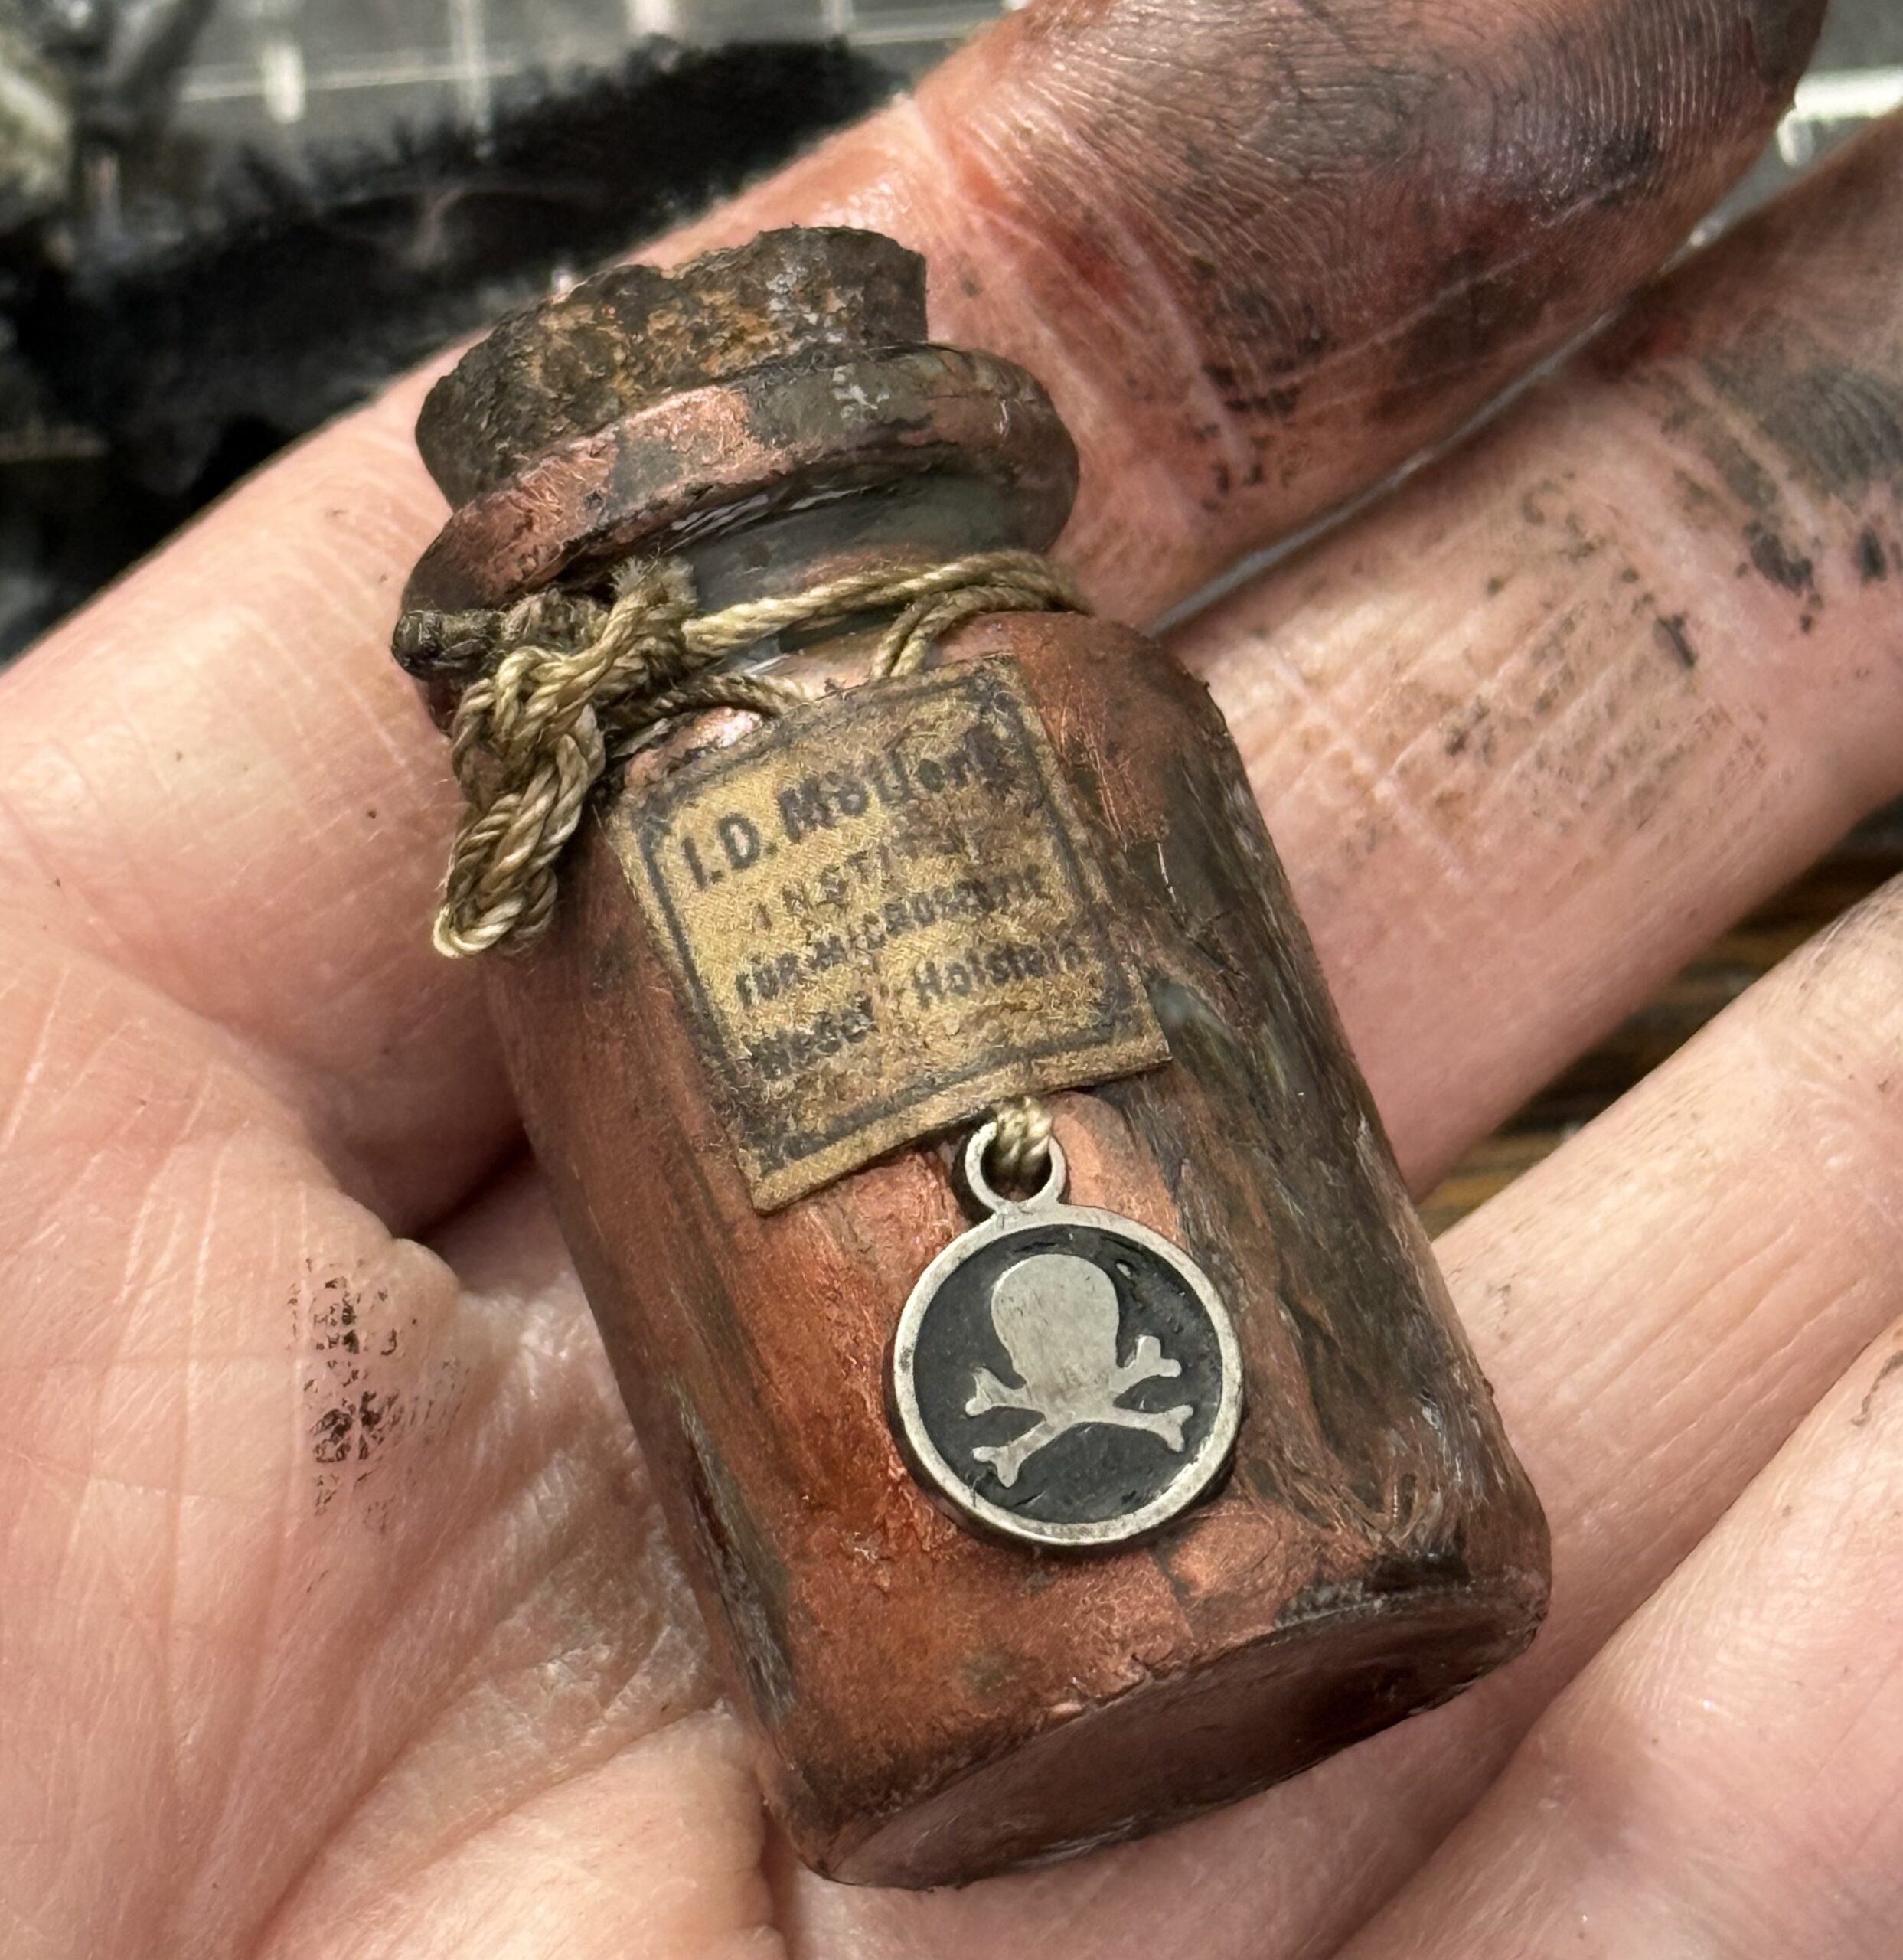
I rubbed an idea-ology skull with Black Soot Distress Crayon, being sure to get a good amount into the eye sockets. I adhered the cork into the bottle then adhered the skull to the top of it. Once they were dry, I applied some Glossy Accents into the eye sockets of the skull and around the top rim of the jar, then sprinkled it with some Chunky Black Dyed Glitter.
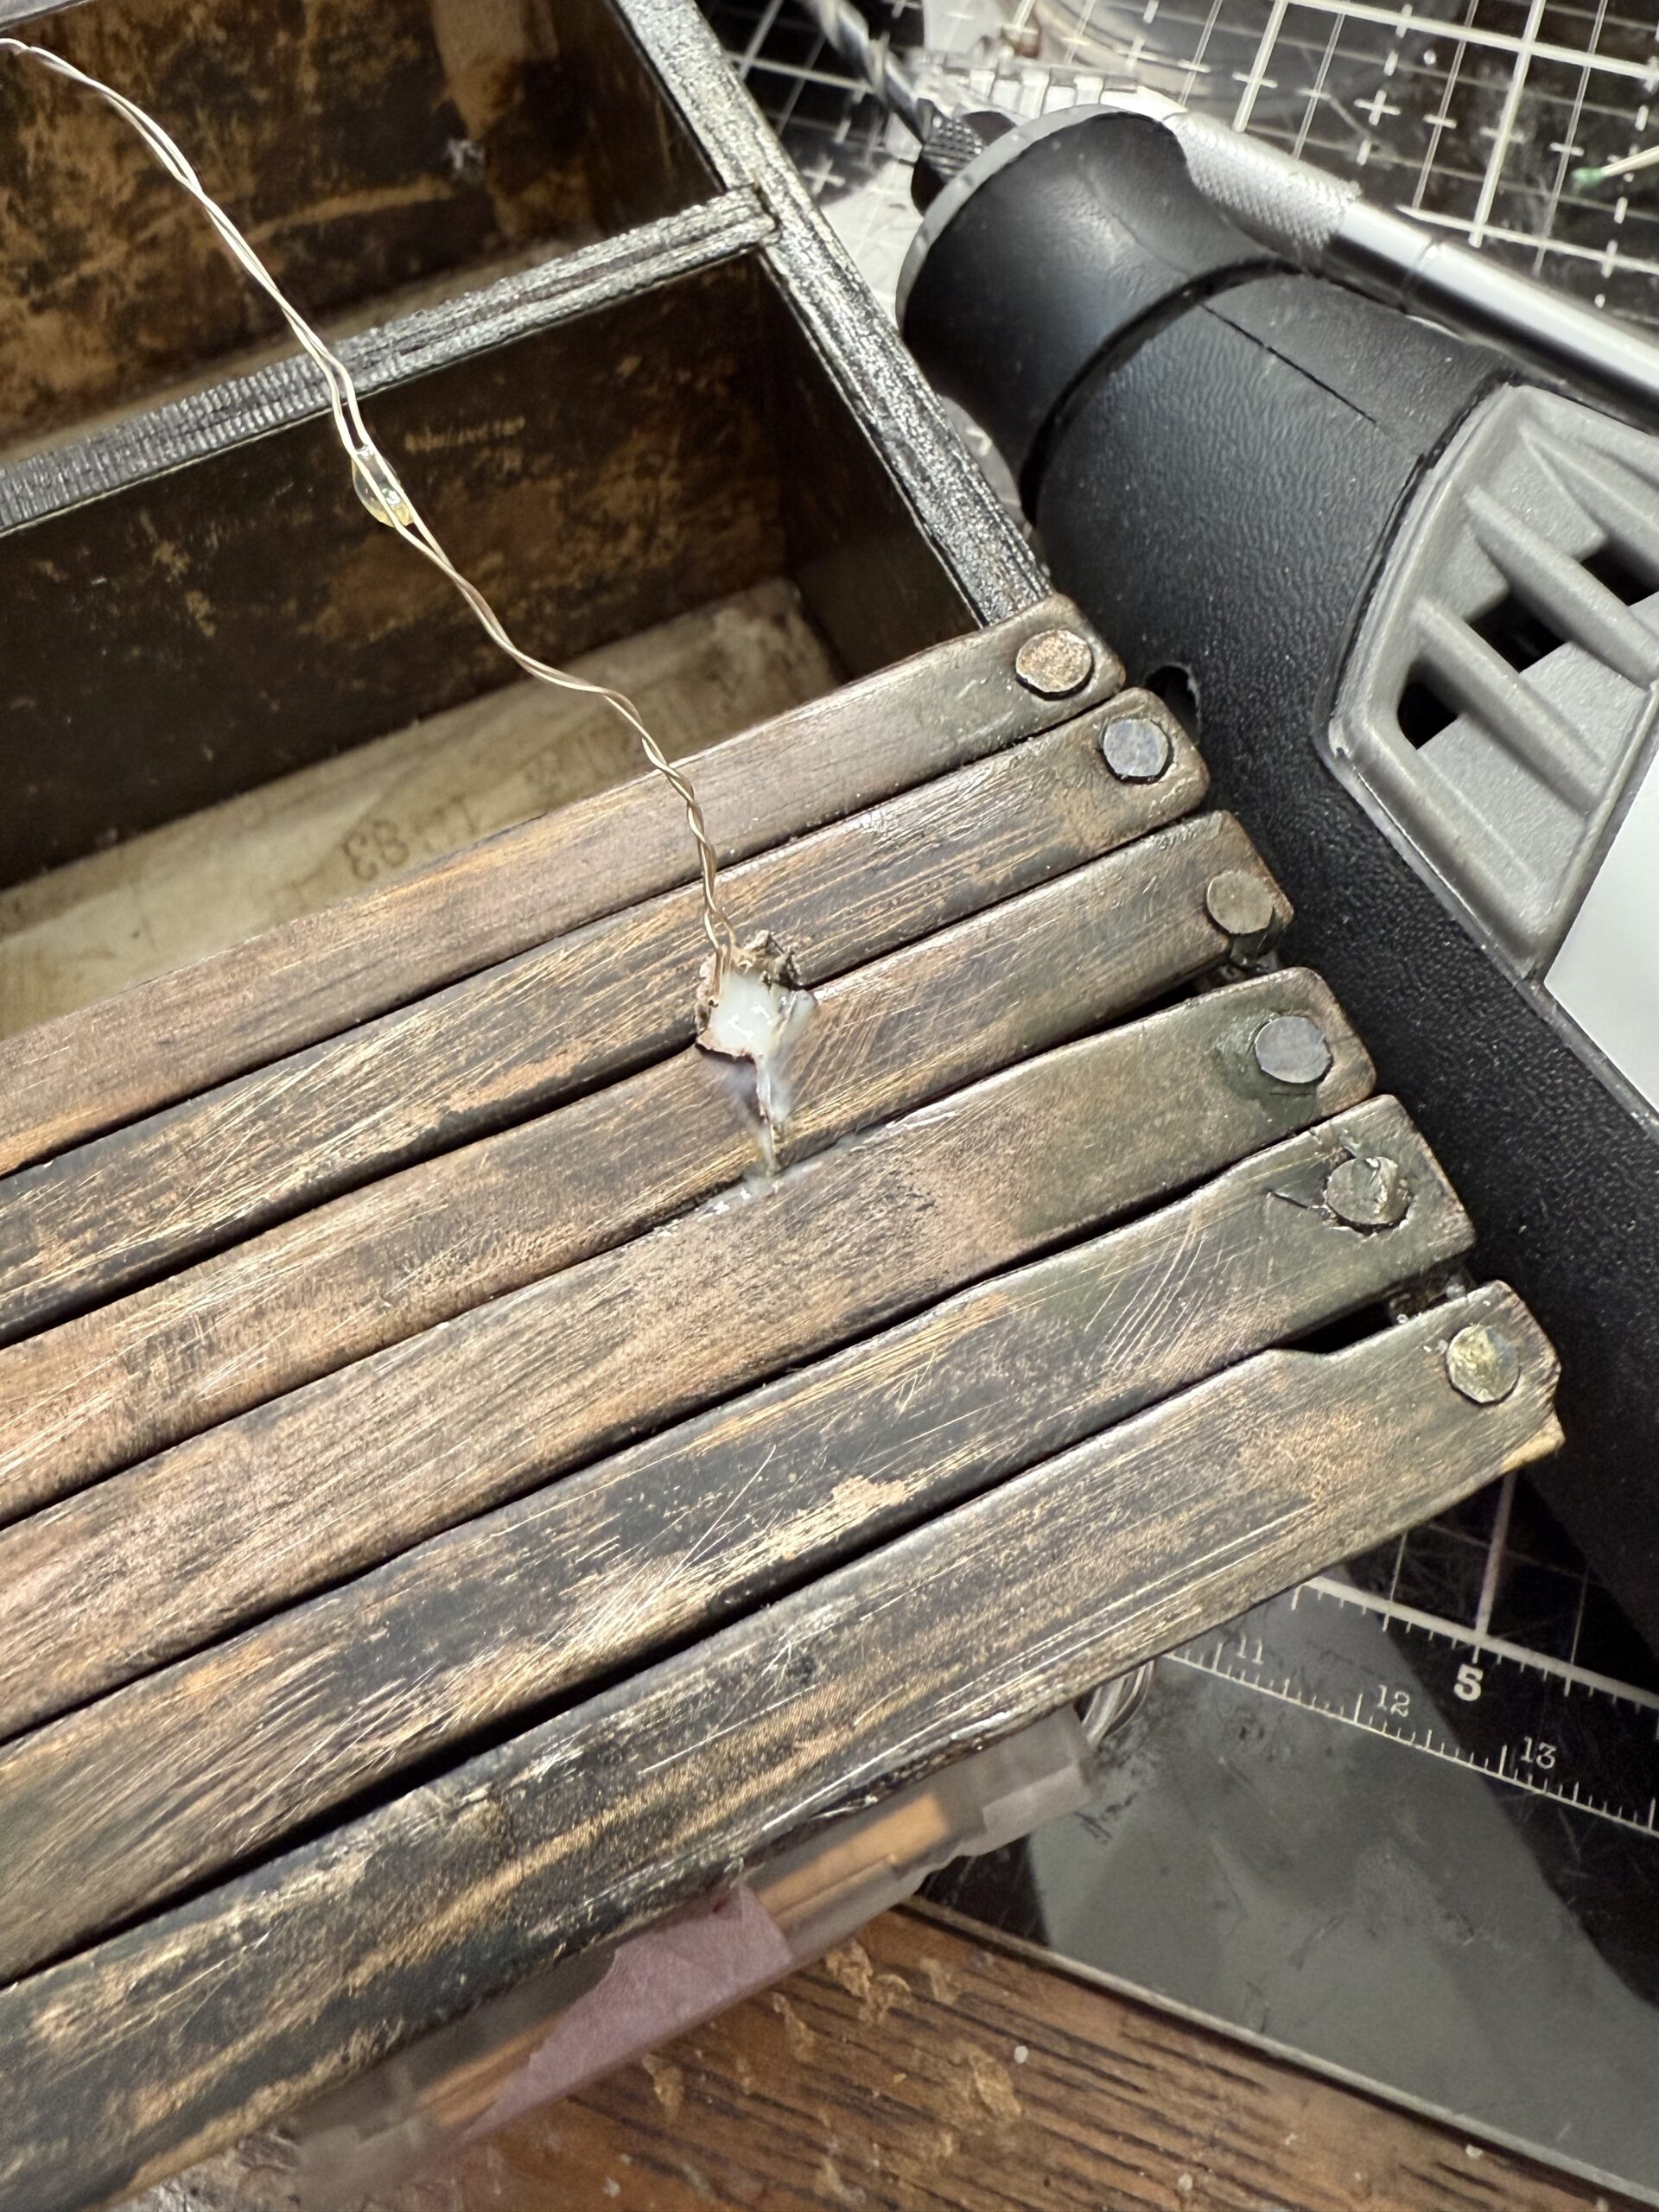
The next step is where I went back to the card file to drill into one of the planks using my dremmel tool. Again, when I started, I didn’t know that I’d want to add tiny lights, but, that was an easy fix, I just drilled into the plank where I was going to place the little cauldron, and added a hole. I also drilled a hole at the back of the box to add the length of lights and switch. But once I did that, I needed to figure out how to catch the string of lights and draw them up through the hole, so I used an exacto knife and cut through it, then adhered it with collage medium afterwards. This was then covered with the cauldron, so it was an easy fix. Whew!
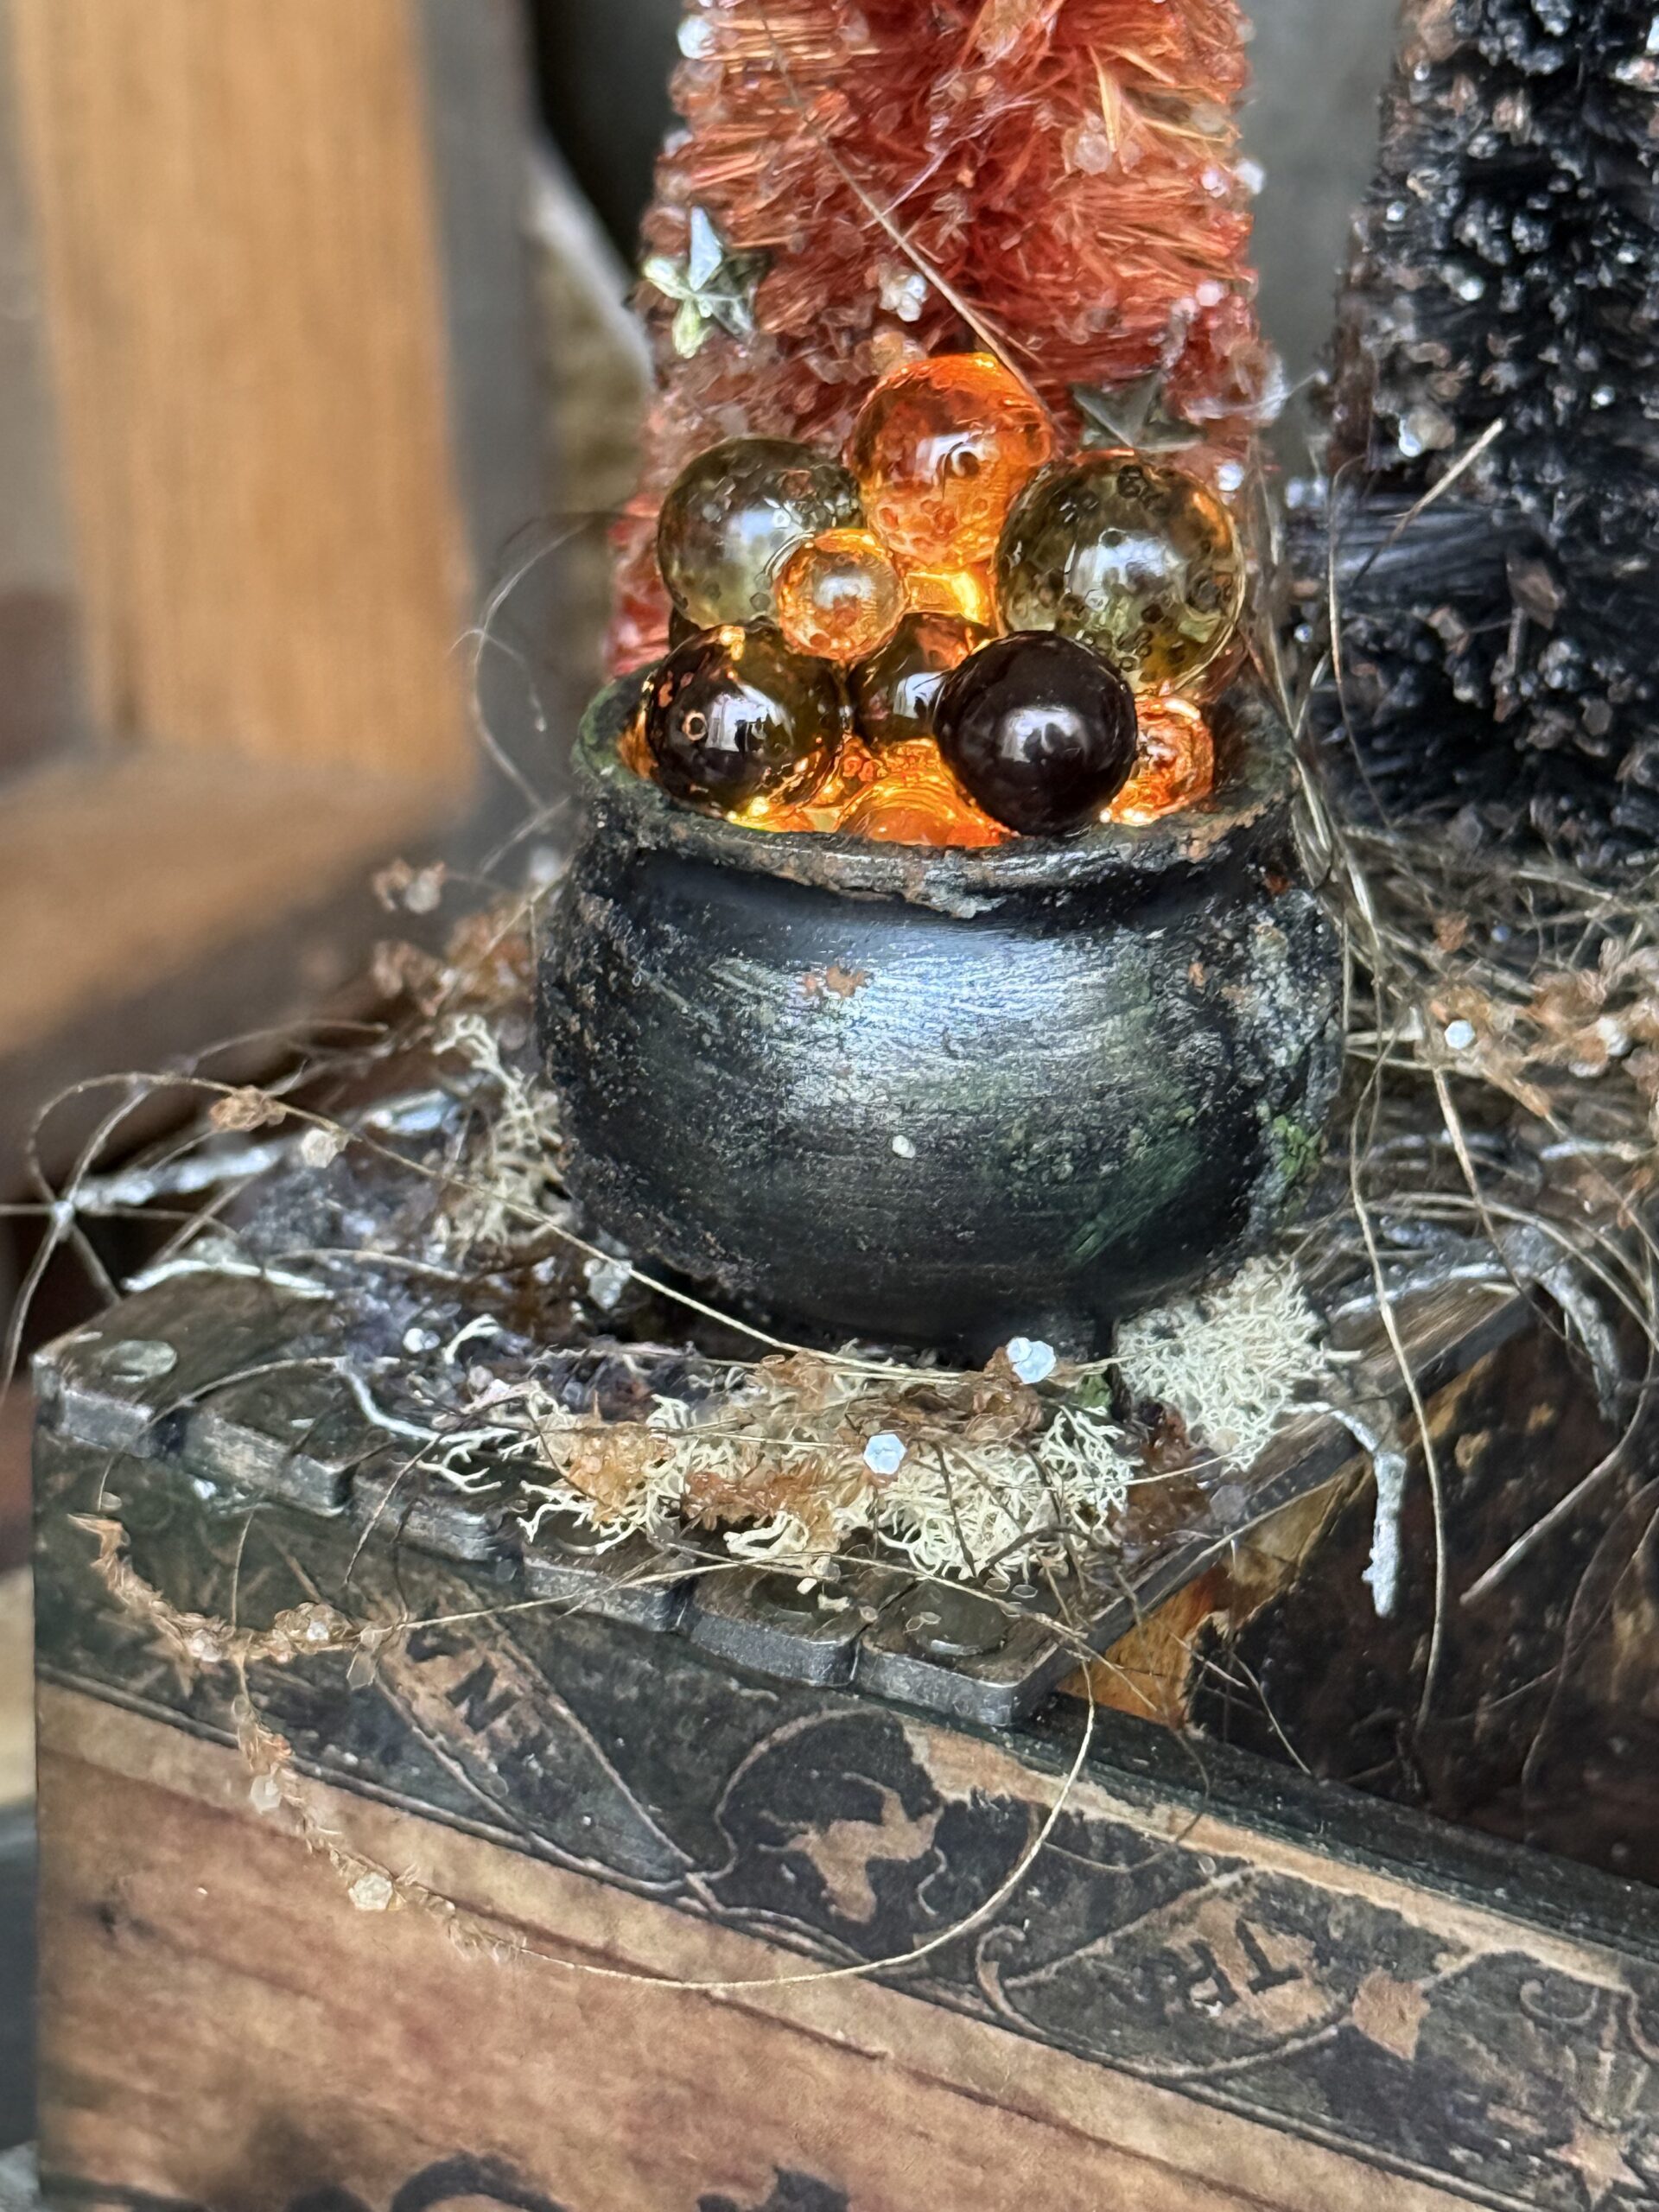
Here’s a look at the cauldron area all finished.
You can see where the cord of the tiny lights was strung through at the back of the vignette. I made a small cover for the battery pack using some scrap paper and the Tim Holtz Sizzix Vault Matchbox die that I cut and made to fit the pack.
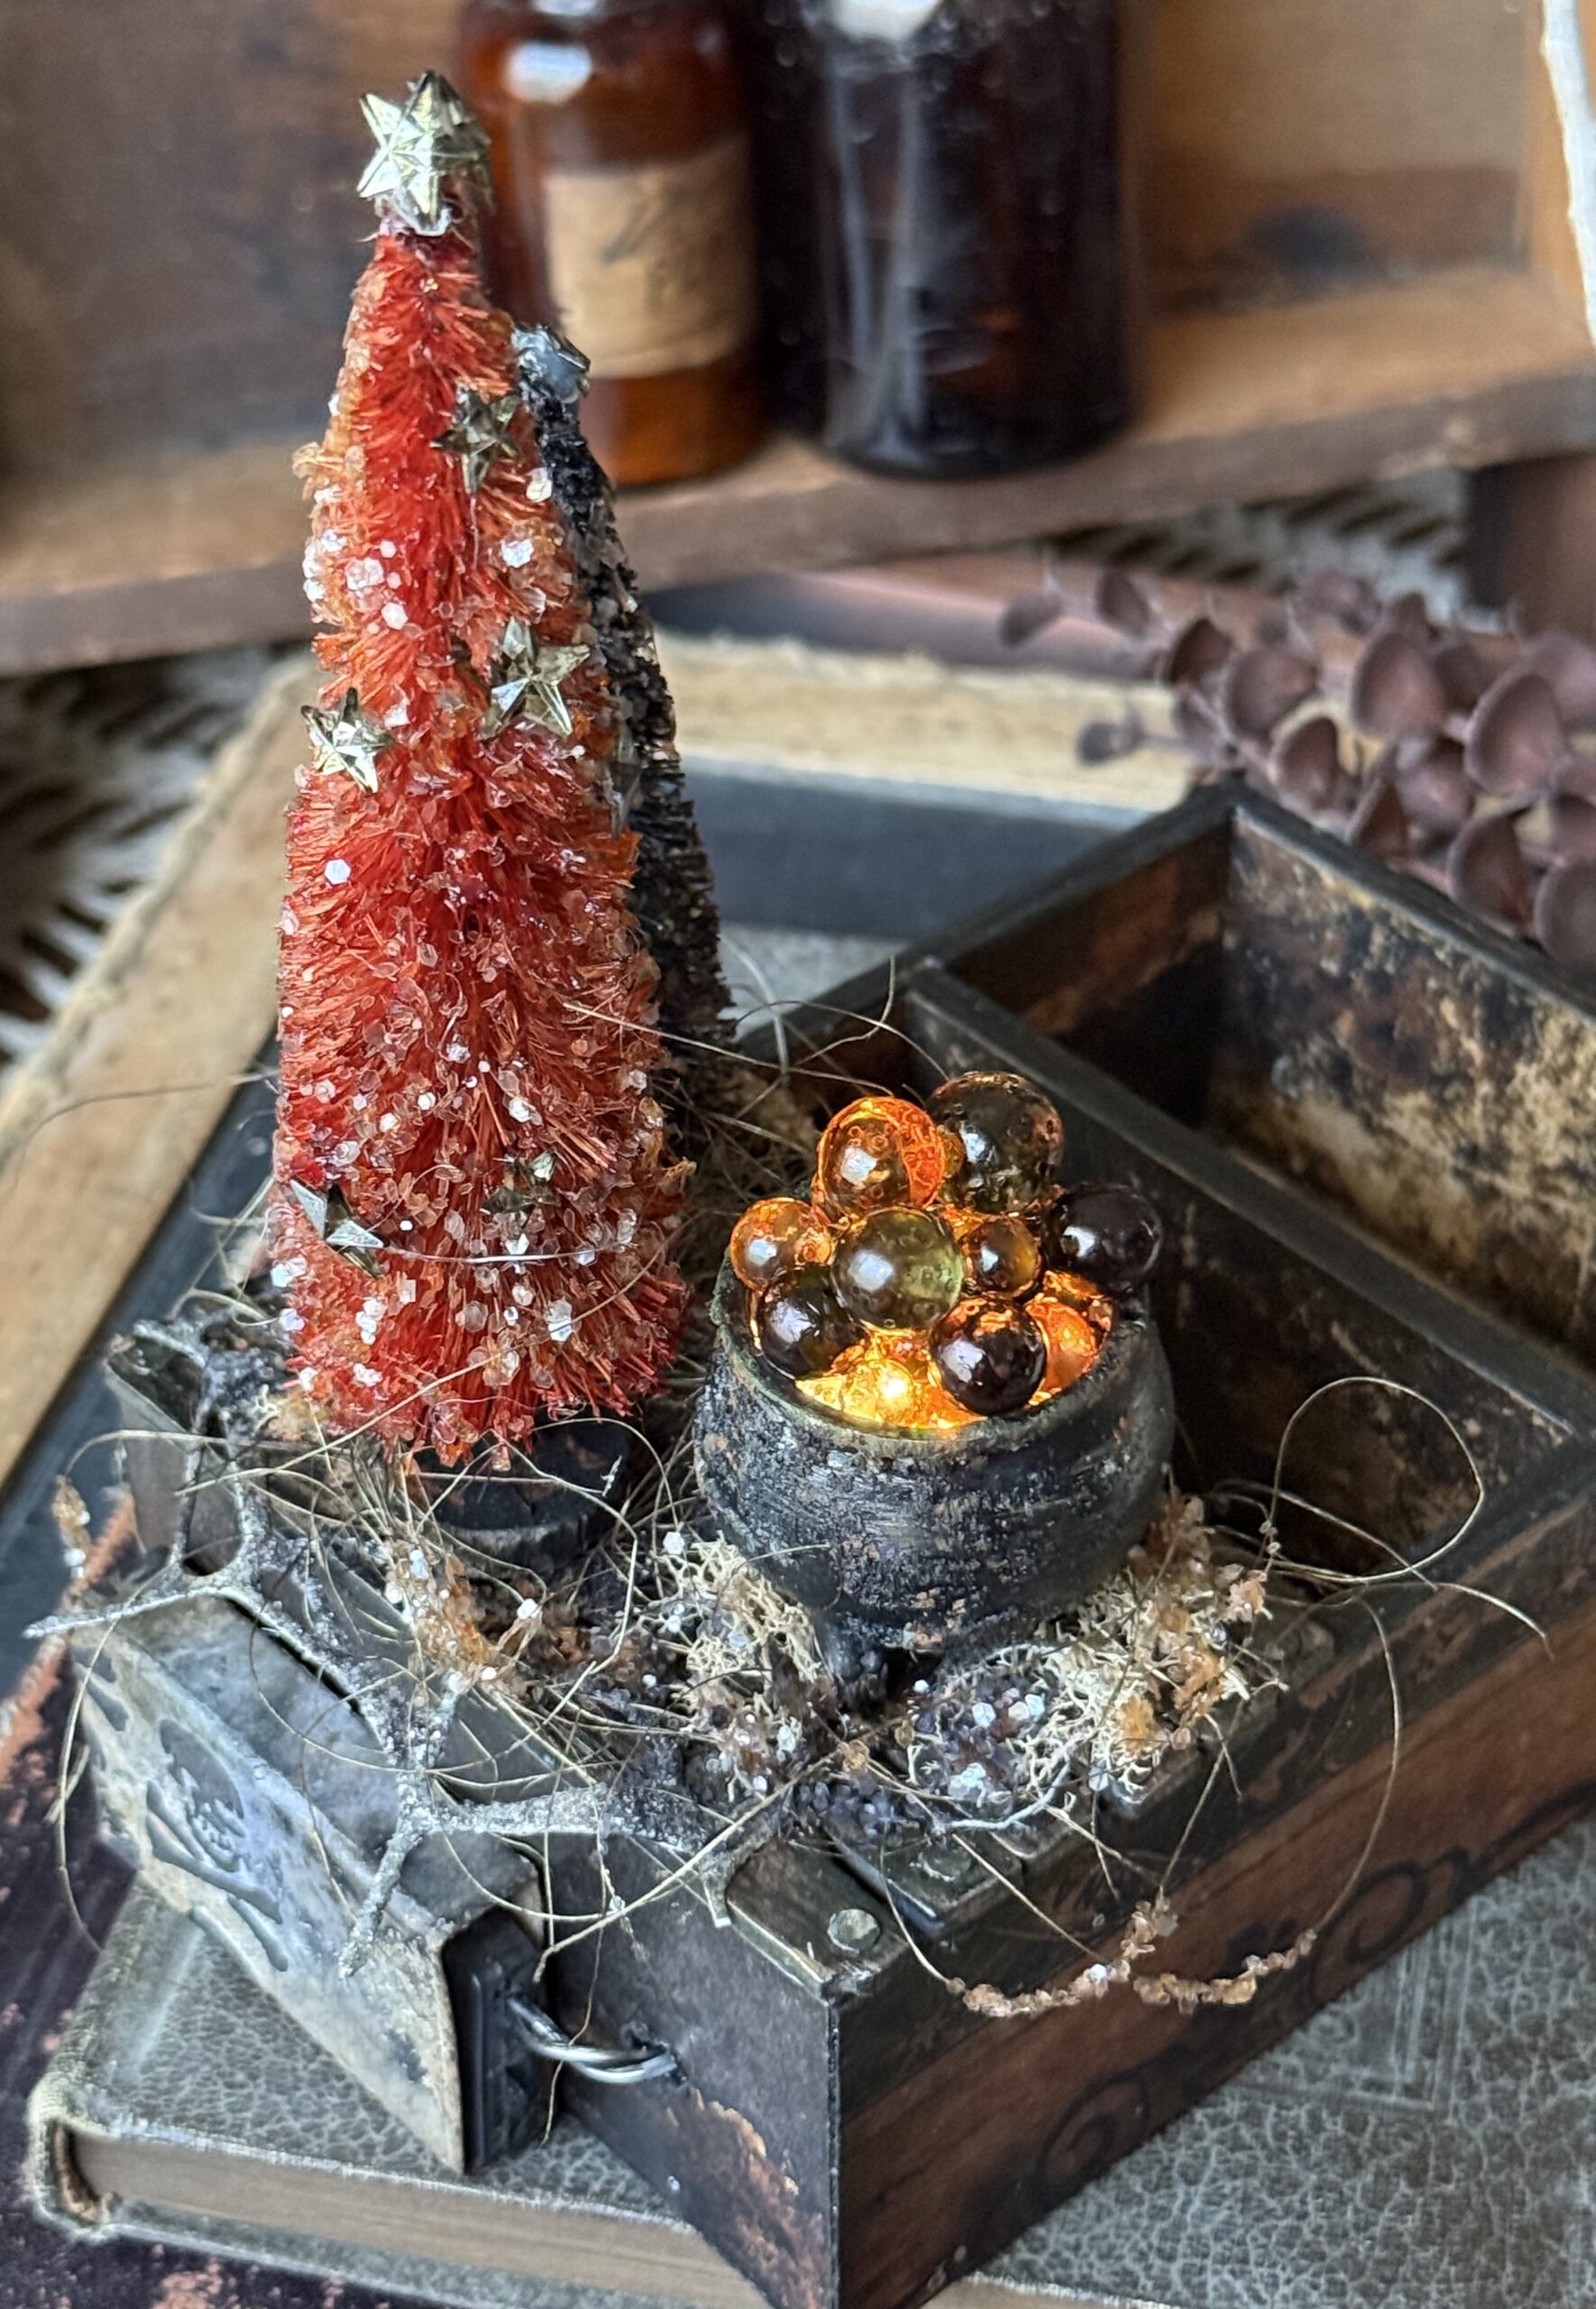
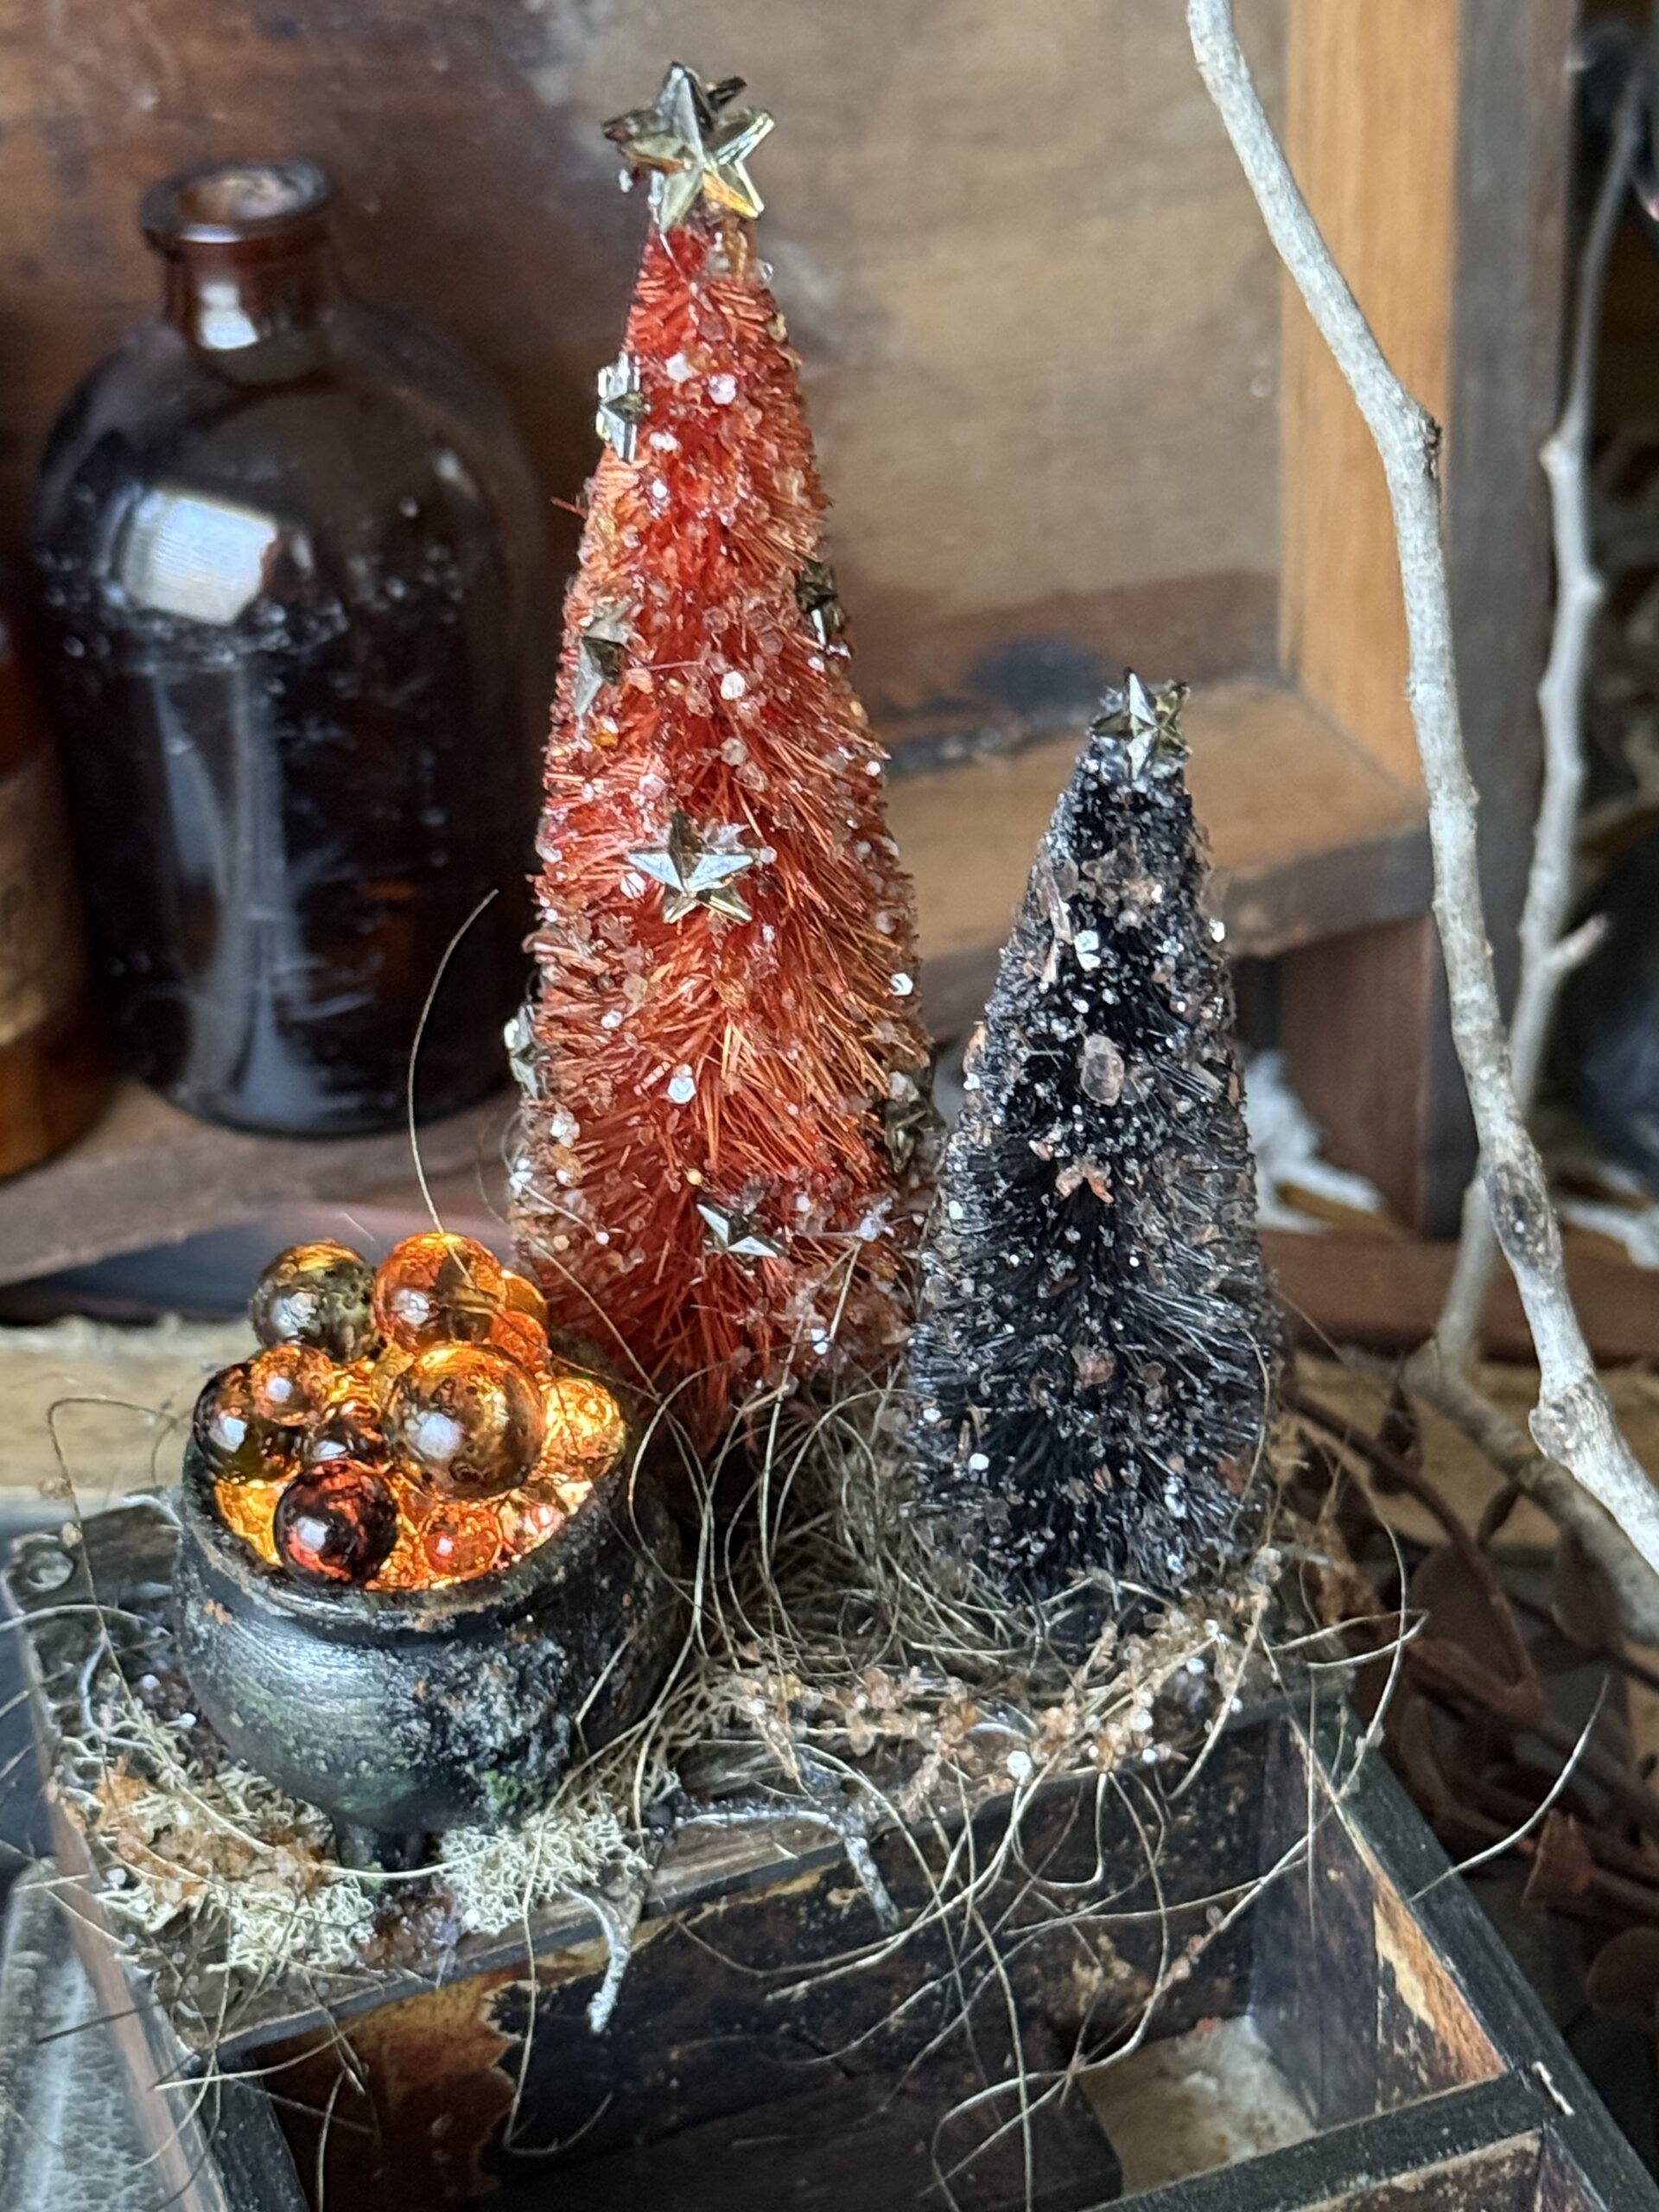
The trees for the vignette were made when Tim Holtz introduced the new Chunky Rock Candy. I dyed a couple idea-ology Alpine Trees using Distress Spray Stains, then using Glossy Accents as an adhesive, I rubbed it onto the trees and sprinkled each tree with some dyed glitter. The trees were embellished with Tiny Stars from Tim’s Christmas release a few years ago. I dyed those with Mushroom Alcohol Ink and adhered them to the tree using a glue gun.

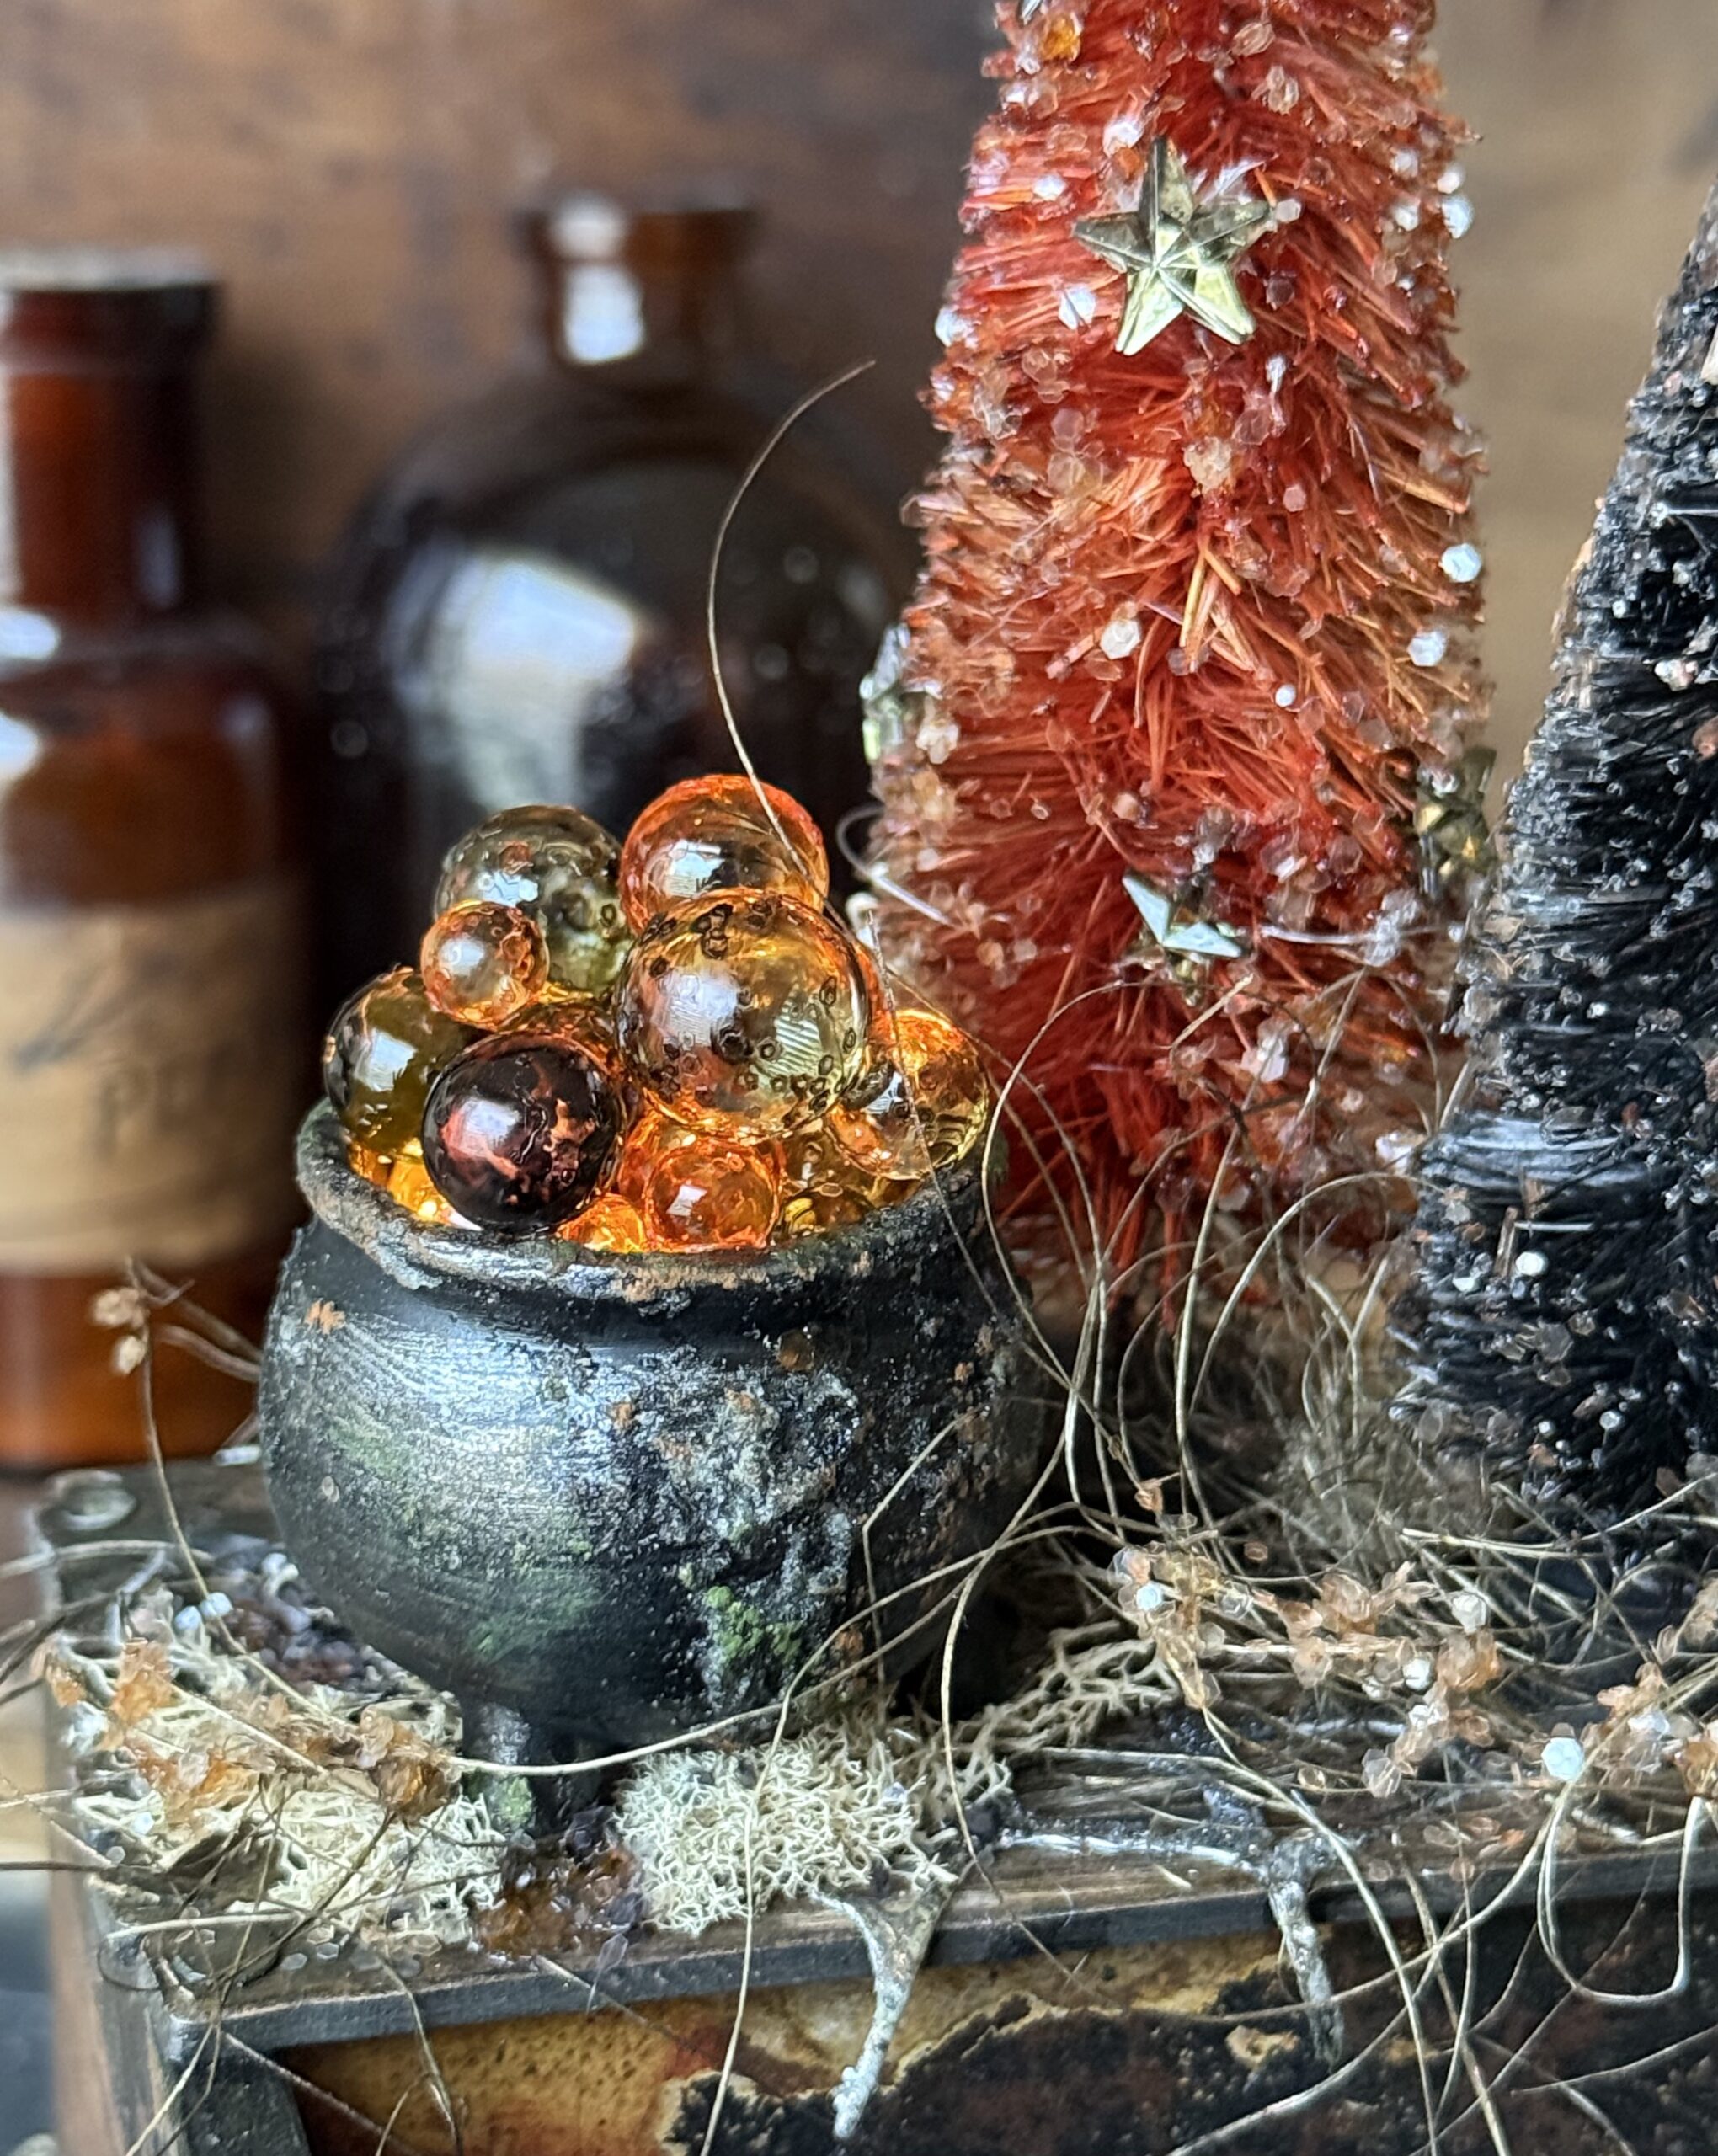
The cauldron was rubbed with some Crypt Grit-Paste then set aside to dry. After it was dry, I randomly painted it with Black Soot Distress Paint, then rubbed the grit-paste areas with a Rusty Hinge and Peeled Paint Distress Crayons.
The bubbles were colored using some Orange and Black Alcohol Inks, then adhered inside the cauldron, along with the string of tiny lights. To adhere the bubbles, I dripped Glossy Accents inside the cauldron, then began dropping the bubbles in one by one, along with a drip or two of Glossy Accents, until it was filled to where I wanted it to be, then I set it aside to dry before I moved on to the next step….
After the bubbles were completely dry, I adhered a glittery cobweb that I had in my stash over top of the planks, and under the cauldron to make it look like a spiderweb rug, then I added bits of floral moss around using collage medium.
I dyed some floral shredded excelsior using Mica Stain, dried it, then wound it around the trees, and hot glued the trees in placed. This created some wispiness to the project, then using the bottle of Glossy Accents, I added tiny amounts onto the wisps and sprinkled them with the dyed chunky glitter.
This was a fluke of a technique, but it totally worked and adds some glittery haunted goodness to the piece. It’s hard to see, but if you look close, it looks like real rock candy strung around.
With that, my project was complete!
I hope you enjoyed taking a peek at the process and hope you get a chance to make with the new idea-ology Halloween soon, you won’t be disappointed!
The products used to create this project are listed below with links to Simon Says Stamp. Thank you so much for supporting me through shopping through them. I appreciate it so much! – Creatively yours, Stacy
What is an affiliate program, and why should I click on the link and buy through you?
When you shop via the affiliate link on this blog, I receive a small commission from the affiliate provider (Simon Says Stamp) at no extra cost to you, whatsoever. These commissions help me to cover the hosting fees and other costs to run my blog and be able to provide you with FREE inspiration. If you shop the links, THANK YOU! I truly appreciate being able to share my love of creating with you.


Brilliant! But can you please tell me where you found the Stafford Glue ephemera? That’s my name and I’d love to find it.
Hello Jane, that’s so cool! Yes, it’s in the Halloween Ephemera pack for this 2025 Season! Here is a link directly to it at Simon Says Stamp. 🙂 https://www.simonsaysstamp.com/products/tim-holtz-idea-ology-2025-halloween-ephemera-pack-th94435
Wow. Love love love it all. Thanks for sharing
Crystal
As always, a beautiful make and a great tutorial Stacy!
thank you, Susan…appreciate you stopping by! 🙂
Another great make! The care you take with every little detail amazes me and I love to look at each picture to see how you do each element no matter how small. Your detailed descriptions and pictures of steps along the way always make me want to plunge into my own creations. Thanks for the inspiation and getting your grunge on.
that is so sweet of you to say..thank you so much, Marilyn. That is always my goal, creativity is good for the soul. Thanks again! 🙂
so many great details! I love it.
thanks so much, Lisa! 🙂
Sooo Good! Spooky and cute and wonderful! Lots of inspiration. Thank you!
thanks so much, Erin! 🙂
Fun post, but looks like you need 1k of supplies, lol. Would be fun to improvise something similar. Sandi
Absolutely use what you have…I am not advocating for always purchasing new things, that’s why I use old things, new things, retired things, vintage things..I am a Tim Holtz addict and have been collecting for MANY years (whether that’s new, sale, thrifted or have been given to promote or try because it’s what I love to create with), which I think if you’re here, you are probably too or have been a collector of crafting and stamping things and own supplies like I use or similar. My hope is to get you to use all of it. I appreciate your comment so that I could explain myself and my reasons for having this blog. 🙂