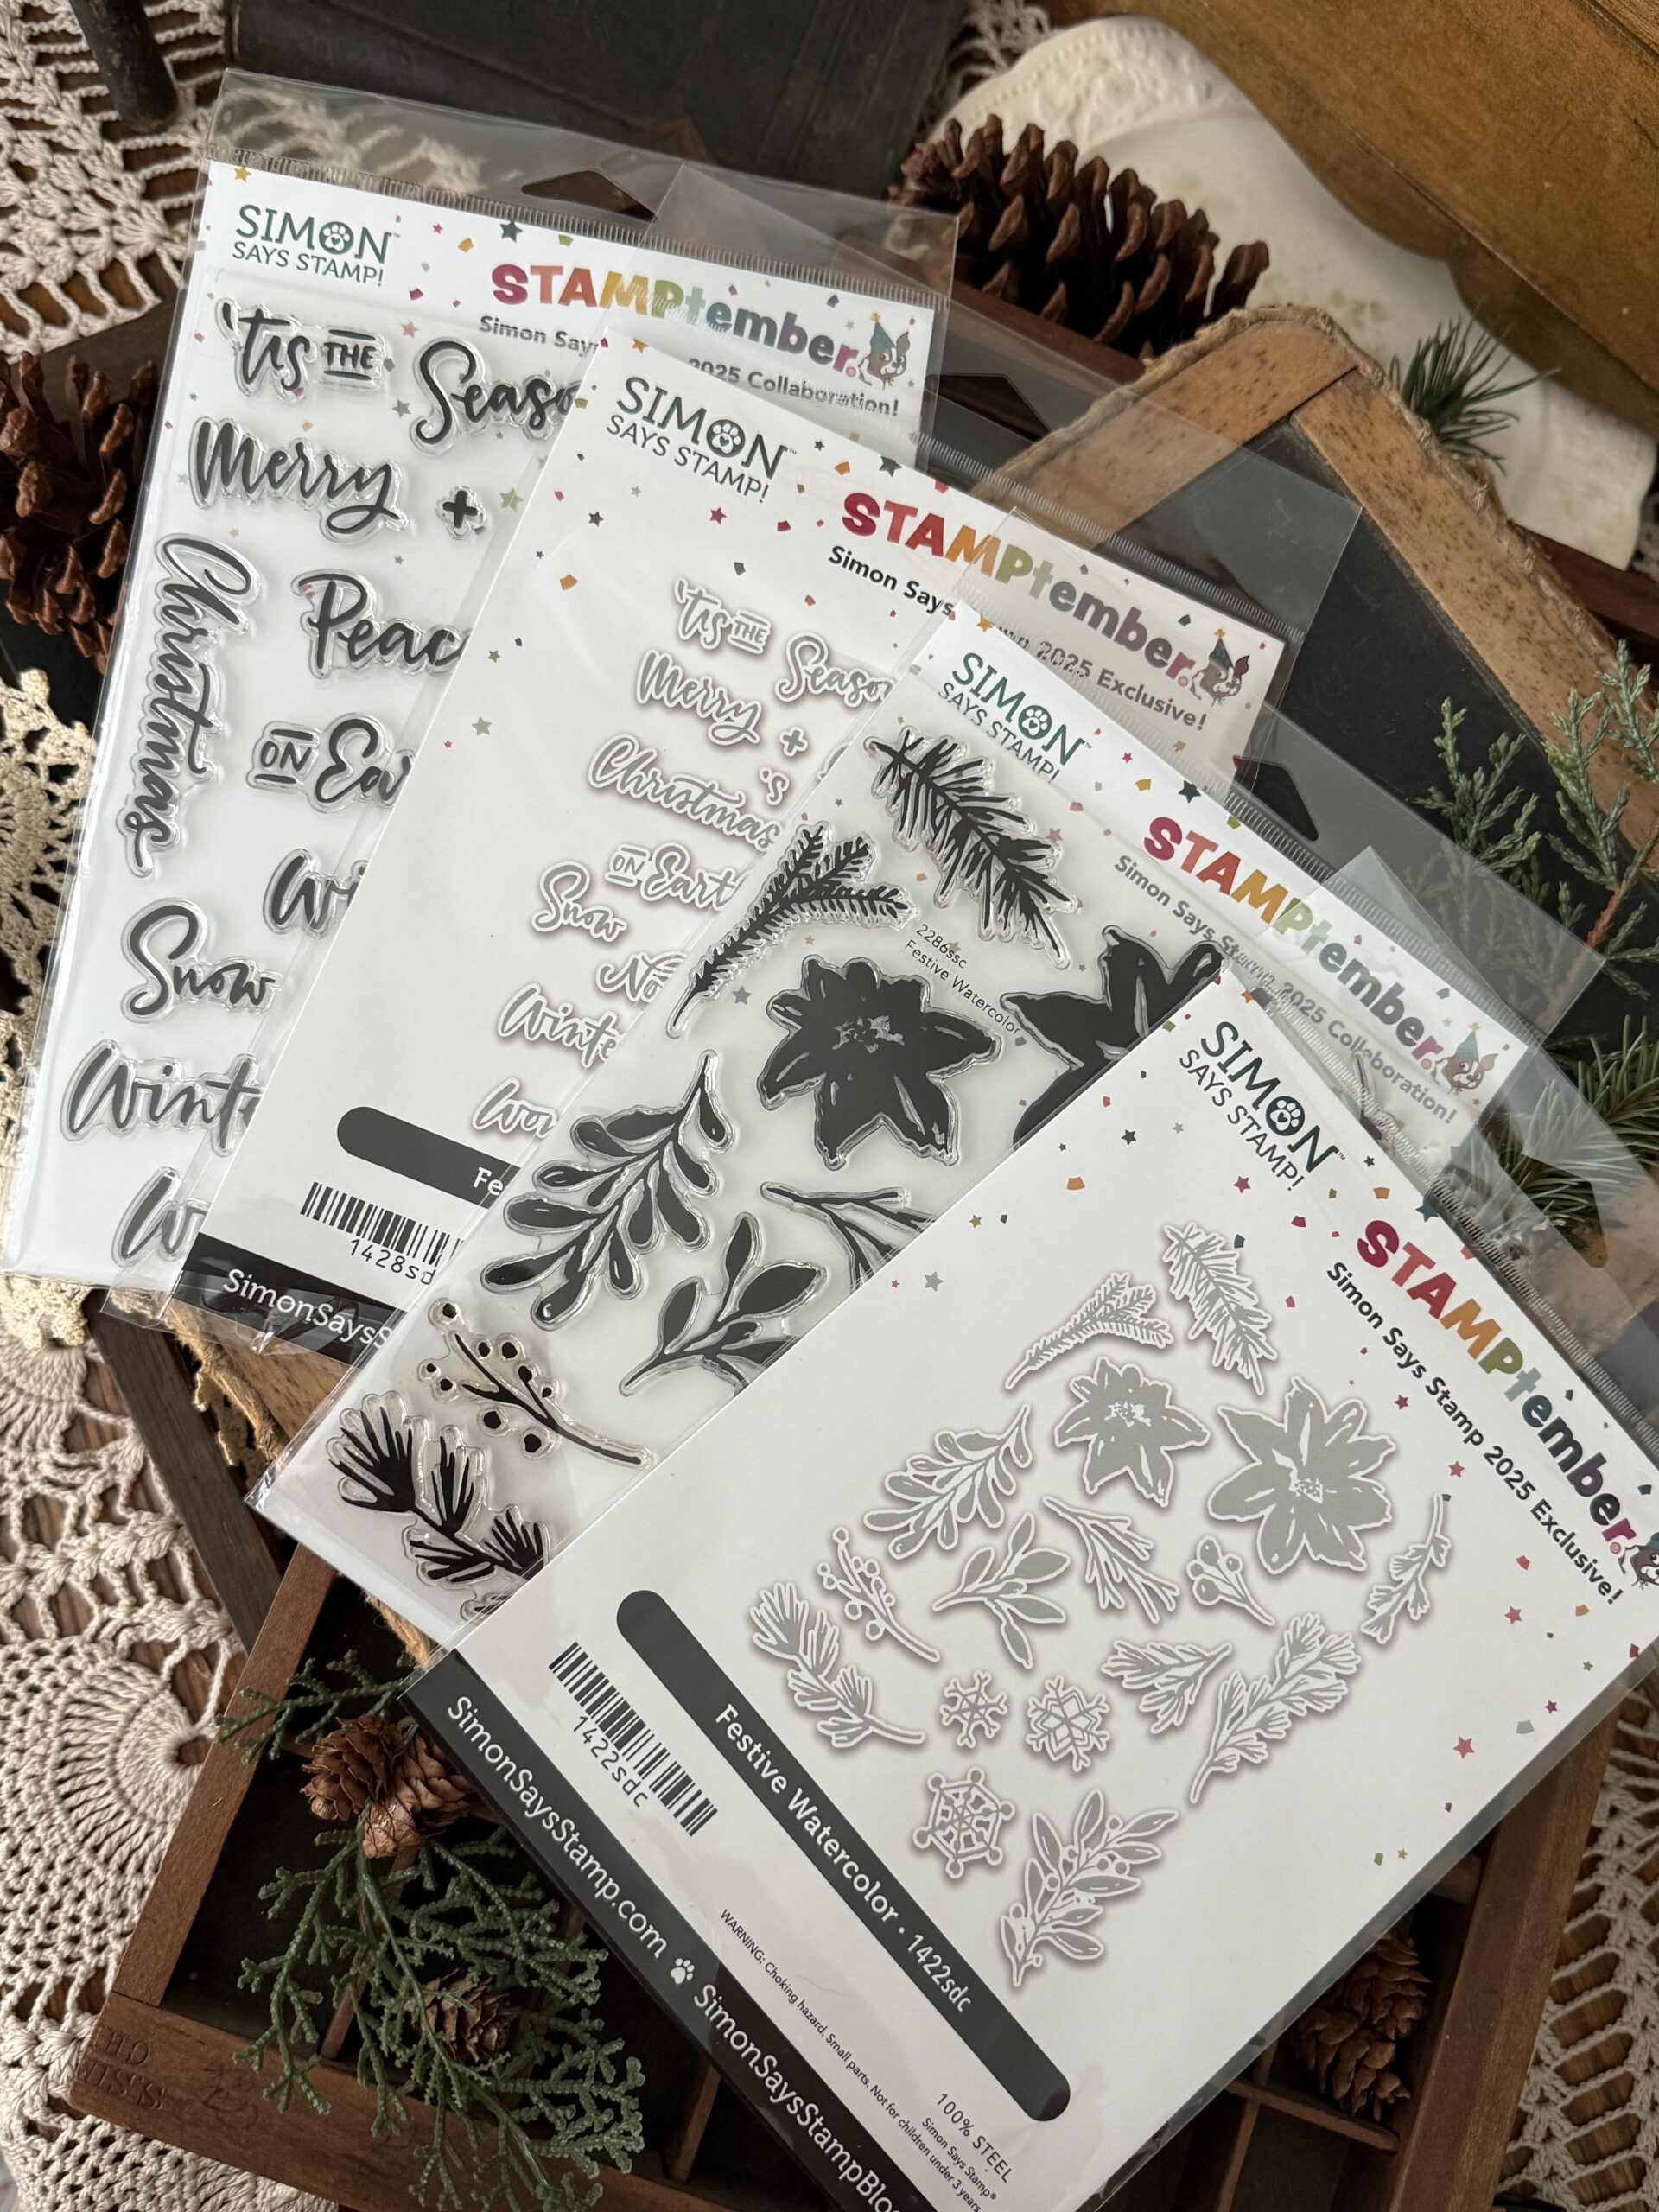
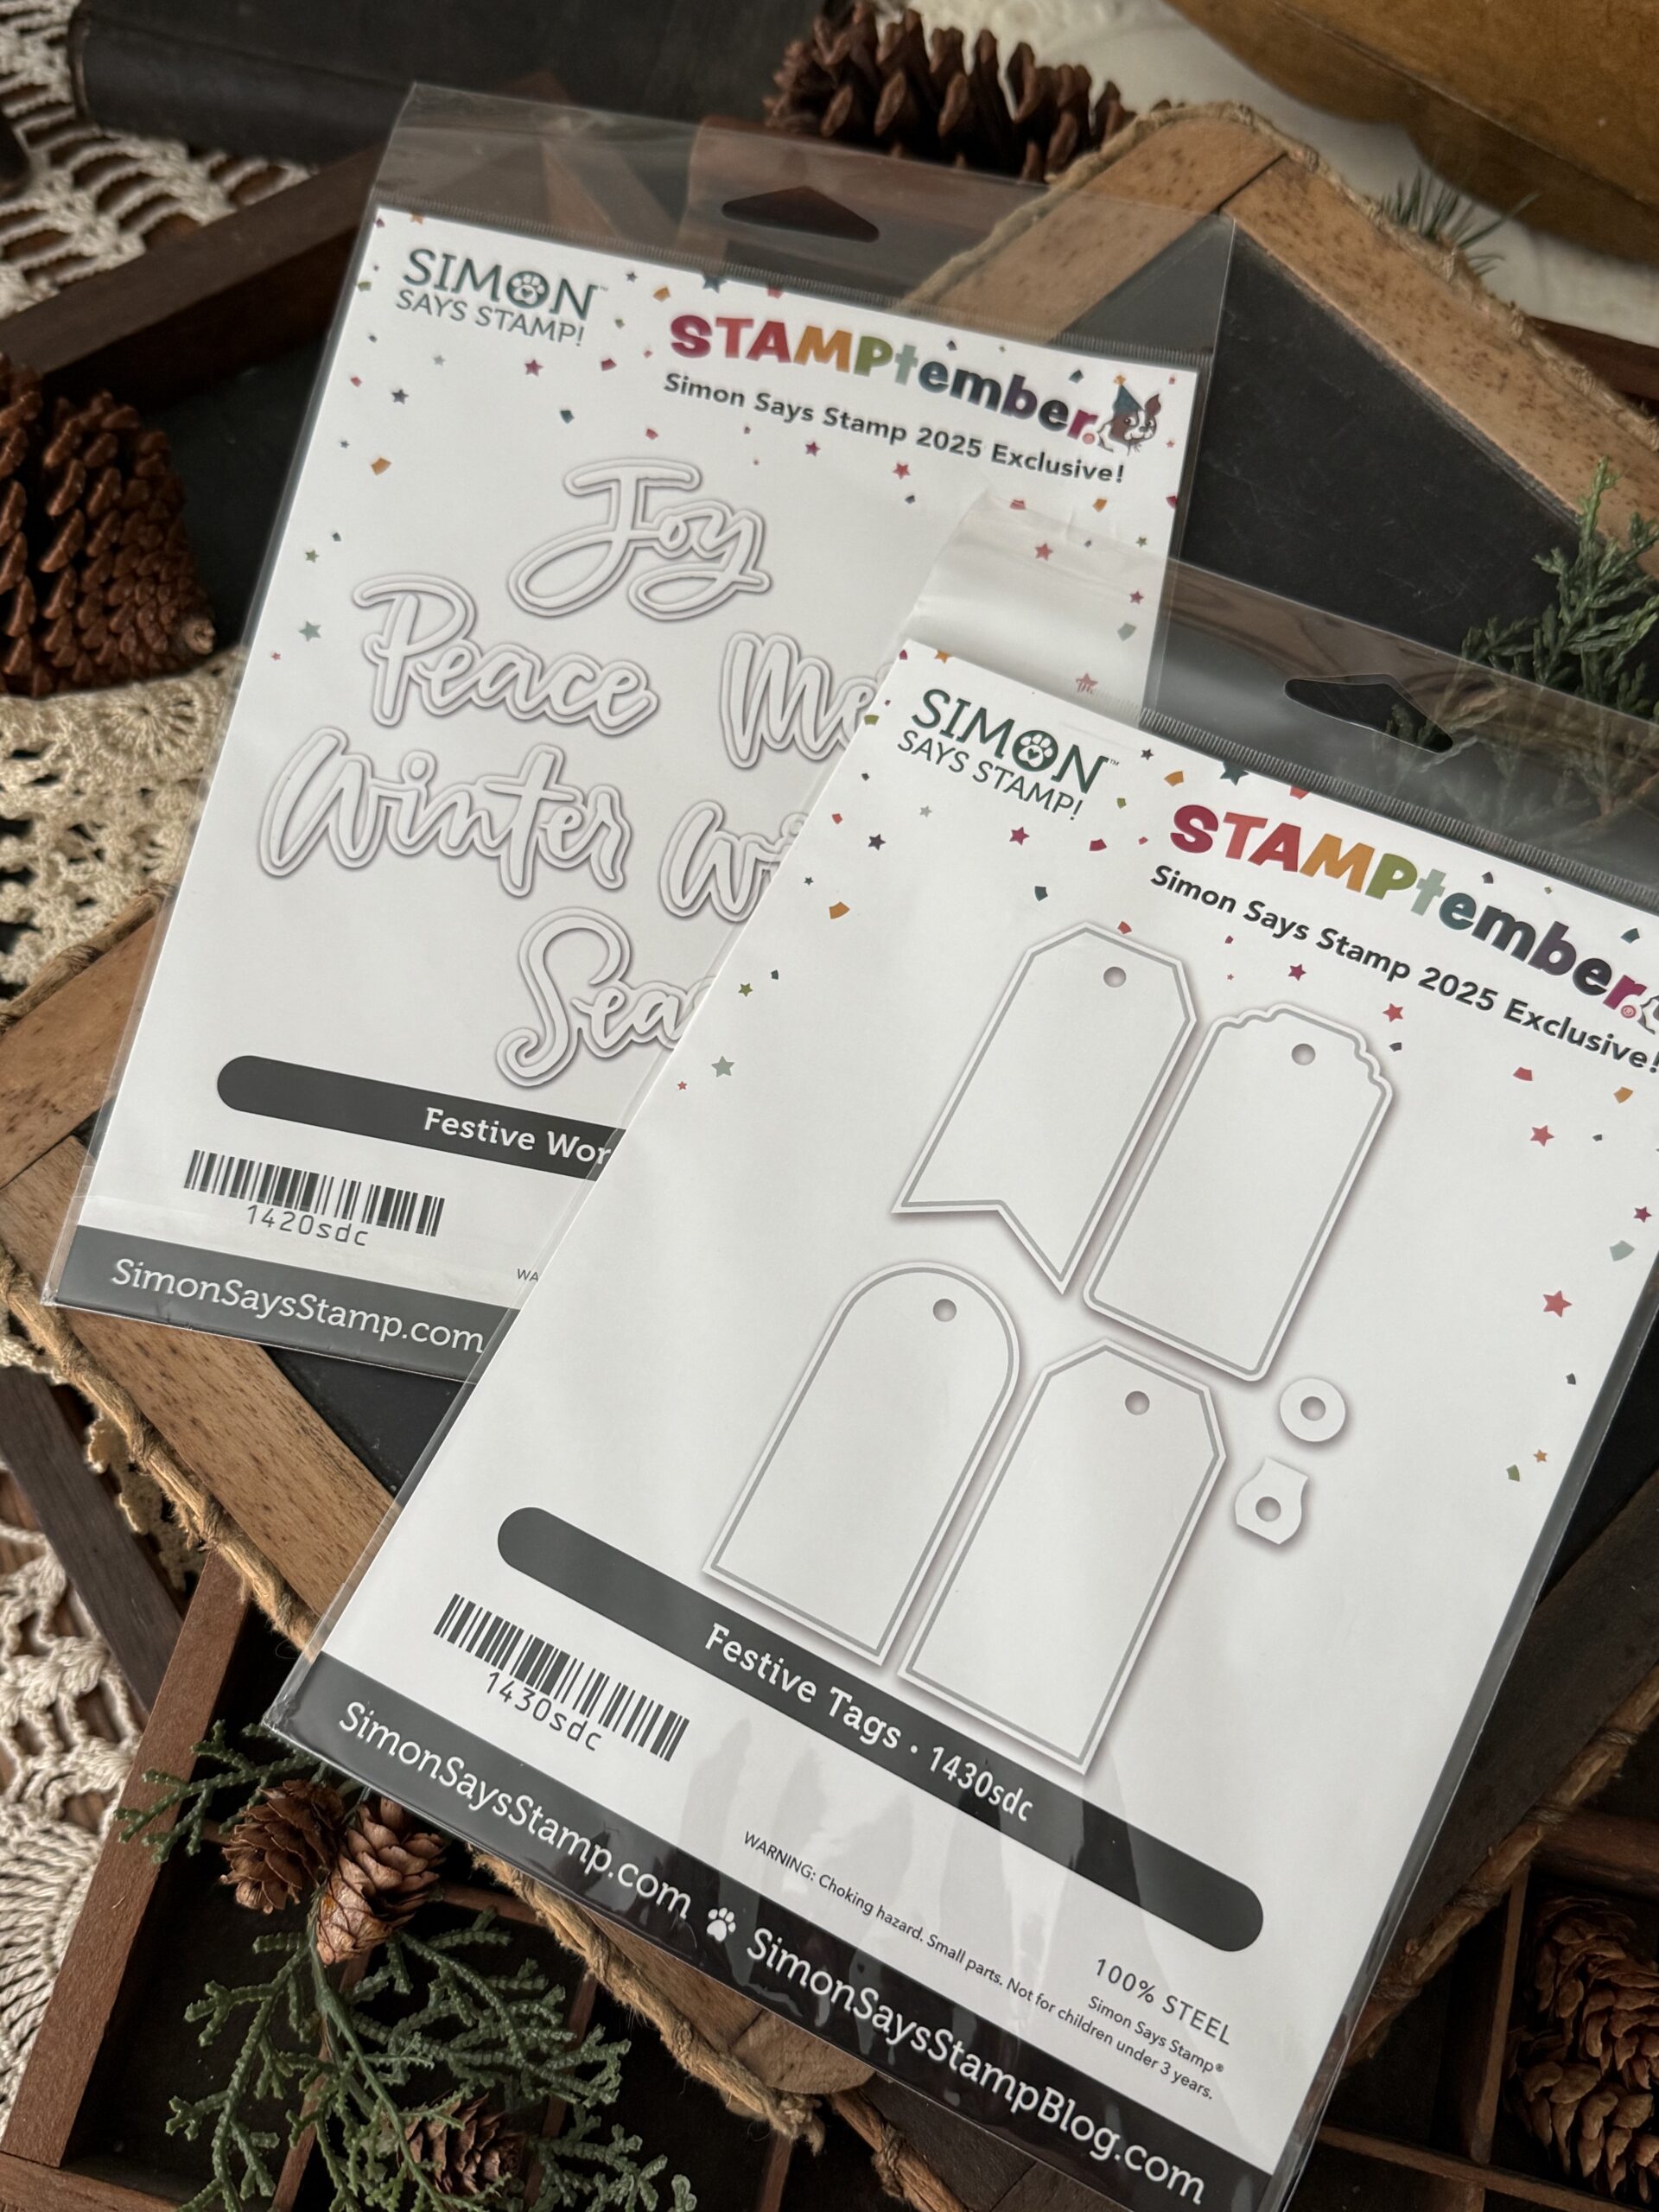
Hello friends… Happy STAMPtember! Simon Says Stamp is celebrating another year of September with special stamp and wafer die releases. I’m here today to share a card that I made using the new Tim Holtz colaboration release. Heidi and Tim were busy coming up with many surprises for the celebration, in fact, they are going to be hosting a CREATE event online using this combination of Stamps and Wafer Dies…how exciting is that??
The products that they released are over the TOP fabulous..and did you see how many they released??!!
Check them out HERE or below in my photos.
******if you’re interested in the product, run, don’t walk and get one, they will sell out quickly!****
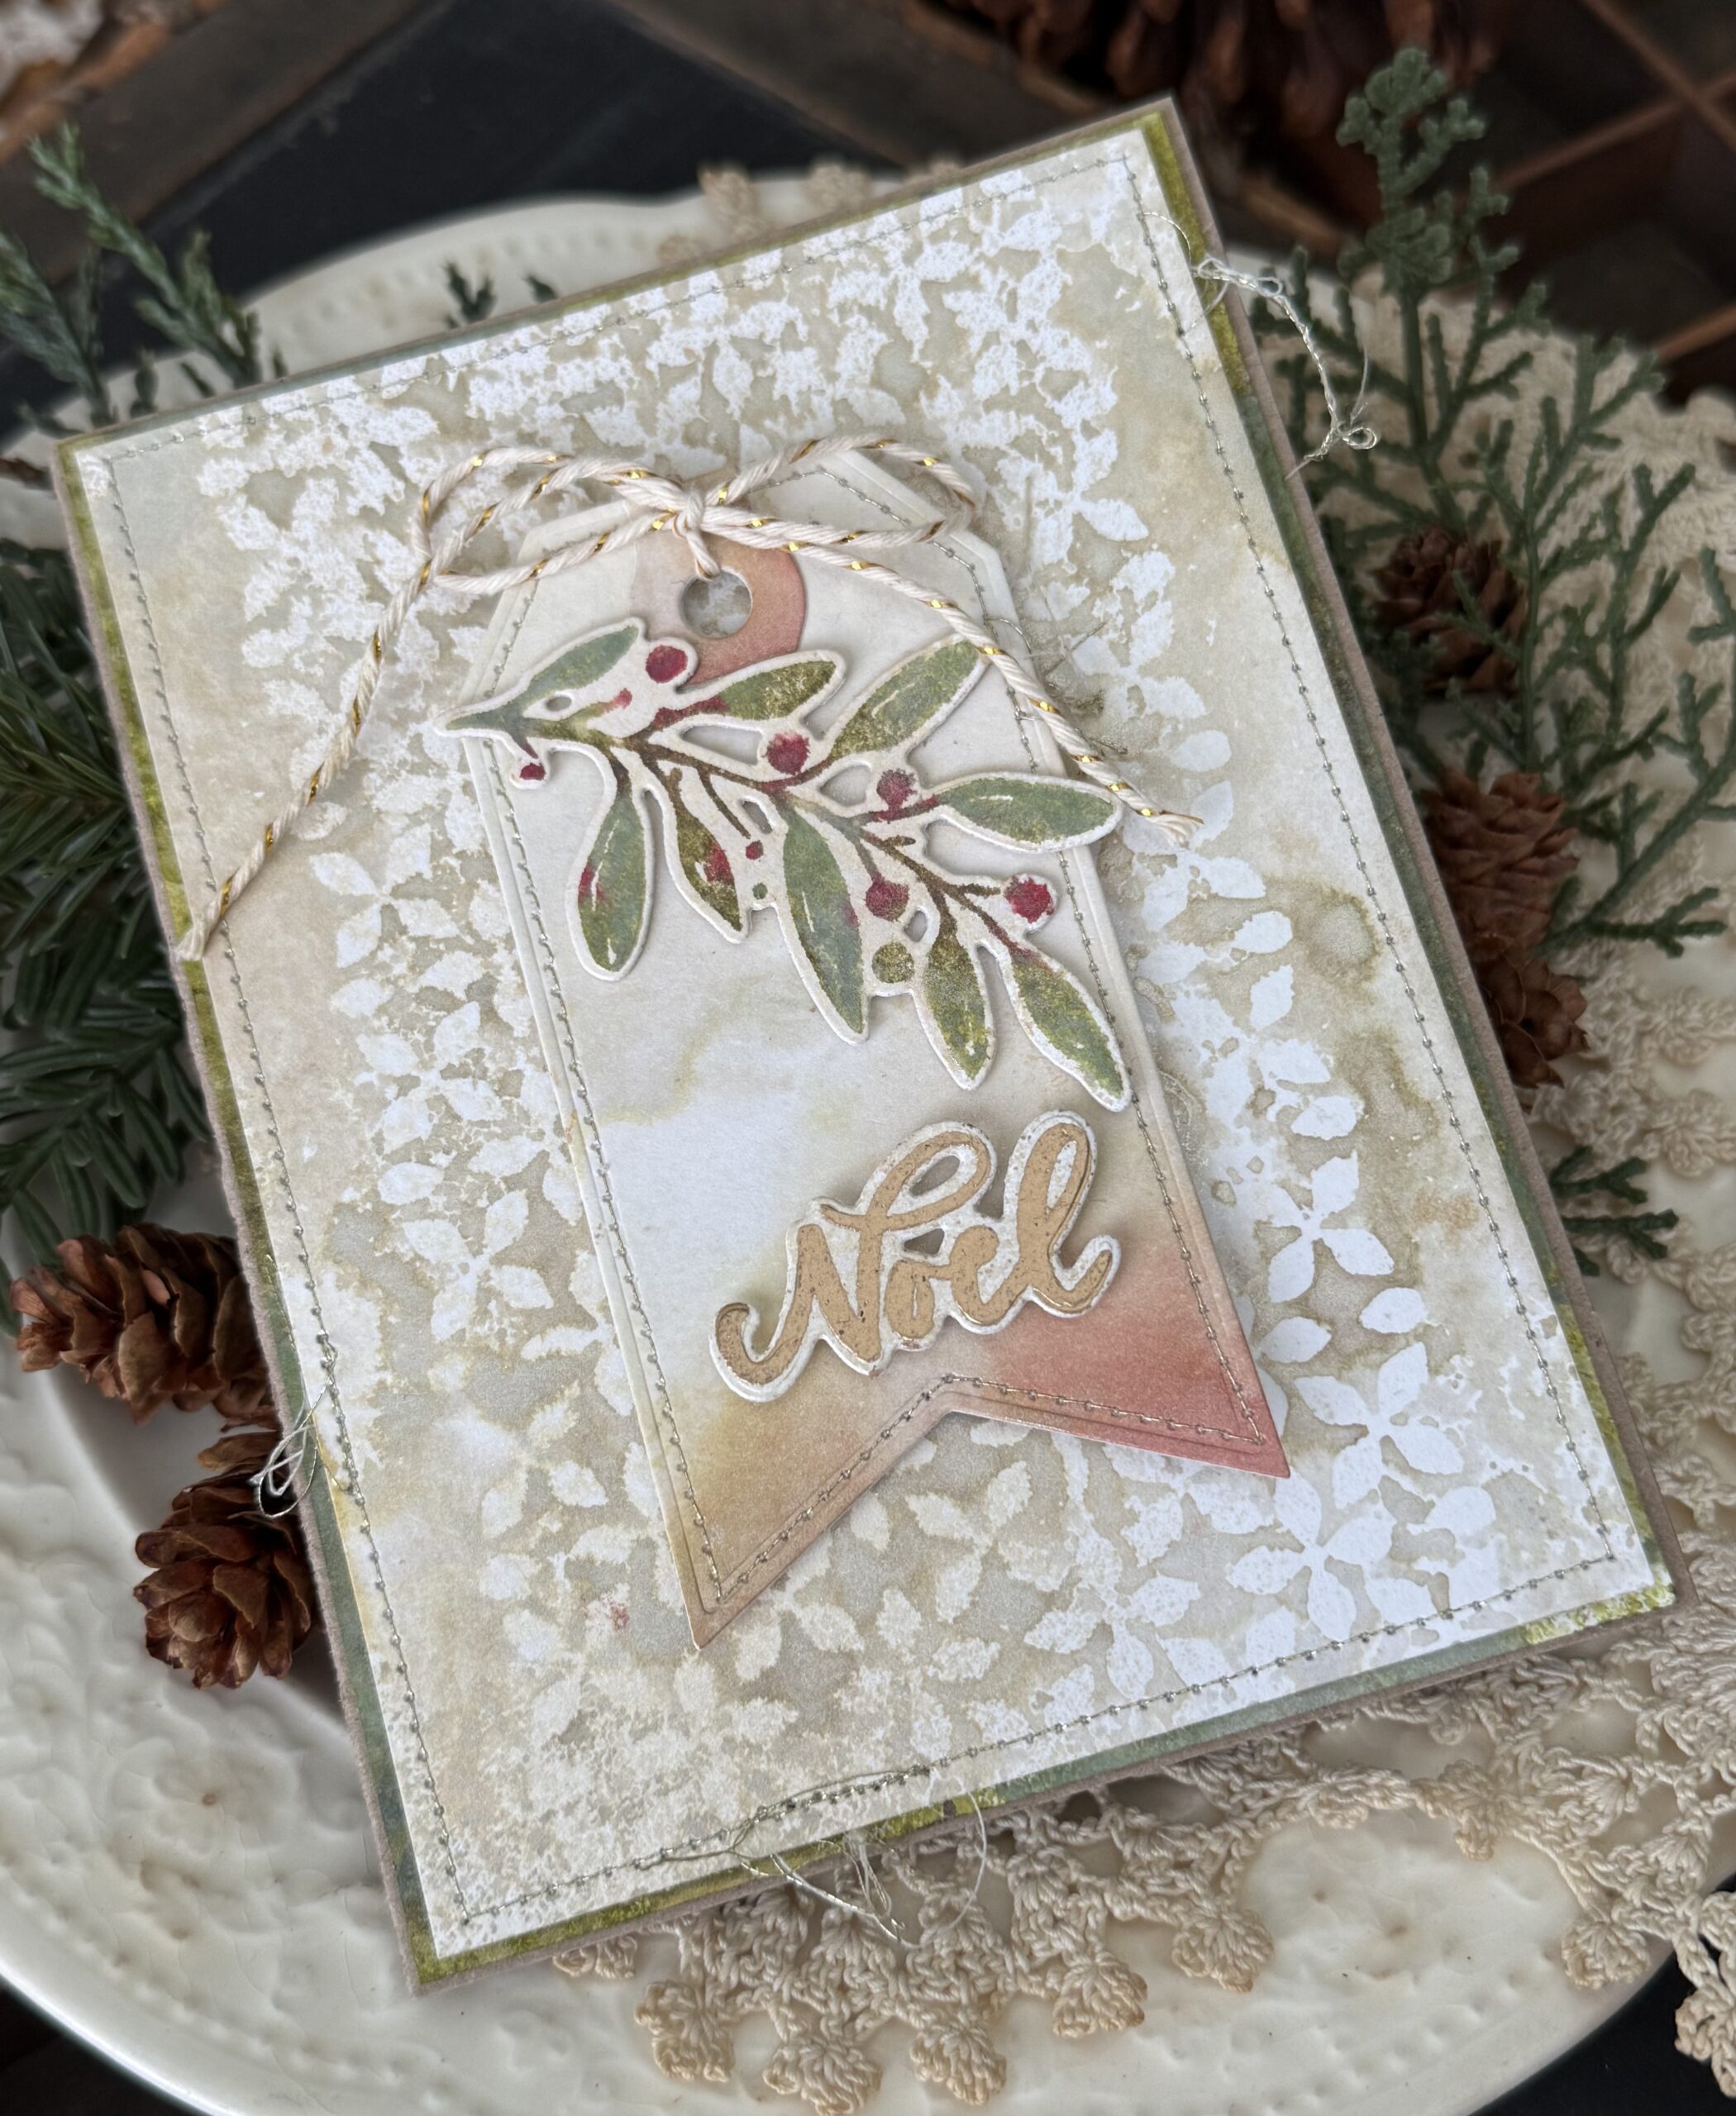
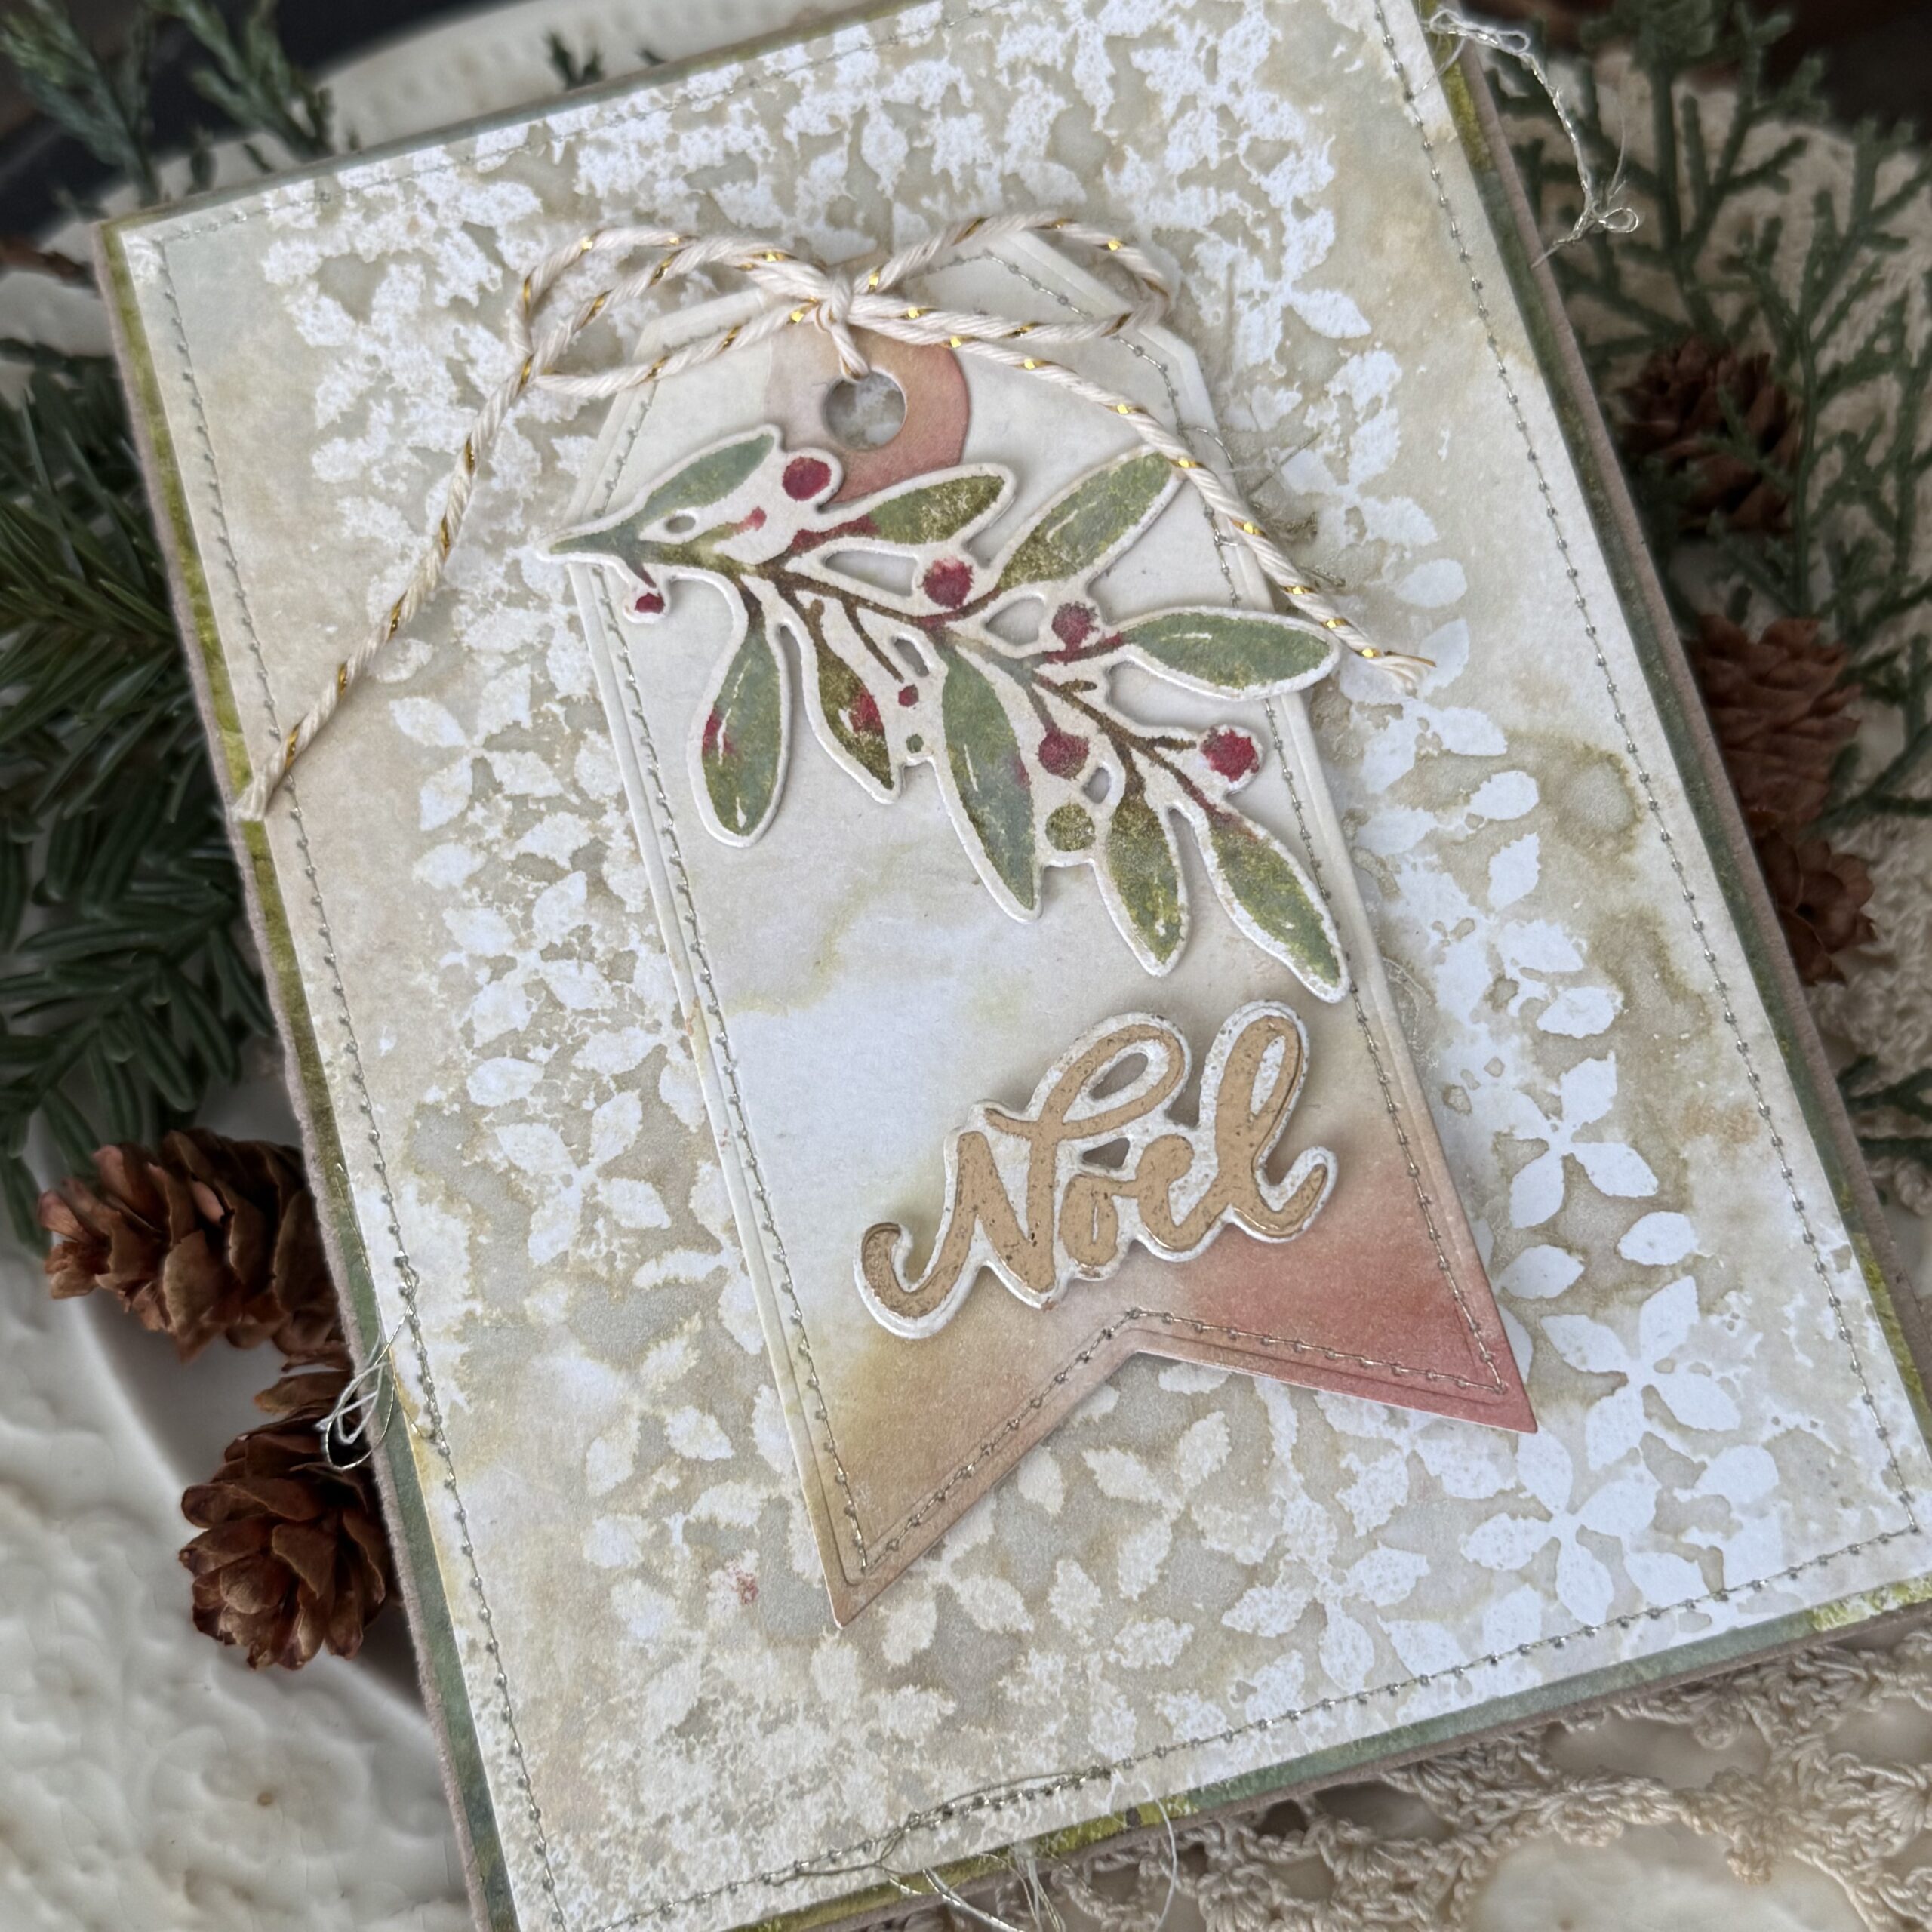
I kept this card pretty simple but love how the focus is on the tag and the floral piece shines. And speaking of shine, I used Distress Mica Sprays and Distress Spritz to create the backgrounds of the card to add a shimmer of holiday magic. (Although it’s hard to see in the photos..the only problem with shiny products, the photo doesn’t seem to give it justice.)
I created the background for the card using a mono-printing technique, I enjoy this technique so much, it’s easy, but has big impact and can be tweaked to create details in the stencil patterns or left plain as I have done here. I sprayed the stencil with a combination of Decayed and Unraveled Mica Stain, and a light spritz of water, directly onto the stencil, then flipped the stencil over onto a piece of Distress Watercolor Paper. I left the stencil on the paper for a few seconds, then daubed up any extra ink that smooshed out from under the stencil with a paper towel. I removed the stencil then dried the background with a heat tool.
To check out some more detailed instructions on the technique with more photos and other ways of doing it, CLICK HERE or HERE. I just love it and have more posts on my blog sharing it!
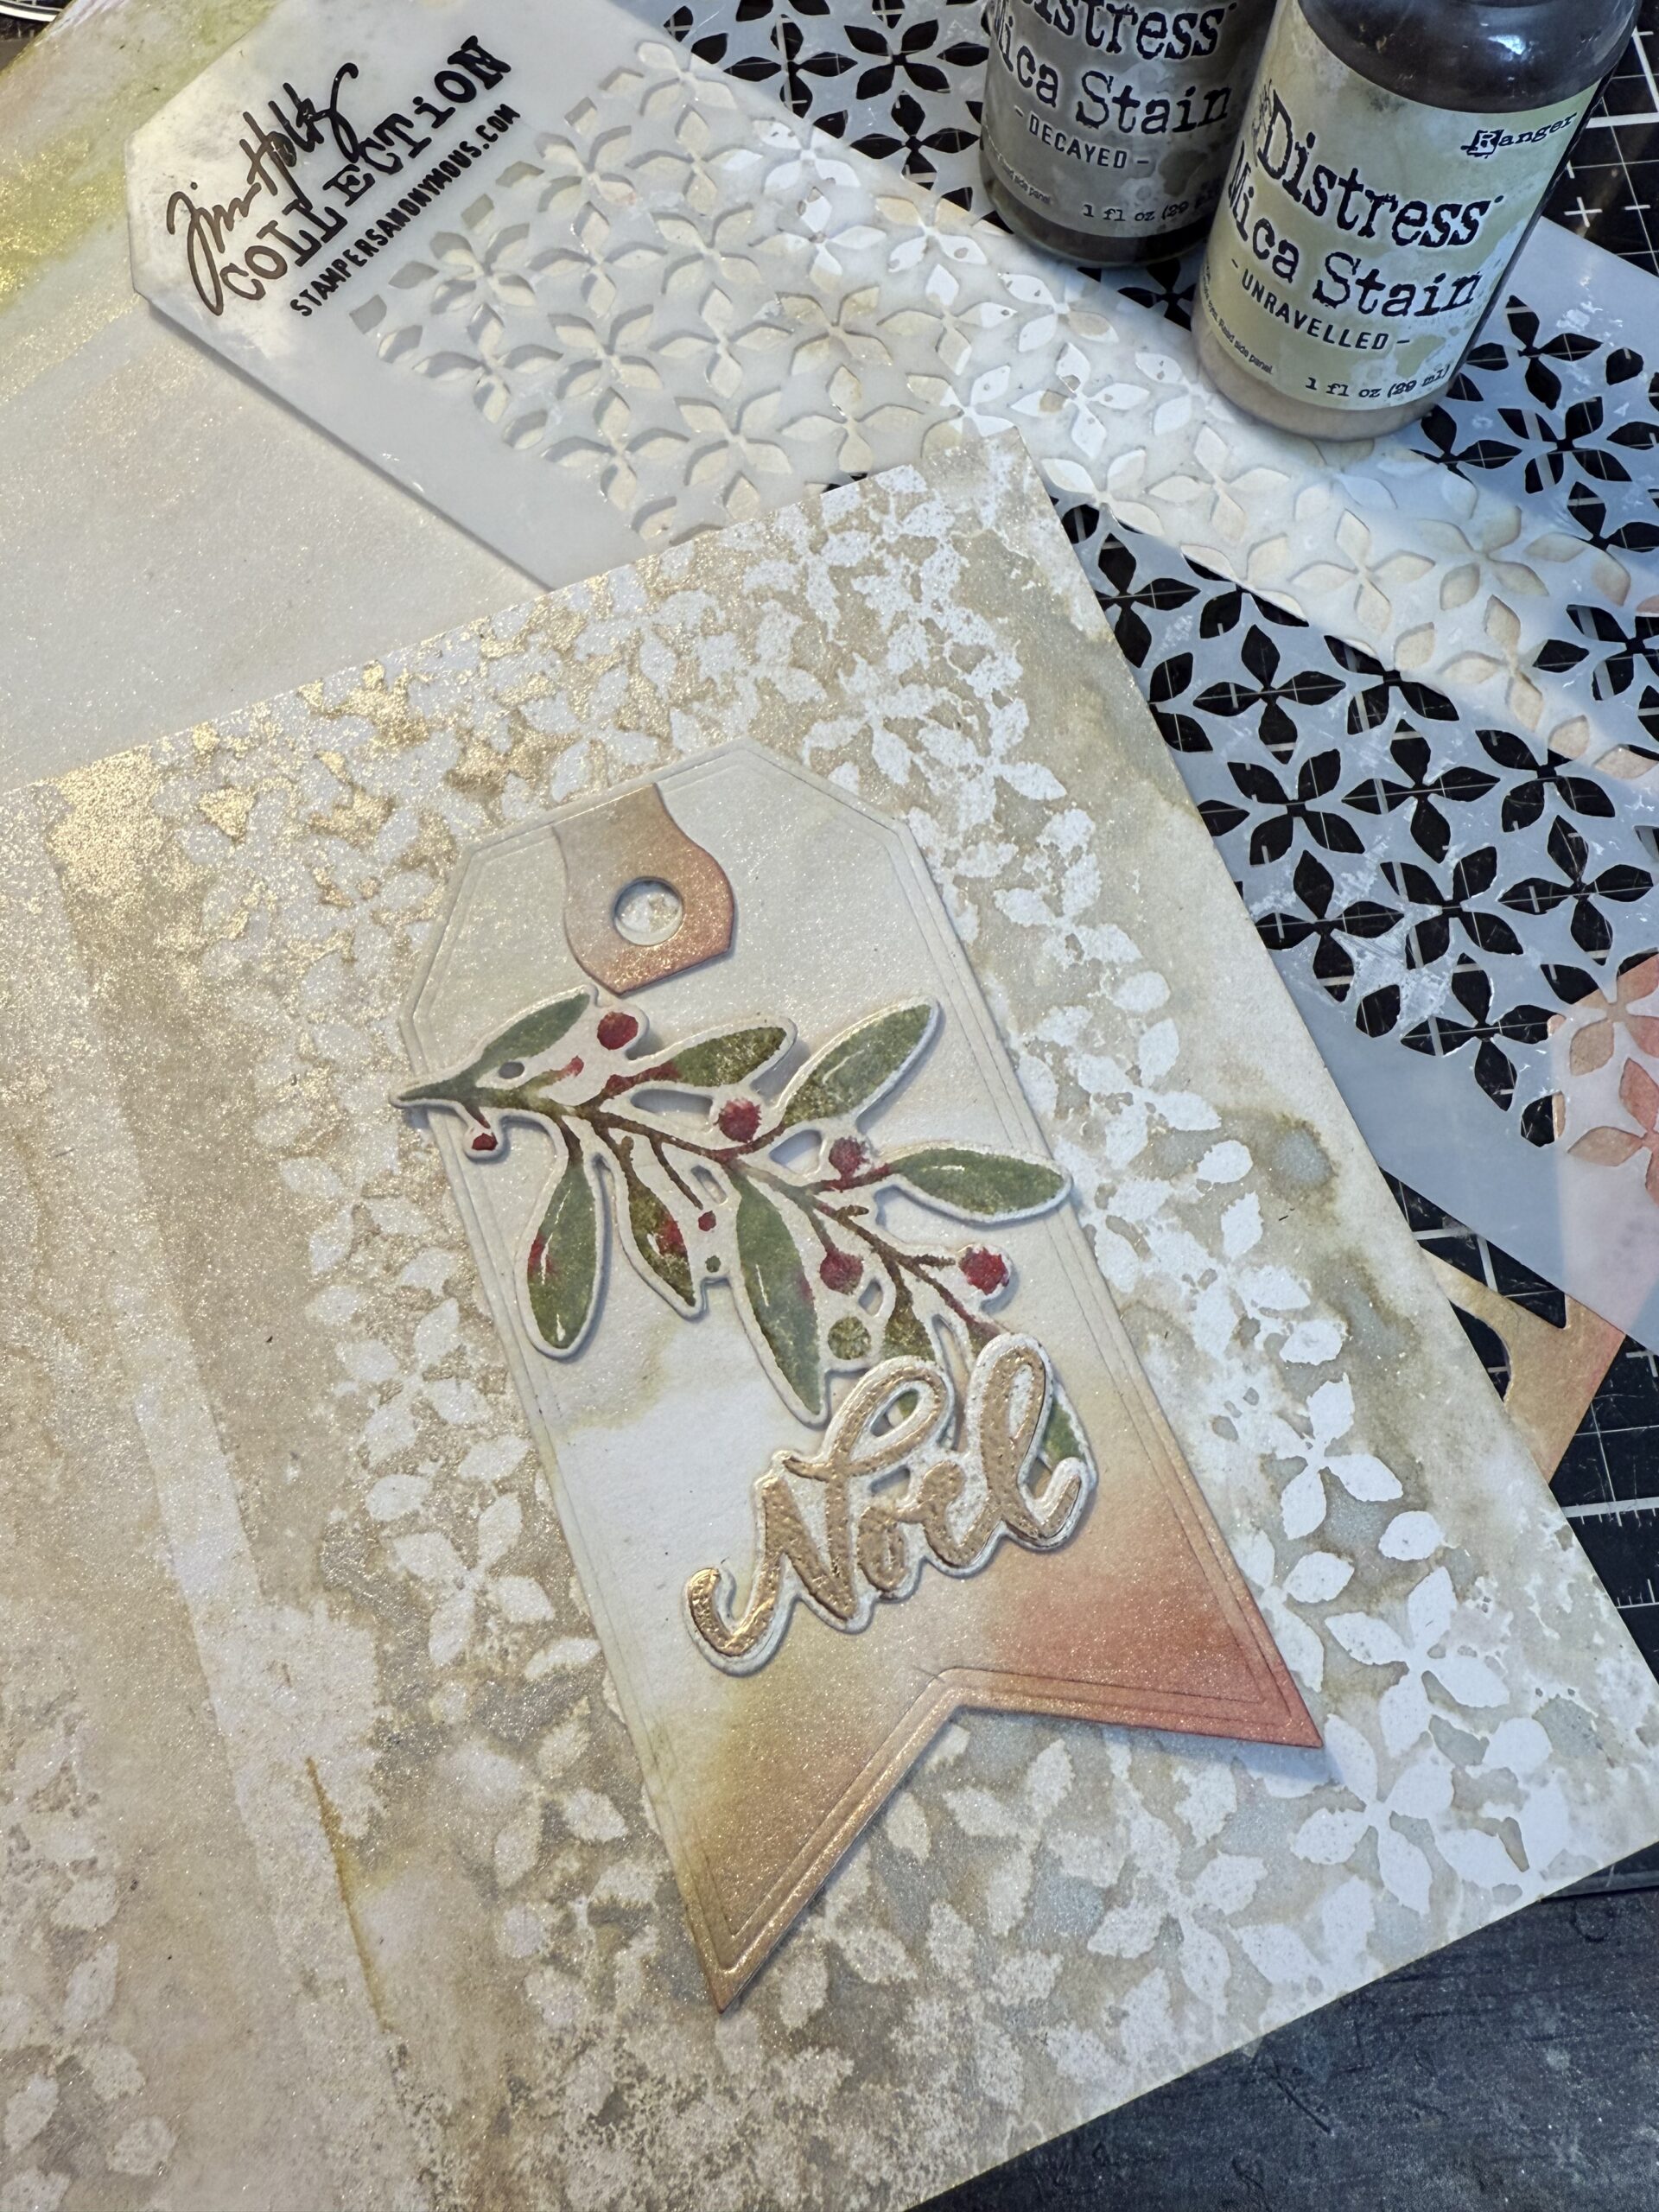
The tag was created by spritzing a piece of Distress Watercolor Paper with a combination of the two Mica Stains I previously used, and a quick spray of Barn Door Spritz. That is the pink/red color that you see on the tag. I then dried the paper, then cut out the tag. I also cut out a matching washer for the top of the tag (you get two choices in this set..yay!)
These tags are TOO MUCH! I can’t tell you how excited I am for this set of dies. I LOVE tags and using them on the front of cards or as a tag, but these shapes and the light embossed edges of them are …chef’s kiss*!
In this close-up you can see that beautiful shimmer! I embossed the word “Noel” from the Festive Words set using clear embossing ink and Gold embossing powder, then used the matching wafer die to cut it out.
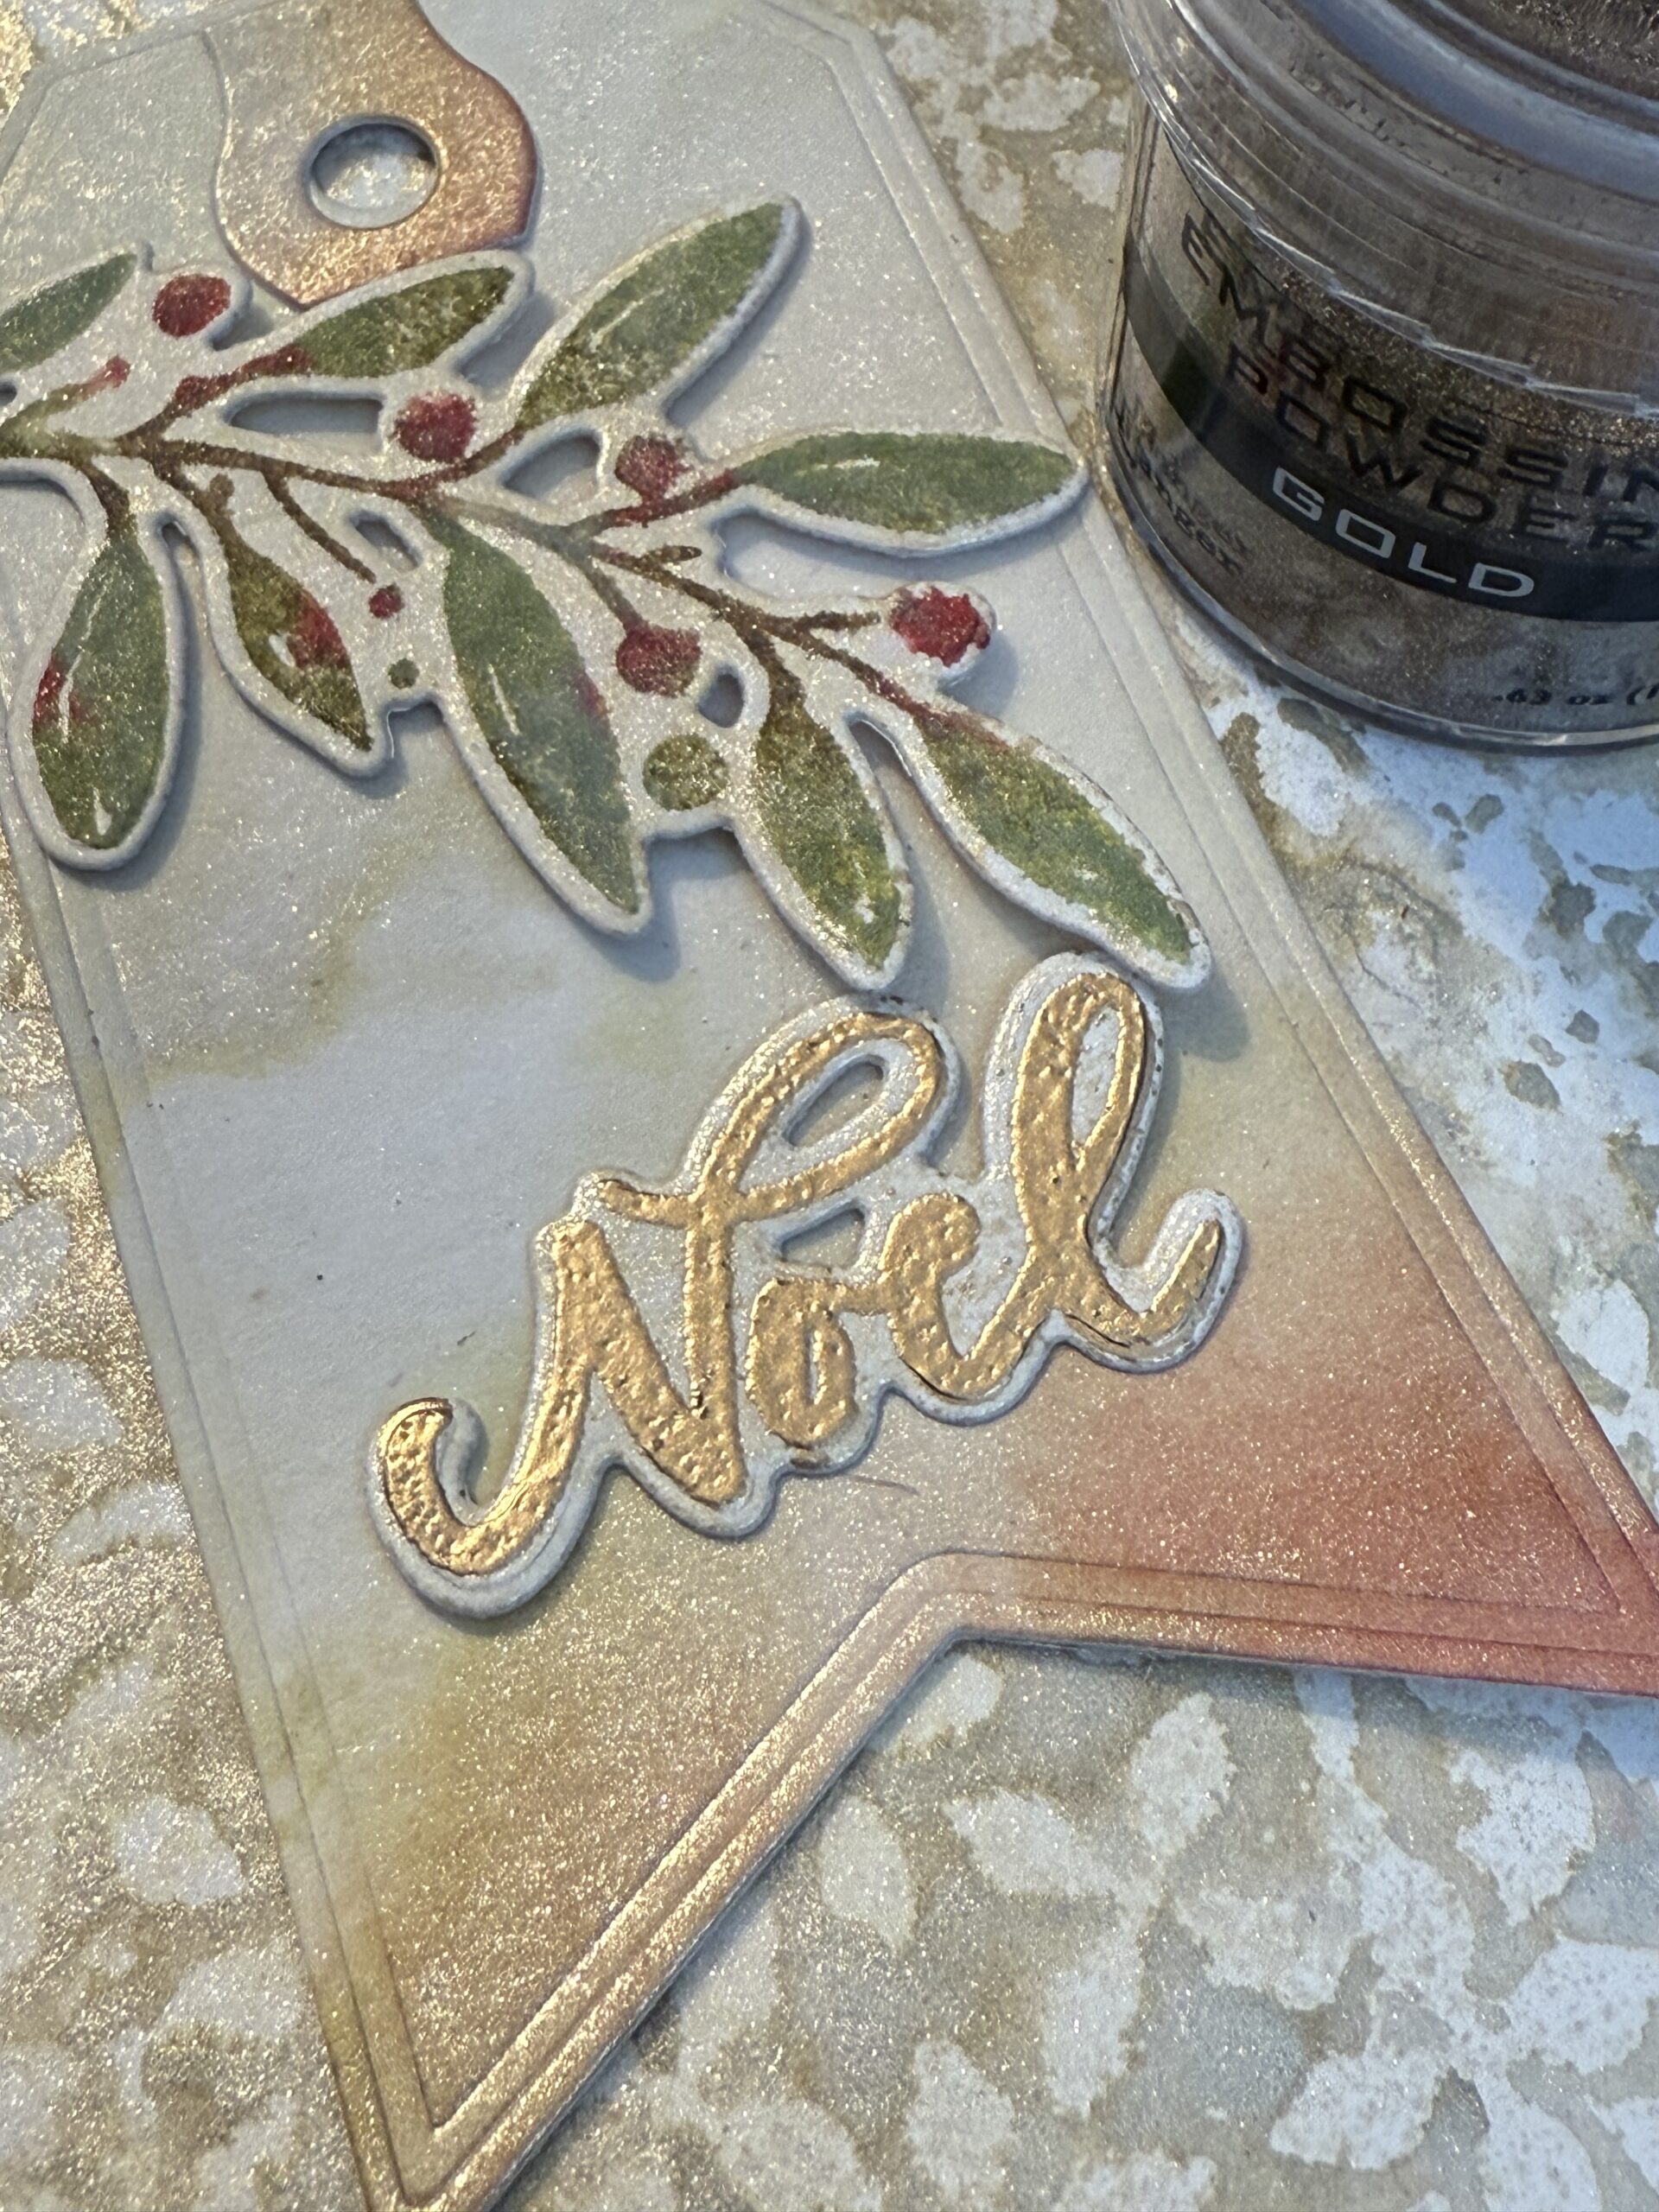
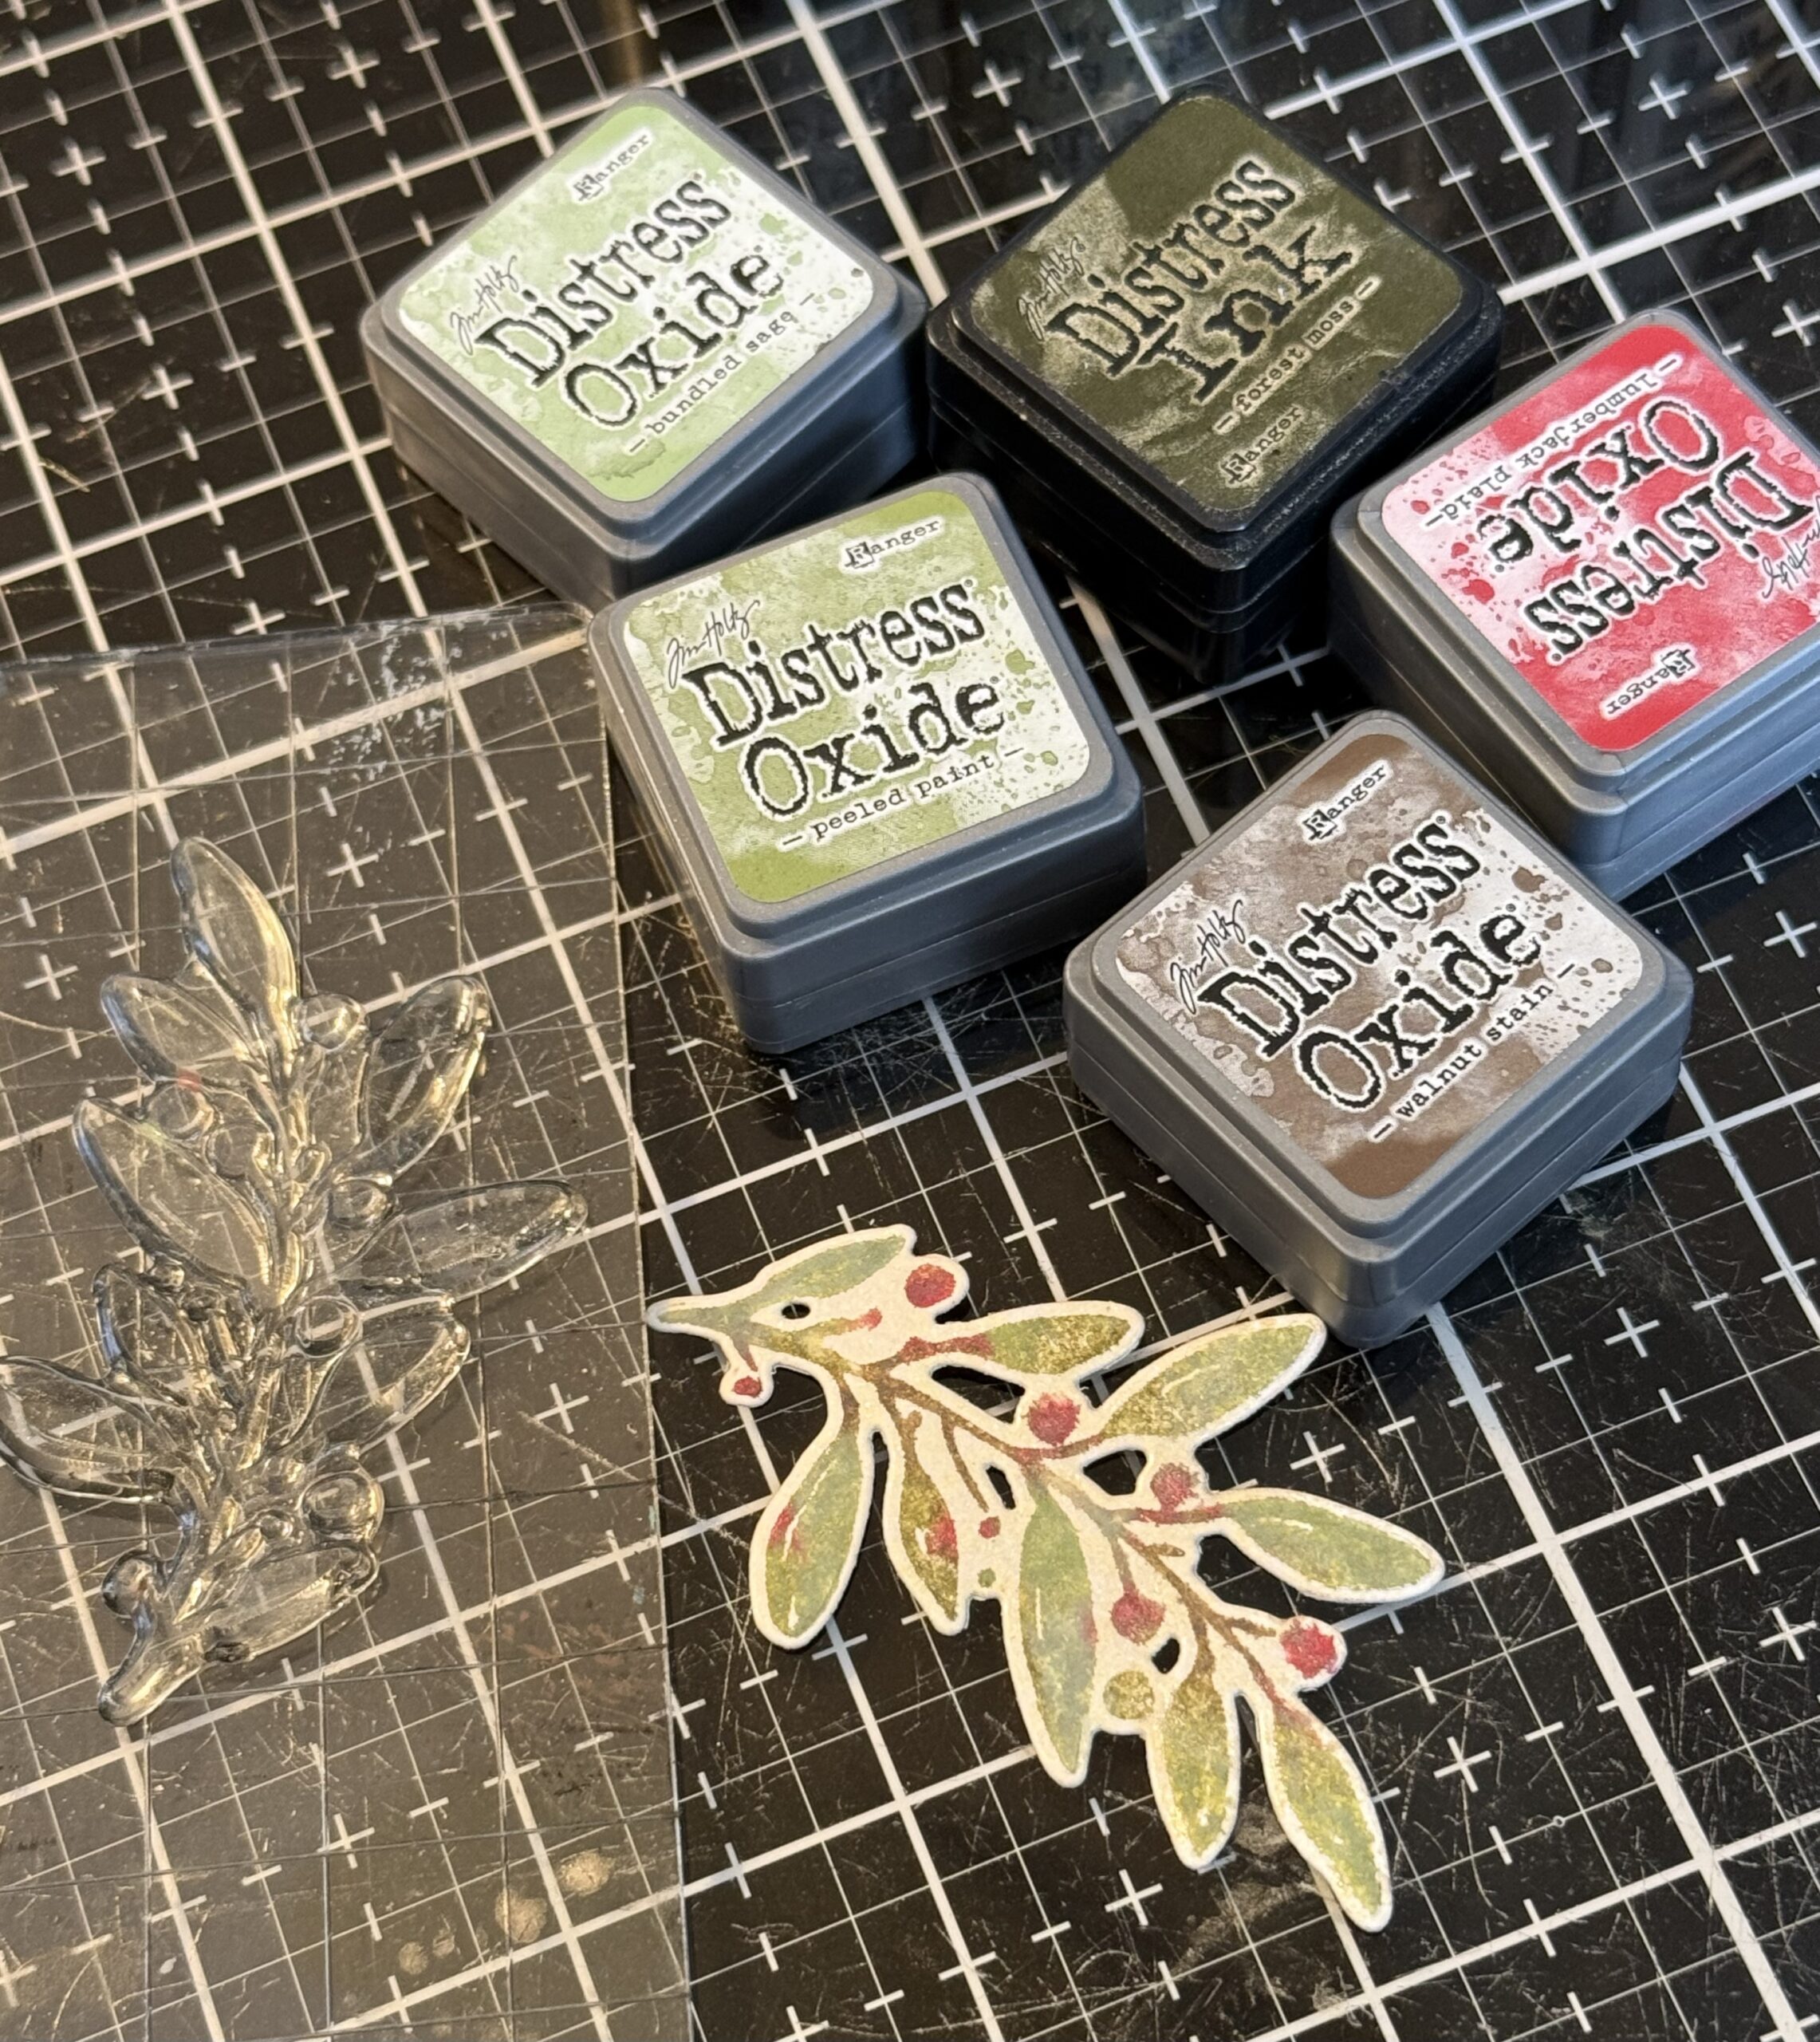
The greenery piece was made by applying a combination of inks directly to the stamp, then spraying with a quick mist of Unraveled Mica Spray. I applied the mini Forest Moss Distress Ink to the whole piece first, then began applying the Distress Oxide minis in Bundled Sage, Peeled Paint, and Walnut Stain to the areas where I thought they should go. The Bundled Sage was applied to most of the leaves, then the Peeled Paint to the outside tips of the leaves. Walnut Stain to the stem in the center and Lumberjack Plaid to the berries. I spritzed the stamp with a light Unraveled Mica Spray and stamped the image onto a scrap of paper and dried it with my heat tool. I then cut out the green using the matching wafer die. Applying the colors to the stamps does NOT need to be precise, as using a small cube with corners, you might get some colors on the stamp where you don’t want it to go, but once it is stamped, it creates a perfectly imperfect watercolored look.
Next, I trimmed my background paper to size and stitched around the edge using a sewing machine. I stitched around the tag as well and began arranging the card. I adhered the tag washer to the top using Collage Medium and tied on a piece of bakers twine into a bow. Next, I applied the greenery and word to the tag using foam square adhesive. The card was complete after applying the entire card front to a piece of inky green paper and then a card base. With that, my card was complete.
Thank you so much for stopping my today and be sure to check out this release over on Simon Says Stamp. These sets are only available for a limited time and will sell out, so be sure to check them out while you can! And be sure to tune in to Tim and Heidi for their Festive CREATE event. You won’t want to miss it, but if you can’t watch it live, be sure to watch it on their Youtube replay.
The products used to create this project are listed below with links to Simon Says Stamp. Thank you so much for supporting me through shopping through them. I appreciate it so much! – Creatively yours, Stacy
To shop at Simon Says Stamp, CLICK HERE or use the links below.
What is an affiliate program, and why should I click on the link and buy through you?
When you shop via the affiliate link on this blog, I receive a small commission from the affiliate provider (Simon Says Stamp) at no extra cost to you, whatsoever. These commissions help me to cover the hosting fees and other costs to run my blog and be able to provide you with FREE inspiration. If you shop the links, THANK YOU! I truly appreciate being able to share my love of creating with you.


