Hello friends…I am back today to share some new cards that I created using the new Wafer Die Sets that were released by Simon Says Stamp yesterday and were perfectly made to match a variety of the Tim Holtz Stamp Sets. These make the use of scissors not needed for fuse cutting out the images and tiny details of the stamped elements…woohoo! I say YES!
These cards were made using the Floral Elements Stamps (CMS445) and matching Wafer Dies plus, the Tiny Text Stamp Set (CMS394) and matching Wafer Dies.
Here’s a peek at the cards I made..
..my favorite thing about these cards besides the new dies, is my love of shabby chic-ness comes shining through!
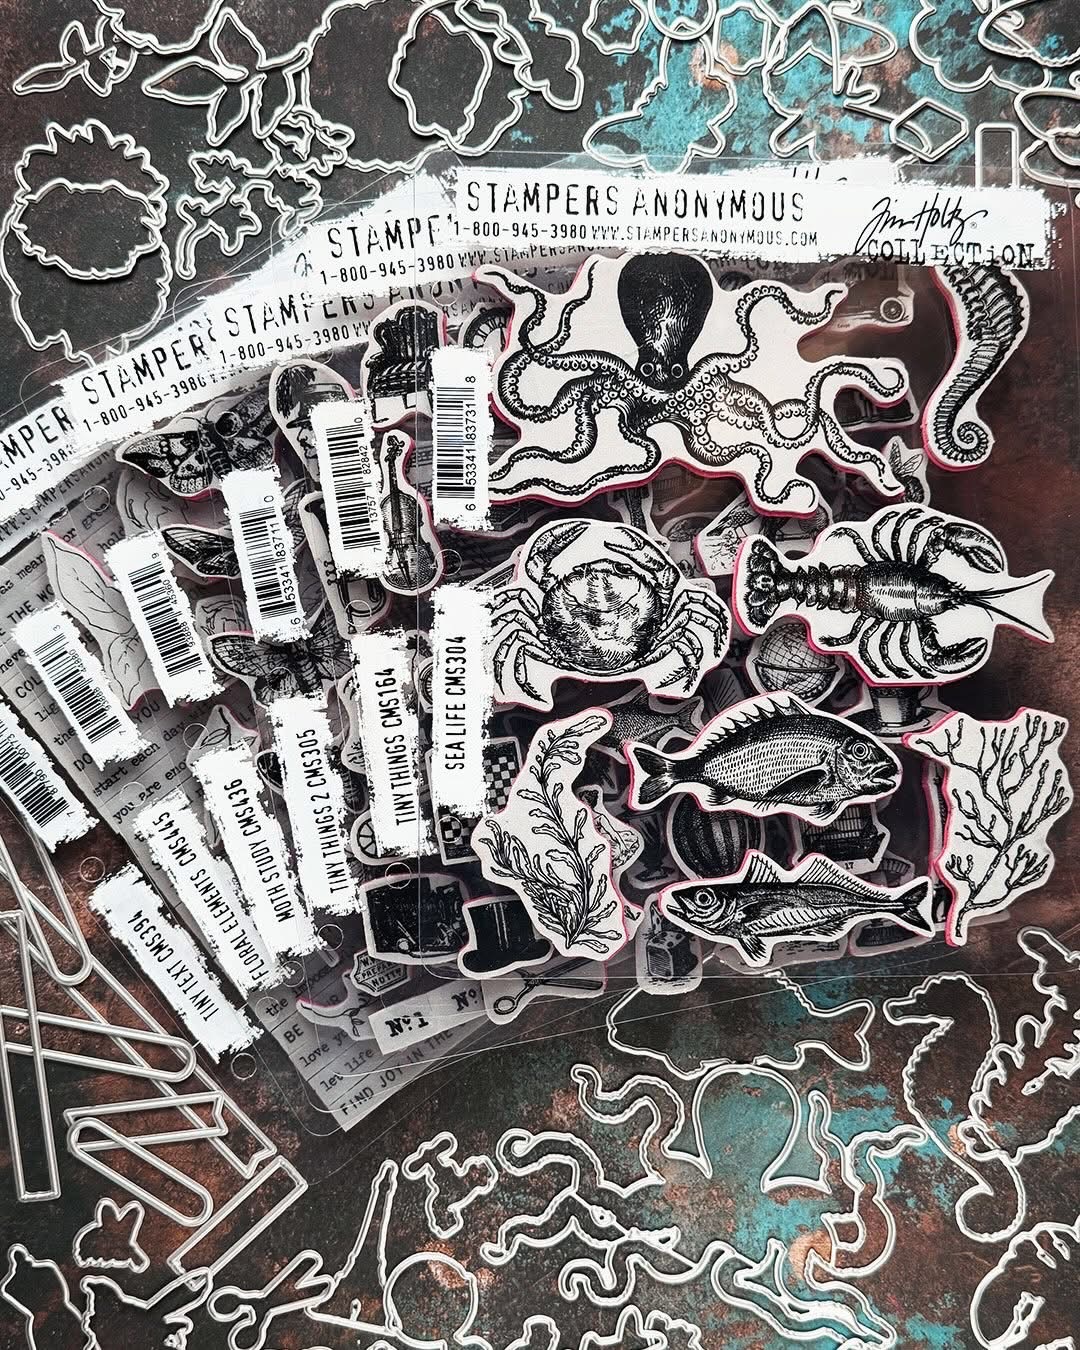
But first, I thought I’d share the Stamp Sets and Matching Wafer Dies that were released today. They include, Tiny Text CMS394, Floral Elements CMS445, Moth Study CMS436, Tiny Things 1 CMS164, Tiny Things 2 CMS305, and Sea Life CMS304…and, BONUS…the Tiny Text Die Set fits all 3 of the Tiny Text Stamp Sets that include Halloween and Christmas!!! They are little labels that are in four different cuttings to make creating even better!
This release is just so GOOD!
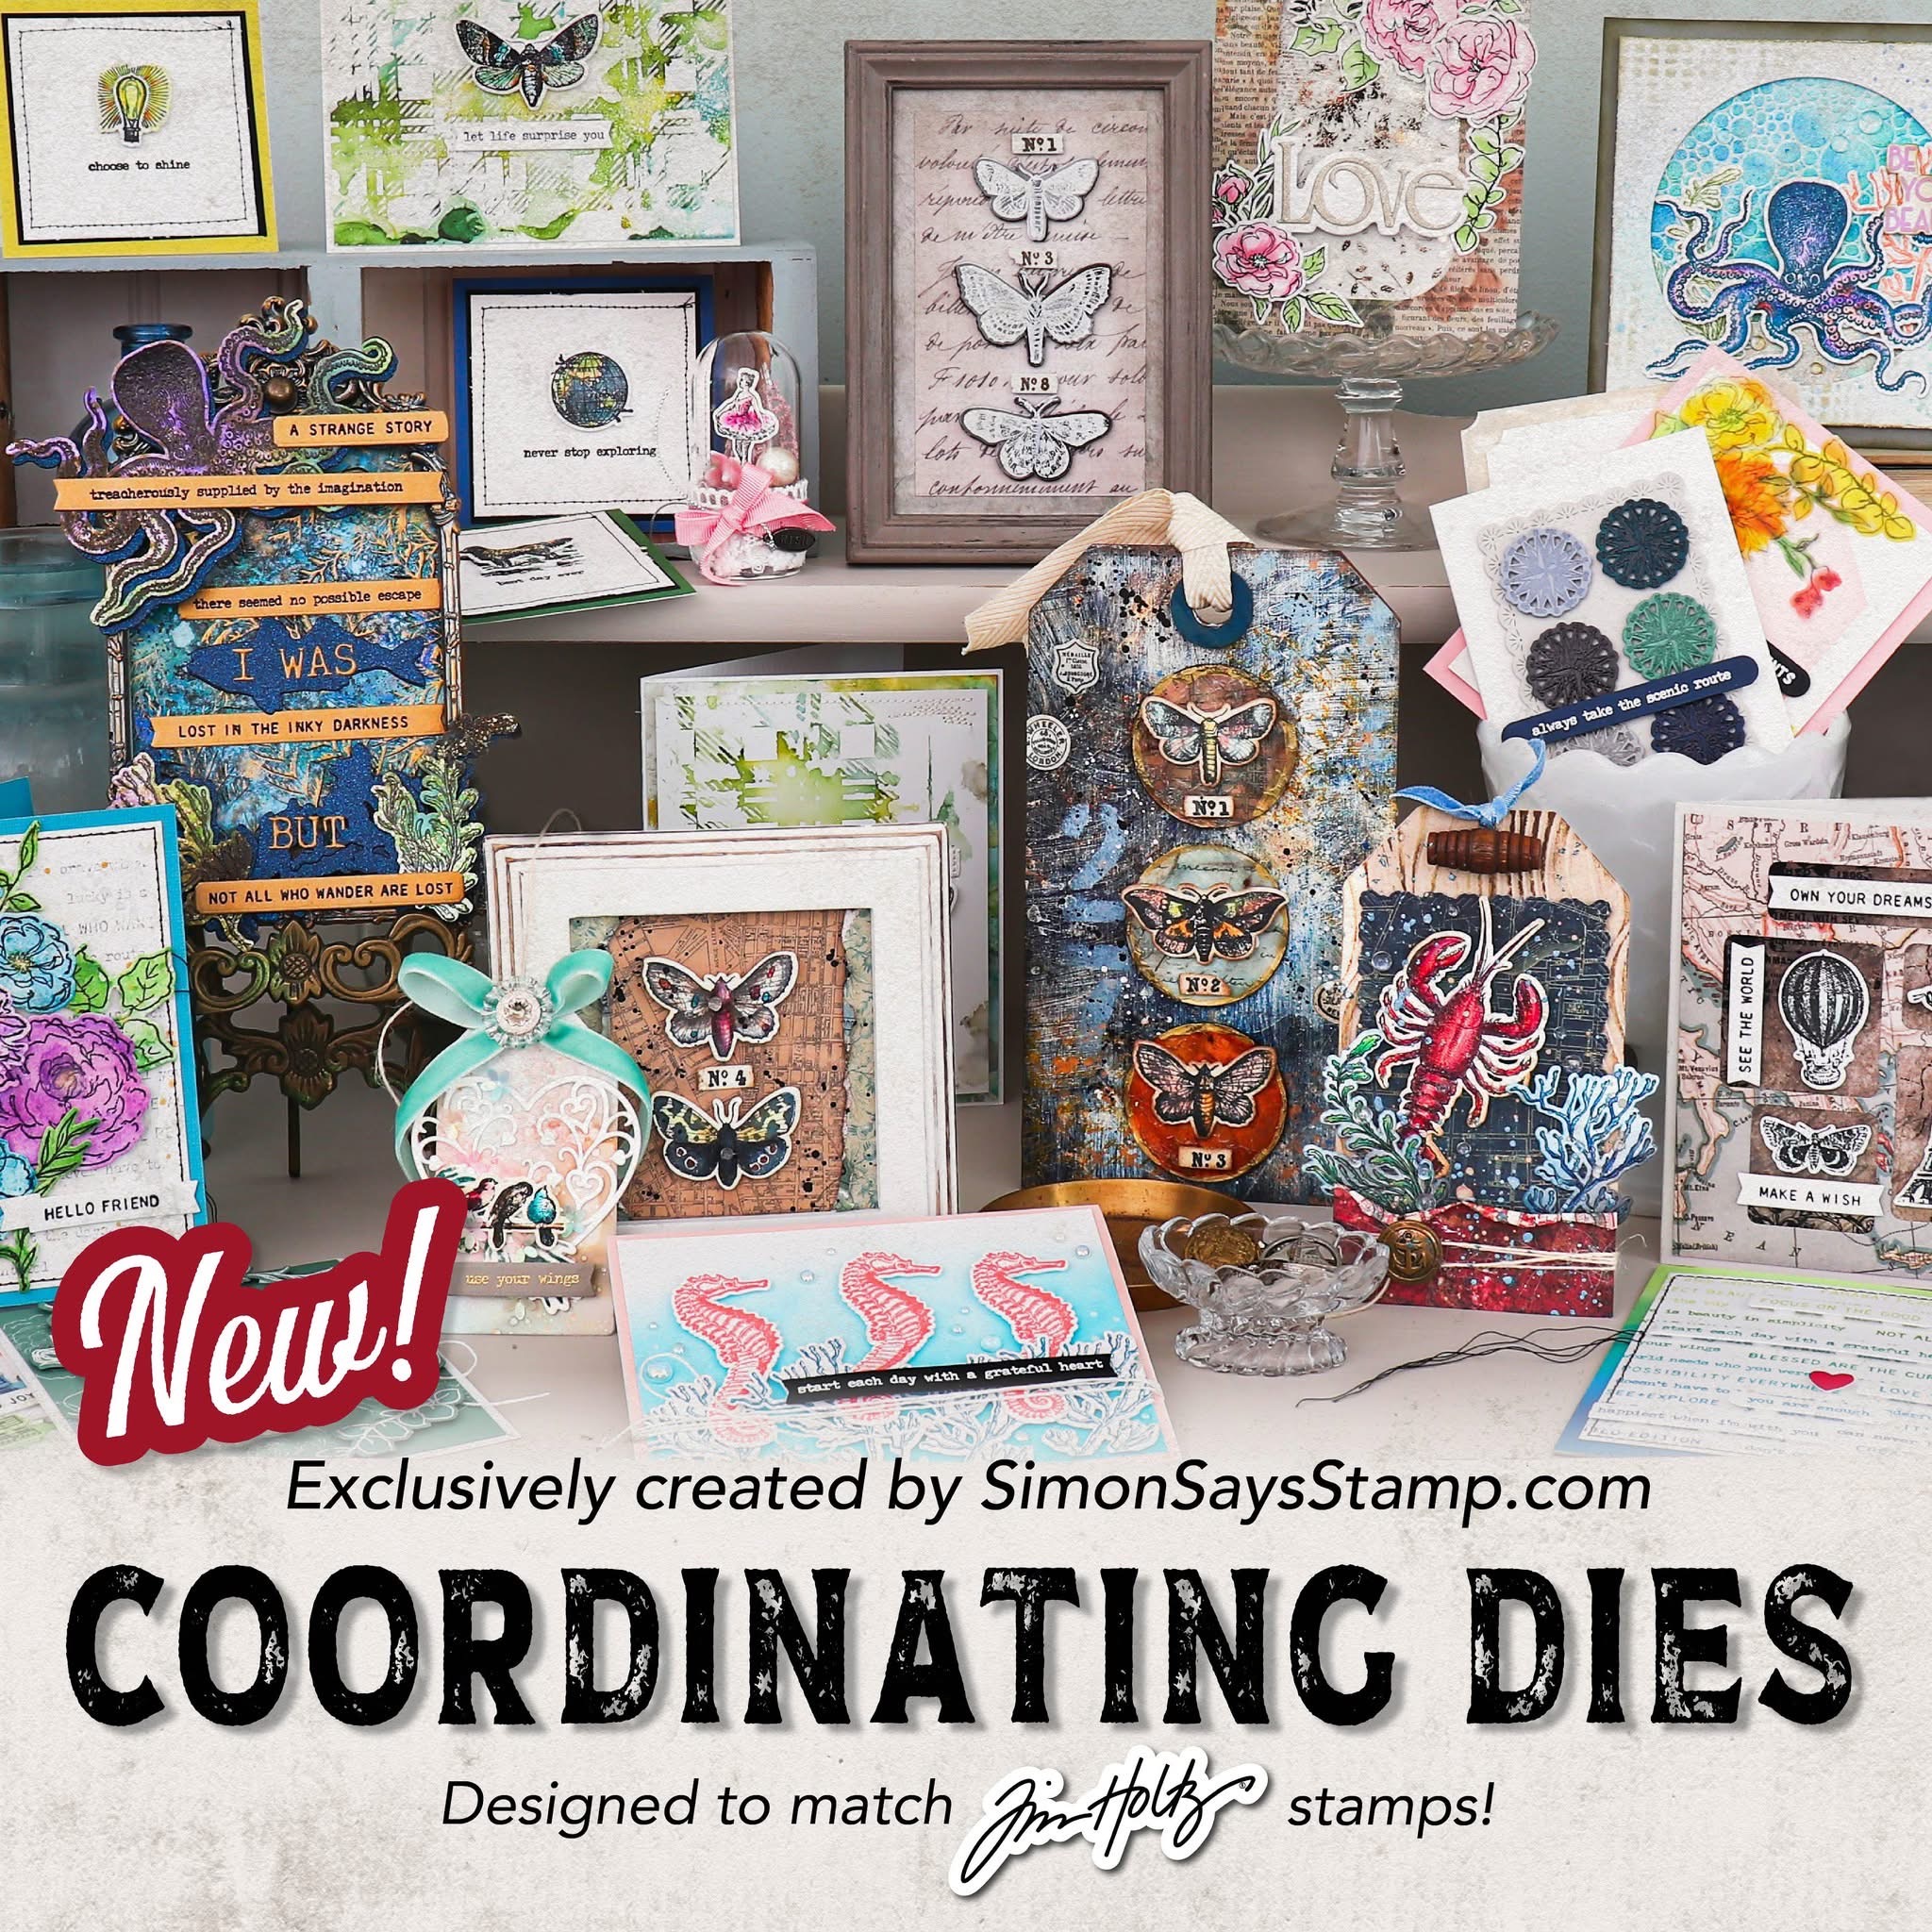
…and here’s a peek at some of the samples that were created for the release…so many wonderful makes! You can check more of these makes out over on instagram by hopping along the instagram hop. You can start by clicking on this LINK to my instagram page and the list of designers participating in the hop is linked by maker name.
Here’s a look at one of the cards I made using both the Tiny Text Stamps and matching dies and the Moth Study and matching dies. In fact, I had a few people ask me how the background was created so I thought maybe I’d share a little tutorial within a tutorial today!
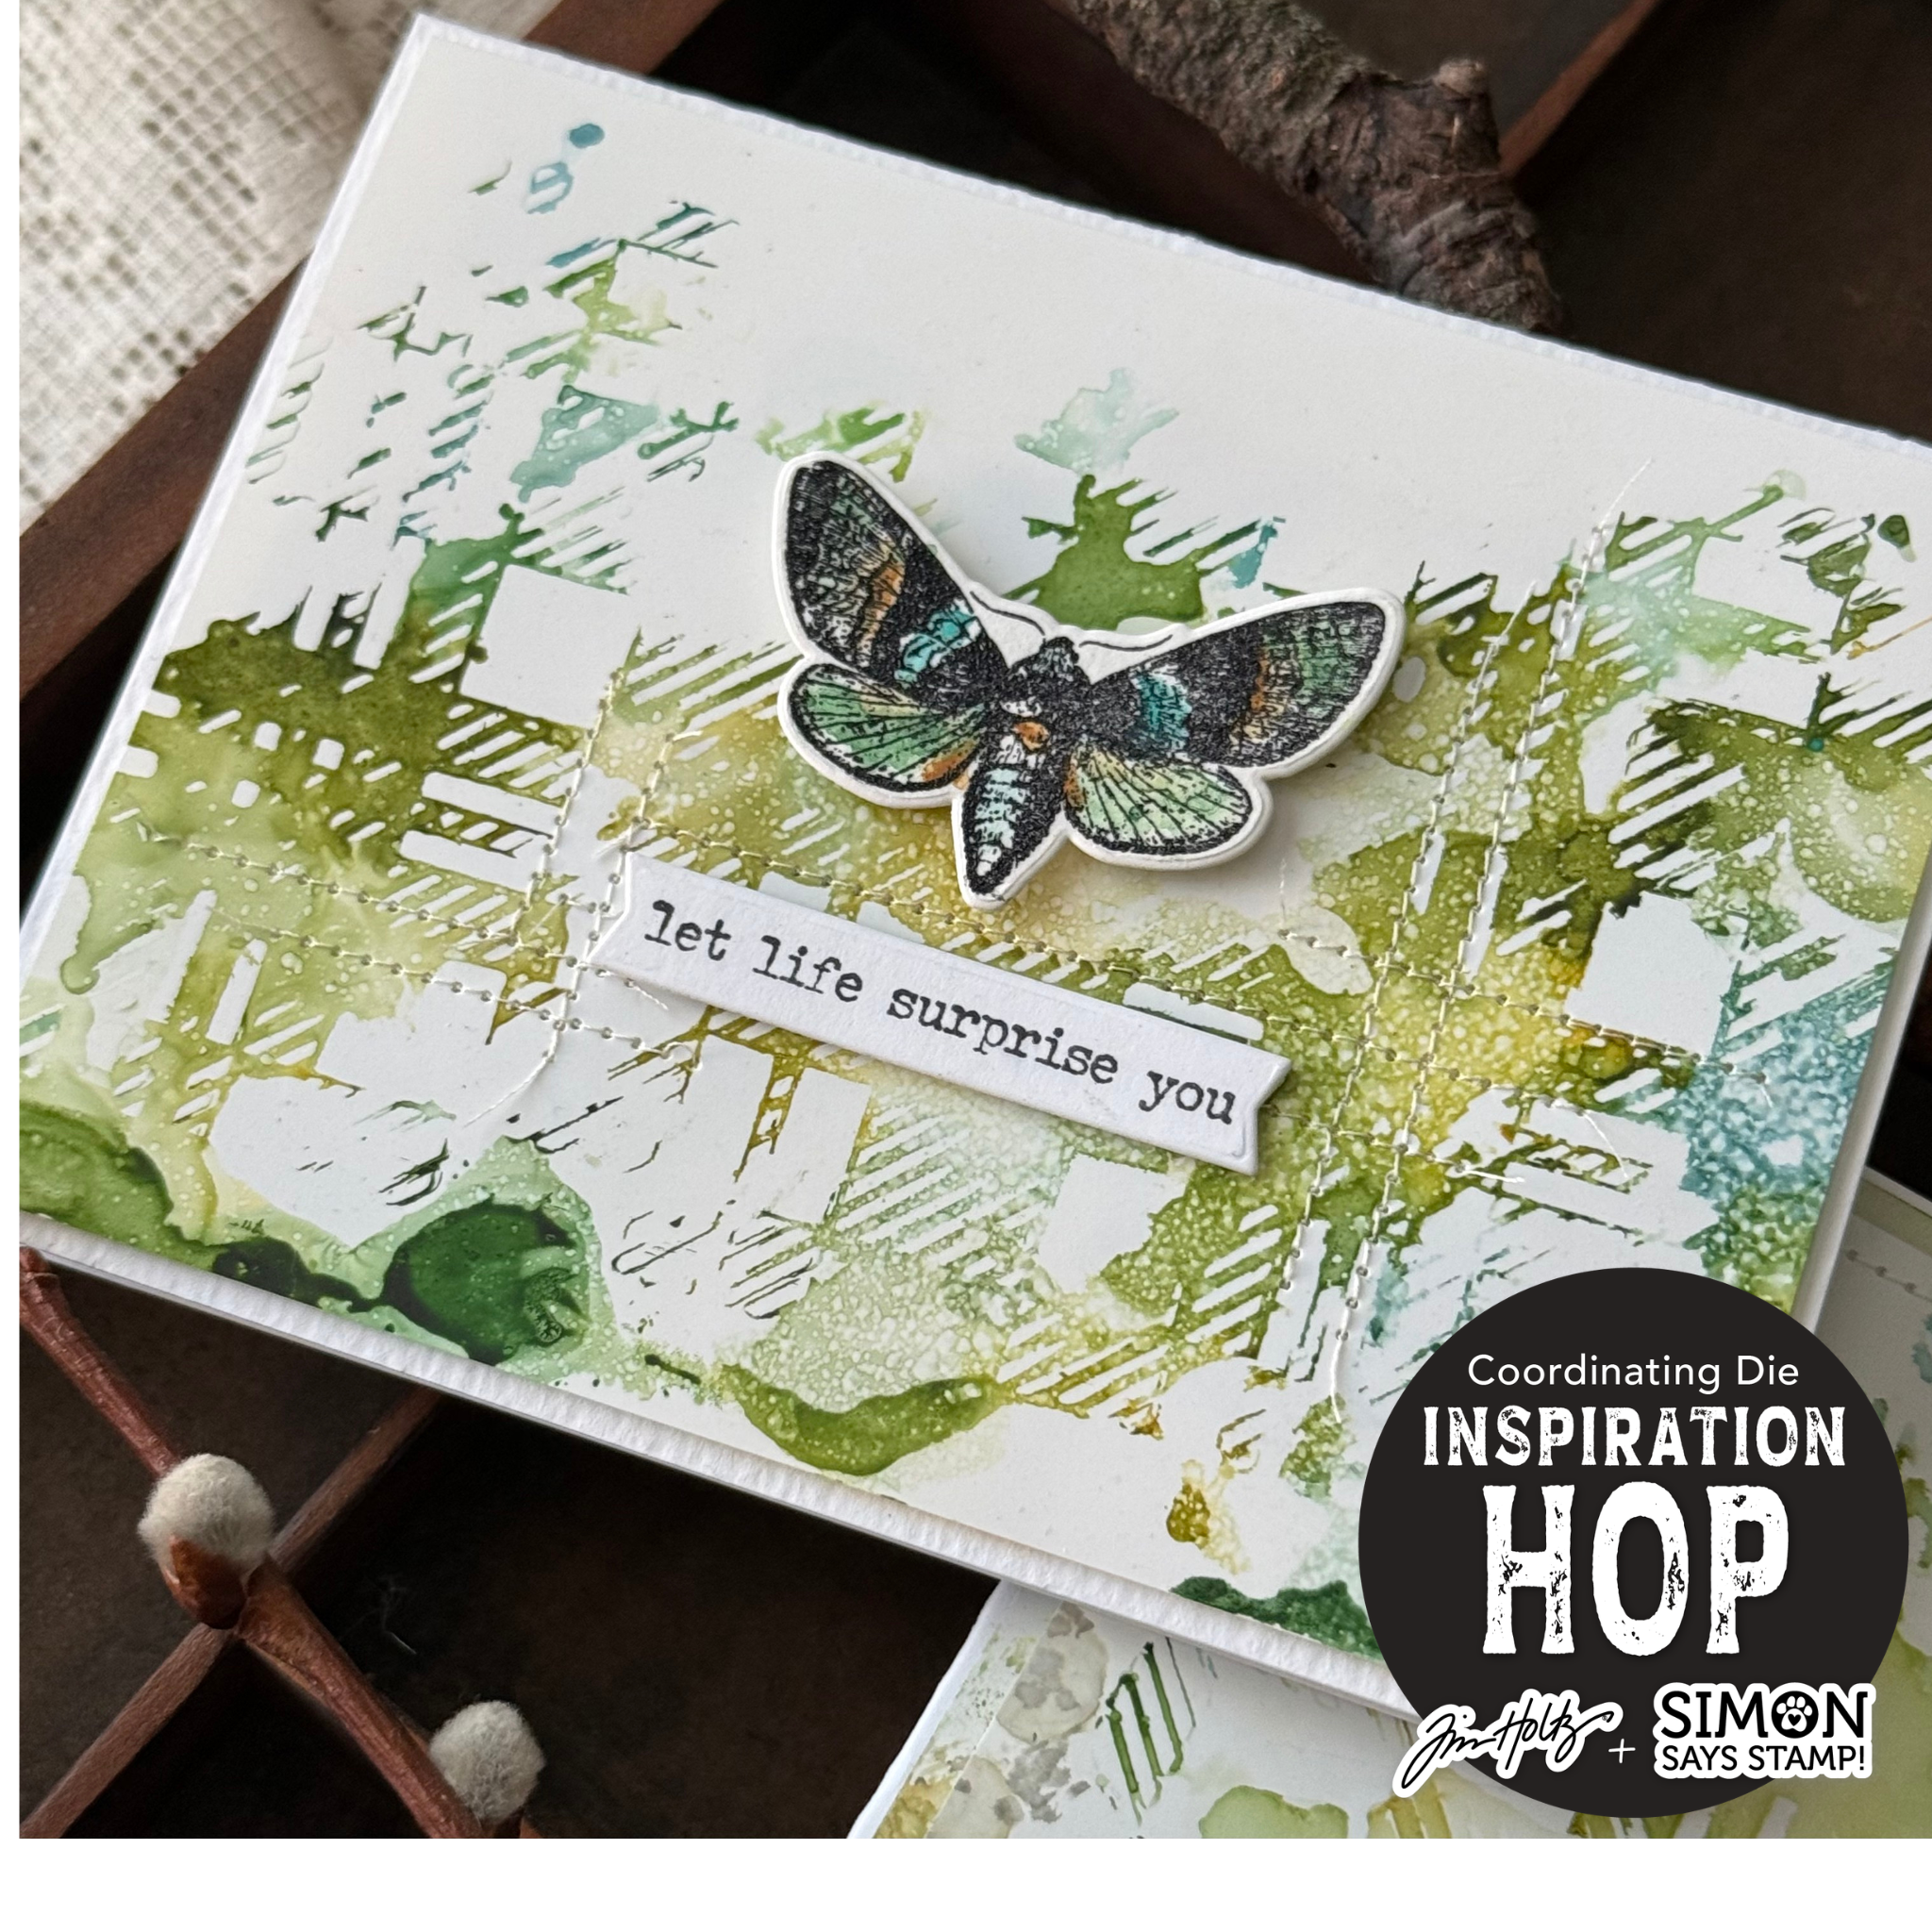
The background was created using Alcohol Inks, the Tim Holtz Plaid Layering Stencil and Yupo Paper. I used the Tim Holtz Plaid Layering Stencil THS097 with Alcohol Inks. The inks I used were Moss, Wilderness, Pool and Chronicle. I added the inks directly onto the stencil, sprayed it with isopropyl alcohol and dripped on some blending solution, then flipped the stencil over onto yupo paper. I used a piece of paper towel to cover the stencil and hold the ink on the yupo paper for a bit till it was dry-ish, then I lifted the stencil to reveal the imperfect patterns. It’s all trial and error to see how it turns out. Sometimes you need to add a little more isopropyl alcohol, sometimes a little more ink, sometimes a little more blending solution.
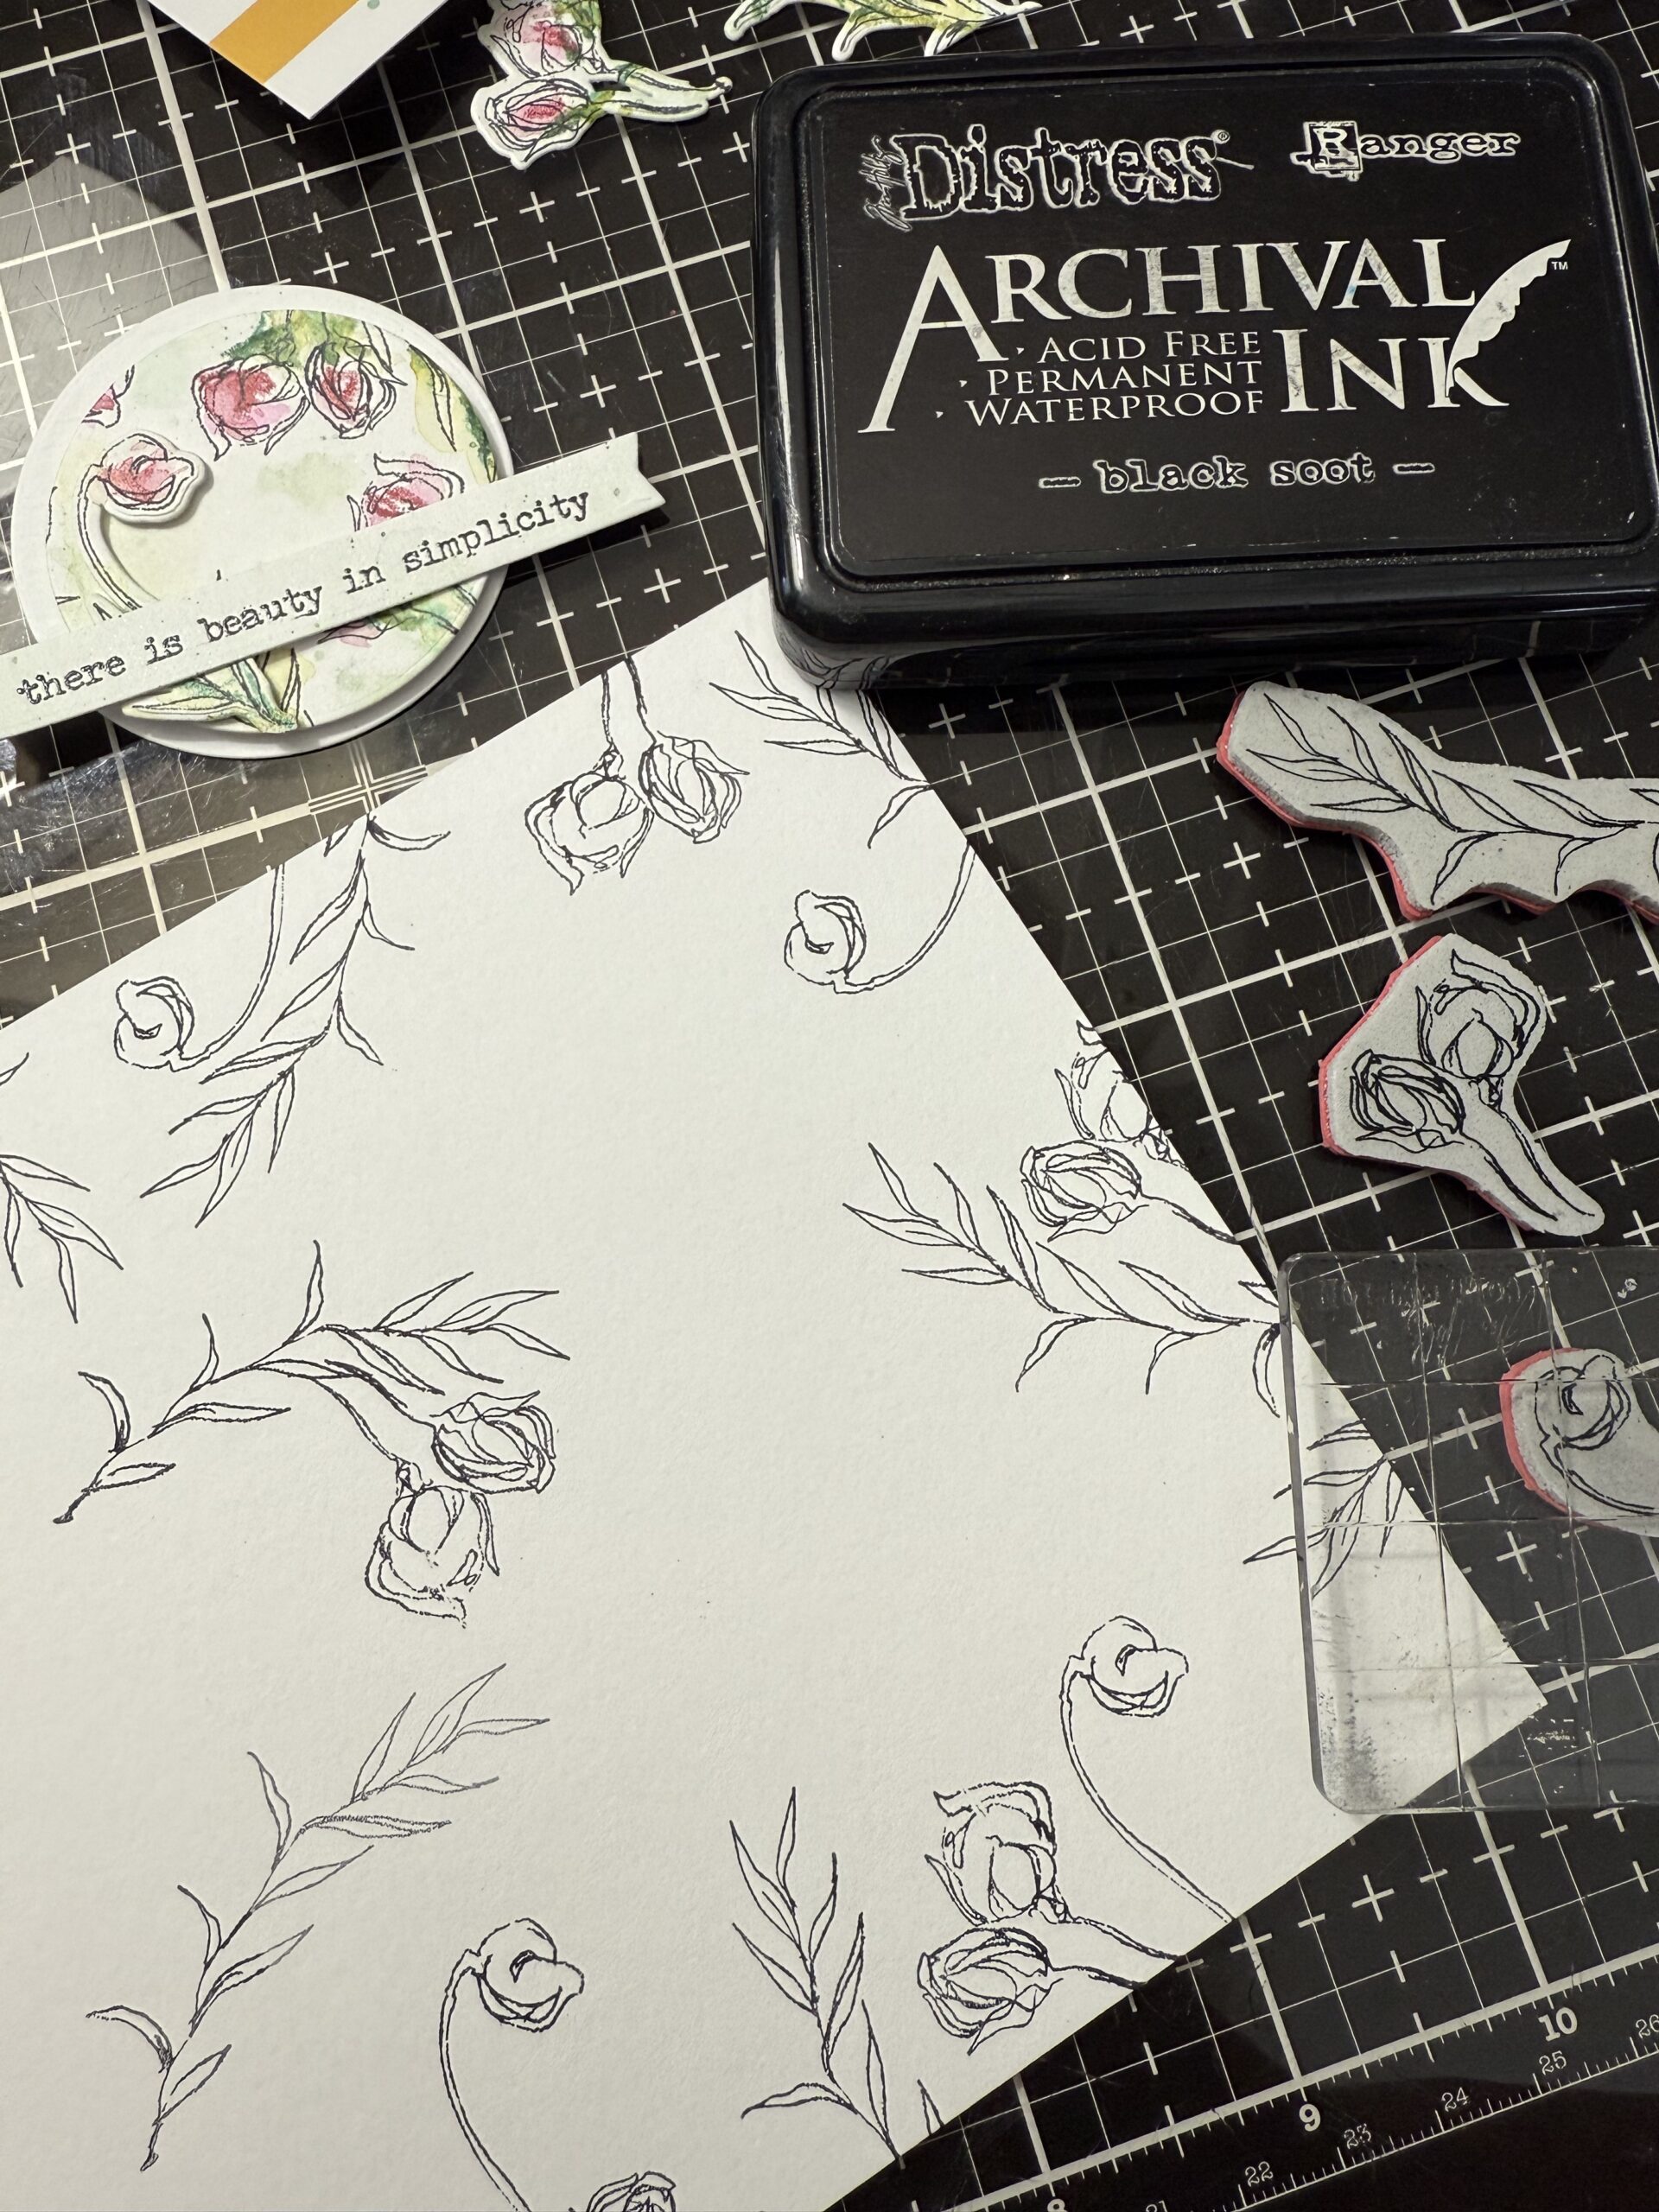
I stamped a moth image onto a piece of Distress Watercolor Paper using Black Soot Archival Ink, then, using wet Watercolor Pencils, colored the moth, dried it, then cut it out using the coordinating die. I stamped a phrase from the Tiny Text Stamp Set, then used a matching die, to cut it out. The background was messy stitched using my sewing machine. I followed some or the existing lines created by the inky pattern and stitched a random pattern onto the card. The moth and phrase were adhered to the card front using foam adhesive to add some depth, then the entire background was adhered to a card front. With that, my card was complete!
Now, let’s get back to today’s tutorial for my shabby chic cards!
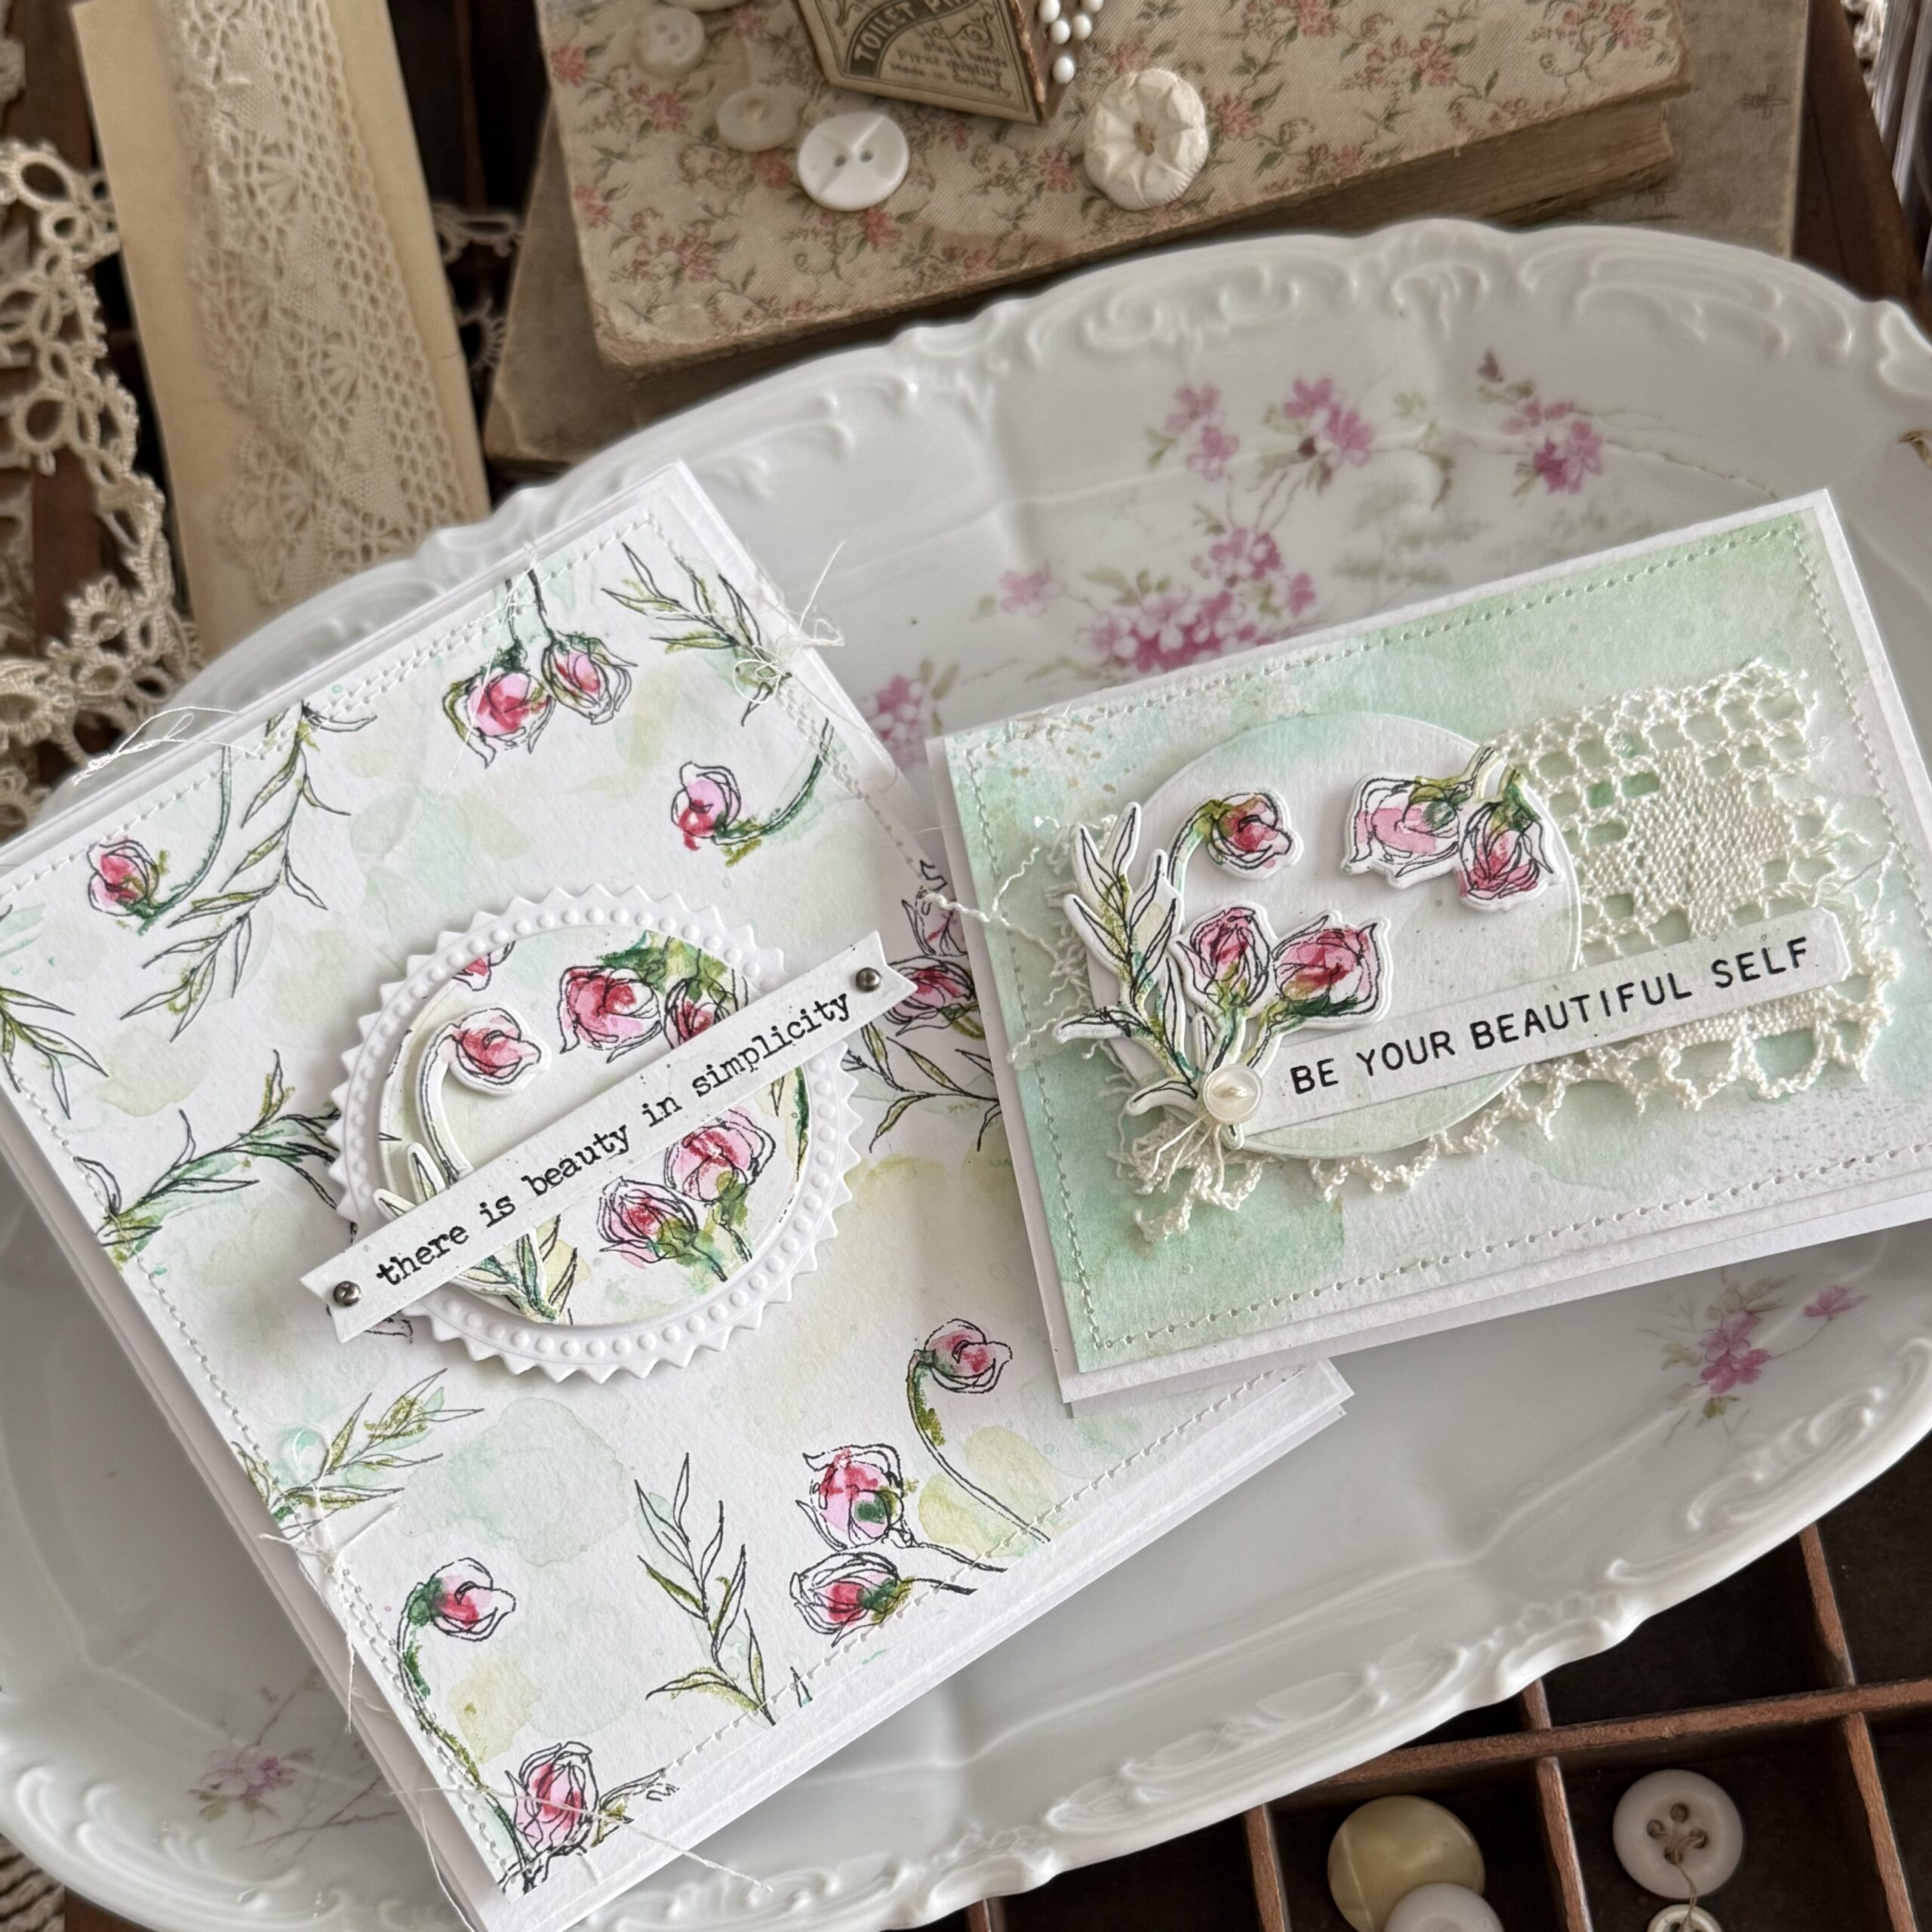
Here is the first..
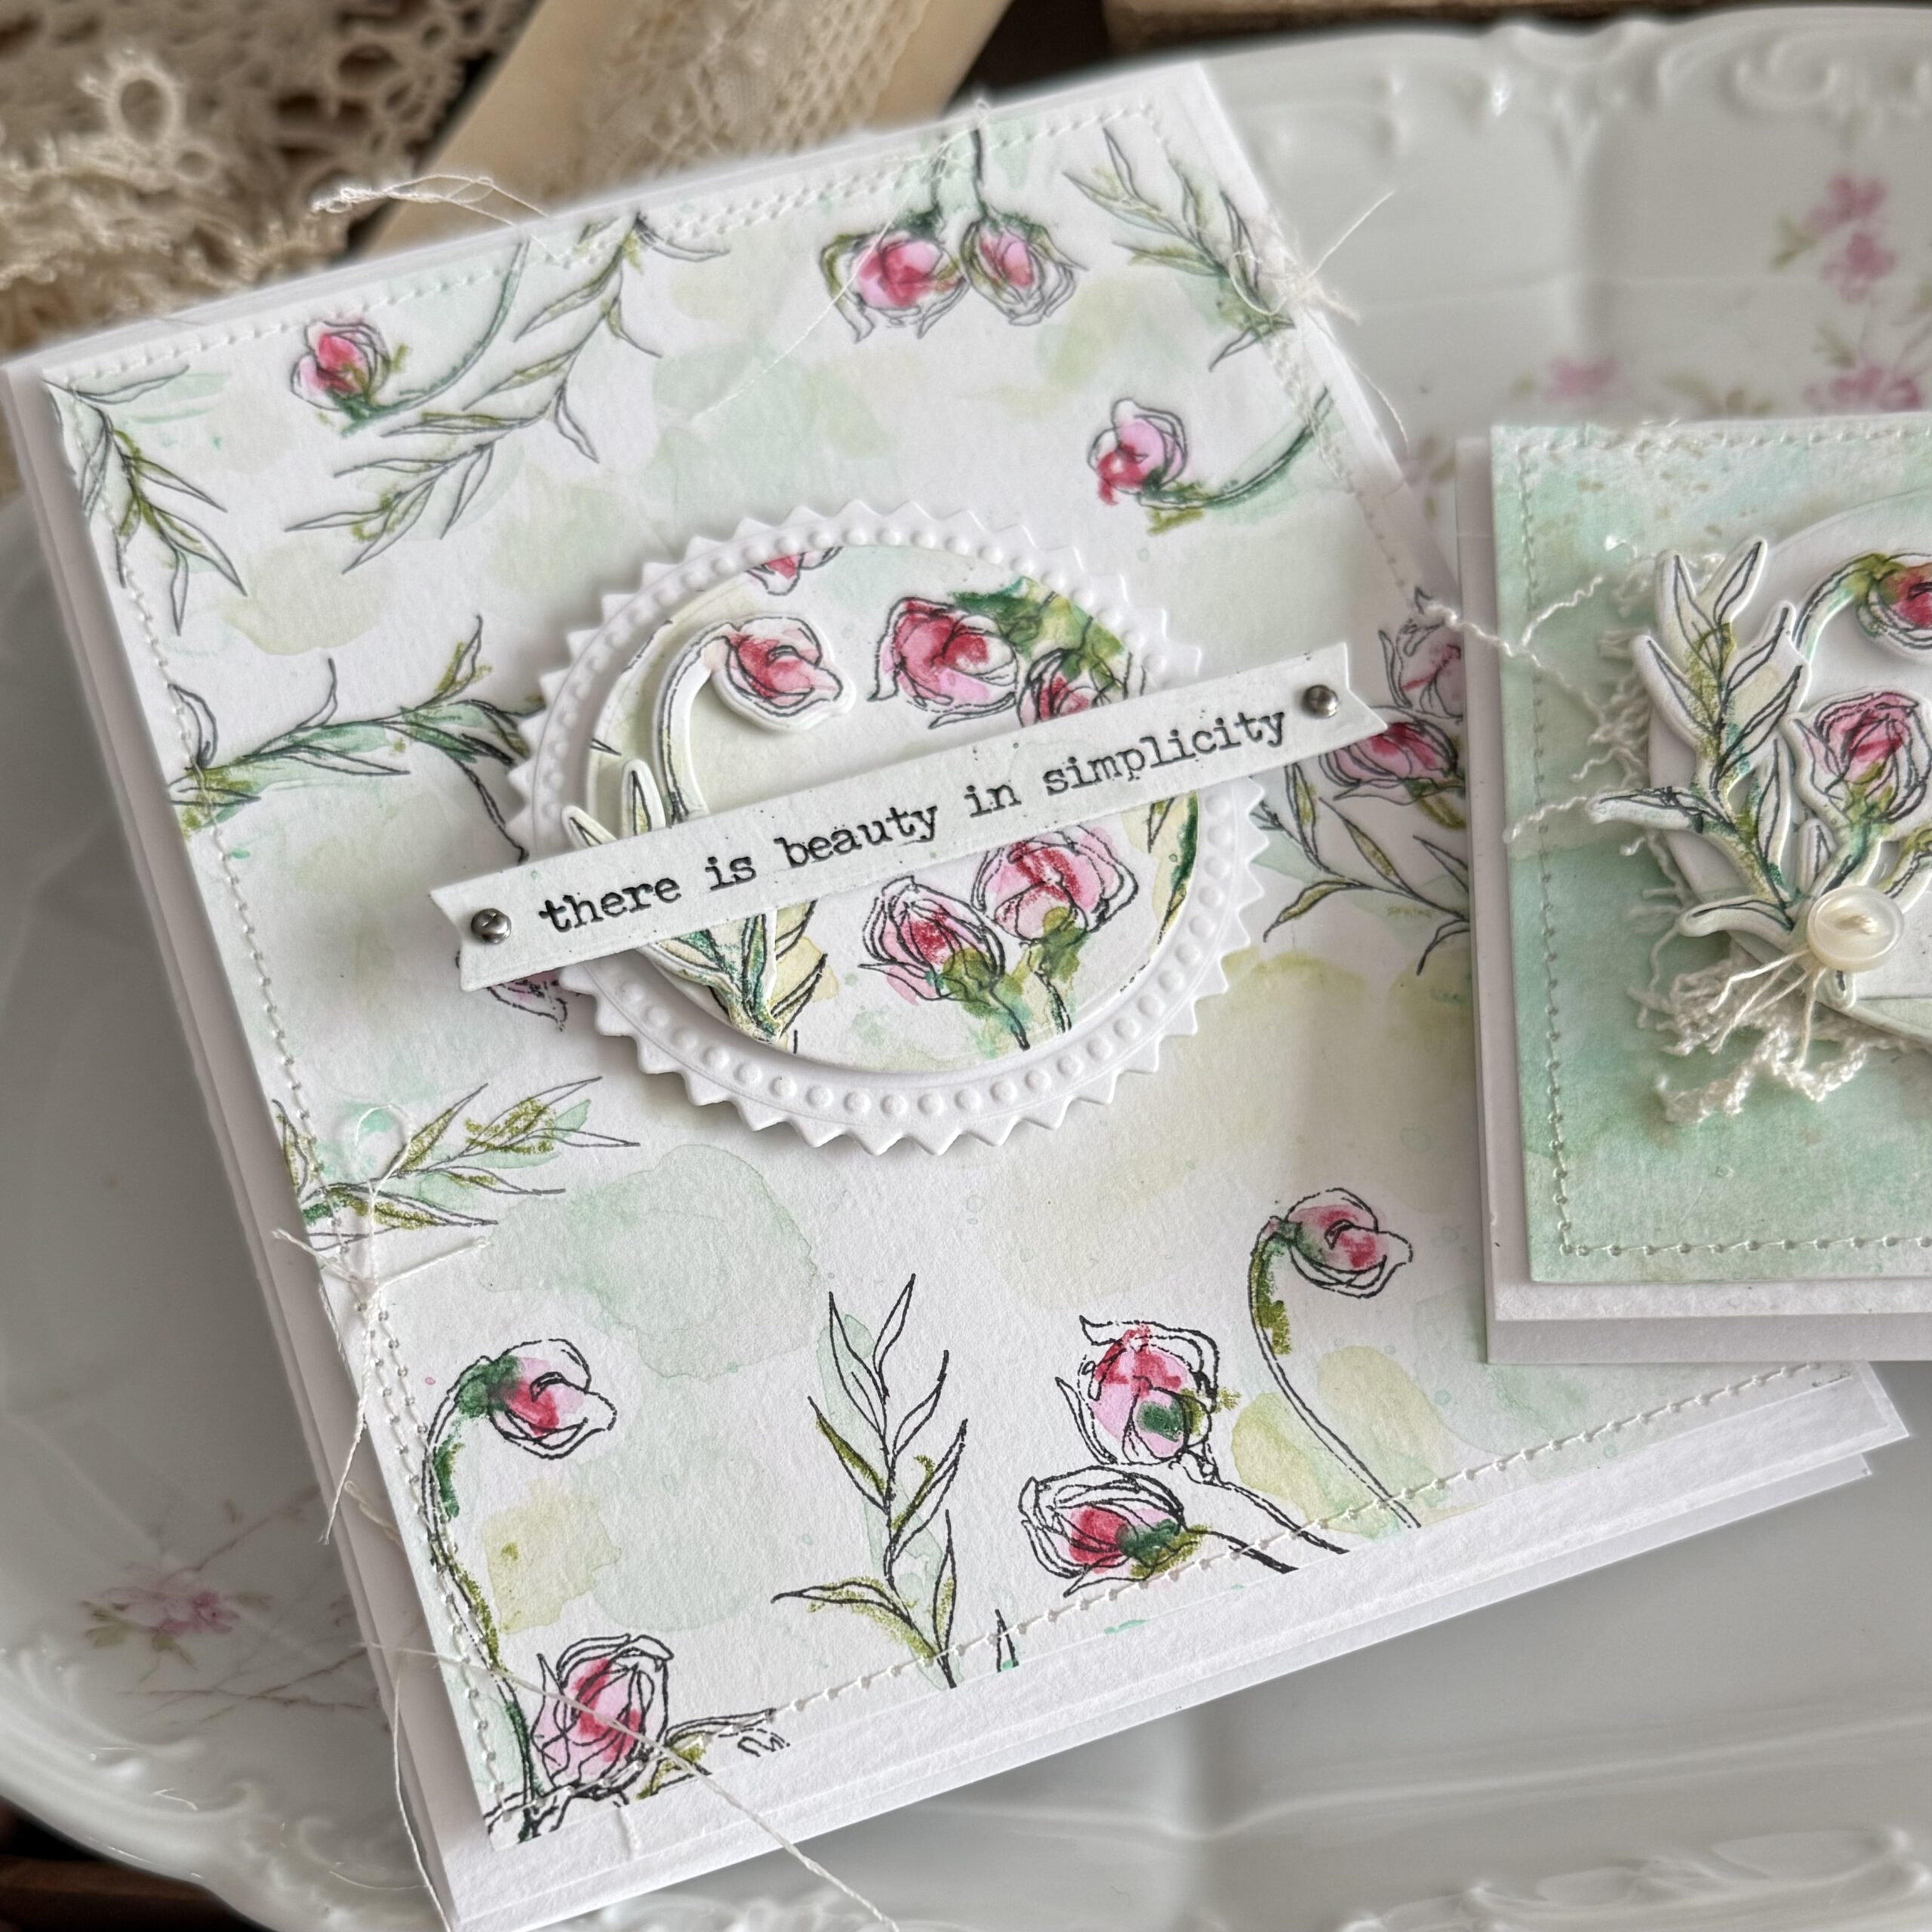
and the second…I mean, if you’re making one, you might as well make two!

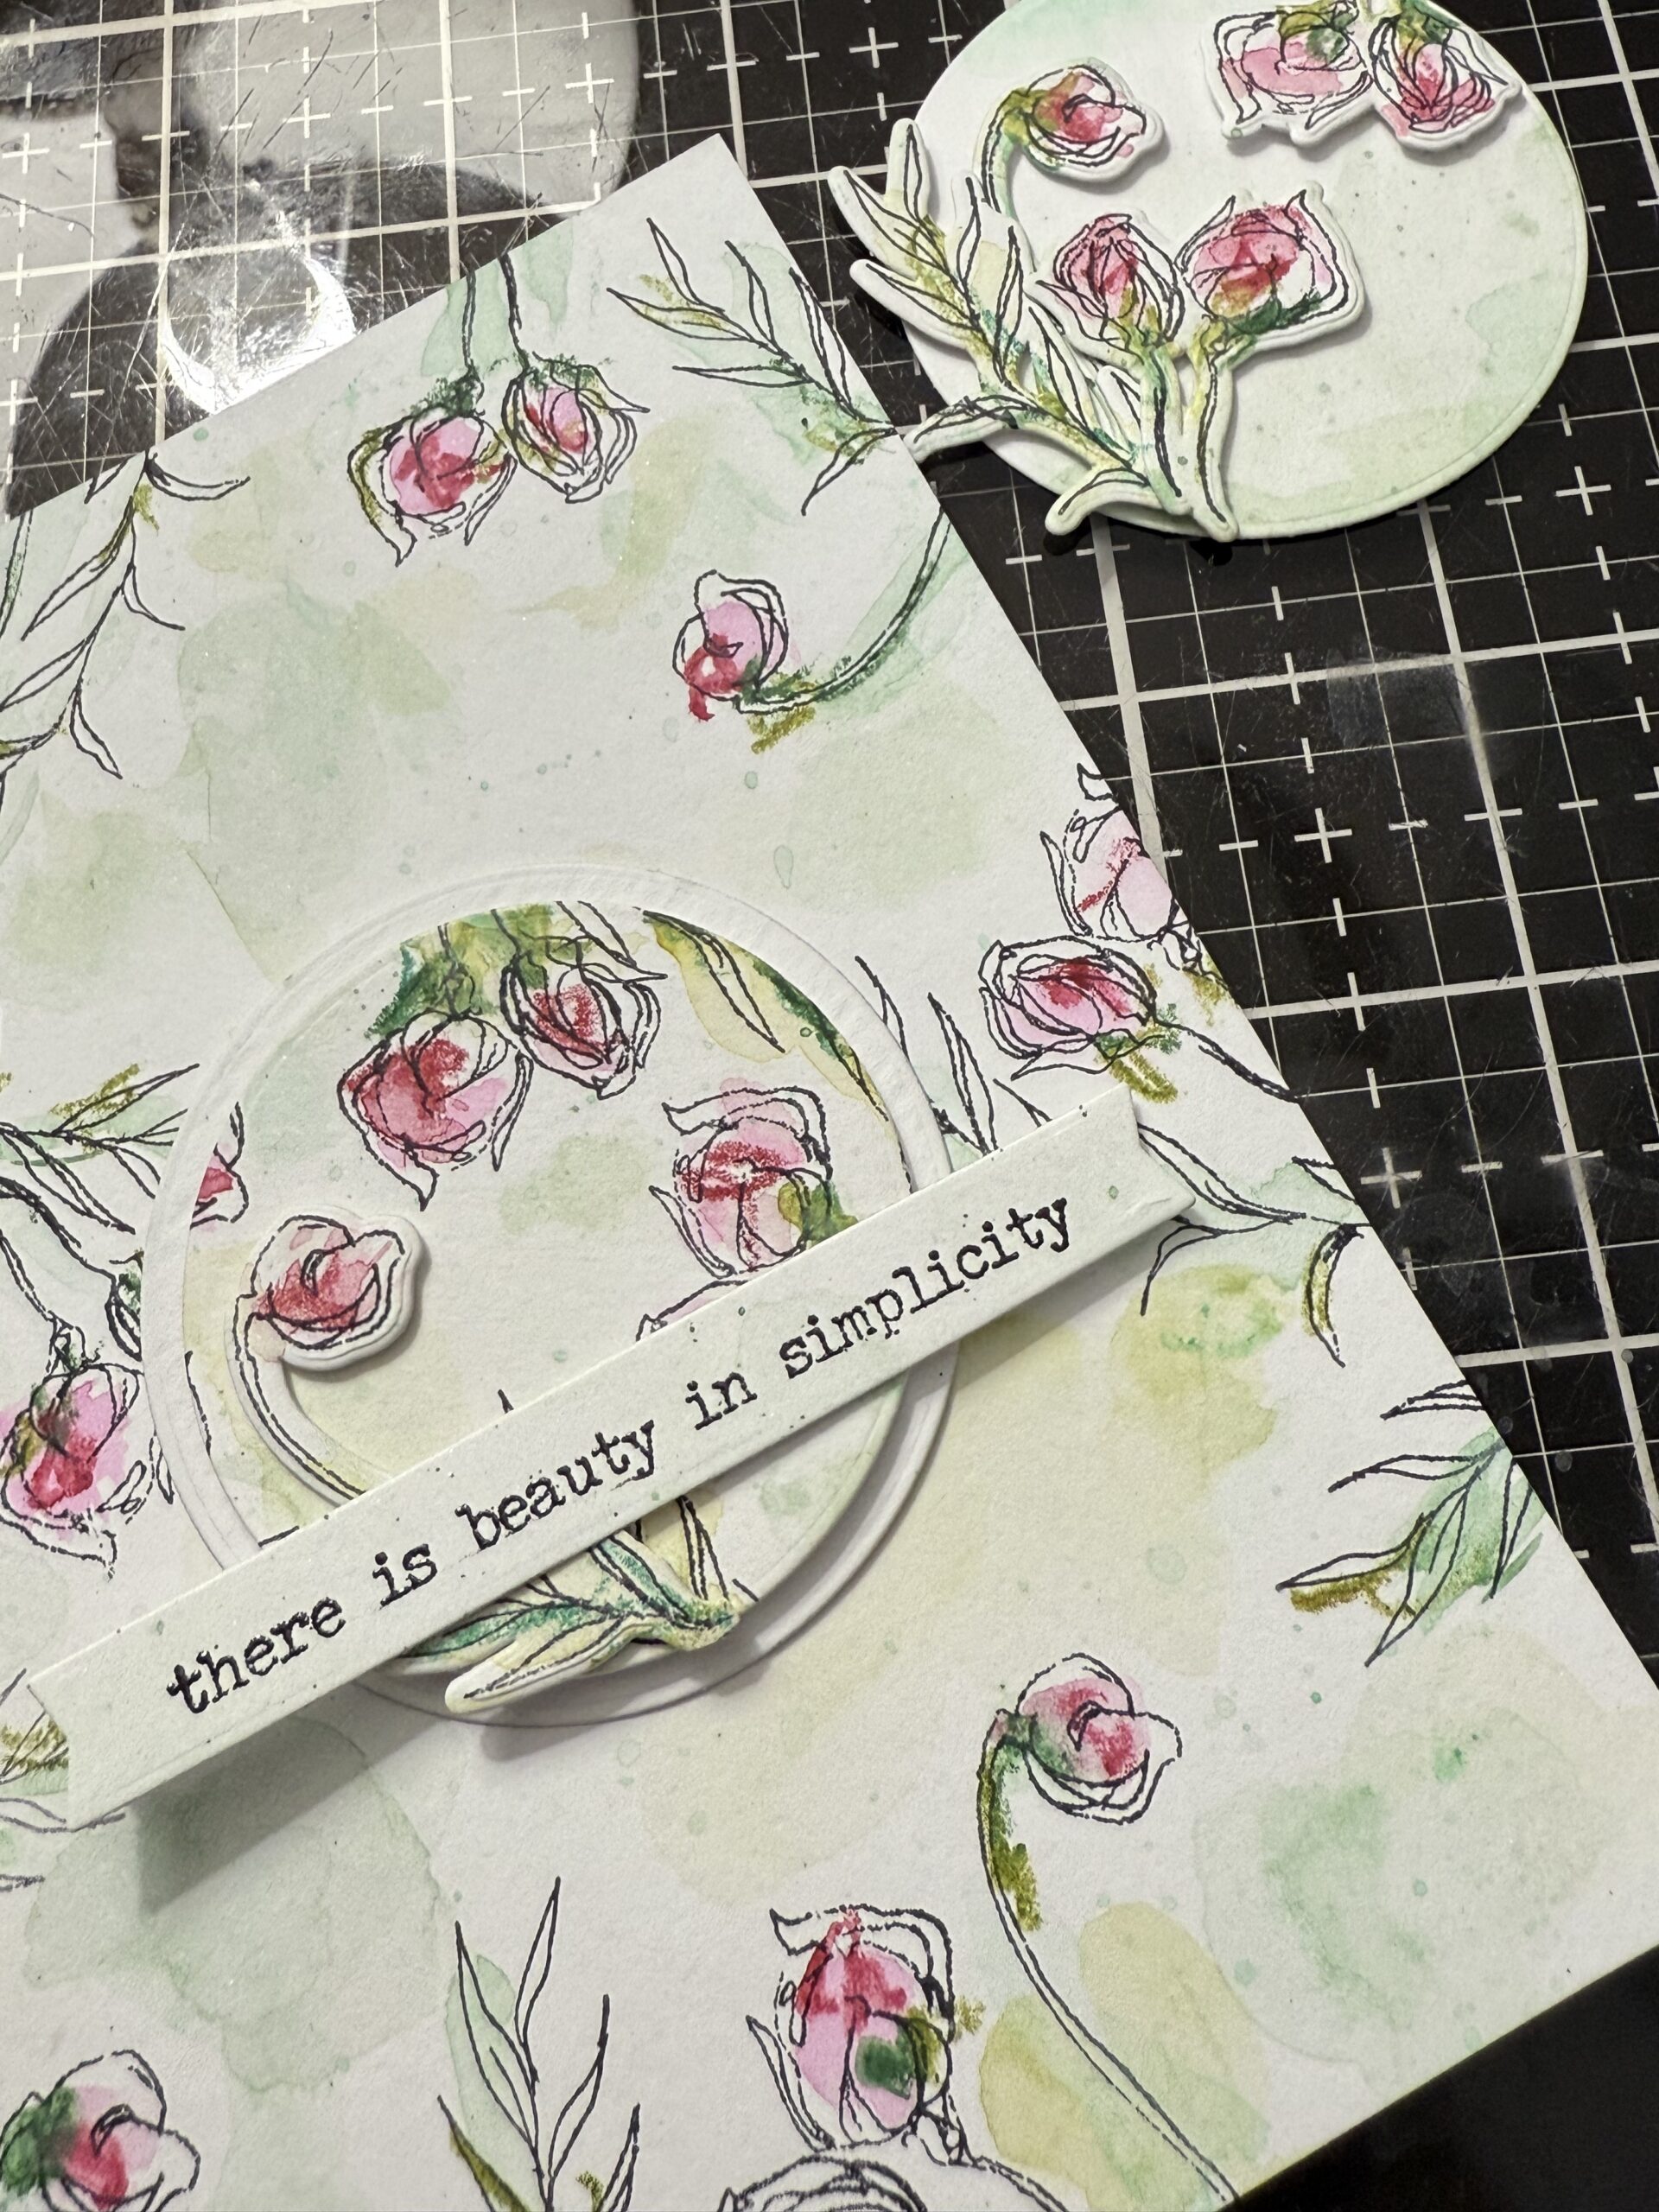
I started by creating a background using 3 of the flowers/leaves that are in the Floral Elements set, this is how these cards came to be, just by stamping and watercoloring the randomly stamped florals, then cutting the pieces out by using the matching dies. Once I had the elements, I began figuring out how to use them.
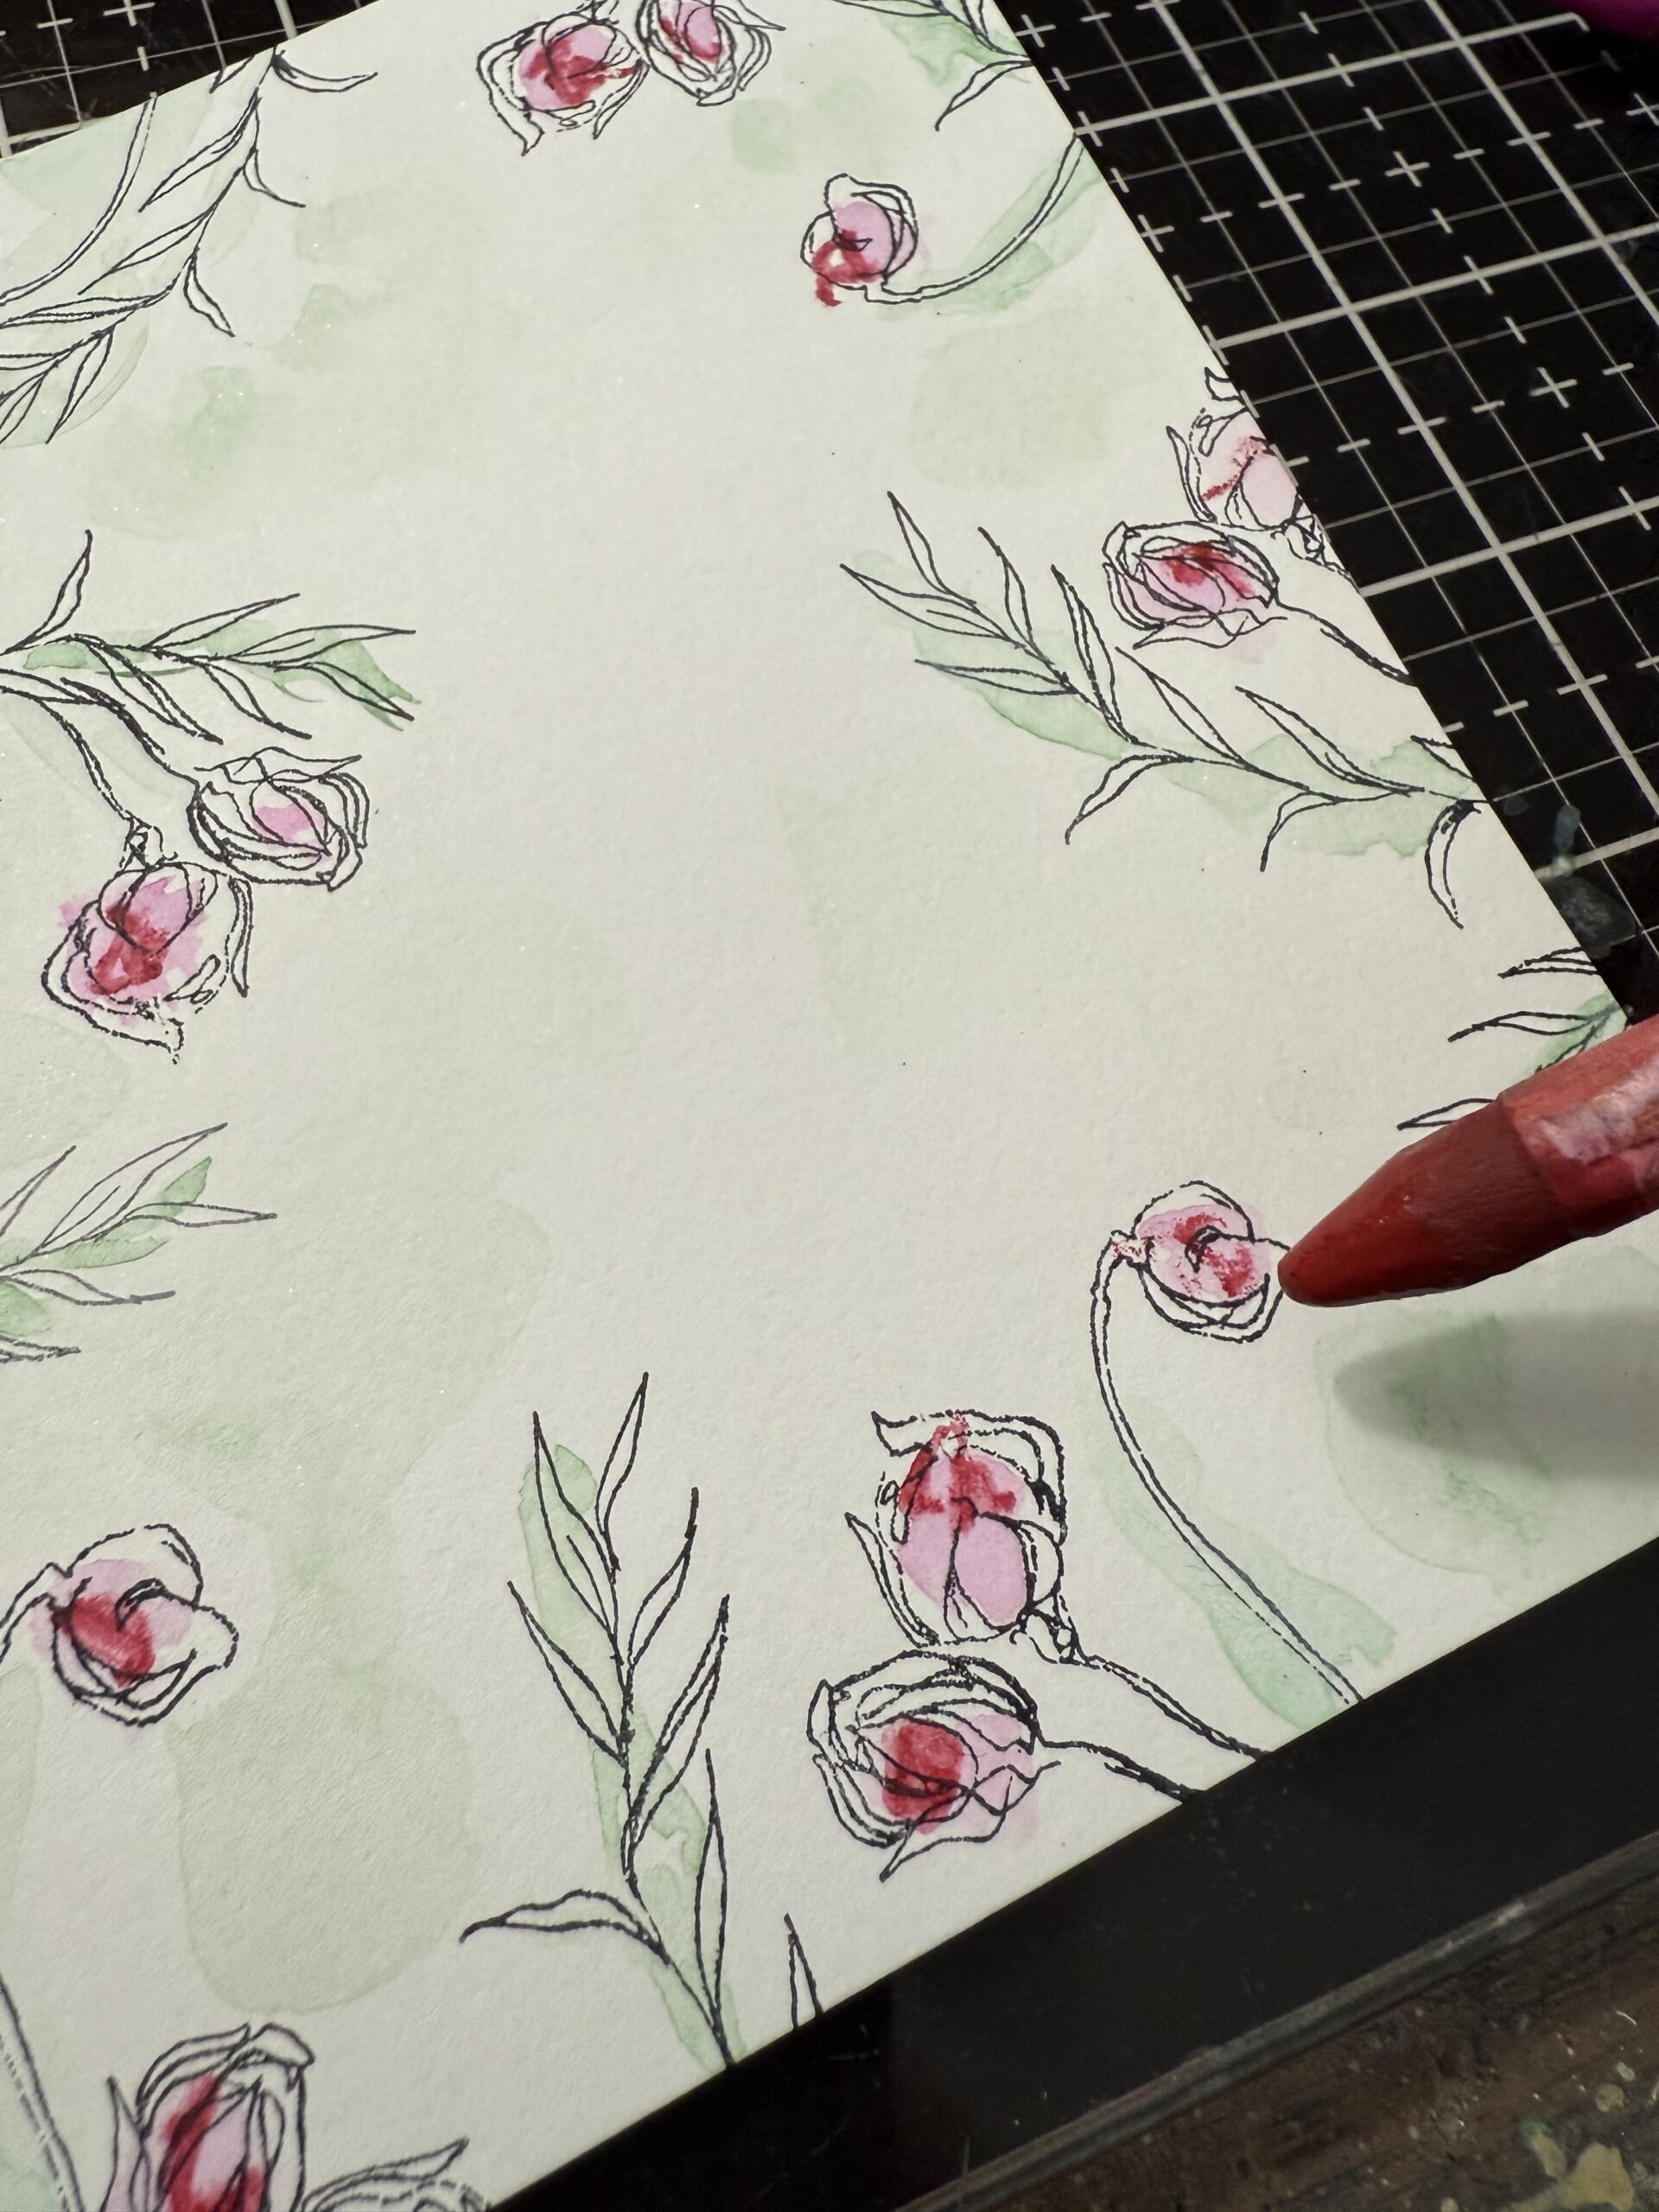
In the photo below you’ll see my randomly stamped florals..I used Black Soot Archival Ink to stamp them, then, using a selection of Distress Watercolor Pencils, loosely colored them. I love using the watercolor pencils wet, meaning, I dipped them into the small bowl of water, then scribble a little bit onto my craft mat to activate the pigments, then I used a brush to pick up the color and colored the flowers. You’ll find step-out photos below explaining this process. I just wanted to show you how my beginning process worked before I knew what I’d be making with the little flowers.
You can see in the photo, that I cut out a couple circle from my first background.
This gave me my jumping off point!
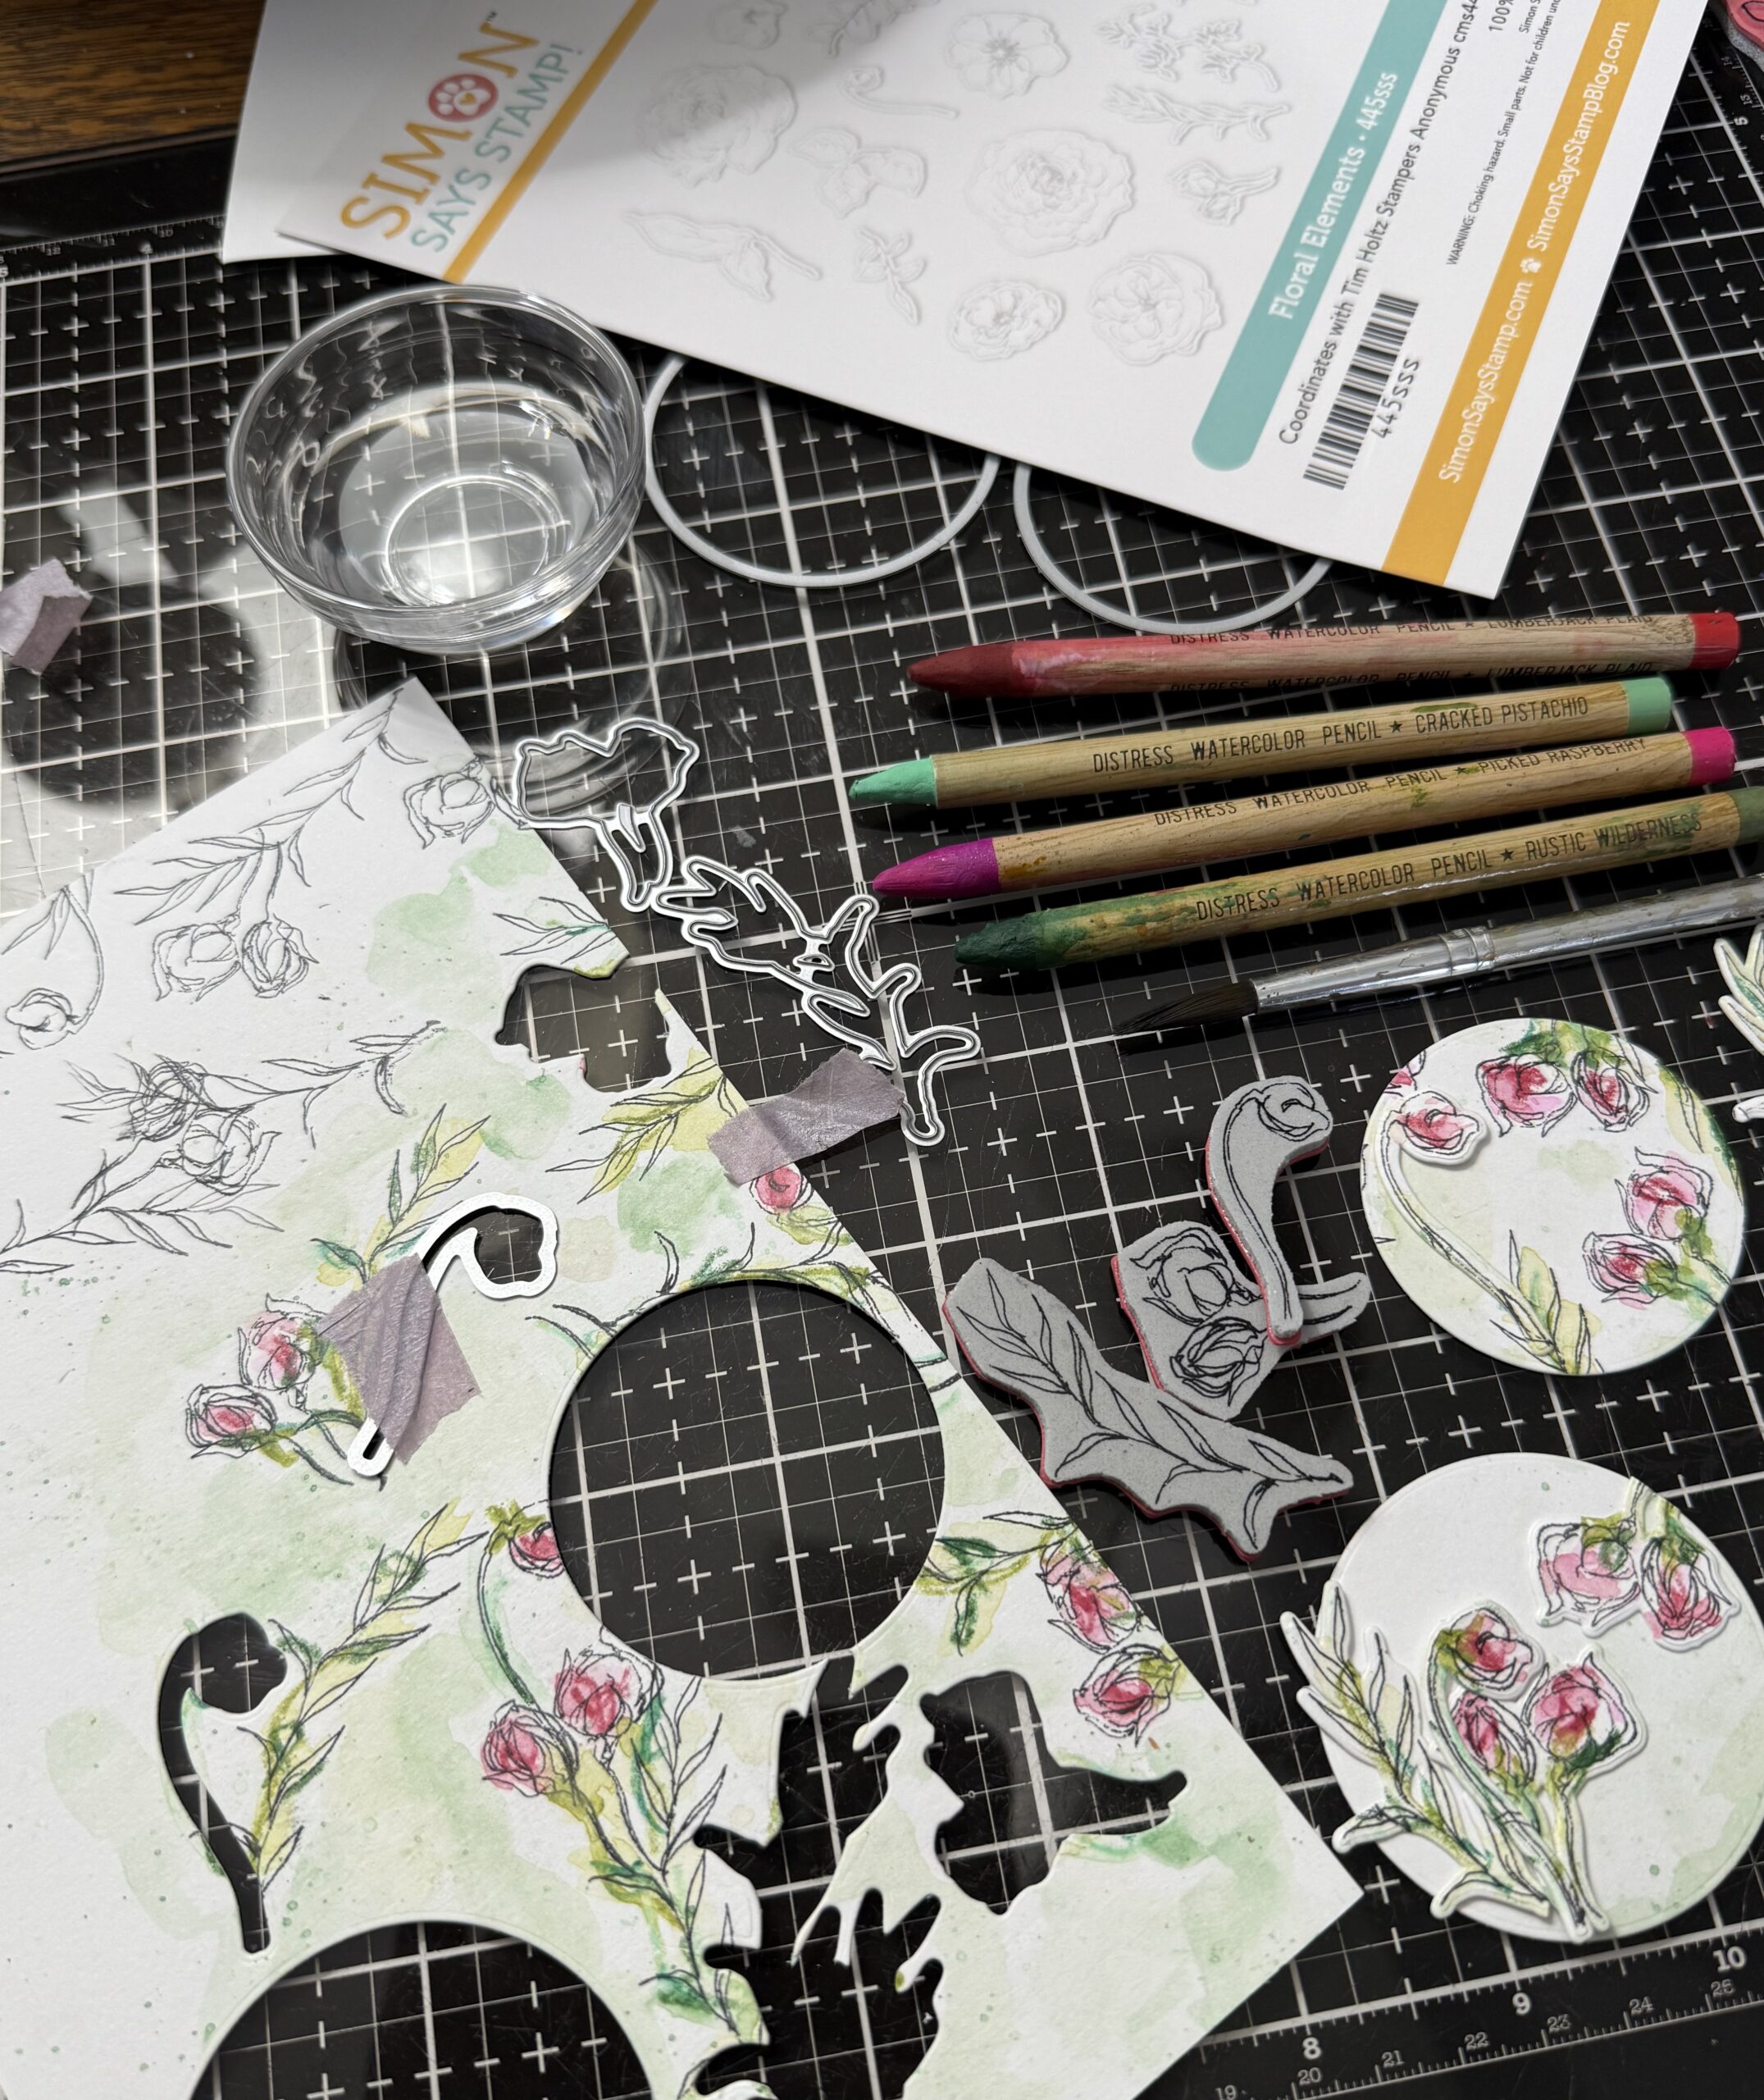
As you can see, I had several of the floral elements and the circles that I had cut to become the focal points of my cards, but after I had used up that first paper by cutting them out, I decided to create a second piece to become the background of the card. I also stamped a couple of phrases from the Tiny Text and cut them out using the dies.
Here are the steps that I used to create both… except the one below was used for the background of the card, so I kept the floral elements towards the edges of the card.
Stamp the images using Black Soot Archival Ink.
Dip your watercolor pencil into water and scribble the pencil onto a craft mat to activate the pigments, using a paint brush, pick up color and color the flowers and stems, then dry with a heat tool. The colors I used were Cracked Pistachio, Rustic Wilderness, Peeled Paint, Picked Raspberry and Lumberjack Plaid.
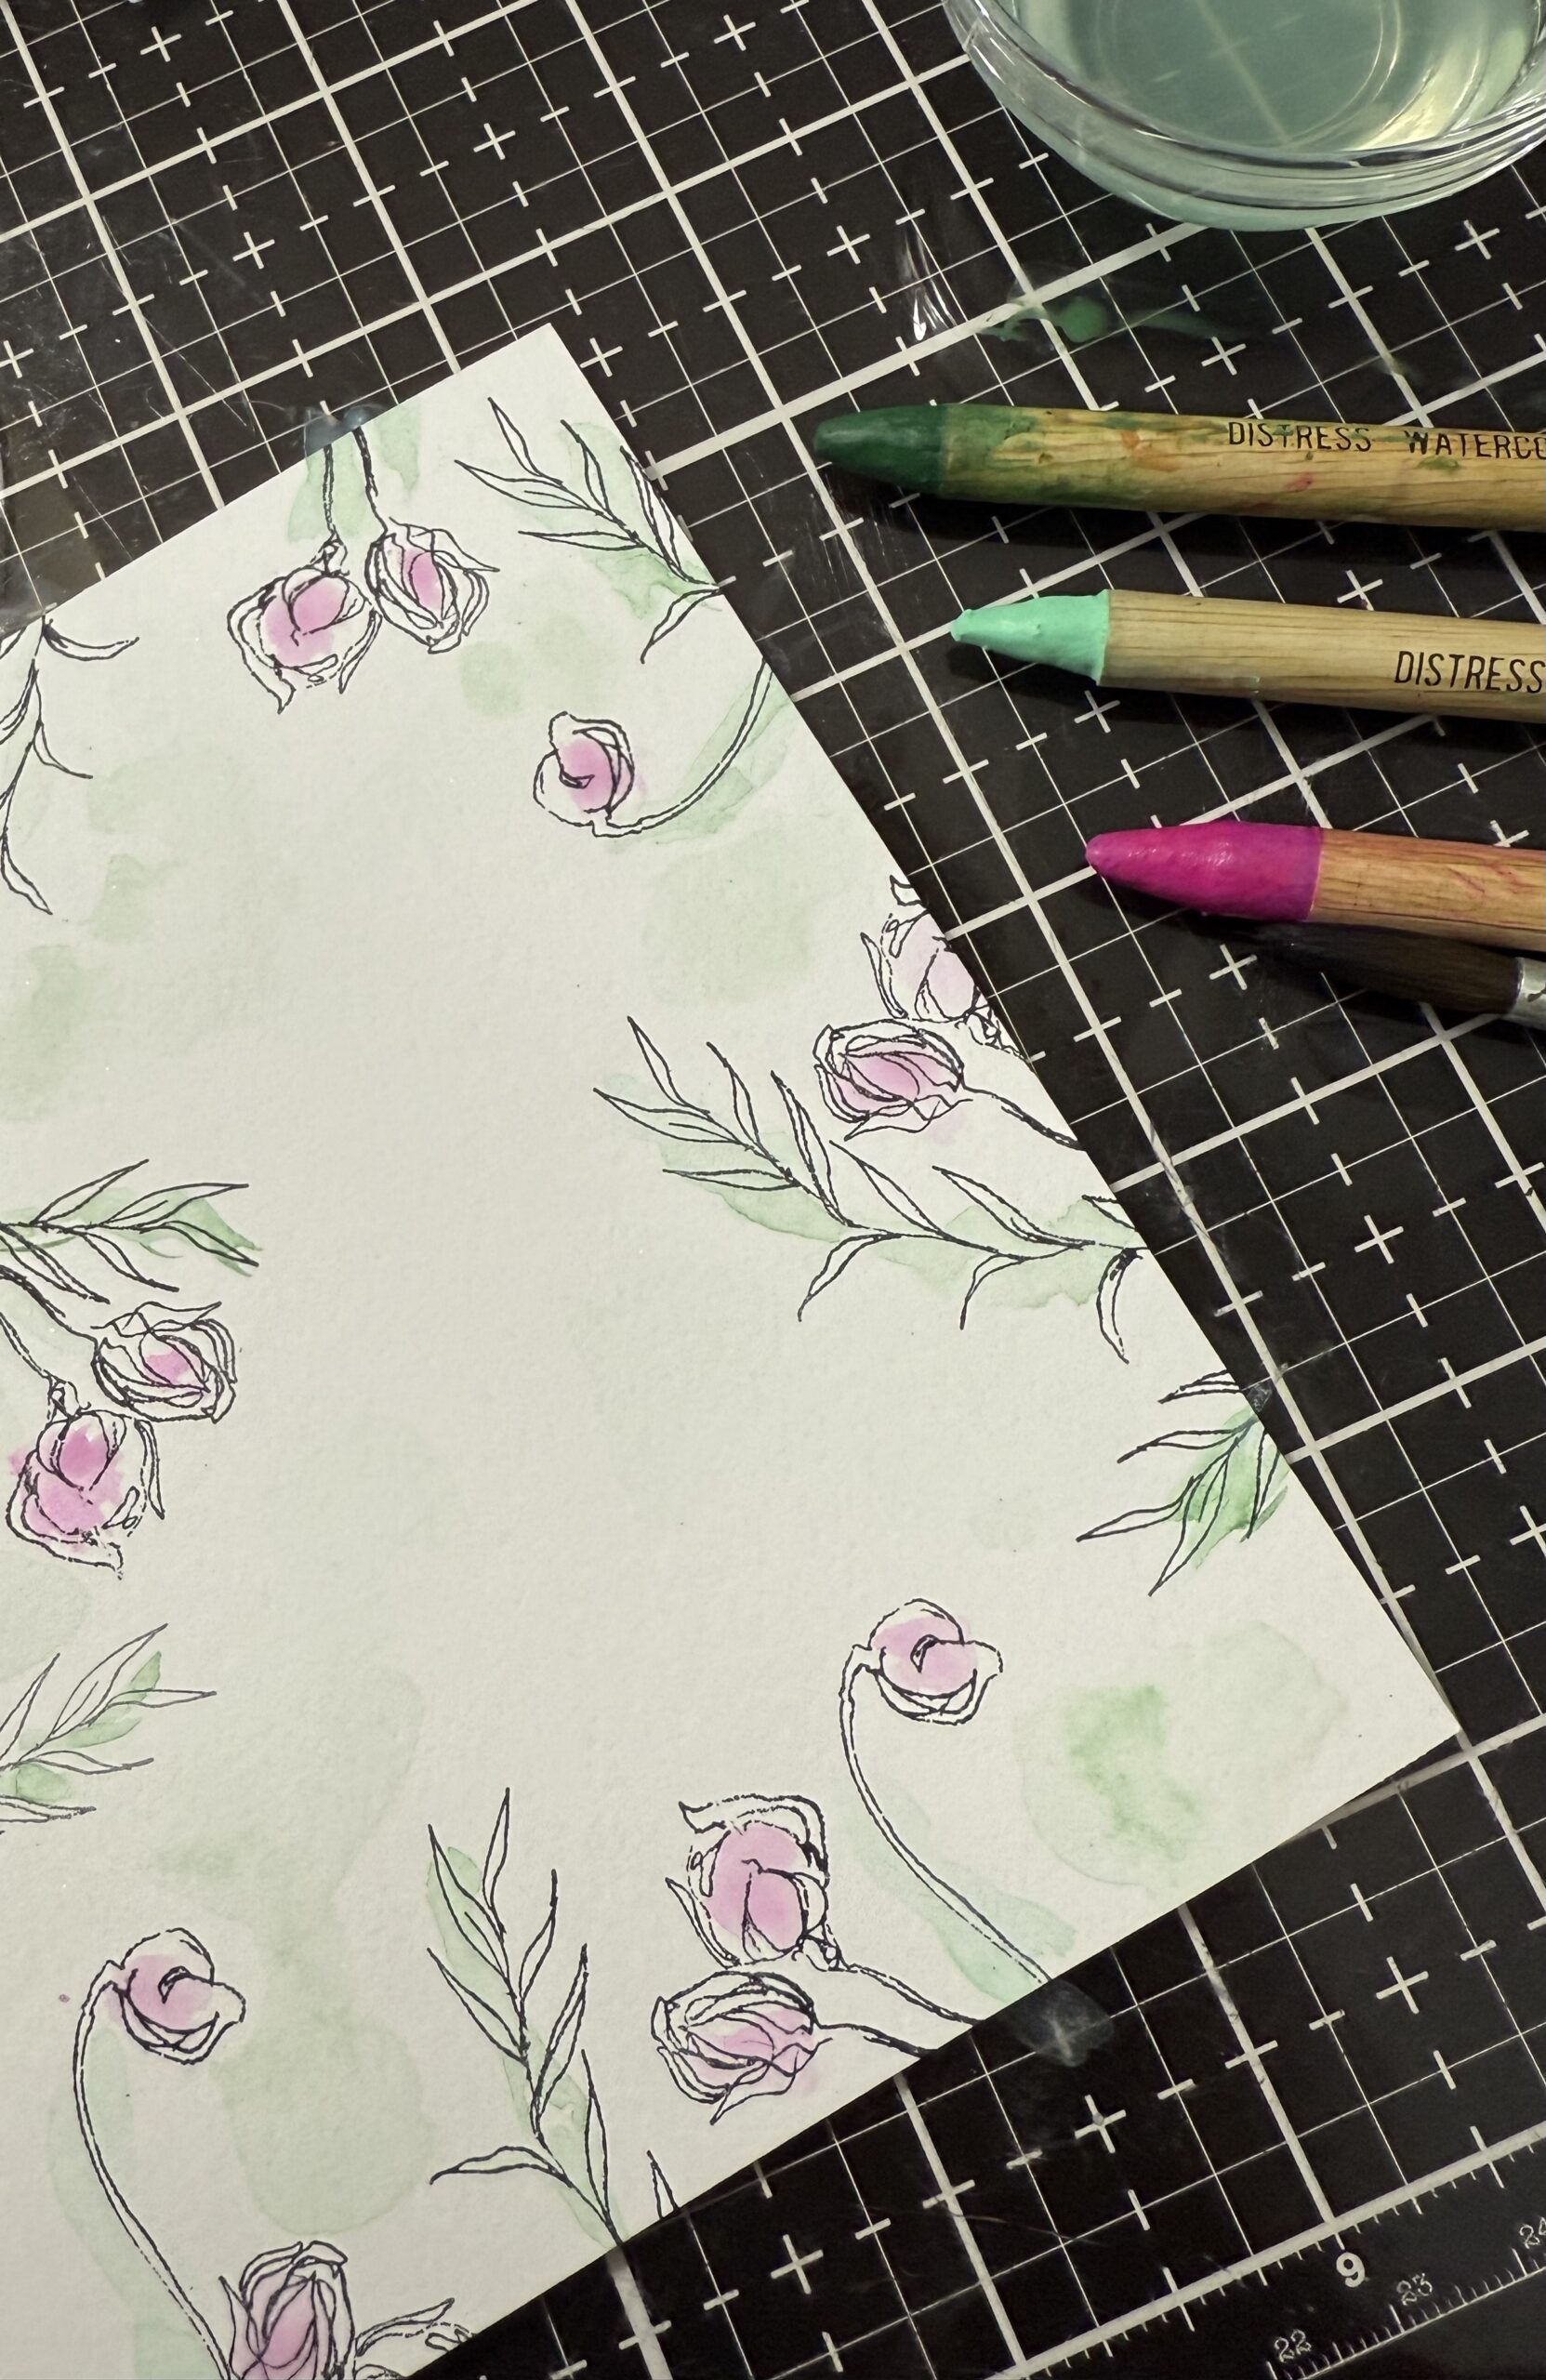
Once I had the initial layer of washed out watercolor on the flowers and a little into the background, I dipped the Lumberjack Plaid pencil into the water, and scribbled the red onto each flower, this was not precise, just a tiny scribble.
Then in the same way, a dip in the water with Rustic Wilderness and scribbles around the base of the flower bud and a little on the leaves and stems.
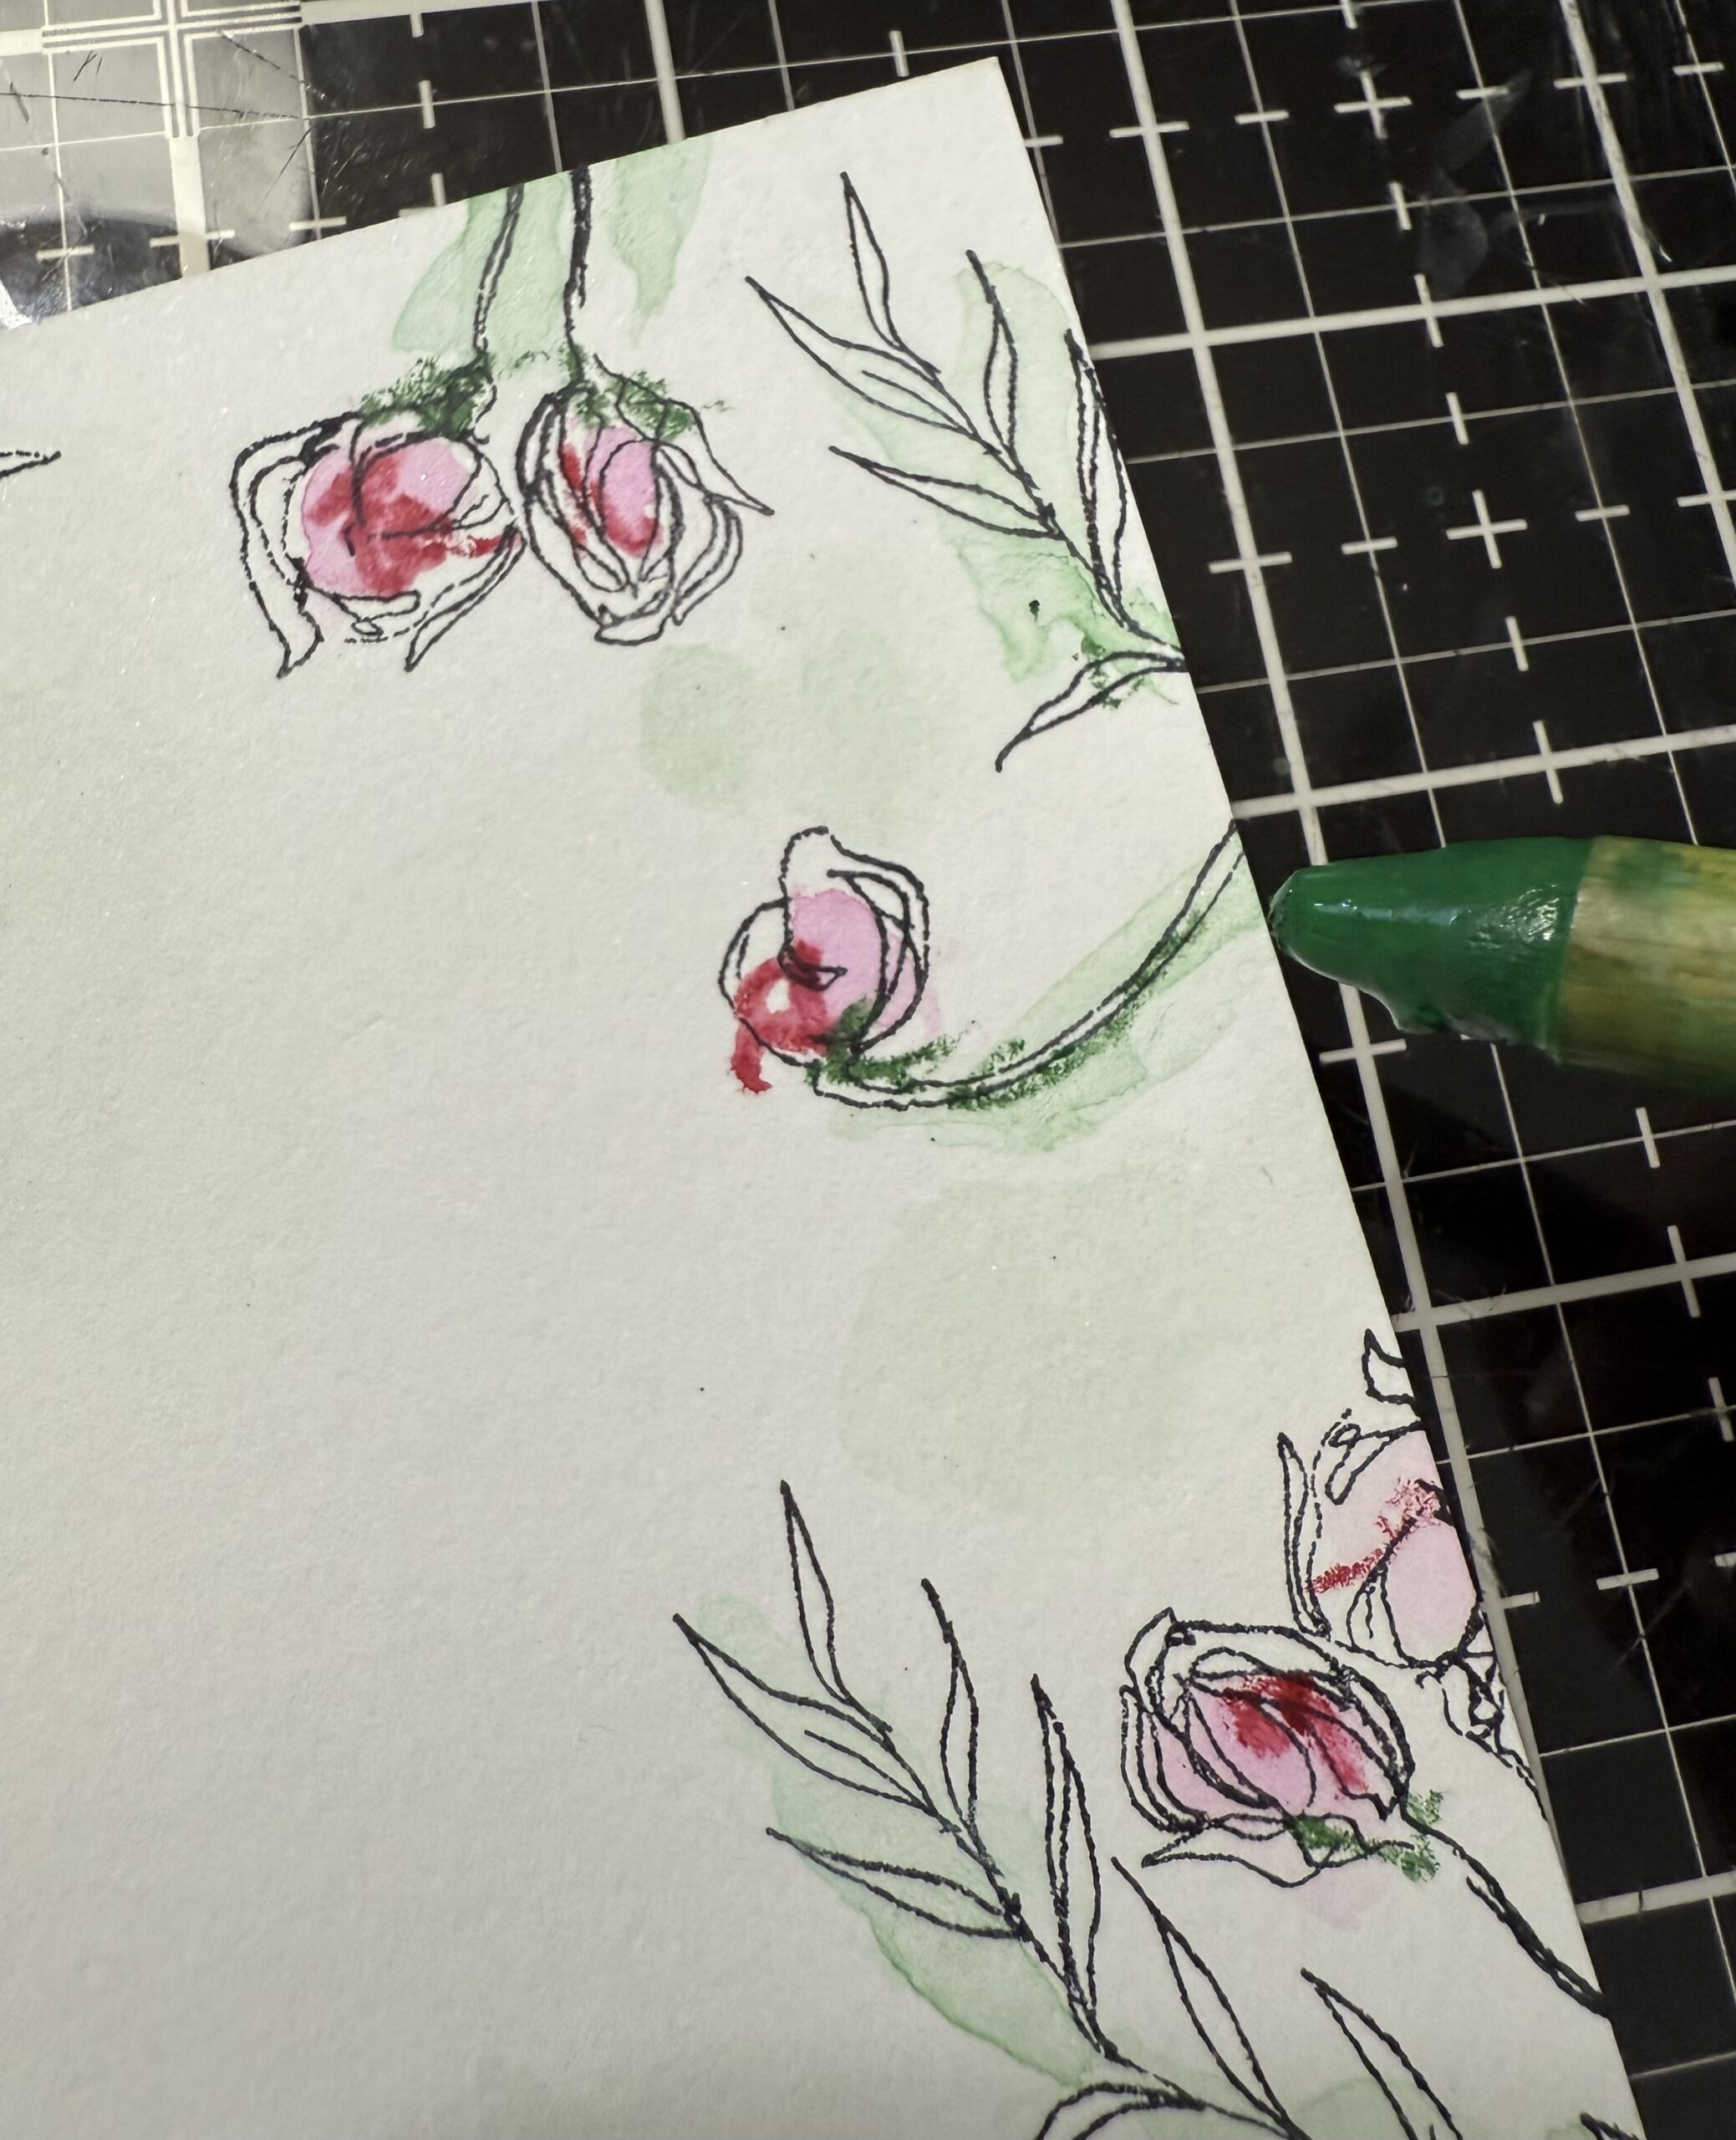
Then I dipped my Peeled Paint pencil into the water and using my paint brush, picked up color directly from the pencil and added some more color around the flowers and background. If the watercolor is too dark, a dip in a puddle on your mat washes it out a bit, then add the color to the background…if you get too much color, use a dry towel to pick it up and start again. Watercoloring is very forgiving, and looks good just about any way that the color gets added.
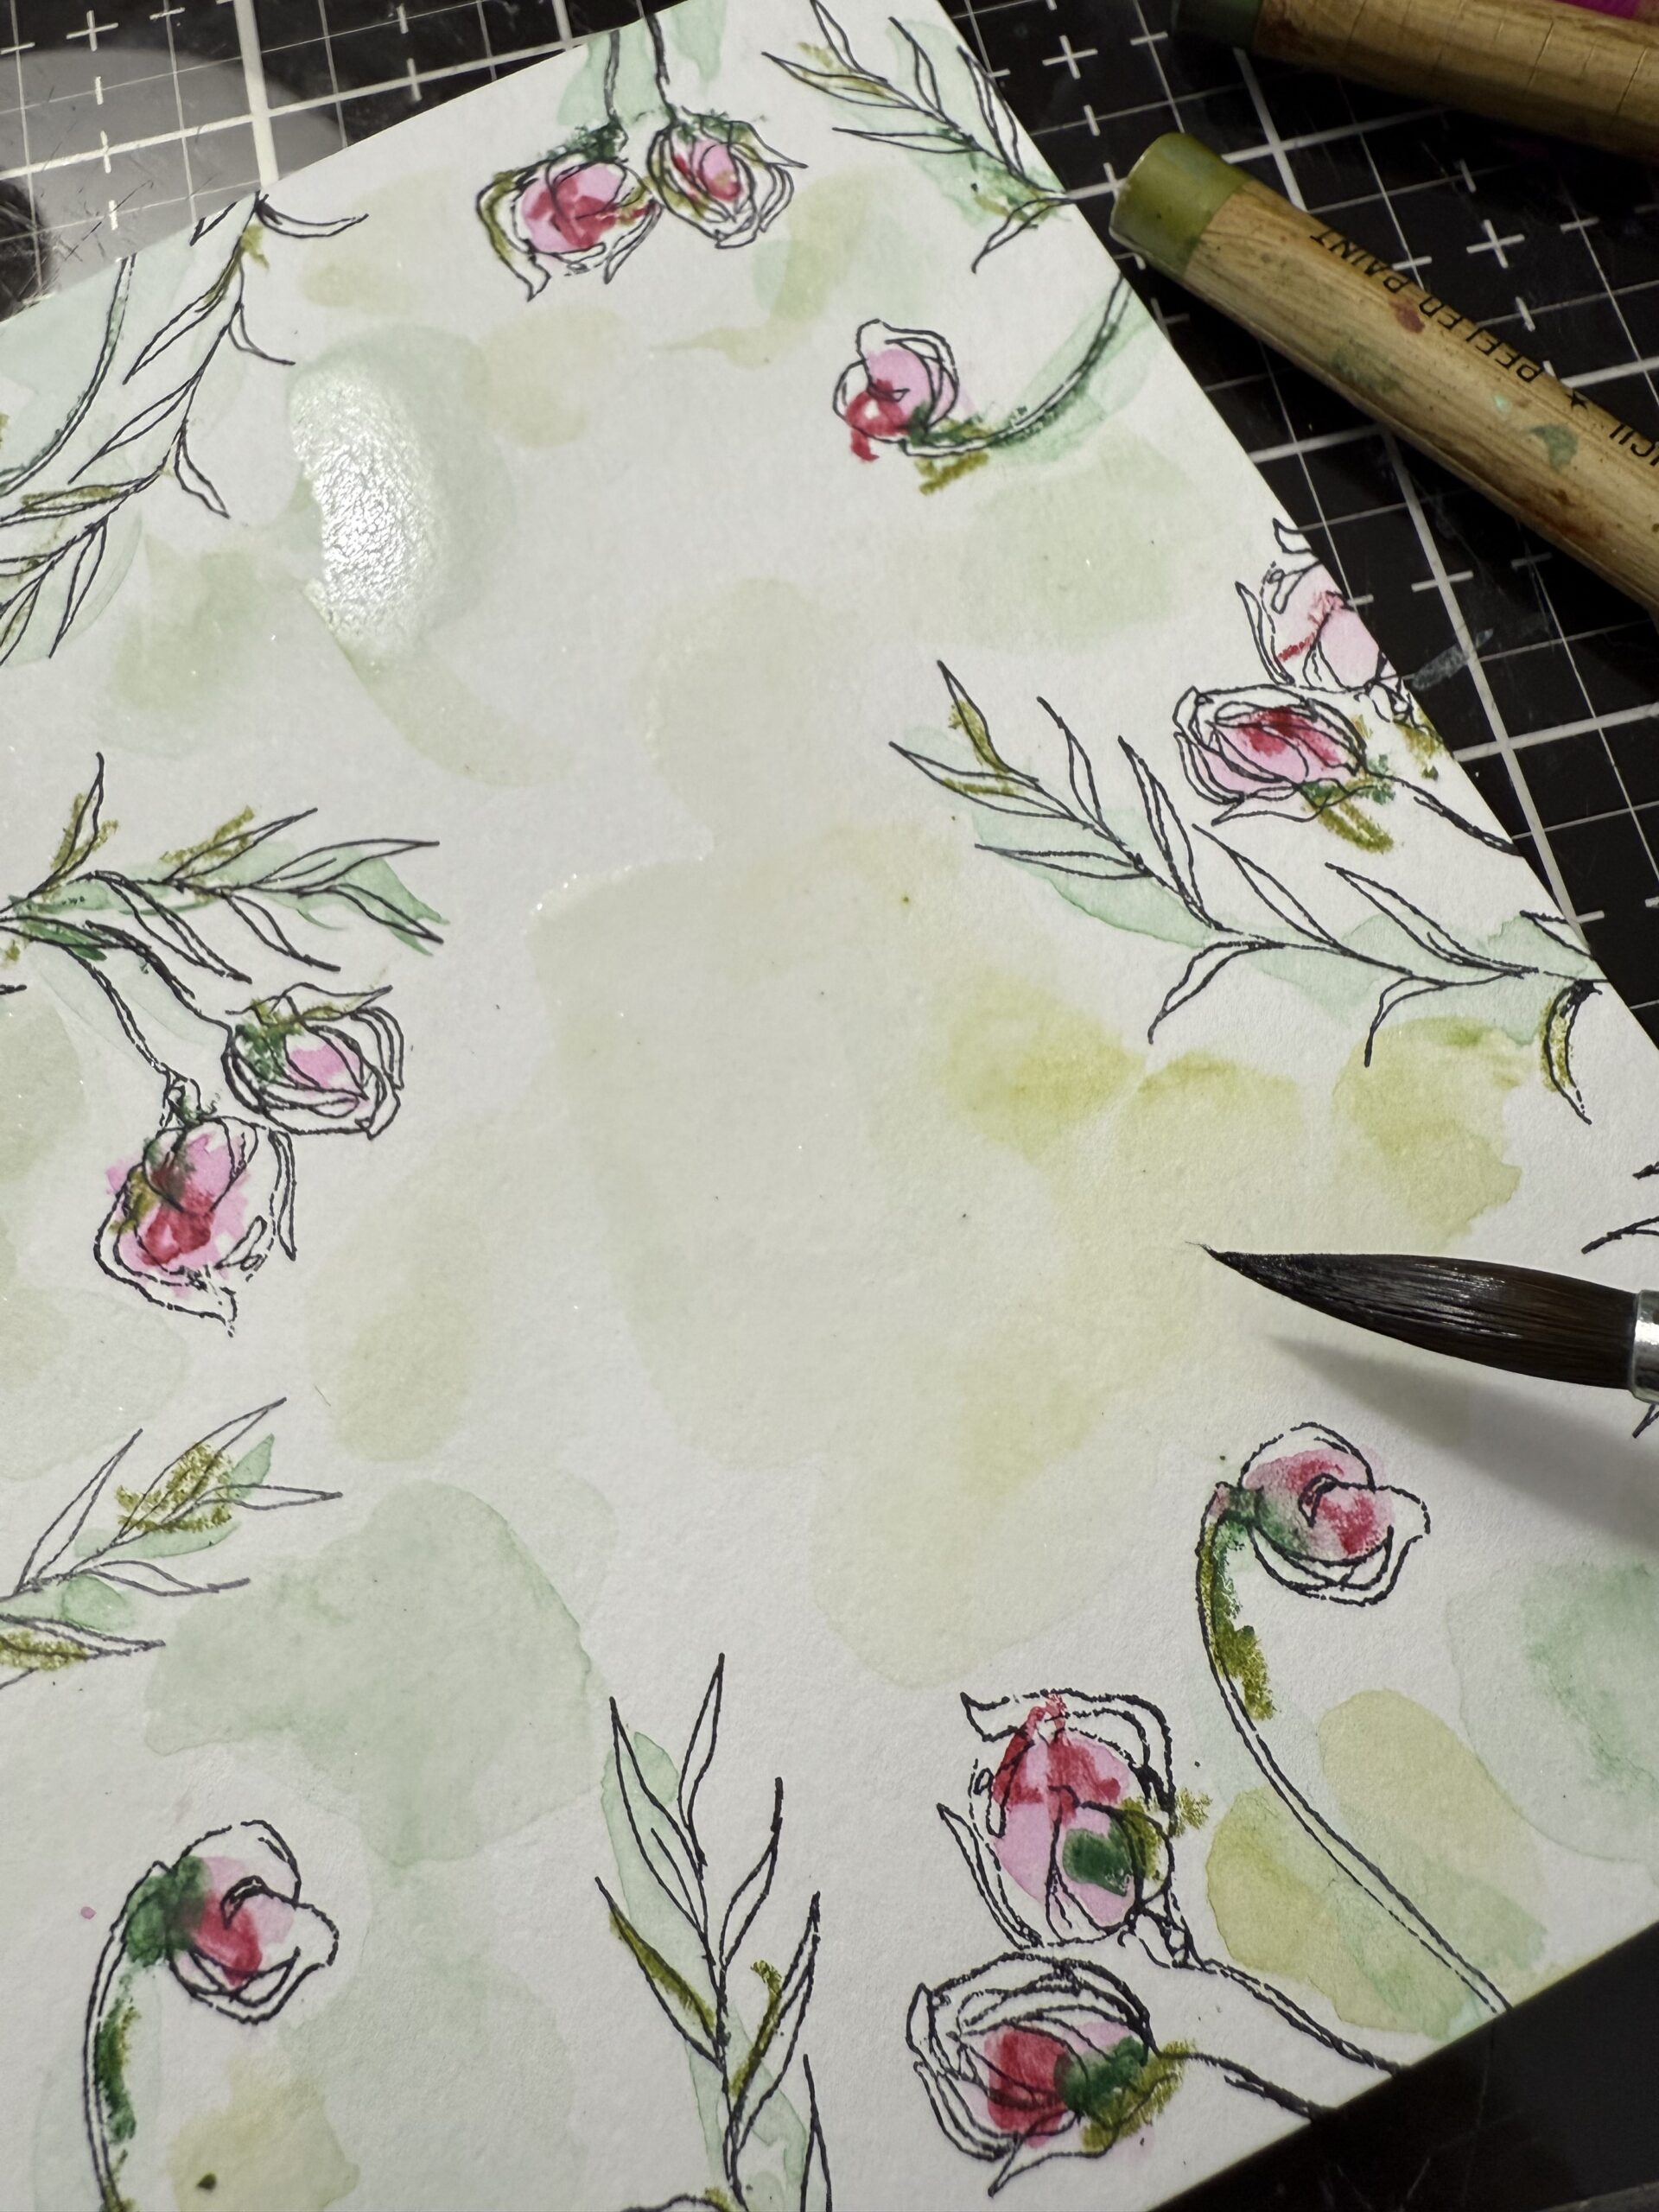
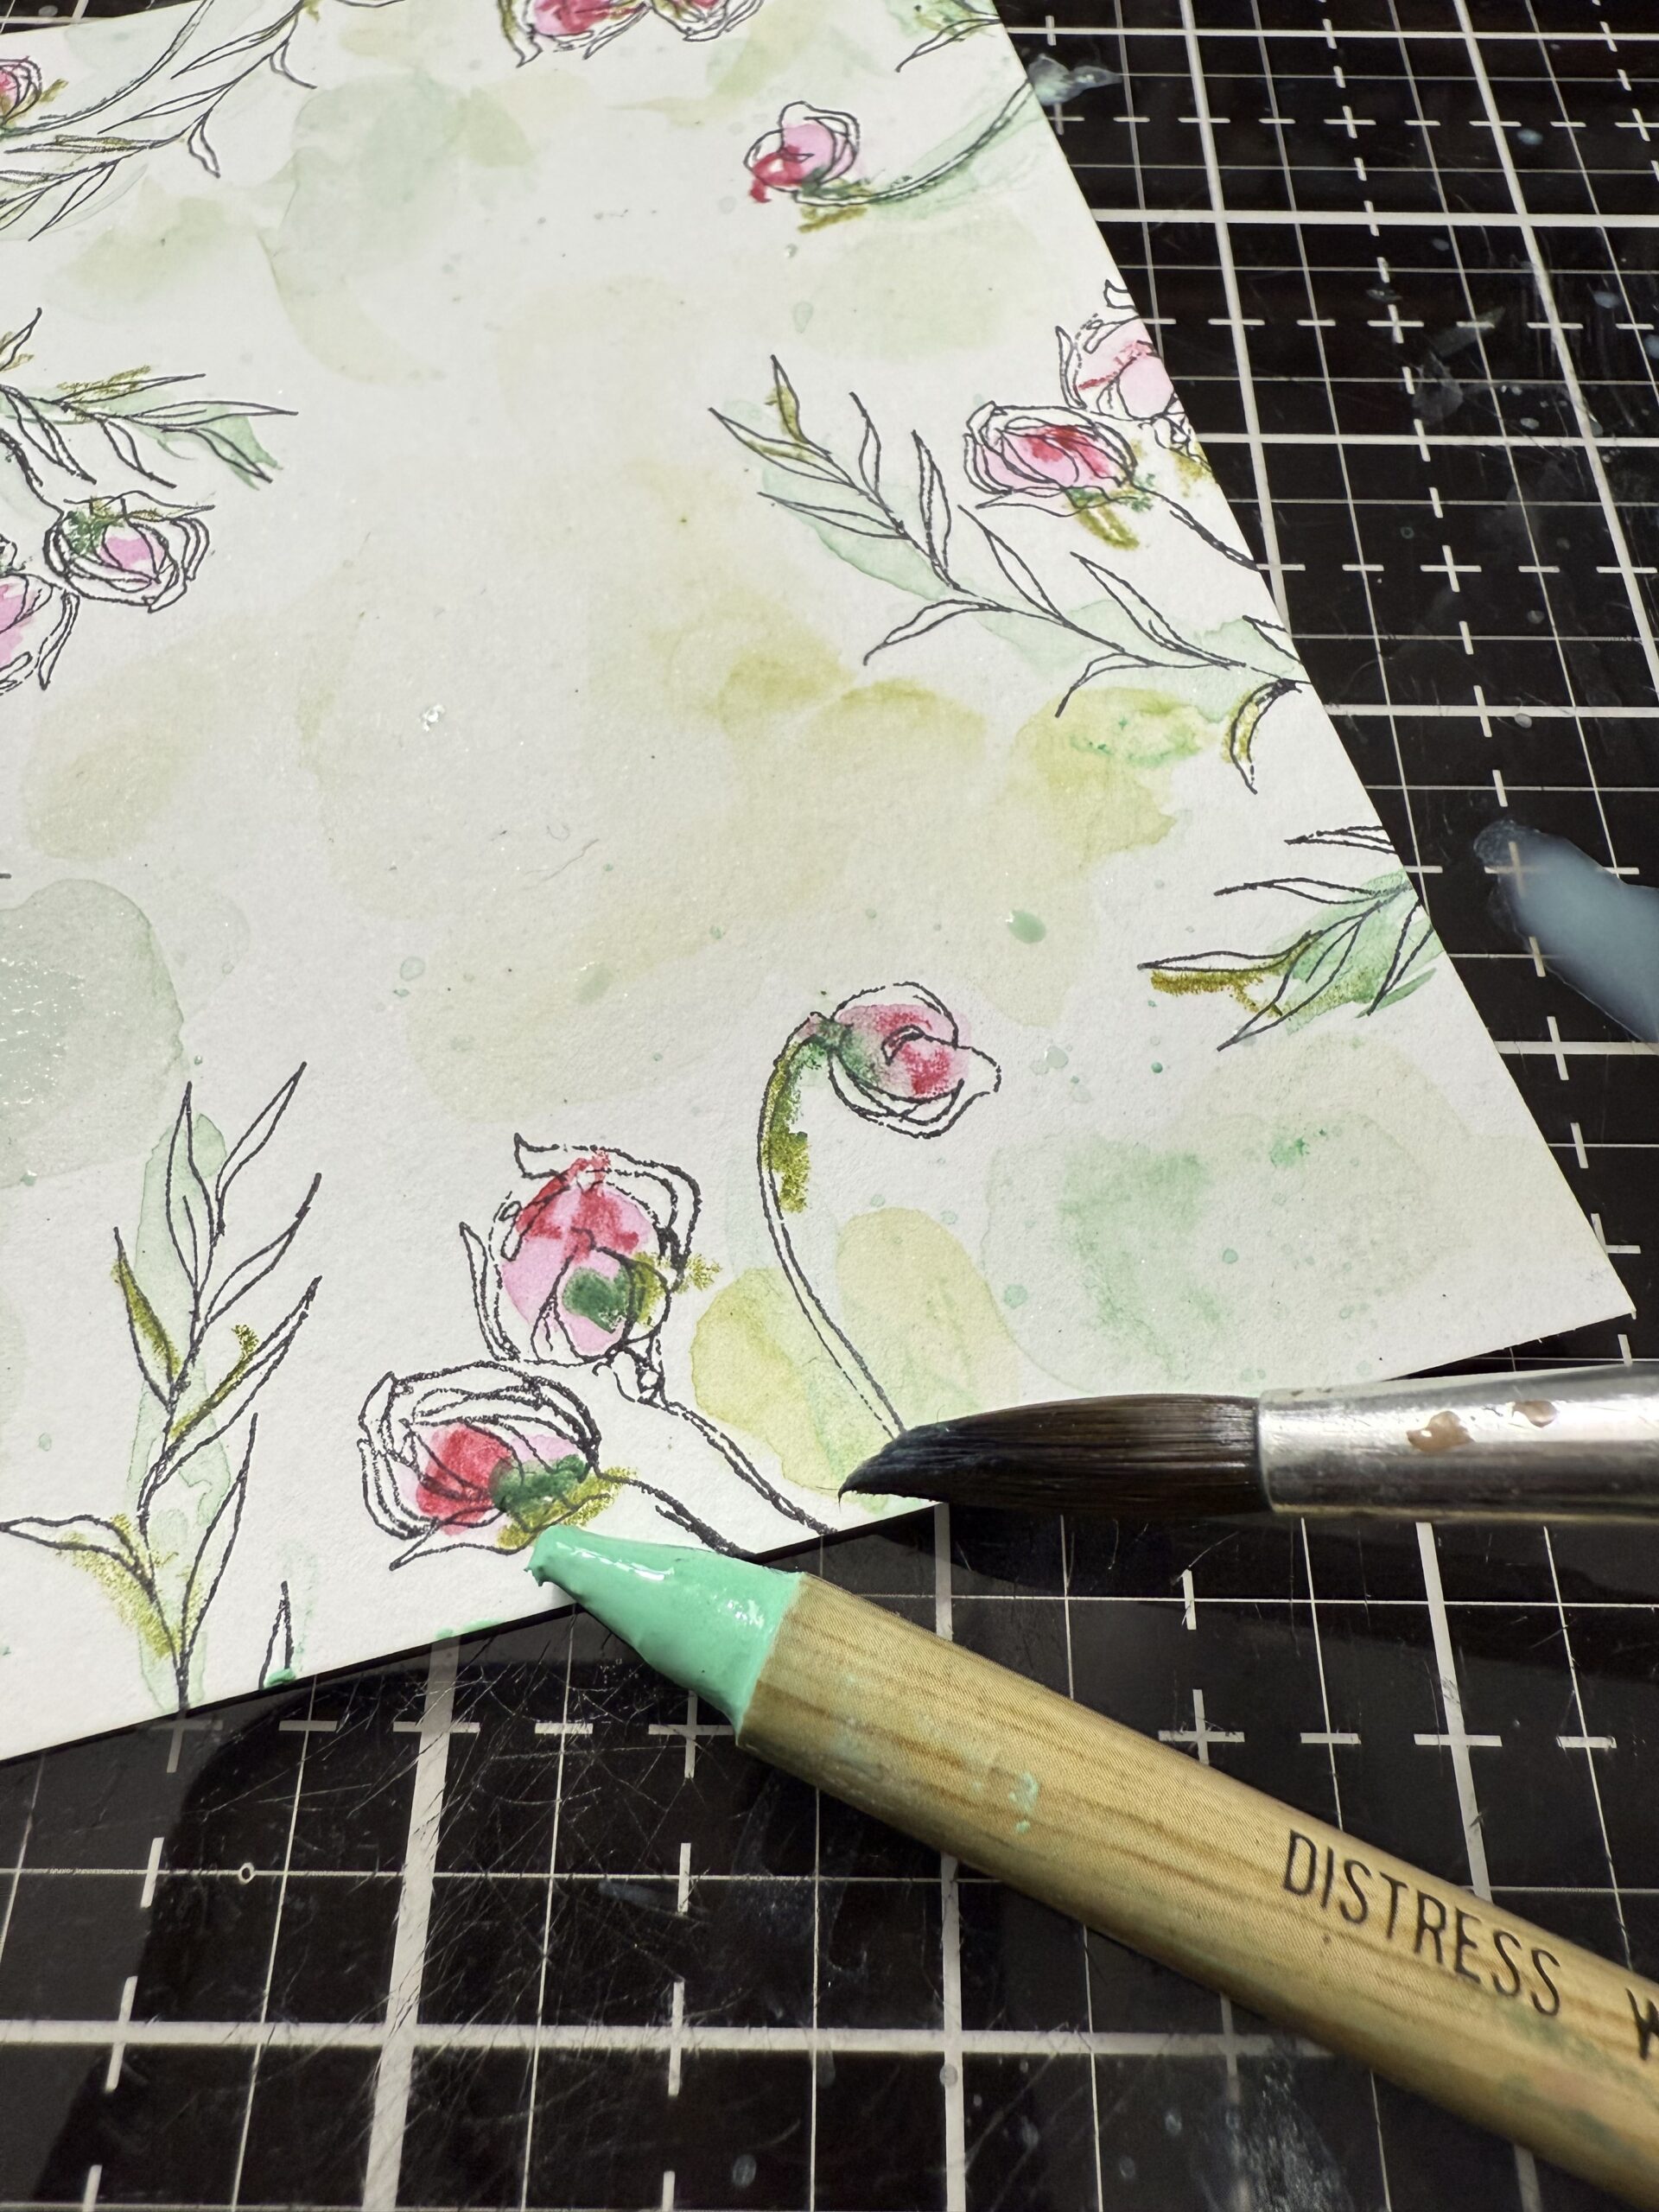
Once I had the background dry, I dipped the Cracked Pistachio Pencil into the water, then using my brush and the pencil, flicked tiny dots of the color over top of the background. Then I dried the background with my heat tool and began arranging the card.
Below you’ll see that I had a plain circle cut to place behind the background circle, it was then that I remembered that I had a circle impresslit set (retired) from Tim Holtz and used that on my final card, but a plain circle would work well too.
I adhered the floral elements to the circle using foam adhesive, then added the phrase over the top. I used two Tim Holtz idea-ology Paper Fasteners on either side of the paper phrase and placed it in the center of the circle. I stitched around the edge of the background using my sewing machine and adhered the circle into the center of the background. the background was then adhered to a card base.
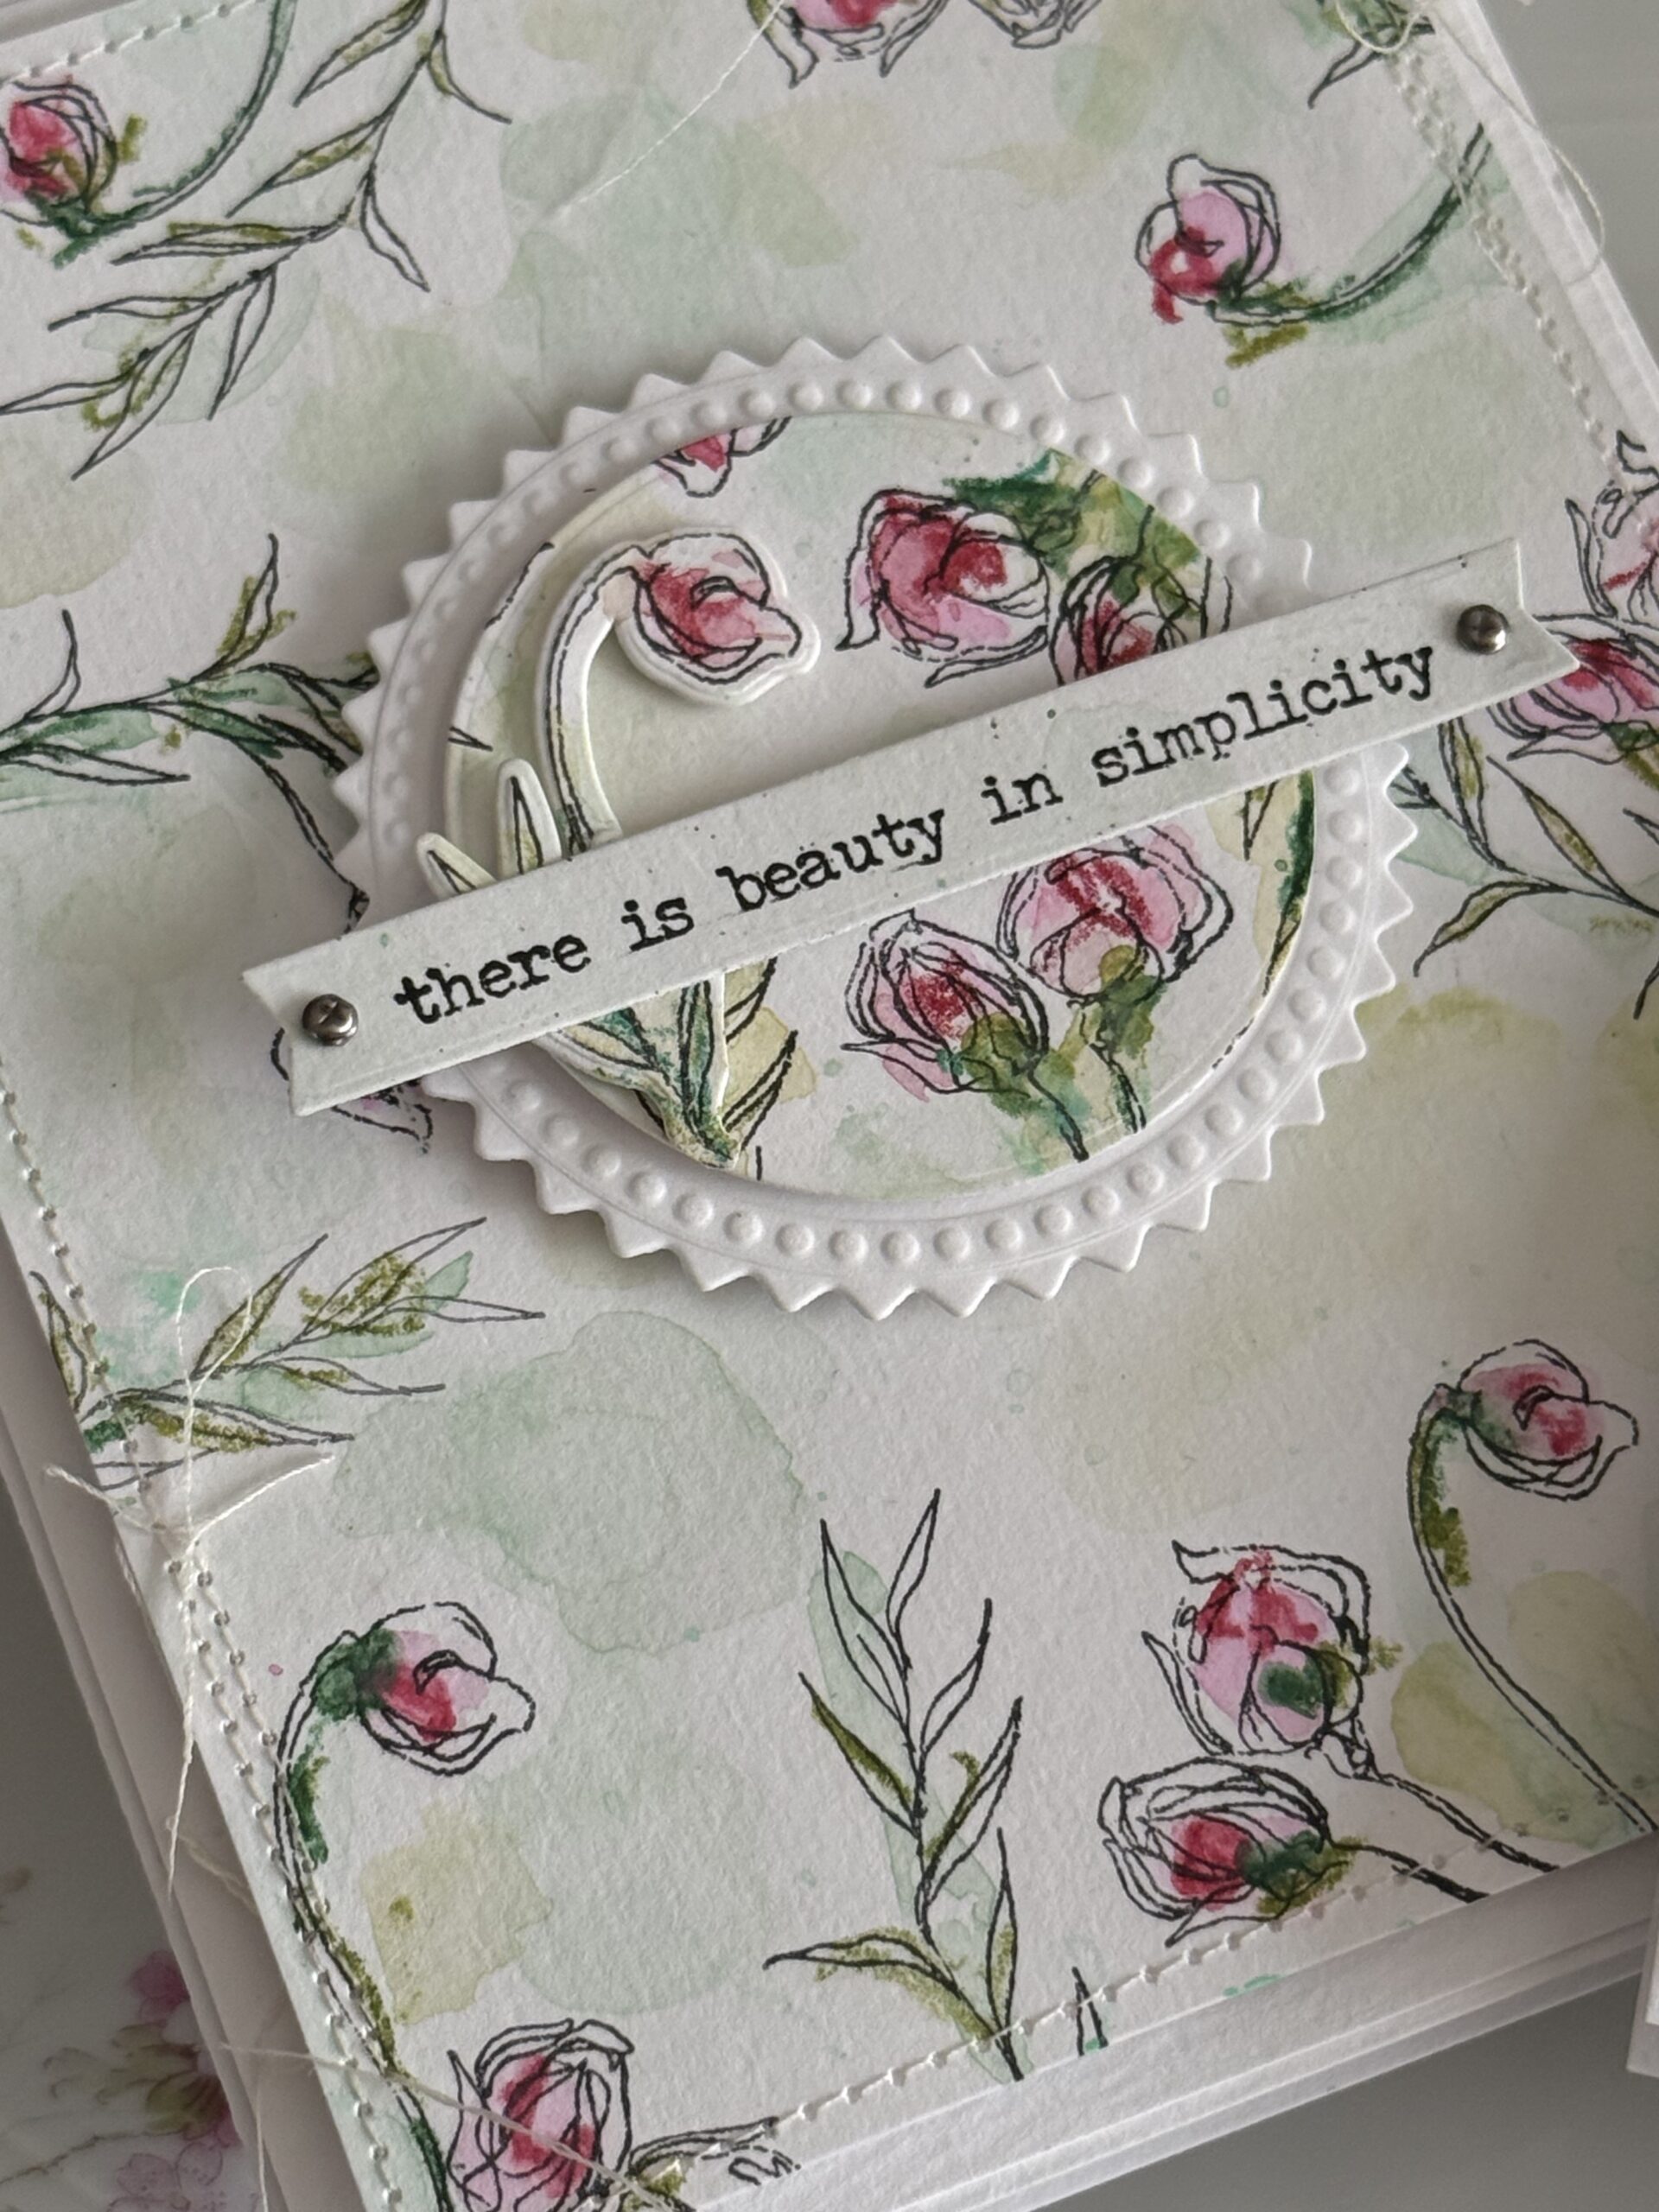
The second card was built almost the same except I added the phrase to the side and adhered a button with some thread just over top of the floral gathering.
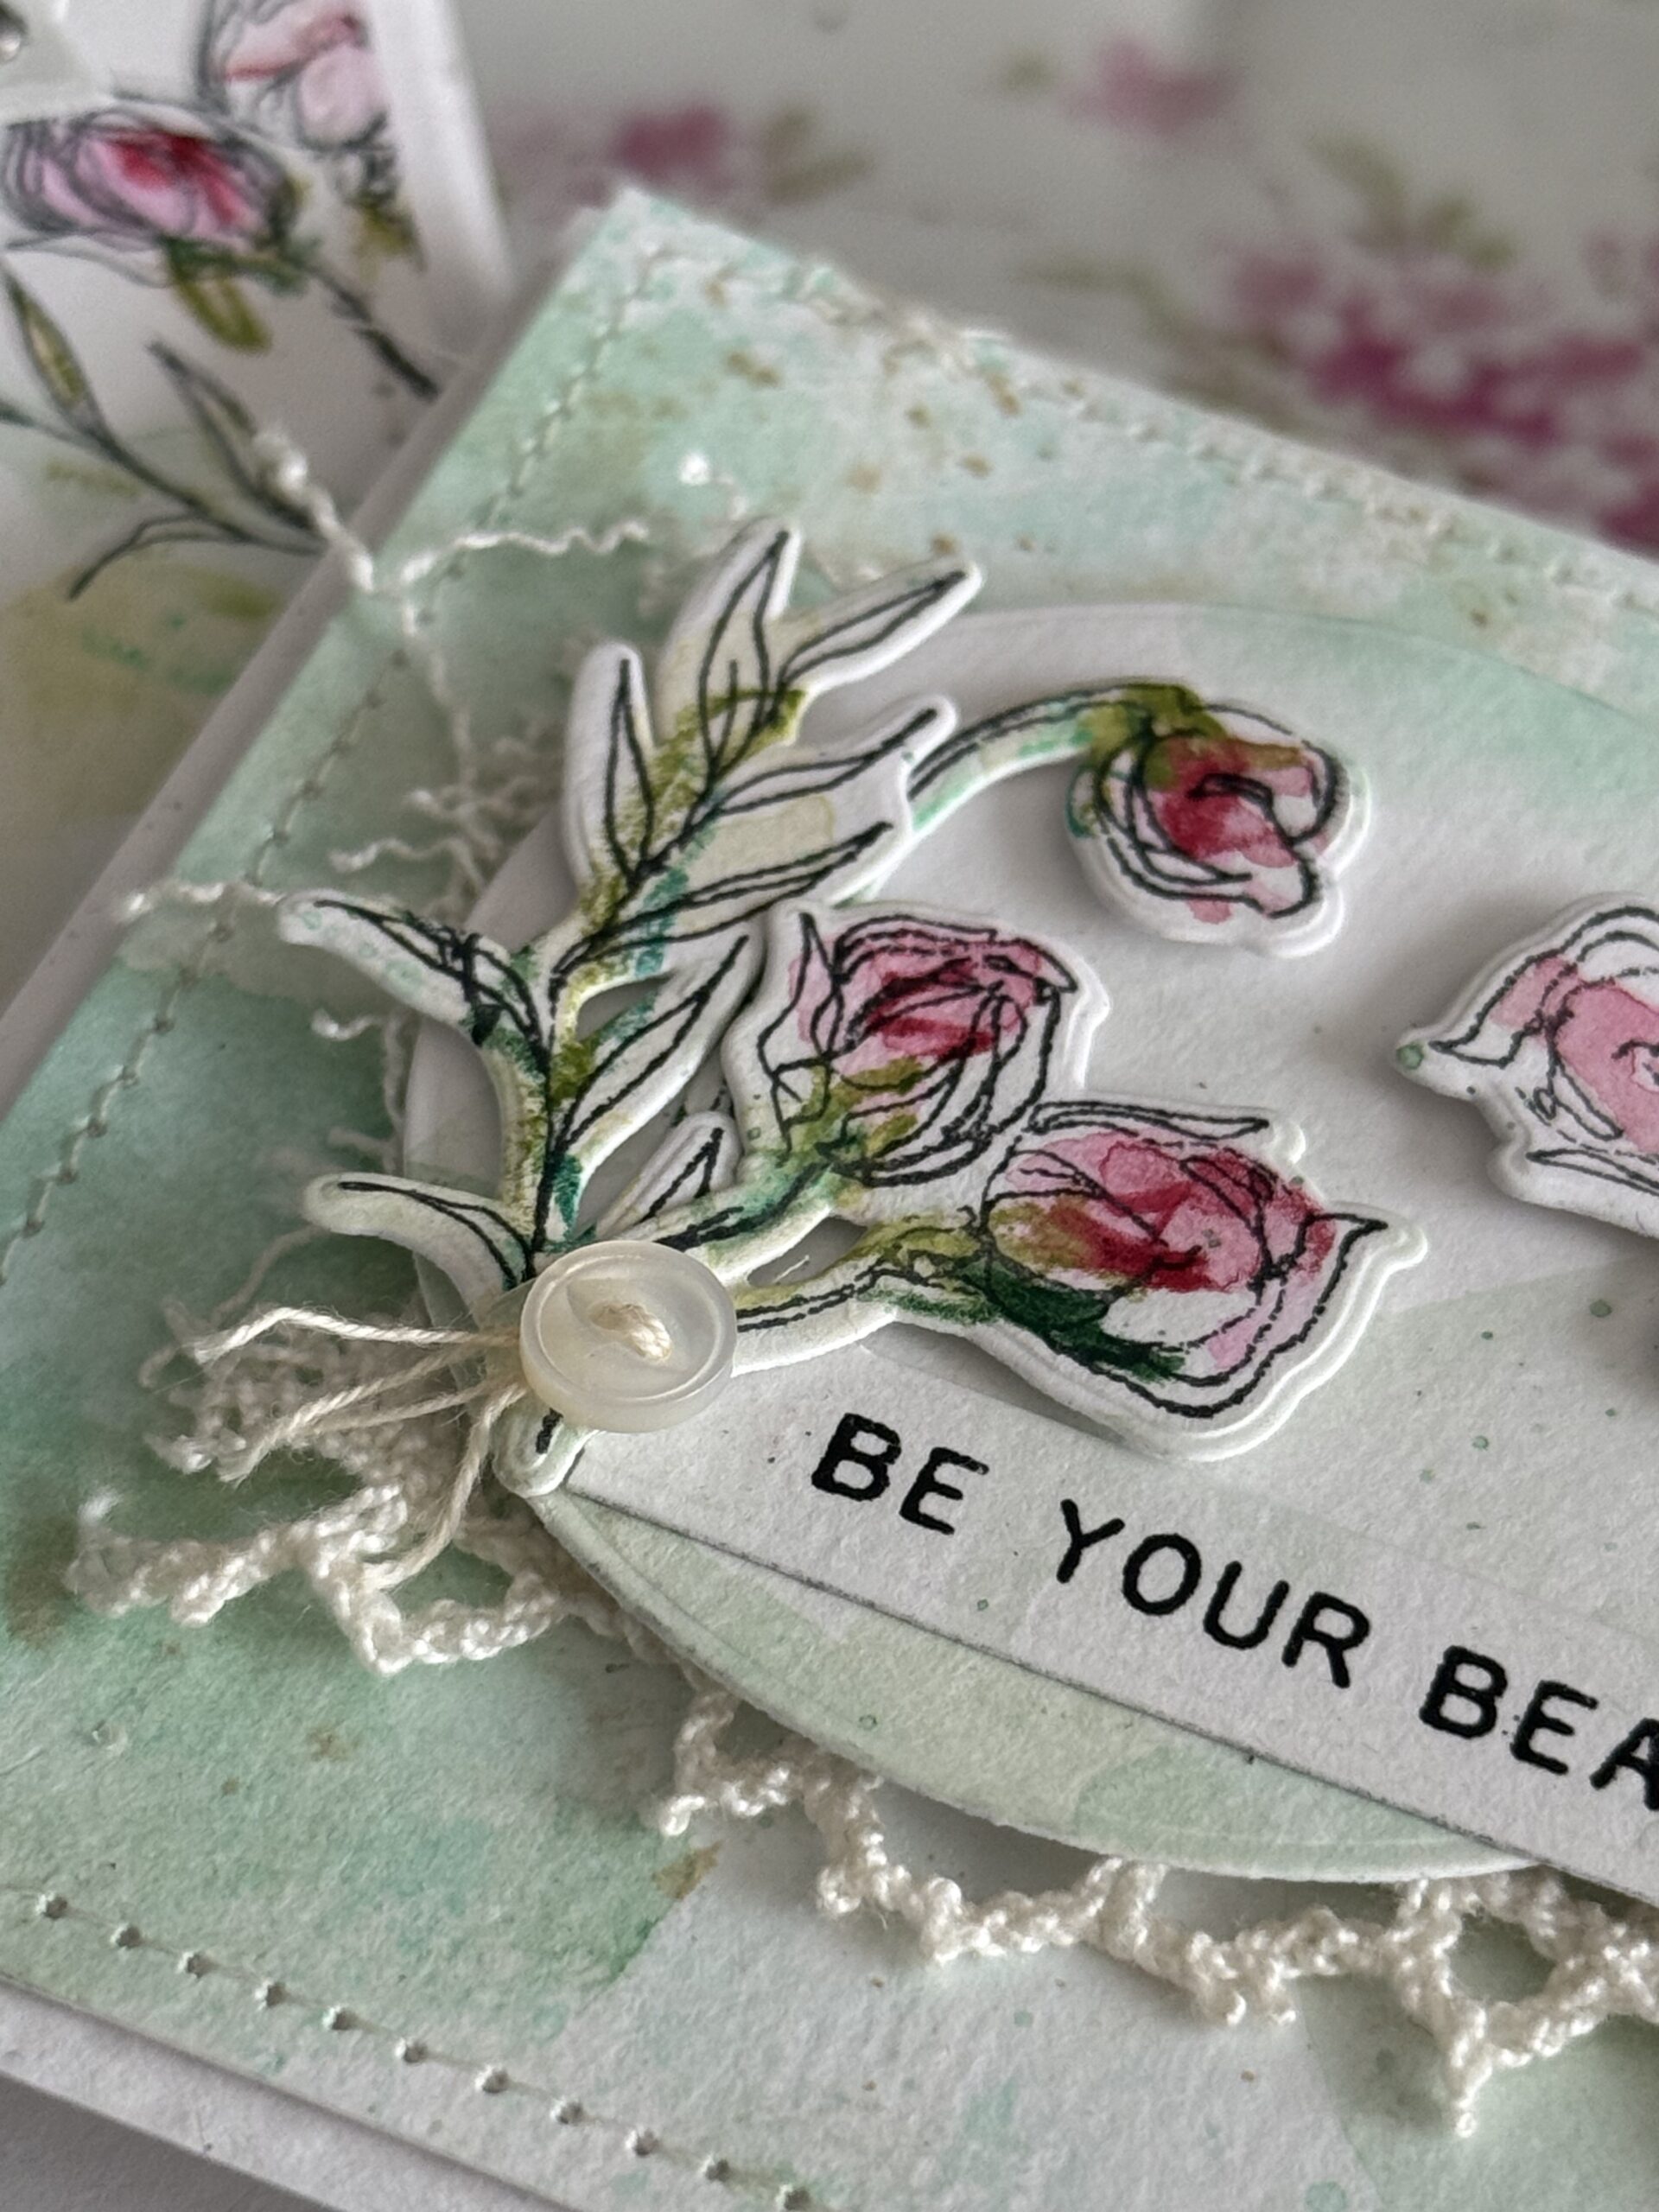
I created a background piece of paper using several of the green watercolor pencils and paint brush then dried it with my heat tool. I trimmed the background down to a small size to fit the circle and found a scrap of vintage lace to apply just under the circle. The background was stitched around the edge, then the lace piece adhered to the front, lastly, I applied the circle/floral embellishment using foam squares and adhered it in place. I used a hot glue gun to add the final circle since I was placing it over top of the lace.

With that, both cards were complete!
Thanks so much for stopping by today..I hope you enjoyed the tutorial. Be sure to stop by Simon Says Stamp to check out the rest of the wonderful release…you won’t regret it!
Shop Simon Says Stamp by clicking on this link. Thank you! I appreciate you for supporting me.
Creatively yours, Stacy
What is an affiliate program, and why should I click on the link and buy through you?
When you shop via the affiliate link on this blog, I receive a small commission from the affiliate provider (Simon Says Stamp) at no extra cost to you, whatsoever. These commissions help me to cover the hosting fees and other costs to run my blog and be able to provide you with FREE inspiration. If you shop the links, THANK YOU! I truly appreciate being able to share my love of creating with you.


Leave a Reply