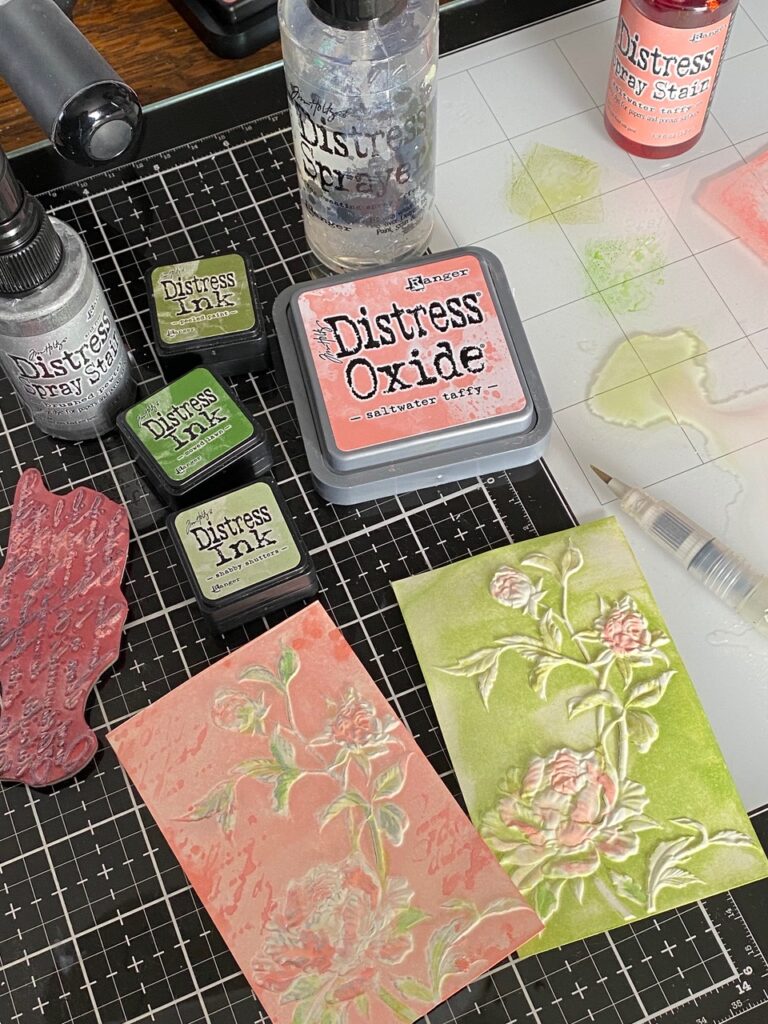
Hello Friends! It’s another exciting day today…want to know why? We have a new Distress Color to welcome to the Distress Family! Let’s Welcome Saltwater Taffy!!!! This is a GORGEOUS shade of pink with a slight tint of Salmon that can also go slightly peachy depending of what type of paper you use.
Just like those old fashion saltwater taffy candies that were fun to eat as a kid. I live in Ohio and as kids, we always made a yearly summer trip to Cedar Point Amusement Park. They always had Saltwater Taffy for sale and it was one of the things our family would bring home as a souvenir.
It’s simply delicious, and the perfect addition to the Distress line! Here’s a link to the Youtube LIVE that Tim hosted today to celebrate its release. As always, you’re not going to want to miss it, so hop over and check out the replay by clicking HERE.
I really enjoyed playing around with this color. It has me looking forward to both spring and summer!
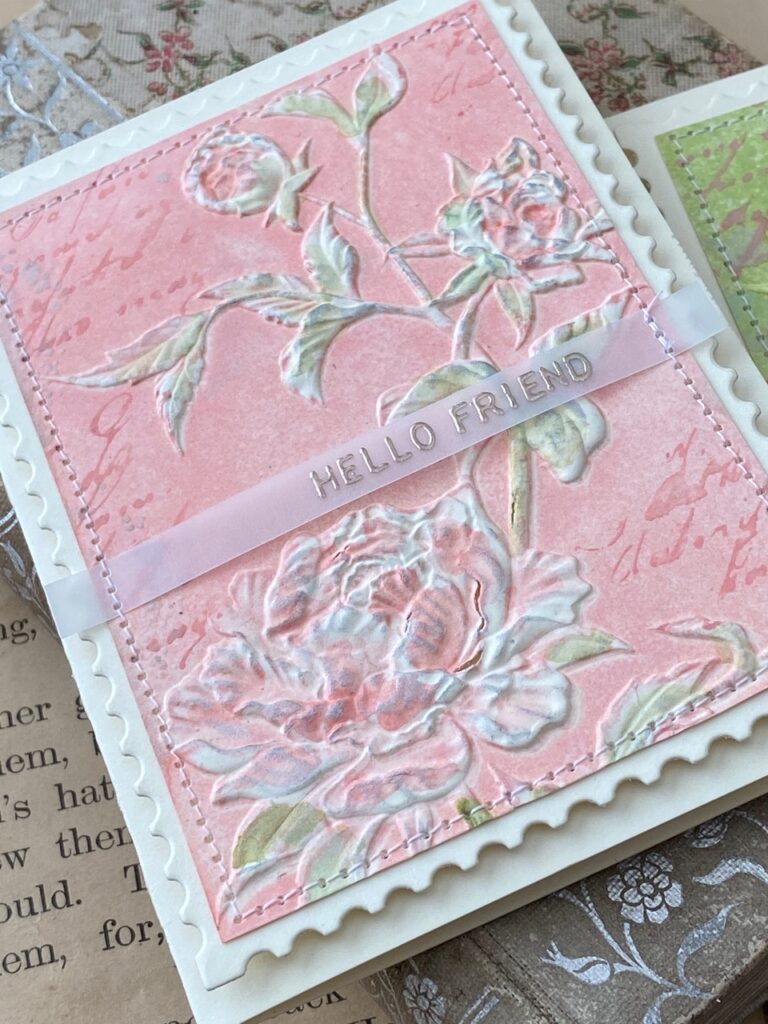
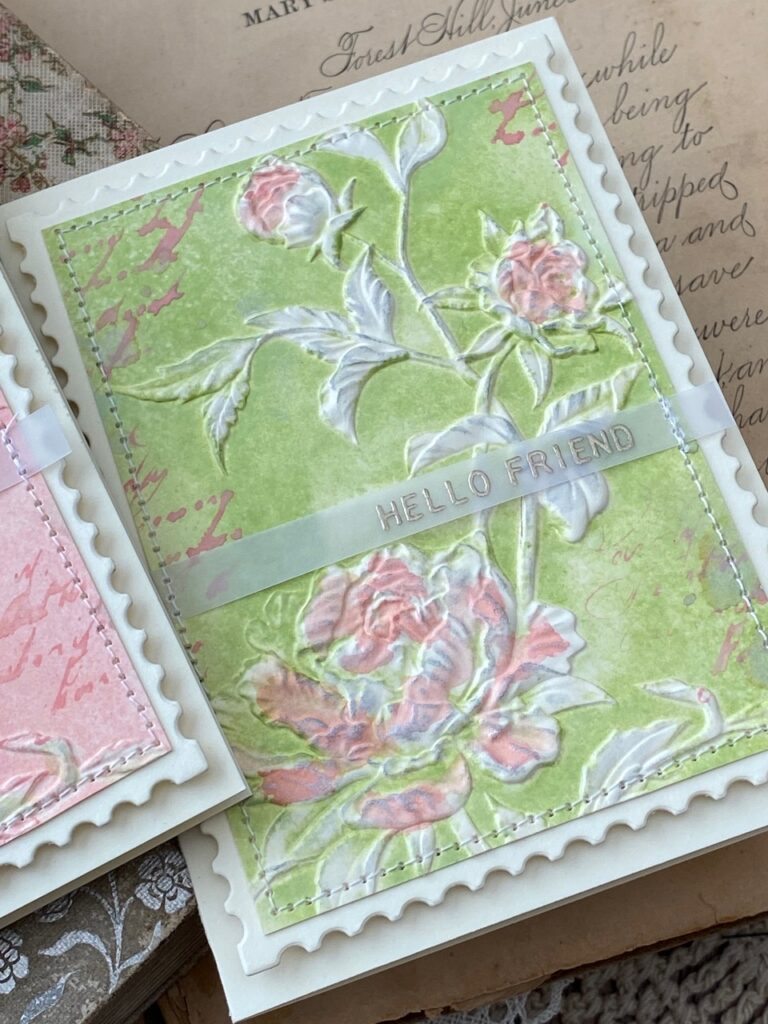
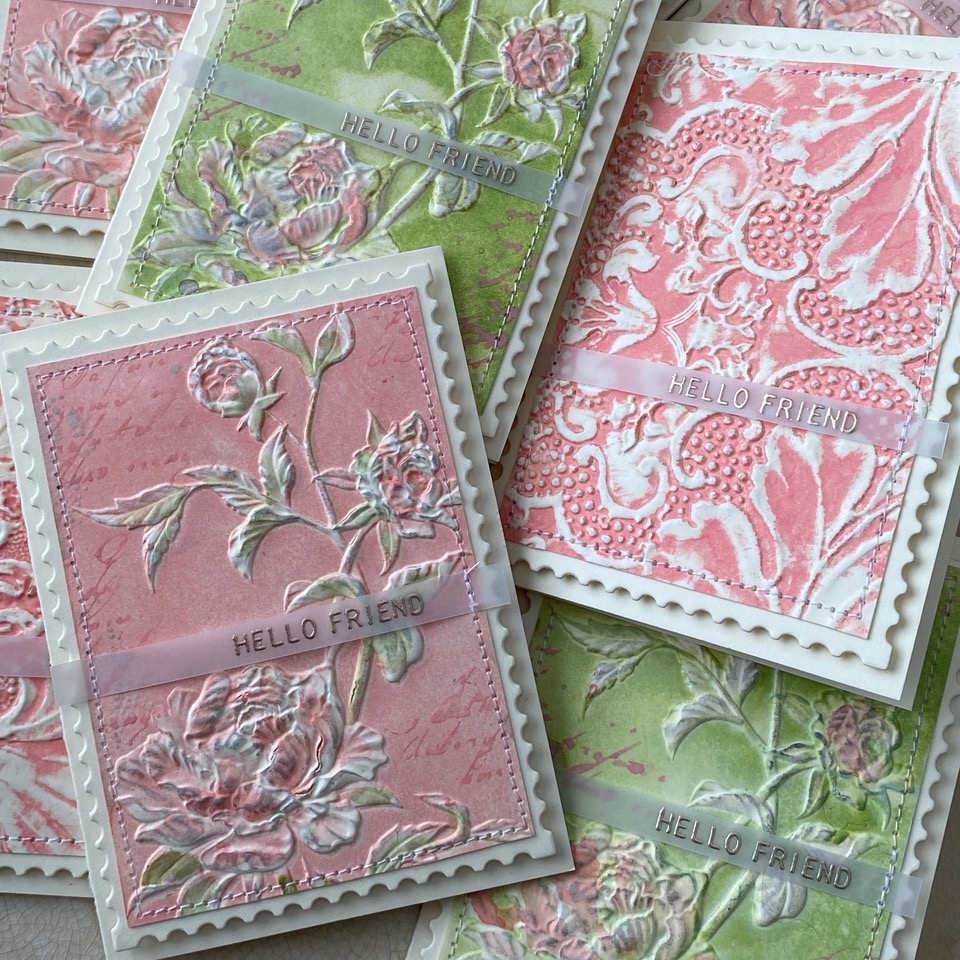
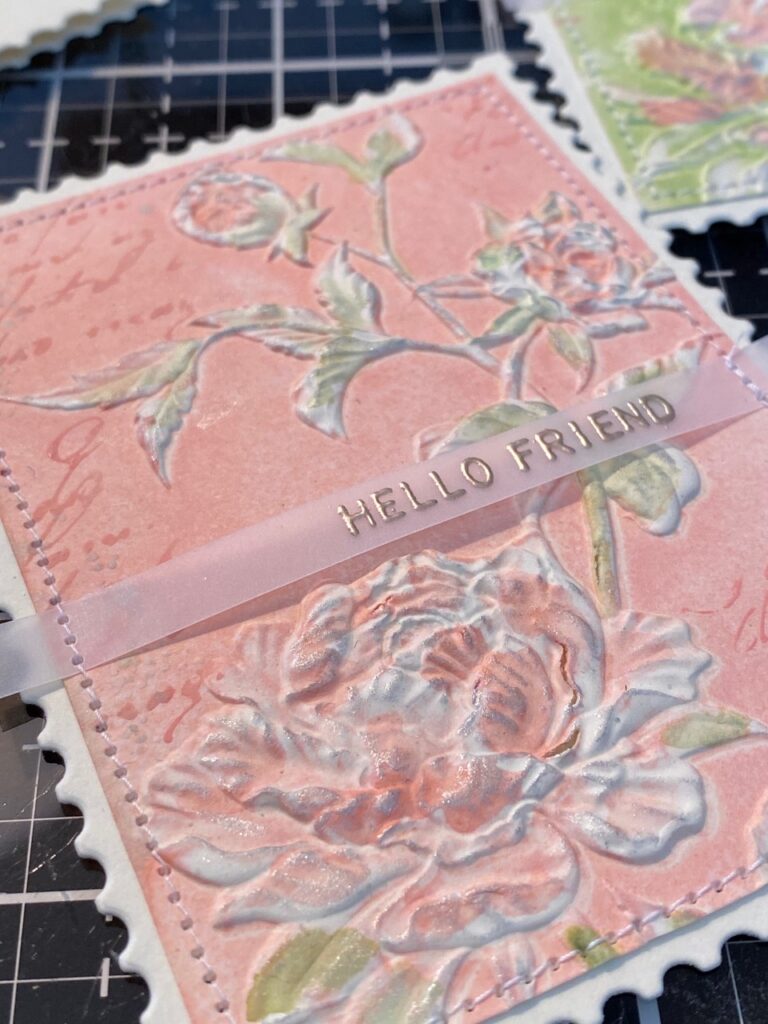
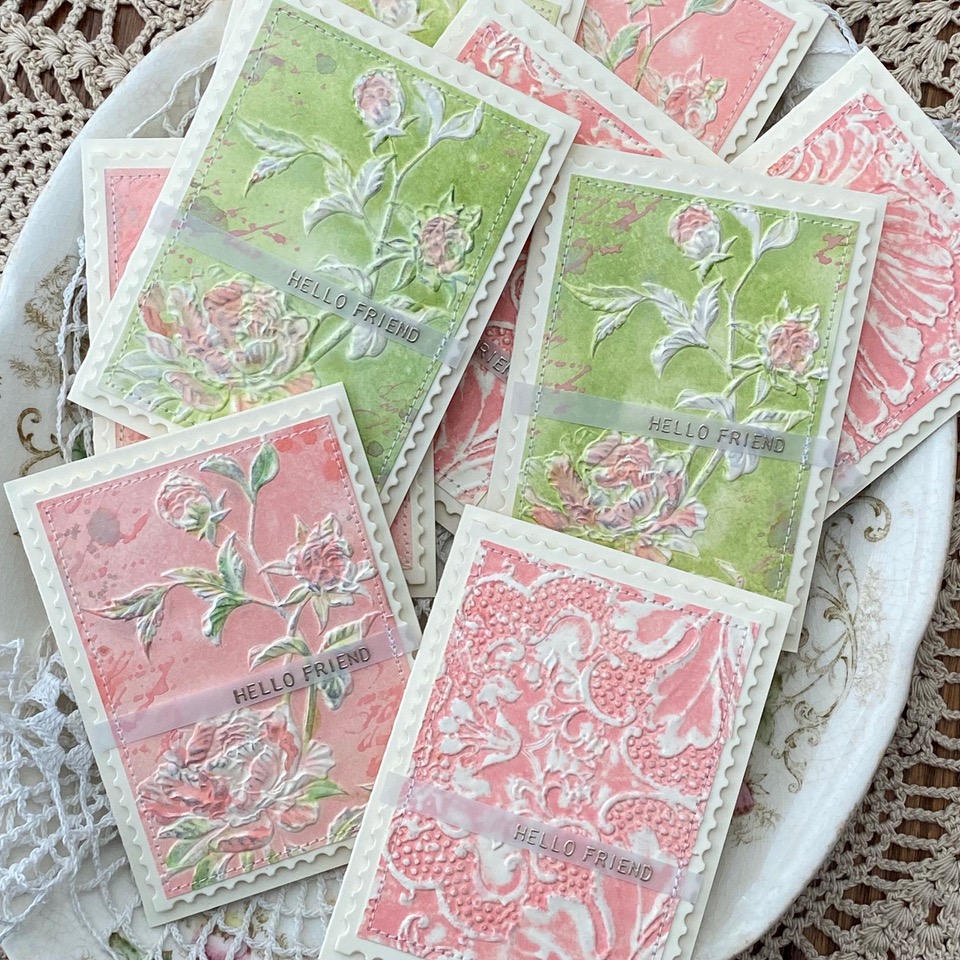
Today I’m sharing a set of small cards I made using a couple of the Sizzix 3D Texture Fades. I just LOVE making small cards. They’re perfect for giving a set as a gift or attaching them to a gift bag or small package. The Mini 3D Rose and new Damask 3D Texture Fade were perfect for them! The background was created by mono printing using the folders, then on the rose cards, the embossed areas were watercolored using distress ink and oxide.
As always, as soon as the package arrived at my home, I tore into it and ran upstairs to my studio and began creating backgrounds using various distress papers, stamp sets, and texture fades. It’s fun to play around with color and see how the inks play together. I chose to combine it with Shabby Shutters first.
Pink and Green, I’m a 80’s girl and just had to try one of my favorite preppy color combos.
Let me show you how they all came together… I started by trimming several piece of Distress Mixed Media Heavystock down to fit the mini 3D folder.
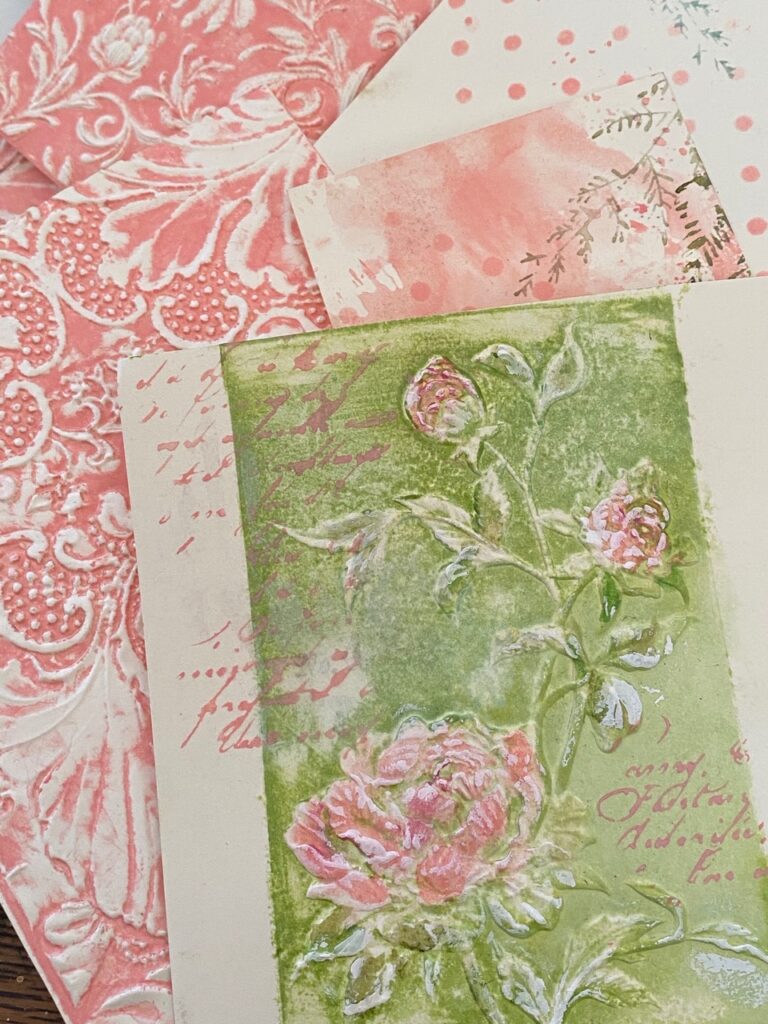
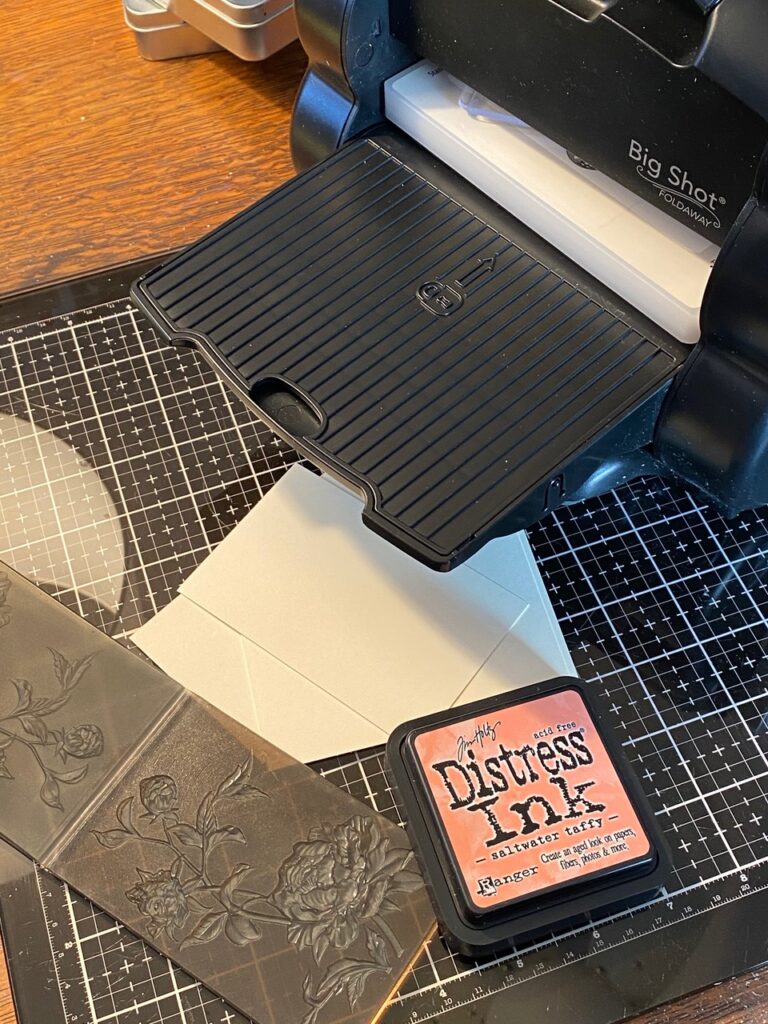
I smooshed the Saltwater Taffy Distress Ink onto the flat part of the embossing folder. I spritzed a piece of the heavystock lightly, then ran it through my Big Shot Foldaway.
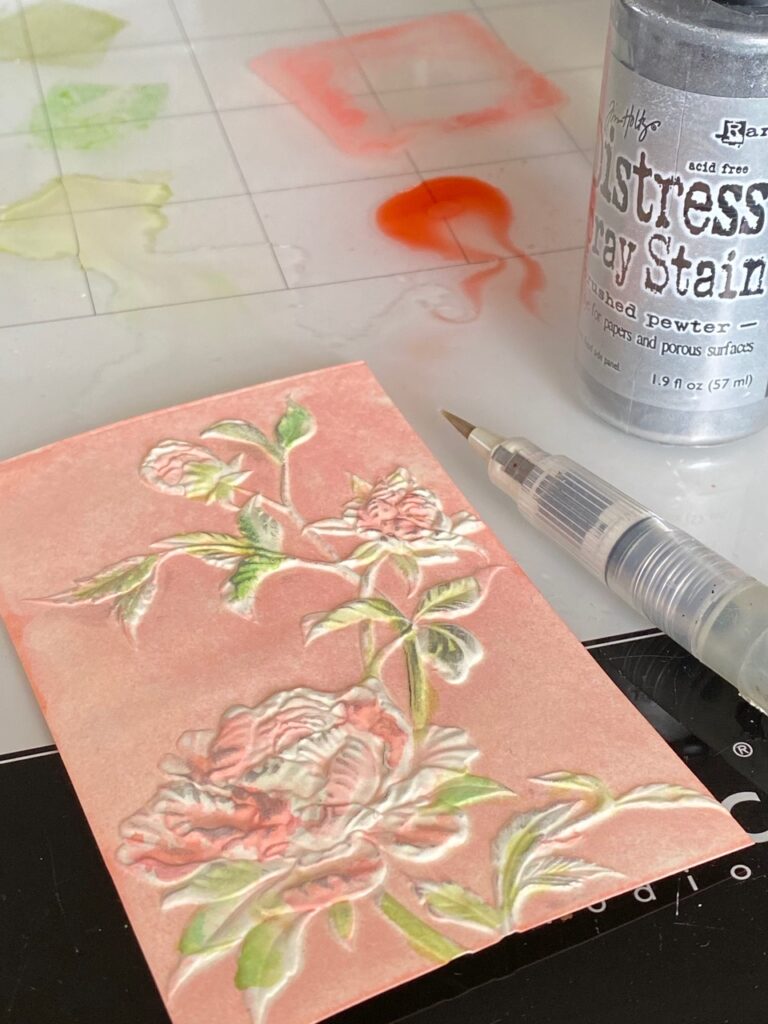
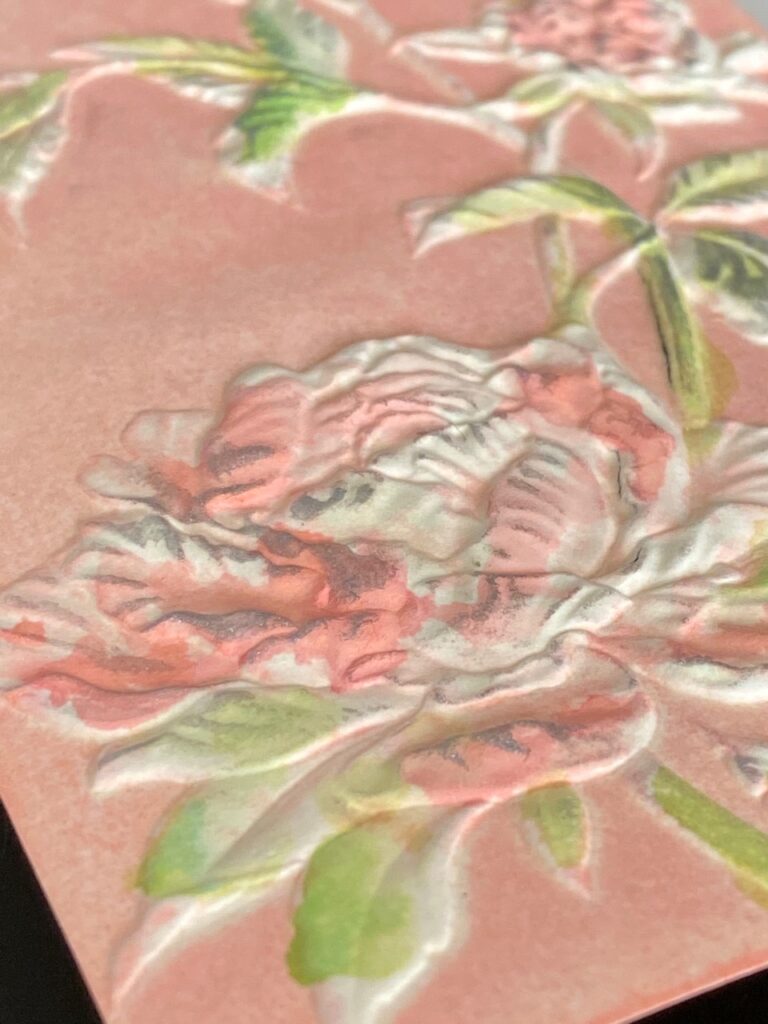
Once the paper was embossed with the folder, I dried it using a heat tool, then began lightly applying color to the embossed areas using a Distress Detail Water Brush. The roses were colored both the Saltwater Taffy in regular Distress Ink and Oxide. The stems and leaves were colored using Shabby Shutters, Mowed Lawn and Peeled Paint. I layered on each color, then dried with the heat tool until they were complete.
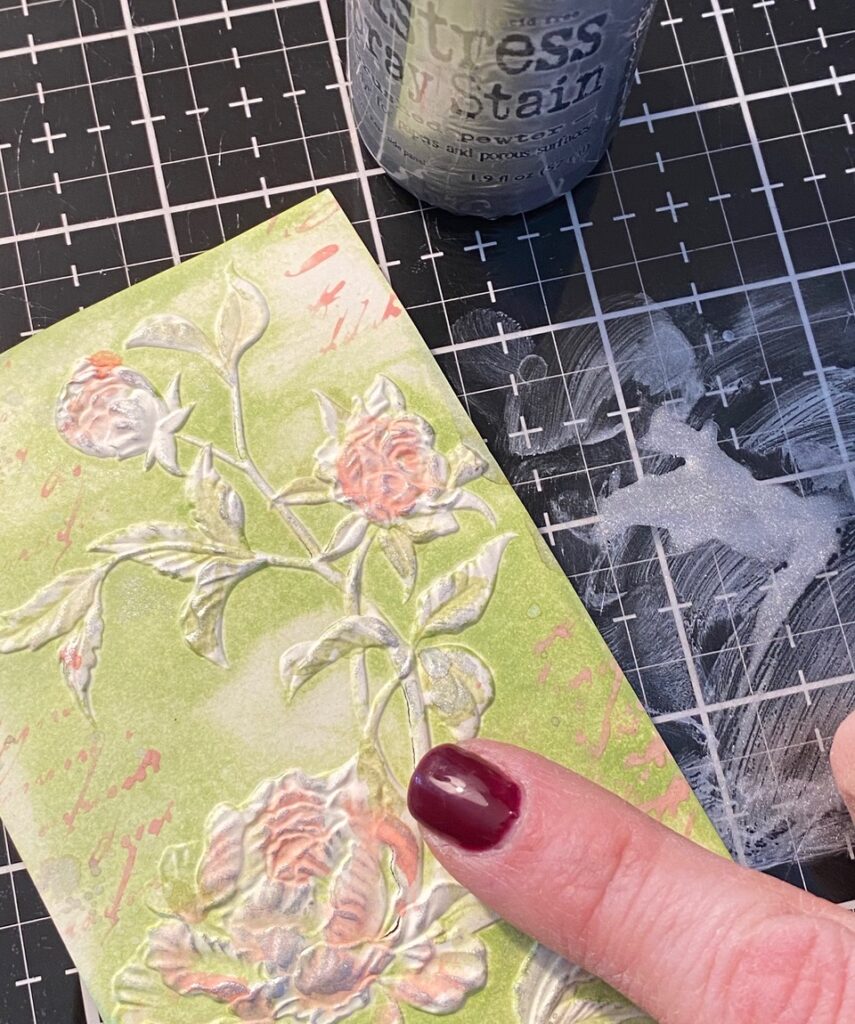
I spritzed some Brushed Pewter Spray Stain onto my media mat, then, using my finger, applied a small amount onto the embossed areas of the roses. The pewter emphasized the details of the embossed area.
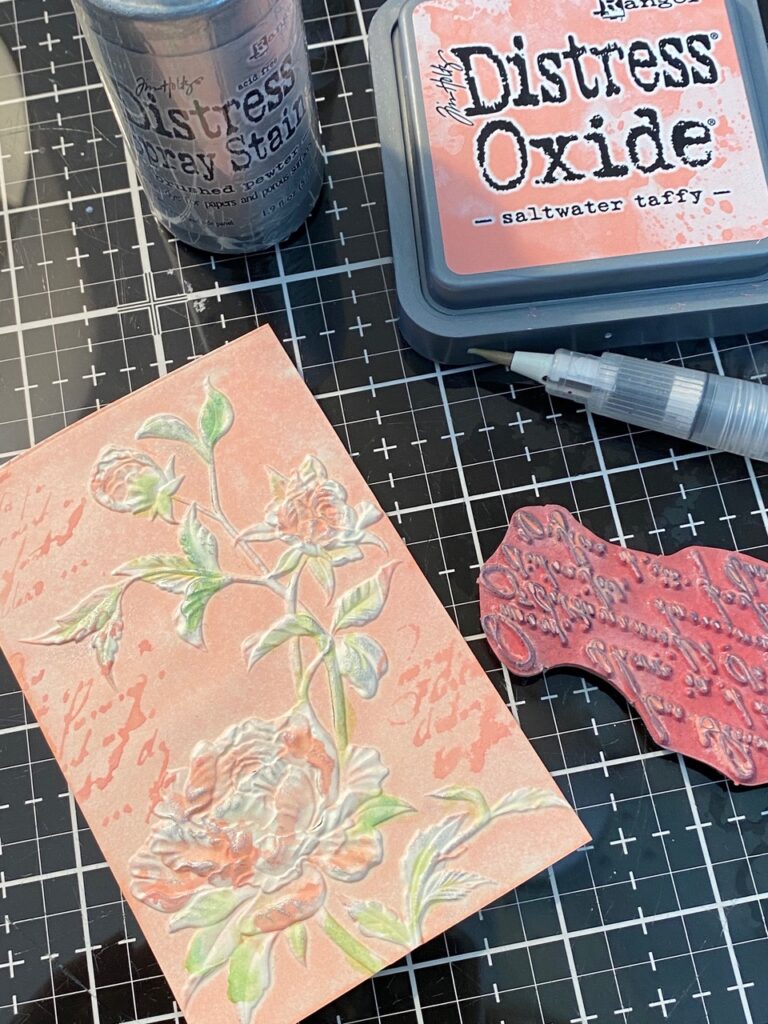
I inked up a handwritten background stamp with Saltwater Taffy Distress Oxide, spritzed the stamp with water, then stamped it randomly int the background areas, then dried it with my heat tool.
I continued to do this technique except using Shabby Shutters on the background of the embossed folder, then colored the roses using the distress colors and water brush.
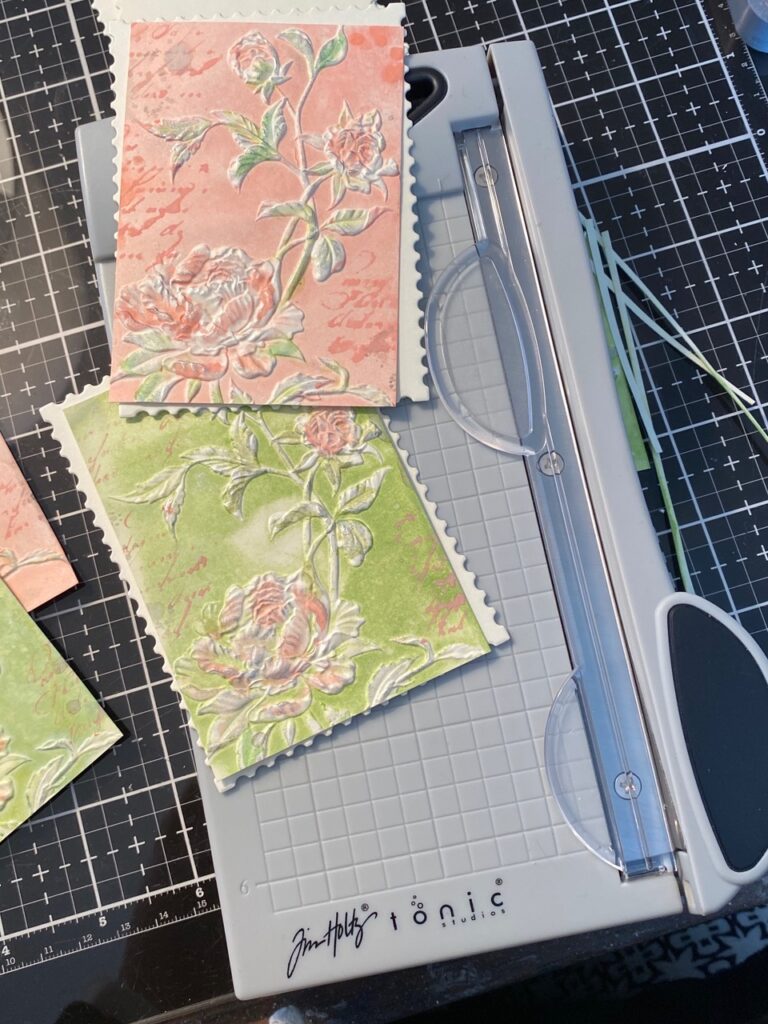
I cut several pieces of Distress Heavystock using the Stacked Postage Thinlet Set. I trimmed the embossed rose pieces to fit one of the postage backgrounds using my Tonic Mini Trimmer, the perfect little trimmer for projects like this…it trims the tiniest slices of both heavystock and vellum.
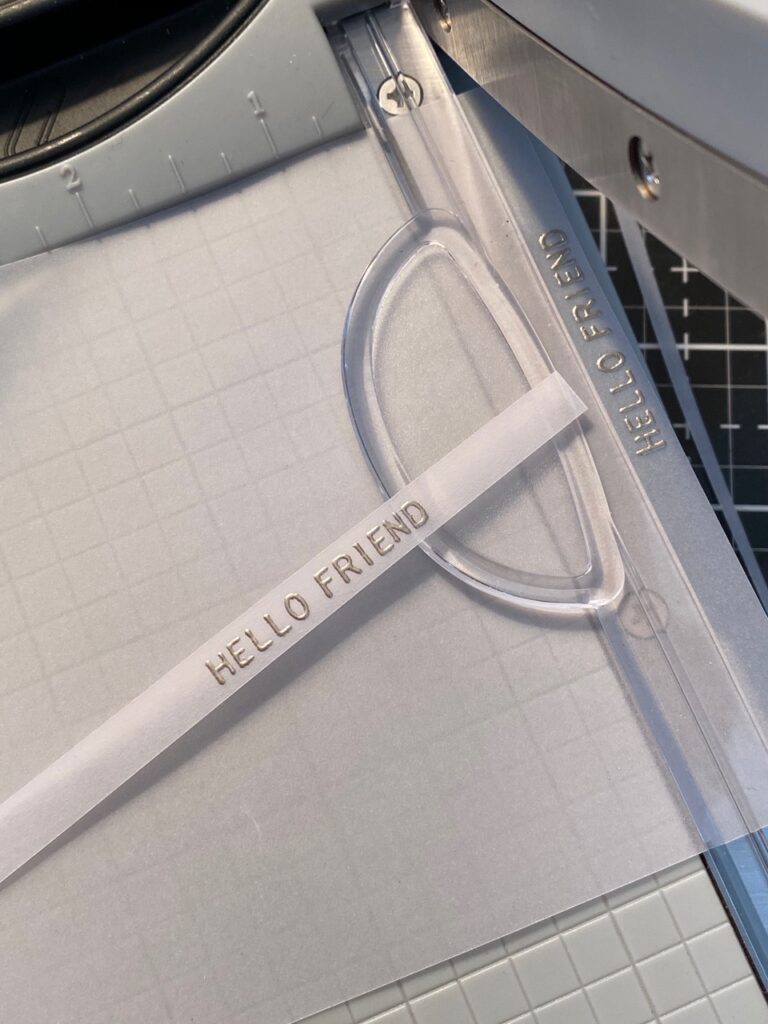
I embossed a phrase from the Tiny Text Stamp Set CMS394 using Distress Embossing ink and sprinkled with Ranger Liquid Platinum Embossing Powder onto a piece of Vellum then I trimmed the embossed phrases into strips.
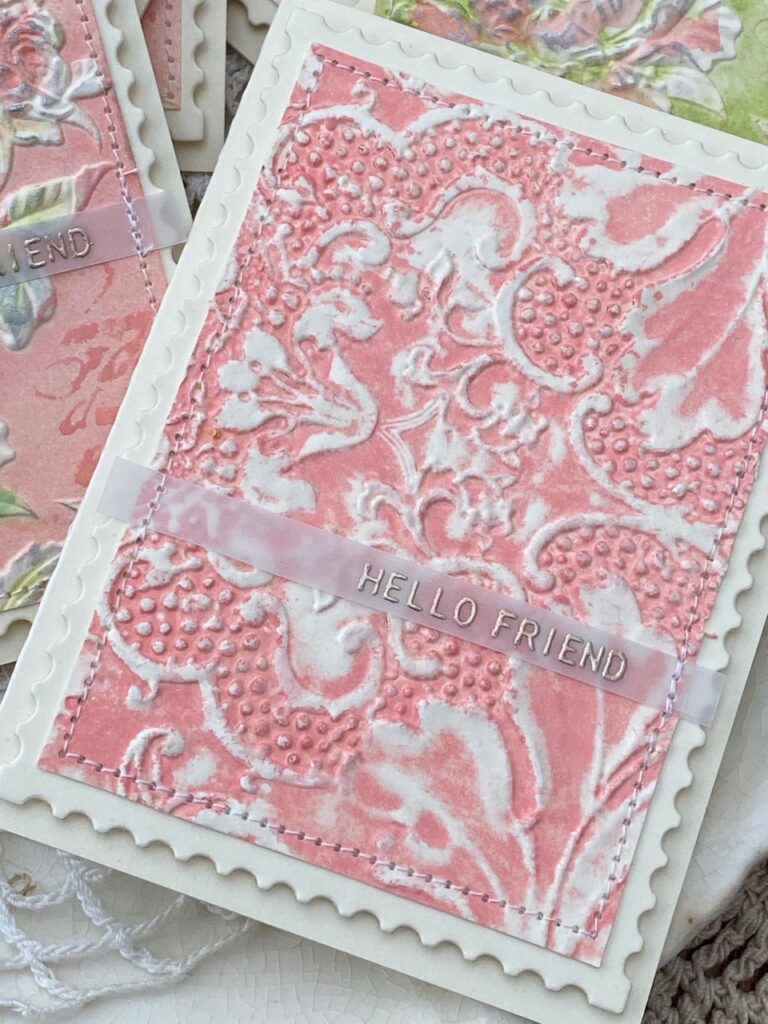
Using my sewing machine with white thread, I stitched around the edge of each of the rose embossed pieces, placing the vellum phrases, then stitching it to the background piece.
I adhered the background and postage stitched pieces to some card bases that I created with more heavystock. The postage was adhered to the card bases using foam adhesive.
My last mini cards were created using the new Damask 3D folder and the Distress Oxide Ink Pad. I inked up the flat side of the embossing folder, spritzed the paper with water then ran it through my Big Shot Foldaway. I dried the paper using a heat tool, then trimmed the piece to fit the same size postage background. I continued with the stitching, vellum phrase and card base. A very easy card but oh so beautiful none-the-less. Sometimes simple is GOOD!
With that, my stack of mini cards was complete.
Products used to create these cards…to shop at Simon Says Stamp Click HERE,
or to shop at Scrapbook.com click HERE.
Saltwater Taffy Distress Inks and Sprays, Mini 3D Roses Texture Fade, Damask 3D Texture Fade, Distress Mixed Media Heavystock, Brushed Pewter Distress Spray Stain, Tonic Mini Trimmer, Tiny Text CMS394, Distress Embossing Ink Pad, Liquid Platinum Embossing Powder

What is an affiliate program, and why should I click on the link and buy through you?
When you shop via the affiliate link (linkdeli) on this blog, I receive a small commission from the affiliate provider (Simon Says Stamp & Scrapbook.com) at no extra cost to you, whatsoever. These commissions help me to cover the hosting fees and other costs to run my blog and be able to provide you with FREE inspiration. If you shop the links, THANK YOU! I truly appreciate being able to share my love of creating with you.


Simply beautiful as always Stacy! TFS
Such a beautiful set of cards, just love the smaller size of these.
These cards are gorgeous! Thank you so much for sharing your technique.🦋
Gorgeous project Stacy! Love the new peachy/pink color and how it changes depending on what you pair it with. It is a perfect addition to the Distress spectrum.
Thank you for the careful and thorough detail with which you describe your process. I don’t have the new color yet, but am looking forward to trying your project with the colors I have on hand.
🙂
These are just beautiful, love the technique!
I love everything about these cards right down to the stitching. The color combo is so perfect. I know this will be my go to combo for a long time. I love all your work.
Thank you for sharing.
Beyond stunning! I shared with my Craft Medley Facebook Group.
TSM!
xOx
Peach
Hi Stacy,
I just love this color and your wonderful little card set! These are just so perfect!
Thank you for explaining your technique, I can’t wait to try it out!
Hugs, Pat
Do you have a simple solution for envelopes for these little cards? Does the size meet the USPS requirements for the mail?
You have inspired me with this perfect example of a gift for a friend who has everything and then even more that she had to give away/sell/and/or donate when she and her husband moved into a cottage! Thanks!
Hello Mary!
I looked it up and usps says the smallest size envelope that you can send is a 3.5×5 size envelope. These cards are slightly under that. Approximately 3.25×4.25/4.5 ish, so they would would fit that size envelope, with a little wiggle room. Because I didn’t add buttons or things, they’d do perfectly well shipped since there isn’t much bulk to them other than the 3d. I’m happy you like them and that you’ll be making them as a gift. Thanks so much! ♥️
Best cards I’ve seen !