Hello all…I hope you all are well.
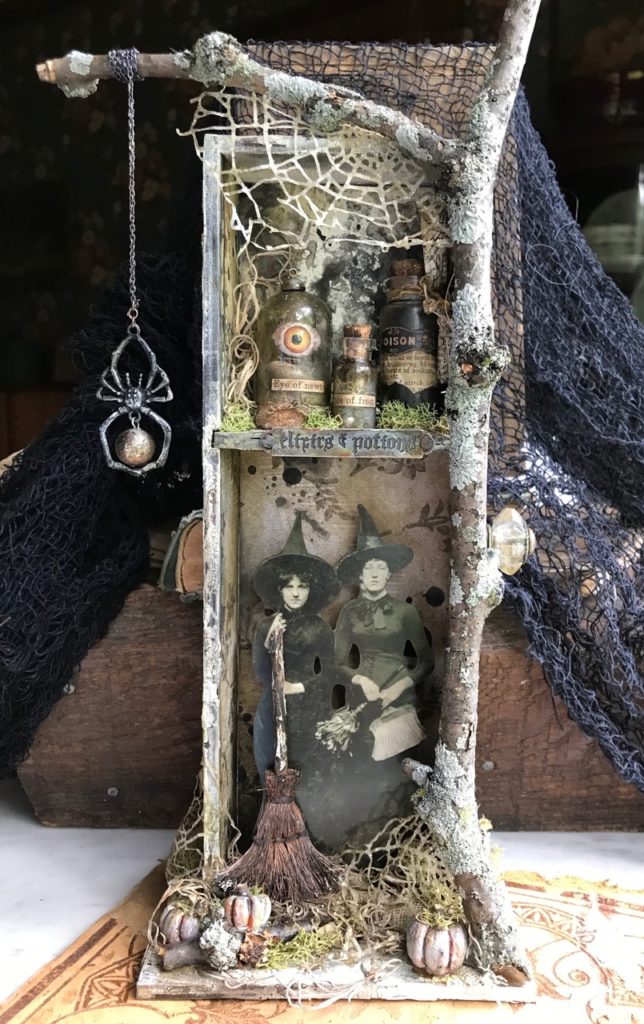
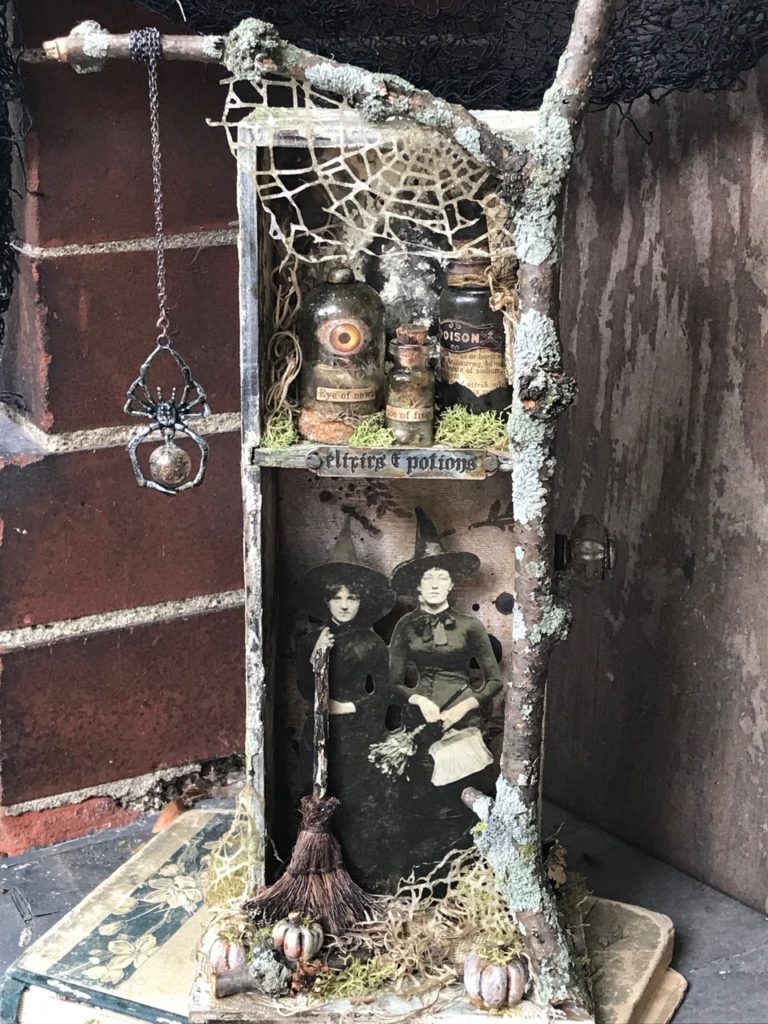
It’s been a busy few weeks around our house, but I’m back today with a tutorial for my Witches in the Wood project that was part of the Tim Holtz Halloween idea-ology Facebook Live a few weeks ago. This project took on a life of it’s own when I happened to be walking through my yard and found the stick that became part of the project.
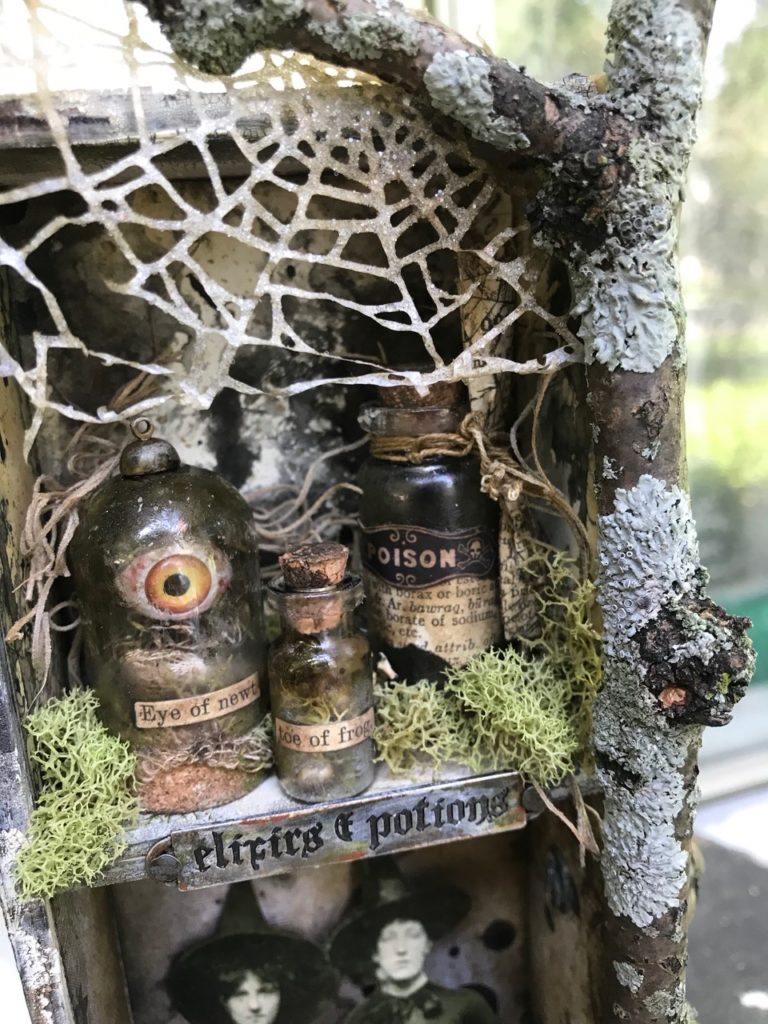
It’s funny that something as simple as a stick could trigger a lightbulb moment, but when it’s cool, covered in lichen and shaped perfectly to become part of your vignette…you just go with it!
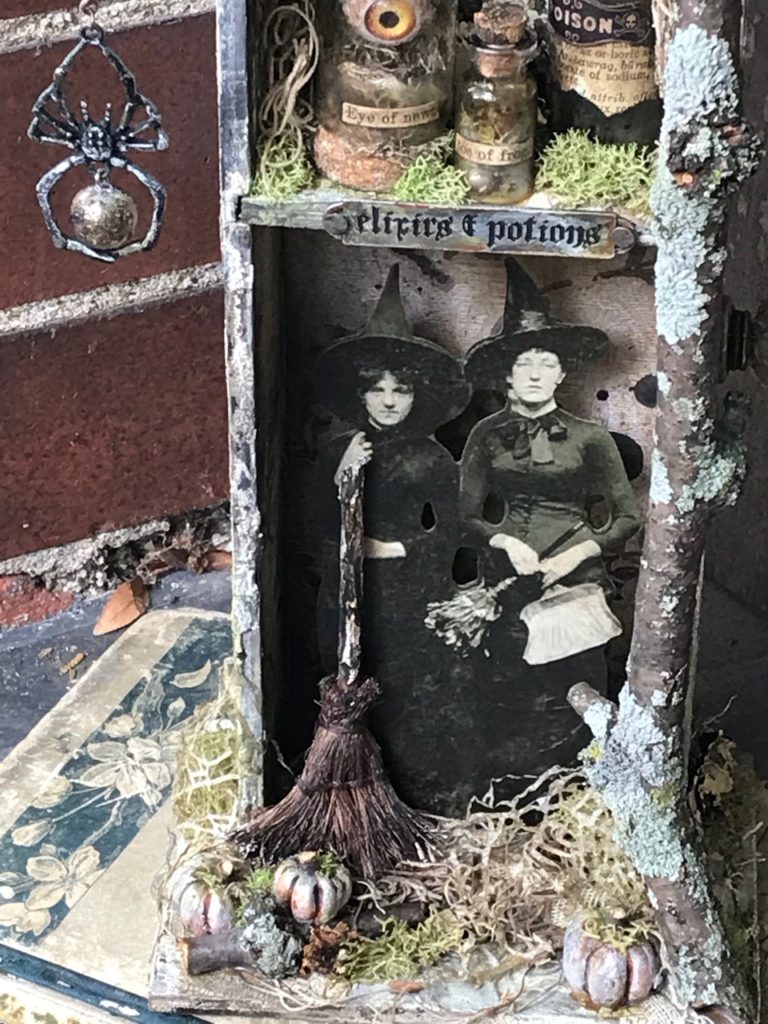
It just goes to show you that you never know where inspiration is going to come from.
So let’s begin…
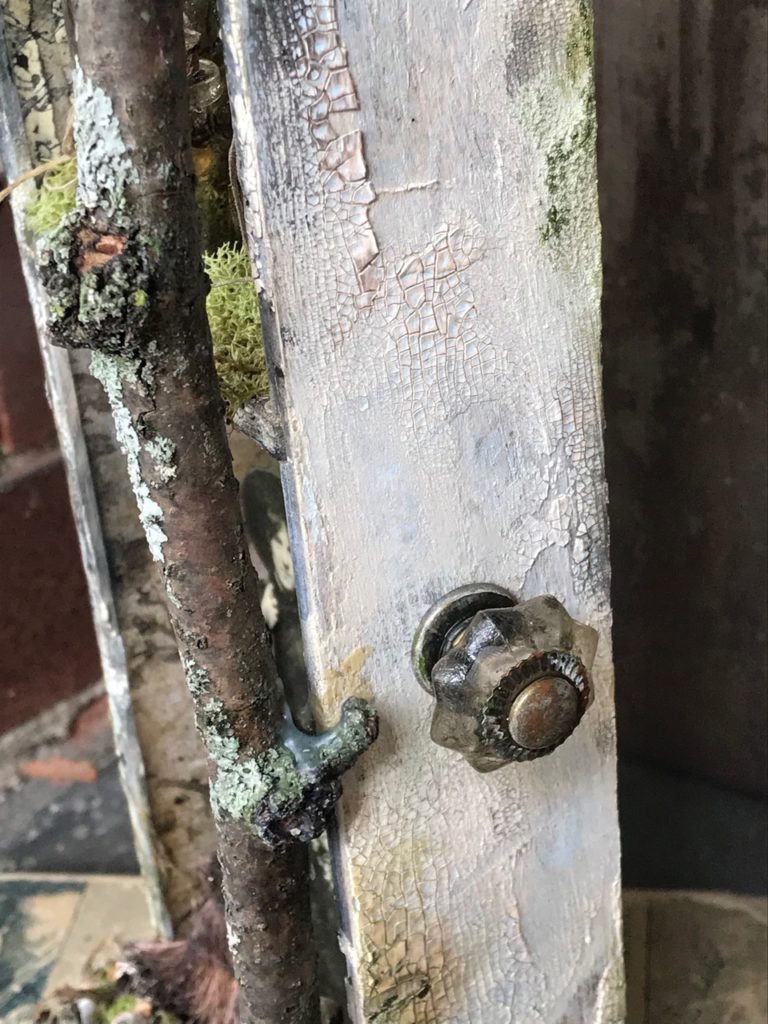
This vignette was created with one of the new idea-ology Vignette Divided Drawers. I removed one of the shelves then painted the entire piece with a light coat of Antique Linen Distress Paint and water and dried it with my heat tool. This gives the drawer some tooth and makes it easier for the next step…applying the Opaque Crackle Texture Paste.
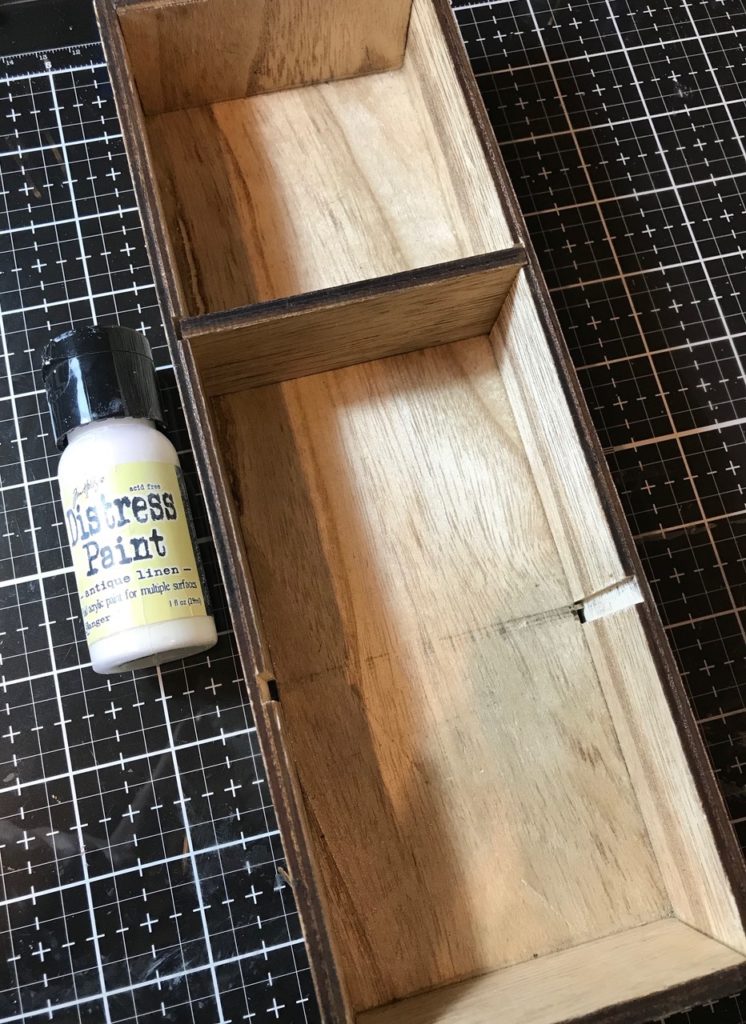
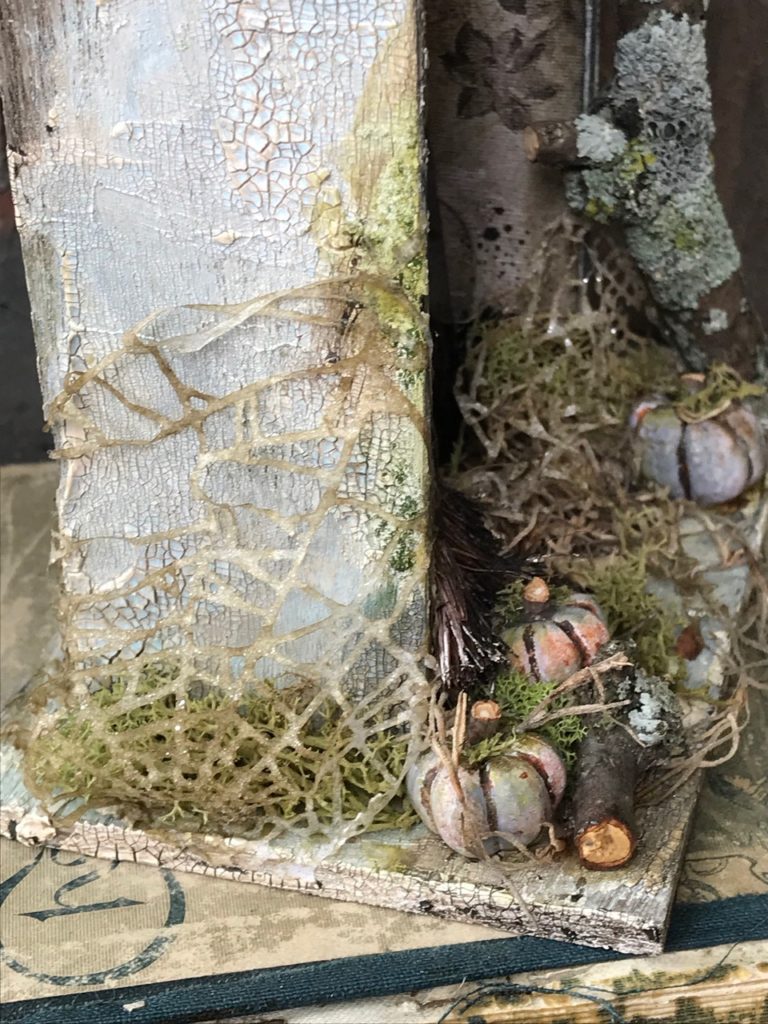
I applied a generous amount of Opaque Crackle Texture Paste to the entire drawer with both a Palette Knife and my fingers, on the inside and outside of the drawer.
Then I set it aside to dry and crackle…
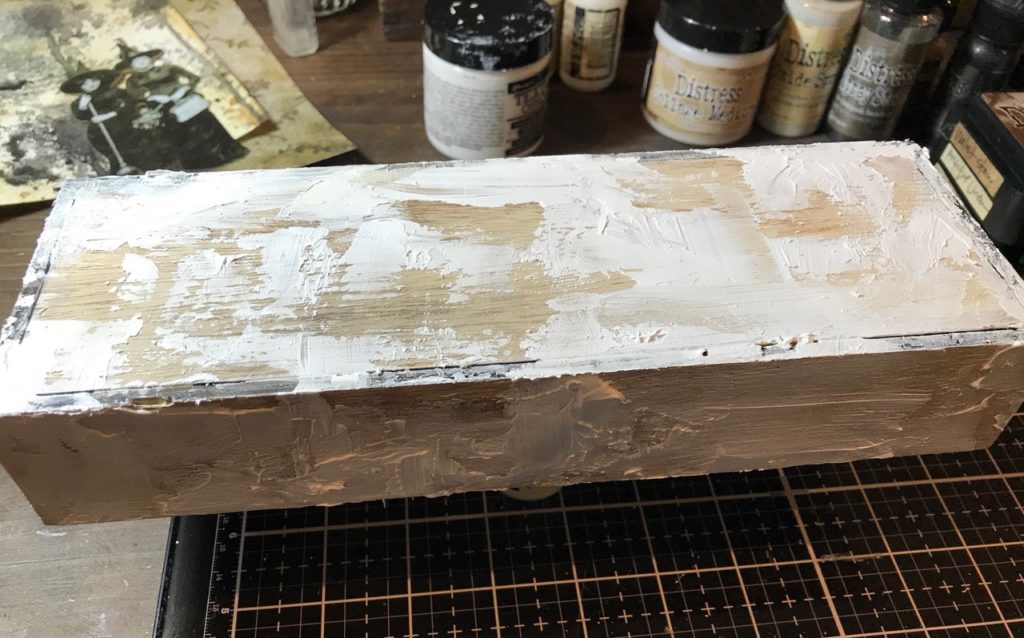
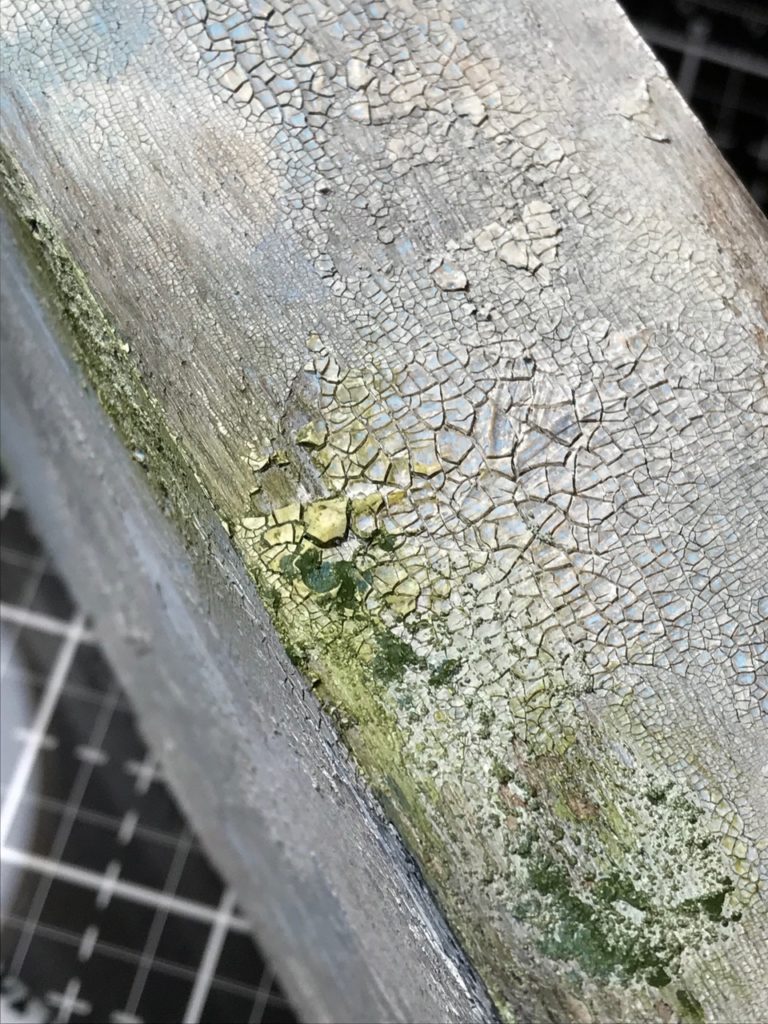
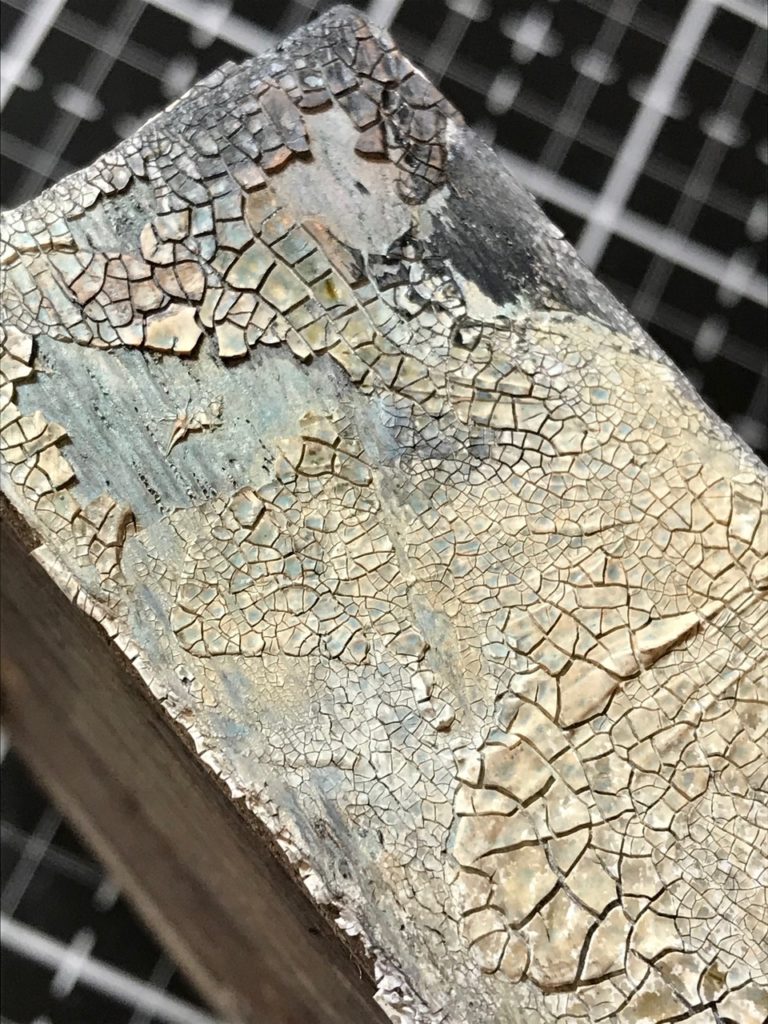
Oh, do you see that???…yummy crackly GOODNESS!! This makes me so happy!!! Crackle is truly the way to my heart…

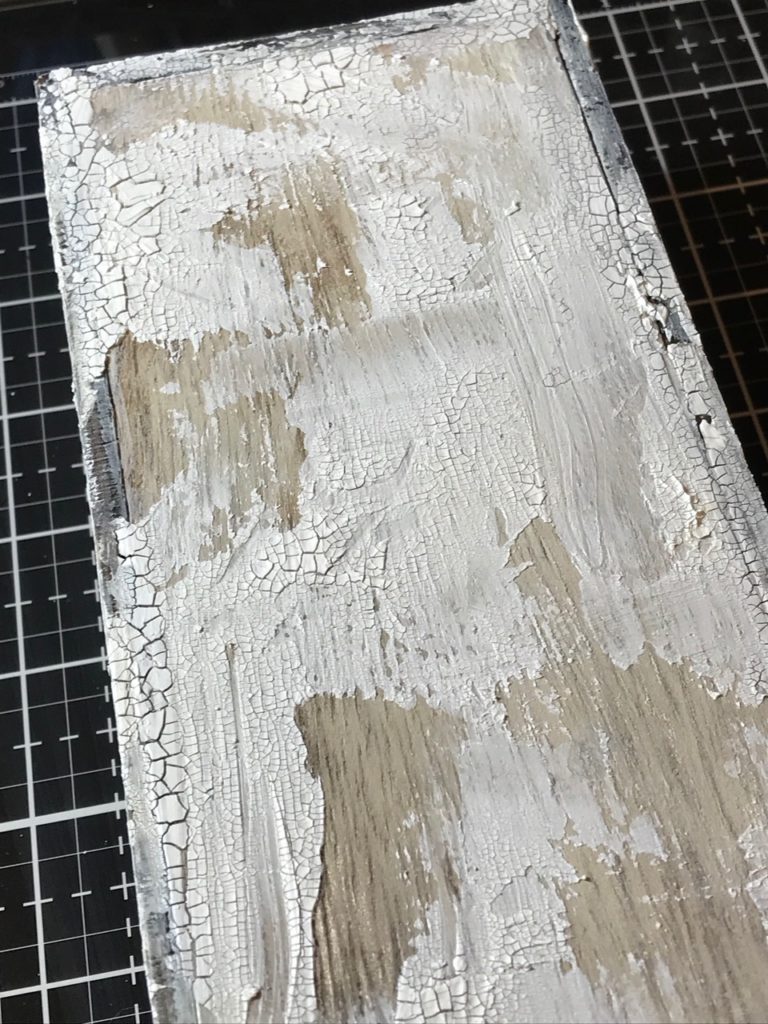
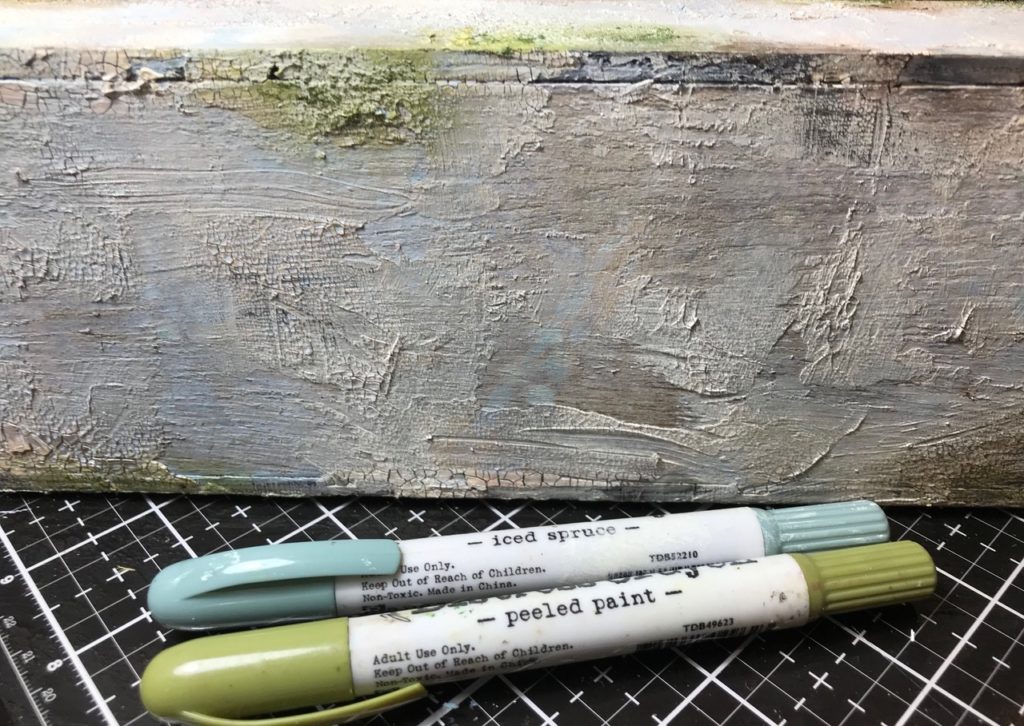
After it was scrumptiously crackled 😉 I sprayed the box both inside and out with Antique Linen Distress Oxide Spray and Frayed Burlap Distress Spray, then dried it with my heat tool.
I applied various distress products including, Black Soot Distress Paint, lightly applied with a dry finger over top to emphasize the cracks. Mushroom Alcohol ink, and some Grit Paste that had been blended with a little Peeled Paint Distress Paint, to look like the moss/lichen that was on the stick.
Then with a damp finger I applied some areas of Peeled Paint and Iced Spruce Distress Crayons to replicate the mossy look. It’s all about playing with the various applications and seeing what happens.
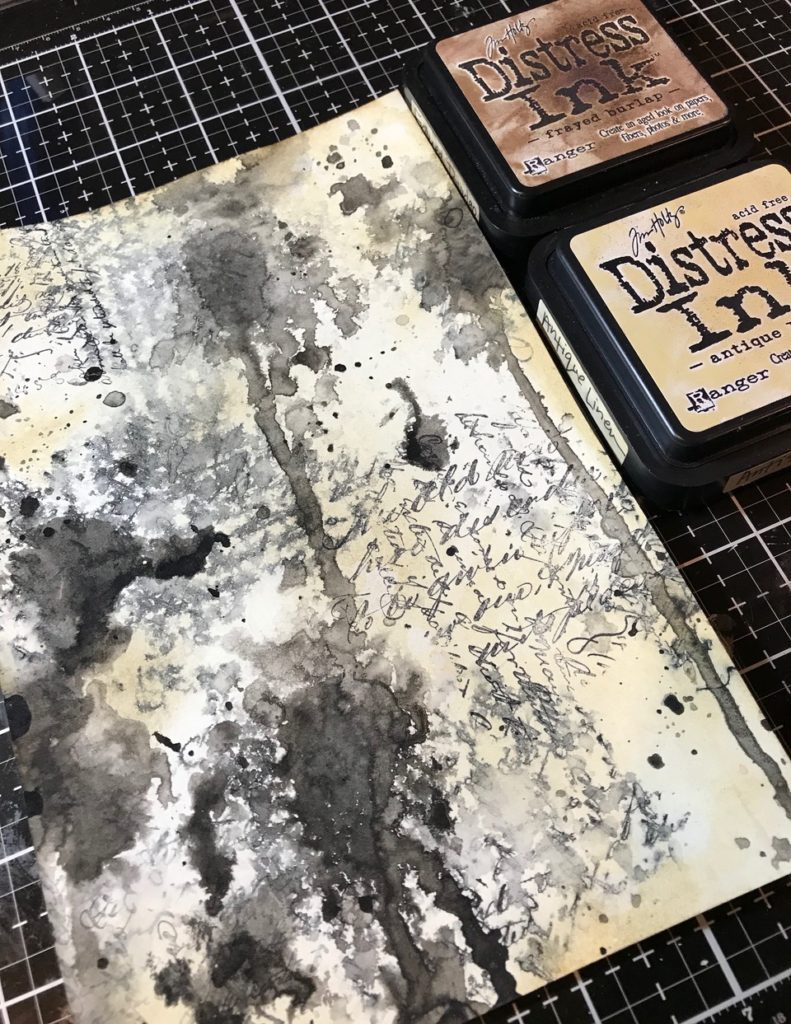
Next, I created some background paper to use in the top section of the box. I wanted the paper to have a creepy witchy feel to it so I stamped both Black Soot Distress Ink and Black Soot Archival Ink with a Ledger Script (CMS241) background stamp. Spritzed the stamped areas with water and as I spritzed, had some of the ink run down the paper, then I dried with my heat tool. I dripped some Black Soot Distress Paint onto the background, then dried it with my heat tool again.

With a blending tool and Frayed Burlap and Antique Linen Distress Ink, I added some color to the background. I spritzed and water flicked it and dried it with my heat tool.
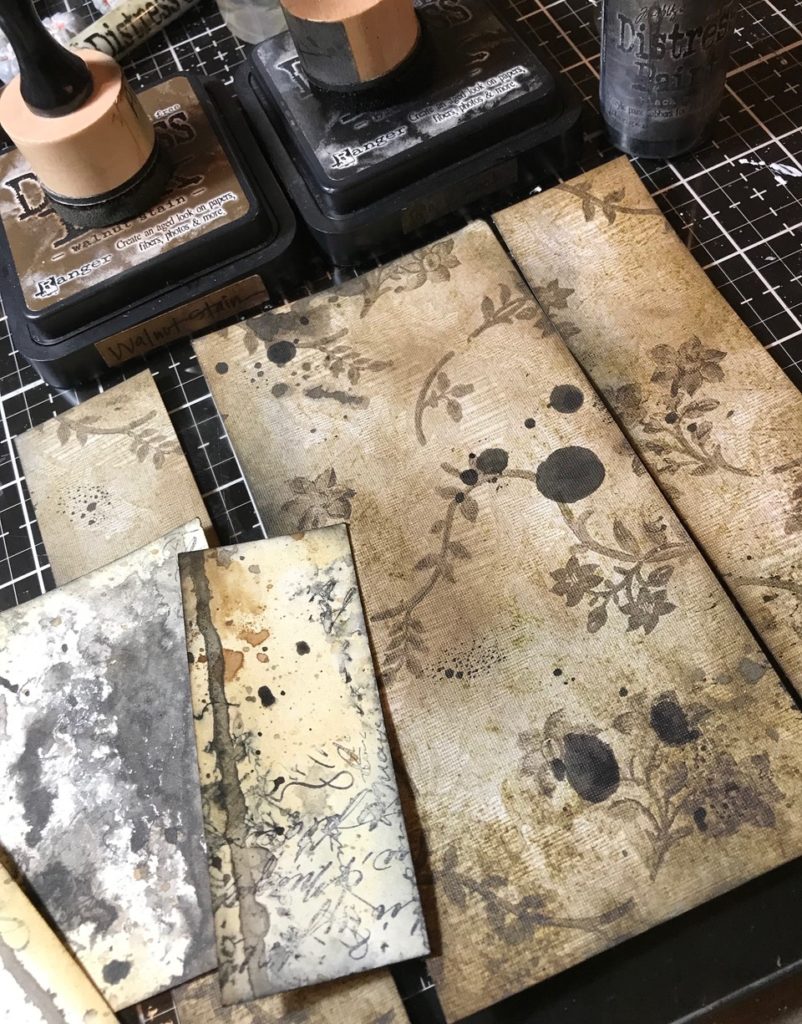
I selected one of the new idea-ology Halloween Worn Wallpaper paper pack that combined with the background paper that I created. To add some more creep to the wallpaper, I dripped some Black Soot Distress Paint onto it and blended with some of the same distress inks. Then the papers were cut down to fit with in the drawer.
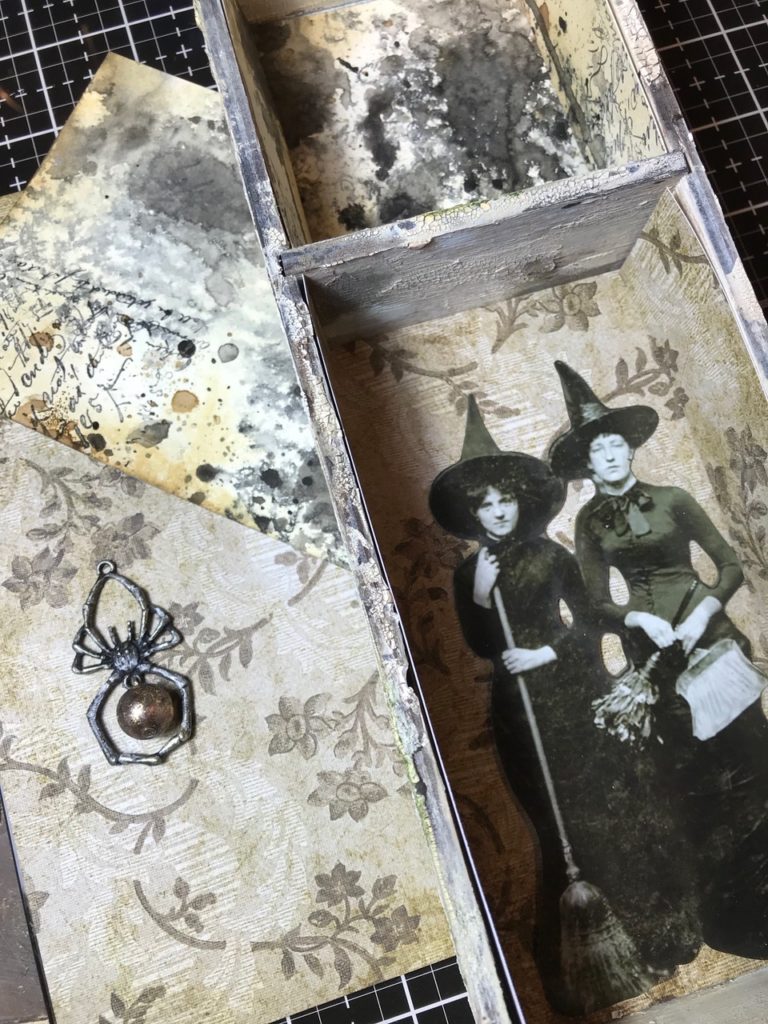
The Spider Charm…
I painted the spider with a light mix of Picket Fence distress paint and water, then highlighted some of the details with Black Soot Distress Paint, and added a little bit of Mushroom Alcohol Ink.
The bauble hanging from the spider was blended with Mushroom Alcohol Ink and then after the alcohol ink was applied, some areas with Ranger Gold Foil. The foil stuck to some of the sticky areas left by the alcohol ink. 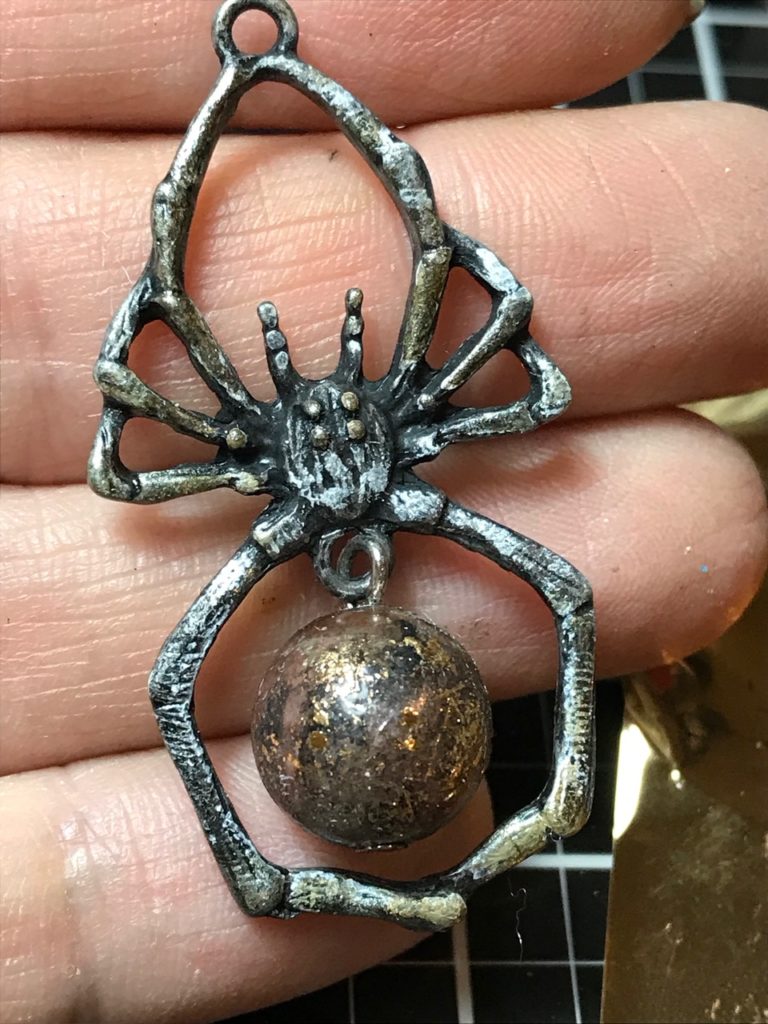
The cobwebs…
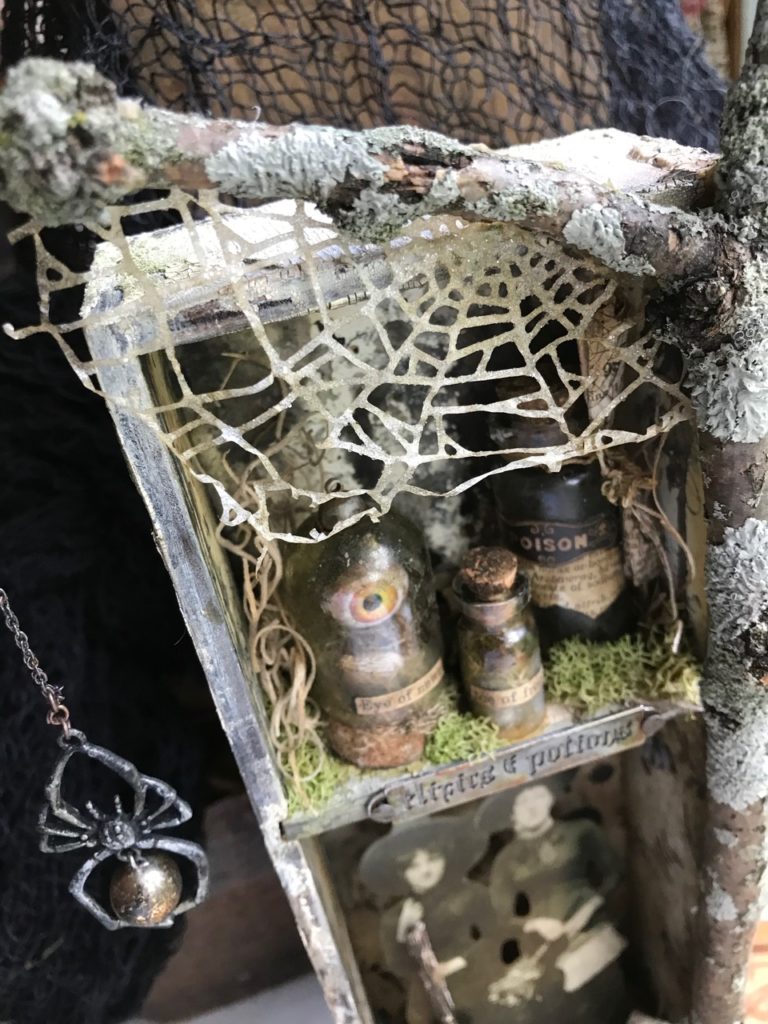
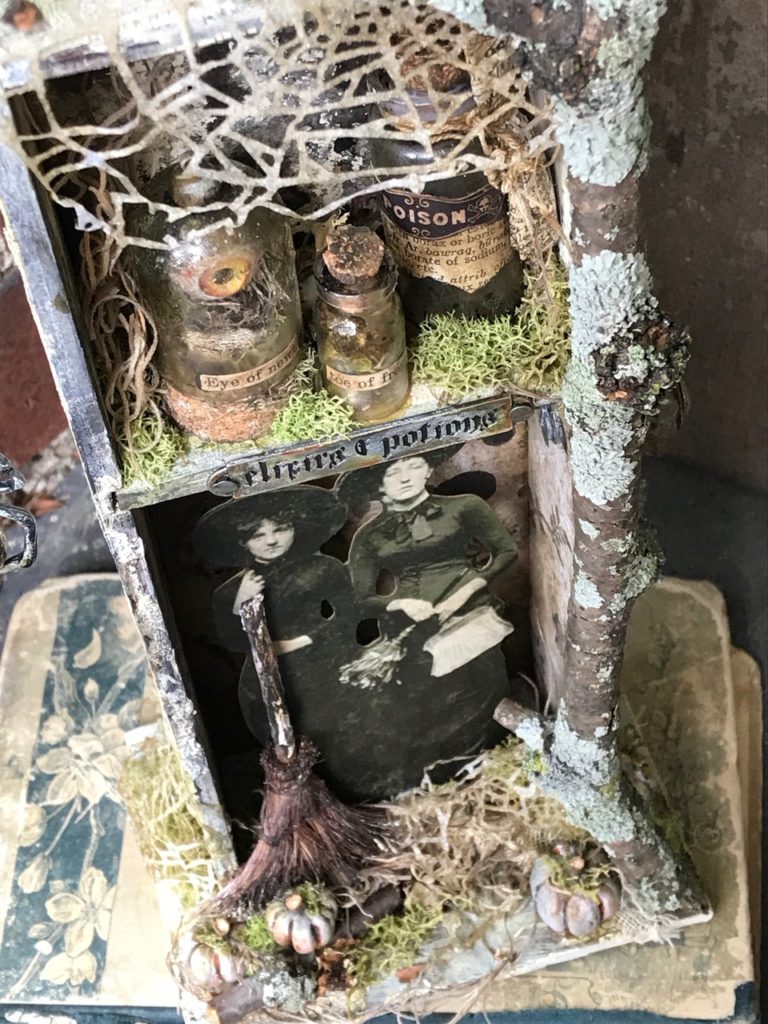
The cobwebs were created by cutting some idea-ology Plain Collage Paper with the cobwebs Sizzix Thinlet. Because the collage paper is thin, I cut both a piece of watercolor paper and a piece of collage paper at the same time. I separated the two pieces after they were cut and set the watercolor web aside to use at another time.
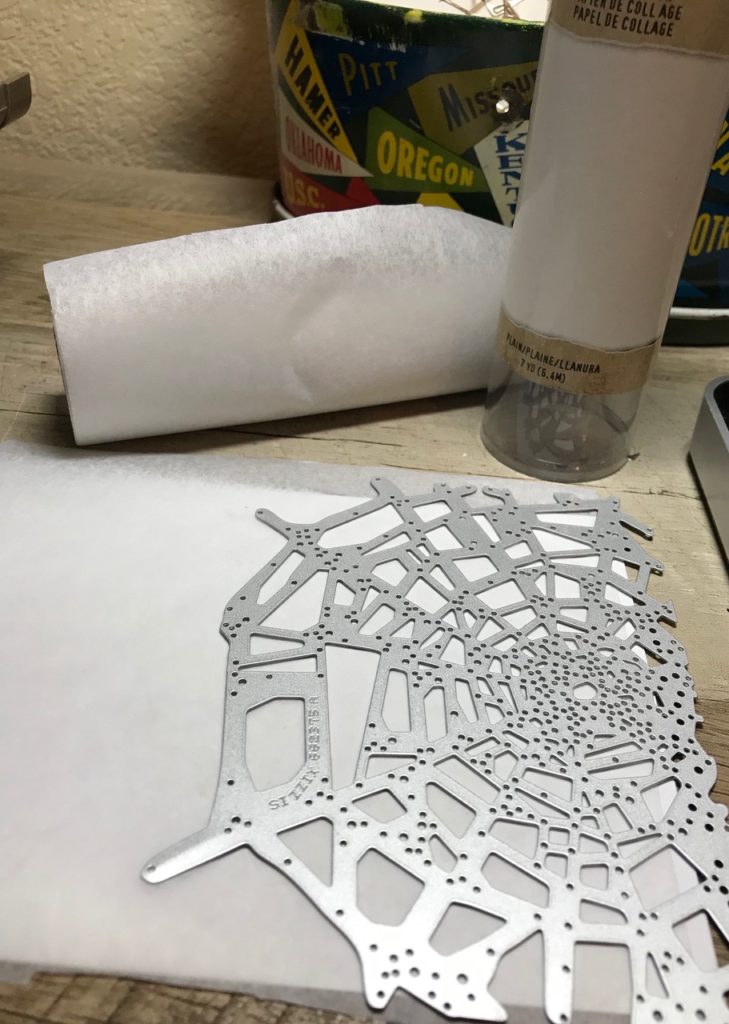
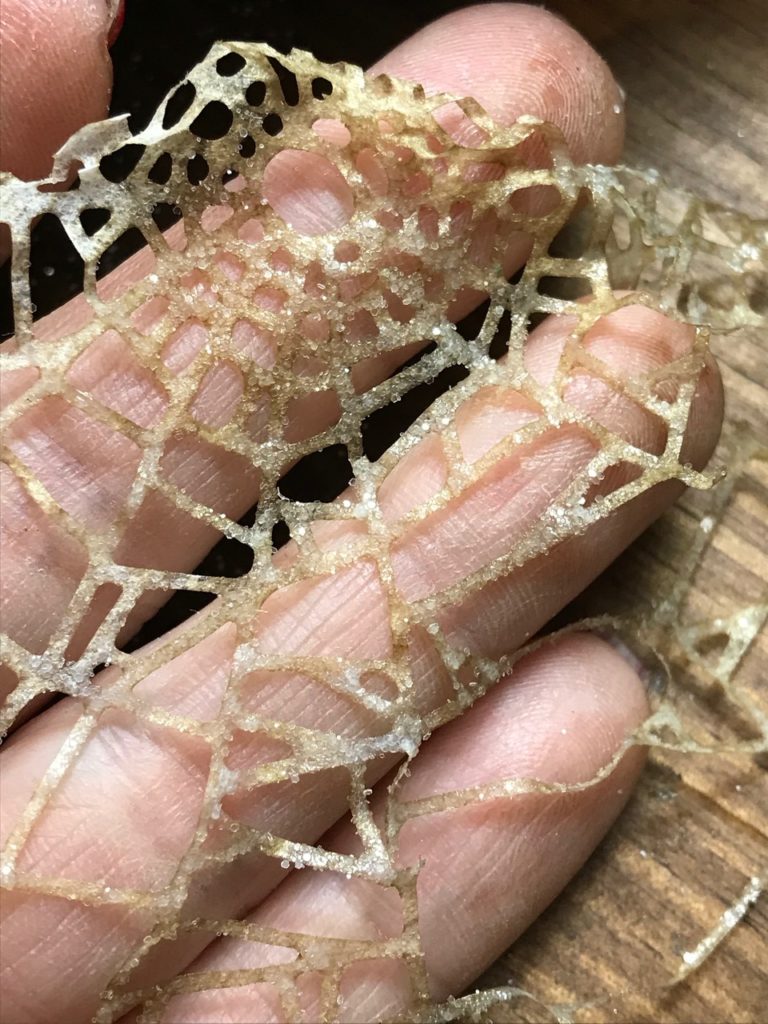
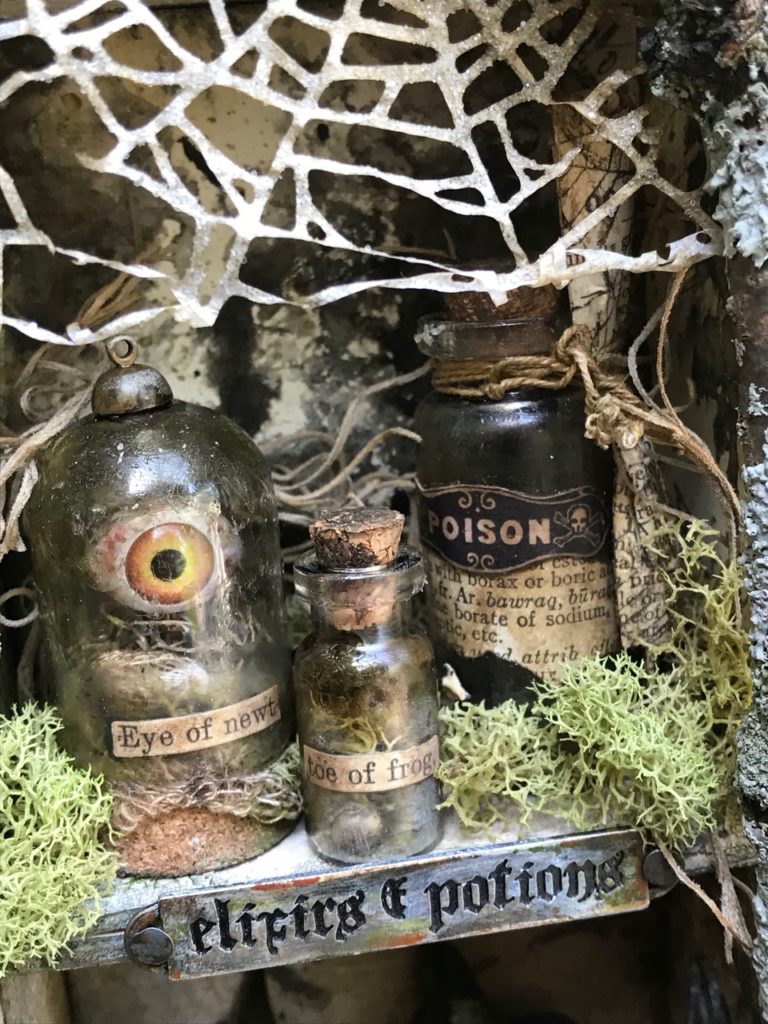
I blended the collage paper web very carefully with Frayed Burlap Distress Ink then sprayed the it with Distress Resist Spray and sprinkled it with some Clear Rock Candy Glitter and my Glitter Duster. They became very delicate little cobwebs…perfect alongside my witches.
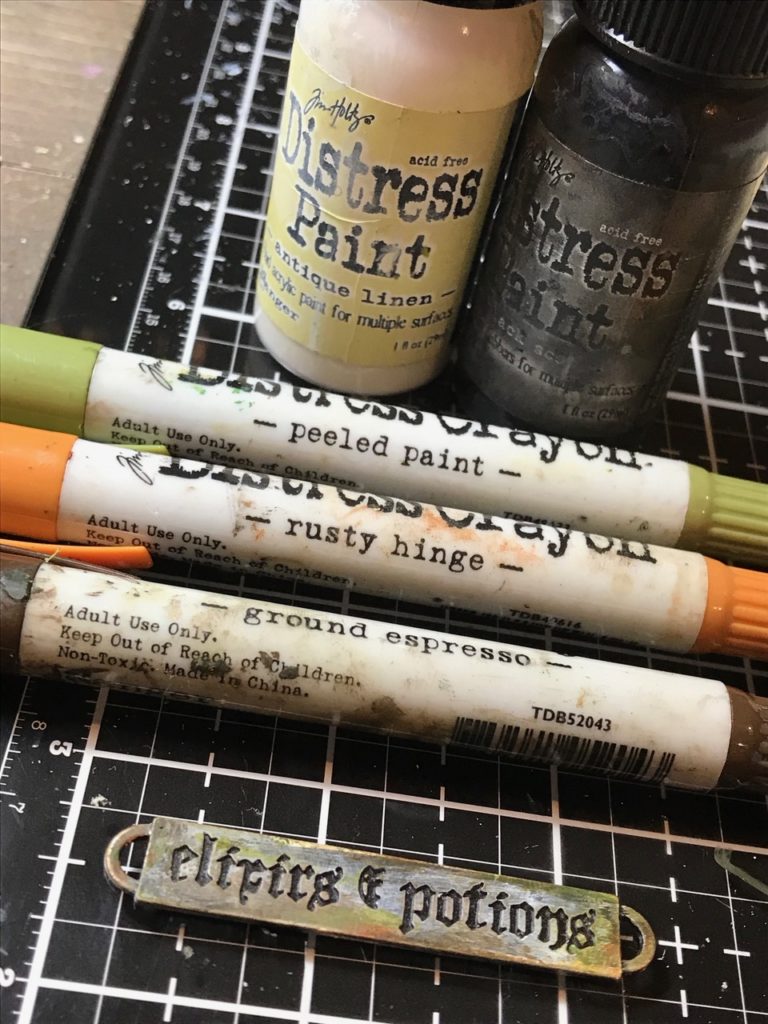
The “Elixirs and Potions” word band was distressed by applying Antique Linen and Black Soot Distress Paint and then after that was dry, applying a small amount of Mushroom Alcohol Ink and rubbing on Peeled Paint, Rusty Hinge and Ground Espresso distress crayons with a damp finger lightly.
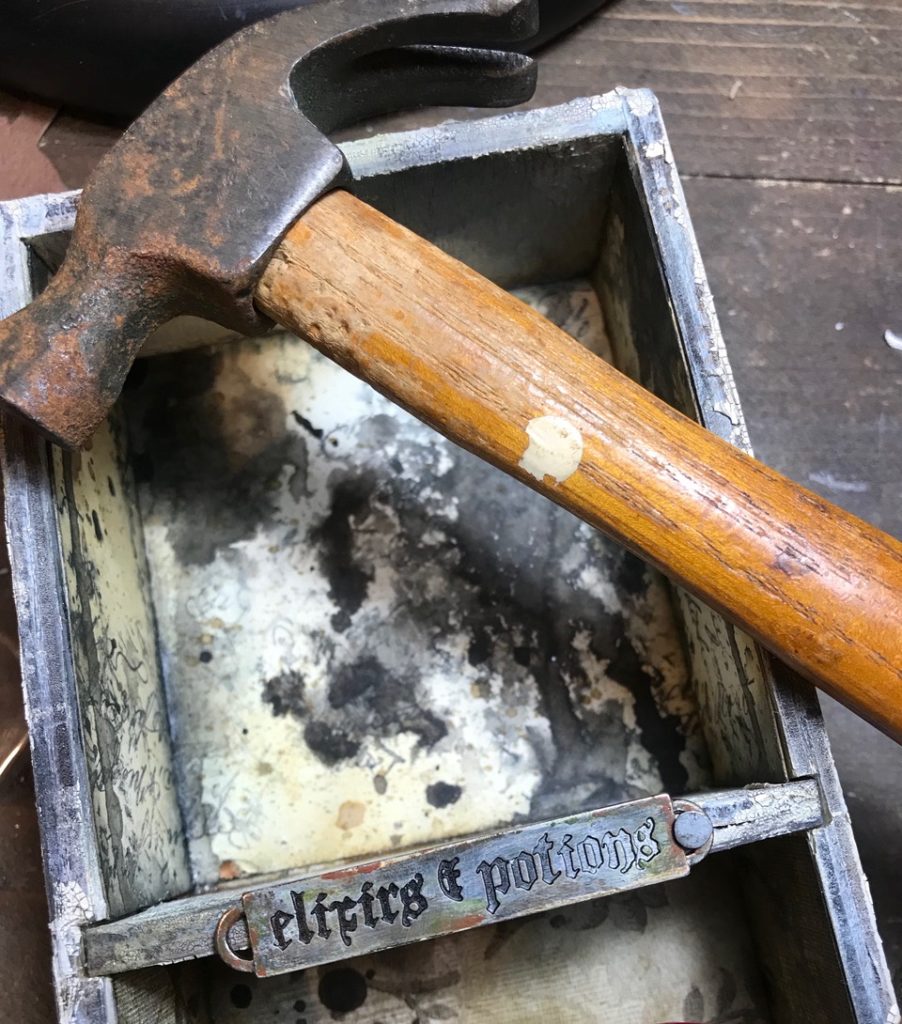
The word band was then hammered into the shelf with a couple nails from the Vignette Hardware Pack.
The creepy pumpkins…
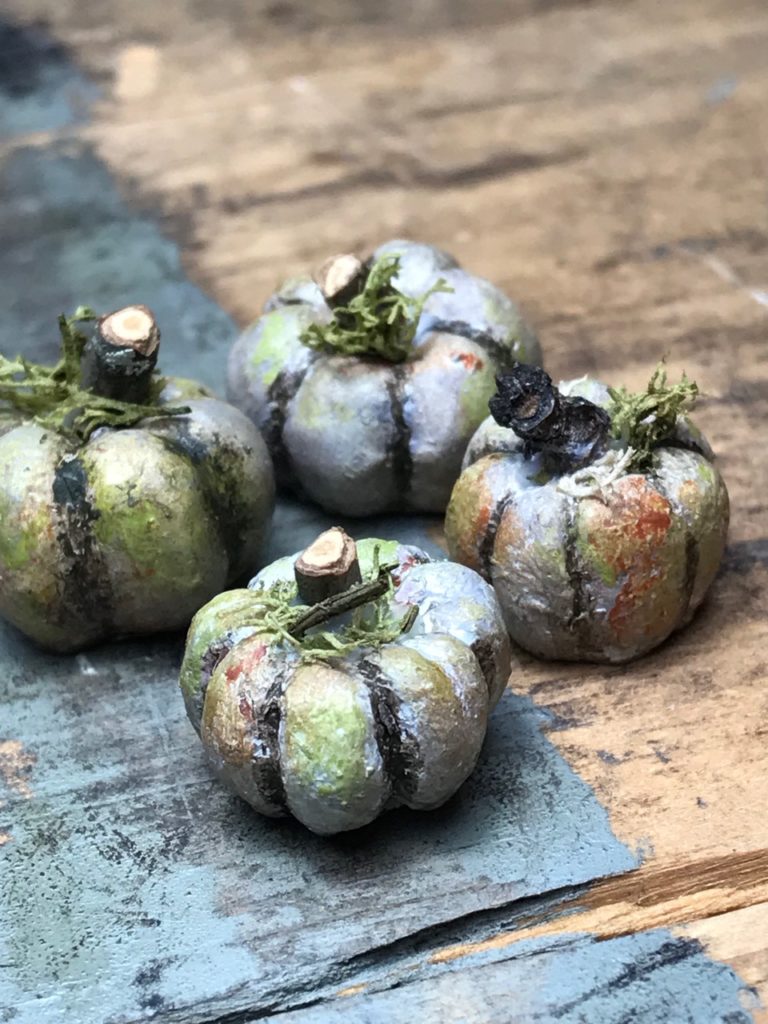
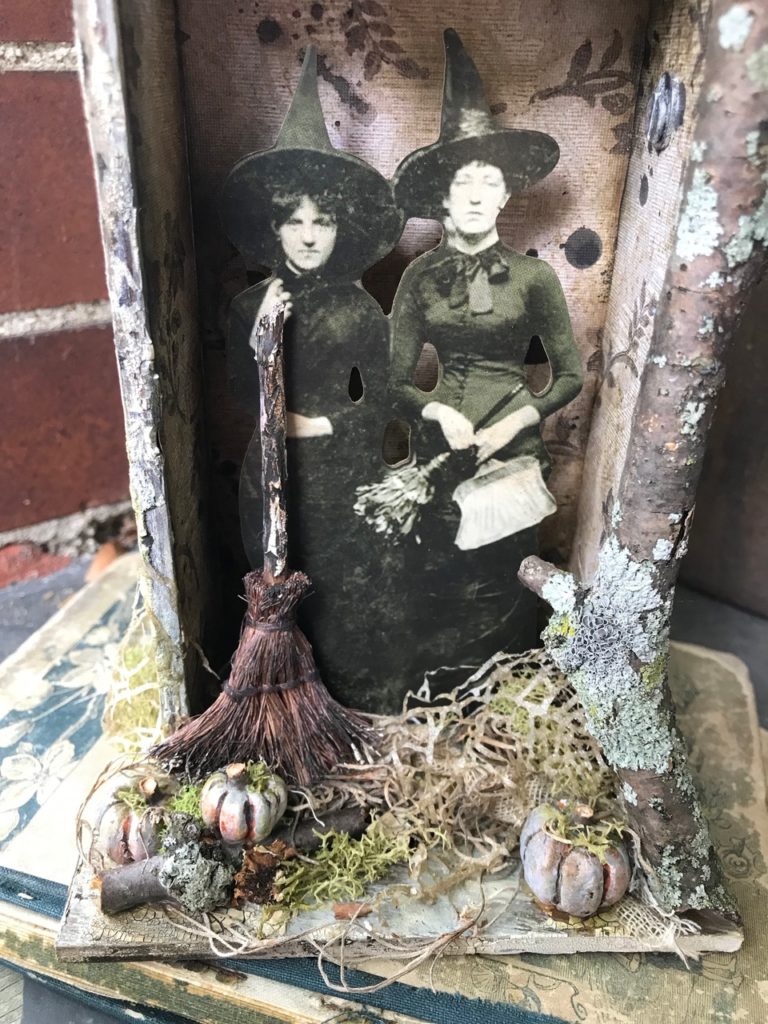
I created some creepy pumpkins to add to the vignette by daubing on Iced Spruce, Hickory Smoke and Peeled Paint Distress Paints with my finger to some of the idea-ology mini pumpkins. Drying them with my heat tool, once they were dry, I applied a small amount of Ground Expresso Distress Paint with a fine tip paint brush into the pumpkin creases. I blended the pumpkins with a bit of Ground Espresso Distress Crayon and a damp finger. I then adhered a small piece of a twig and Floral Moss with Distress Collage Matte Medium. Yay…creepy pumpkins!!!
The creepy eye…
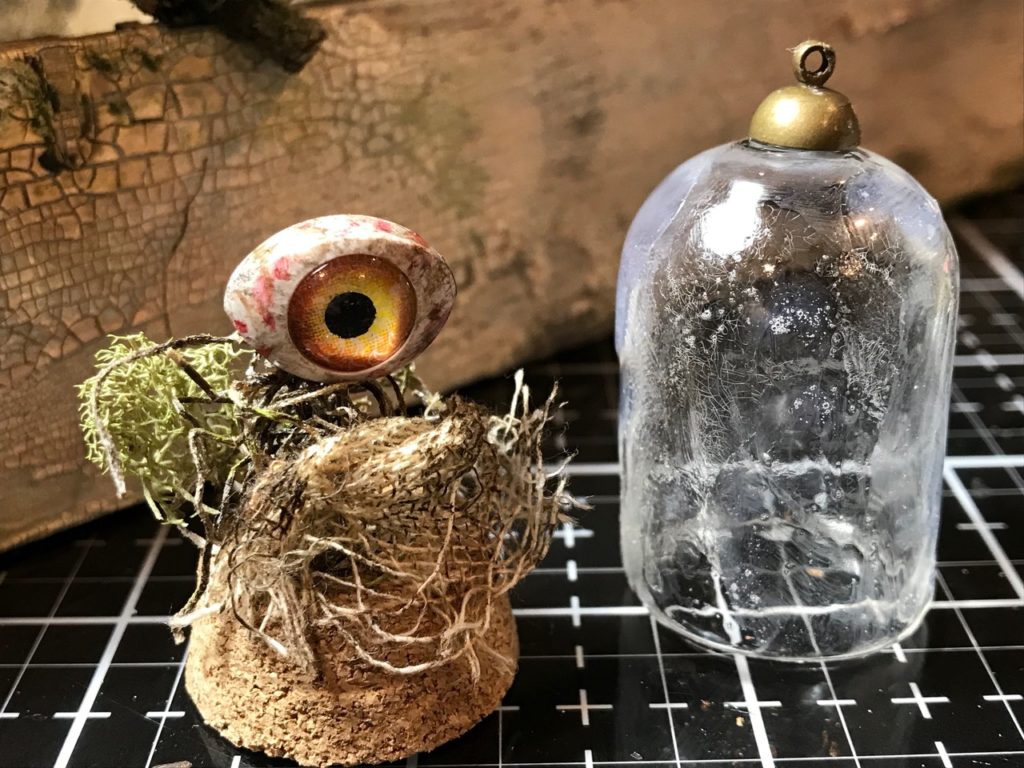
The creepy eye embellishment was created using Mushroom Alcohol Ink, a red permanent marker, an idea-ology corked dome, decorative dome cork, Mummy Cloth, floral moss and a straight pin.
All of my various parts and pieces were combined with some other idea-ology favorites that included, glass jars, corked vials, Curio Knob, Halloween Clippings, Halloween Ephemera, Broomsticks, and various vintage bits that included, dictionary book paper, beads, string and more to finish and bring the witchy vignette together…
I hope you enjoyed some of the techniques and highlights that I featured in this tutorial. I had an absolute blast making it! Thanks so much for stopping by and have a great day!
Creatively yours,
Stacy
What is an affiliate program, and why should I click on the link and buy through you?..
When you shop via the affiliate link on this blog, I receive a small commission, from the affiliate provider (Simon Says Stamp), at no extra cost to you whatsoever. These commissions help me to cover hosting fees and other costs to run my blog and be able to provide you with FREE inspiration. If you shop the links, THANK YOU! I truly appreciate being able to share my love of creating with you.
Gather Your Supplies-
Tim Holtz/Stampers Anonymous- Ledger Script (CMS241), Splat Box
Tim Holtz/Sizzix- Cobweb
Tim Holtz/ Idea-ology- Vignette Divided Drawer, Vignette Panels, Corked Vials & Glass Bottles, Corked Domes, Decorative Domes, Mummy Cloth, Creepy Eyes, Broomsticks, Halloween Paper Dolls, Halloween Worn Wallpaper, Pumpkin Pieces, Halloween Clippings, Plain Collage Paper, Curio Knobs, Vignette Hardware, Adornments Halloween Words, Spider Adornments
Tim Holtz/Tonic- Tonic Guillotine Paper Trimmer, Tonic Shears
Tim Holtz/Ranger- Distress Watercolor Paper, Opaque Crackle Texture, Grit-Paste, Black Soot Archival Ink-Dirty Package #3, Mushroom Alcohol Ink, Resist Spray, Clear Rock Candy Glitter, Gold Foil
Distress Ink- Black Soot, Walnut Stain, Frayed Burlap,
Distress Sprays & Oxide Sprays- Frayed Burlap, Oxide Sprays- Antique Linen
Distress Crayons- Ground Espresso, Peeled Paint, Iced Spruce
Distress Paints- Black Soot, Antique Linen, Peeled Paint
Distress Tools/Mediums- Distress Sprayer, Media Mat, Heat it Heat Tool, Blending Tools and felt pads, Distress Collage Matte Medium, Detail Water Brush
Other- String, Stick, Floral Moss, dictionary paper, beads, old chain


I love this piece, so much to see and the stick, oh the stick, perfect for this piece. I love halloween and Tim Holtz makes it even better! Great work. Can’t wait to see what you do next.
Stacy, you never disappoint. Your spooky creation is amazing!!!
OMGosh Stacy, that cobweb is brilliant, using the Vellum makes perfectly delicate webs…I agree about the using your products to see what you get. If I don’t like the way something is headed…change products and keep going. It is all about trial and error after all, as our Professor would say. Loving the Halloween inspirations and looking forward to the Christmas/Holiday ones after that…thank you for sharing your time with us…
OMGOSH! I LOVE this!!! My favorite is the cobweb! Holy cow! It’s really great!!!! LOVE LOVE LOVE!
I really enjoy your projects! Thanks so much for the tutorial, so much information to use.
Magnificent as always! Thanks for the great tutorial, encouragement and tips; I so appreciate your exploratory techniques! ❤️
So fabulous! Love the web and tiny painted pumpkins and the branch is icing!!!
Stacy, this piece is fabulous! The crackling on the box is exquisite and the way you did the cobweb was genius, I would never have thought of that. Thank you so much for the inspiration! Anne x
Another amazing project that’s creepily detailed and wonderful. I pinned so many of your photos under my Techniques board so I could try them myself. You are so very talented!
About how much would all of the supplies to make something this cost, assuming I don’t have any of it?