Hello there…
I told you I’d be back with another post, but this time it’s for Halloween!!
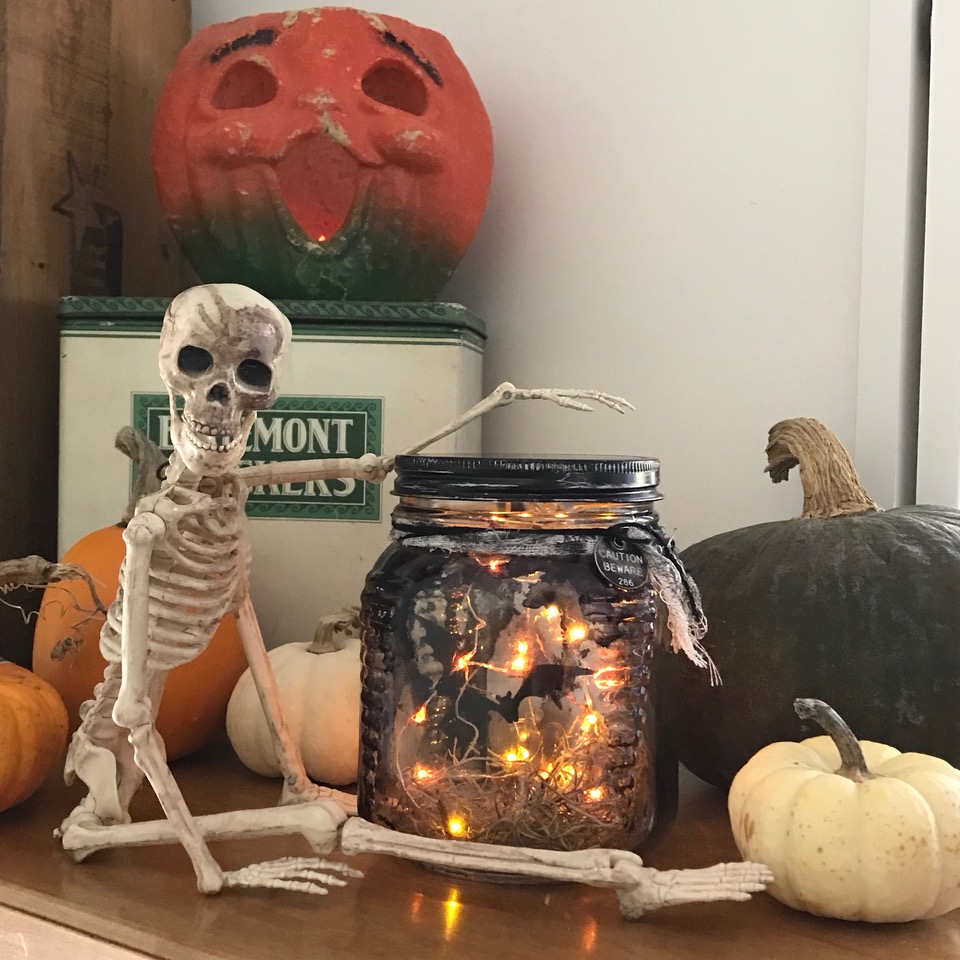
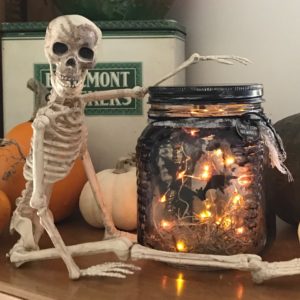
I LOVE Halloween…and my most favorite things are vintage Halloween (of course!) This little jar was made to go along side some of my favorite new and vintage things. I used the new Sizzix Bat Crazy thinlet set, a string of the new idea-ology tiny lights, and colored the lights with alcohol inks to give them a good vintage vibe. With the help of the wire and lights, the tiny bats look as if they’re flying around inside the jar. It was super easy and looks cute along side my Halloween decor. Skelly is so happy to have some creepy new pets to keep him company on my kitchen shelf.
So let’s get started!
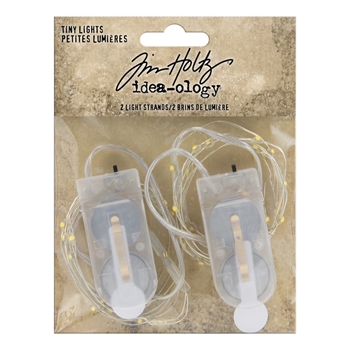
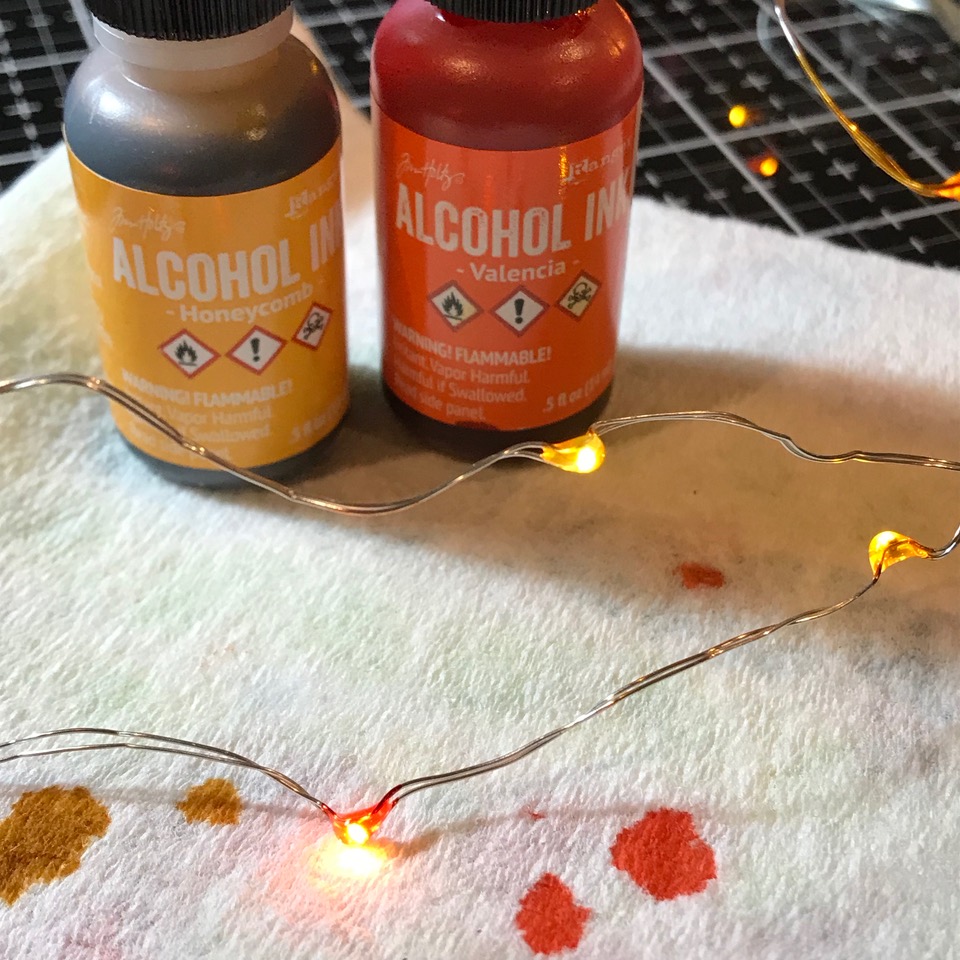
These are the new Tiny Lights that became available in the idea-ology line with the new Holiday release. They’re perfect for Christmas, Halloween, and all year long! They’re small and powered by 2 batteries that are included with them. Simply pull out the little plastic tab, and they’re ready for your projects!
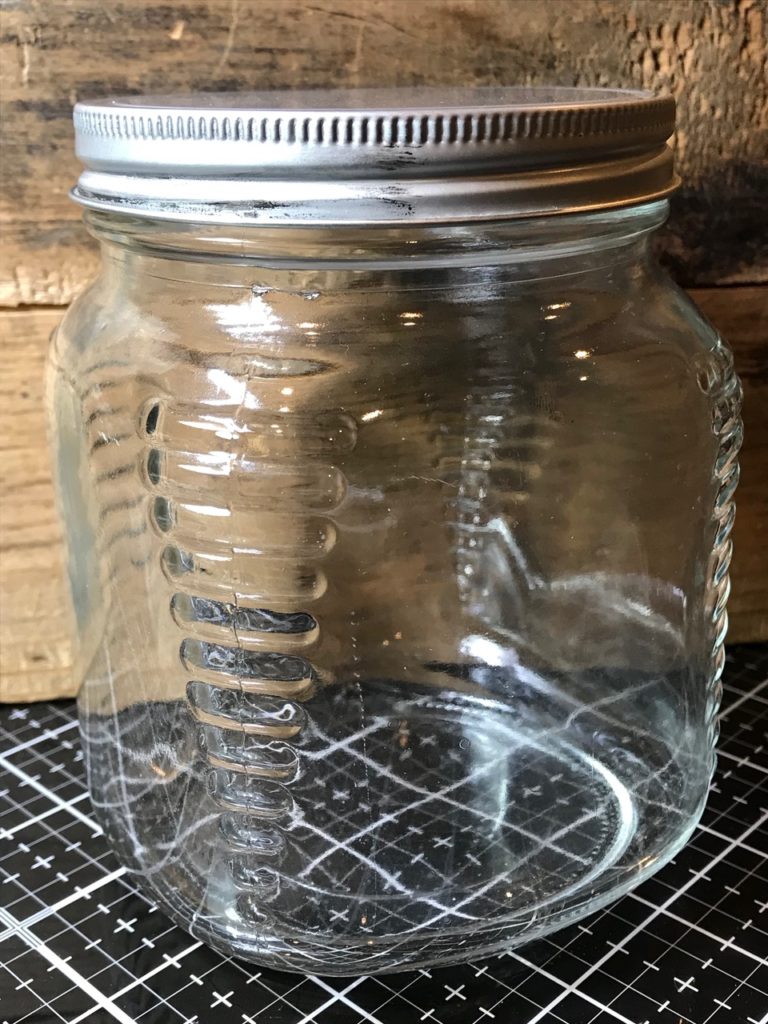
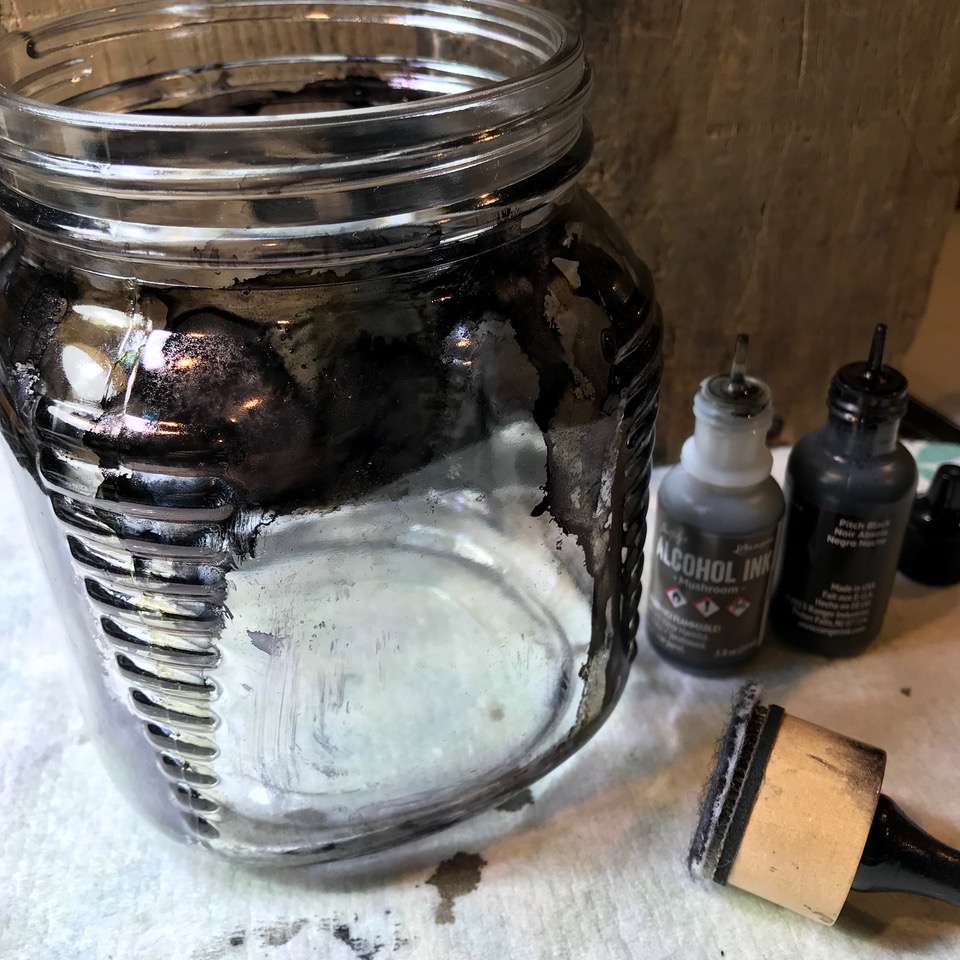
I started with a small wide-mouth jar that I picked up at Hobby Lobby a while ago. It’s approximately 4.5″x 5.5″ and was the perfect size to hold the string of bats.
I painted the lid of the jar with two coats of Black Soot Distress Paint and let it dry.
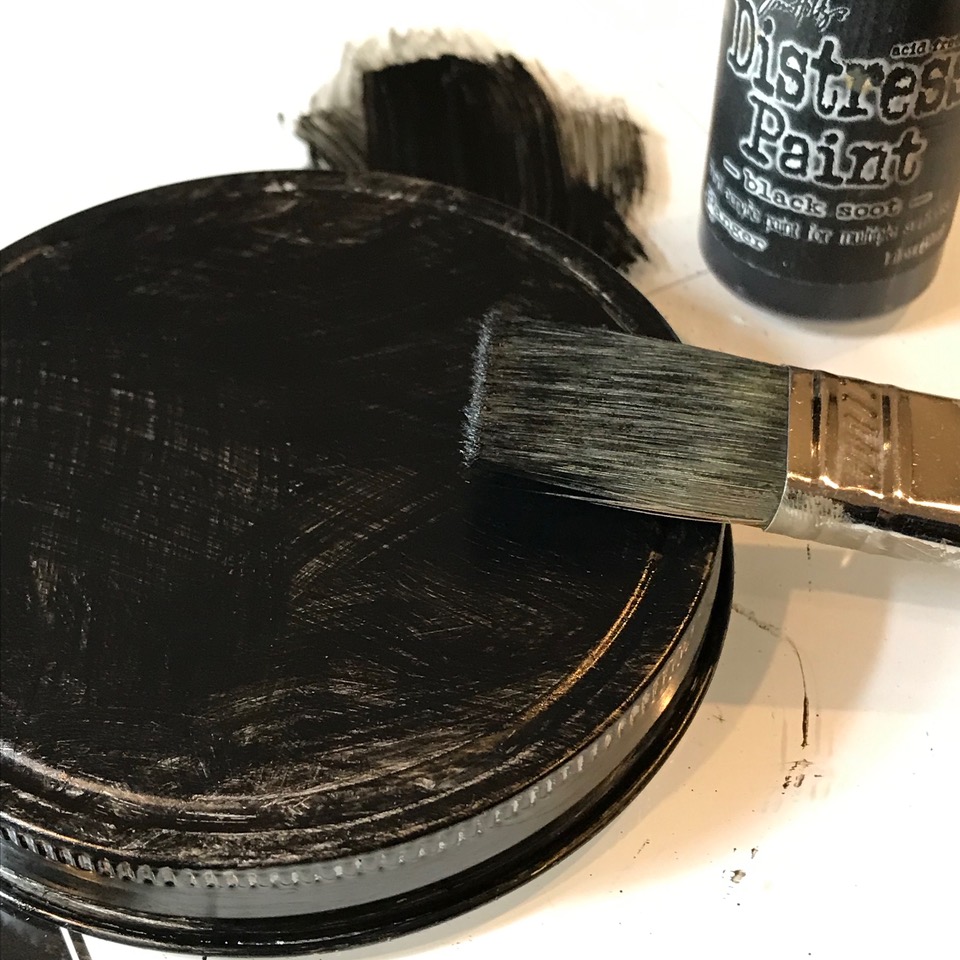
After the lid was dry I scratched it up with my sanding grip.

I dripped and rubbed some Pitch Black and Mushroom Alcohol Ink onto the jar to give it some creep and age.
I dripped some Honeycomb and Valencia Alcohol Inks onto the lights and let it dry. I variegated the colors by applying them on every other light. After they were dry, I applied a second coat to each light.
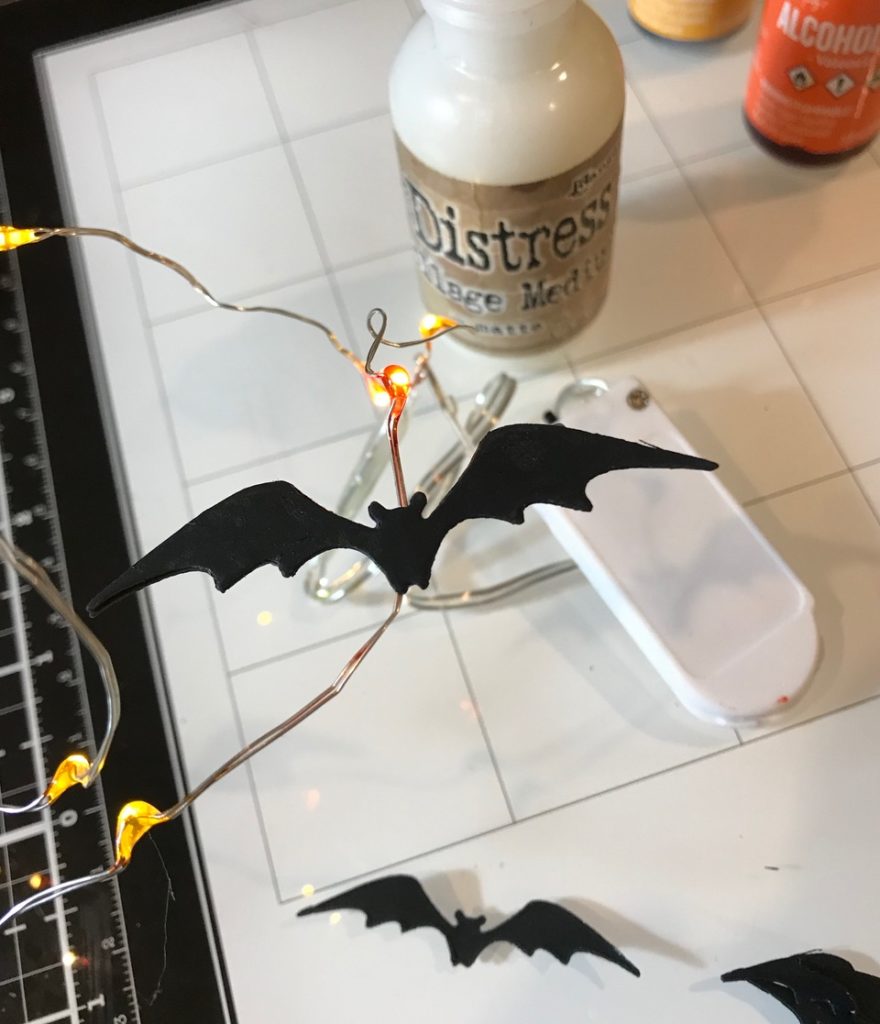
I cut a total of 10 bats from a piece of Black Alcohol Ink paper using the Bat Crazy Thinlets set, 6 of the smallest and 4 of the next size up. Check this set out! Bats in all different sizes, perfect for all your Halloween makes!

I sandwiched two of the same size bats together onto the wire and adhered them to it with Distress Collage Medium.
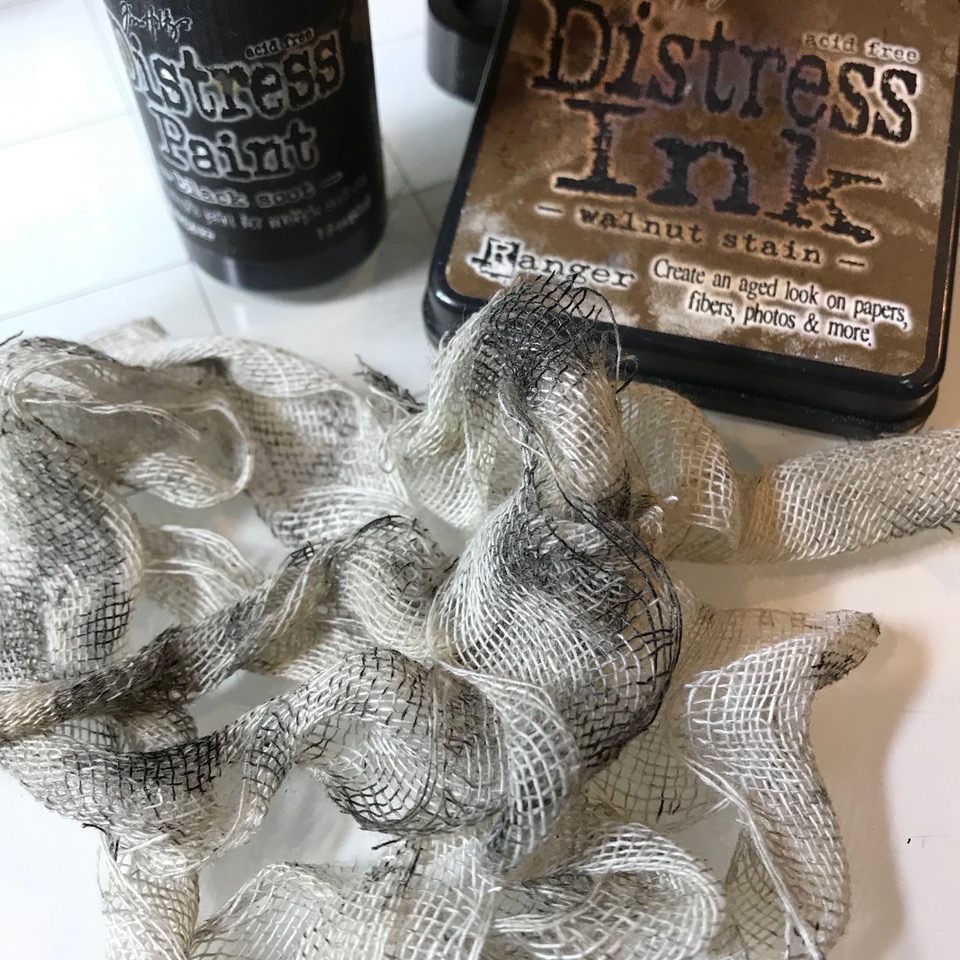
I cut a length of mummy cloth to tie around the jar and dyed it with a bit of Black Soot Distress Paint and Walnut Stain Distress Ink, then I dried it with my heat tool.
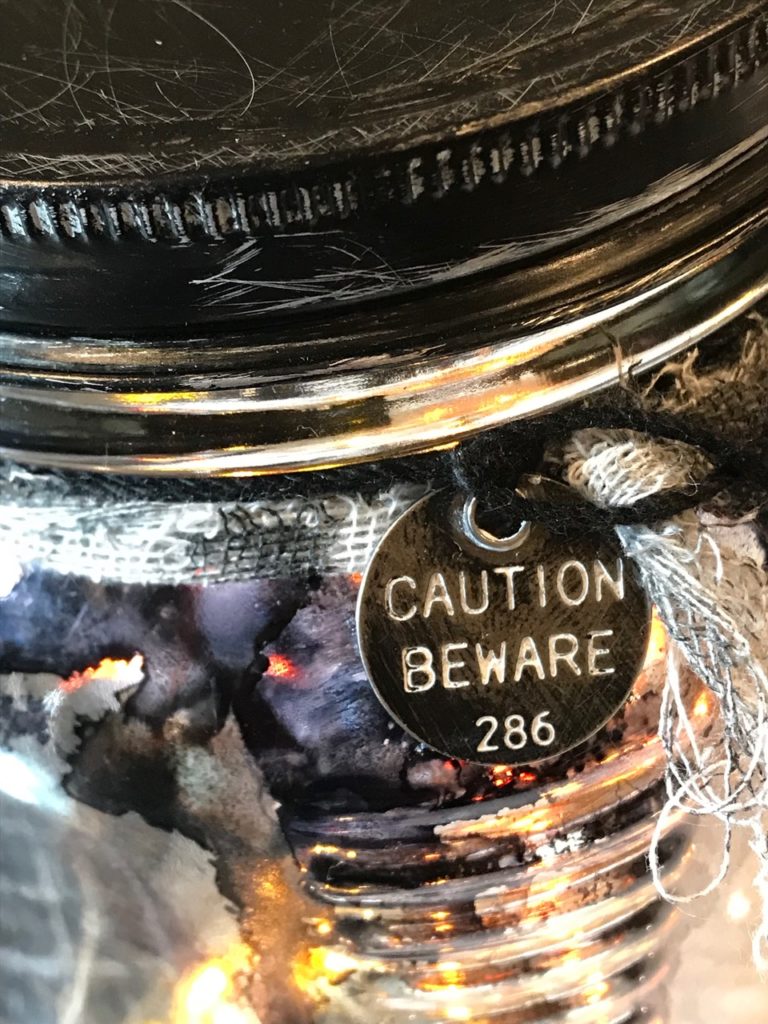
I tied the mummy cloth around the jar and added an idea-ology Halloween Token with some black string. The token had been painted with Black Soot Distress Paint, dried, then scratched up with some steel wool. Then I rubbed over top of the phrase with a Picket Fence Distress Crayon.
I dropped a bit of Spanish Moss into the bottom of the jar and added the string of lights with the bats attached.
The battery pack was then adhered to the inside top of the jar with a little bit of poster putty. (removable, just in case I have to change out the batteries)
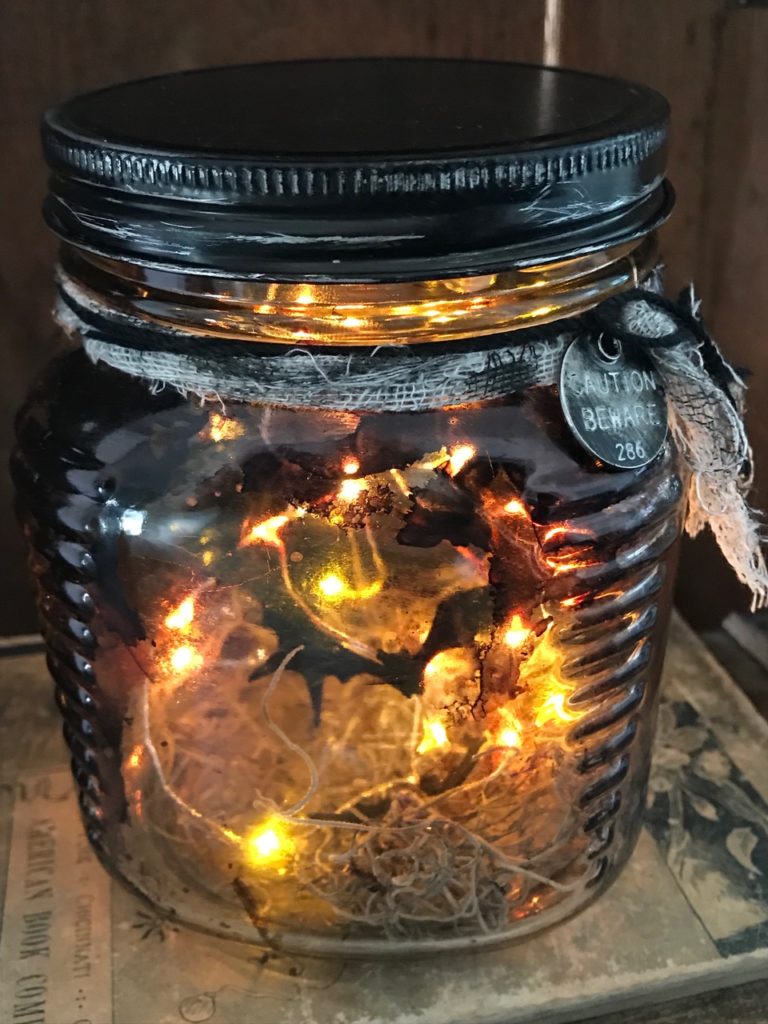
With that, my jar full of bat crazy was complete and ready for my Halloween display!
Thanks so much for stopping by…have a great day!
Creatively yours,
Stacy
What is an affiliate program, and why should I click on the link and buy through you?..
When you shop via the affiliate link on this blog, I receive a small commission, from the affiliate provider (Simon Says Stamp), at no extra cost to you whatsoever. These commissions help me to cover hosting fees and other costs to run my blog and be able to provide you with FREE inspiration. If you shop the links, THANK YOU! I truly appreciate being able to share my love of creating with you.
Gather Your Supplies-
Tim Holtz/Sizzix- Bat Crazy
Tim Holtz/ Idea-ology- Tiny Lights, Mummy Cloth, Halloween Tokens
Tim Holtz/Tonic- Tonic Guillotine Paper Trimmer, Tonic Shears
Tim Holtz/Ranger- Mushroom, Pitch Black, Valencia, & Honeycomb Alcohol Ink, Black Alcohol Ink Paper
Distress Crayons-Picket Fence
Distress Paints- Black Soot
Distress Ink- Walnut Stain
Distress Tools/Mediums- Distress Sprayer, Media Mat, Heat it Heat Tool, Blending Tools and felt pads, Distress Collage Matte Medium
Other- Black String, Floral Spanish Moss, Wide Mouth Jar


I LOVE Halloween too and this is another fantastic project you’ve created. The lights are on back order at our store, so I hope they arrive soon. This is a quick last minute project. Thanks for sharing.
So fun, and so clever.
this is awesome Stacy!! Bet my son will want me to make one for us. =D
This is drop dead gorgeous. Thank you so much for posting the step by step instructions!!!! How about a Christmas one with stars or snowflakes? No pressure, I just love everything you create and your instructions are so clear.
Love the jar of bat crazy; how perfect! Great instructions and inspiration. Now, for the BIG trick, wondering how I can get the “bat crazy” to stay contained in the jar and only let it out occasionally? Happy crafting, Stacy….🕷🕸🎃
My favorite part of this post is the name!!!
Great jar!
What a great project! Don’t think I can get my hands on the lights in time for Halloween so may have to improvise or keep this in mind for next year. Definitely want to make 2, one for each end of the mantle.
This is so cool, Stacy! You’ve done a wonderful job of grunging up that jar adn I love the bats! I just saw something similar on pinterest, and I’ve been trying to figure out how to get those tiny lights into vials! Ha! Ha! Love this, and I’m picturing a gorgeous Halloween display at your home! Happy Halloween!
Love this project Stacy! (…and Halloween too 🙂
This is AMAZING! I just received the bat crazy dies.
Oh how super fun!!!
OMG that is so clever !!