Hello and Welcome!
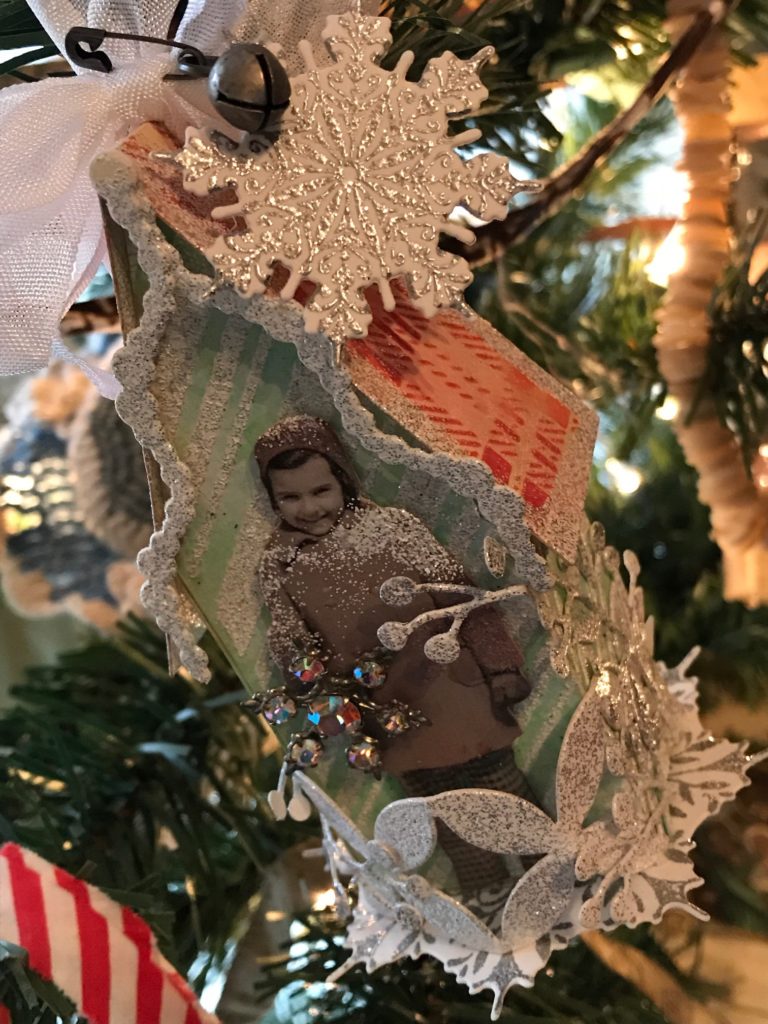
I hope you all had a wonderful Thanksgiving and were blessed to share it with your friends and family. It is so hard to believe that Christmas is just a little over a month away! In preparing for that, I was playing with my Sizzix tiny houses die the other day and wanted to share an ornament that I made with it. I used the tiniest house and am hoping to make a variety of them for my family this year. Fingers crossed with all the hustle and bustle that I get some made 🙂
Lets get started!
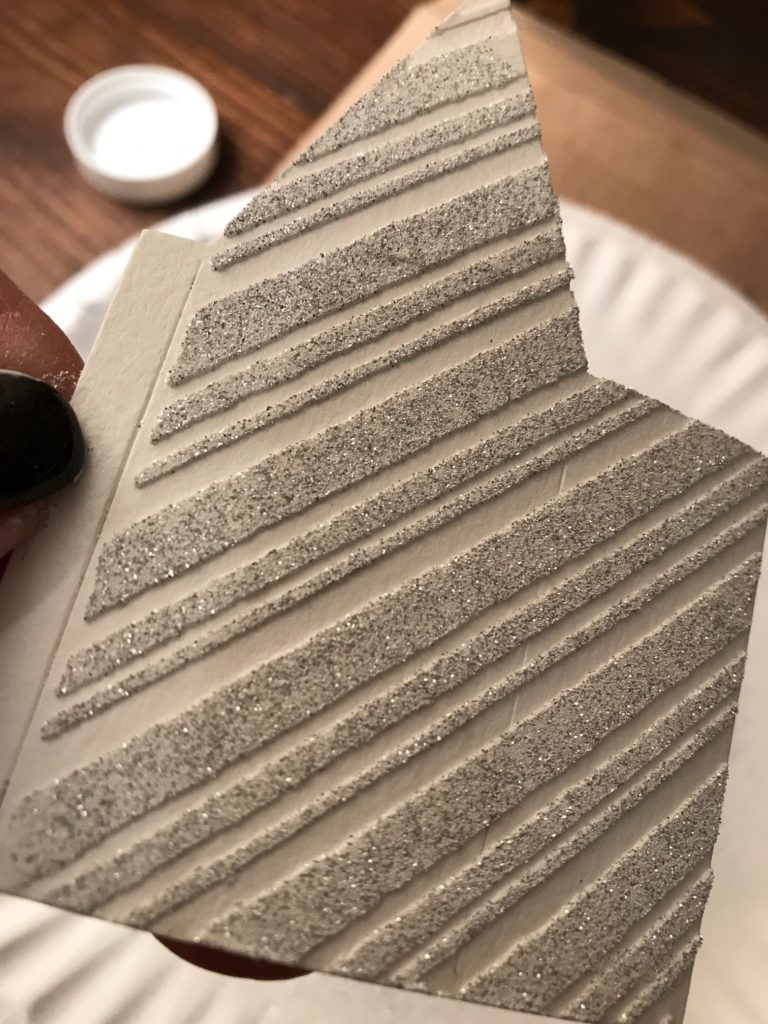
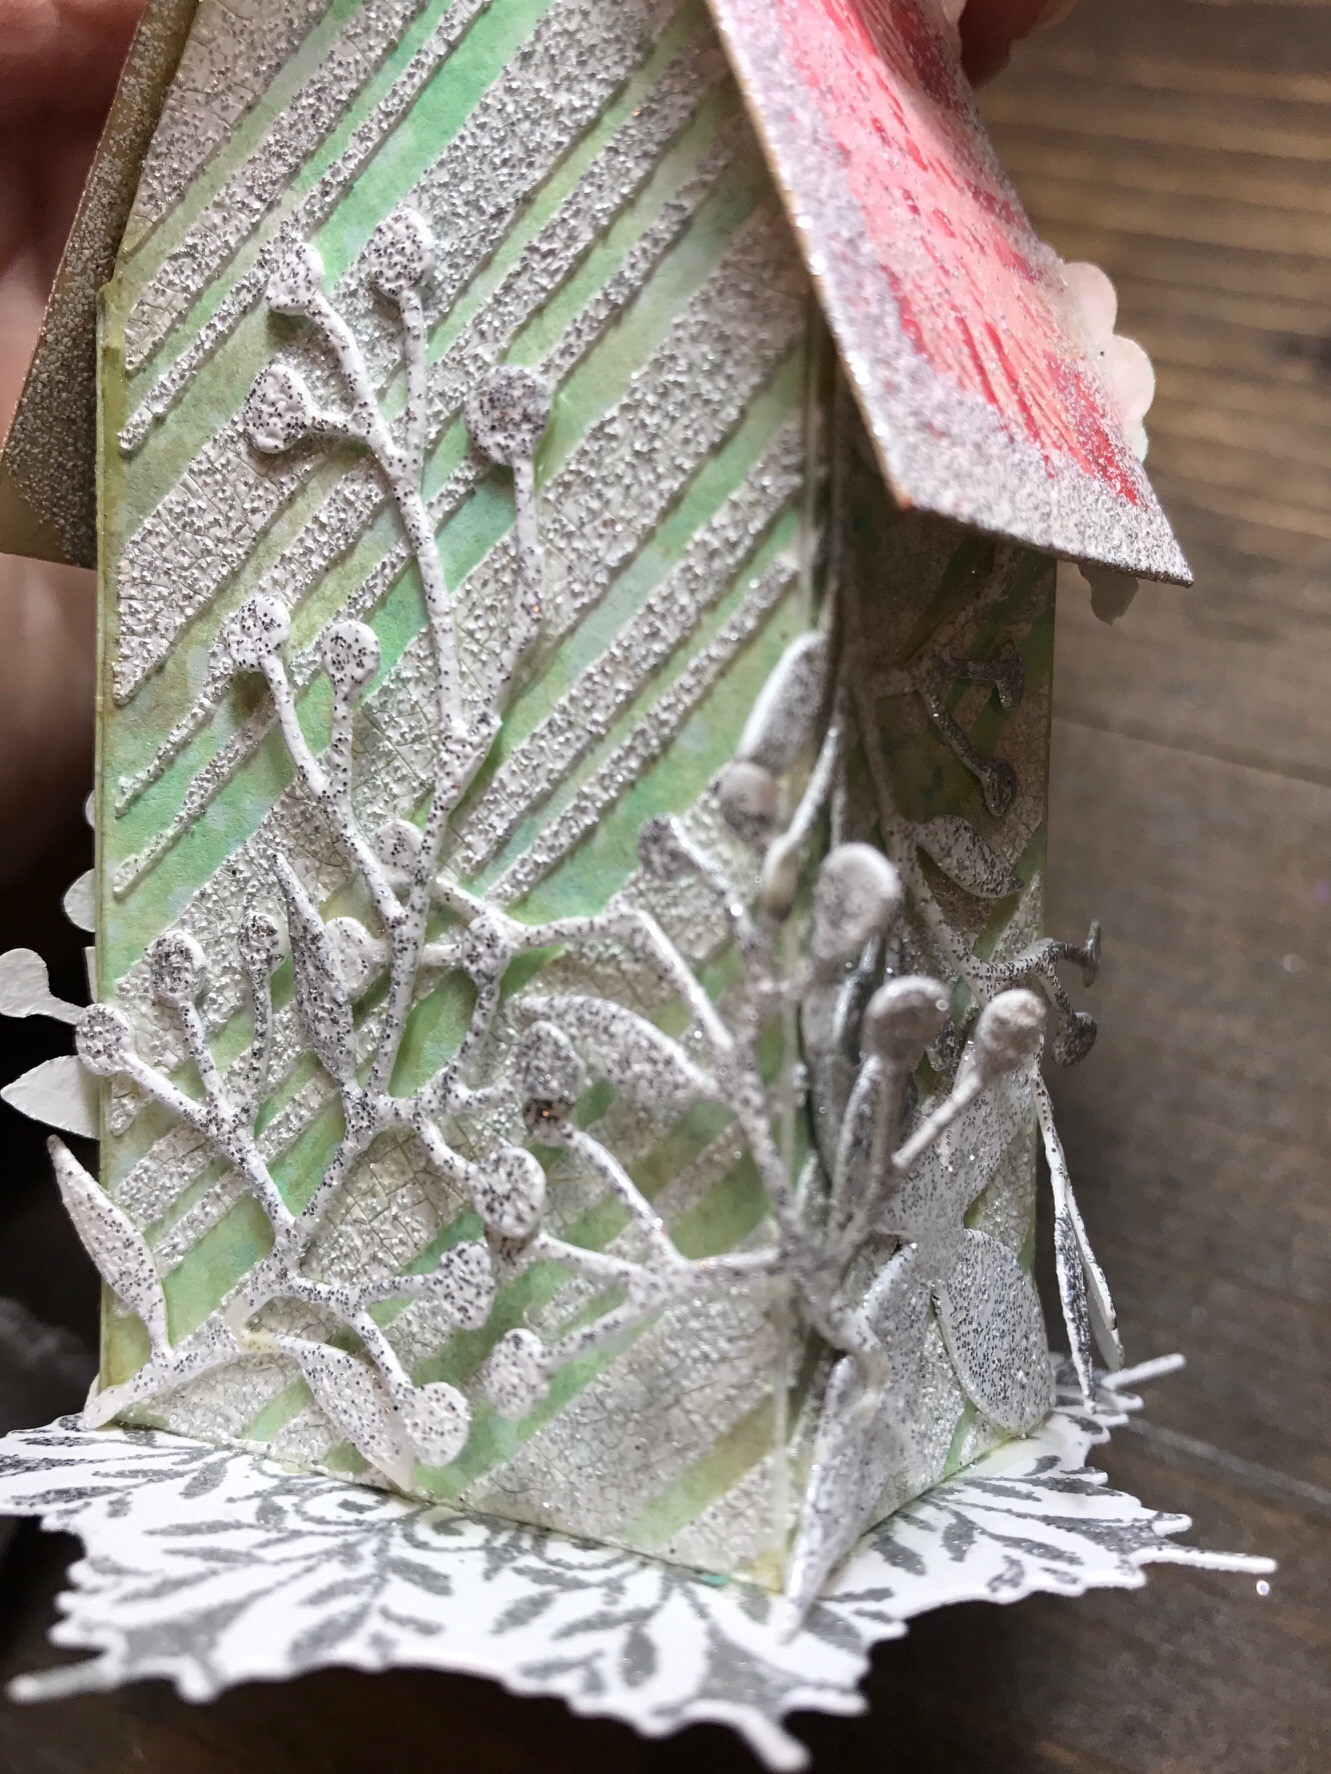
First, I cut two of the a tiny houses from Watercolor paper and then using the Tim Holtz Peppermint Mini Stencil, applied texture paste through the stencil and sprinkled it with Recollections Opaque Bling Sparkle Embossing Powder. I then let the pieces dry.
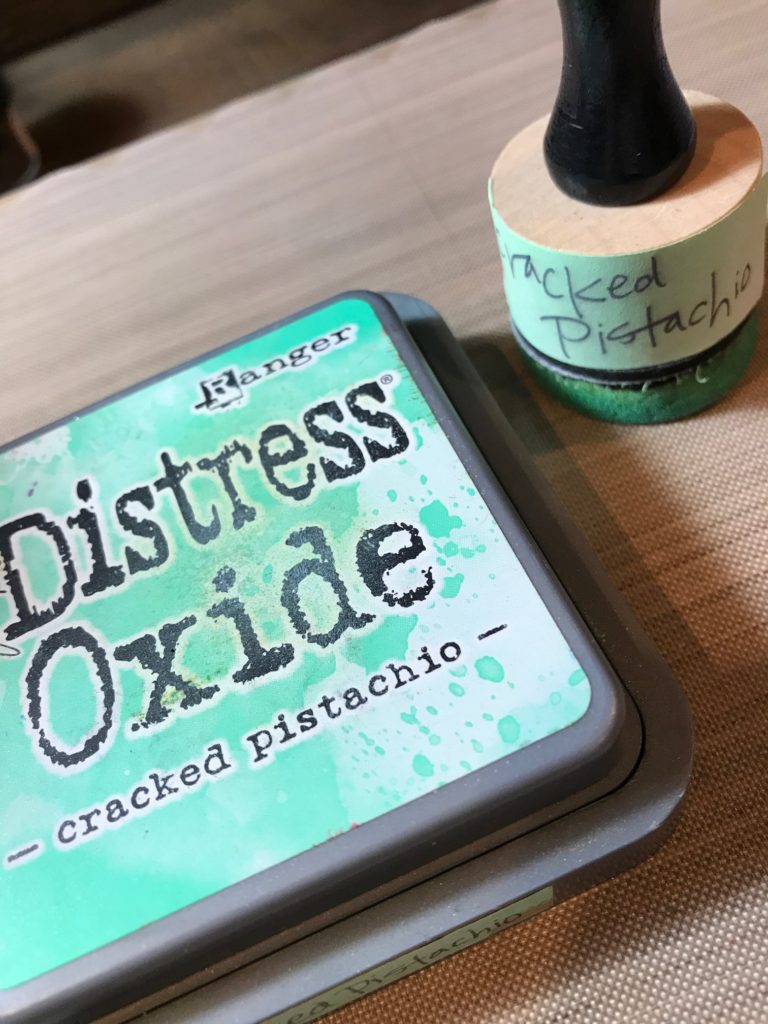
After they were dry, I embossed them with a heat tool and blended Cracked Pistachio Distress Oxide over top. I then sprayed it with a Distress Sprayer, wiped it with a towel and dried them again with my heat tool.

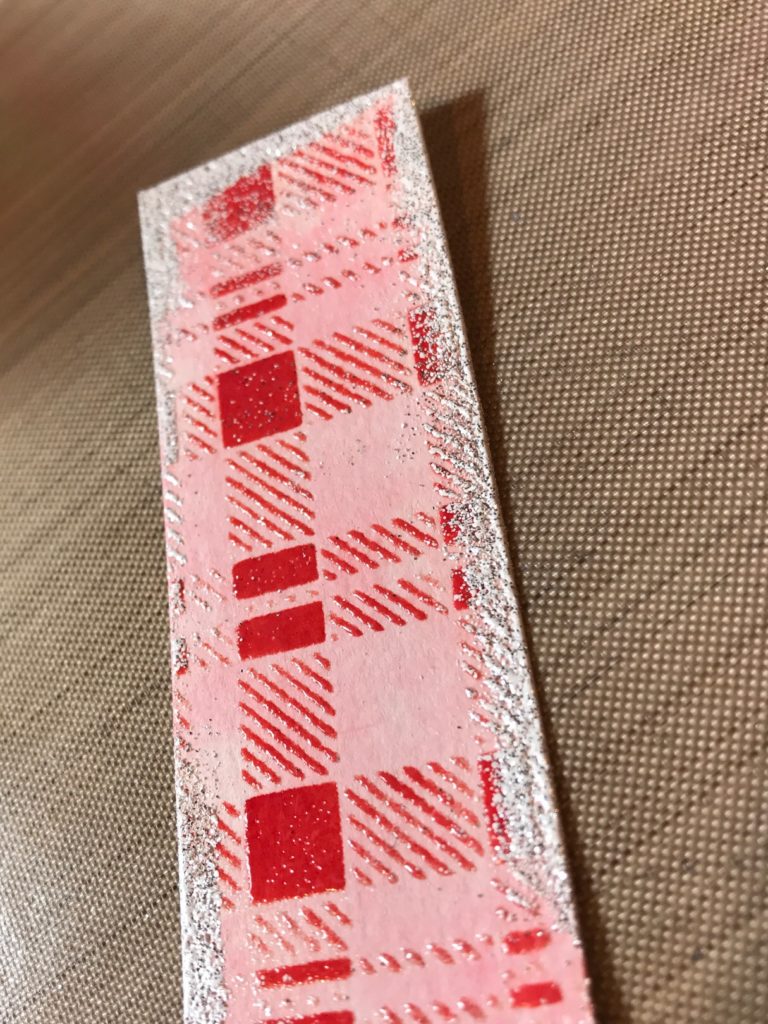
On the roof of the house, I smushed Candied Apple Distress Oxide through the Tim Holtz Plaid Mini Stencil with a blending tool and embossed it with Clear Embossing powder. Then I added a bit of Worn Lipstick Distress Oxide with a blending tool and sprayed it with water, blotted it with a towel and dried it with my heat tool. After that I added a bit of the Opaque Bling Embossing Powder to the edges of the roof.
Out of watercolor paper I cut a few Greens with the Sizzix Holiday Greens Mini Set and also cut a piece from the Sizzix Courtyard Die.
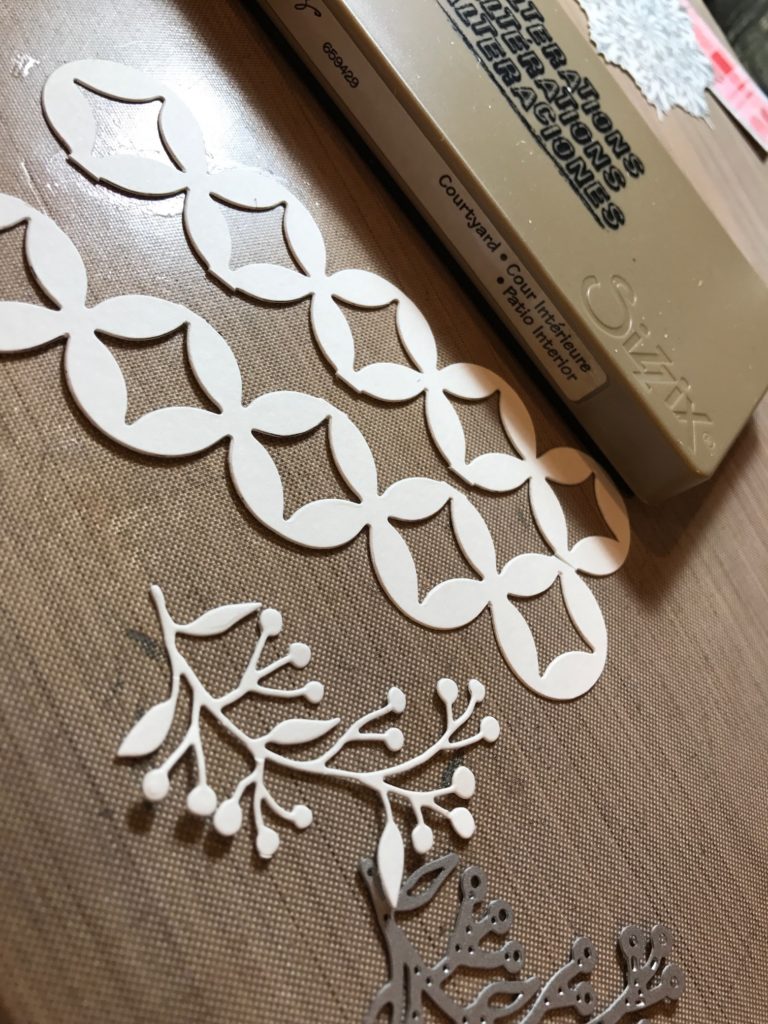
For the garland at the top of the house I cut 2 of the dotted garlands from the Tim Holtz/Sizzix Village Christmastime Die Set, the Courtyard die was then cut in half lengthwise and all of the pieces were embossed with Opaque Bling Embossing Powder.

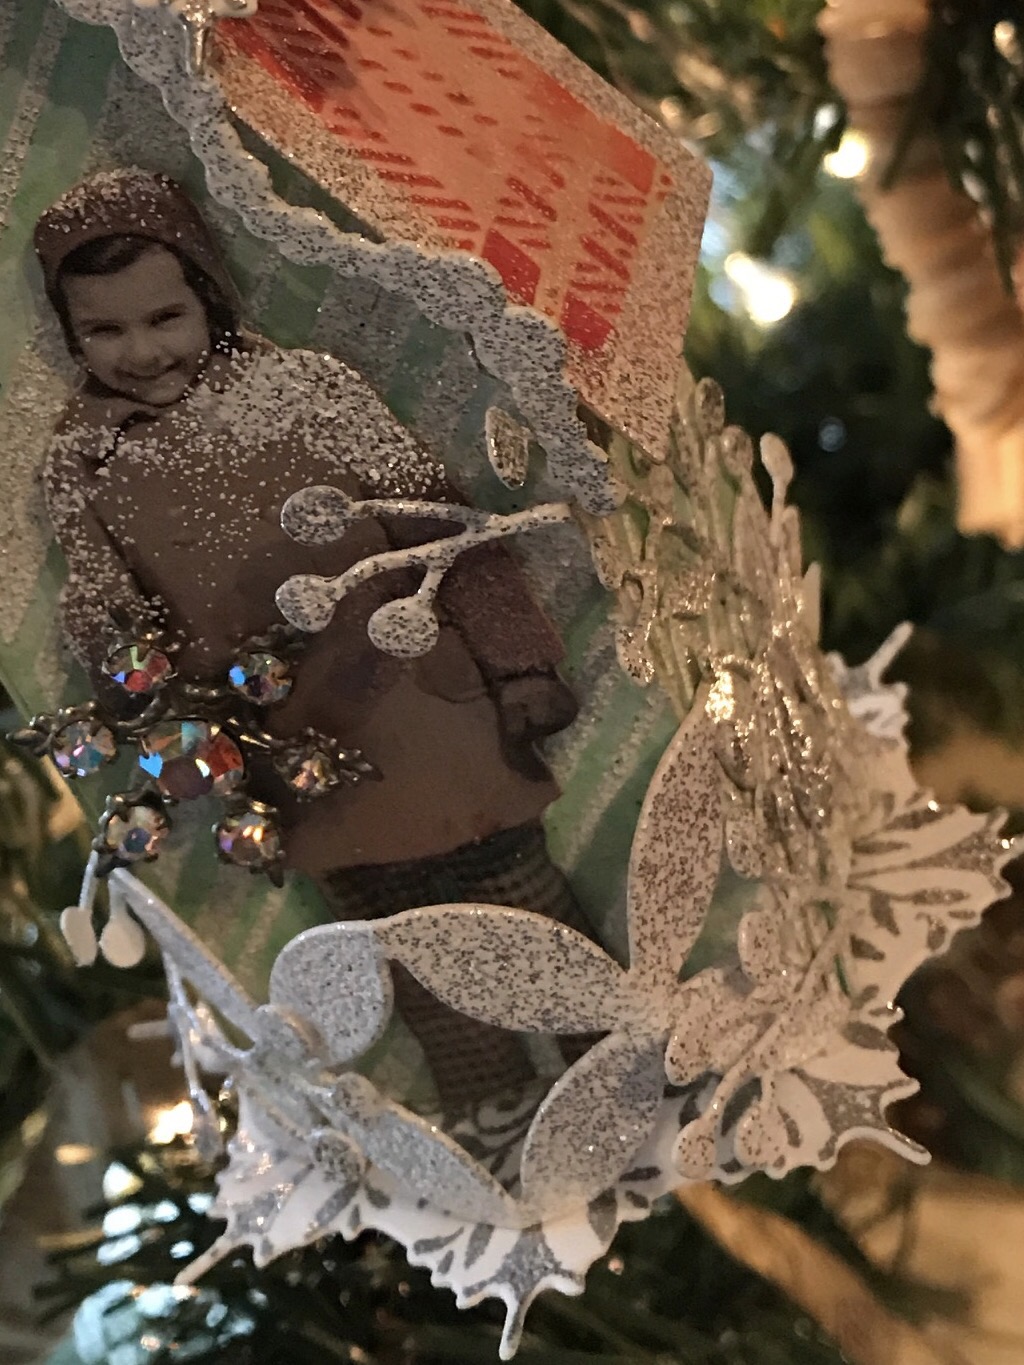
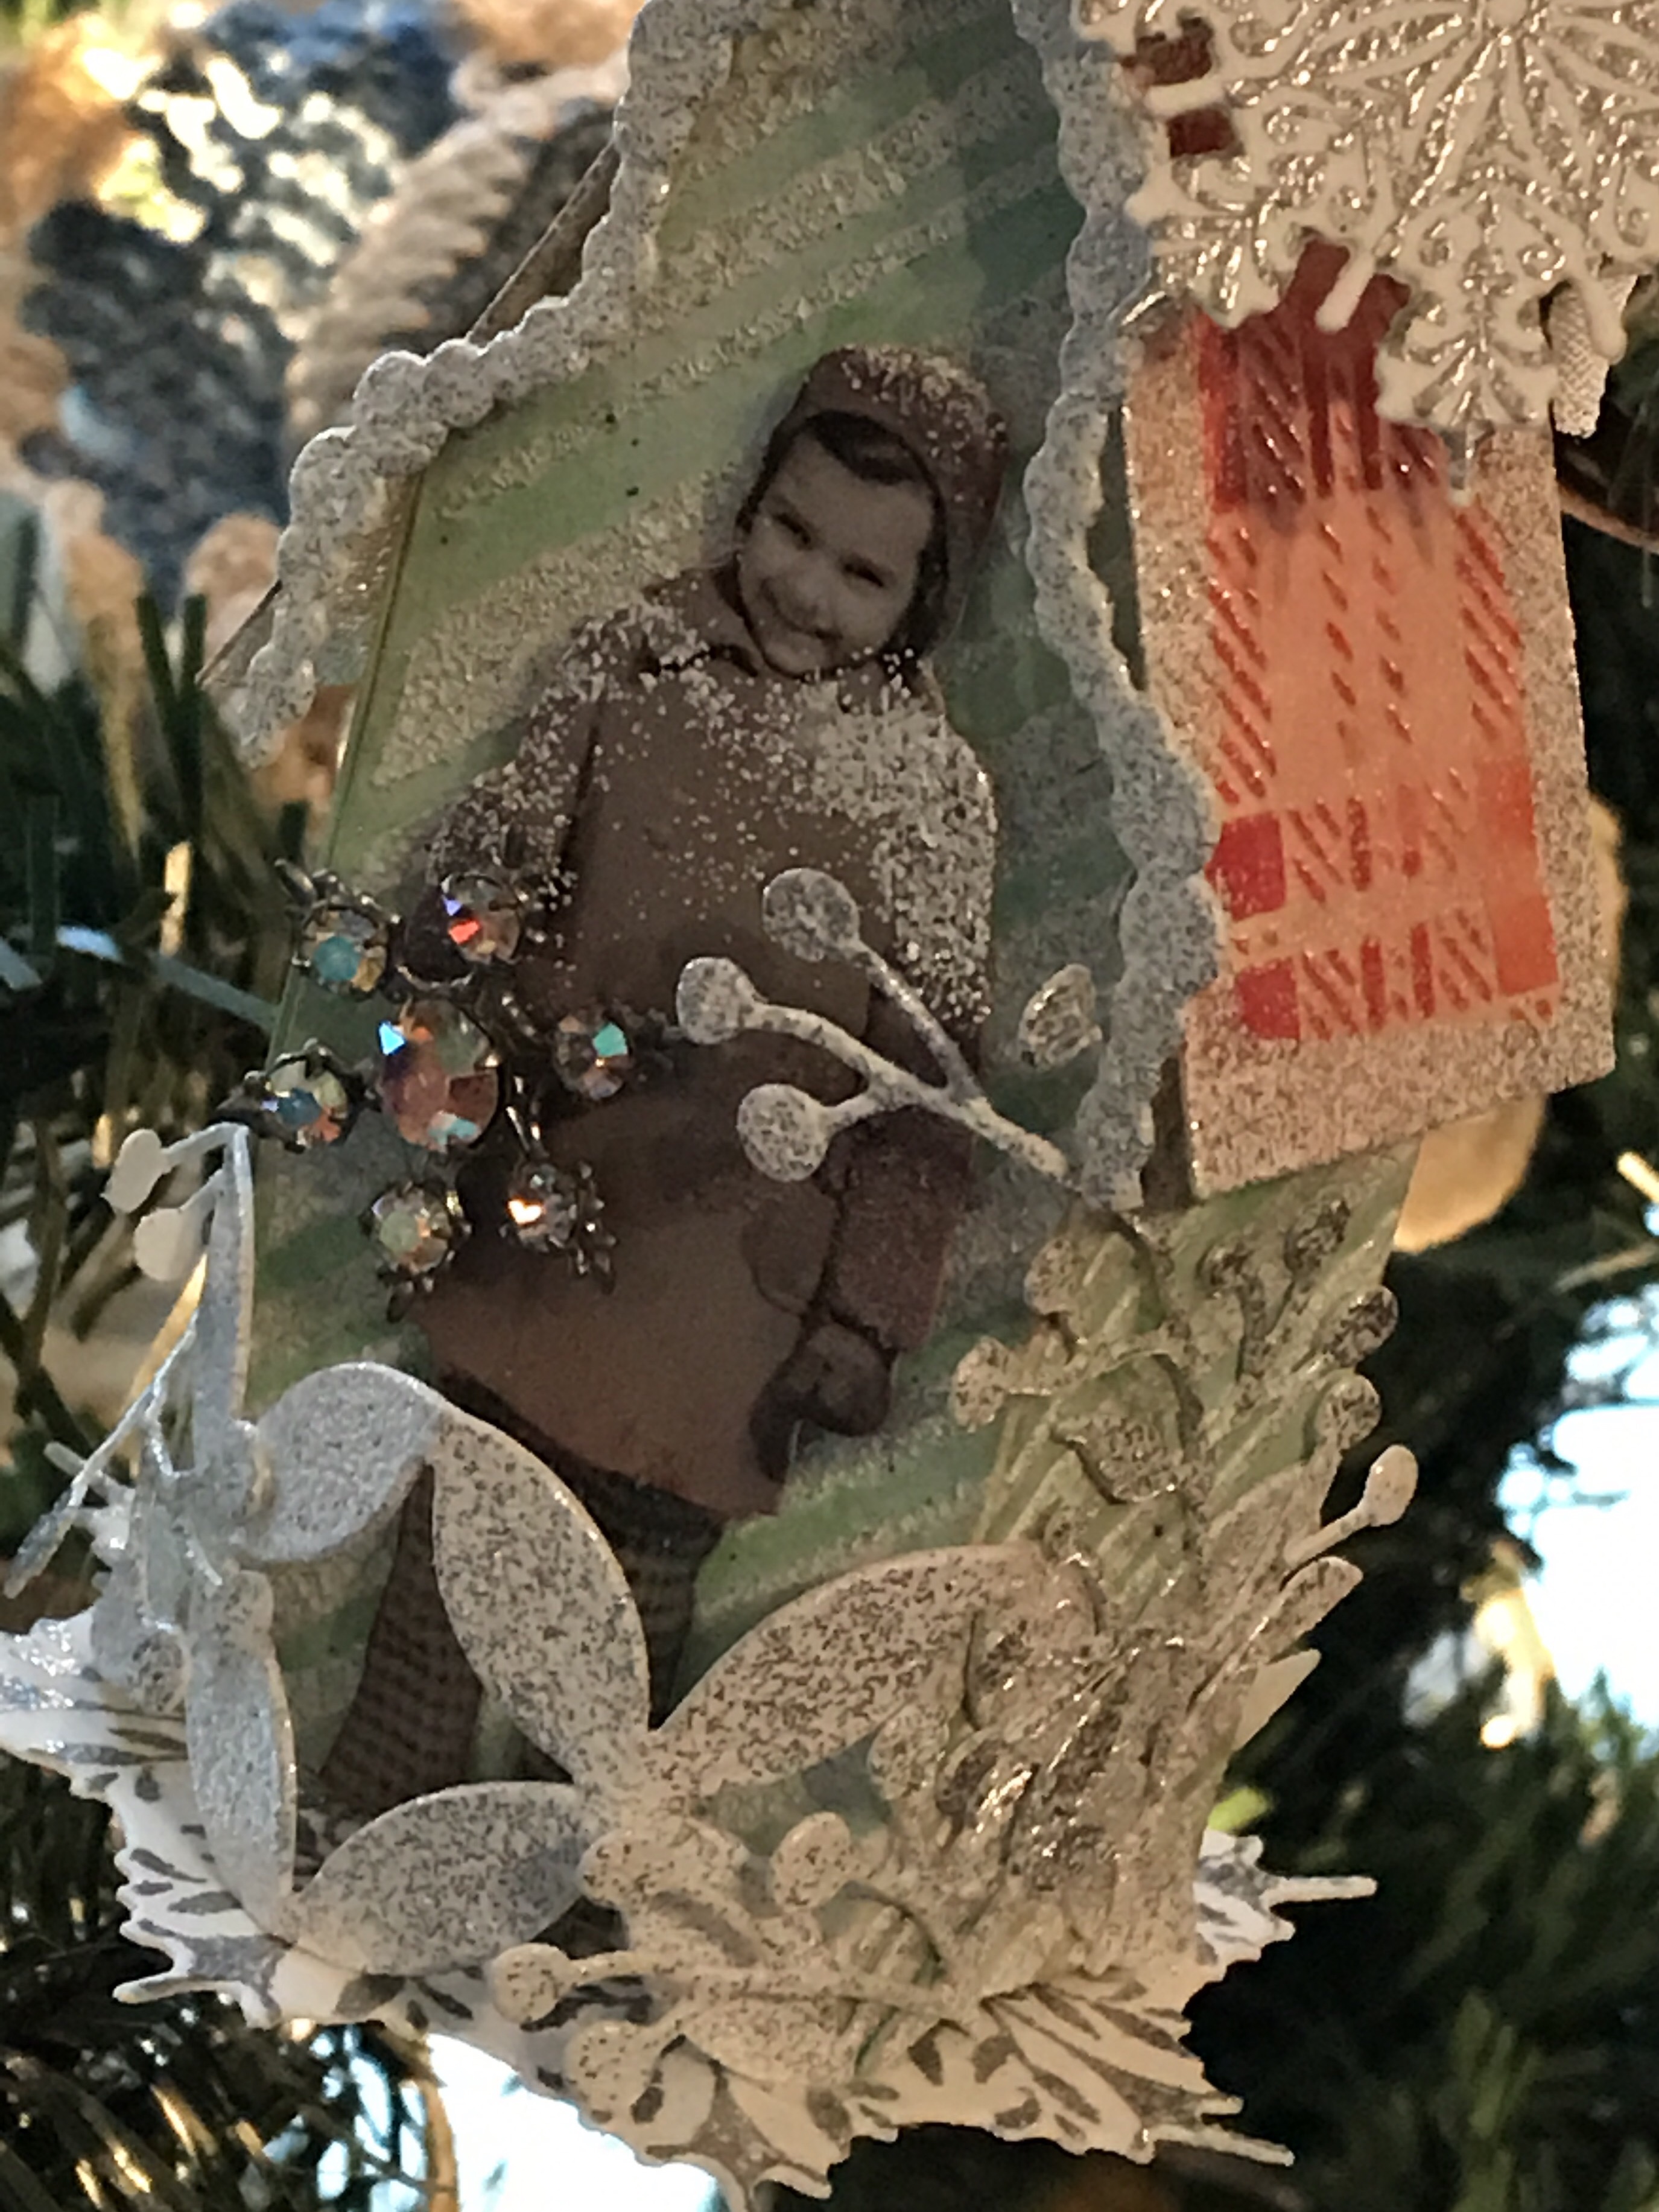
I picked a cute little girl from the Tim Holtz Christmas Paper Dolls pack and colored her coat with a Worn Lipstick Distress Marker that I rubbed with my finger and blended out. Her pants were colored the same way but with a Peeled Paint Distress Marker. I then added a bit of Opaque Bling Embossing Powder to her and then, after your house is built, she is adhered with pop dots.
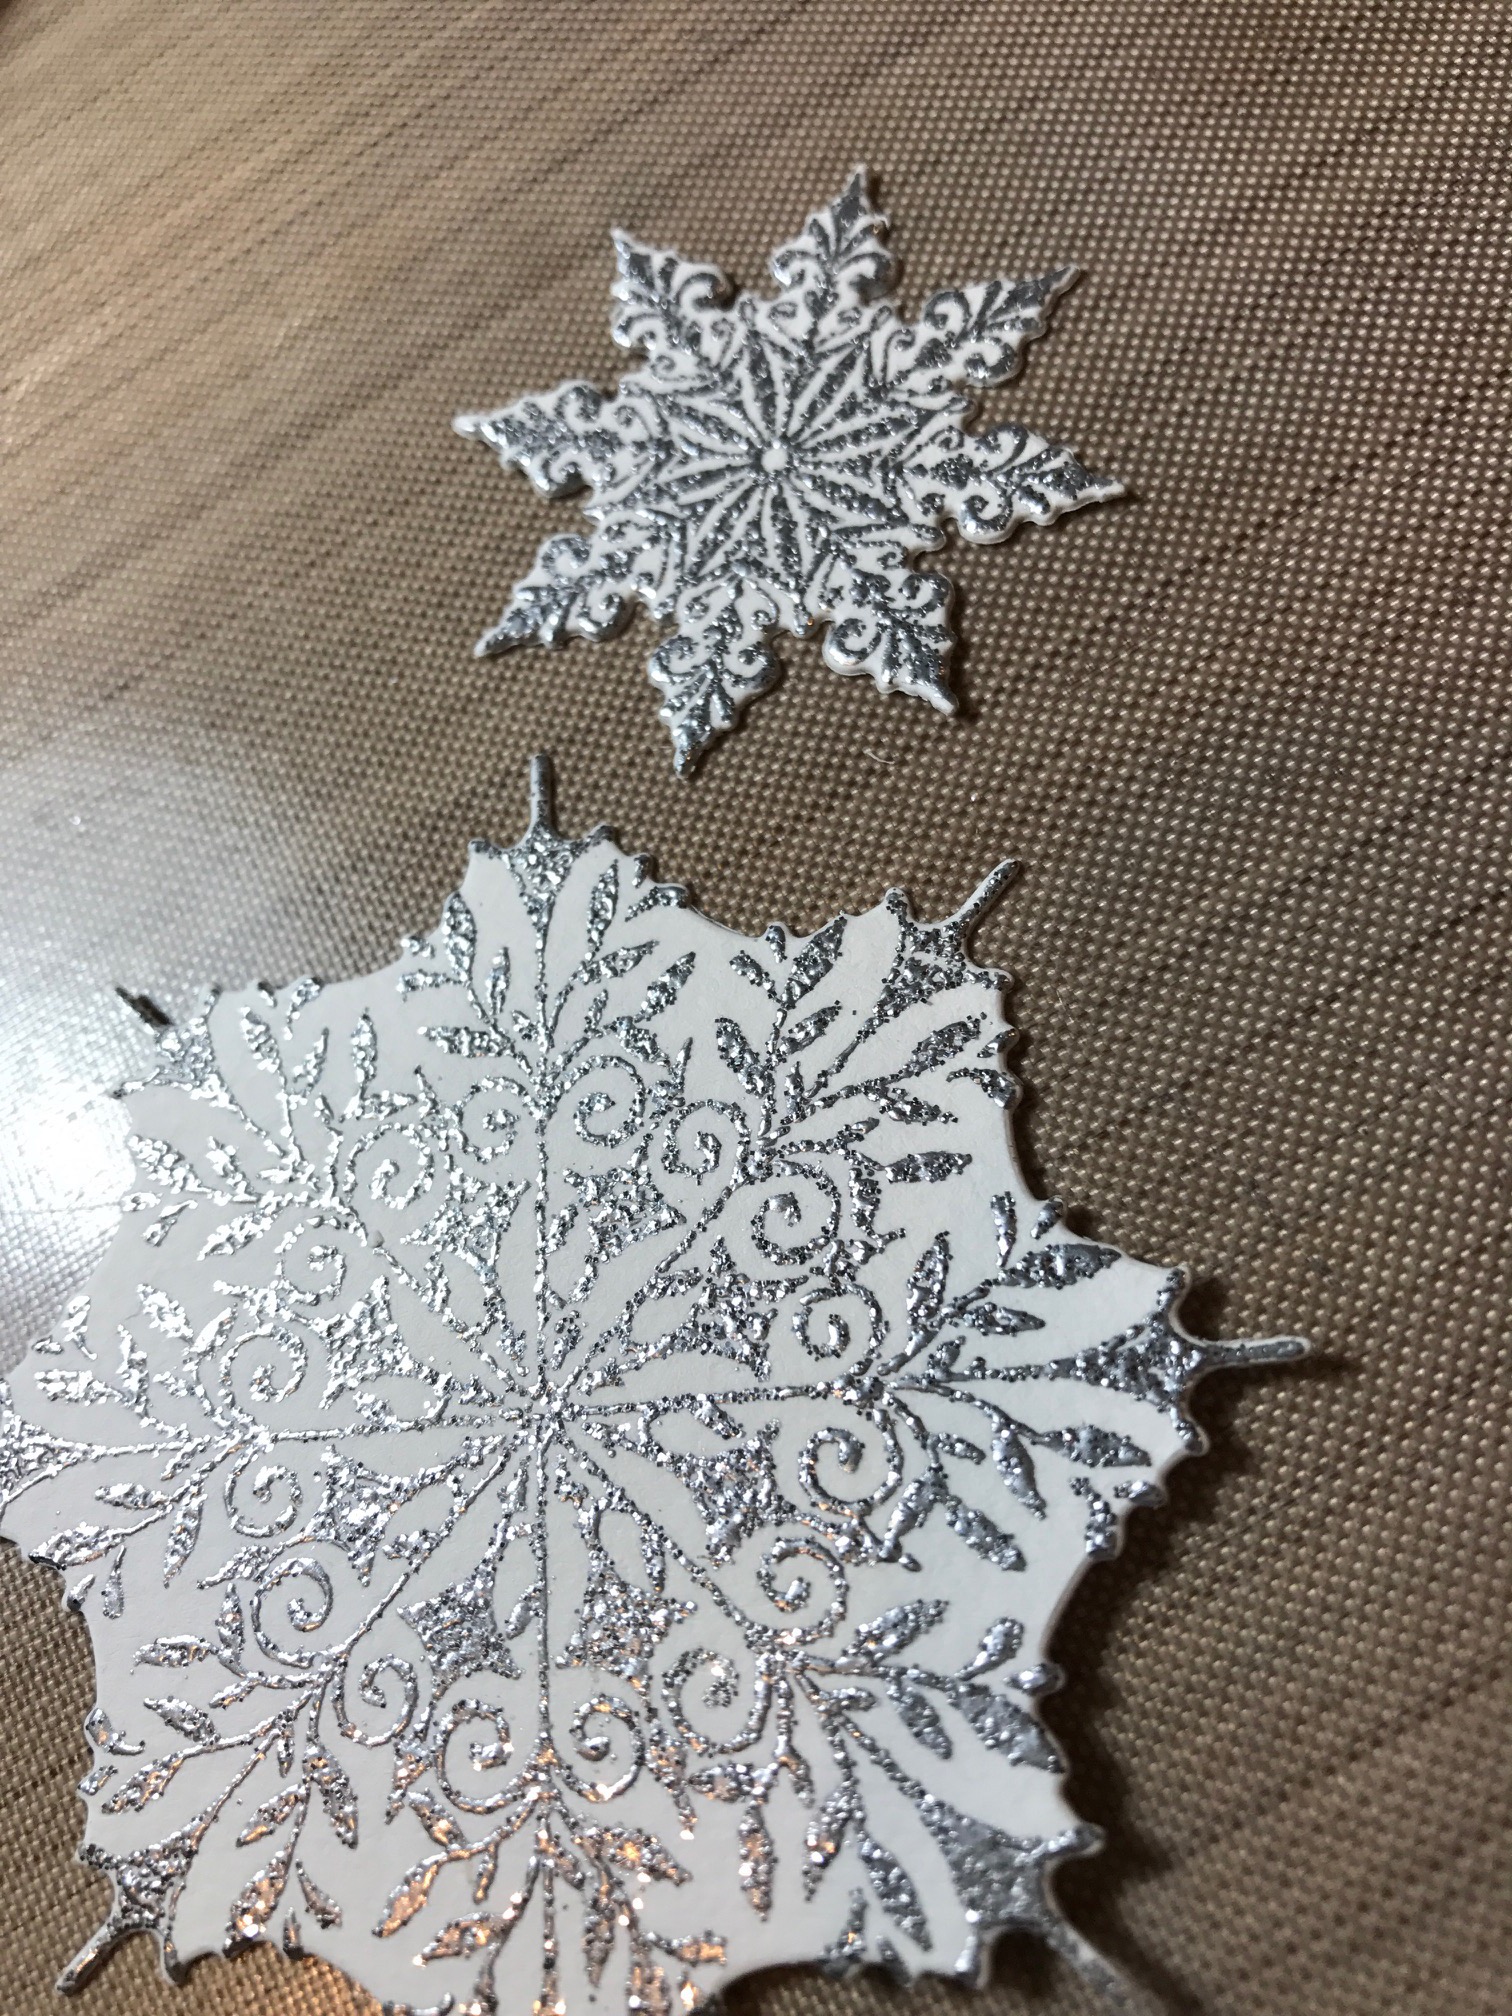
I stamped a small and large snowflake from the Tim Holtz/Stampers Anonymous Swirly Snowflakes and Mini Swirly Snowflakes Stamp Sets in Clear Embossing ink and embossed them with Silver Tinsel Embossing Powder. Then I cut them out with the Sizzix Swirly Snowflake Dies.
The large snowflake is for the base of the house and the small snowflake is for an embellishment to be pinned on the ribbon at the top.
Adhere the house together with Glossy Accents. Glossy Accents, in my opinion, is the best adhesive for adhering these type of projects together, its super clear, has a very fine tip and dries pretty quick, I like to hold the seams together for a few seconds/minutes and blow on it a little. I also think that the heat from your hands helps it to dry/set faster.
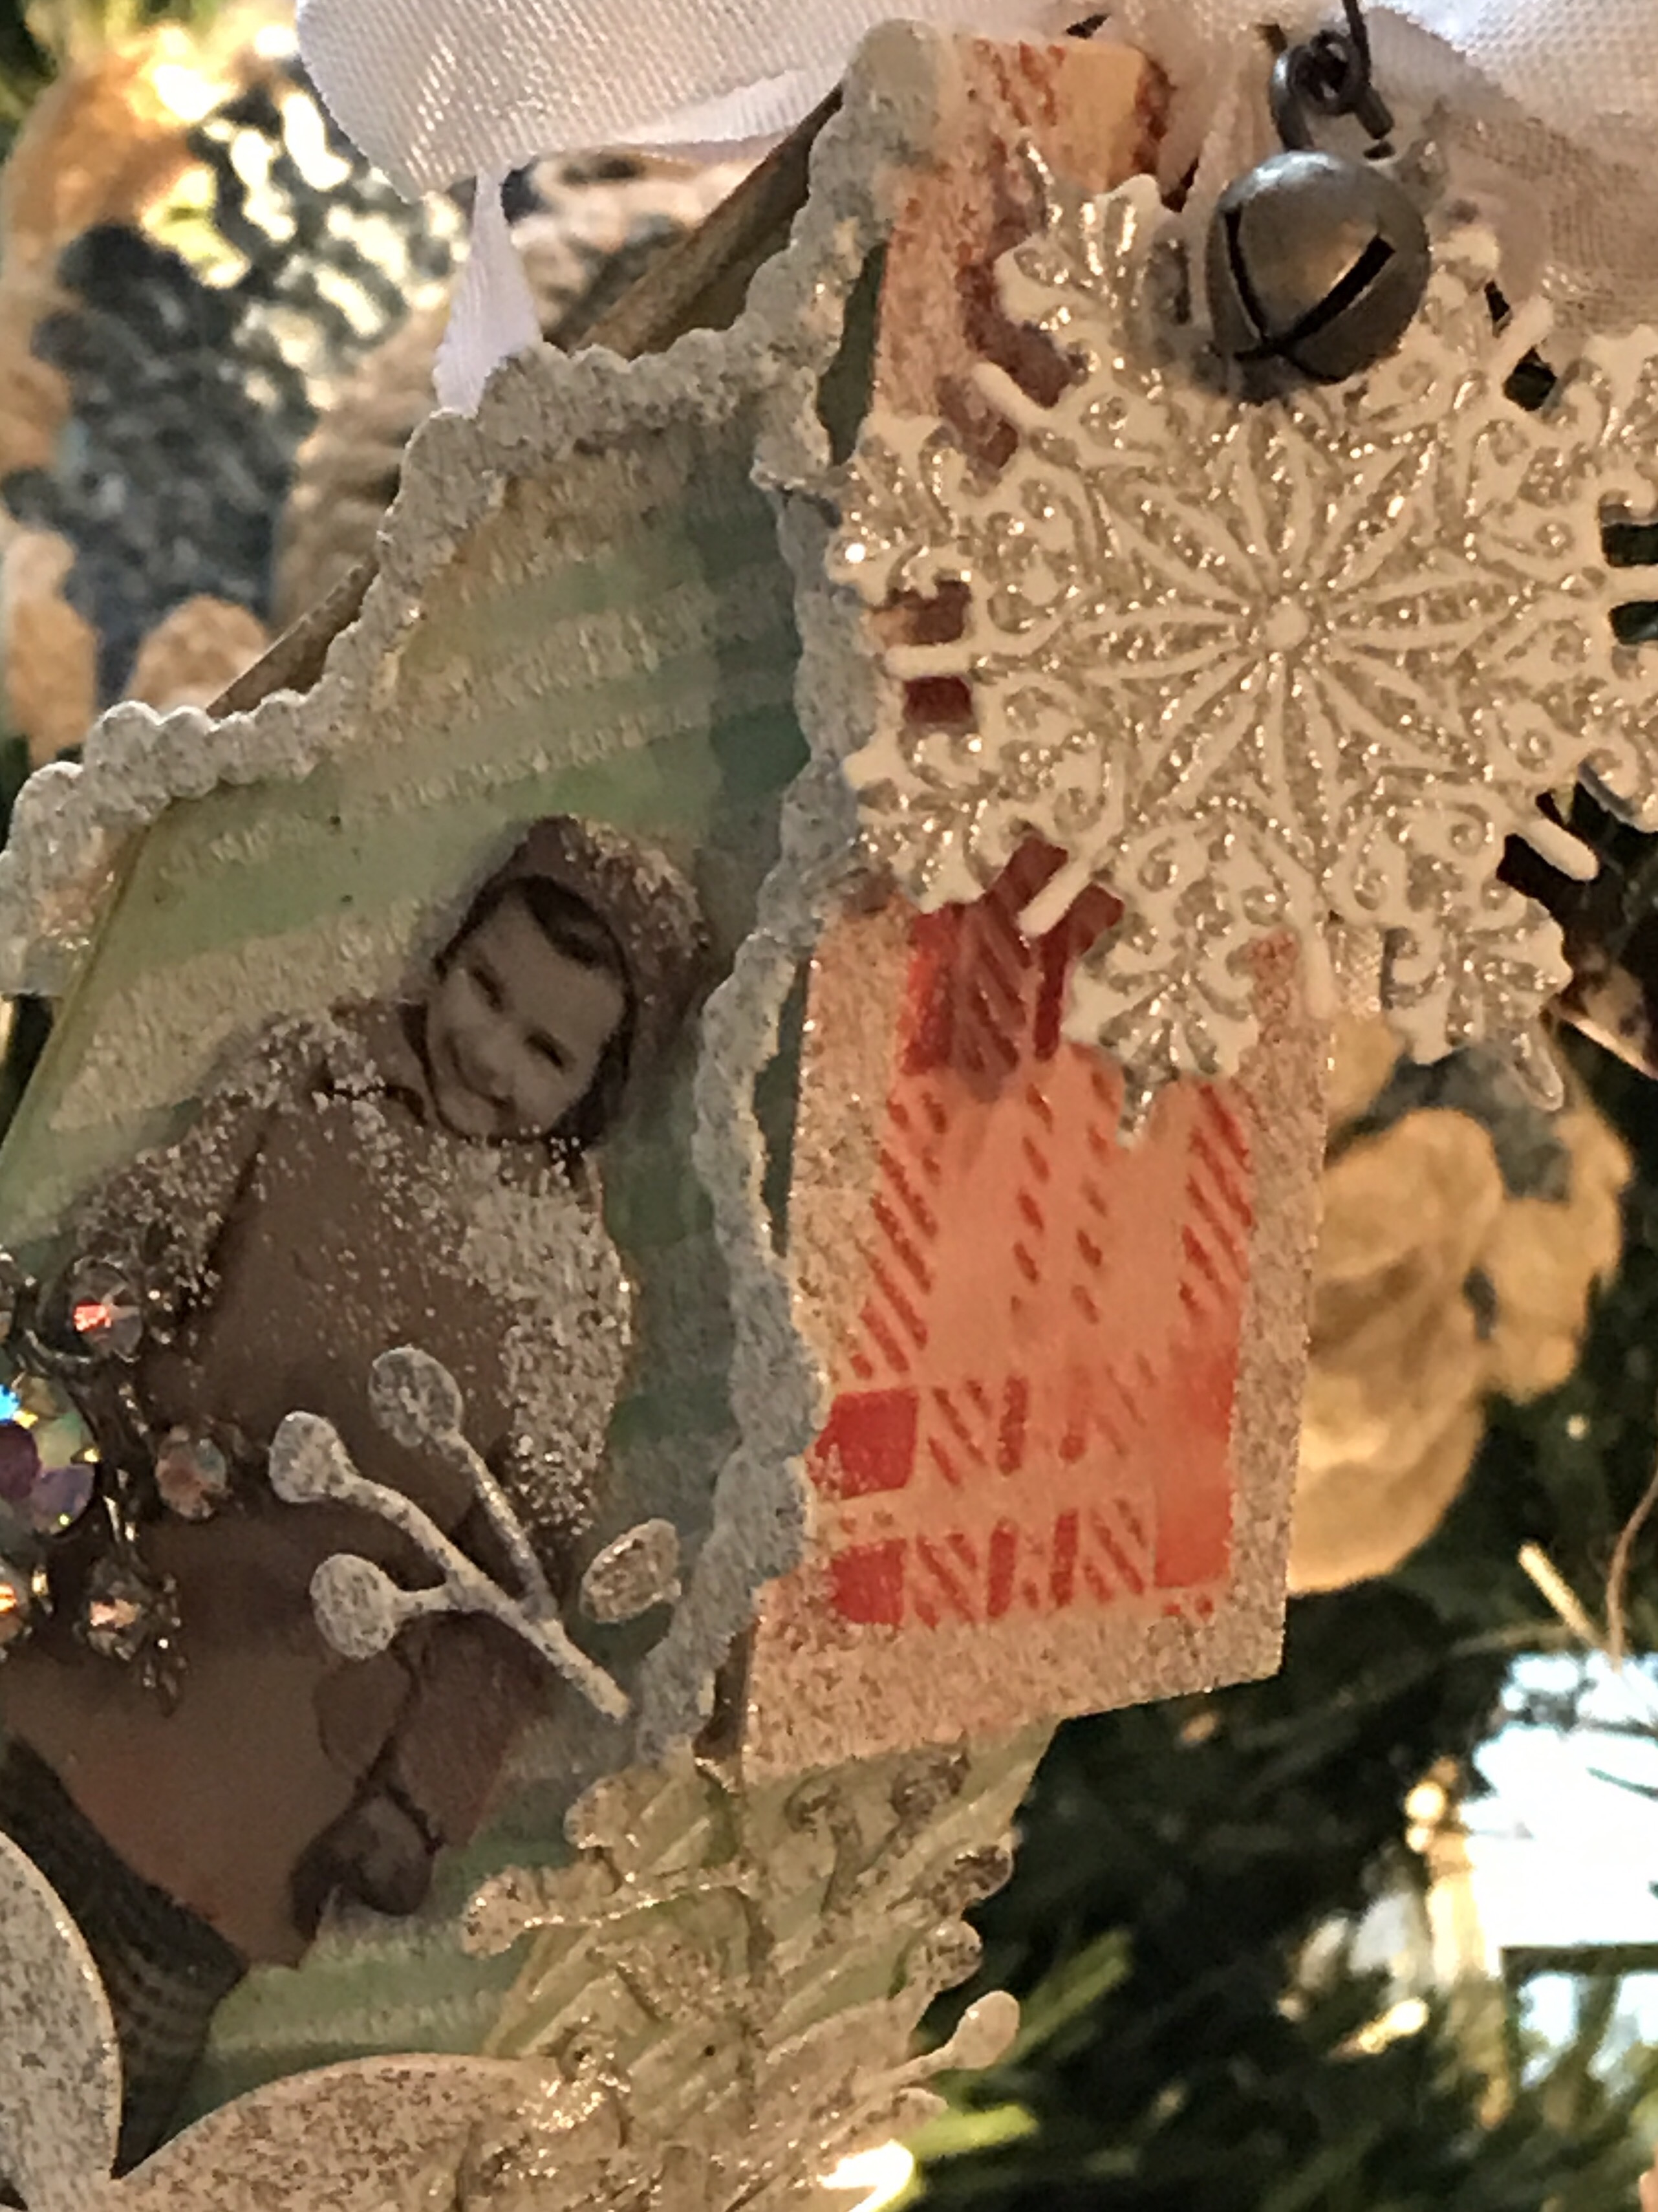
I punched two small holes in the top of the roof and threaded some crinkle ribbon through the holes before I adhered the roof. After that I added the Courtyard cutting. The courtyard piece is slightly curved around the front of the house and adhered onto both side of the house. the garland trim was them added to the front edge of the roof.

The greens were added to both the sides and back of the house and the large Swirly Snowflake was added to its base.
I found an old vintage earring, cut the back off, and hot glued it to the little girls hand.

I tied a bow at the top of the house and added a Tim Holtz/Ideaology small safety pin, jump ring, jingle bell and the small Swirly Snowflake for the ornament topper.
This was such a fun and easy project to make! The possibilities are endless…and it would make a great little gift.
Thank you so much for stopping by today!
Creatively Yours, Stacy
Gather Your Supplies –
Tim Holtz/Stampers Anonymous- Swirly Snowflake, Mini Swirly Snowflakes,
Layering Stencils/Mini Stencils- Mini Peppermint, Mini Plaid
Tim Holtz/Ranger-
Distress Oxide Ink- Cracked Pistachio, Candied Apple
Distress Ink- Distress Clear Embossing Ink
Distress Markers- Worn Lipstick, Peeled Paint
Distress Tools/Mediums- Texture Paste, Distress Sprayer, Craft Mat, Ranger Clear Embossing Powder, Glossy Accents, Heat it Heat tool, Blending Tools
Tim Holtz/Sizzix- Tiny Houses Die, Holiday Greens Mini Set, Courtyard, Village Christmastime Die Set, Swirly Snowflake Die Set
Tim Holtz/Idea-ology- Christmas Paper Dolls, Jingle Bells, Jump Rings, Safety Pins, Crinkle Ribbon
Surfaces- Canson Watercolor Paper
Other- Palette Knife, Recollections Sparkle Embossing Powder – Opaque Bling, Vintage Earring, 1/8” Hole Punch, Jewelry pliers, Wire Trimmers, Hot Glue Gun, Pop Dots


This is an absolutely brilliant way to use the Tiny House die and the garland from the new Christmas release. Every detail is wonderful!! I will be studying this post because I love to make little houses.
Thank you so very much, Lucy! I’m so happy you like it! I love the tiny houses as well and they are the perfect size for ornaments! ❤️ Be sure to stop back again!
~ Stacy ❤️
ah ha! I just ordered the Tiny House die last night! =D I love this, it’s so festive. =)
Awesome! Thank you, It’s a really fun die to play with! ❤️
~ Stacy ❤️
Squeal! I LOVE your ornament! The colors the glitter, the sparkle, the snow! Ooooh, I love it all! I originally purchased the house die to make Christmas ornaments, then never had time to do it. I’m inspired to make Christmas houses all year round! Thank you for your amazing inspiration!
Thank you so much, Sara!! I love that die…I had plans to make more ornaments this year with it but got sidetracked…hoping to make some in the new year for next year! Thank you for your kind words!
~ Stacy ❤️