Hello Friends!
I hope you are all doing well…I’m sorry it’s been a little bit since my last post. My family and I went on vacation for just over a week to visit family, and when we came home I had some major catching up to do around the house.
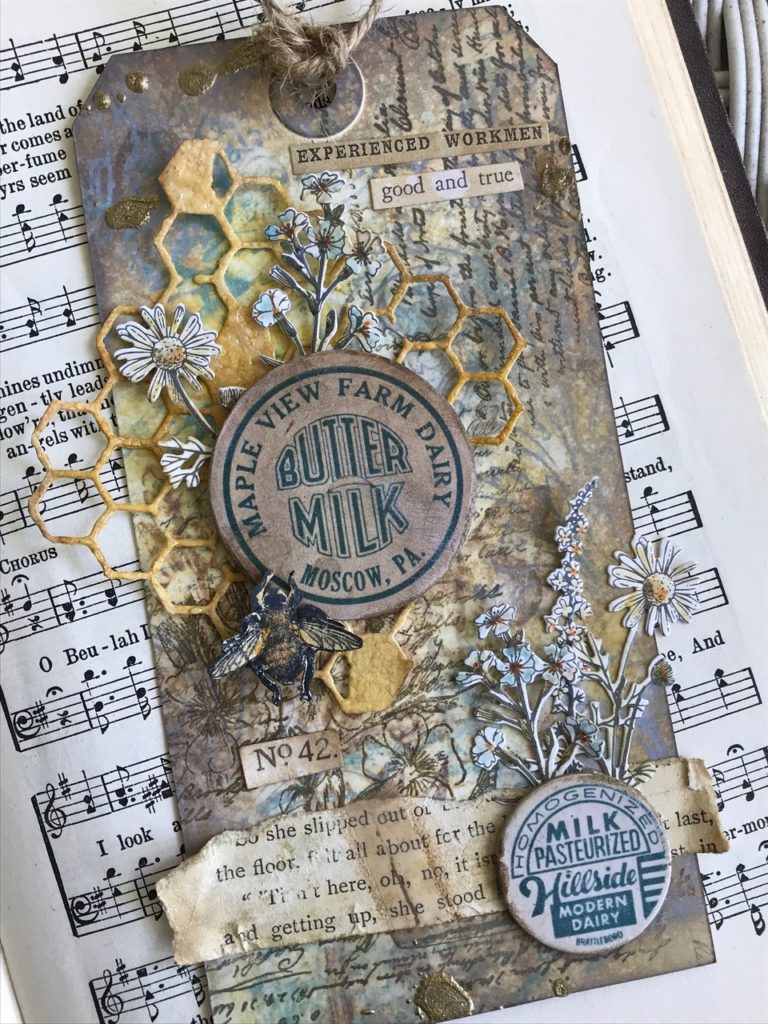
This tutorial is slightly based on my last post. I created this tag using the same Distress Oxide Smudging Technique that I learned at the Mega Meet. You’ll recall that I stood and watched Tim demo and this was one of the techniques he was showing. I’m kind of addicted to it right now, the effects are so dreamy… (be sure to pop over to that post to check out exactly how you get this background effect) You can press HERE to check it out!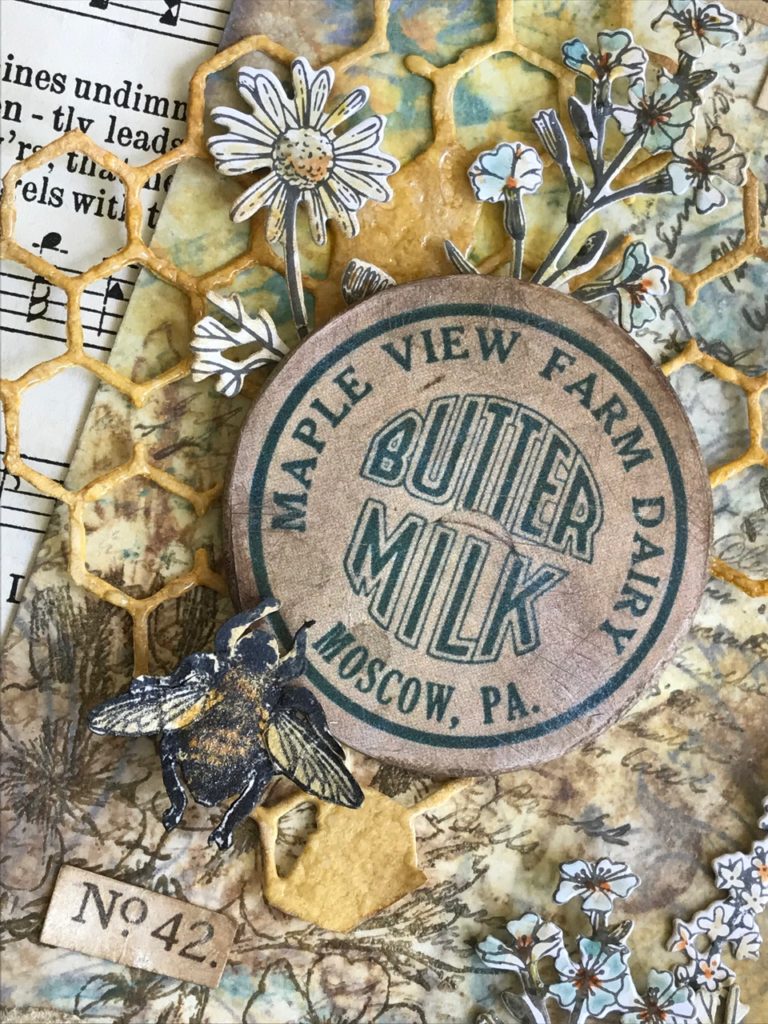

You’ll notice that I’ve been working on creating several bug and nature inspired tags and I am planning on using them in an upcoming project that I will be sharing with you in the near future…but for now, let’s create another tag!
First, I started by creating a background using the smudging technique and several Tim Holtz Stampers Anonymous Stamp Sets.
The stamp sets and distress oxide colors that I used for the background were… Papillon (CMS106), Fabulous Flourishes (CMS070), Entomology (CMS328), Illustrated Garden (CMS295), Tiny Things (CMS164)…Oxides colors – Fossilized Amber, Wild Honey, Evergreen Bough, Antique Linen, Forest Moss, Bundled Sage, Gathered Twigs, Shaded Lilac…
Whoa!!! I know what you’re thinking, “that’s a lot of stamp sets and colors my friend” and I may have gone a tiny bit crazy…but any combination of stamps sets or colors that you have would make a great background…that is the beauty of this technique! So play and create your own. 🙂
Actually, this tag almost ended up in the trash bin. I started out with too many of the yellow oxides and the combo just wasn’t talking to me, I decided to walk away from it one evening and by the next morning, I sat down and things just started clicking. Sometimes that is the only way it works for me. If I get too much in my head, it just doesn’t come together.
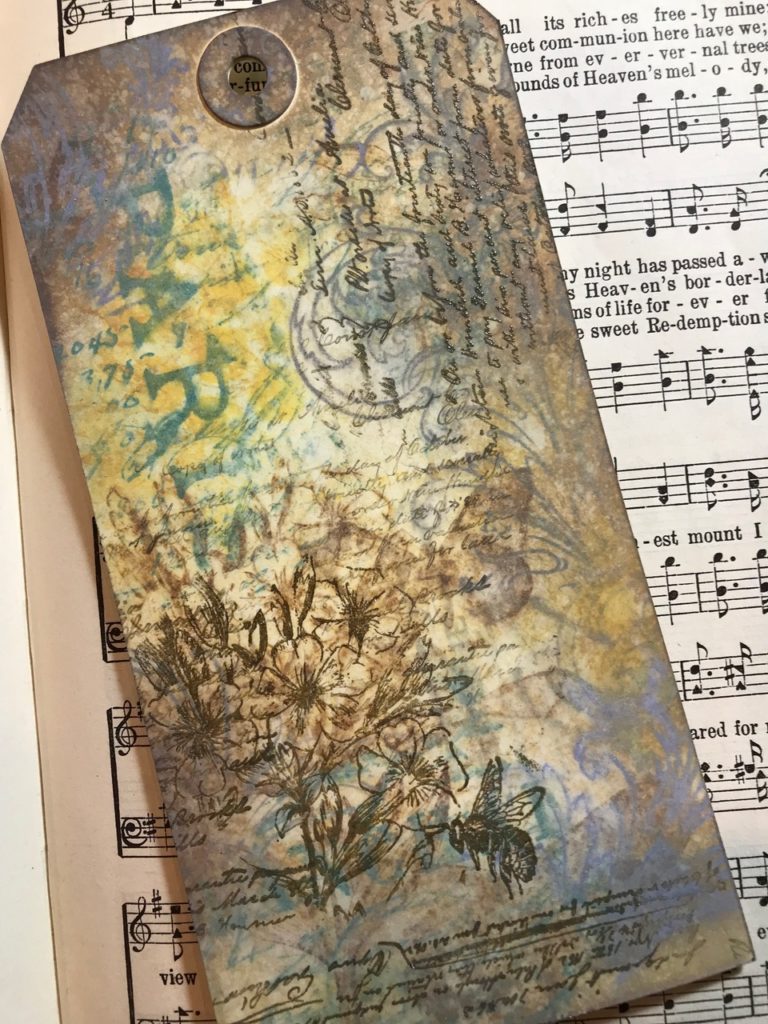

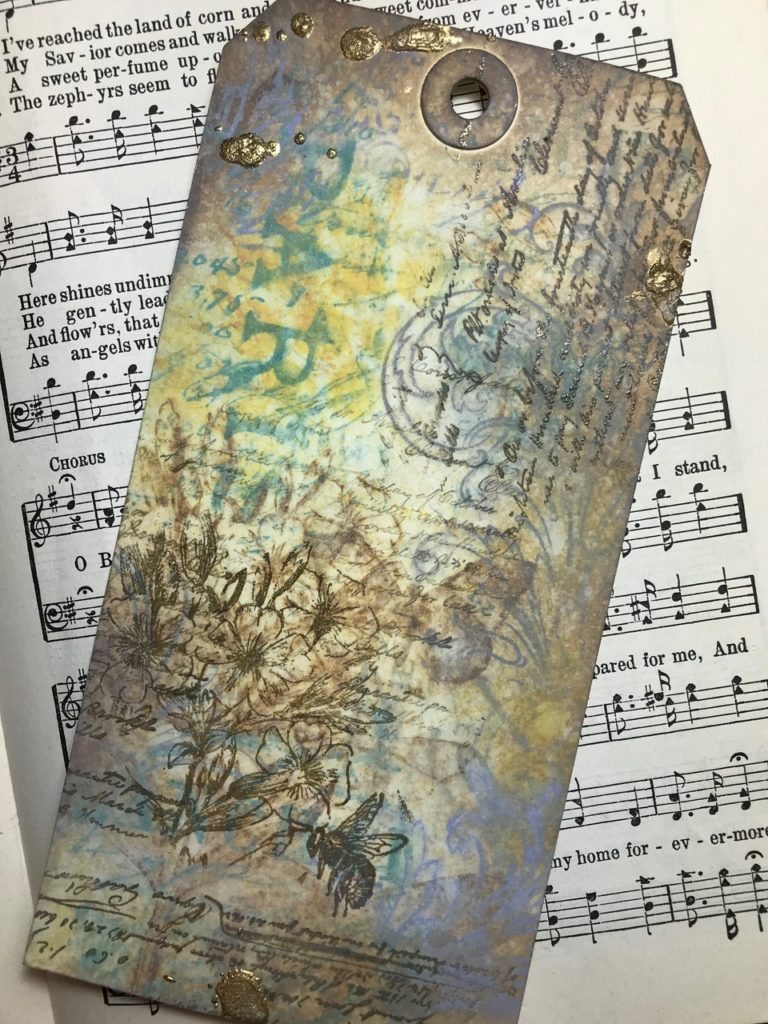
After my tag background was complete, I sprayed a couple drips of Distress Resist Spray onto the tag and sprinkled it with some Ranger Ink Gold Embossing Powder and set it aside to dry, then I heat set it with my heat gun.

For the Embellishments…
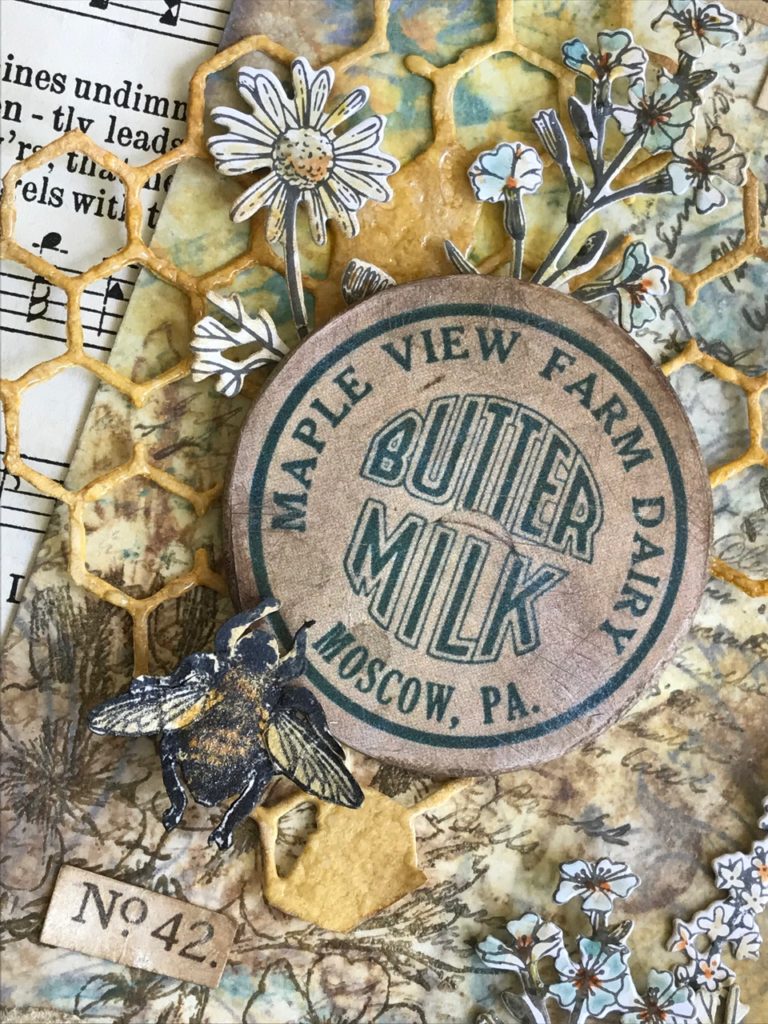
The Bee- I stamped a bee from the Entomology set with Black Soot Archival Ink and colored him with Distress Markers and a Clear Wink Of Stella marker. Then I fussy cut him out (fingers crossed that Sizzix will eventually come out with the Entomology Die Set, fussy cutting these little guys can be tricky) and set him aside.
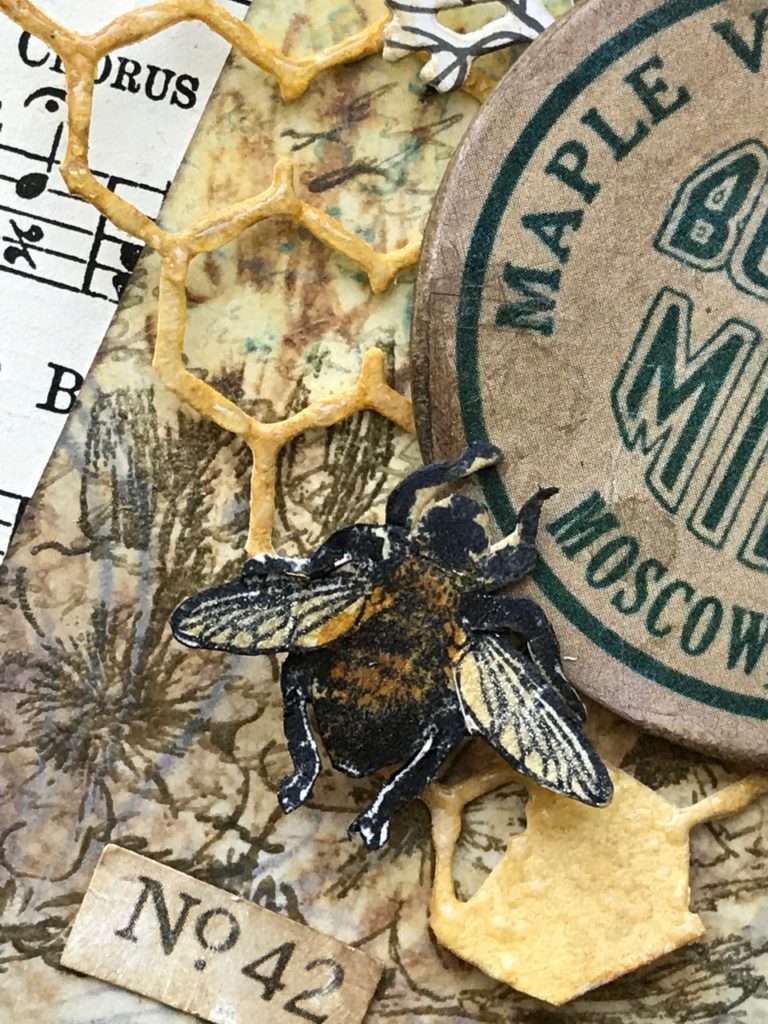

The Honeycomb – I dug through my scrap box and found a piece of watercolor paper that had been blended with a few different yellow and brown oxide inks, I cut it with the honeycomb die from the Sizzix Mixed Media Set.
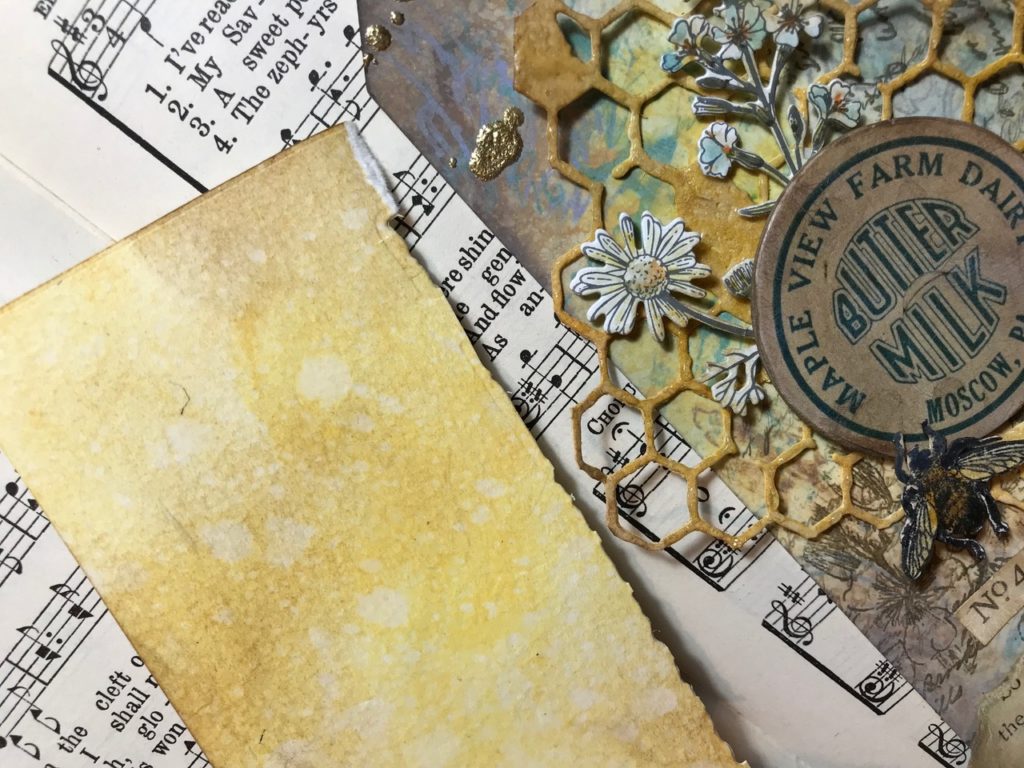

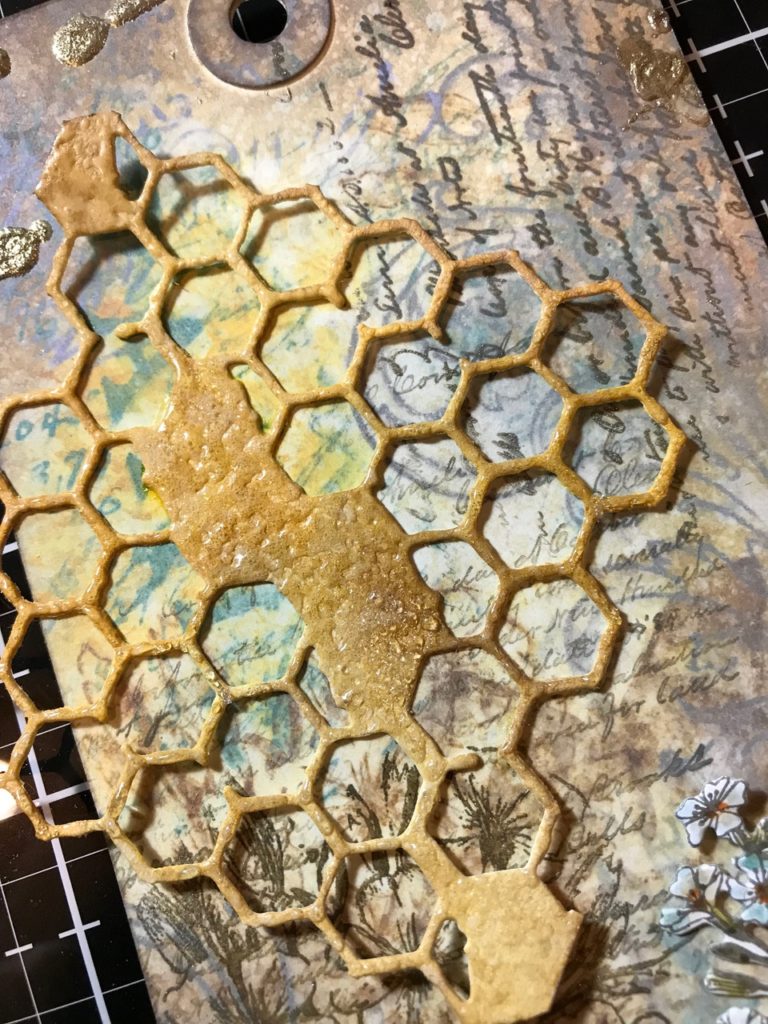
I then sprayed the honeycomb with Distress Resist Spray and sprinkled it with Emerald Creek Baked Texture Vintage Beeswax Embossing Powder, when it was dry, I heat set it with my heat gun.

The Flowers –
I stamped a few of the flowers from the Flower Jar Stamp Set with Watering Can Archival Ink onto Distress Specialty Stamping Paper. (I highly recommend this paper for these type of tiny detailed stamps. It really made a difference with the details and then cutting them out was a breeze.) I colored the flowers with distress markers and a detail water brush and then cut the flowers with the matching Sizzix dies.
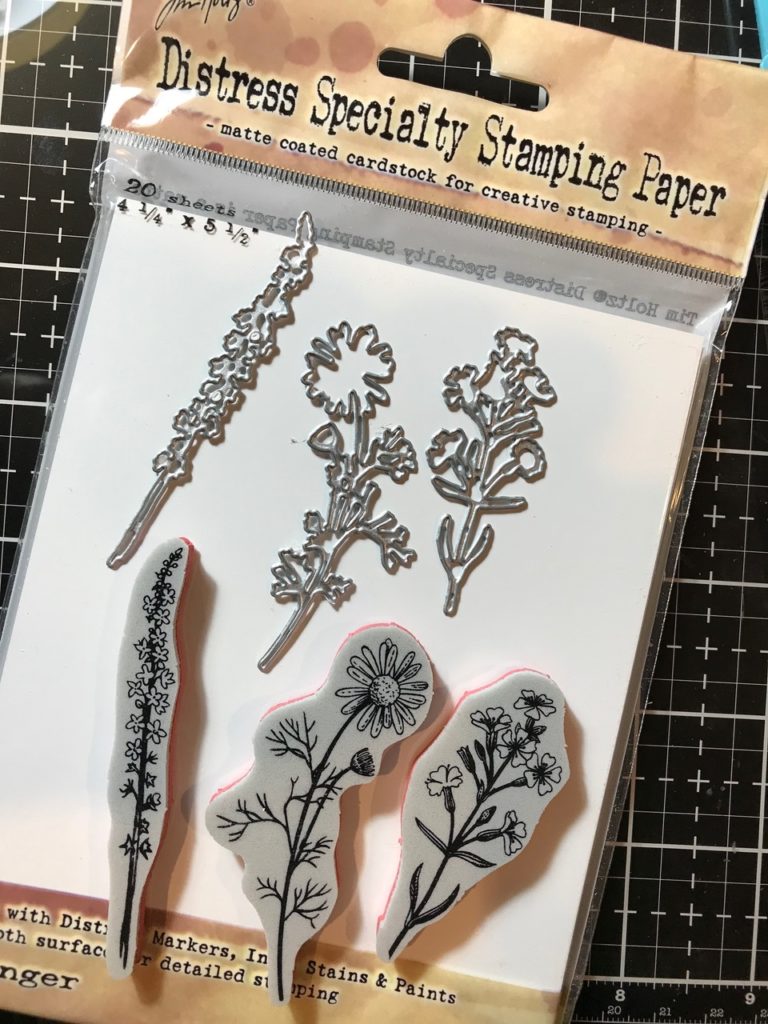

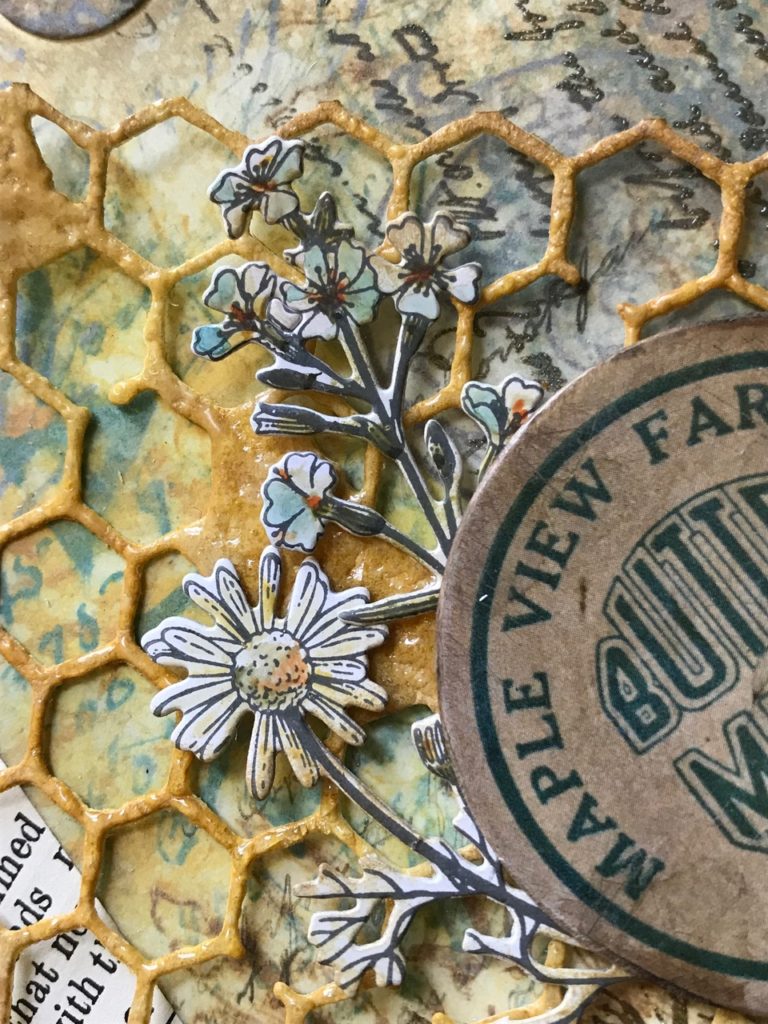

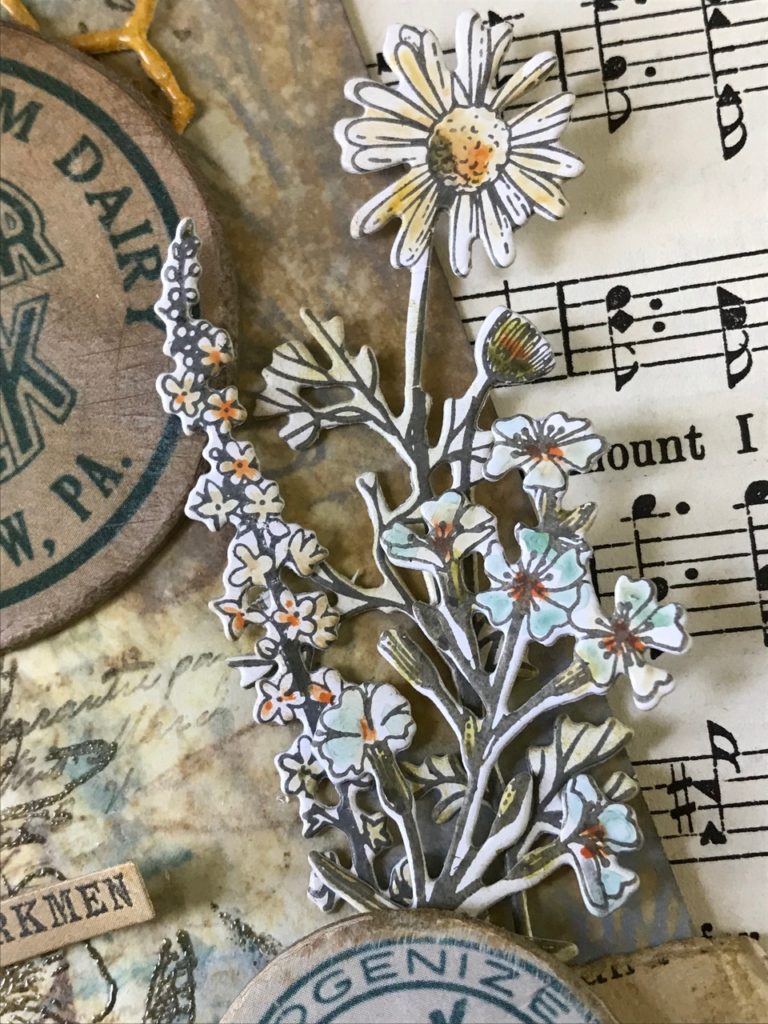

How amazing are these itty bitty tiny flowers!!??! I love them! The detail in each one of them is phenomenal! They may become one of my new Stamp Staples…thank you Zoe, her creations are what hooked me.
Check out her samples HERE and HERE, her projects are AMAZING!
The Idea-ology Milk Caps were distressed with my Sanding Grip and blended with a bit of Gathered Twigs Oxide Ink and Mushroom Alcohol Ink.
The Sticker Clippings were blended with a bit of Gathered Twigs Oxide Ink.

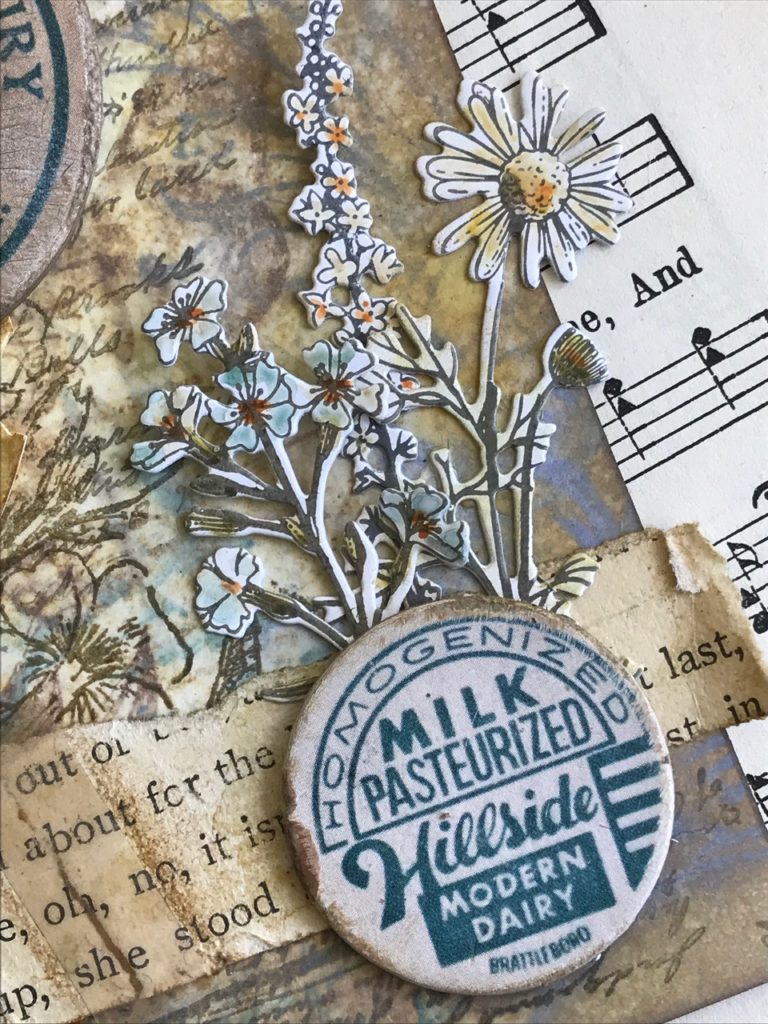

I tore a piece of book page from an old book and sanded it with my Sanding Grip…you’ll notice that there is a bit of tape on the book paper. It tore in half as I was sanding it, so a grabbed a piece of tape, cut it to a smaller width and with some brown archival ink and my finger, blended a bit of Acorn Archival Ink onto the tape to give it an aged look. I love when you see old tape on vintage ephemera and it has turned a slight brown/orange tint….A happy mistake 🙂
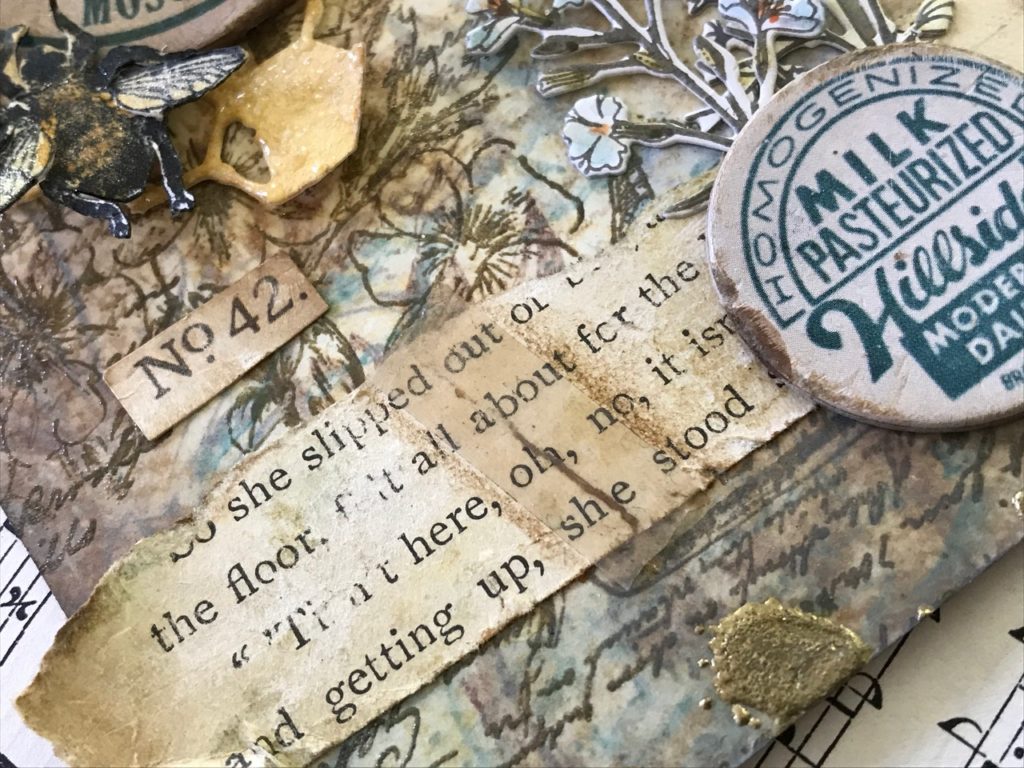

All of my embellishments were then adhered to my tag.


Thank you so much for stopping by today!!
Have a wonderful day!
Creatively Yours,
Stacy
What is an affiliate program, and why should I click on the link and buy through you?..
When you shop via the affiliate link on this blog, I receive a small commission, from the affiliate provider (Simon Says Stamp), at no extra cost to you whatsoever. These commissions help me to cover hosting fees and other costs to run my blog and be able to provide you with FREE inspiration. If you shop the links, THANK YOU! I truly appreciate being able to share my love of creating with you.
GATHER YOUR SUPPLIES –
Tim Holtz/Stampers Anonymous- Papillon (CMS106), Fabulous Flourishes (CMS070), Entomology (CMS328), Illustrated Garden (CMS295), Tiny Things (CMS164), Flower Jar (CMS297)
Tim Holtz/Ranger- Black Soot Archival Ink, Watering Can Archival Ink, Acorn Archival Ink, Mushroom Alcohol Ink, Gold Embossing Powder
Distress Oxide Ink- Fossilized Amber, Wild Honey, Evergreen Bough, Antique Linen, Forest Moss, Bundled Sage, Gathered Twigs, Shaded Lilac
Distress Markers- Various colors
Distress Tools/Mediums- Distress Water Brush Detail Tip, Distress Collage Medium, Distress Sprayer, Media Mat, Heat it Heat tool, Blending Tools, Distress Watercolor Paper, Distress Mixed Media Tag, Sanding Grip, Distress Resist Spray and Splatbox
Tim Holtz/Sizzix- Vagabond 2, Precision base plate, Flower Jar Set, Entomology, Mixed Media
Tim Holtz/Idea-ology- Milk Caps, Sticker Clippings
Other- Zig Wink of Stella Glitter Clear Brush Marker, Emerald Creek Baked Texture Vintage Beeswax Embossing Powder, Vintage book page scrap, tape, jute


Stacy, this is wonderful, you have such a beautiful way with your creations. I love the honeycomb tucked in. Those dainty flowers are special indeed! I am heading back to the smudge technique because I can’t figure it out for the life of me! Maybe the ink needs to be drier…who knows, all my attempts are a mess, while yours look amazing. Thank you for sharing your talents! Always such a treat! ~Ann xx
Hi Ann! Thank you as always for your kind and sweet comments! They mean so much to me! The smudging technique, have you tried by starting with one color, smudging that with a clean dauber then moving on to another stamp and color, then smudging that? I hope that helps a bit…I know it can look a bit messy at first but with a little practice it will work 🙂 Thank you again for stopping by! Hugs! ~Stacy
thanks so much for the tip! Definitely going to try, and otherwise hope he does it on Ohio! Hugs Stacy! x
You are so welcome, Ann! ❤️
Gorgeous tag…love the bee and honeycomb…always special!
Thank you so much, Deb! I’m so happy you like it! ~Stacy
Gorgeous Stacy. Love all the layers. Thanks for sharing your creativity xx
Hi Christina! Thank you so much for the kind comments, you are always so sweet! Hugs! ~Stacy
So glad this tag didn’t wind up in the bin! I love the bugs you’ve been using.
Hi Jess! I know…that wouldn’t have been good! I’m so happy you stopped by to check it out…the bugs are so much fun! Thank you my friend! ~Stacy
what a great tag Stacy! I’m not sure if I had that flower die set so I had better look! This is fantastic!
Hi Paula!! Thank you, you, not have this set of dies? I hope you found them! Thank you as always for stopping by and your kindness! ~Stacy
This one really speaks to me… Nicely done!
Hi Beulah!! I am so glad that you like it! It’s funny, When I opened the old hymnal that I used as background for the photo, the title of the hymn was “Beulah Land”, so I thought of you and of course the bee too!! How neat is that! I’m so thrilled that it spoke to you. Thank you for stopping by! ~Stacy
I’m a firm believer that you can take any of the Distress Ink colors, put them together and they look like a million. I’m so glad you’re back! I just love your work.
Hi Betsy! I think you are correct! The Oxides are pretty amazing and they totally do blend with one another…MAGIC! and I’m so happy that you’re glad I’m back! Hugs! ~Stacy
This is such a wonderful piece. I love all the little tiny details and the way you’ve used so many different medias and techniques. I will certainly be giving this project a try on an ATC six-drawer storage chest – I think it will look fabulous on it!
Of course, now I need to make a few purchases, especially that little flower die set and the beeswax embossing powder – love those.
Thanks for sharing and inspiring. – Kriss (The Old Raven)
Hi Kriss! That sounds like an AWESOME project! What a great idea! Thank you for the kind words and for stopping by today! Hugs! ~ Stacy
Thanks! And thanks for sharing your great posts every week!
Thank you so much for stopping by and checking it out! ~Stacy
This is a great project Stacy! Such lovely texture and wonderful ideas I can’t wait to try.
Hi Pamm! Thank you! I’m so happy that you’re going to give it a try…it is such a fun technique! Thanks for stopping by! Hugs! ~ Stacy
I love this! Thank you for sharing :).
Thank you, Rebecca!! ❤️
Stacy this tag is out of this world! This inspired me to no end. I am totally going to have a go at this technique as I love the look. Thank you for sharing your how to. I absolutely adore it. Hugs from Holland
Freddie
Hi Freddie! I’m so glad you stopped by…and happy that you like it! You are always so sweet and your words mean so much! Hugs my friend! ~Stacy ❤️
I absolutely love the tag, especially the background! I have tried the technique you mentioned with sort of disastrous results…. But after viewing your newest creation, I’m trying again! Your projects are such an inspiration. The finished tag is totally awesome. Thank you for sharing your talents.
Hi Nancy! Yes, give it a try again! You’re sure to get it! I’m so happy that you like the tag and thank you for the kind words! ❤️
How lovely and creative your tag is! I never knew what to do with those milk caps and woo -la! Now I do! hehee
Thank you for the inspiration and sharing your steps-really beautiful!
Jackie xx
Thank you so, so much, Jackie…those milk caps are FUN!!! Hope you have a great day and thanks for stopping by! ~Stacy ♥️
I really like your tag A Worker Bee …Good and True, I’m having trouble determining what die cut you used for the honey comb, can you send me the product#, die#?
Hi Lori! Thank you, yes, it’s the Sizzix Tim Holtz Mixed Media Die Set…it has 4 different background type dies in it. Hope that helps and thanks for stopping by! ♥️
Wow!! I just love anything yellow/gold you make! And the flowers – perfect!