Hello there and happy Wednesday!
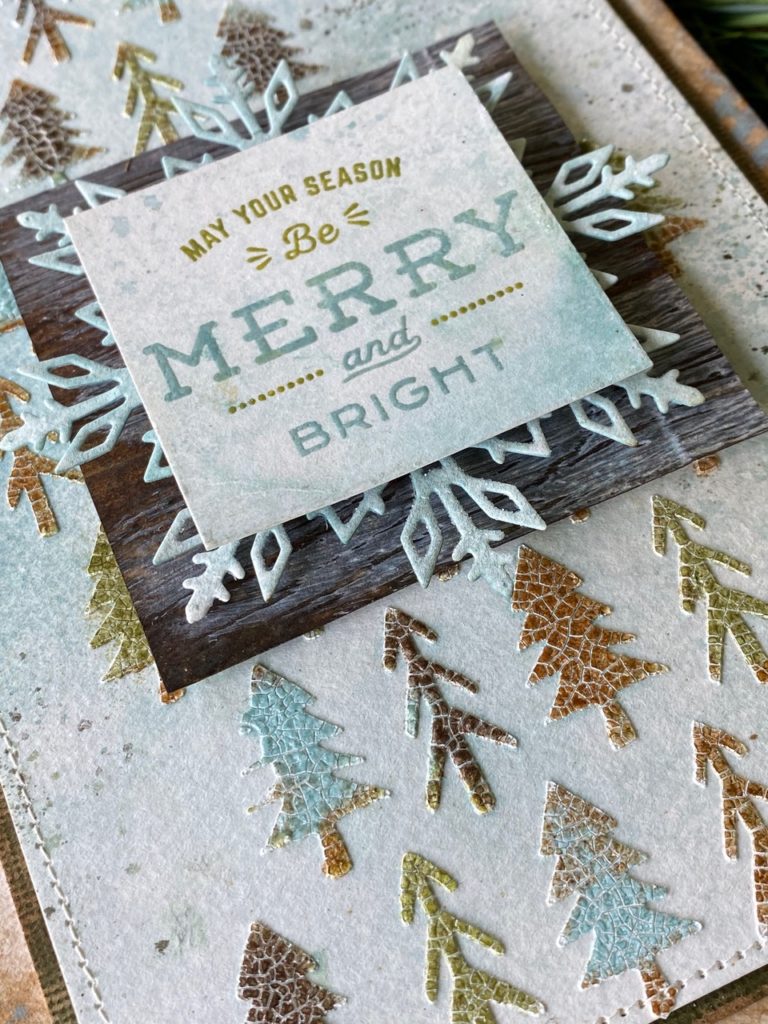
I am back today with the 4th and final example card that I created for the new Distress Color, Speckled Egg. Tim introduced the new color a few weeks ago on his Facebook Live. Speckled Egg is such a beautiful color and is perfect for not only spring and summer..but also, winter!

I used it with a few other colors of the Distress Embossing Glazes by sprinkling it on some Distress Crackle Paste that had been applied through the Pines Layering Stencil THS096 with a palette knife. The colors combined together created an icy wintery look, perfect for Christmas!
So, let’s get to it!
I applied Distress Crackle Texture Paste onto a piece of Distress Watercolor Paper through the Pines Laying stencil using a palette knife.
I sprinkled the wet texture paste with Speckled Egg, Walnut Stain, Vintage Photo, and Peeled Paint glazes. I used this same technique in the tutorial that I shared entitled “Use Your Wings”.
Simply sprinkle the wet texture paste with little pinches of the colors, then tap the underside of the paper to distribute the powders, then tap off any excess.
Set the paper aside until dry, then heat emboss with an embossing gun.

Here’s a little close-up of them before they were embossed.

and the crackly goodness after…yum, I love crackle!!
You might notice that the little fragments of trees that were on my paper are removed on my final card. I removed them after the trees had dried, but before they had been embossed. I simply used a exact-o knife and gently scrapped them off.
Viola! the perfect tree background!
The crackled pines background was spritzed with water then both the regular and oxide Speckled Egg sprays then dried. Then the paper was dipped into some Walnut Stain Ink that had been smooshed onto a craft mat and spritzed with water to create tiny droplets ink. The paper was then dried with a heat tool.

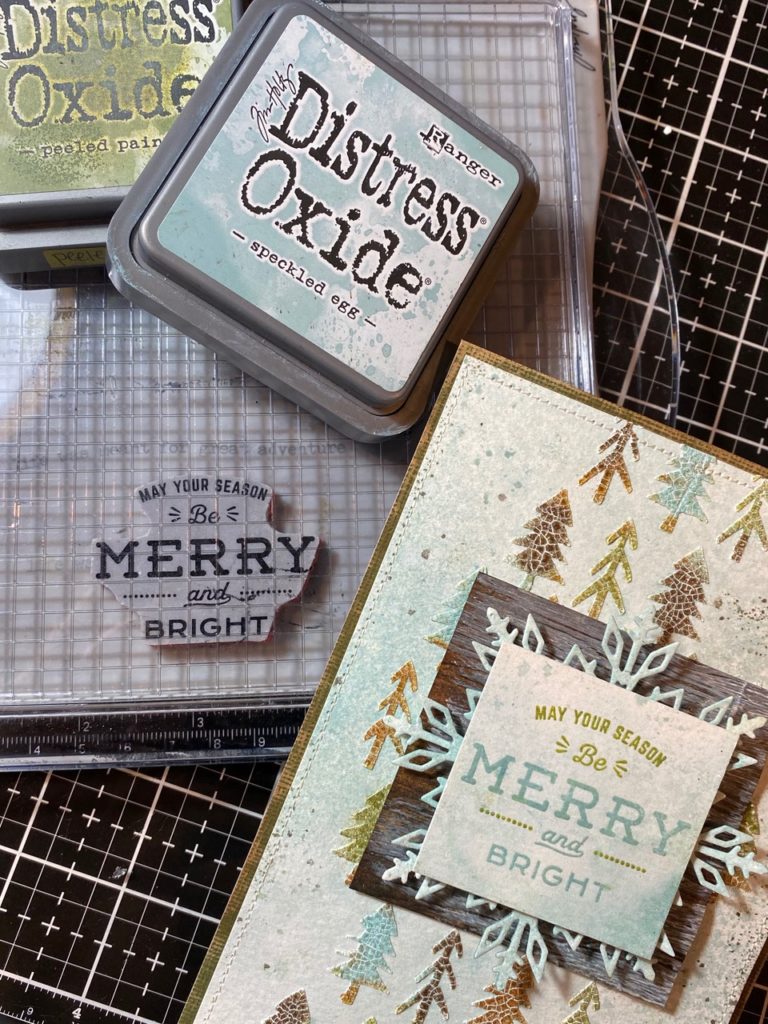
The greeting came from the Festive Overlay Stamp Set CMS357.
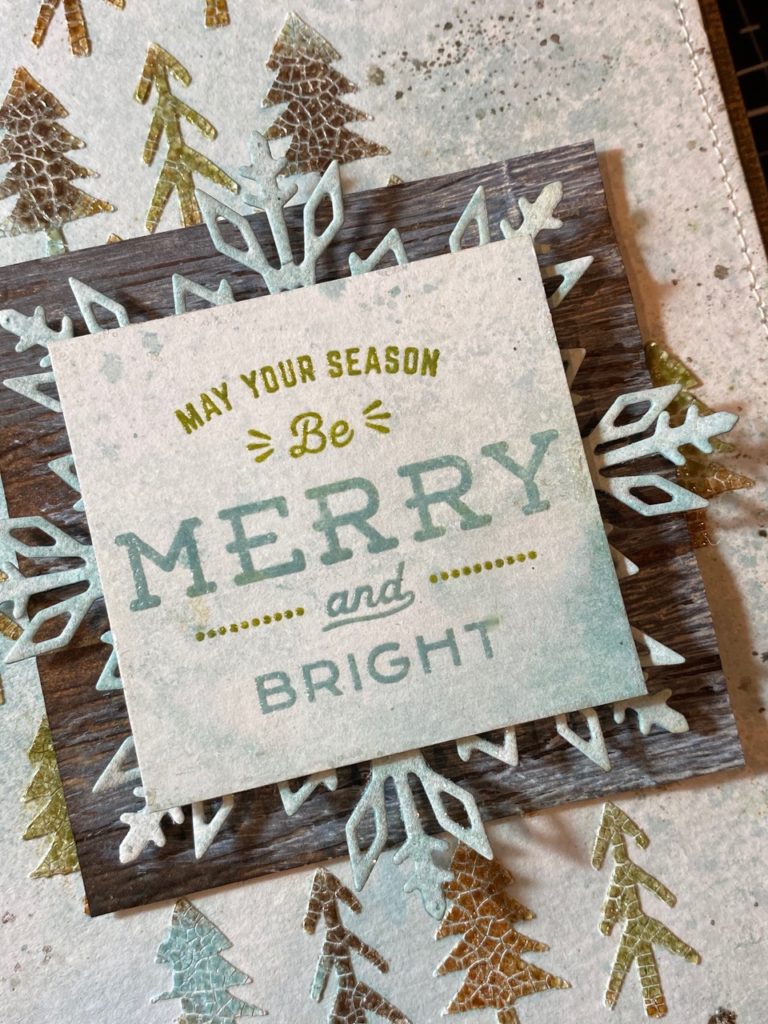
I stamped the phrase using both Speckled Egg and Peeled Paint Oxide Inks by using my stamp platform.
I added the peeled paint oxide ink onto the “may your season be” and the dots next to the “and”, then it was stamped onto the paper. I left the paper in place then cleaned off the stamp, then I added Speckled Egg oxide ink onto the rest of the phrase.
I removed the paper from the platform, then sprinkled the entire phrase with Clear Embossing Powder then embossed it with my embossing gun.
The phrase was then blended with Speckled Egg Distress Ink.
I cut a piece of paper that had been embossed with the 3D Lumber Texture Fade. The lumber paper was spritzed with both water and Walnut Stain Spray Stain.
I cut a snowflake out of watercolor paper using the Flurry 2 thinlet, spritzed it with Speckled Egg Spray Stain, then spritzed the snowflake with Resist Spray and sprinkled it with some Clear Rock Candy Glitter.
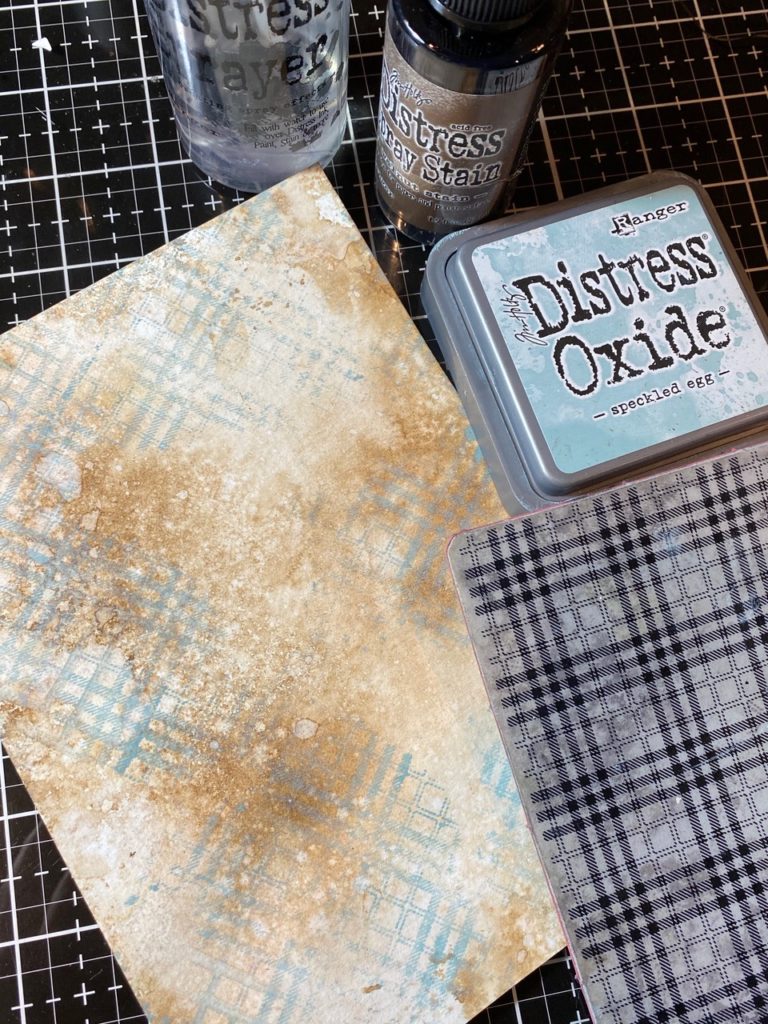
I spritzed a piece of watercolor paper with water and some Walnut Stain Spray Stain, dried it with my heat tool, then randomly stamped the Speckled Egg Oxide ink using the Perfect Plaid Background stamp CMS383. I spritzed the paper with water to activate the oxide, then dried it with my heat tool again.
I stitched around the pine layer of the card, layered them pieces together and adhered them with both foam tape and adhesive.
With that..my card was complete.

Thanks so much for stopping by today, have a great rest of your week!
Creatively Yours,
Stacy
What is an affiliate program, and why should I click on the link and buy through you?..
When you shop via the affiliate link on this blog, I receive a small commission, from the affiliate provider (Simon Says Stamp), at no extra cost to you whatsoever. These commissions help me to cover hosting fees and other costs to run my blog and be able to provide you with FREE inspiration. If you shop the links, THANK YOU! I truly appreciate being able to share my love of creating with you.
Gather Your Supplies-
Tim Holtz/Stampers Anonymous- Pines Layering Stencil THS096, Festive Overlays CMS357, Perfect PlaidsCMS383
Tim Holtz/Sizzix- Flurry 2, 3D Lumber Texture Fade, Vagabond
Tim Holtz/Tonic- Stamp Platform, Tonic Guillotine Paper Trimmer, Tonic Shears
Tim Holtz/Ranger-
Distress Sprays- Speckled Egg Spray Stain and Oxide Spray, Walnut Stain
Distress Ink- Speckled Egg Ink and Oxide, Walnut Stain, Peeled Paint Oxide
Distress Embossing Glaze- Speckled Egg, Peeled Paint, Vintage Photo, Walnut Stain
Distress Tools/Mediums- Distress Sprayer, Media Mat, Heat it Heat Tool, Blending Tools, Distress Collage Matte Medium, Foam Tape, Distress Watercolor Paper, Hickory Smoke Archival Ink
Other- Sewing Machine, Thread


Oh Stacy- this is absolutely wonderful ! I’d just started planning out some Christmas cards and this popped up ! Your creativity knows no bounds ! Thank you and keep making, as TH would say. 🙂
What can’t you do!? I absolutely love your style and appreciate your blog so much! For an idea challenged, wanna-be-maker like me, having folks like you share your ideas is so inspiring! Having such a detailed blog is icing on the cake! Thank you, as always, for sharing! You ROCK!!
Absolutely stunning!!! Your creativity always amazes me Stacy! Love how you created the background and all the layers makes for an elegant Christmas card. Love it!
absolutely awesome card! Love the colors you chose and the great background!
This effect is stunning for a winter scene. Can you clarify how to apply the crackle after you have used the glaze? Thank you for your inspiration, you are a creative genius!!
I’ve been making some Christmas cards lately so I really appreciate the inspiration. Seeing what you did on this card — and how you did it — has sparked an idea I could try with the supplies I have! There’s a card drive I participate in at Christmas and I struggle to come up with card ideas that lean a bit more masculine but can also be gender neutral. This one fits the bill!! Thank you so much for sharing.
Looks life a fun card to make several of using different Christmas stencils…need to crack into my glazes…don’t know what I am waiting on…LOL…OH! I know, I am waiting on HALLOWEEN!!!!!! makes…………..LOL…just the best stuff!
Simply stunning! I love the crackled trees!
Okay, this stuff is way cool! I have never used any embossing glaze and I didn’t realize it was a powder. That’s FANTASTIC stuff! I love your step by step, I always learn so much from you. THANK YOU!
I love the new distress color so much and I absolutely loved how you used it for Christmas cards. Your technique sharing is superb. Thanks so much!
Although I don’t like to think of Christmas yet, this card truly is my jam. LOVE the colours you chose and everything about it. I can’t wait to get my Speckled Egg Oxide and Glaze. I want some more glazes too, but gotta save my nickels. Thanks for sharing this one Stacy it is gorgeous.
You did it again! Another beautiful card with amazing techniques that I would not have thought of for the world.