Hello there and happy Friday!
I am back on my blog today with a technique that I discovered while creating a card for my dad for father’s day…
While gathering supplies I came across a package of the new Tim Holtz Leather paper. I wondered if I could make a background that looked like the embossed leather spines of some of the vintage books that I collect… and I’m so excited because it worked, I just had to share.
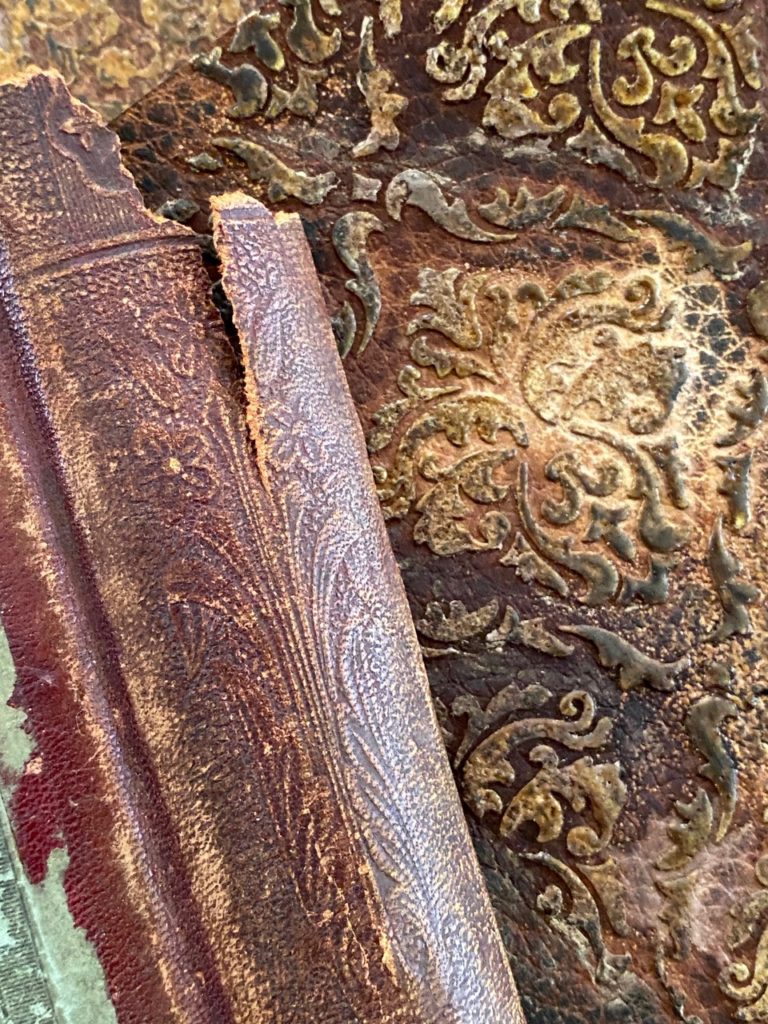
So, here is the spine of the book that inspired the technique, right next to the backgrounds that I created.
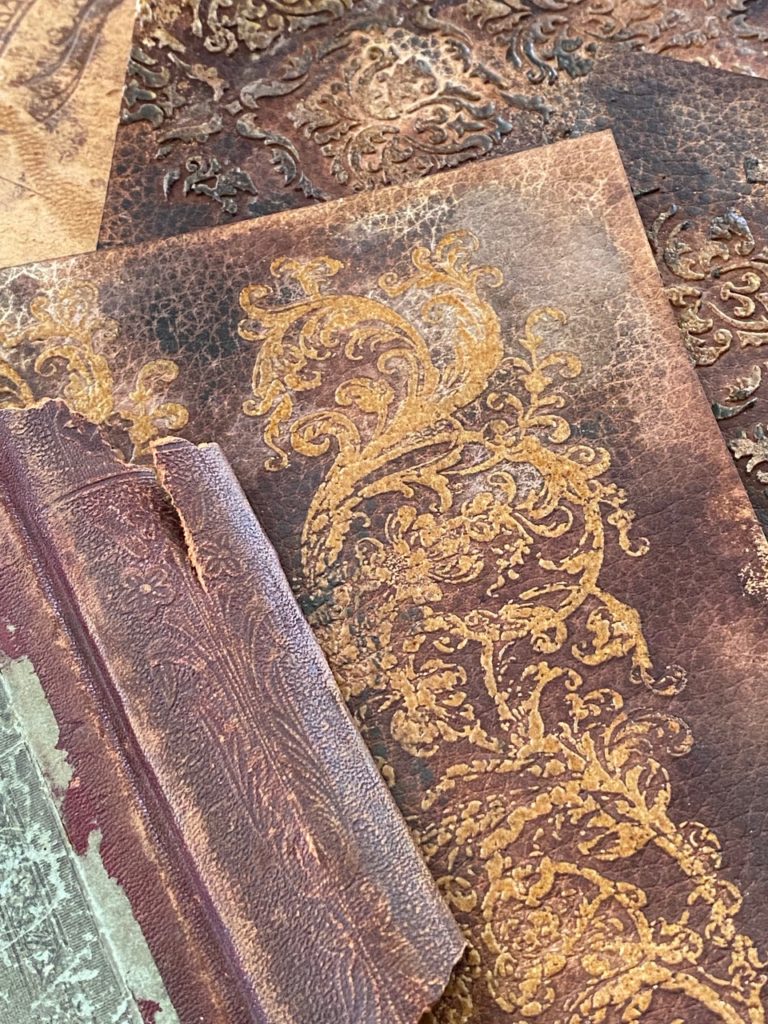
Isn’t it COOL?! It totally looks like vintage embossed leather 🙂
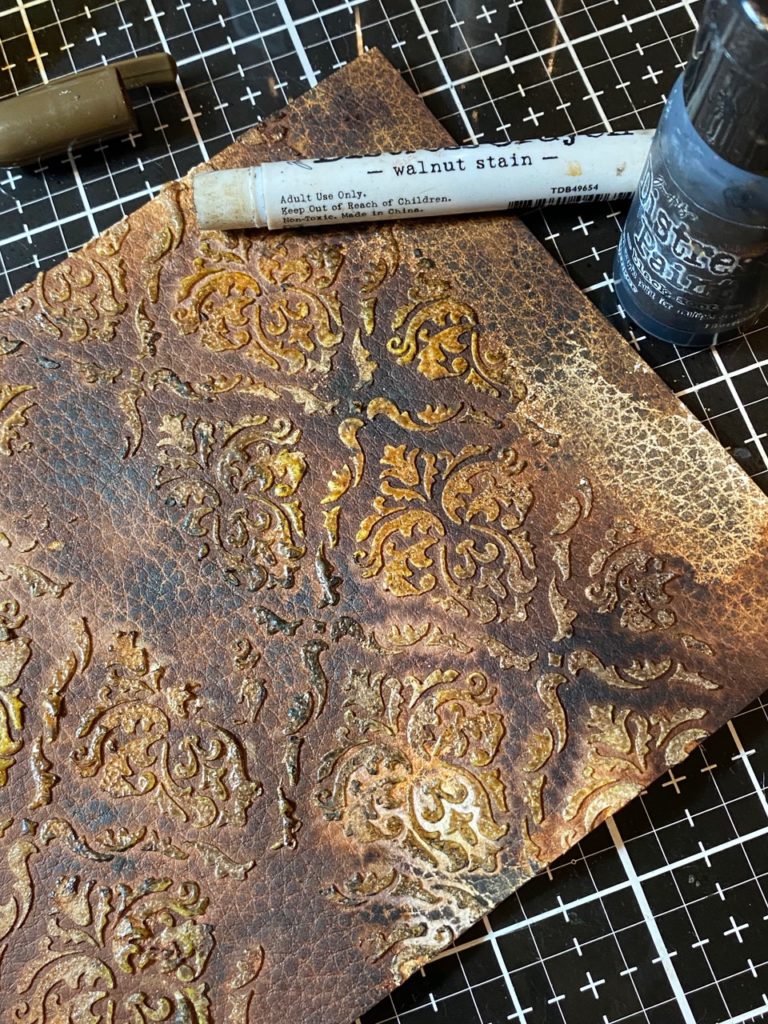
This background was created using the new Baroque CMS400 Stamp Set and Vintage Photo Embossing Glaze.
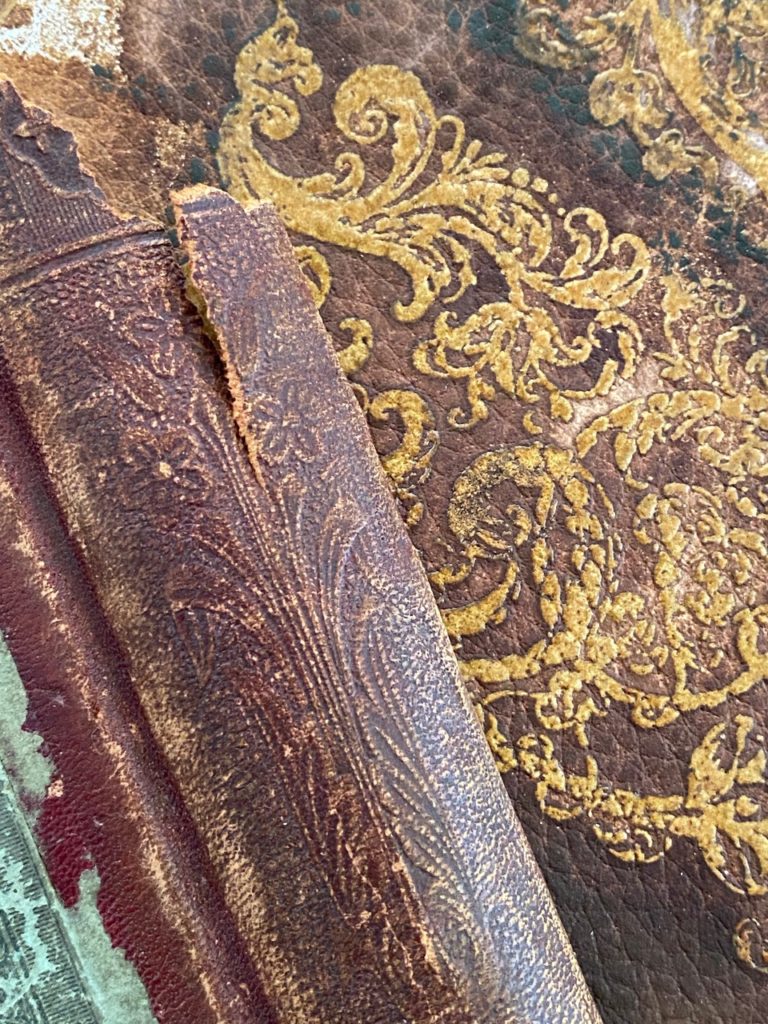
This one was created using the Gothic Layering Stencil THS026, Distress Texture Matte Paste and Vintage Photo and Walnut Stain Embossing Glazes.

So, let’s get to it!
We’ll start with the stamped and embossed background…
I stamped one of the baroque images a couple times onto the leather paper with Embossing ink. Then I sprinkled on some Vintage Photo Embossing Glaze.
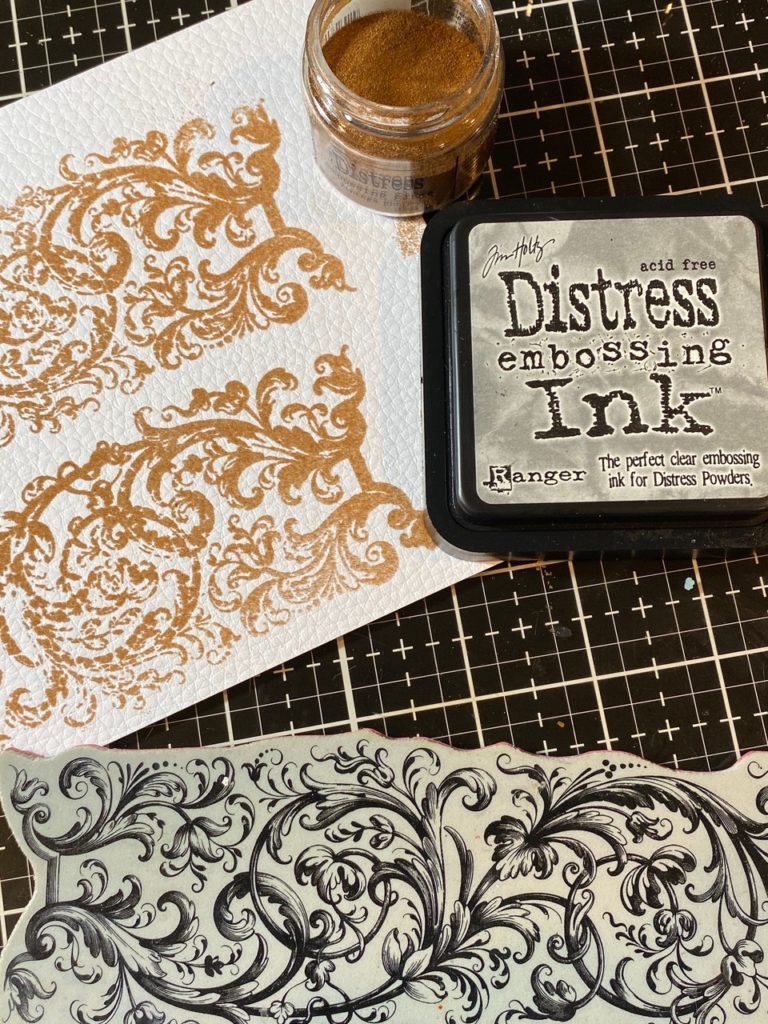
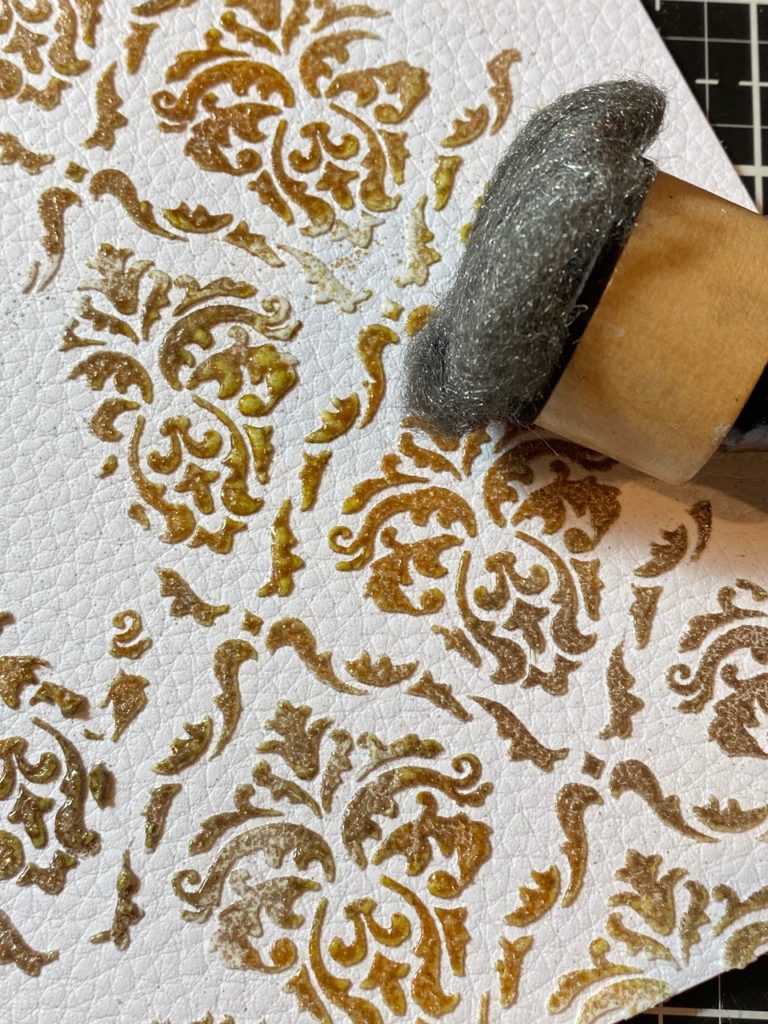
I embossed the glaze with my embossing gun, then lightly went over top of the embossed image with a bit of steel wool. This is done to remove some of the shine from the glaze.

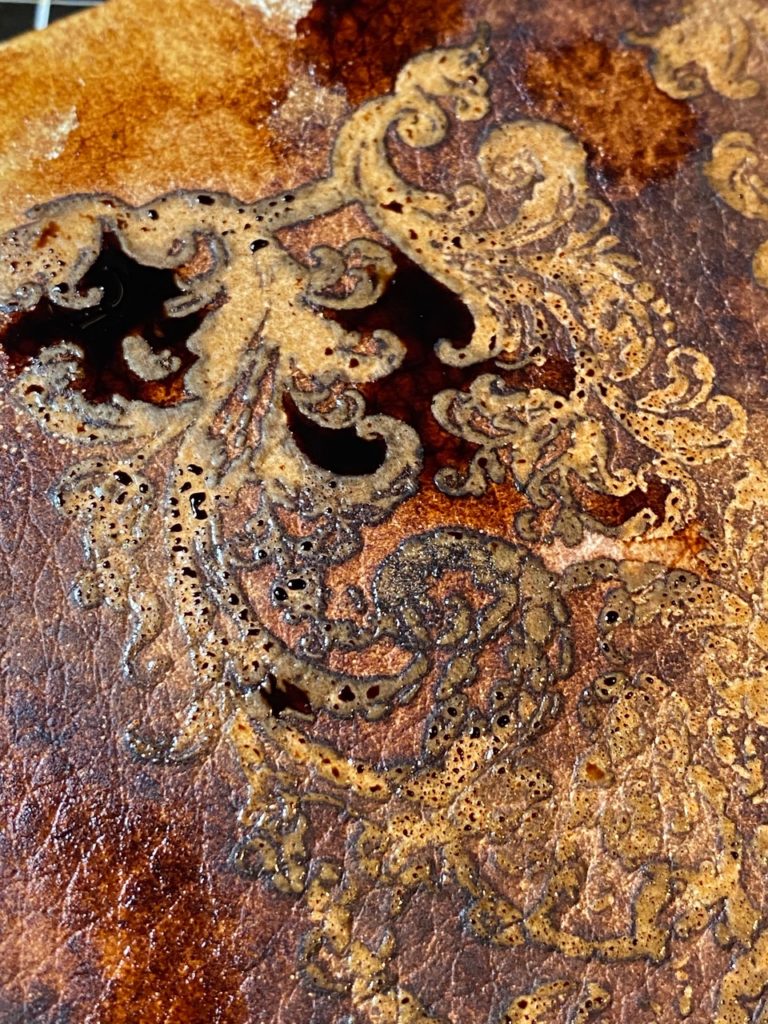
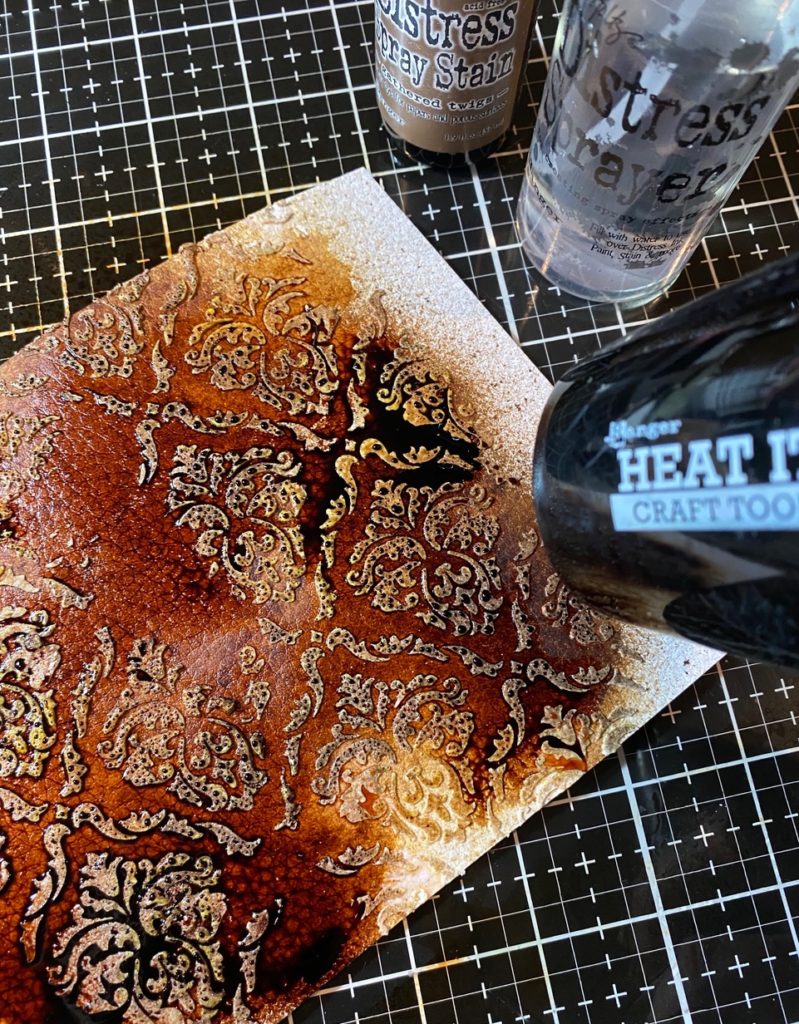
Next, I spritzed the paper with a good amount of Gathered Twigs Spray Stain and a tiny bit of water. You really want the ink to get into the dry paper. So be sure not to use too much water. The ink will really soak into the areas around the baroque pattern, and that what you want.

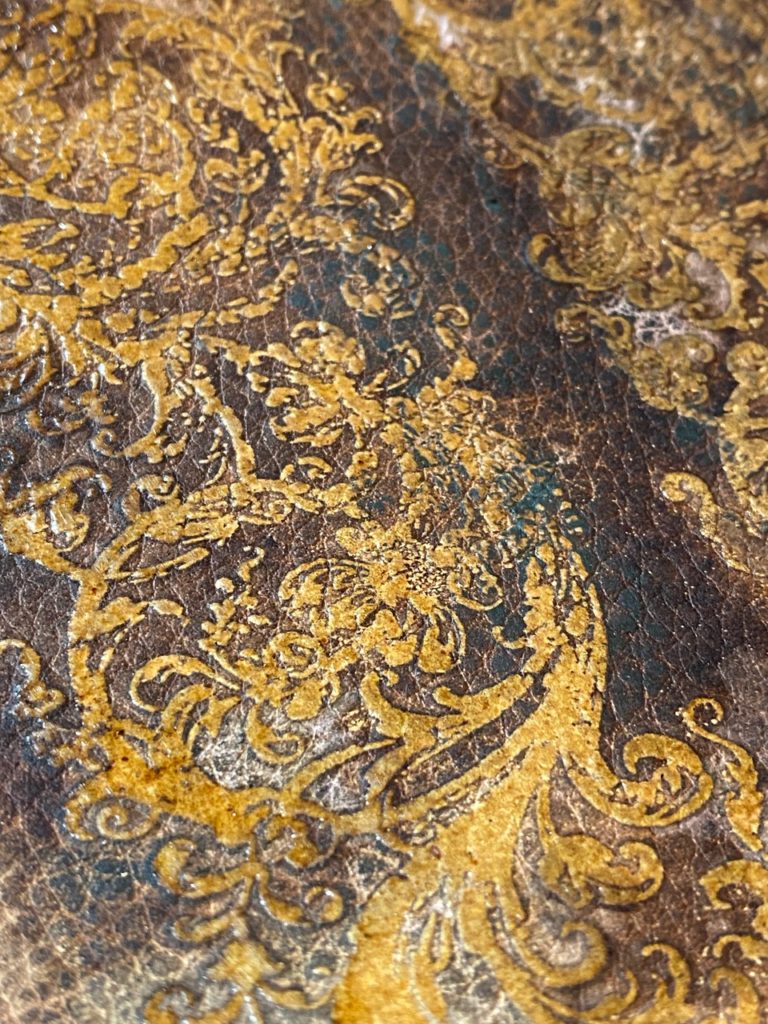
Here’s a close-up of the pools of ink…see how its really sinking into the edge of the pattern? YUM!! Then I dried the ink with my heat tool.
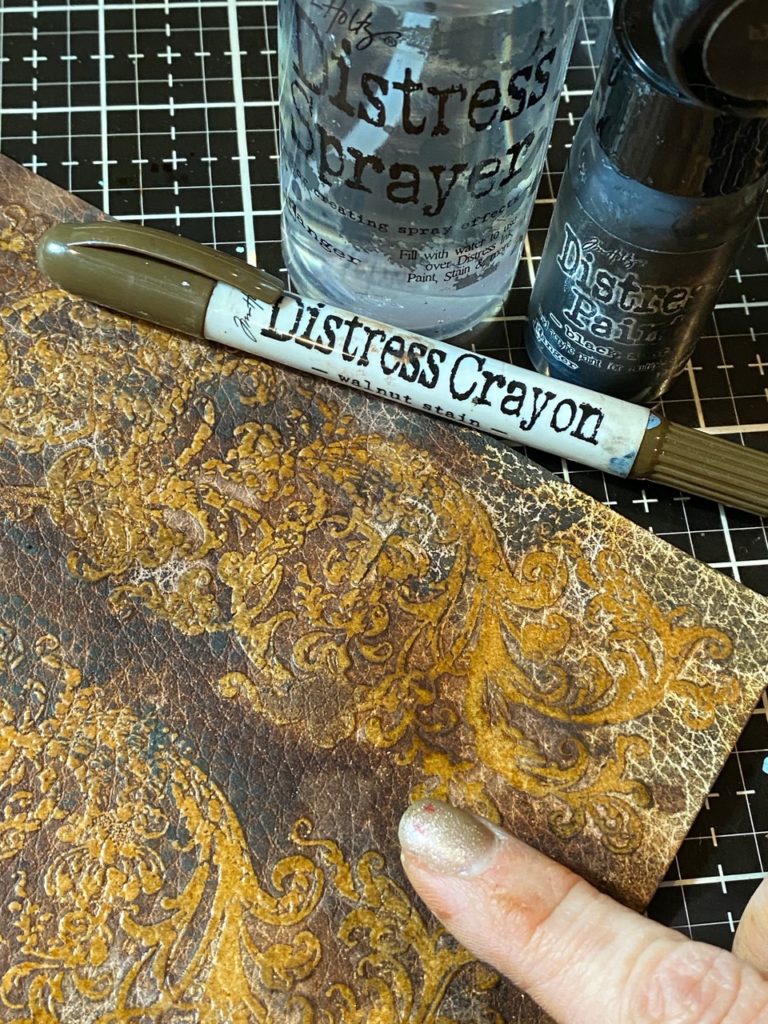
I scribbled some areas of the leather paper and the baroque pattern with a Walnut Stain Distress Crayon and rubbed it in with a damp finger.
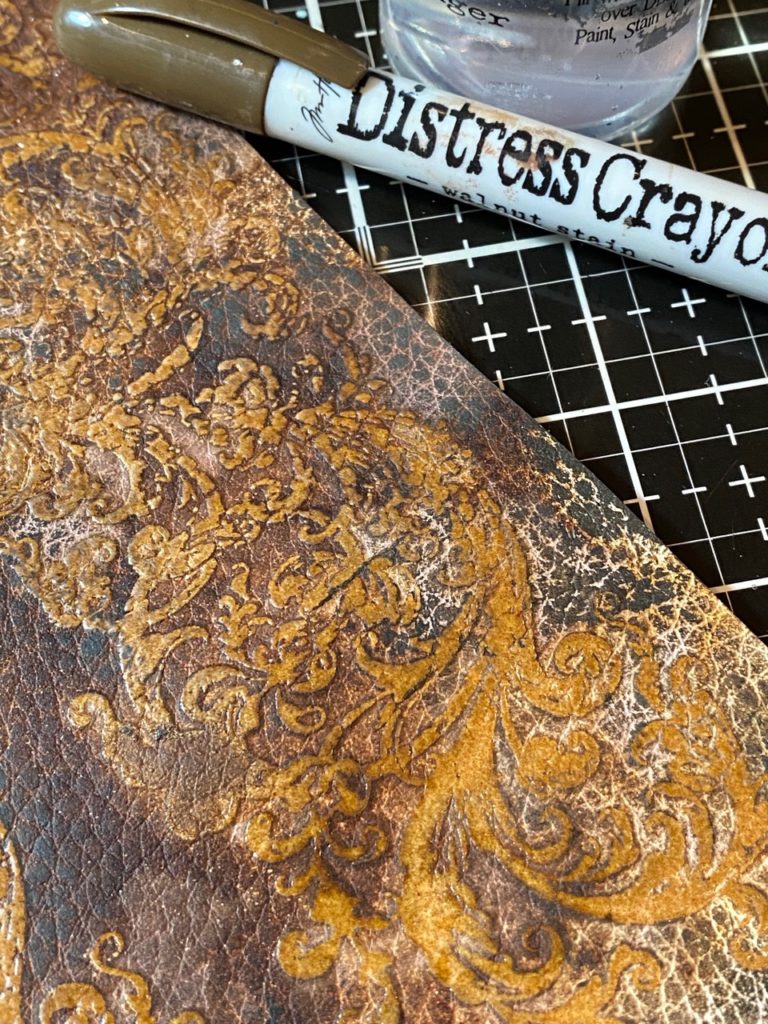
Then, with my finger and a tiny bit of paint, gently rubbed to bring out more of the texture.
Holy Moly…we have texture!! 🙂
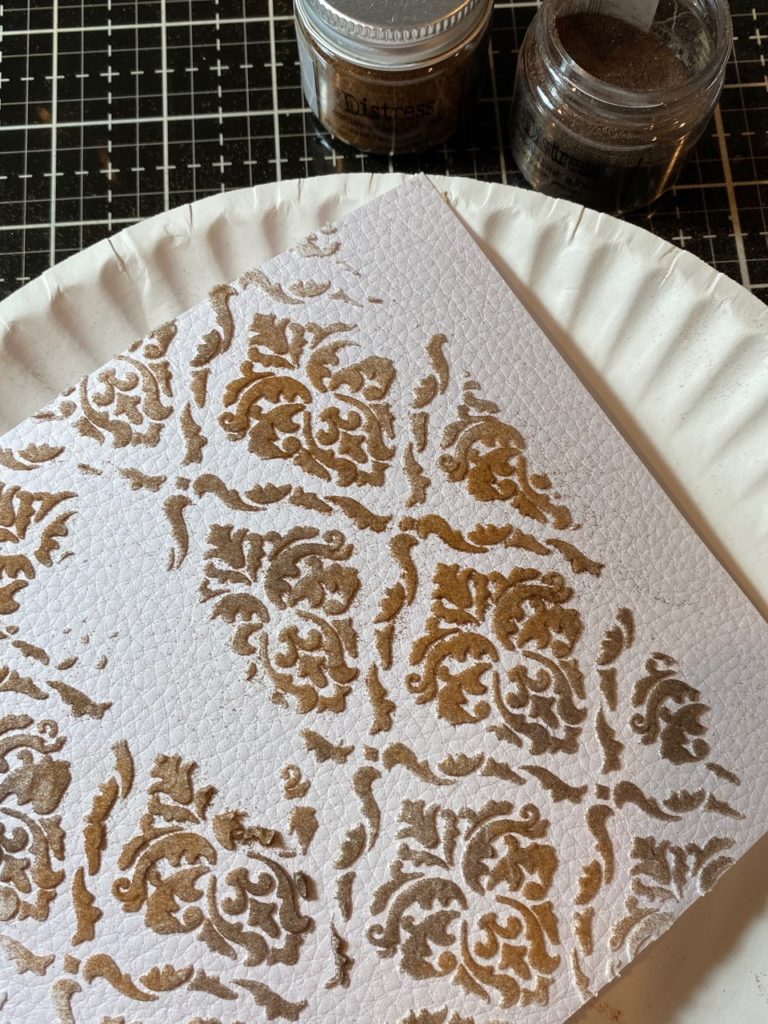
And, here’s the Texture Paste background…
Using a Palette Knife, apply Matte Texture Paste through the Gothic Layering Stencil onto a pice of Distress Leather Paper.

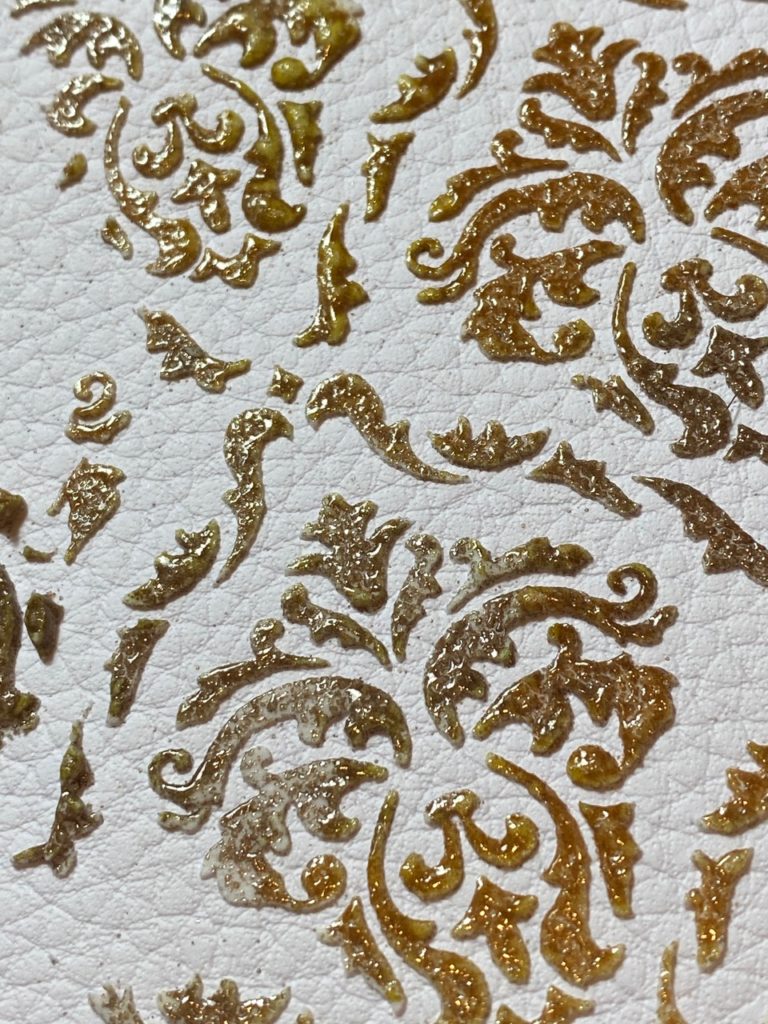
Sprinkle little pinches of Walnut Stain and Vintage Photo Glaze onto the wet paste and tap the underside of the paper to distribute the powders. Then set aside to dry for a bit. I didn’t wait till in was completely dry because I wanted some of the bubbles that are created when you emboss damp texture paste.
Then emboss the glaze with an embossing gun.
And remove some of the shine with steel wool.
Spray the paper with Gathered Twigs Spray Stain, a little bit of water, and dry with a heat tool.
And add the crayon and distress paint as we did with the previous background.
YUMMMMMM!! 🙂
I hope you enjoyed the quick tutorial…thanks so much for stopping by!
Have a great weekend!
Creatively yours,
Stacy
What is an affiliate program, and why should I click on the link and buy through you?..
When you shop via the affiliate link on this blog, I receive a small commission, from the affiliate provider (Simon Says Stamp), at no extra cost to you whatsoever. These commissions help me to cover hosting fees and other costs to run my blog and be able to provide you with FREE inspiration. If you shop the links, THANK YOU! I truly appreciate being able to share my love of creating with you.
Gather Your Supplies-
Tim Holtz/Stampers Anonymous-Baroque CMS400, Gothic THS026
Tim Holtz/Tonic- Stamp Platform, Tonic Guillotine Paper Trimmer, Tonic Shears
Tim Holtz/Ranger-
Distress Sprays- Gathered Twigs Spray Stain
Distress Paint- Black Soot
Distress Crayon- Walnut Stain
Distress Embossing Glaze- Vintage Photo, Walnut Stain
Distress Tools/Mediums- Distress Sprayer, Media Mat, Heat it Heat Tool, Blending Tools, Distress Collage Matte Medium, Foam Tape, Distress Watercolor Paper, Distress Cracked Leather Paper, Distress Embossing Ink Pad, Distress Texture Paste Matte, Embossing Gun
Other-


Oh wow! What a perfect duplication of old leather! You should be very proud of the work you did. It’s wonderful!
WOW!!!!!!!!!! Stacy, these are amazing!!!! So cool!!!!!
Really awesome! Thanks for your instructions!!
These are stunning! Love this technique! 💗
Yeah wow!
Didn’t think I was interested in the new leather paper except for creature skin but you got me with this work!!!
Looks so real & would feel like it too I imagine.
You really blow my mind! Got to get what I don’t have!
Thank you for sharing!
I am in absolute awe my friend, you are a creative genius.
Oh, my. How incredibly wicked cool is that?!!!! Brilliant!! Thanks so much for sharing how to do this technique. Can’t wait to see how you put it to use in a project!!
WoW this is amazing Stacy. Love it! Thnx for sharing xxx
So will we see a finished product with this fabulous old leather?
This is an awesome technique tutorial, bravo to you!
This is just a stunning technique! Thanks for sharing! I may pick your idea, cause I love everything vintage, especially books!! Hi from Belgium !
What will you think of next? This is amazing!
Wow a great tutorial, thanks. Have to try it 😀
Wow. Amazing. Love this technique
what a great technique Stacy. I just did a background with heavy spraying over glaze but I never thought to us the cracked leather background! Brilliant idea!
Ooo that looks amazing. I definitely want to give this a try.
You nailed the leather look for sure and the comparison with an actual book, no way could you tell the difference. Thanks you Stacy for sharing your talents!! I do love your work/art.
Absolutely gorgeous. Thank you for the wonderful tutorial.
So cool, i have to try. Thank you for sharing.
Such grungy, crusty, yumminess those turned out to be…love it…
You are so great at giving details and explaining how to’s. Thank you so much I love your creativeness.