Hello Friends!
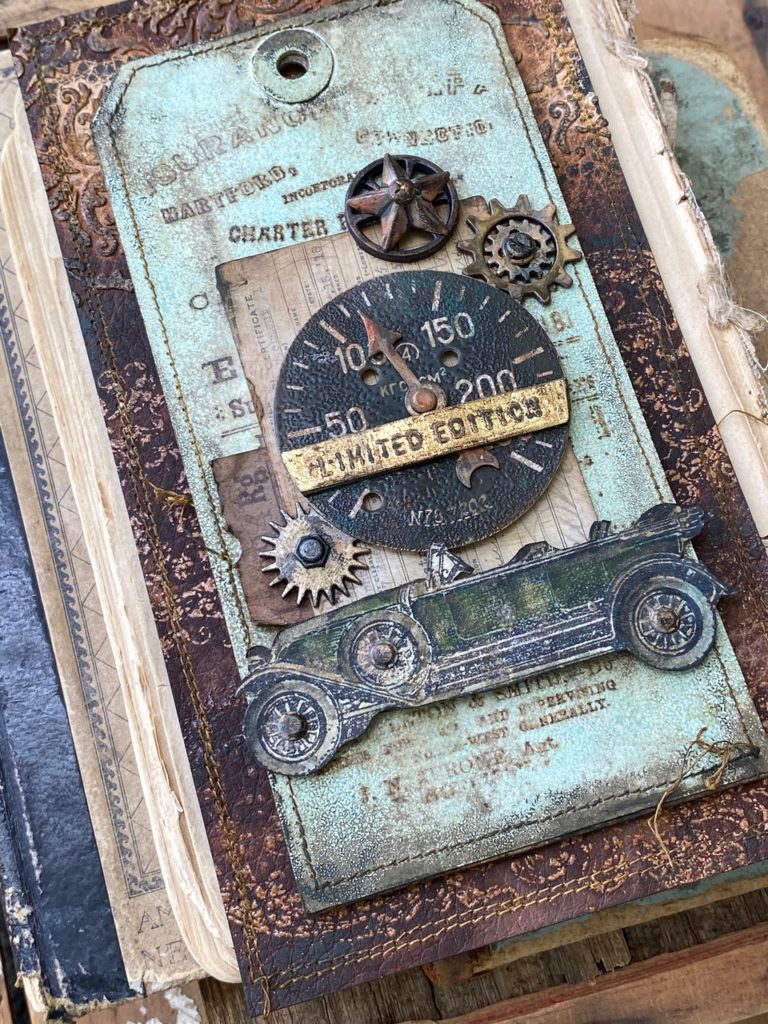
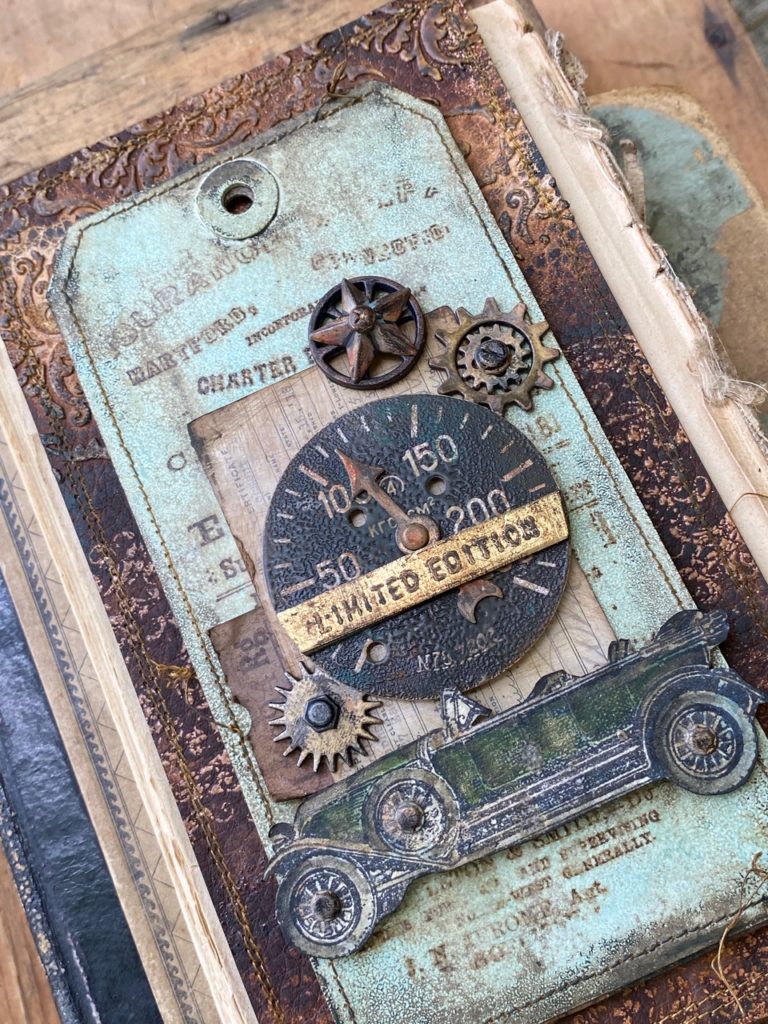
I hope you are all staying well…I’m back today with a card that I created for my Dad for Father’s Day using the vintage embossed leather technique that I shared last week. My Dad is a classic car collector, and enjoys everything vintage.
I decided to make him a card using the Vintage Auto CMS265 combined with the new Professor 2 CMS395. I threw in some bits of idea-ology ephemera and metal adornments to create a collage, and added a leather background that blended well with the vintage auto theme. I was thinking vintage leather upholstery.
So, let’s get to it!
the tag…
I created it by using a technique that I shared on my “With a Joyful Spirit blog post” and a technique that Tim shared on his Distress Crayon Demo Saturday. The link to the Tim Video is HERE 🙂
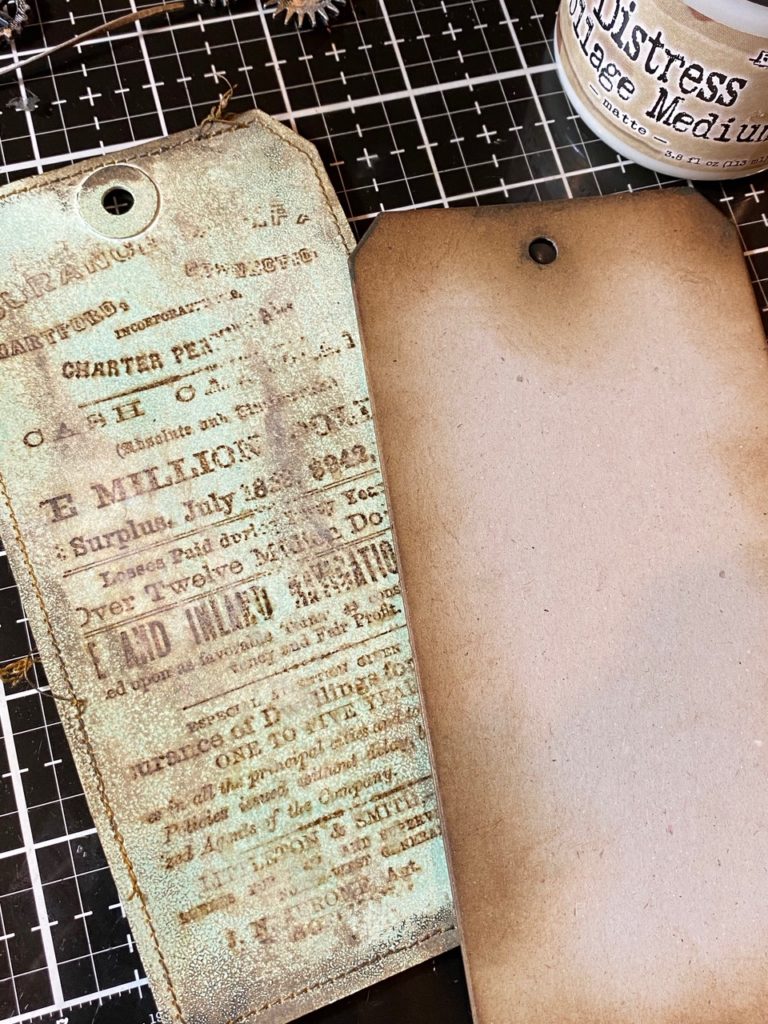
I stamped the distressed background from the Professor 2 stamp set onto a Distress Mixed Media tag using Distress Walnut Stain Distress Ink. I dried it with my heat tool and then lightly blended Embossing Ink, very randomly, onto the the entire tag. Then the tag was sprinkled with Speckled Egg Embossing Glaze and embossed with an Embossing Gun.
After the glaze had cooled down, I used a small piece of steel wool over top of the glaze to take away some of the shine. Then scribbled on some Walnut Stain Distress Crayon. With a damp finger, rubbed the crayon into some of the areas of the tag.
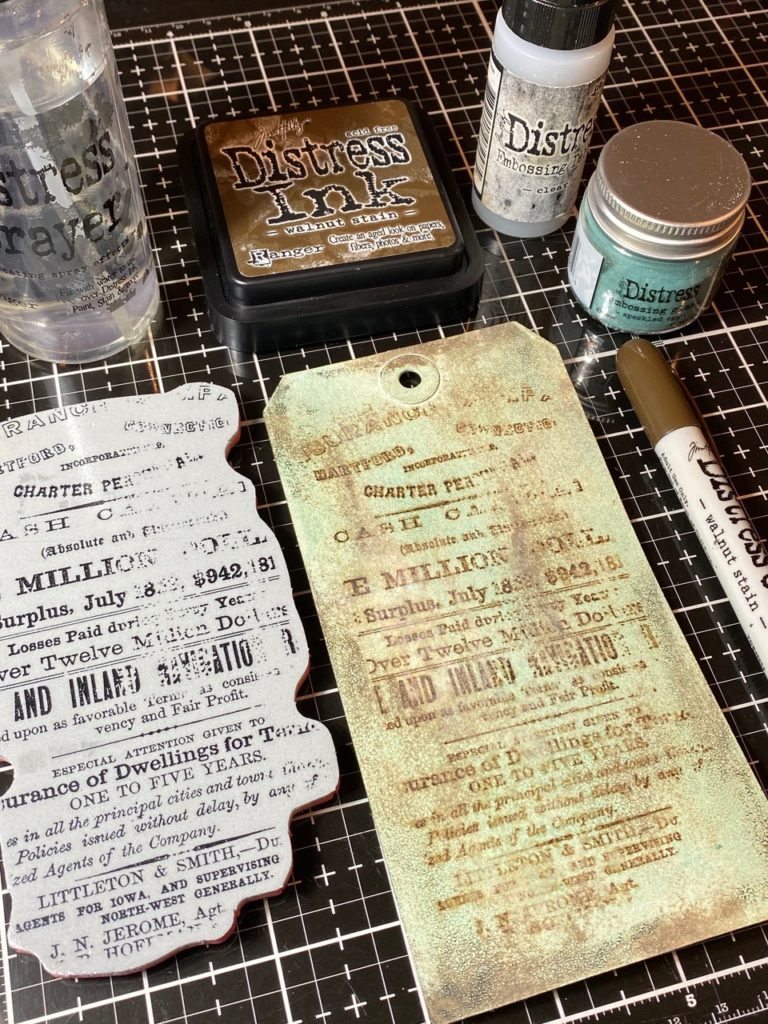
I stitched around the edge of the tag by using my sewing machine and thread, then rubbed the edges with some more Walnut Stain Distress Crayon and Ink.
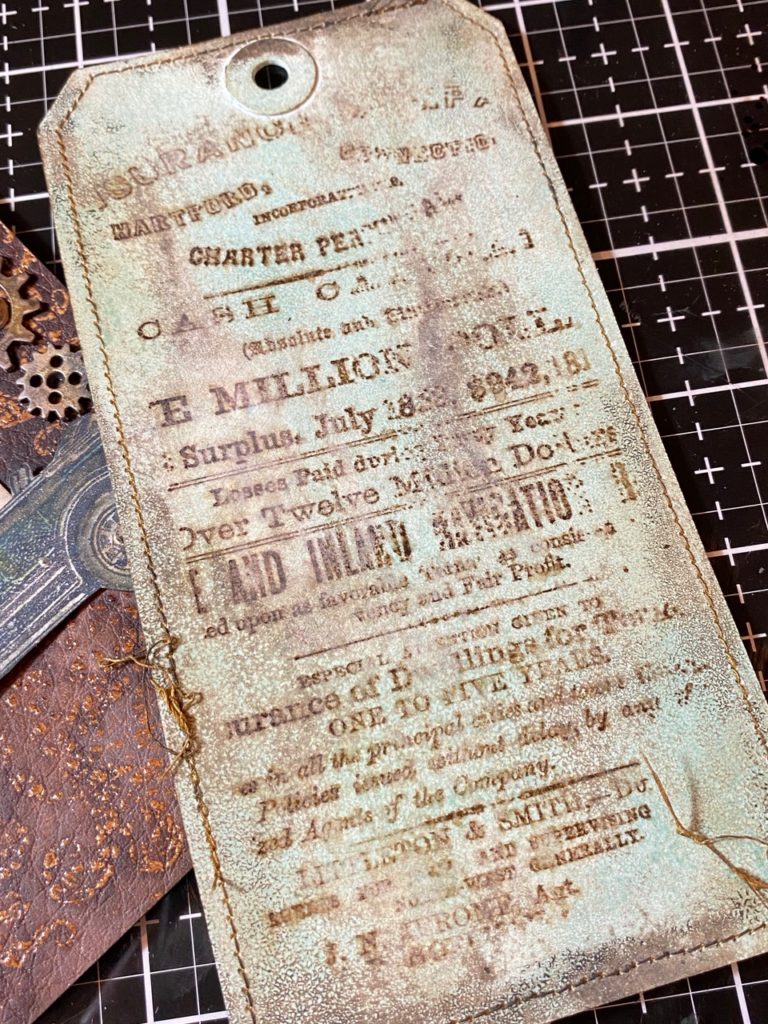
I cut a tag out of chipboard by using the Sizzix Stacked Tags thinlet set. Then rubbed the edges of the tag with Walnut Stain Distress Ink and Crayon. Then I applied the stamped tag to the chipboard tag base with Collage Medium. This created stability to the tag as to add the embellishments and keep the card sturdy.
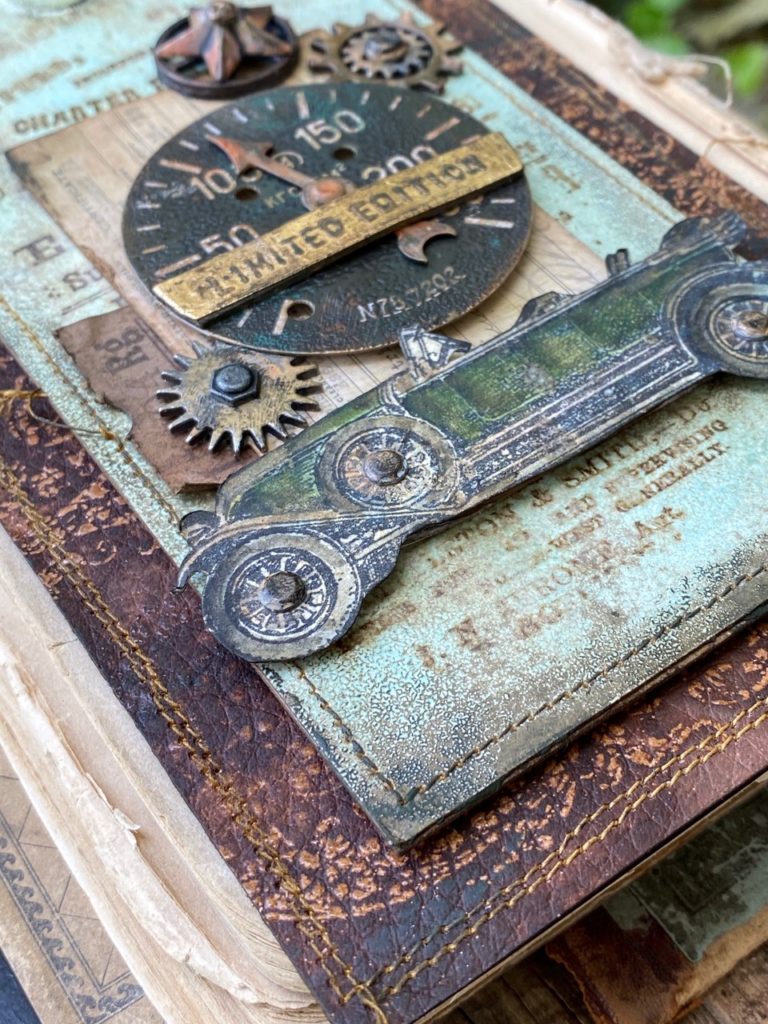
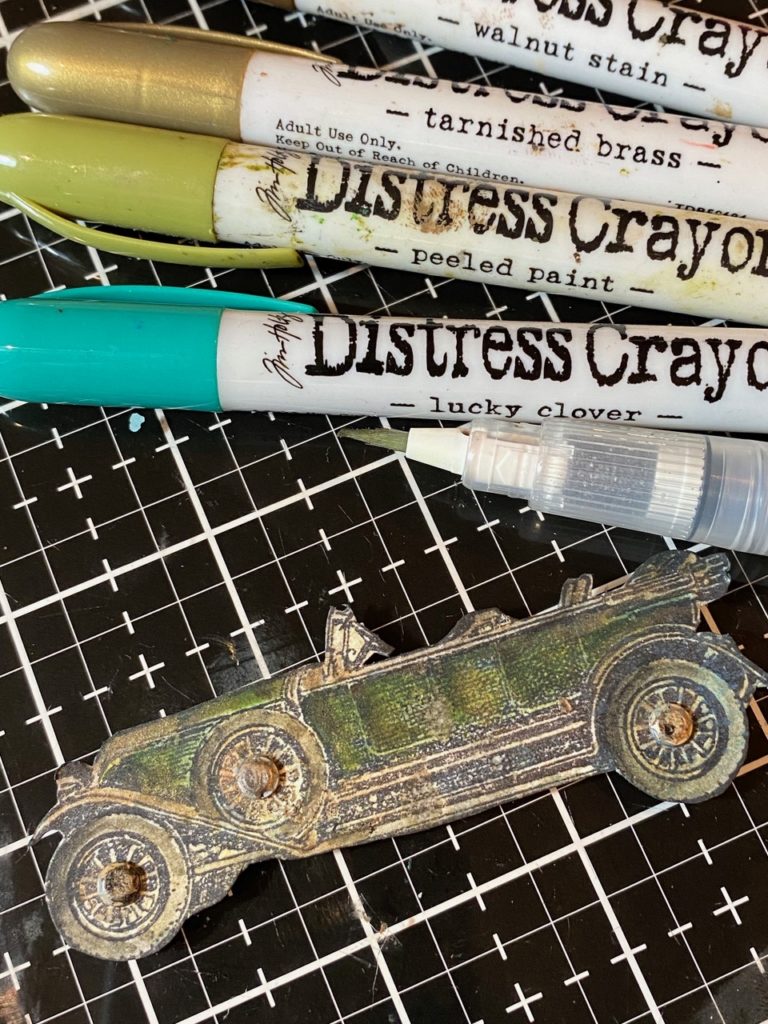
the car…
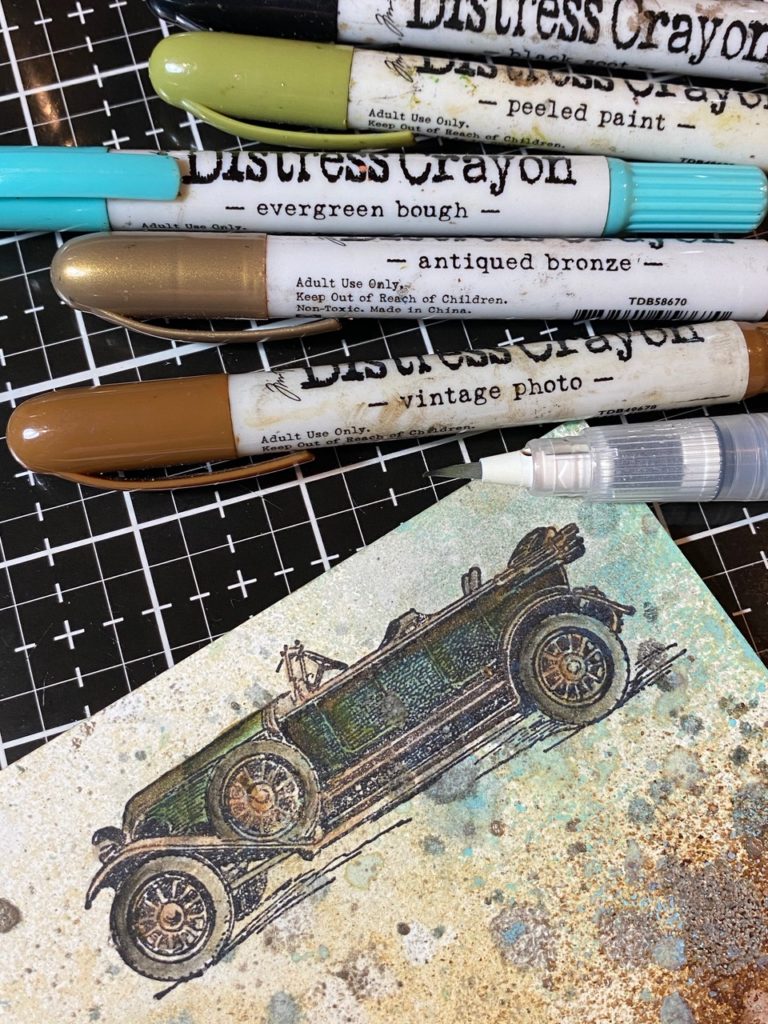
Using Black Soot Archival Ink, I stamped the car onto a background paper then began coloring it using a selection of Distress Crayons and a Detail Waterbrush.
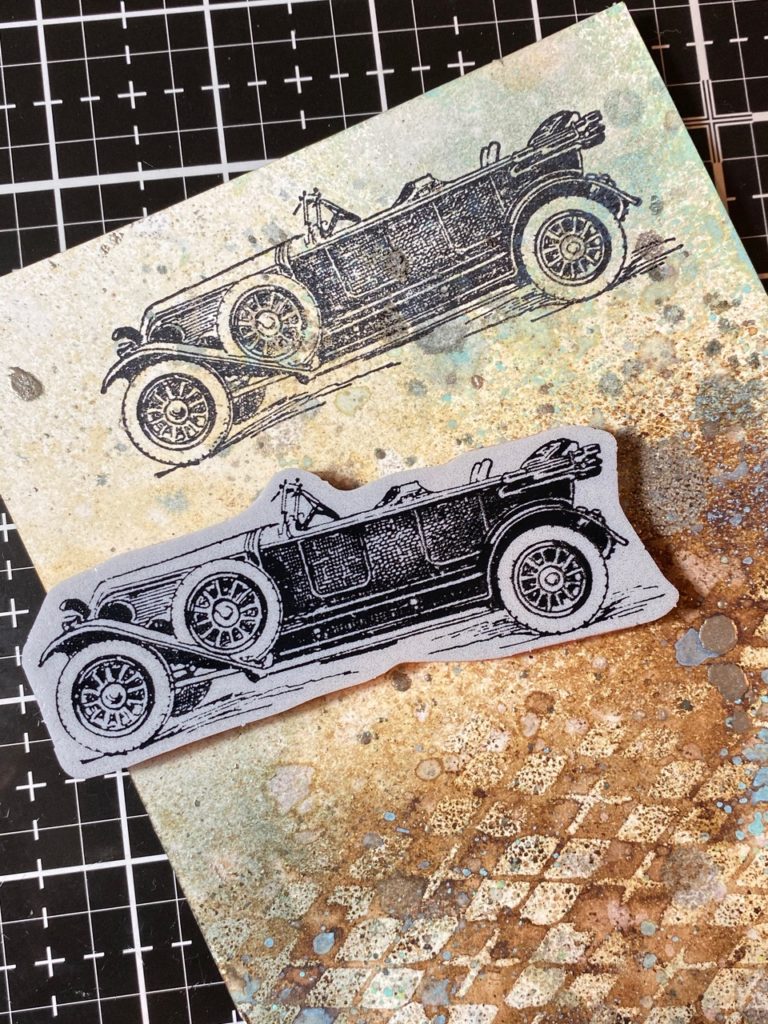
The car was then fussy cut out and the tires were embellished with a few Hardware Heads that had been painted using Distress Paint, Alcohol Ink and Distress Crayons. Then the hardware heads were applied with Distress College Matte Medium.
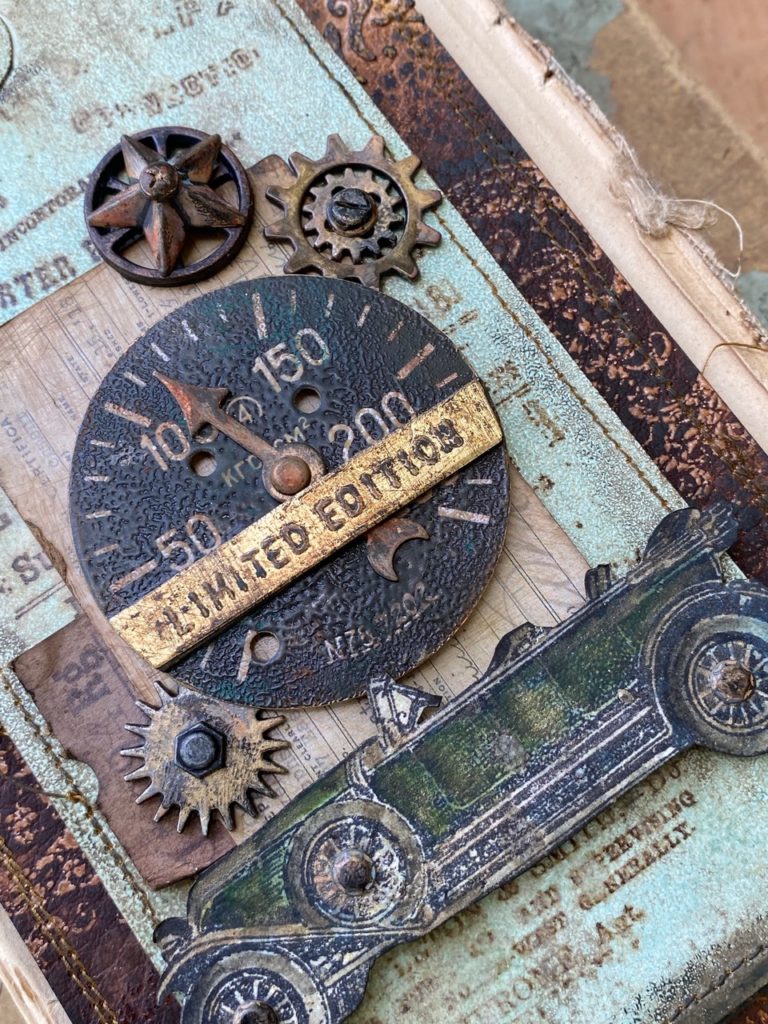
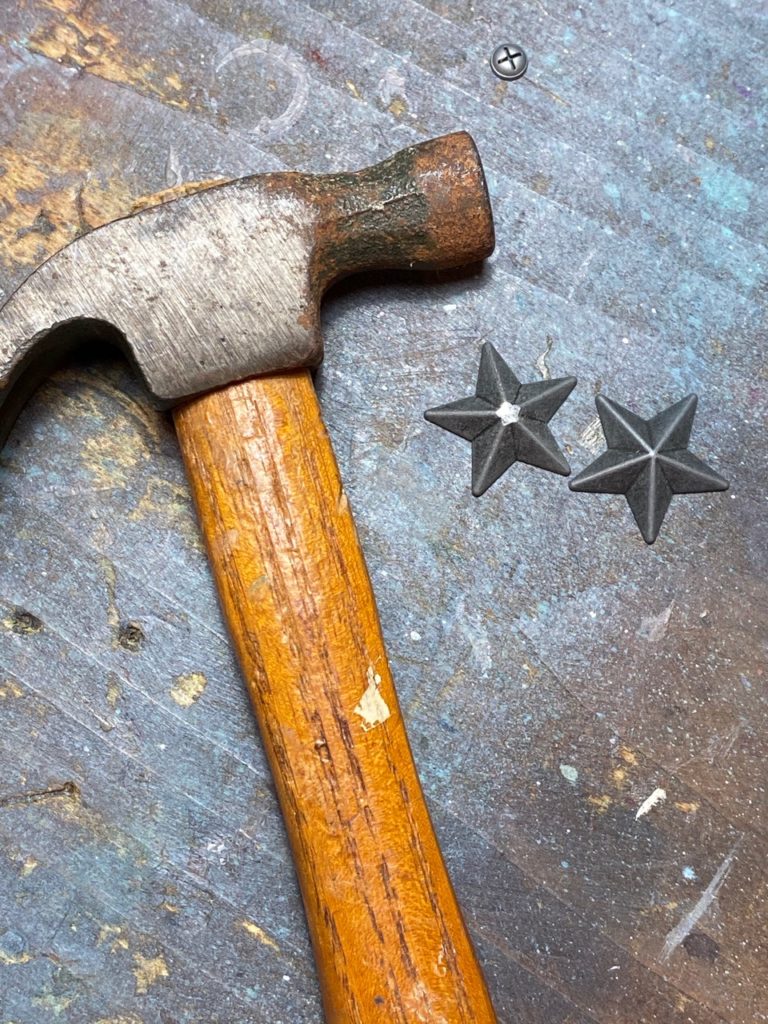
idea-ology adornments…
I hammered down the center of an idea-ology star to create a flat location to add a hardware head.
This took approximately 25 hammer hits… LOL, but it flattened out quite nicely. 😉 That old rusty hammer comes in handy in my studio, and my husband thinks I’m really going at the mixed media techniques really hard.
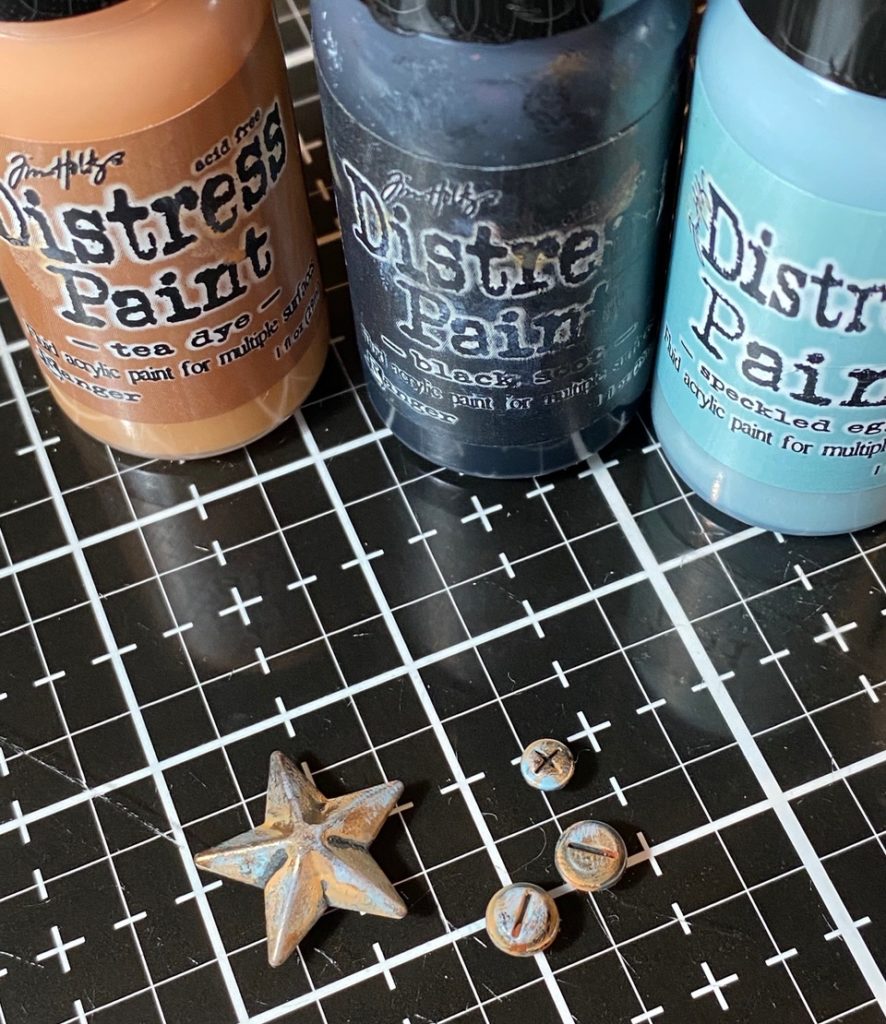
With my finger, I dabbed on a selection of Distress Paints to all the adornments that included the hardware heads, star, mini gears, sprocket gears, and game spinner. The nail heads were applied to the center of the gears and a hardware head applied to the star.

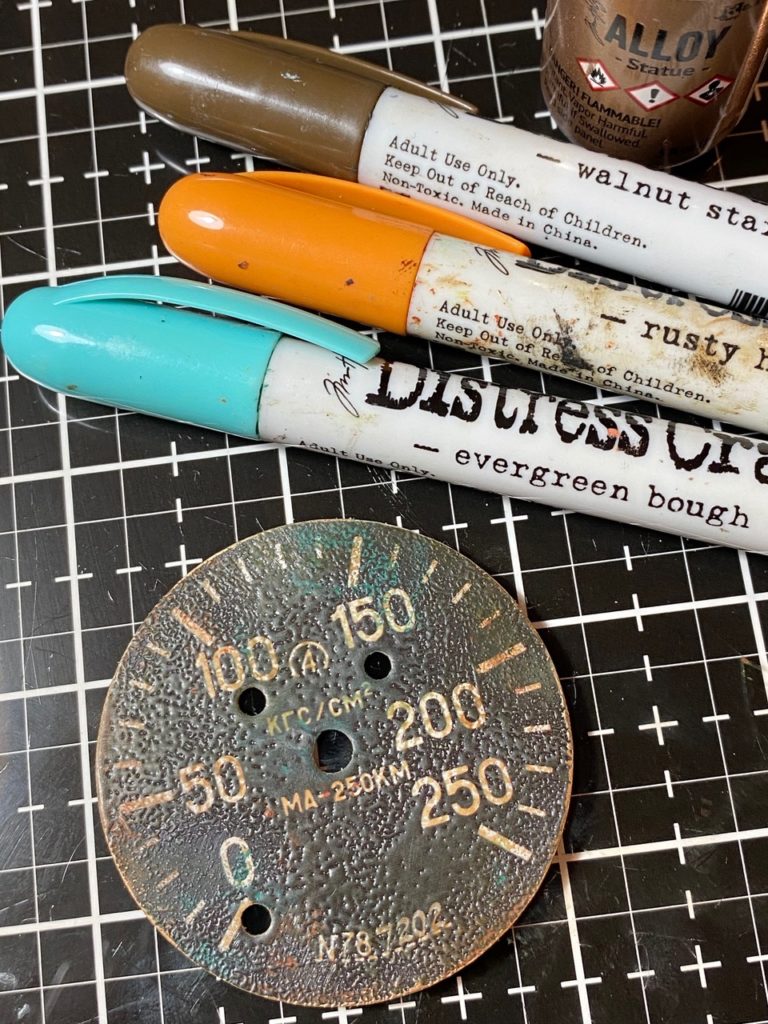
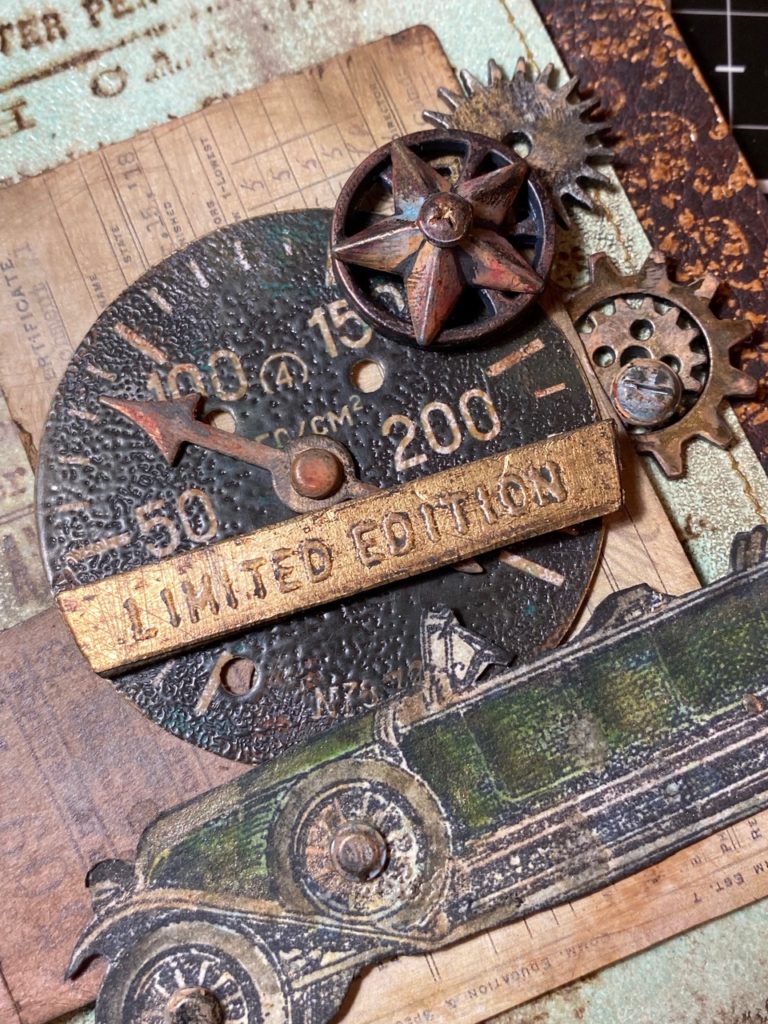
the gauge and ephemera…
I dug through the new idea-ology Urban Layers and Collector Layers and found the gauge and an old certificate. (that’s the piece you see in the background) and added a ticket from the new Ticket Book.
The gauge was rubbed with the embossing dabber and a light amount of Antique Linen Embossing Glaze was applied and embossed with an Embossing Gun.
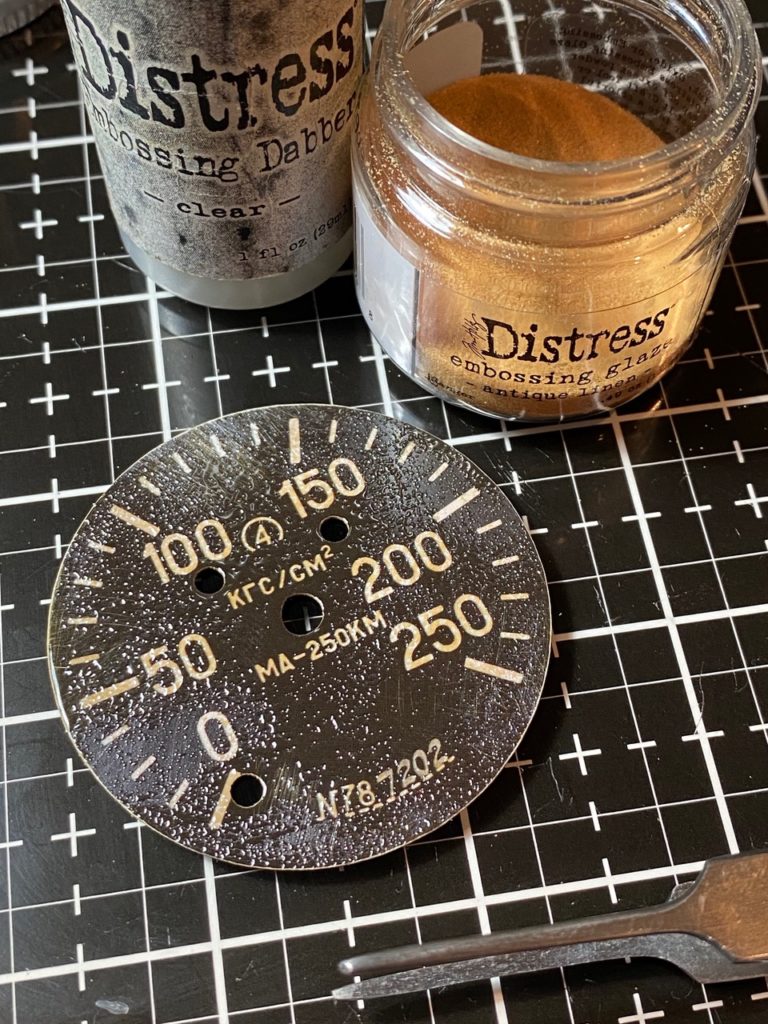
I took away a bit of the shine by rubbing it with steel wool.
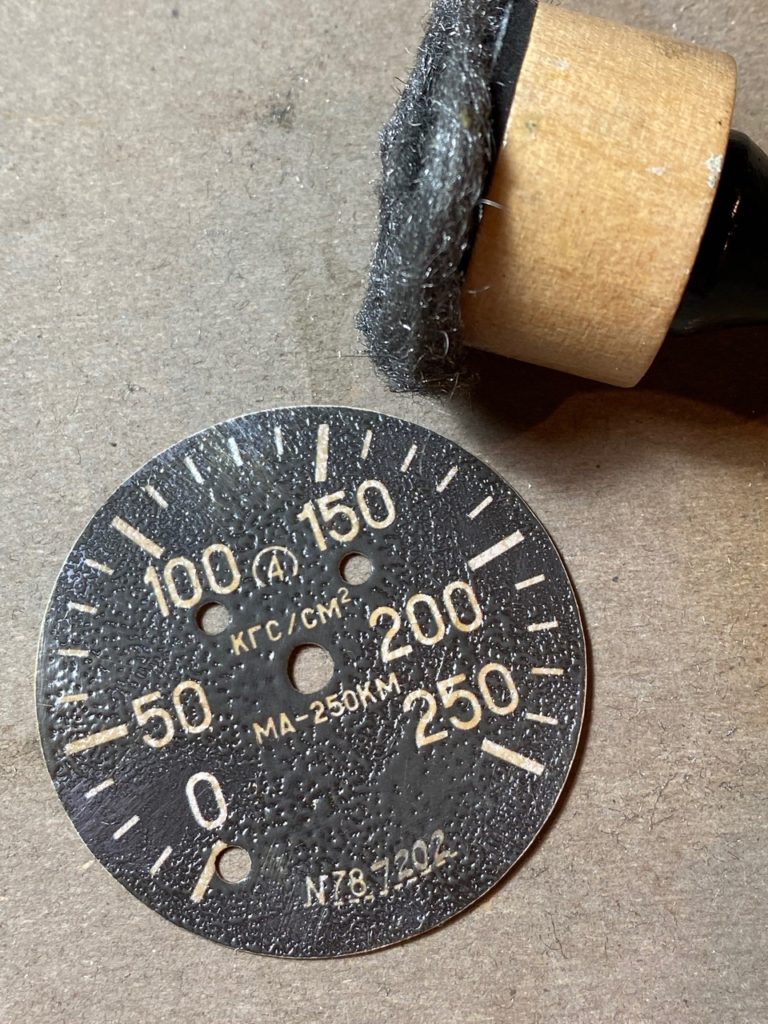
Then added age by rubbing it with a selection of Distress Crayons.
Then a game spinner was added and I began gathering and arranging the layout of the card.
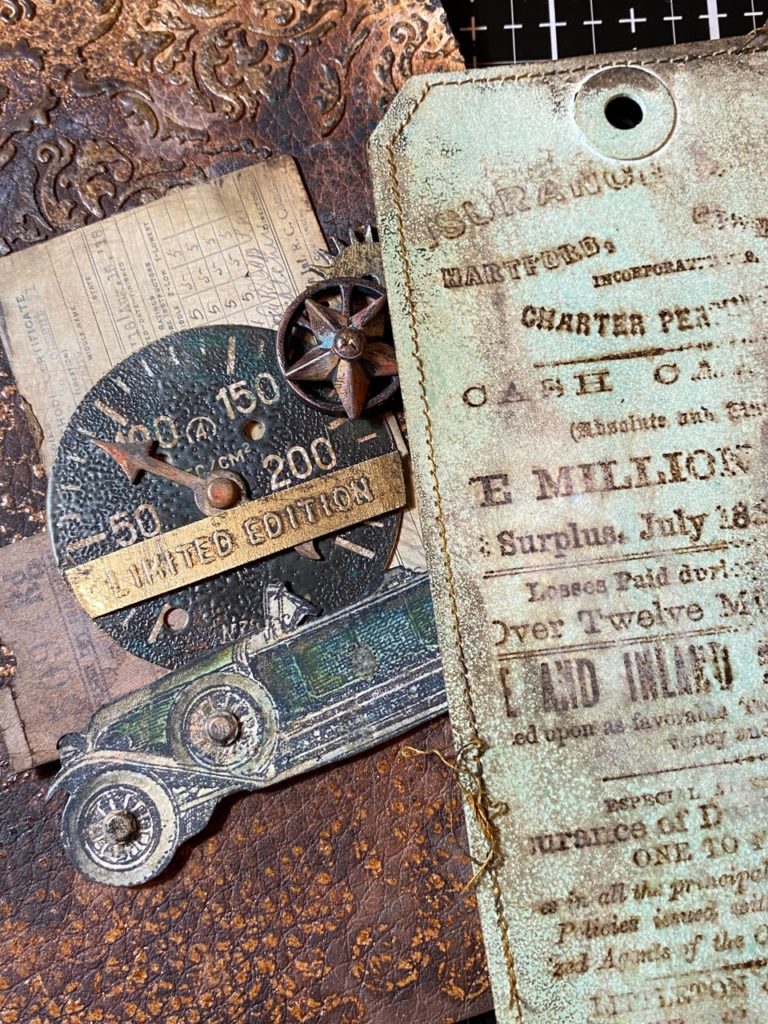
I stamped “Limited Edition” using the Tiny Text phrase onto a piece of scrap metallic paper, embossed it using Liquid Platinum Embossing Powder and rubbed the phrase with Walnut Stain Distress Crayon…here’s a more in-depth description of this technique.
I applied the phrase to a scrap piece of chipboard to give it more stability and the look of a metal plaque. It was then applied to the gauge with collage medium.
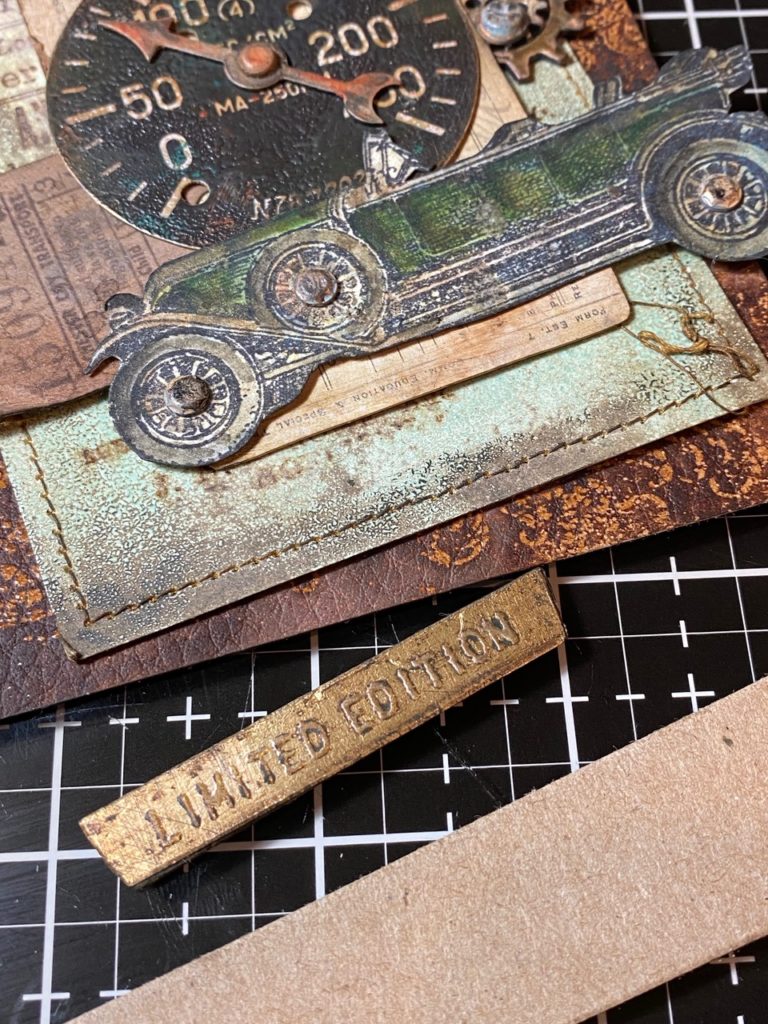
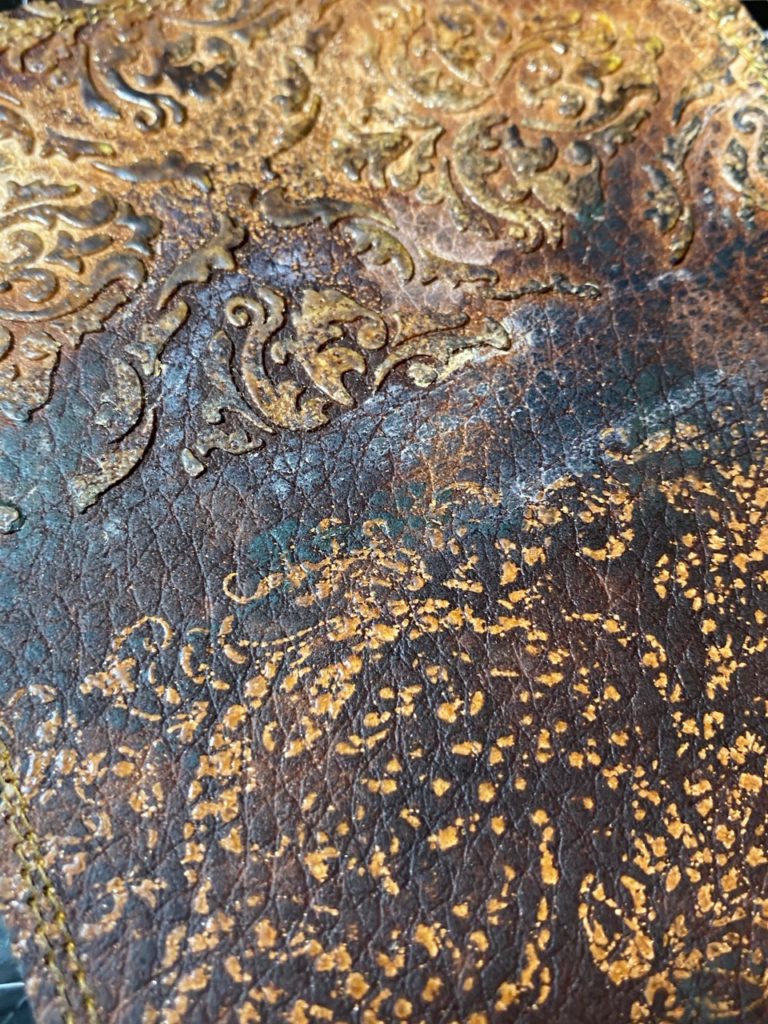
I created a piece of leather paper, trimmed it down to fit as the background and base of my card and stitched around the edge by using my sewing machine and thread. To see the steps at how the leather paper was created, stop over and check out my Vintage Embossed Leather Technique and blog post.
This background had both the texture paste and stamped image added to it.
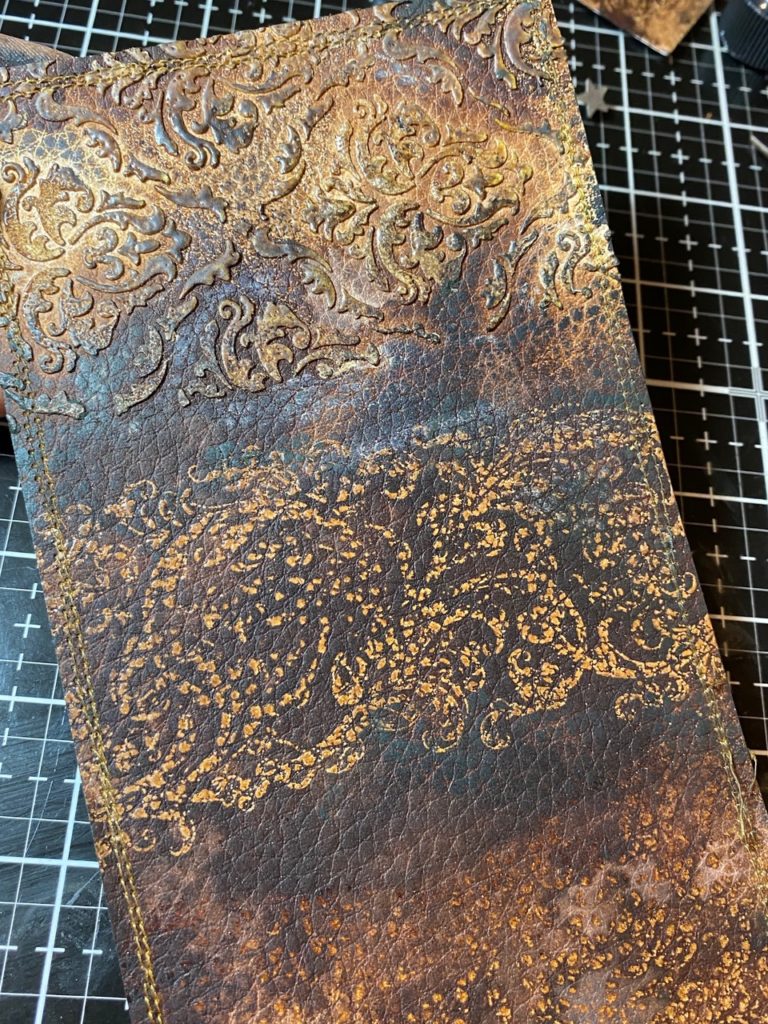
YUM!!!!! You’d think that it would smell like leather, but alas, it does not, just paper…but it sure looks like the real deal.
I arranged and adhered the card together and with that, my card was complete.
Thanks so much for stopping by…stay safe and well! See you soon!
Creatively yours,
Stacy

What is an affiliate program, and why should I click on the link and buy through you?..
When you shop via the affiliate link on this blog, I receive a small commission, from the affiliate provider (Simon Says Stamp), at no extra cost to you whatsoever. These commissions help me to cover hosting fees and other costs to run my blog and be able to provide you with FREE inspiration. If you shop the links, THANK YOU! I truly appreciate being able to share my love of creating with you.
Gather Your Supplies-
Tim Holtz/Stampers Anonymous-Vintage Auto CMS265, Professor 2 CMS395, Tiny Text CMS394, Baroque CMS400, Gothic THS026
Tim Holtz/ idea-ology- Hardware Heads, Ticket Book, Urban Layers, Collector Layers, Metallic Paper Stash, Game Spinner, Mini Gears, Sprocket Gears, Adornment Stars
Tim Holtz/Tonic- Stamp Platform, Tonic Guillotine Paper Trimmer, Tonic Shears
Tim Holtz/Ranger-
Distress Ink- Walnut Stain
Distress Sprays- Gathered Twigs Spray Stain
Distress Paint- Black Soot, Speckled Egg, Tea Dye,
Distress Crayon- Walnut Stain, Evergreen Bough, Rusty Hinge, Lucky Clover, Tarnished Brass, Peeled Paint, Vintage Photo, Antiqued Bronze
Distress Embossing Glaze- Vintage Photo, Walnut Stain, Antique Linen, Speckled Egg
Distress Tools/Mediums- Distress Sprayer, Media Mat, Heat it Heat Tool, Blending Tools, Distress Collage Matte Medium, Foam Tape, Distress Watercolor Paper, Distress Cracked Leather Paper, Mixed Media Heavy Weight tags, Distress Embossing Dabber, Distress Texture Paste Matte, Embossing Gun, Liquid Platinum, Black Soot Archival Ink
Other-
Sewing Machine and Thread


A really fabulous card for your dad, Stacy!!!
Masculine perfection! I think it is really great to see some masculine cards because there really is not enough showcased. Many of the men in our lives do appreciate all the hard work that goes into making this amazing card. just love the card, great job
THAT is a labor of love!! One extra special card for sure. Love it. Would you mind sharing where you buy the chipboard you used? I finally found a bit in a local craft store quite a while ago (the only plain chipboard I’ve been able to find) but it’s too thick to cut with wafter dies. Thank you for sharing this masterpiece and all the techniques you applied.
Absolutley BRILLIANT!
Omg Stacy this is incredible! I LOVE this tag/card. Beautiful colouring, love the embellishing, everything! Your Dad must have loved it!!!
Most excellent and fabulous!!!!
This is so awesome Stacy, I can’t wait to try it!
Is there any secret to attaching the steel wool to the Tim Holtz circular blending tool? I haven’t tried it yet, just wondering if it sticks on its own or if it has to be glued to something? Thanks!
Hi Robin! No secrets..It clings to the Velcro on the blending tool. If you form the steel wool into a little round patty/pillow and pop it onto the tool, it works perfectly! ♥️
Wonderful – like all your work Stacy – your dad will LOVE it I know. Your tutes are so so clear and inspirational thanks so much for all of them – I’m addicted xoxo (Sue in Australia)
What a treasure for your Dad…My Dad was a car collector too…the cars/trucks/firetrucks he collected were the Miniature Banks…LOL. When he left us to be with Mom, he had over 500! It was a love and a passion with him and gave him great pleasure to dust and rearrange the ones not in glass cases….anyway, I am sure your Dad will love and treasure this card….thanks for sharing it with all of us.
Stacy, I love the way your mind works! What a fabulous tribute to and for your Dad! I’m sure he was delighted! Thank you for your inspiration and your tutorial! It’s always a pleasure to visit your blog, and I always leave refreshed and inspired! Have a great Sunday!
Absolutely fabulous! Thank you for sharing your wonderful tutorials. Found it interesting you were able to cut a chipboard tag from the Sizzix Stacked Tags thinlet set – didn’t realize thinlets would cut through chipboard. Will give a try.