Hello friends! Hope you are doing well!
I have a new tutorial for you today made using the new Tim Holtz Christmas idea-ology…can you believe it is that time of the year again, at least for makers, we have to get a head start for the making season.
The release by Tim Holtz and idea-ology is always the best and especially at Christmas! Here is a link to the entire line of products that have come out this year…CLICK HERE to check it out!
This project is a trio of sorts…I used a set of idea-ology square vignette boxes to make it. I began thinking about the little wreath for the smallest box, then decided it would be fun to create “memory boxes” after I found the new photomatic photo in the new idea-ology Christmas layers pack. Maybe she had a story to tell that involved a special little wreath ornament, a corsage given to her from someone special, and a memory of a past snowy adventure with some friends…at least that’s the story that felt right to me, and why I created 3 separate boxes.
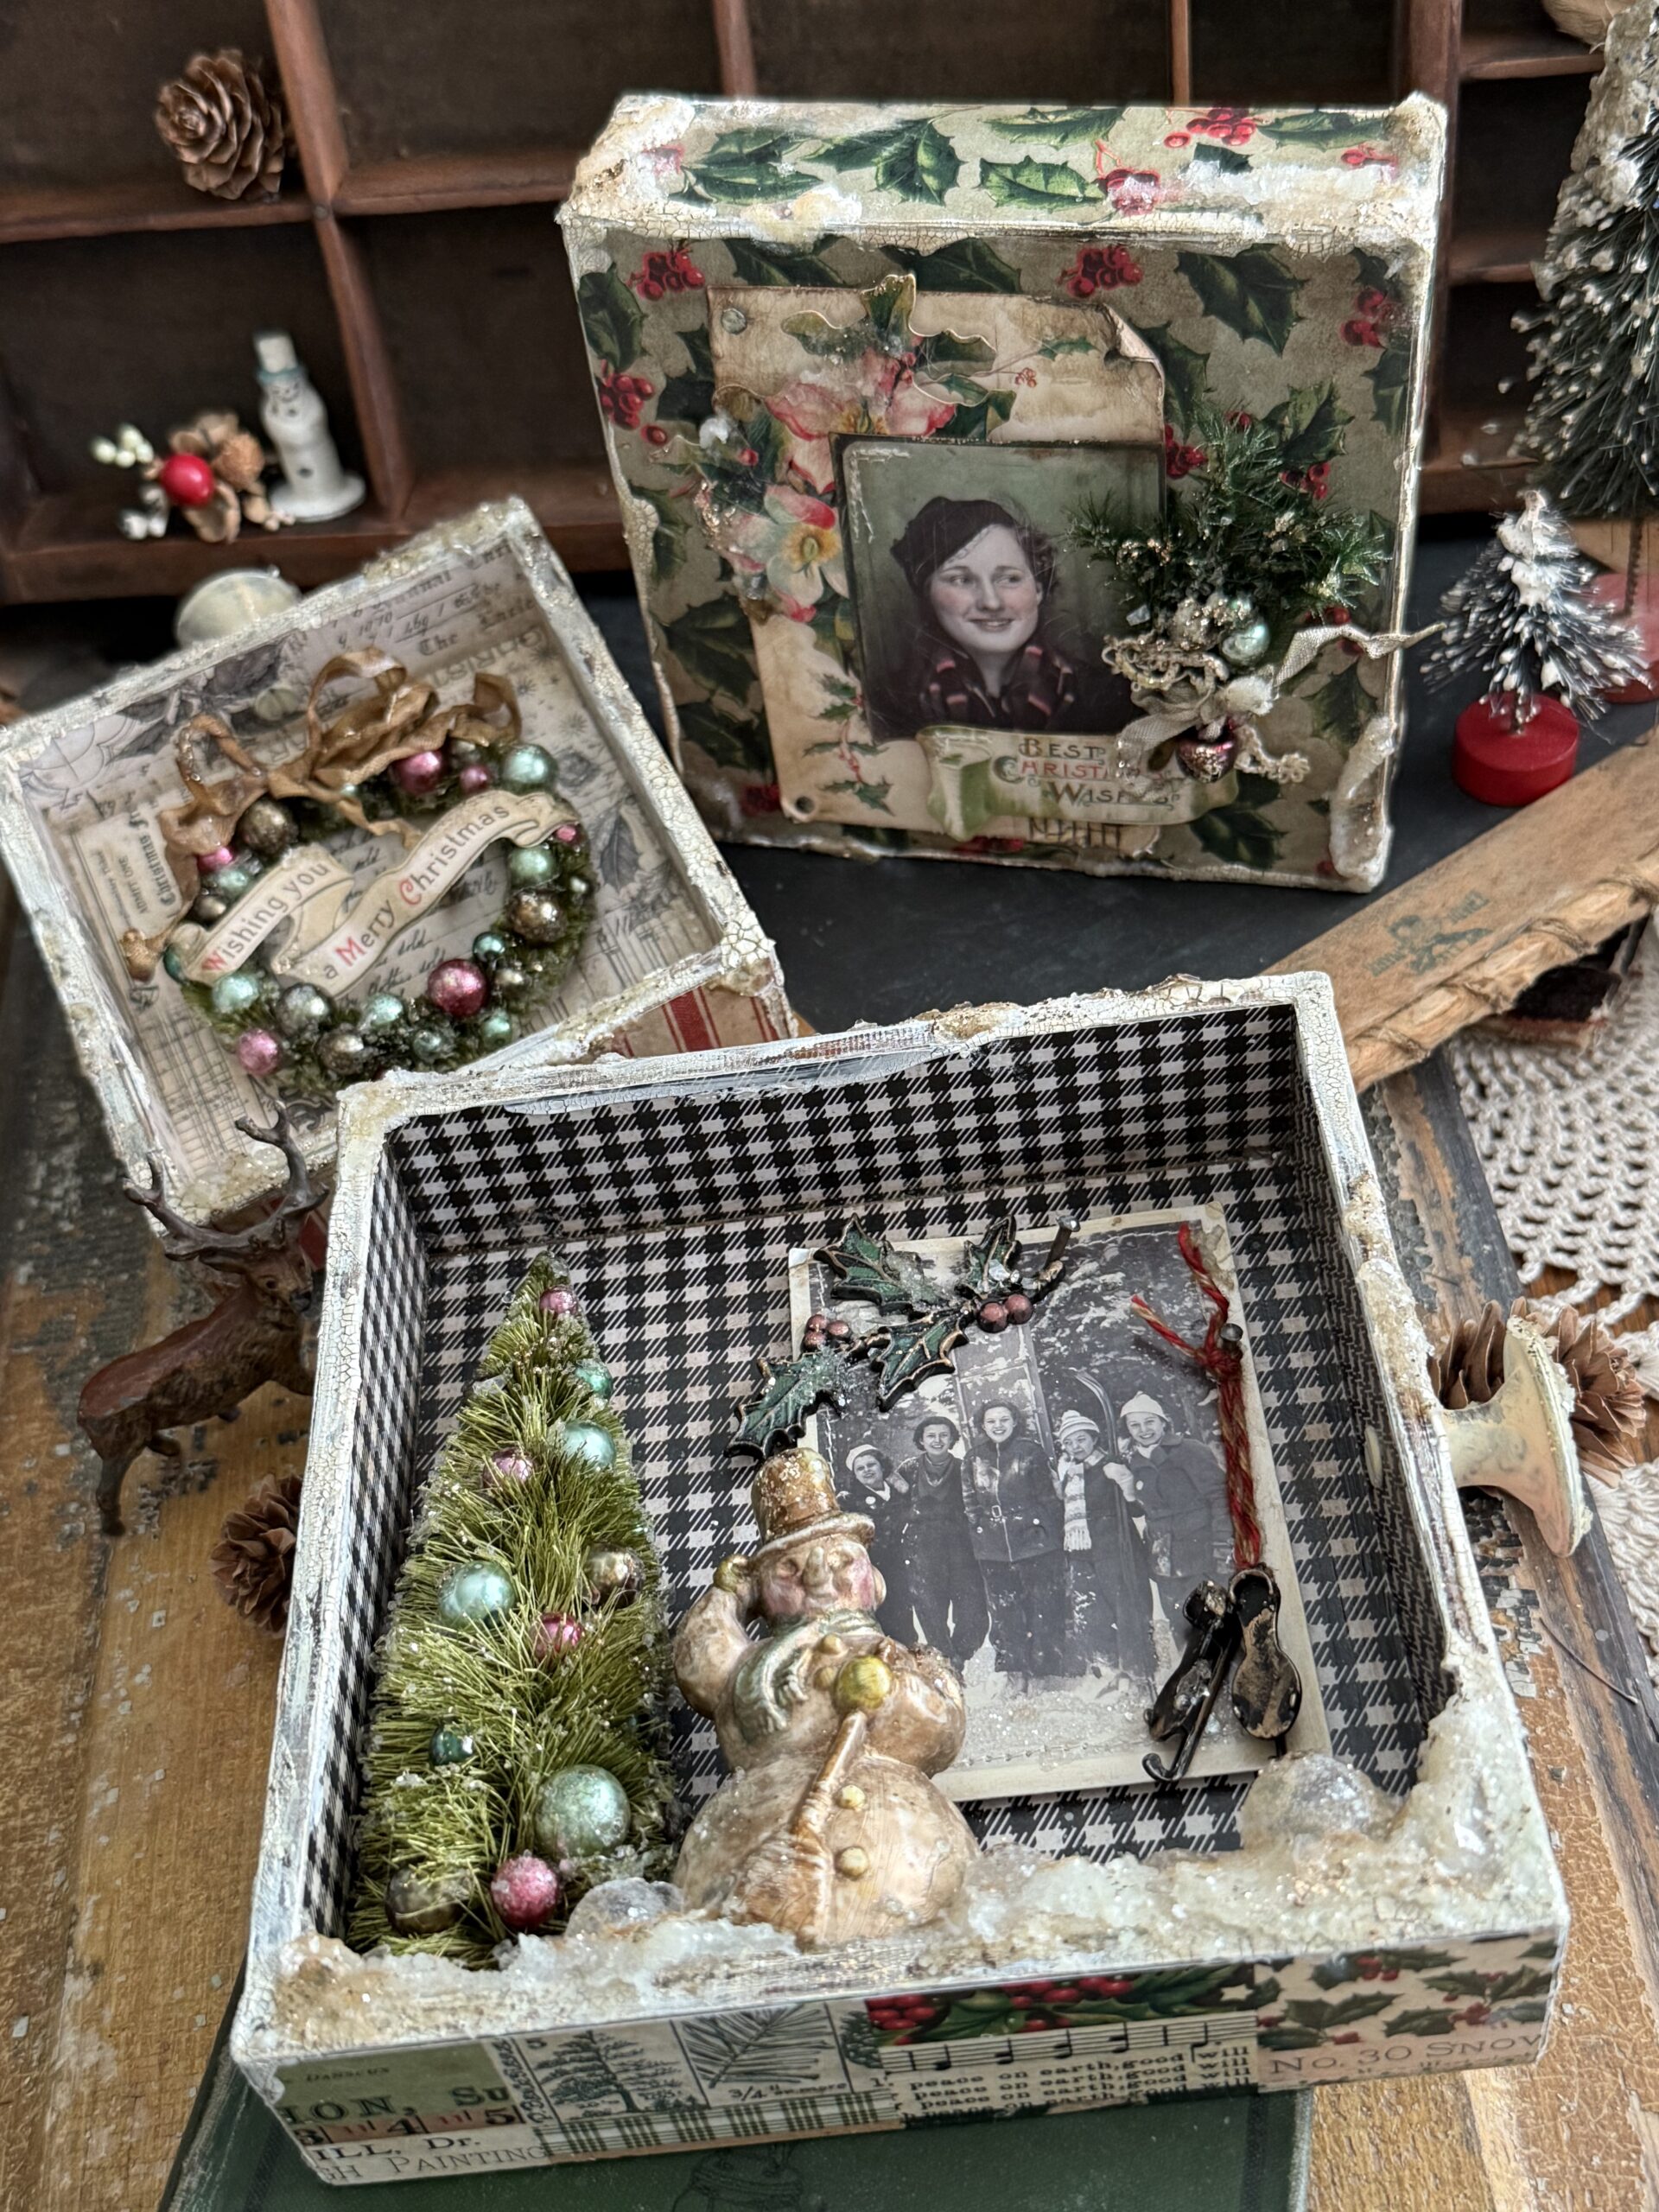
I thought these could be displayed together in a trio on a wall of displayed next to each other to tell the story.
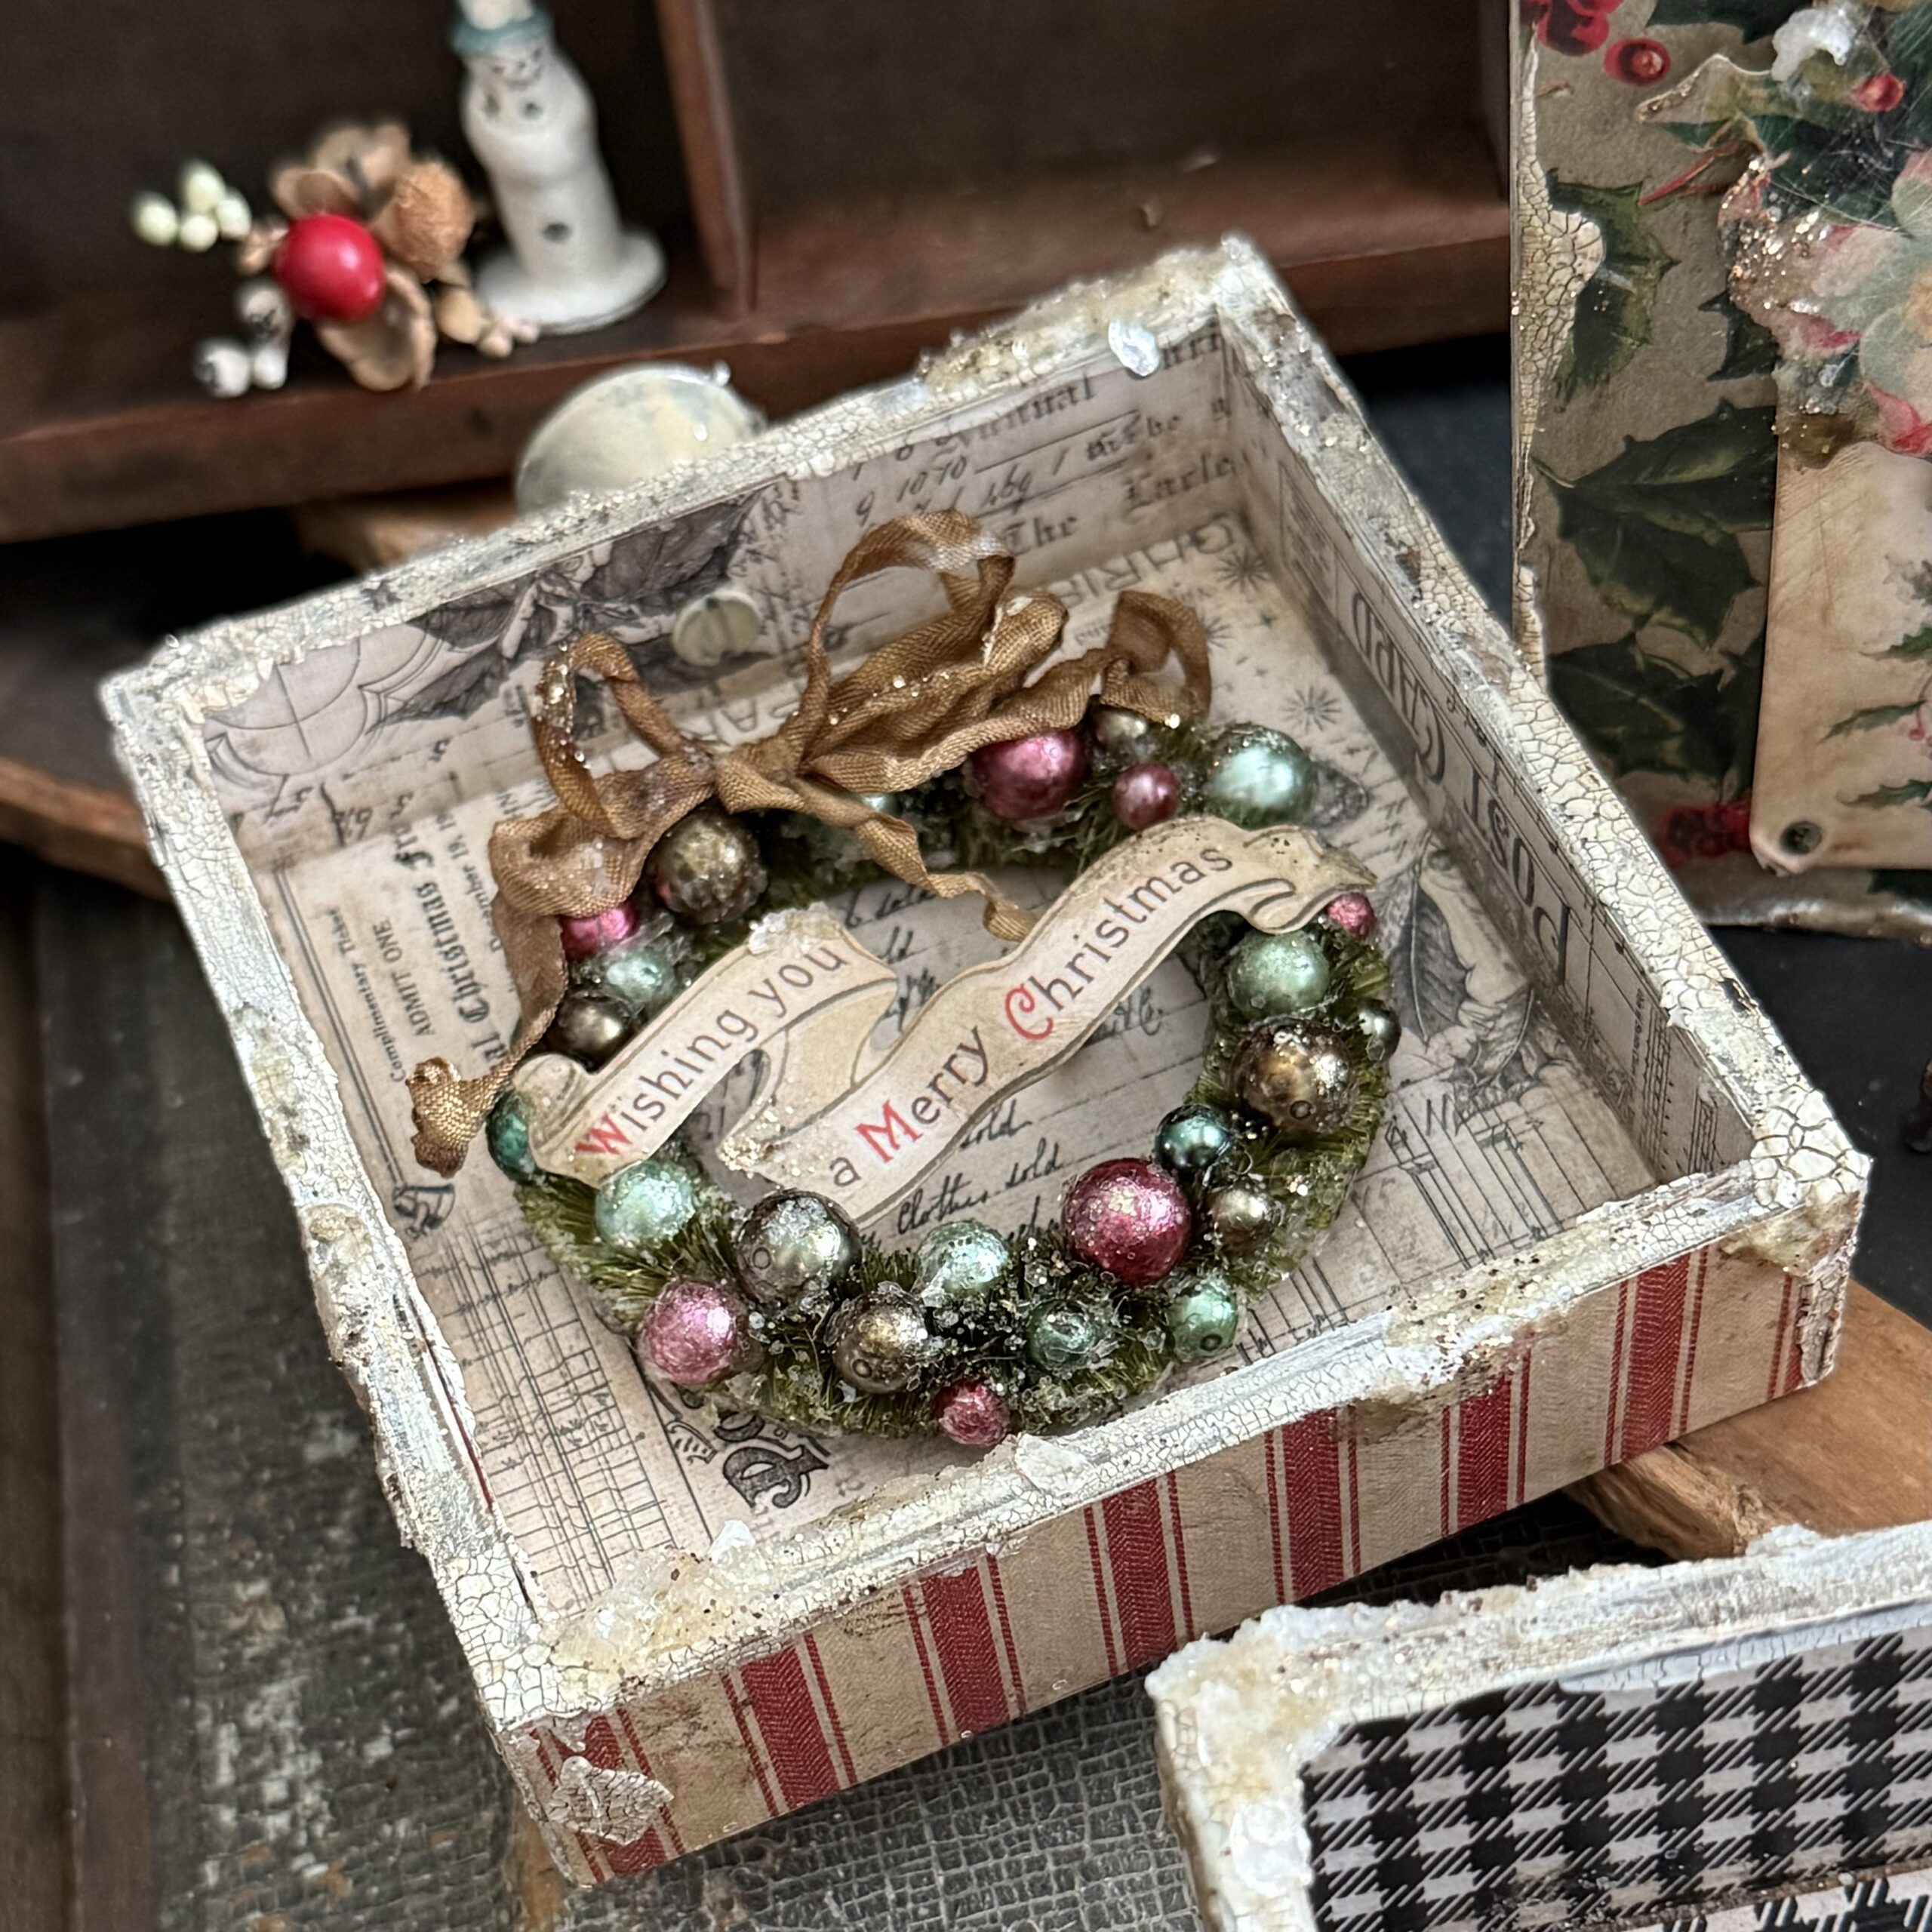
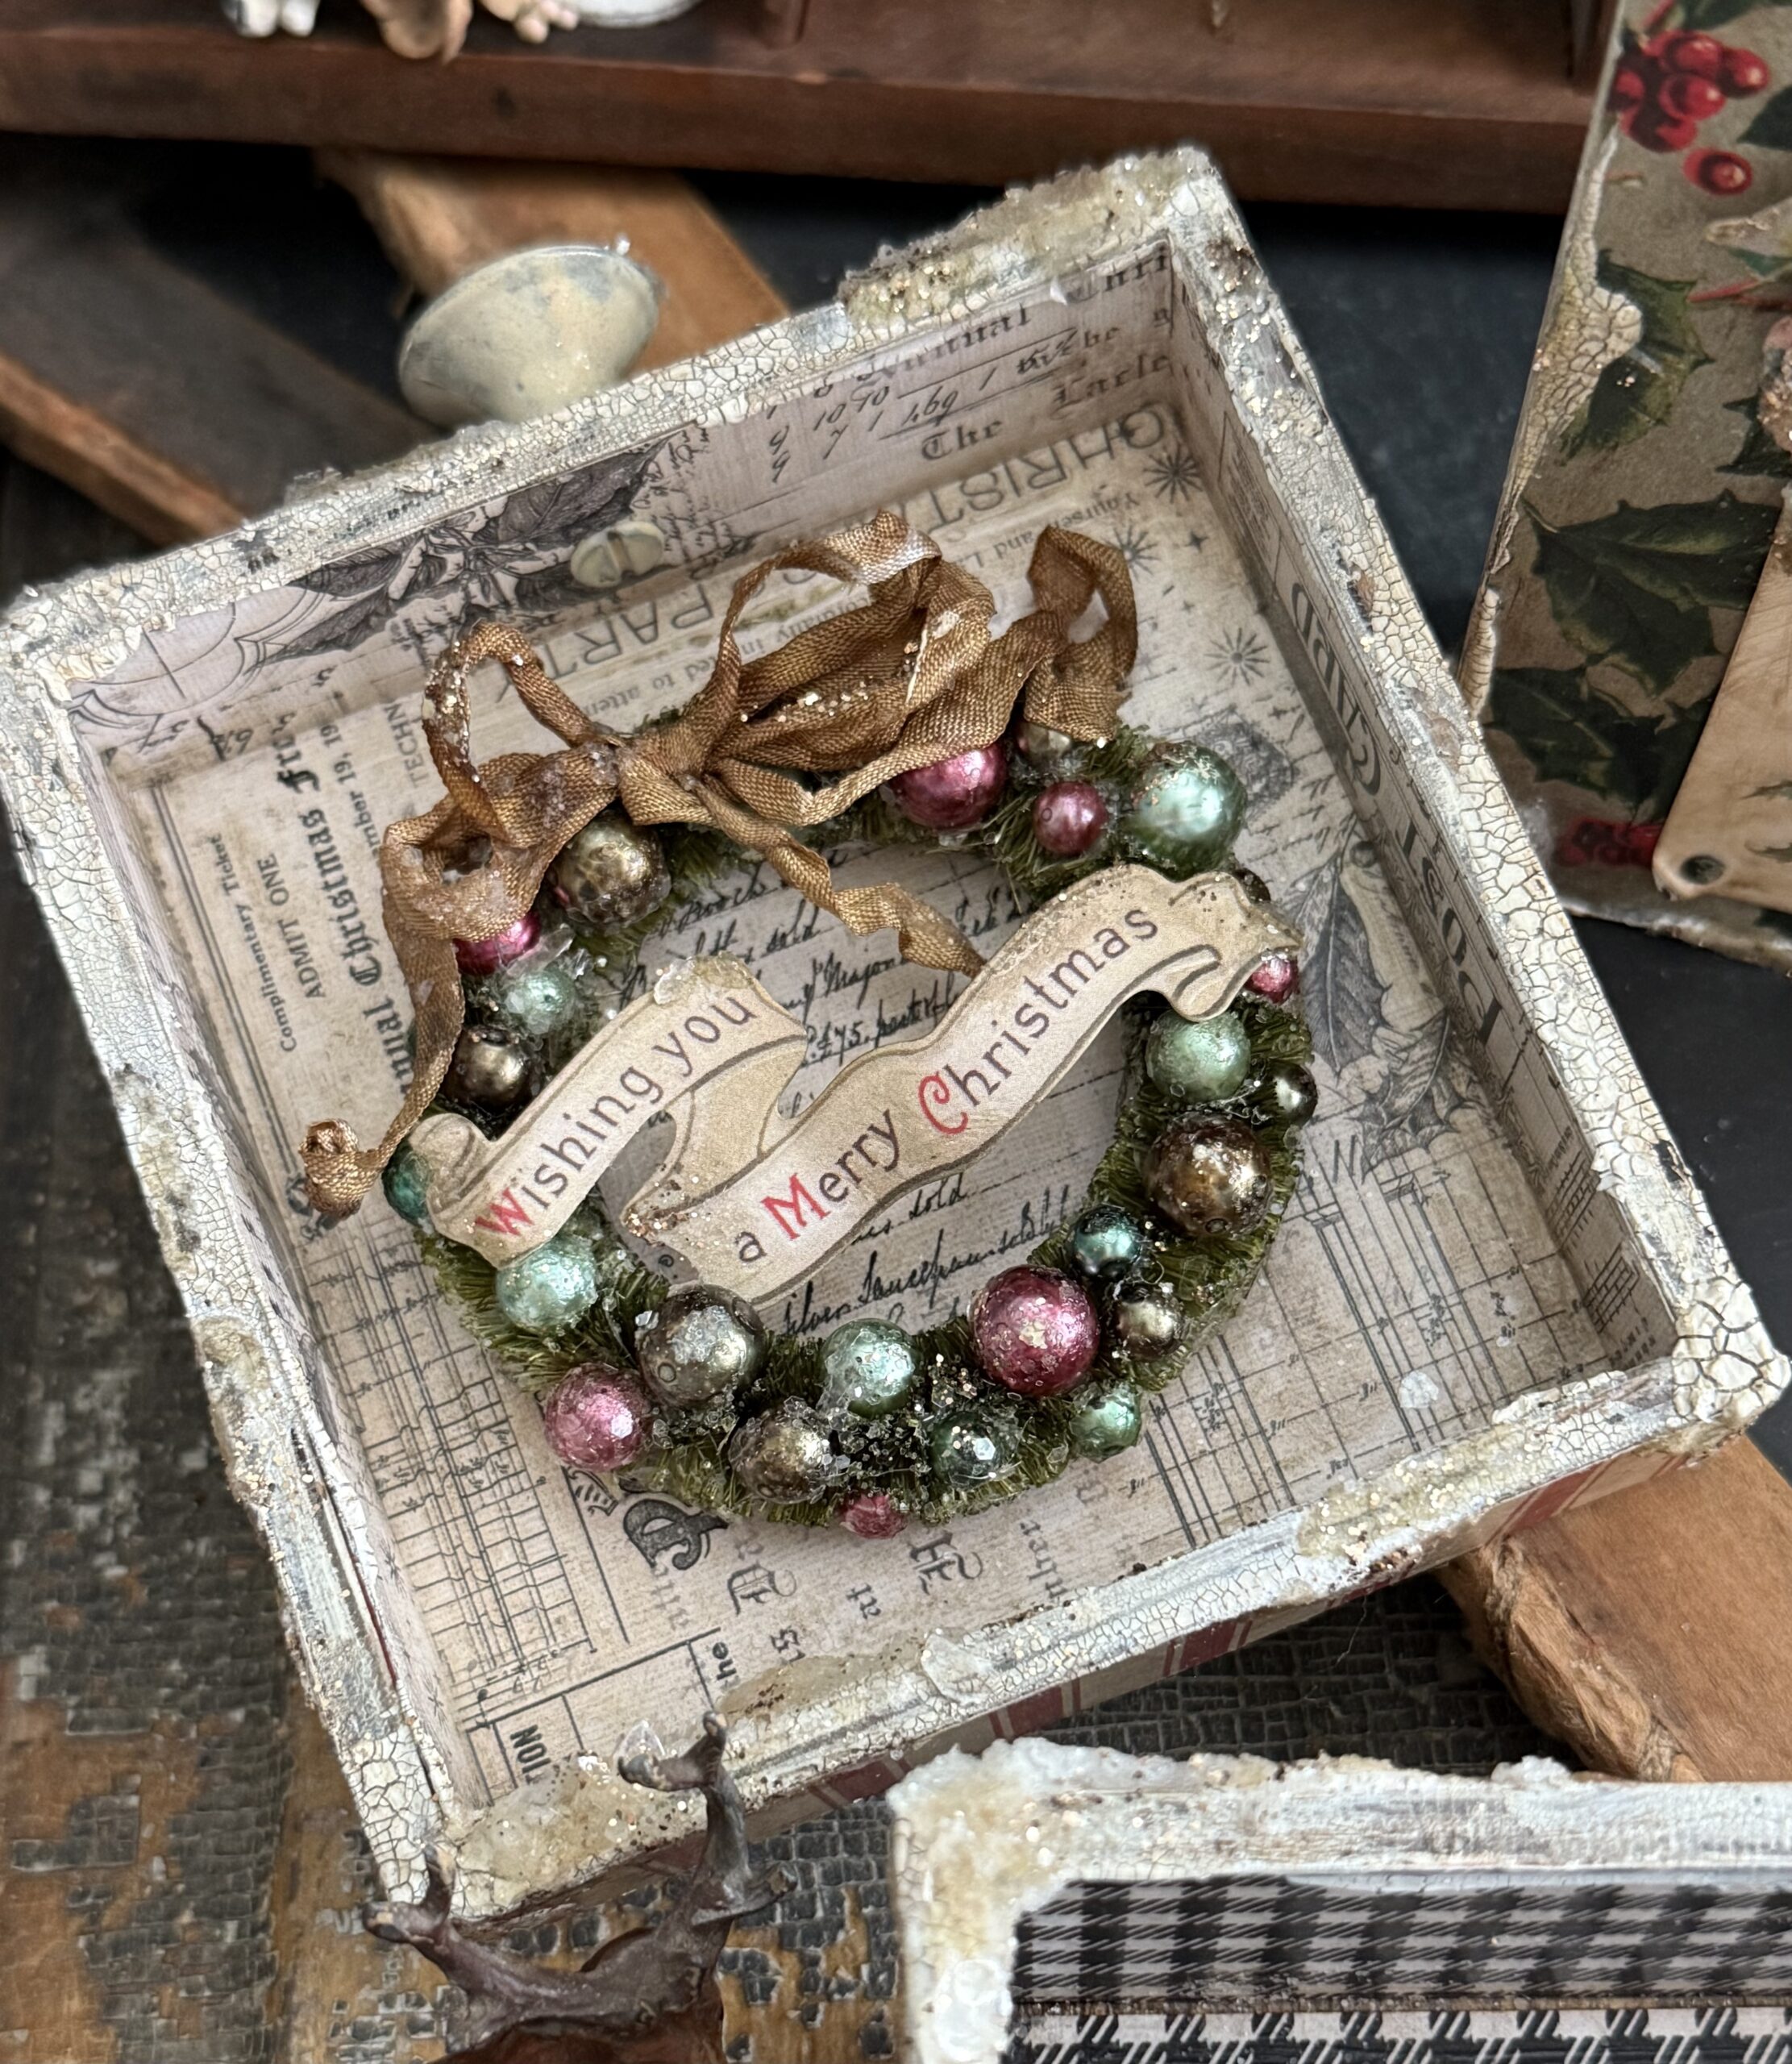
The first, the smallest box of the set, contains a small wreath that I made using the Woodlands Garland, Baubles, and a banner I found in the Christmas Ephemera pack. It is all gussied up using alcohol inks to color the baubles and lots of added sparkle using a little bit of everything that included Mica Flakes, Rock Candy Glitter Fine and Chunky and the new Liquid Tinsel Chunky in Tarnished…now, I know that’s a lot for such a small wreath, but if you’re anything like me, this time of the year is the BEST time to add all the glitz! Besides the fact is that true vintage bottle brush trees and wreaths are ALWAYS covered in all sorts of glitter. So, I just went at it with my whole heart!
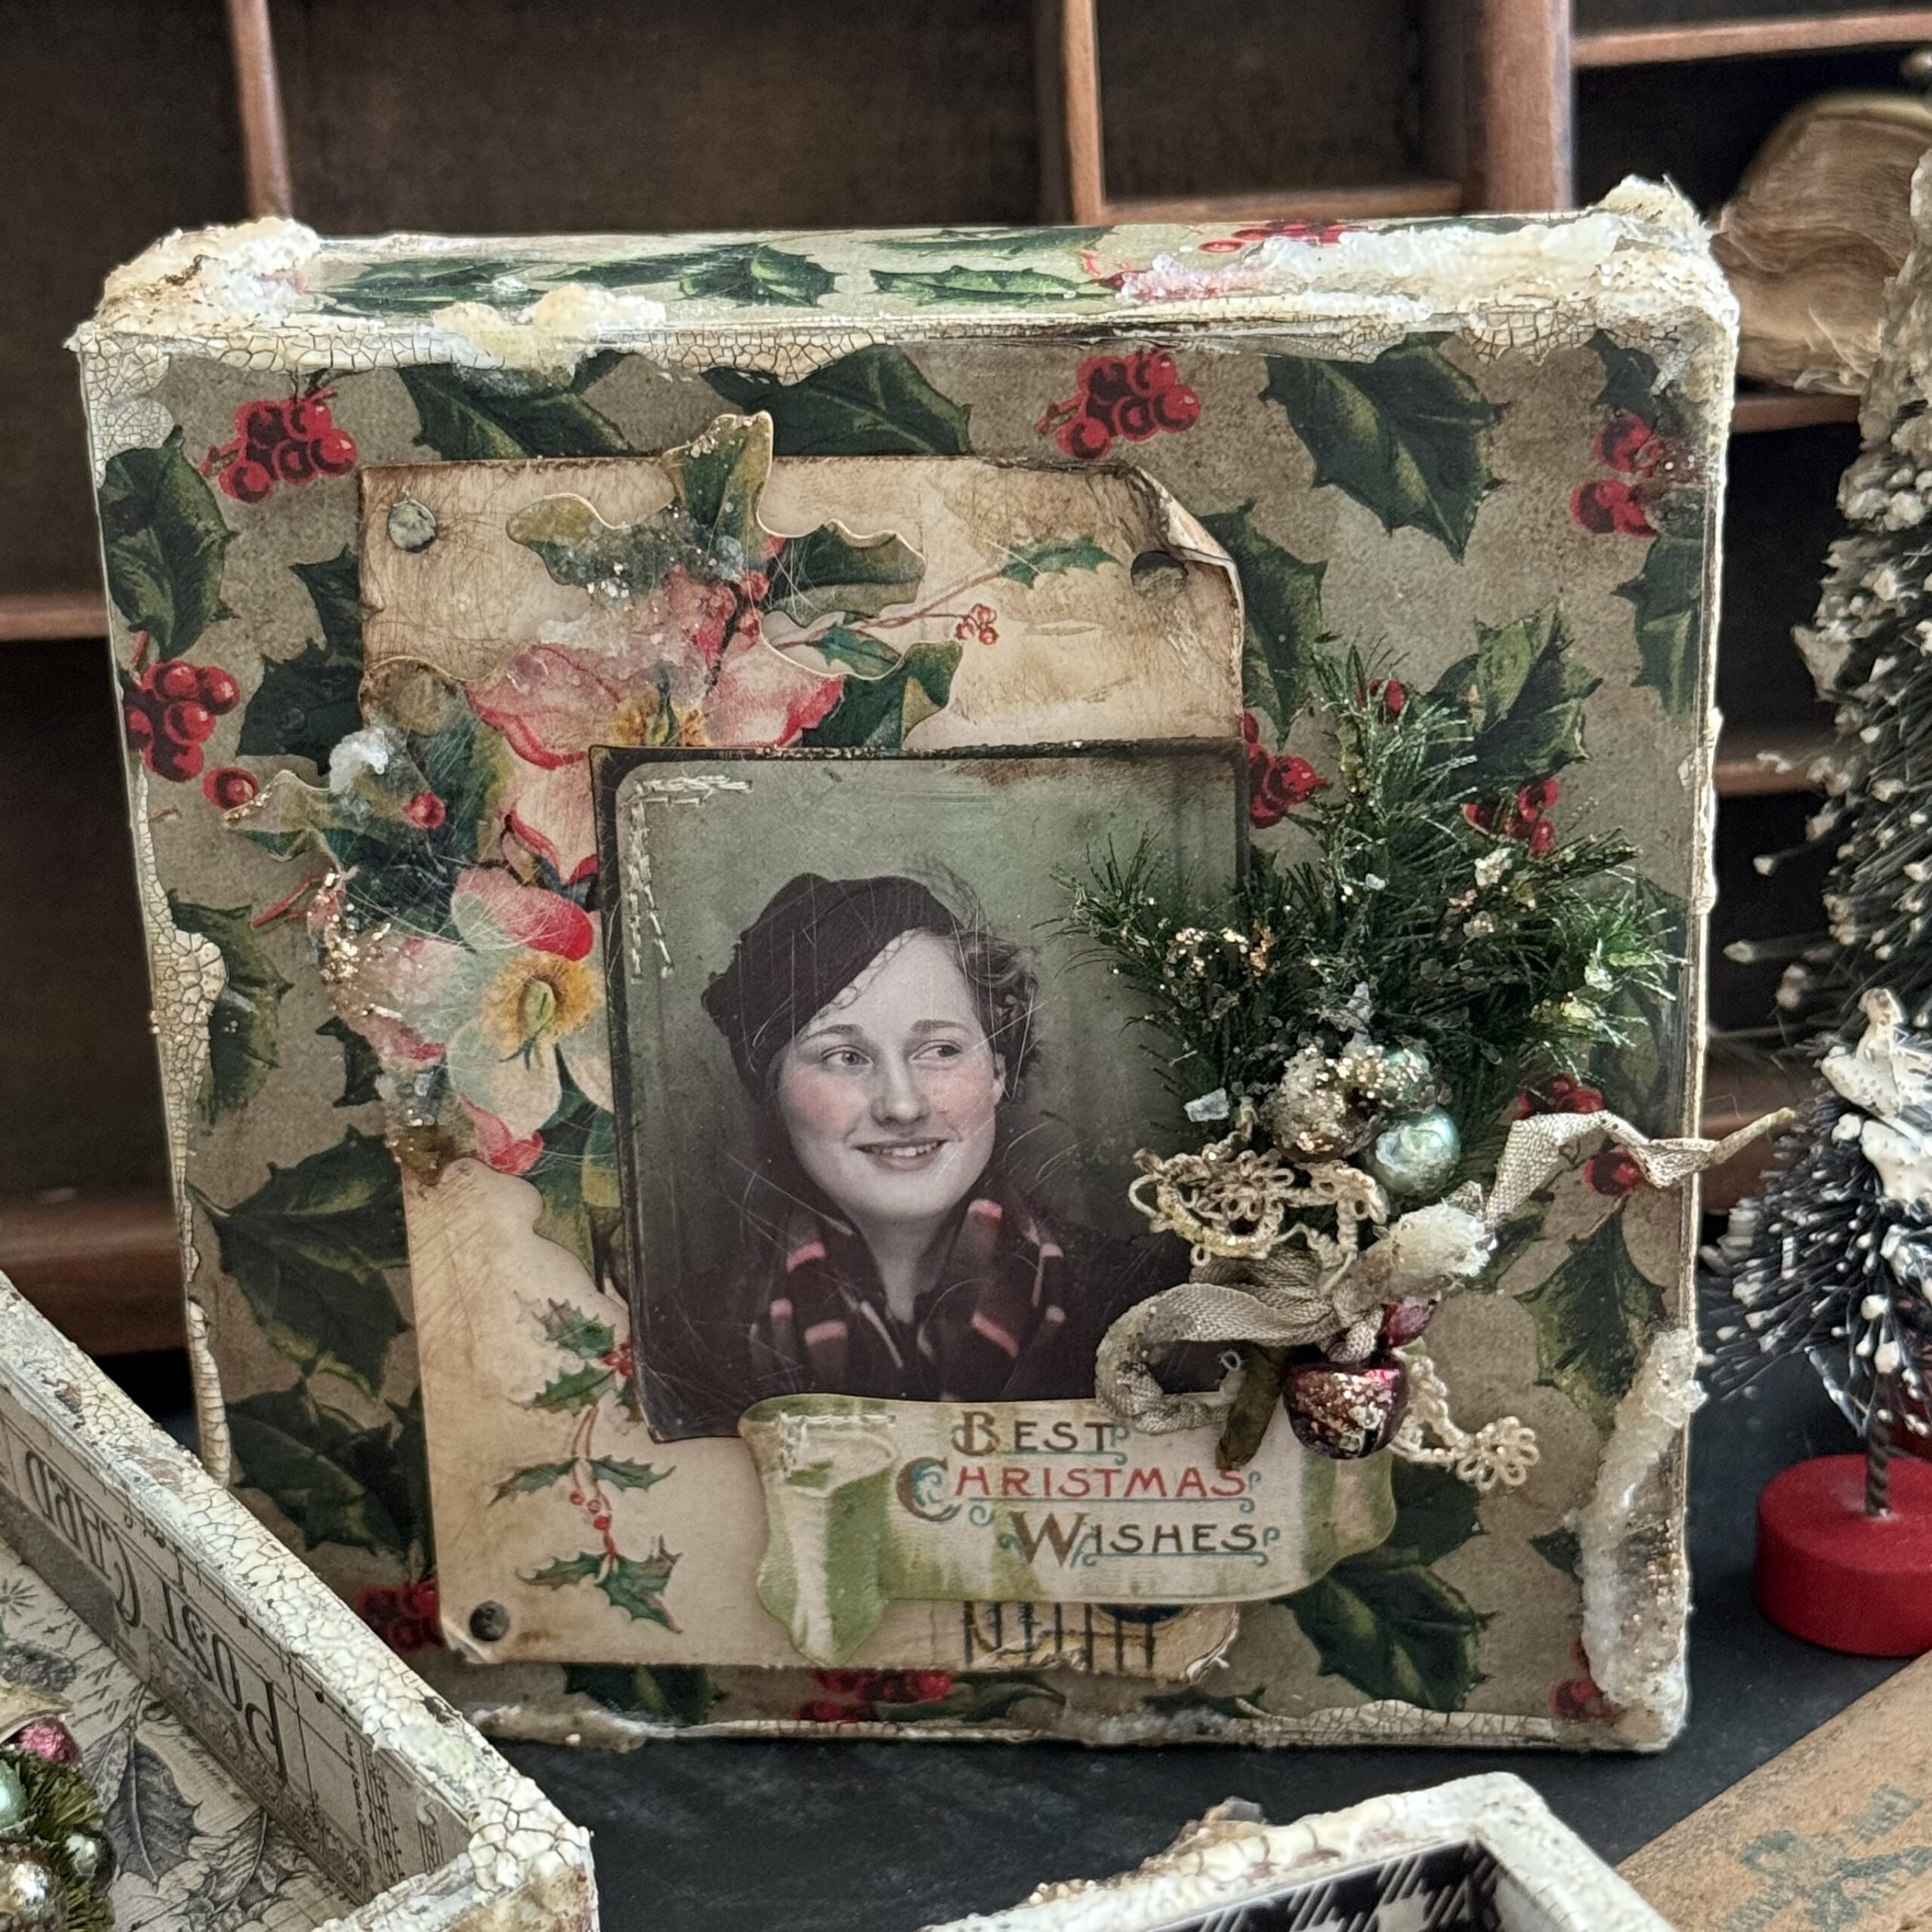
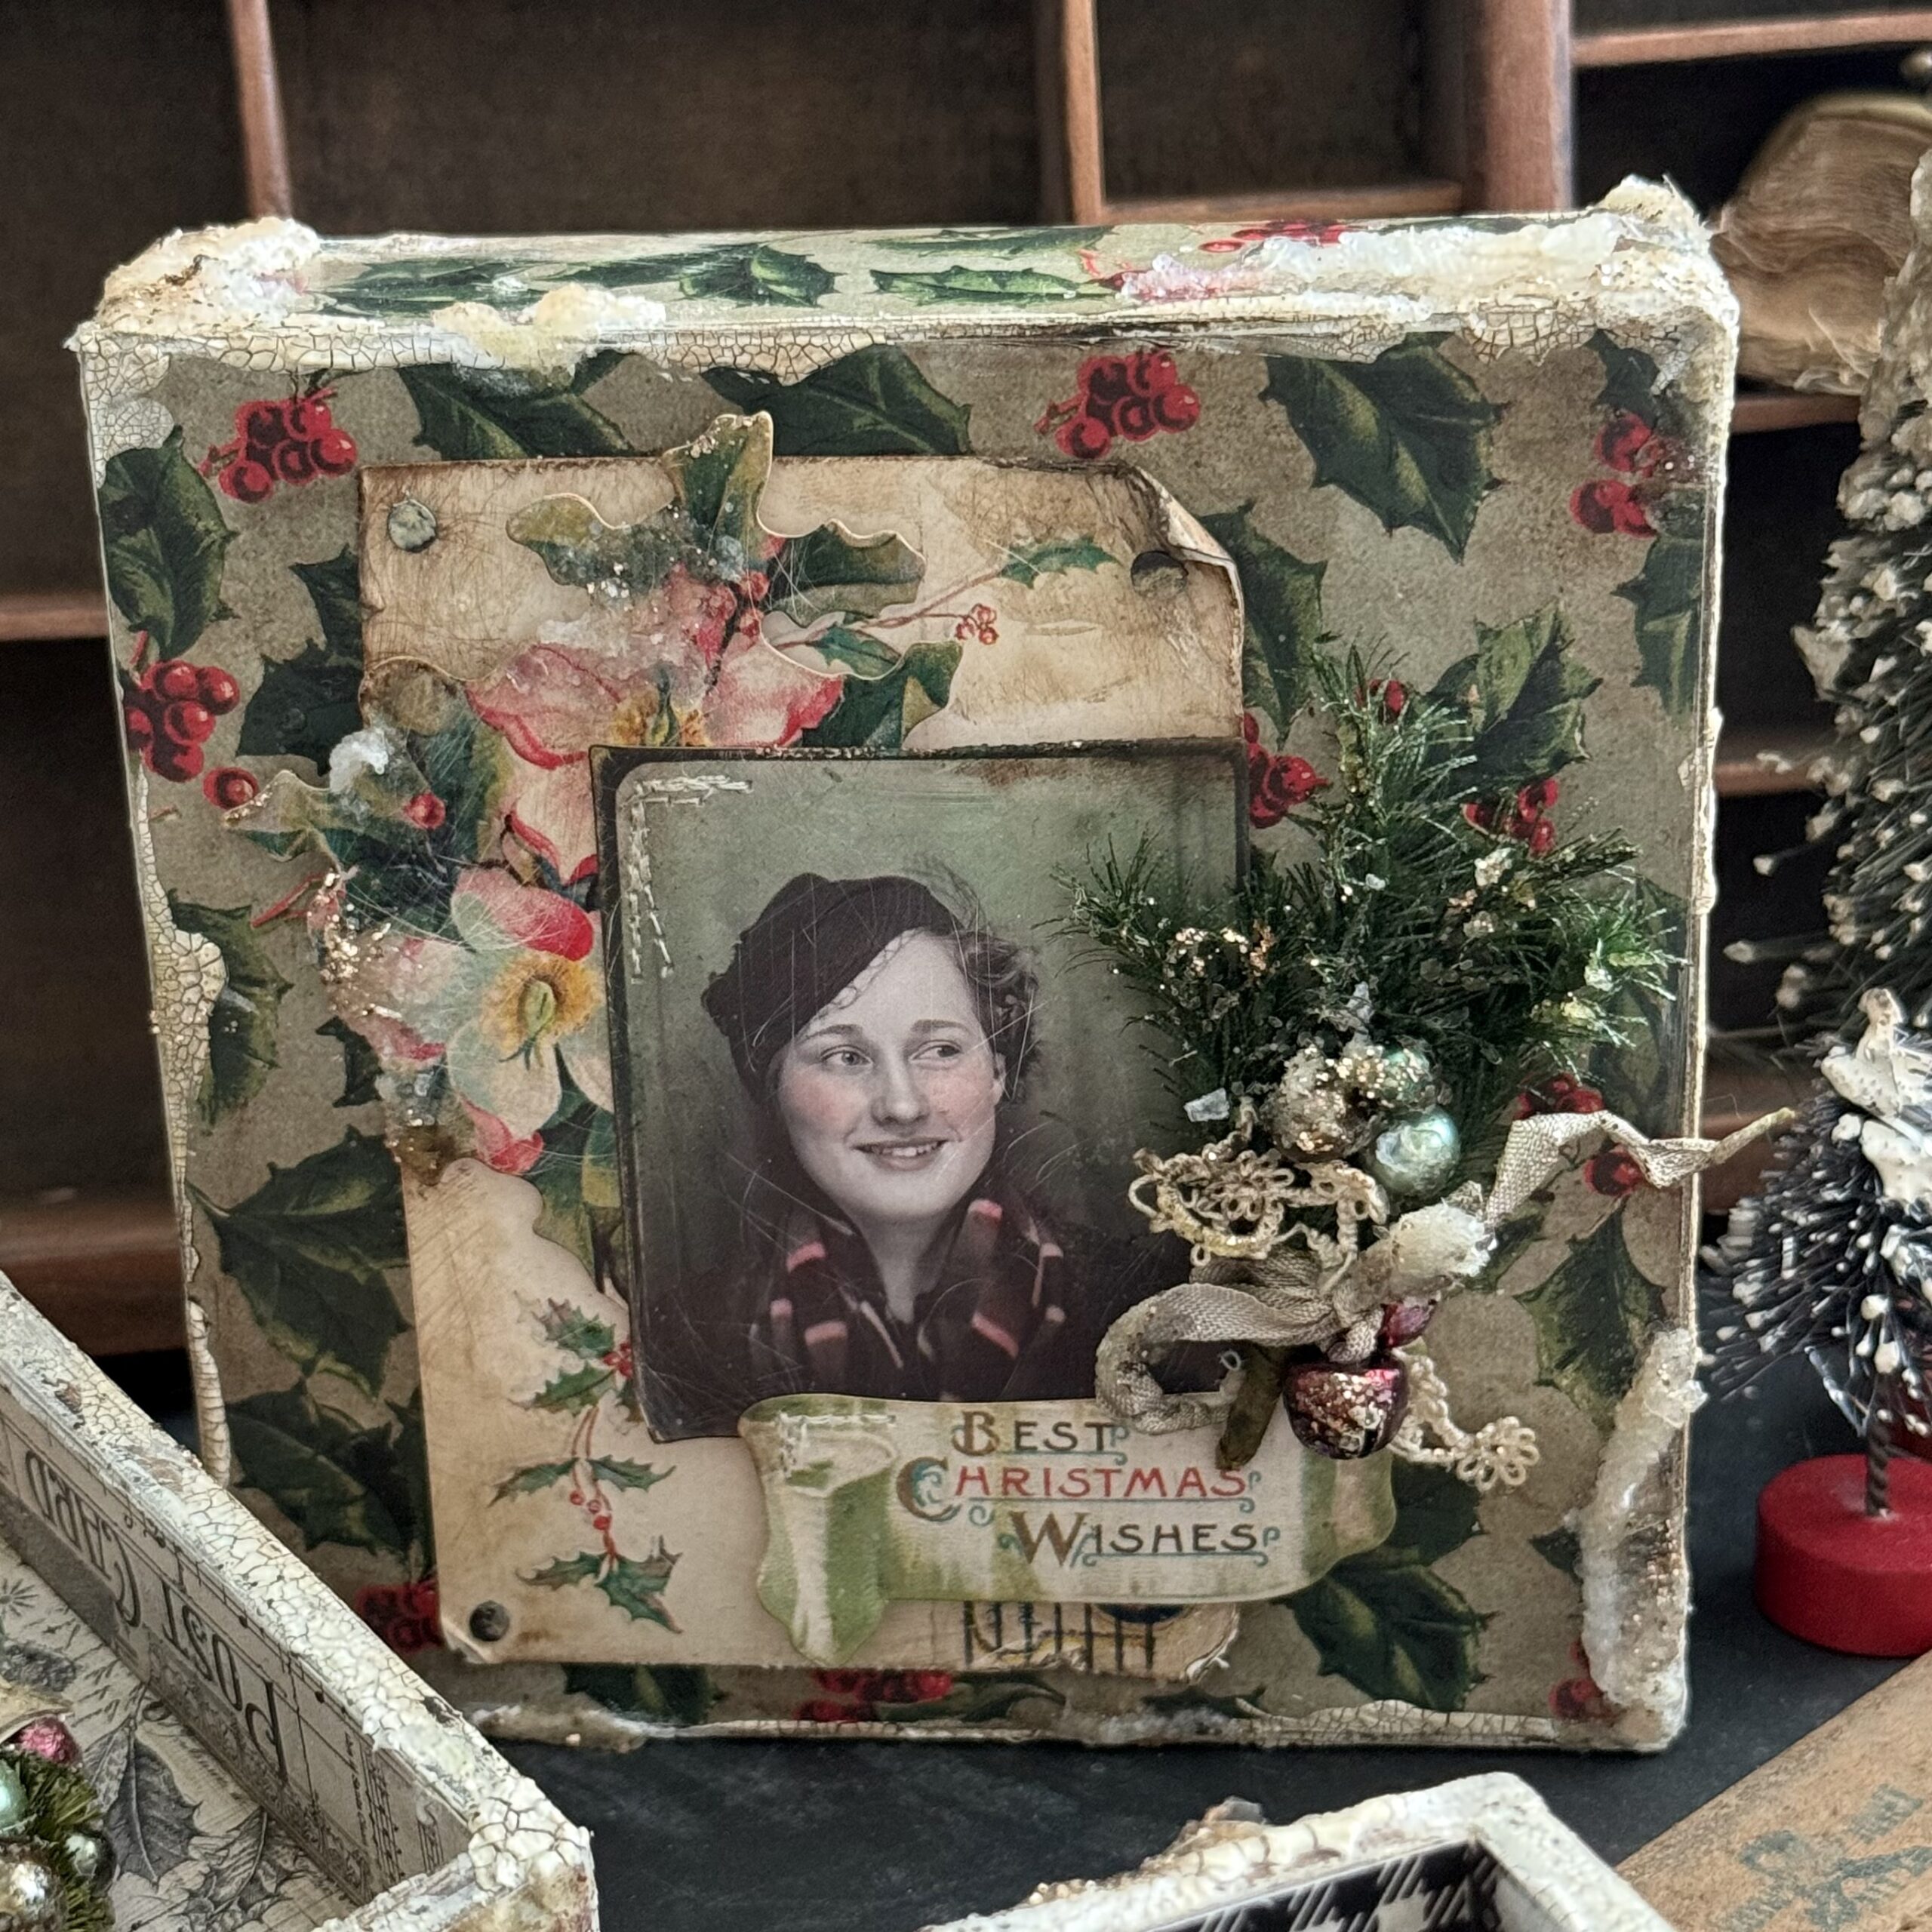
The next square vignette uses the photomatic photo that I found in the idea-ology Layers, and this time, I used the new Pine Stems to create a small corsage type of piece to add to the vignette. I collect true vintage corsages to display at Christmas with my holiday displays and I used those for my inspiration. I also used a pretty floral piece that is found in the new Layers Botanical. It is chuck full of beautiful florals..I love it! This box uses the outside of the box for the display.
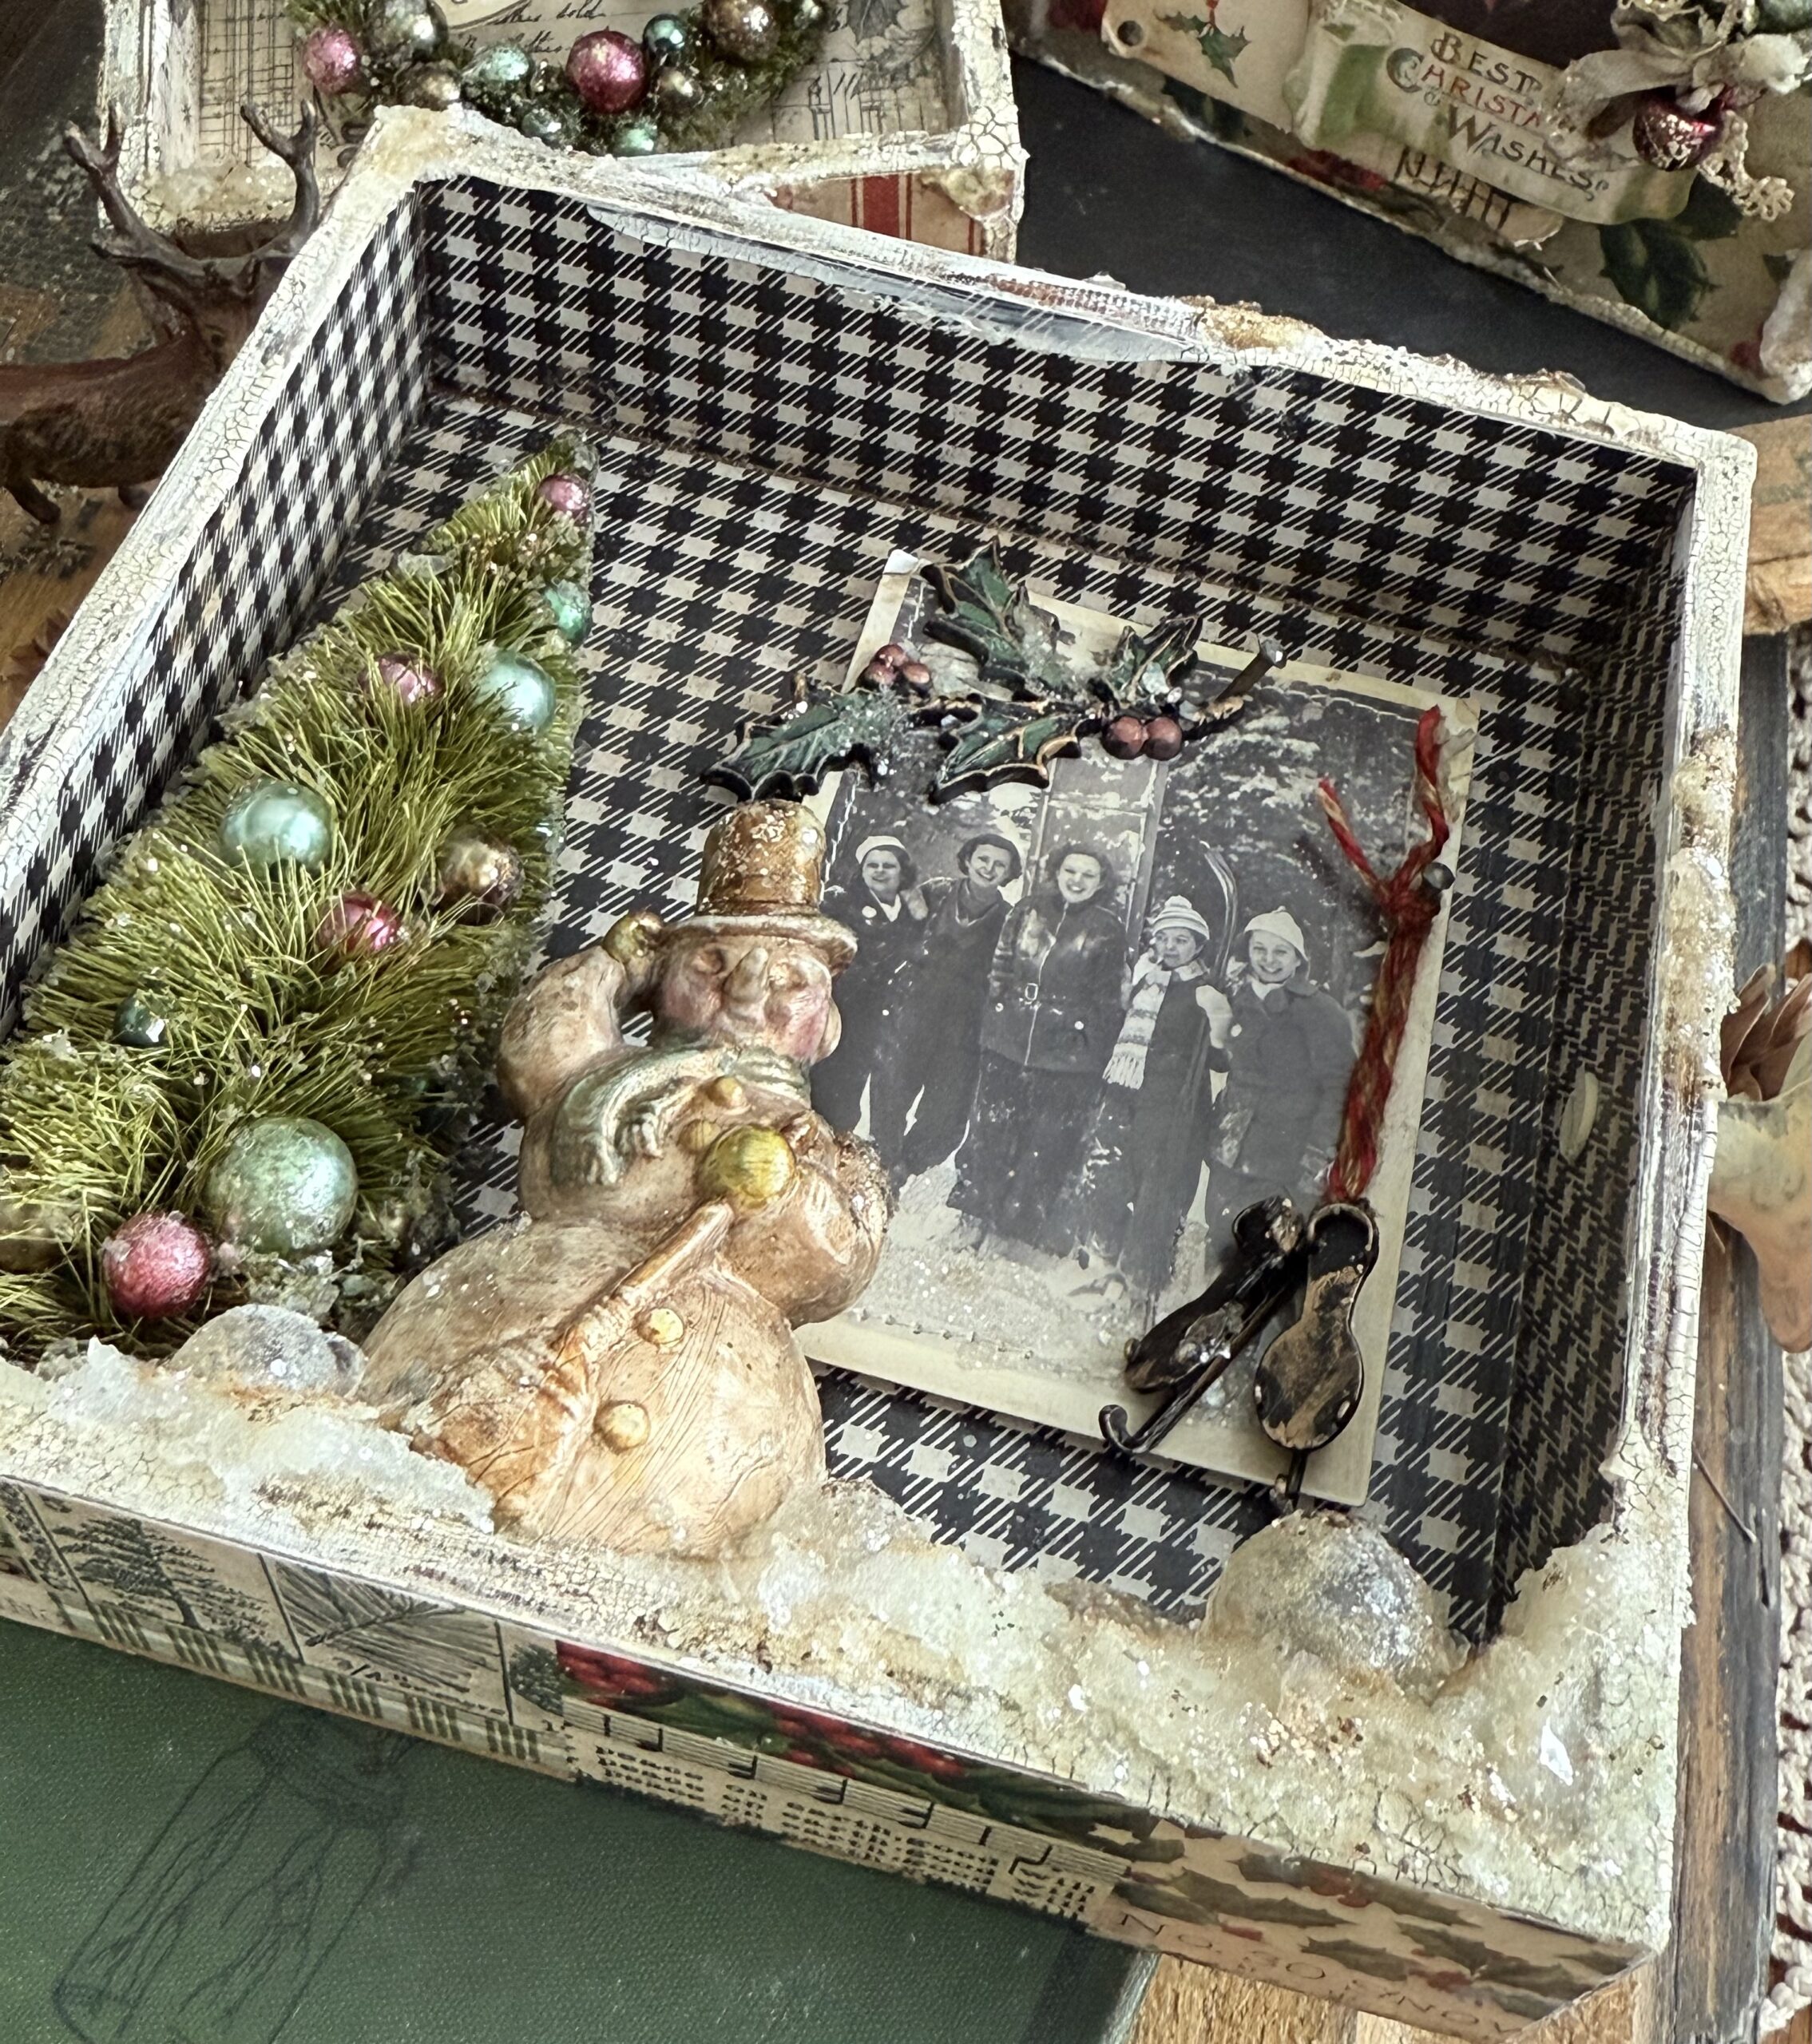
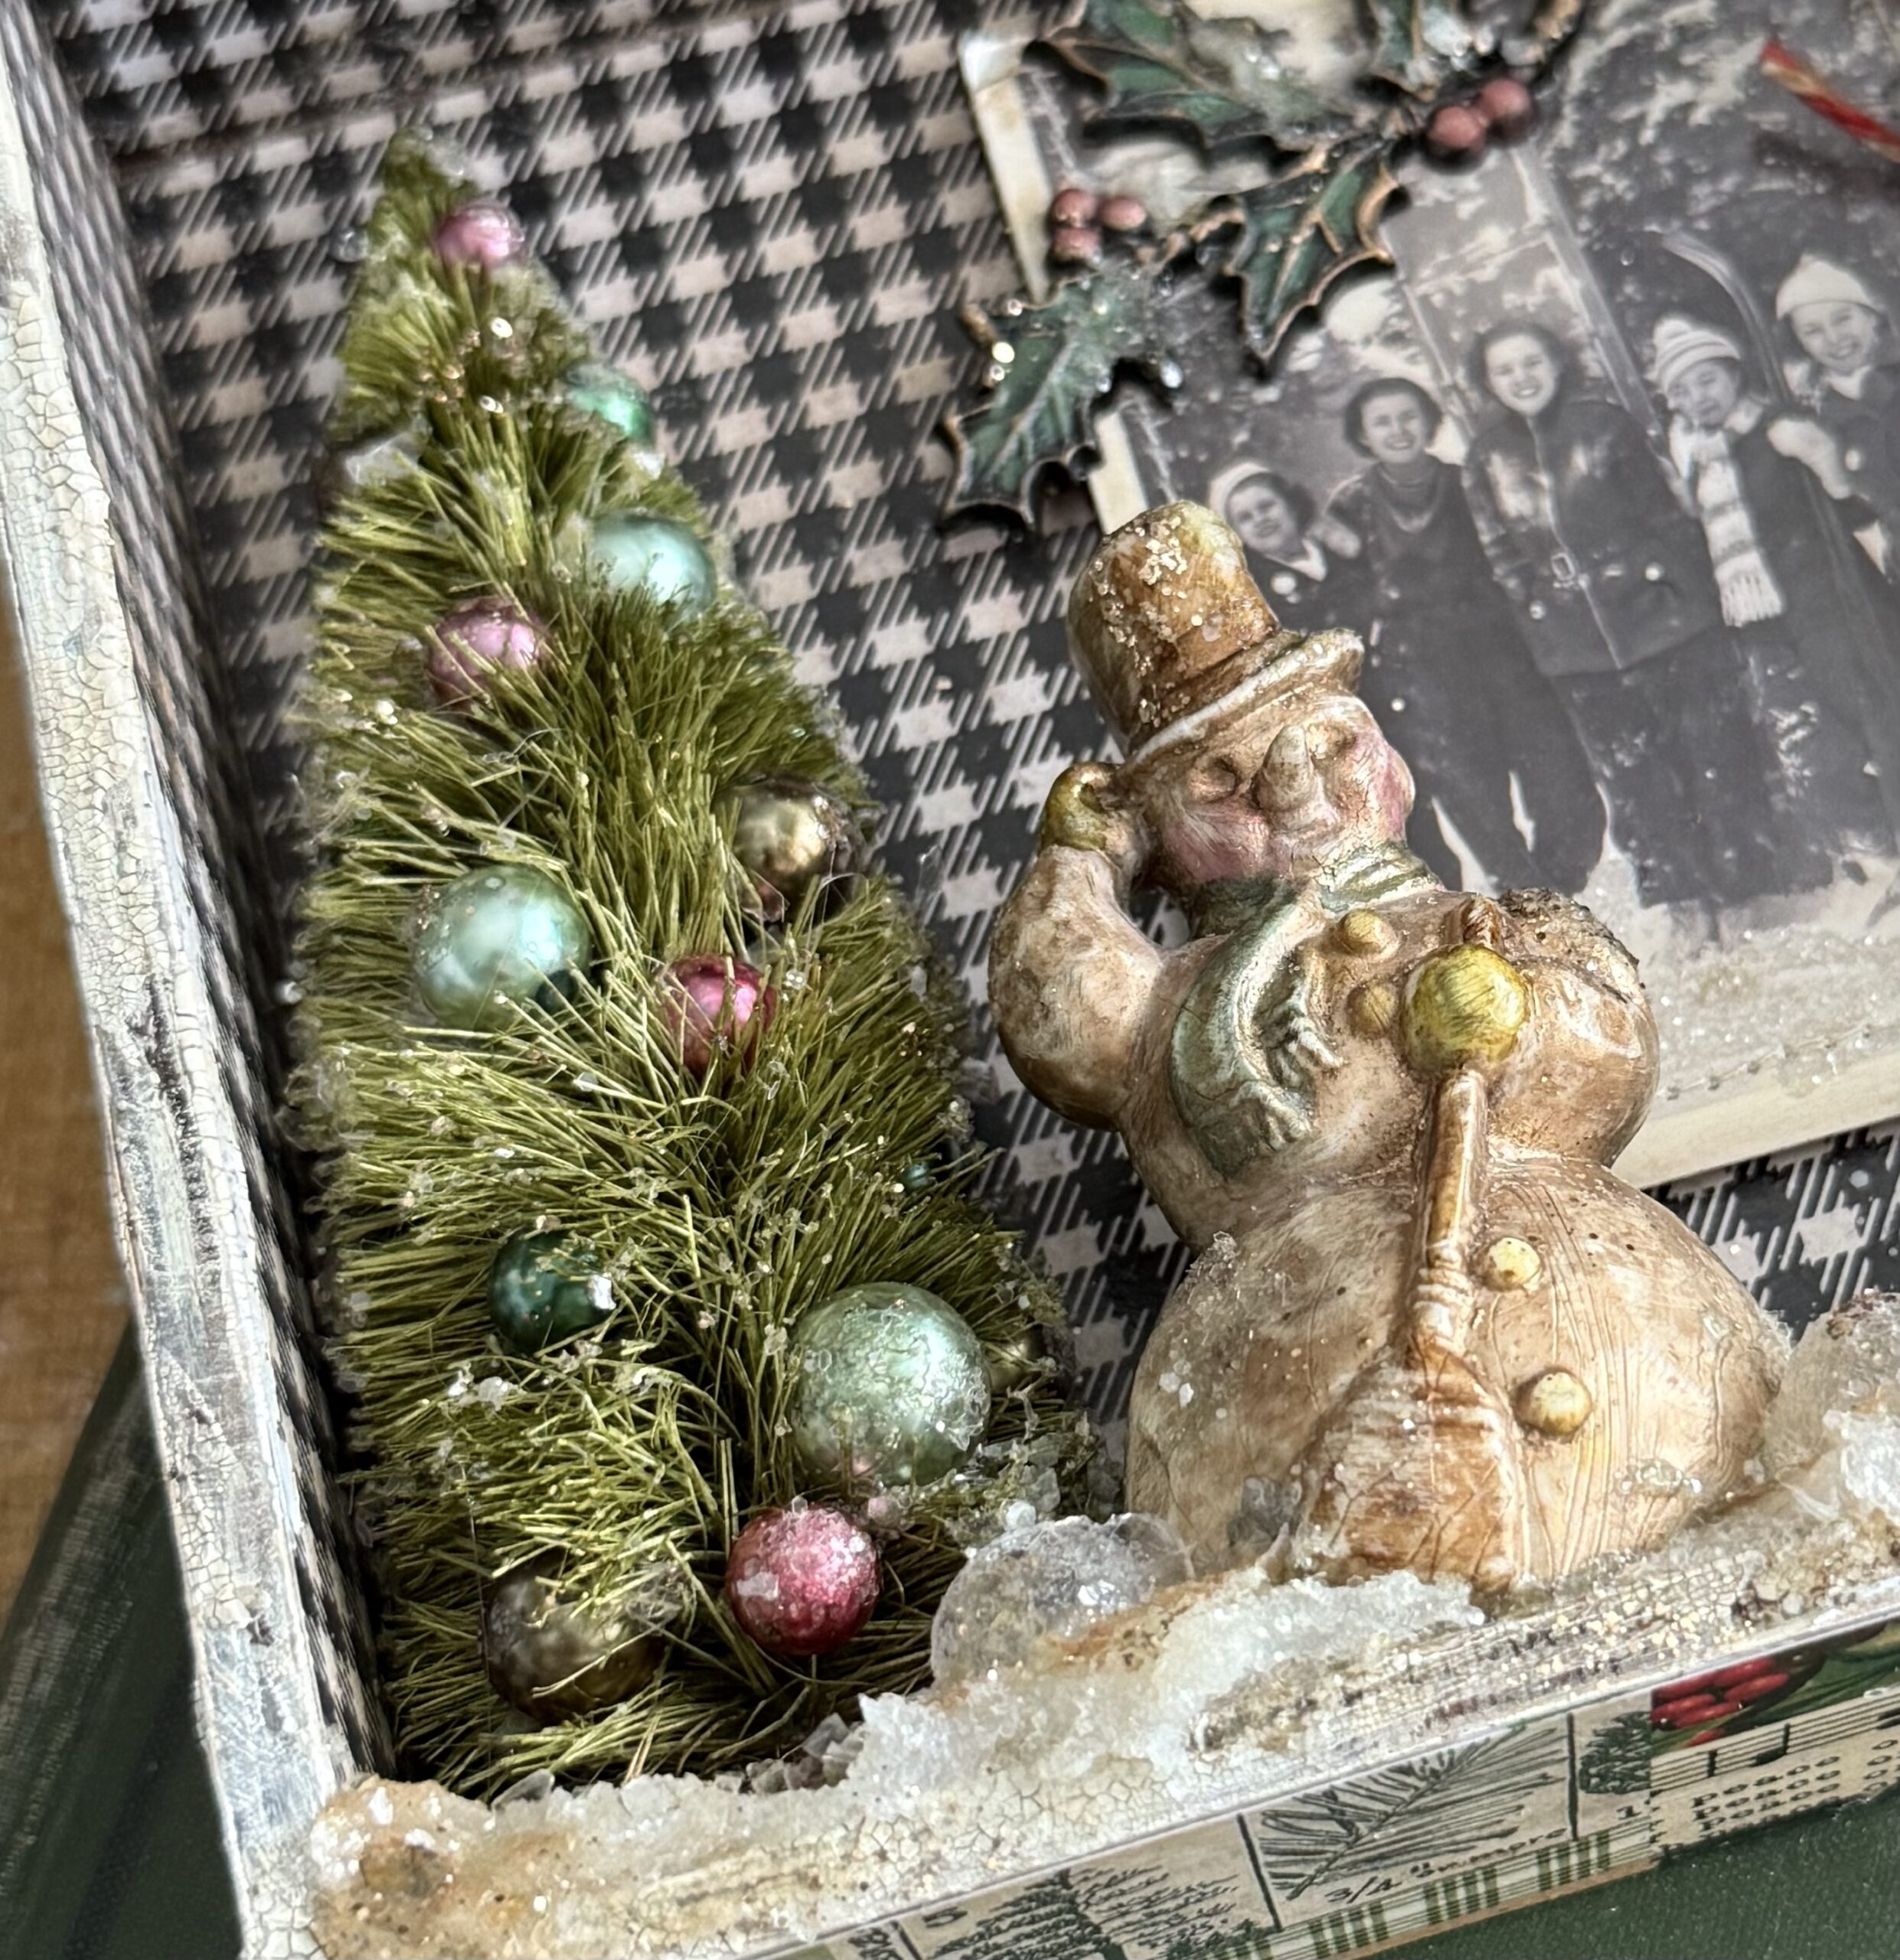
And finally, the third box, containing the adventure photo that I imagined was a snapshot of her and her friends enjoying a winter adventure together. I used the photo to tell the story, then added a mini snowman and bottle brush tree. The tree was decorated with the same colors of baubles and glittered up in the same way as the other boxes…I added a tiny set of Skate Charms from the Wonderland Adornments and a spray of holly from the Festive Adornments pack.
So, let’s get to making…
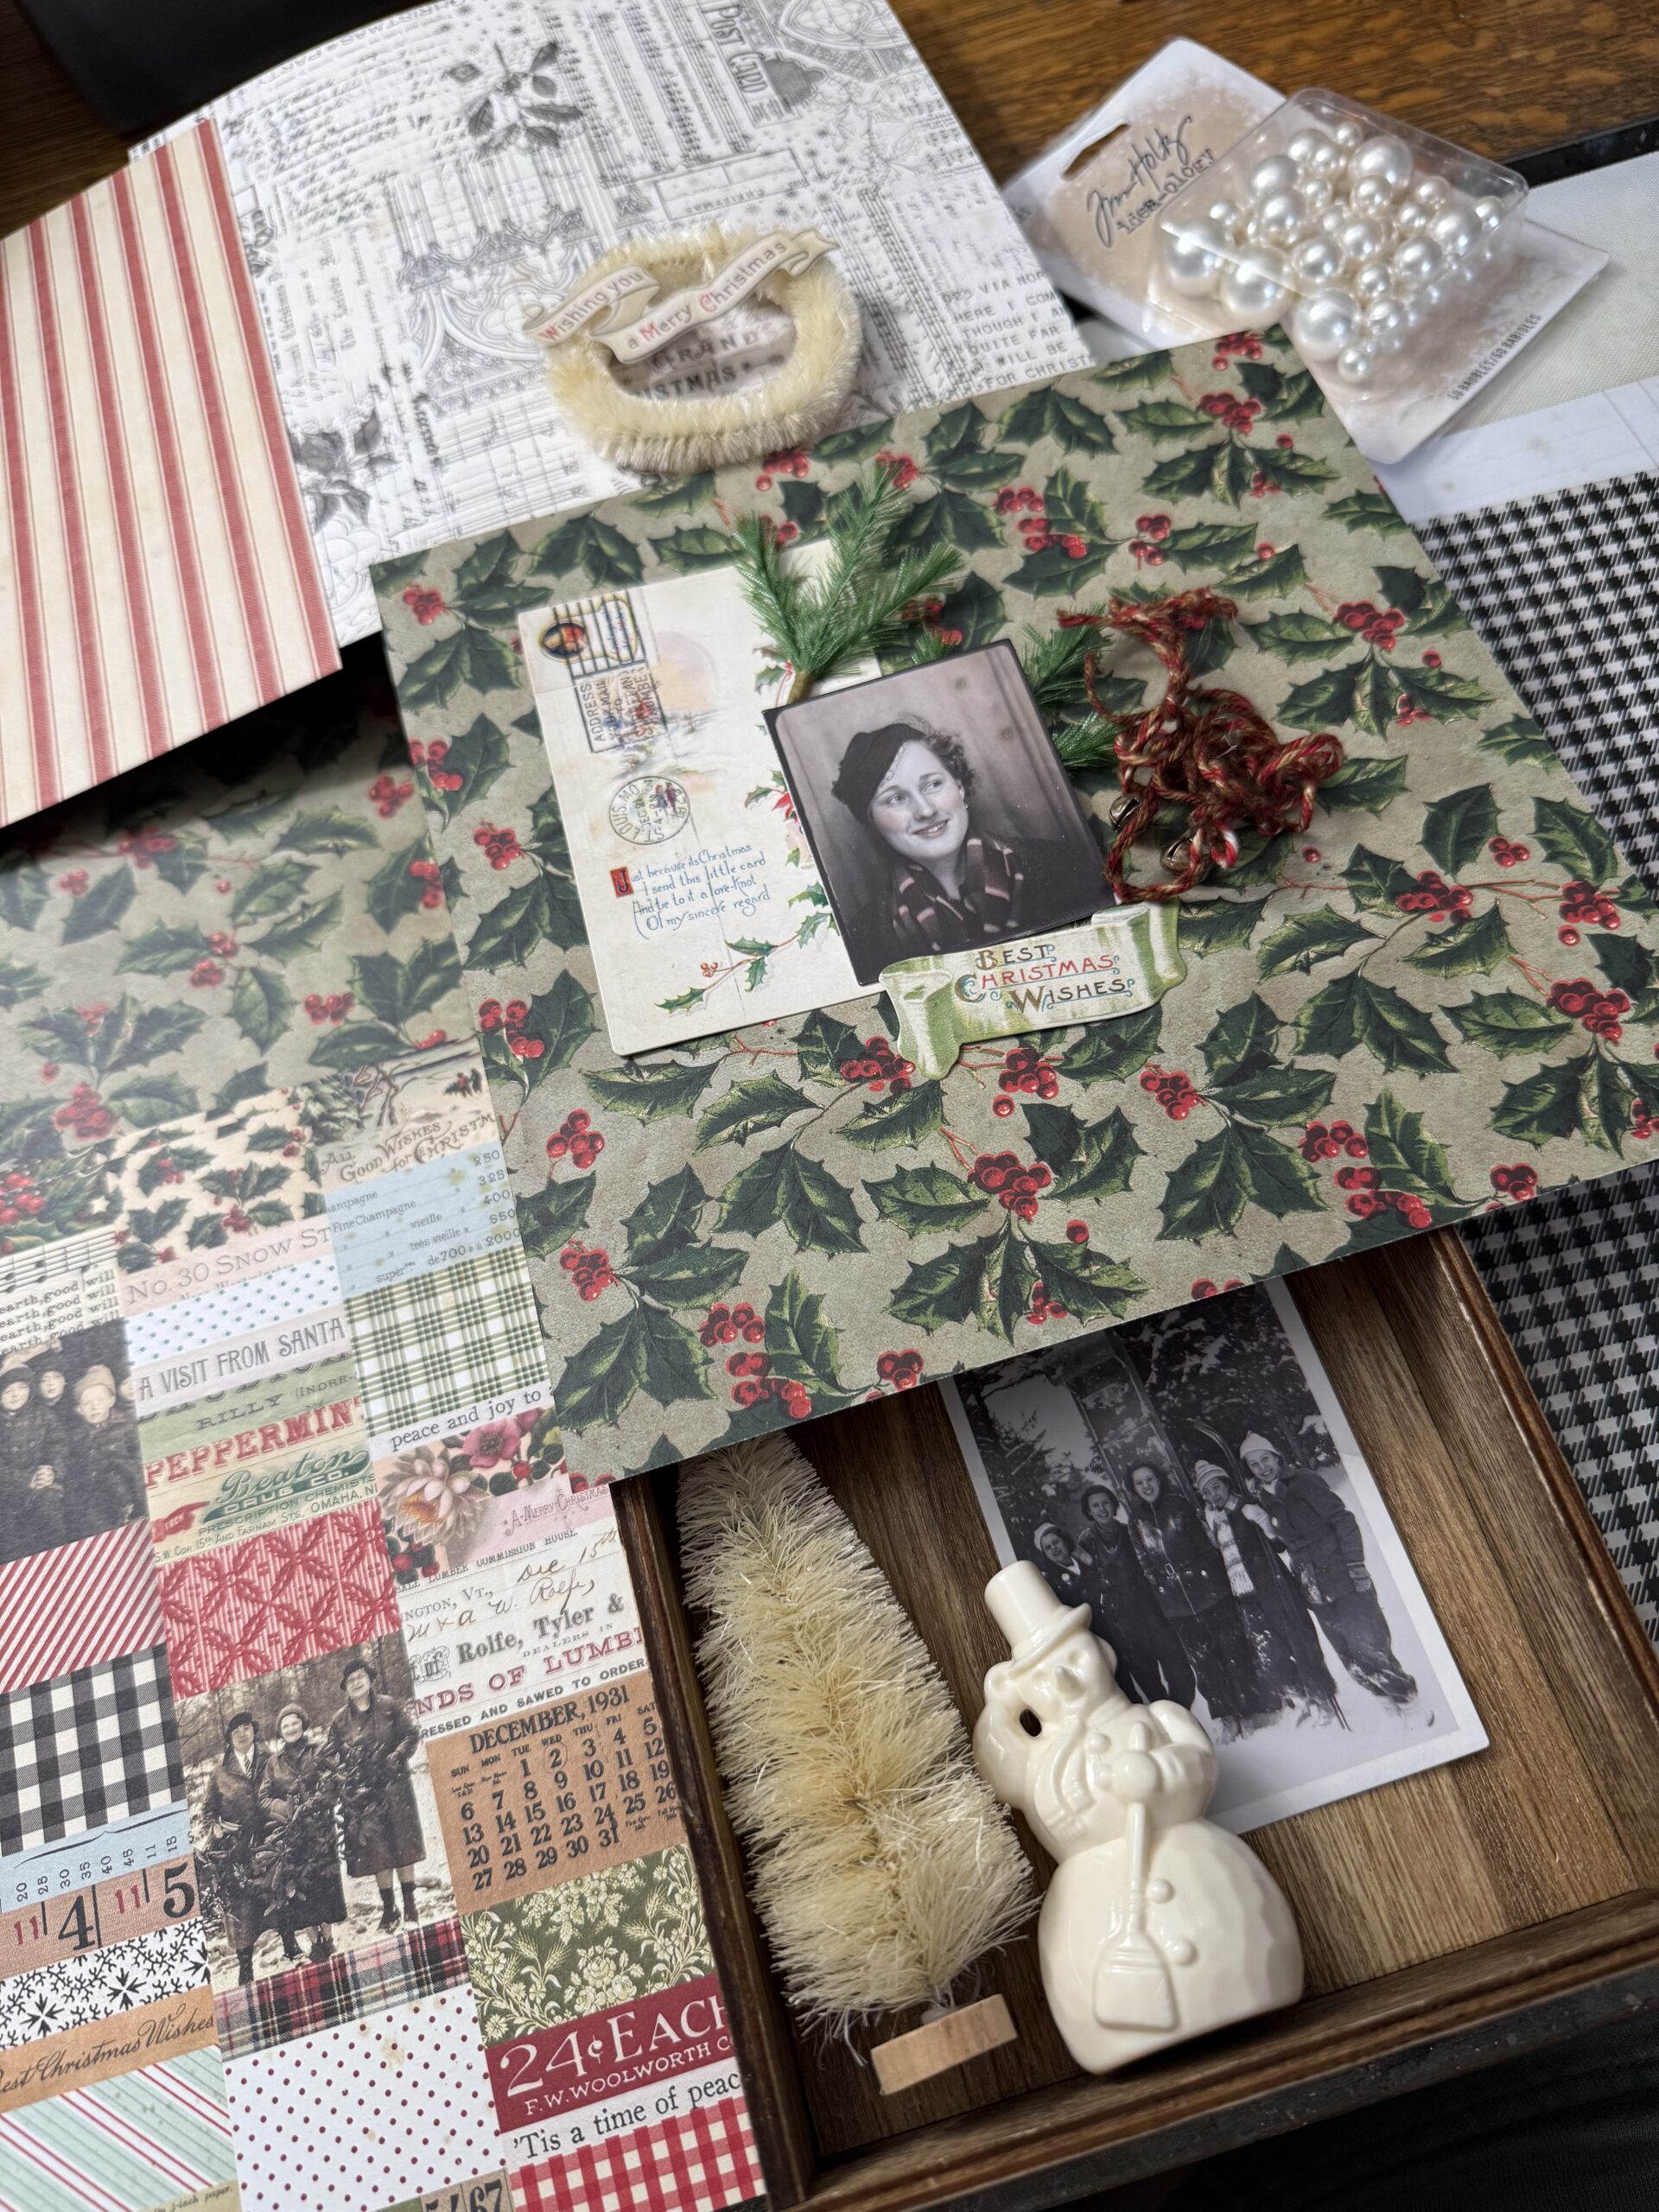
This is how it all began.. papers from both the Christmas Palette Paper pack and the Christmas Backdrops, the wreath, baubles, pine stems, the photos, Christmas ephemera and layers and the Salvaged Snowman and a Woodland tree.
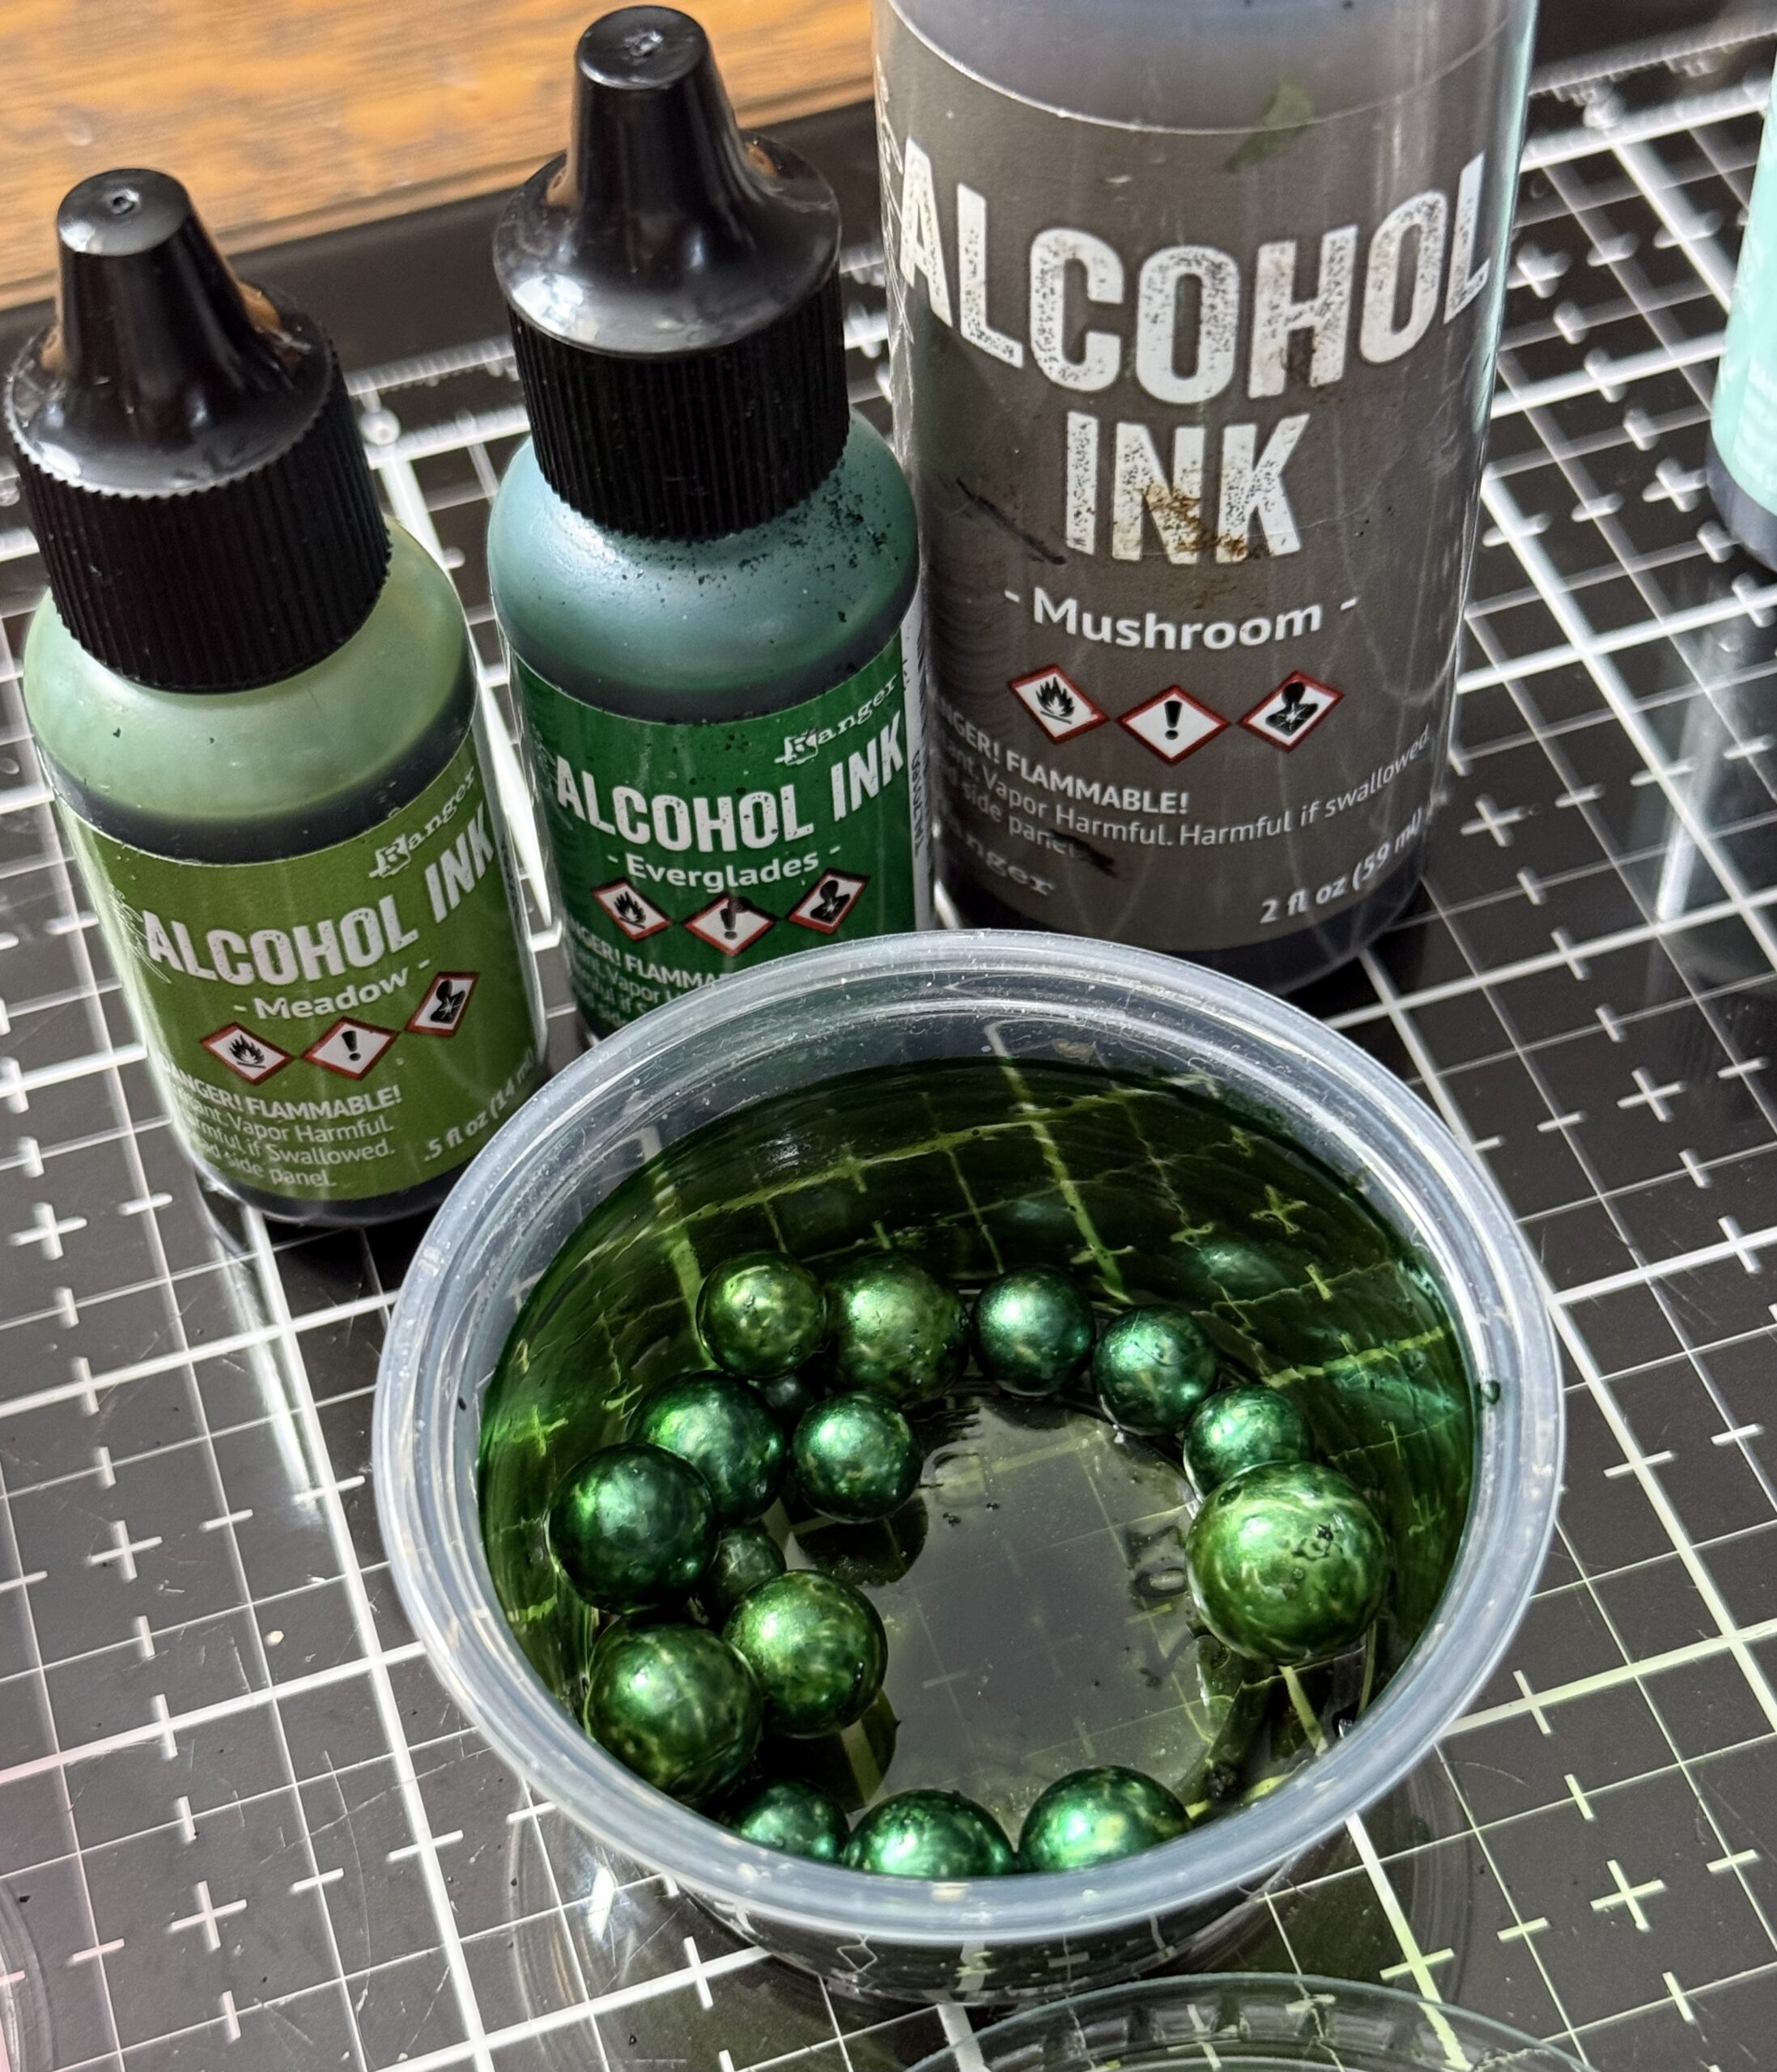
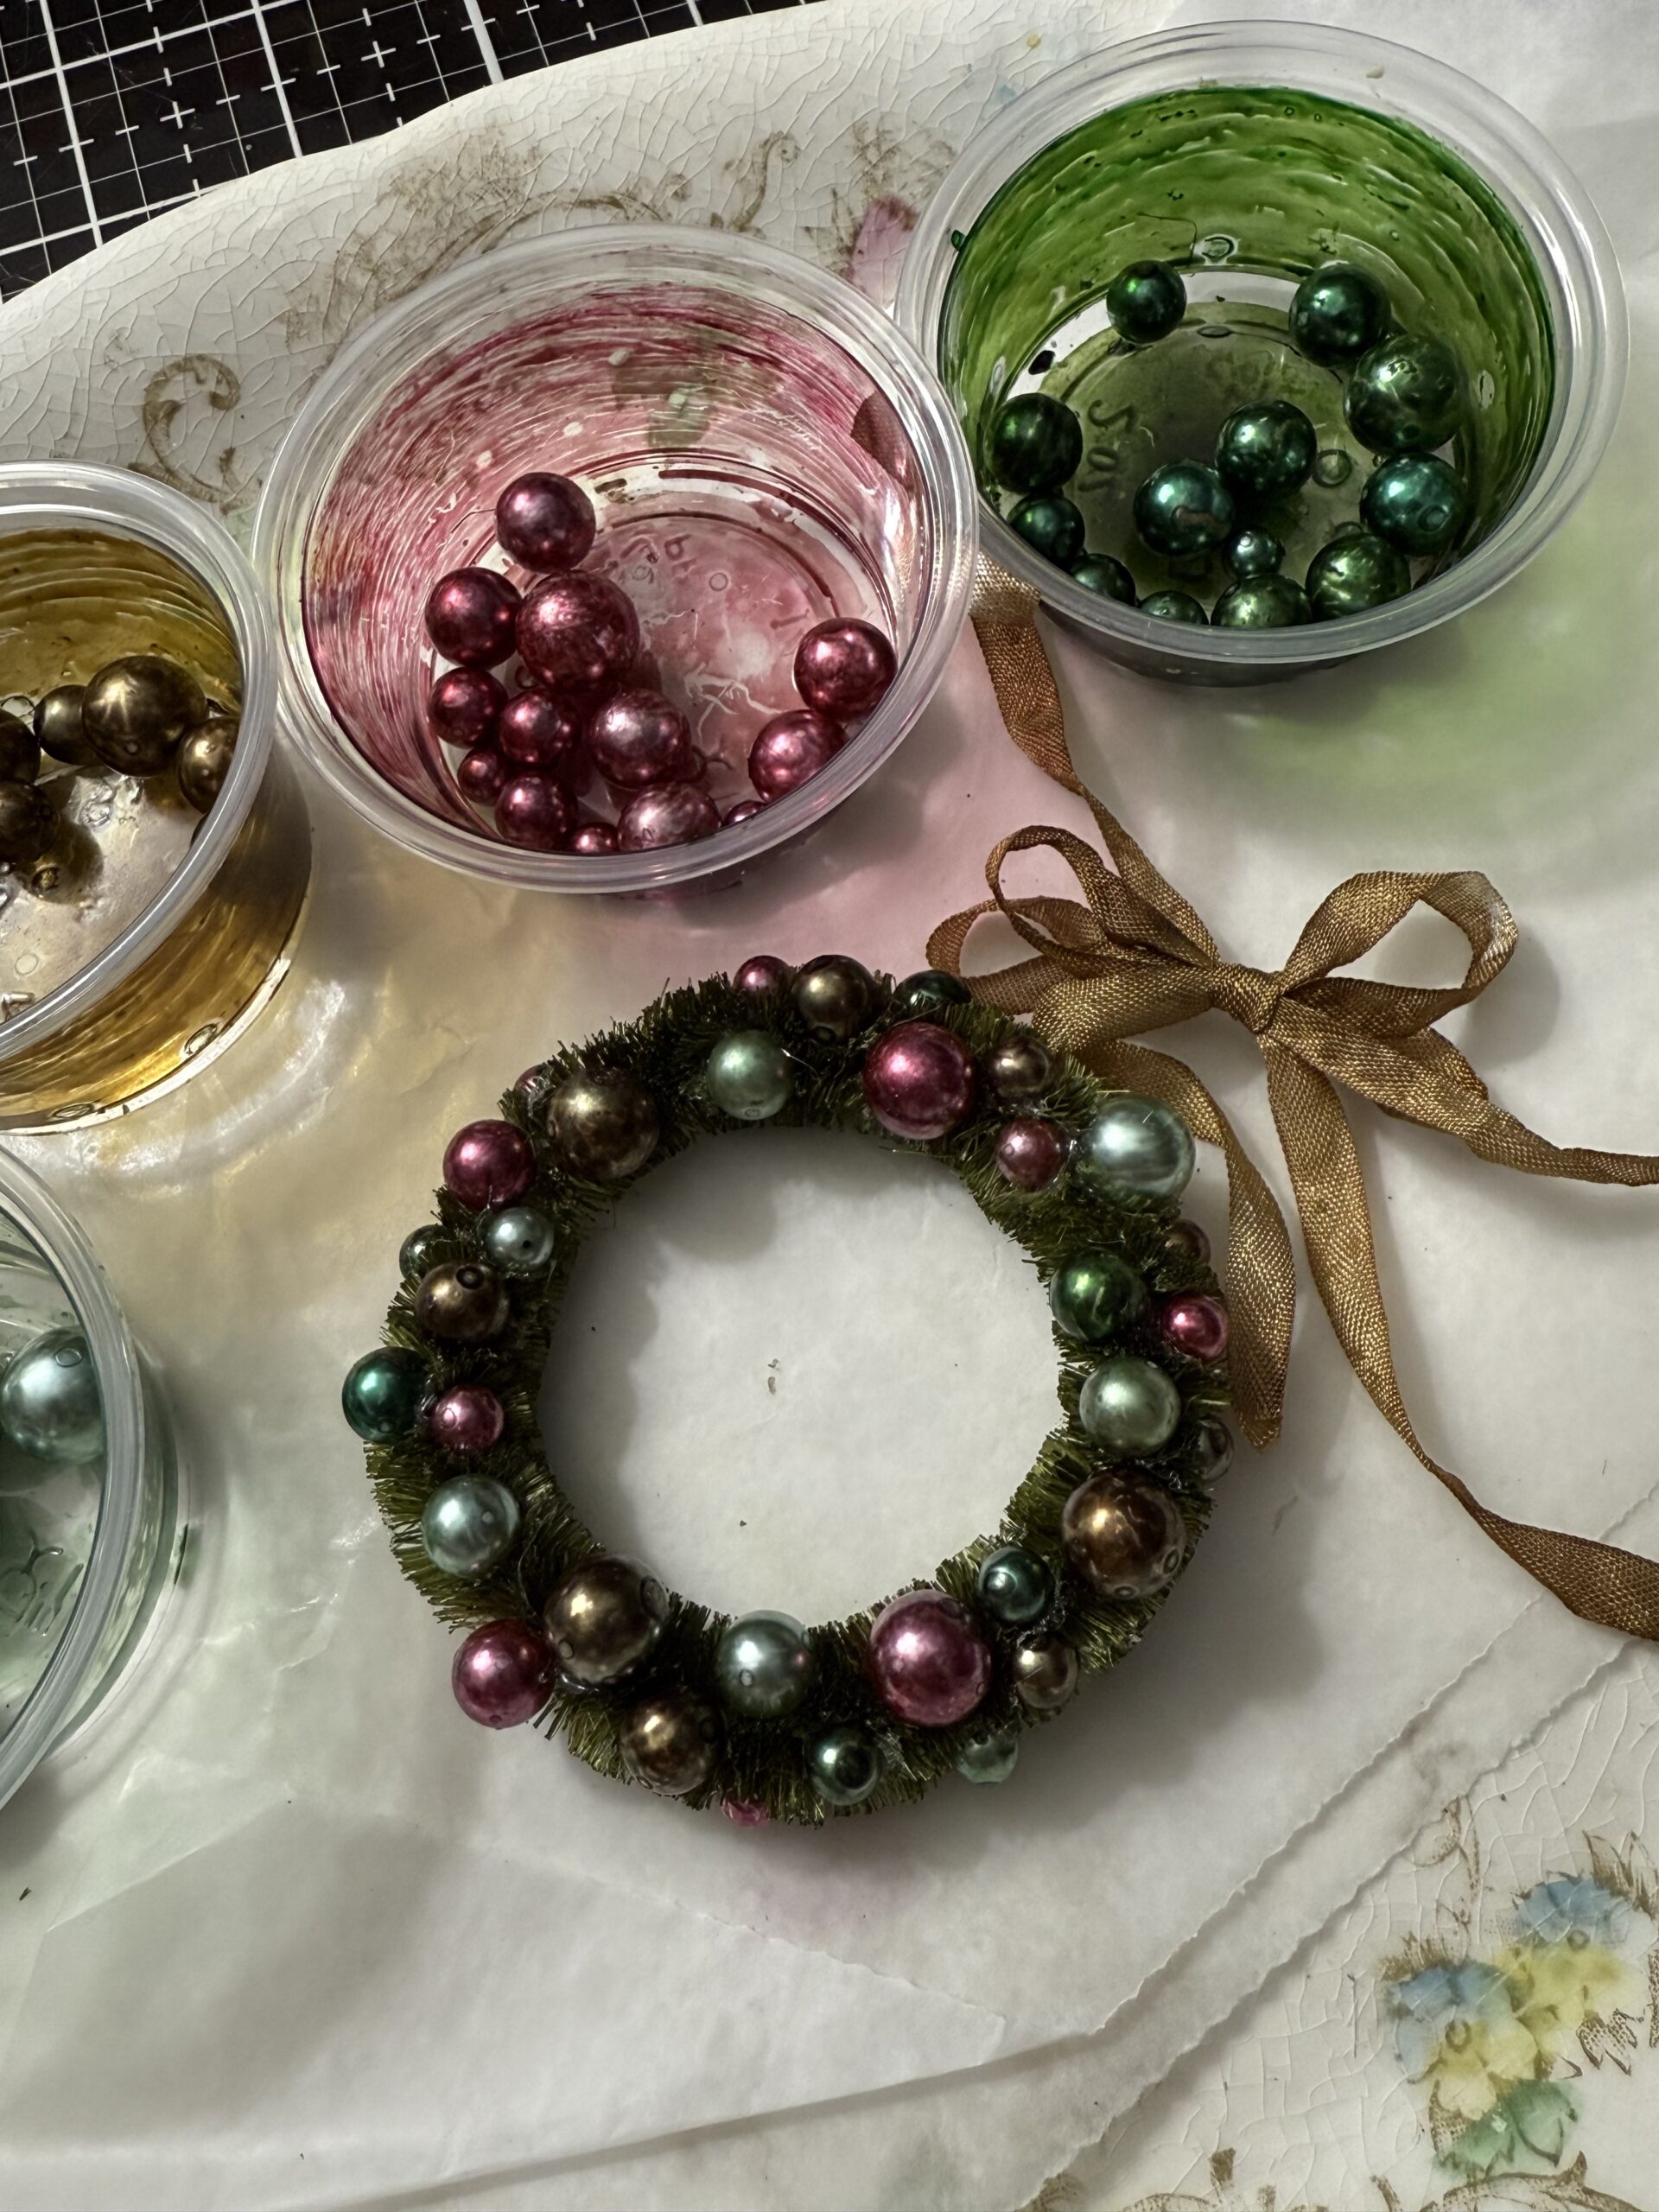
To start, I colored up a good amount of baubles using some of my favorite vintage colors…I did this by using alcohol ink. Portion cups work great to mix them because you add your baubles, add the drips of alcohol ink, snap the lid on and shake. Once your baubles are to the color blends that you want, spill them out on a piece of paper towel and let them air dry for a little bit. This process is one that Tim has shown on his YouTube channel Holiday Hoopla CLICK HERE to watch. (at 8:36 time stamp) So easy and FUN and super vintage!
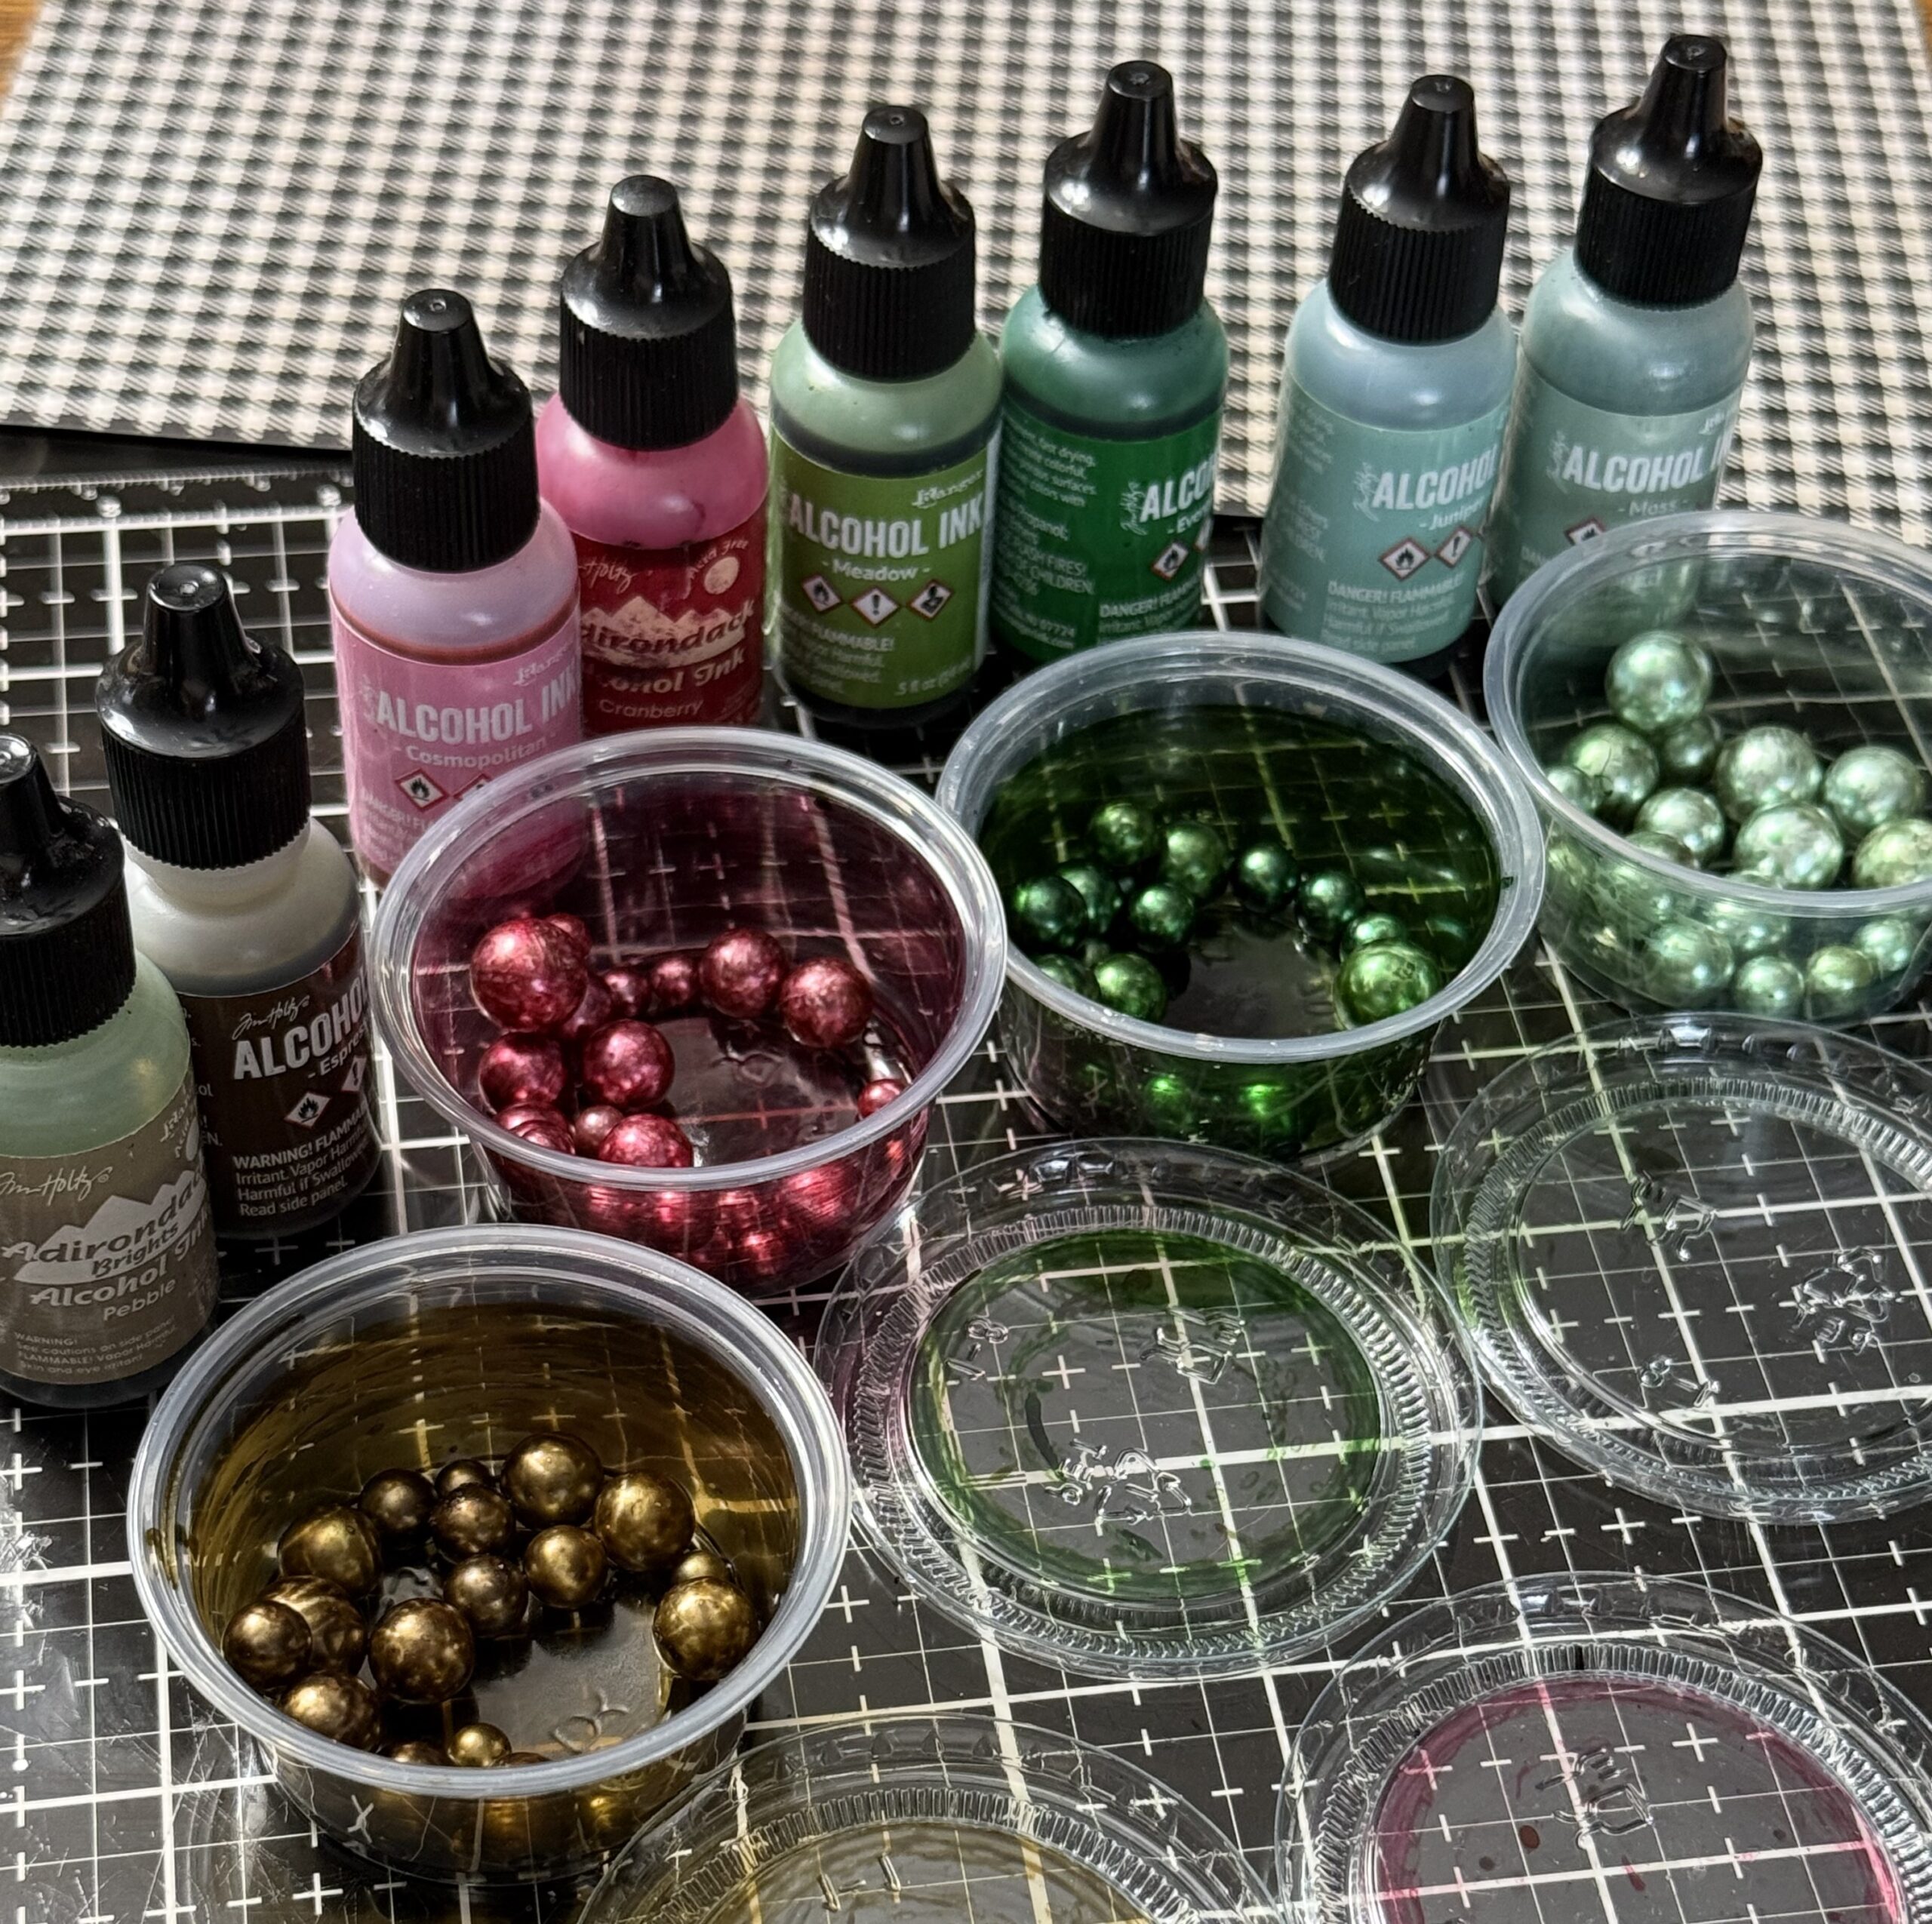
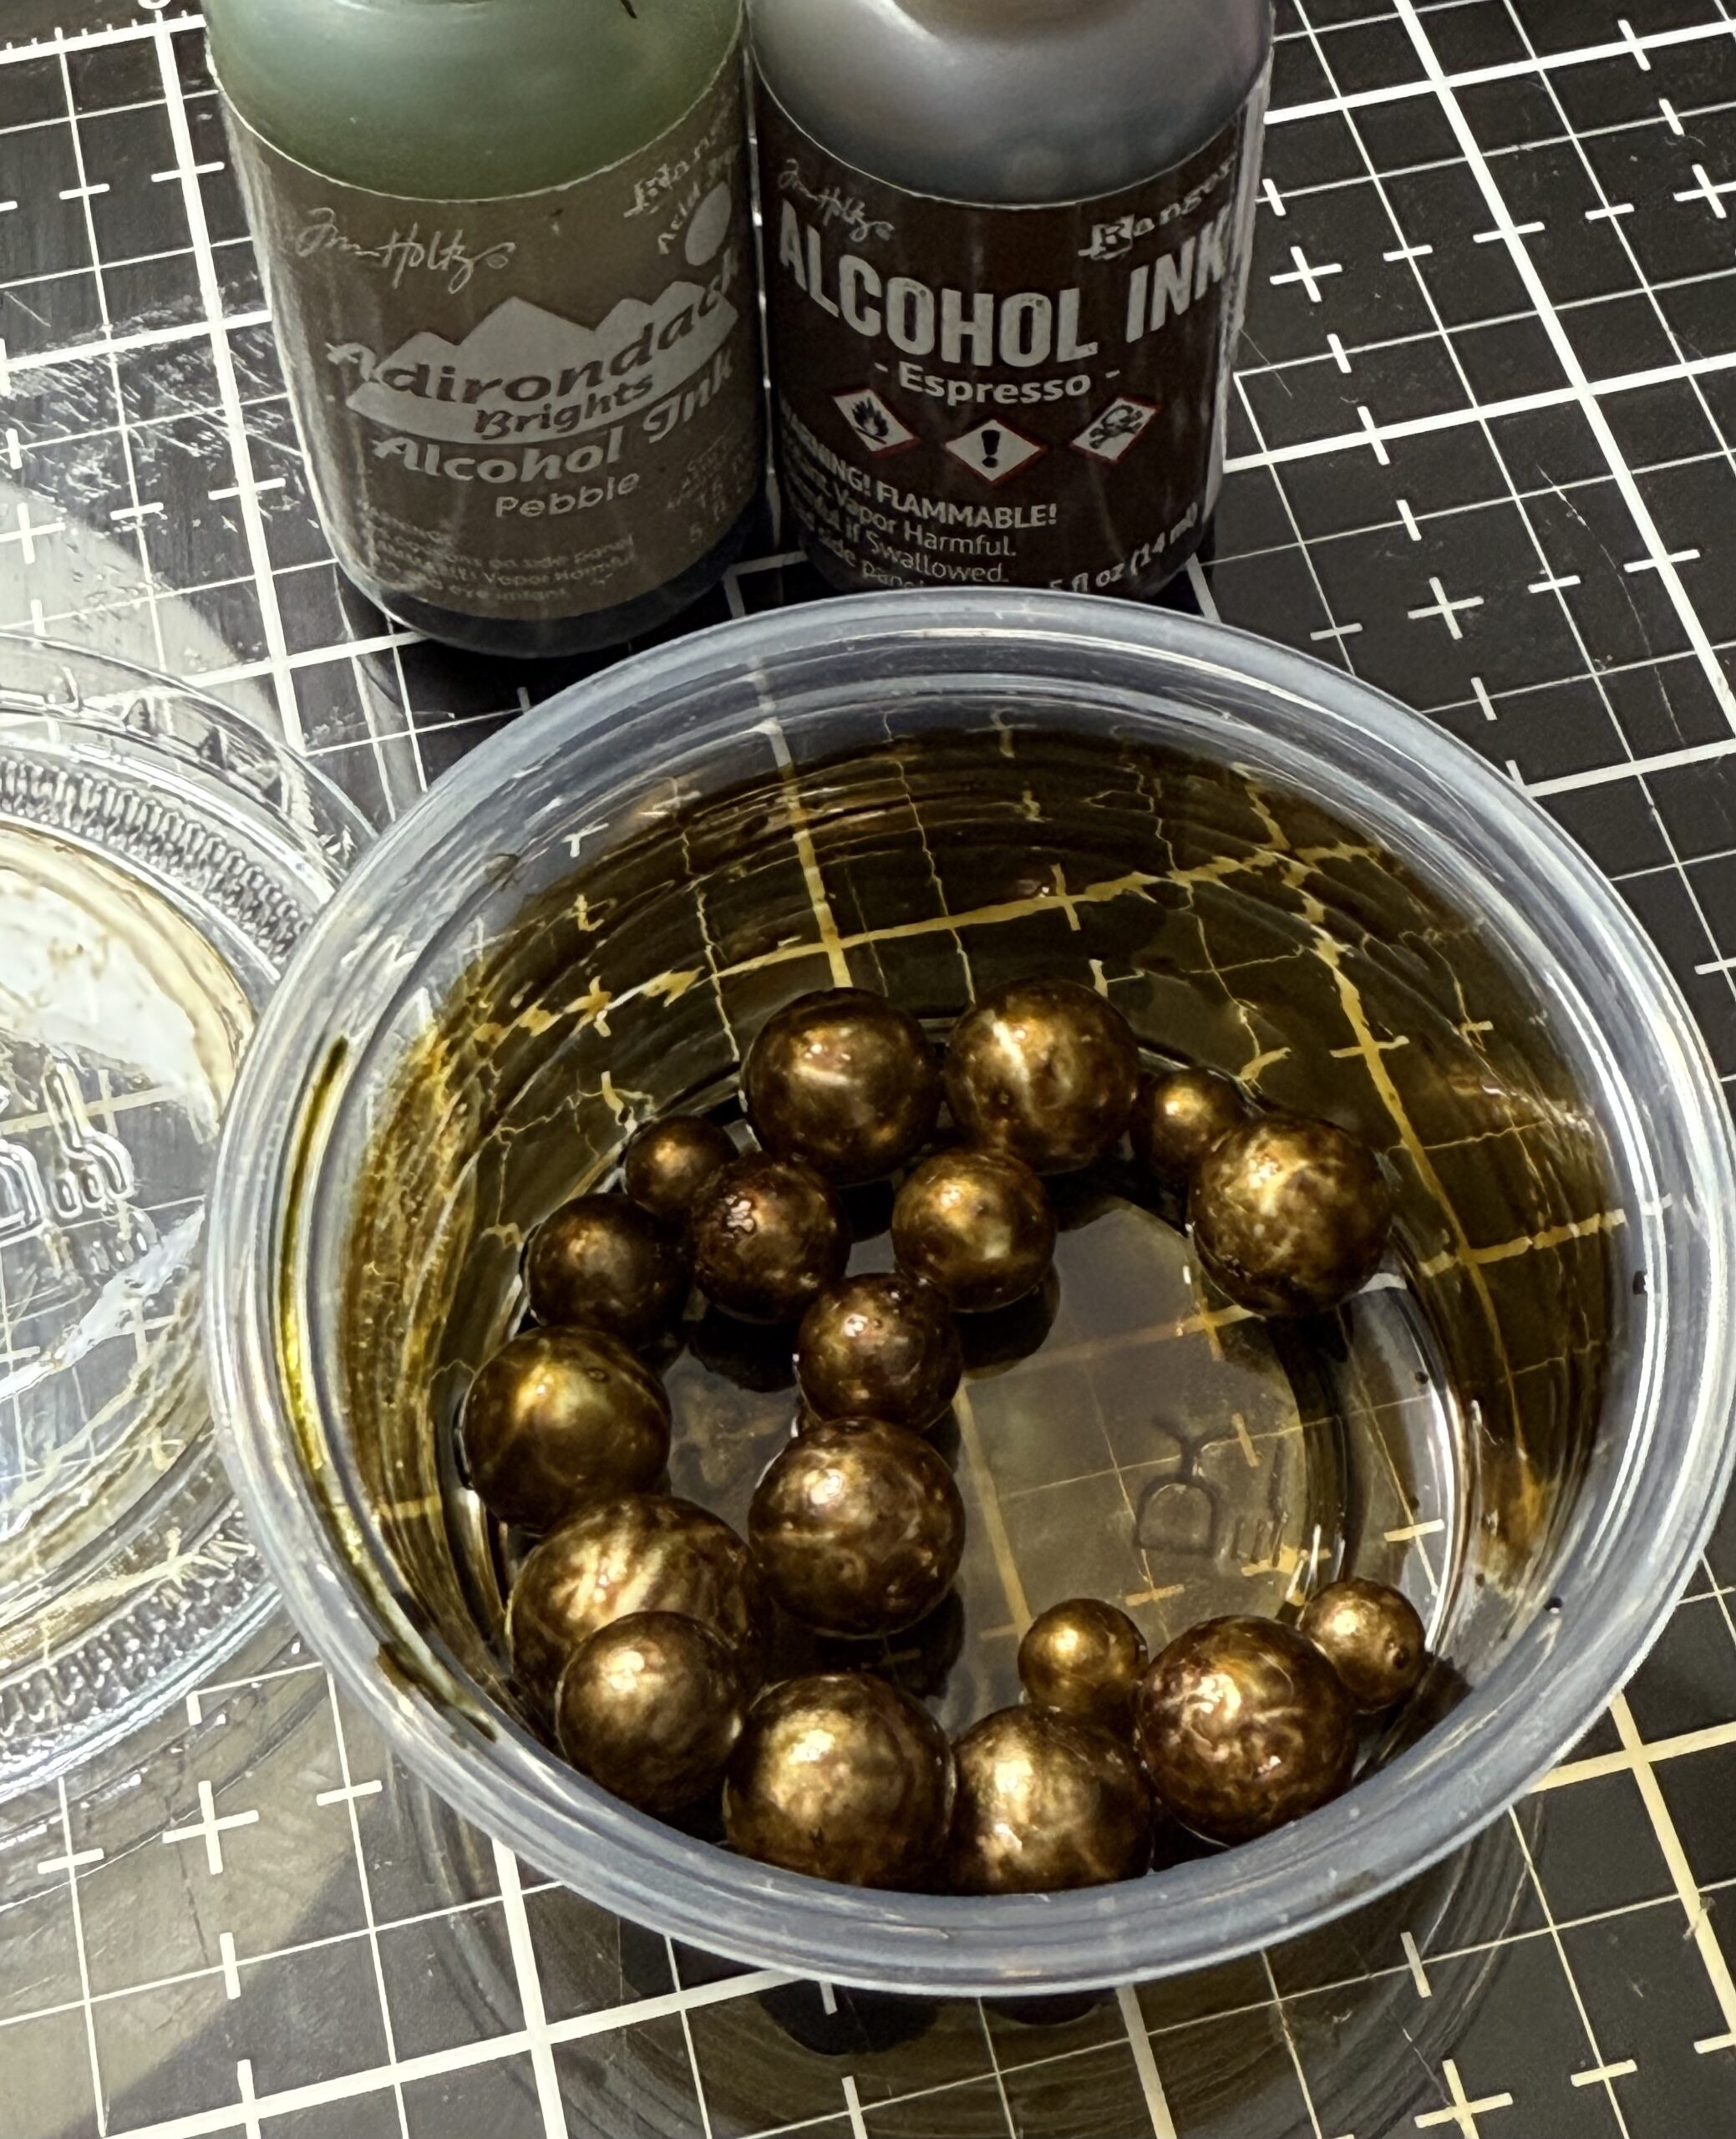
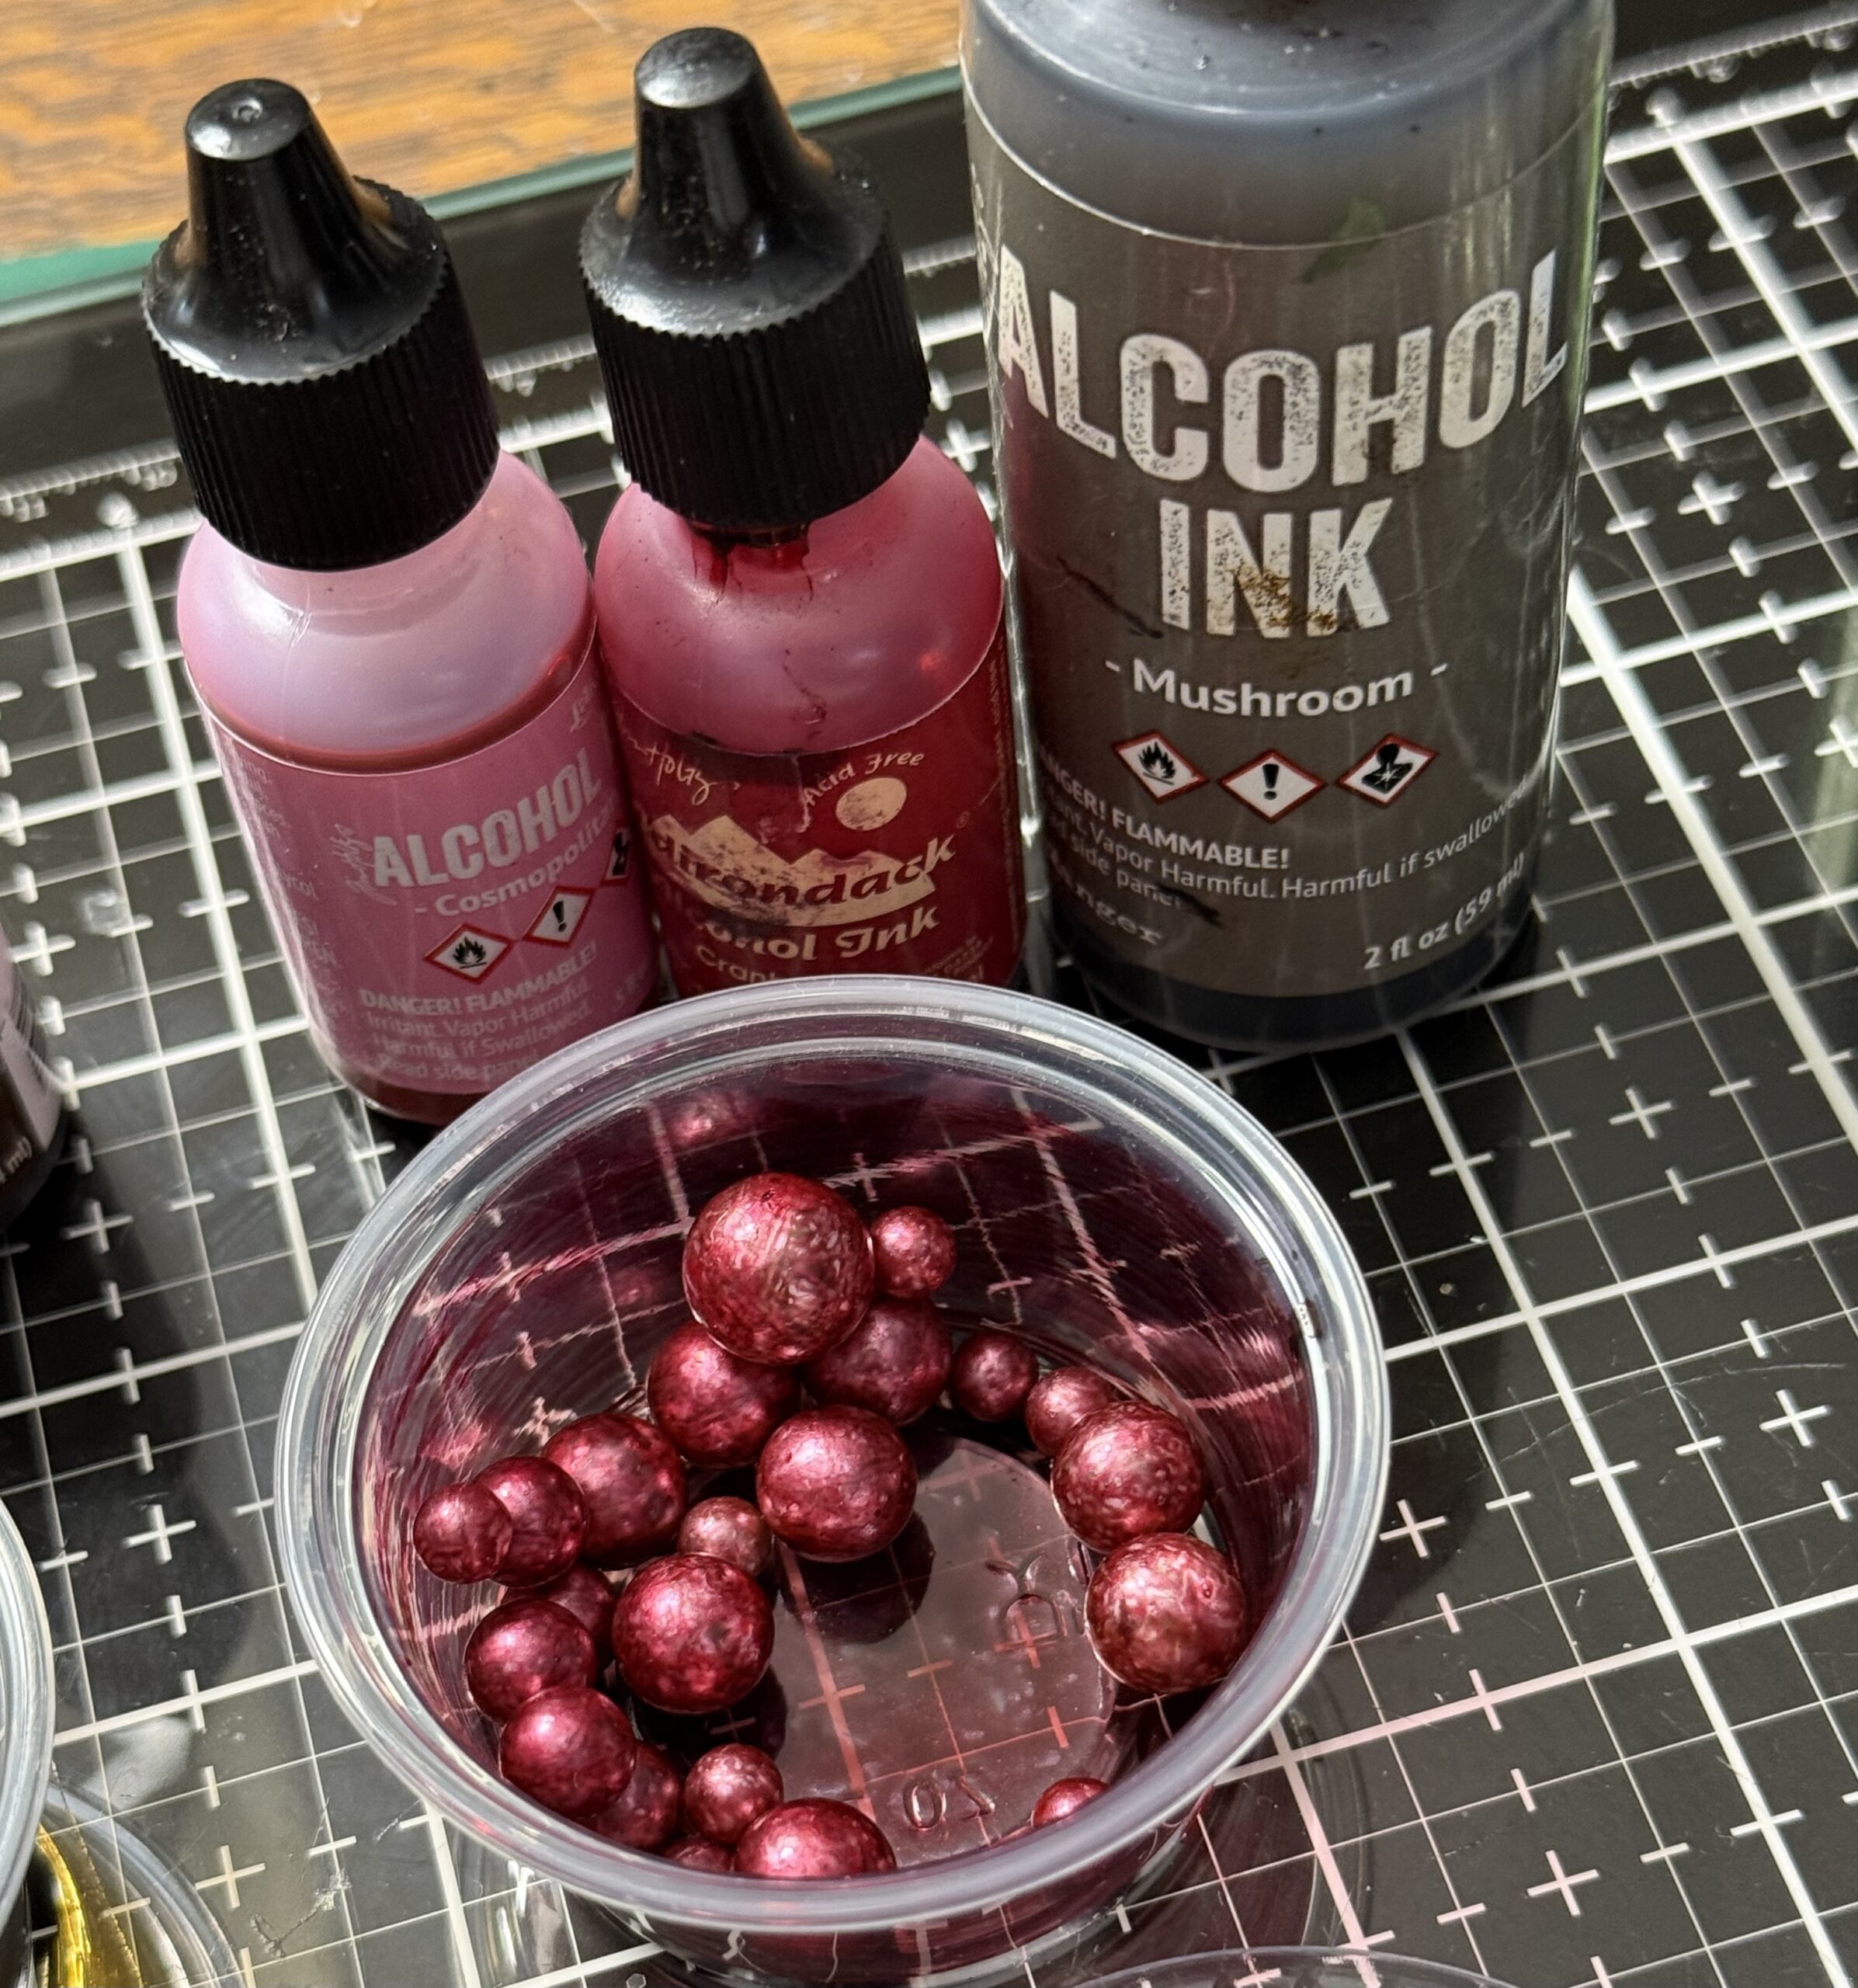
Here were my combos..
Pebble and Espresso
Cosmopolitan and Cranberry plus a little Mushroom for added grunge.
Meadow and Everglades plus some Mushroom.
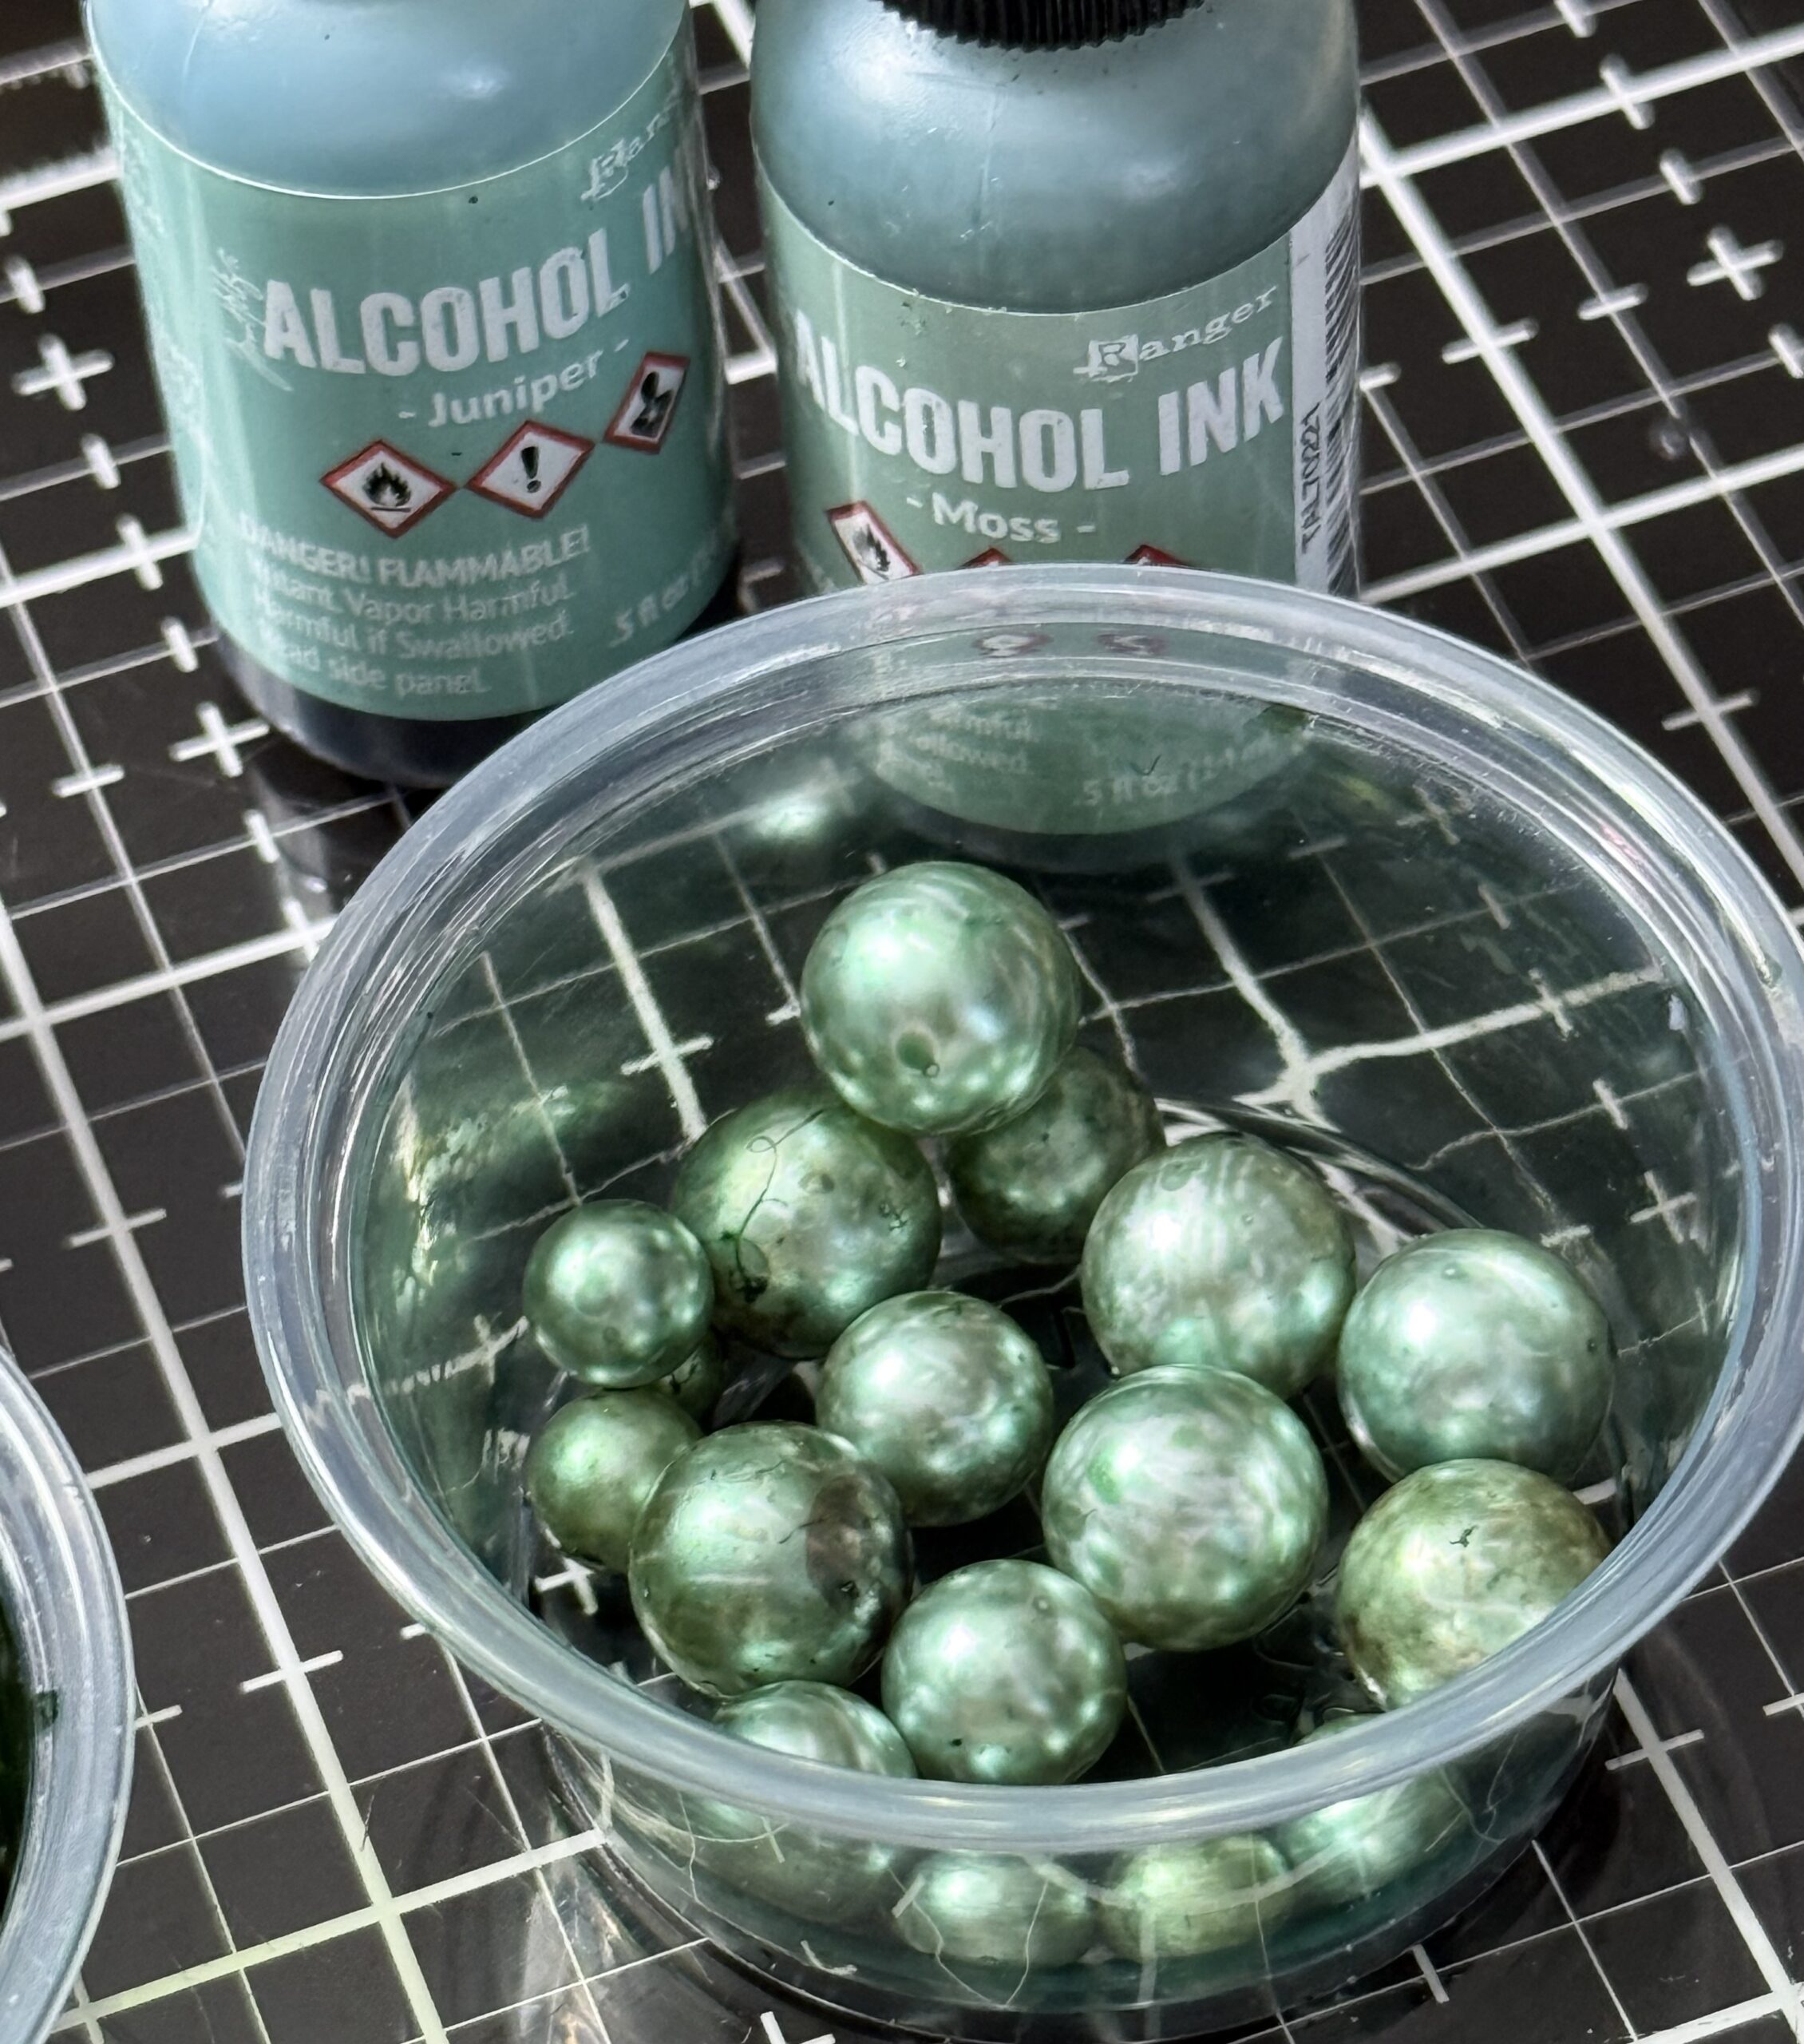
And finally, Juniper and Moss and some Mushroom (although not pictured). Mushroom adds the vintage to every combo in my opinion. 😉
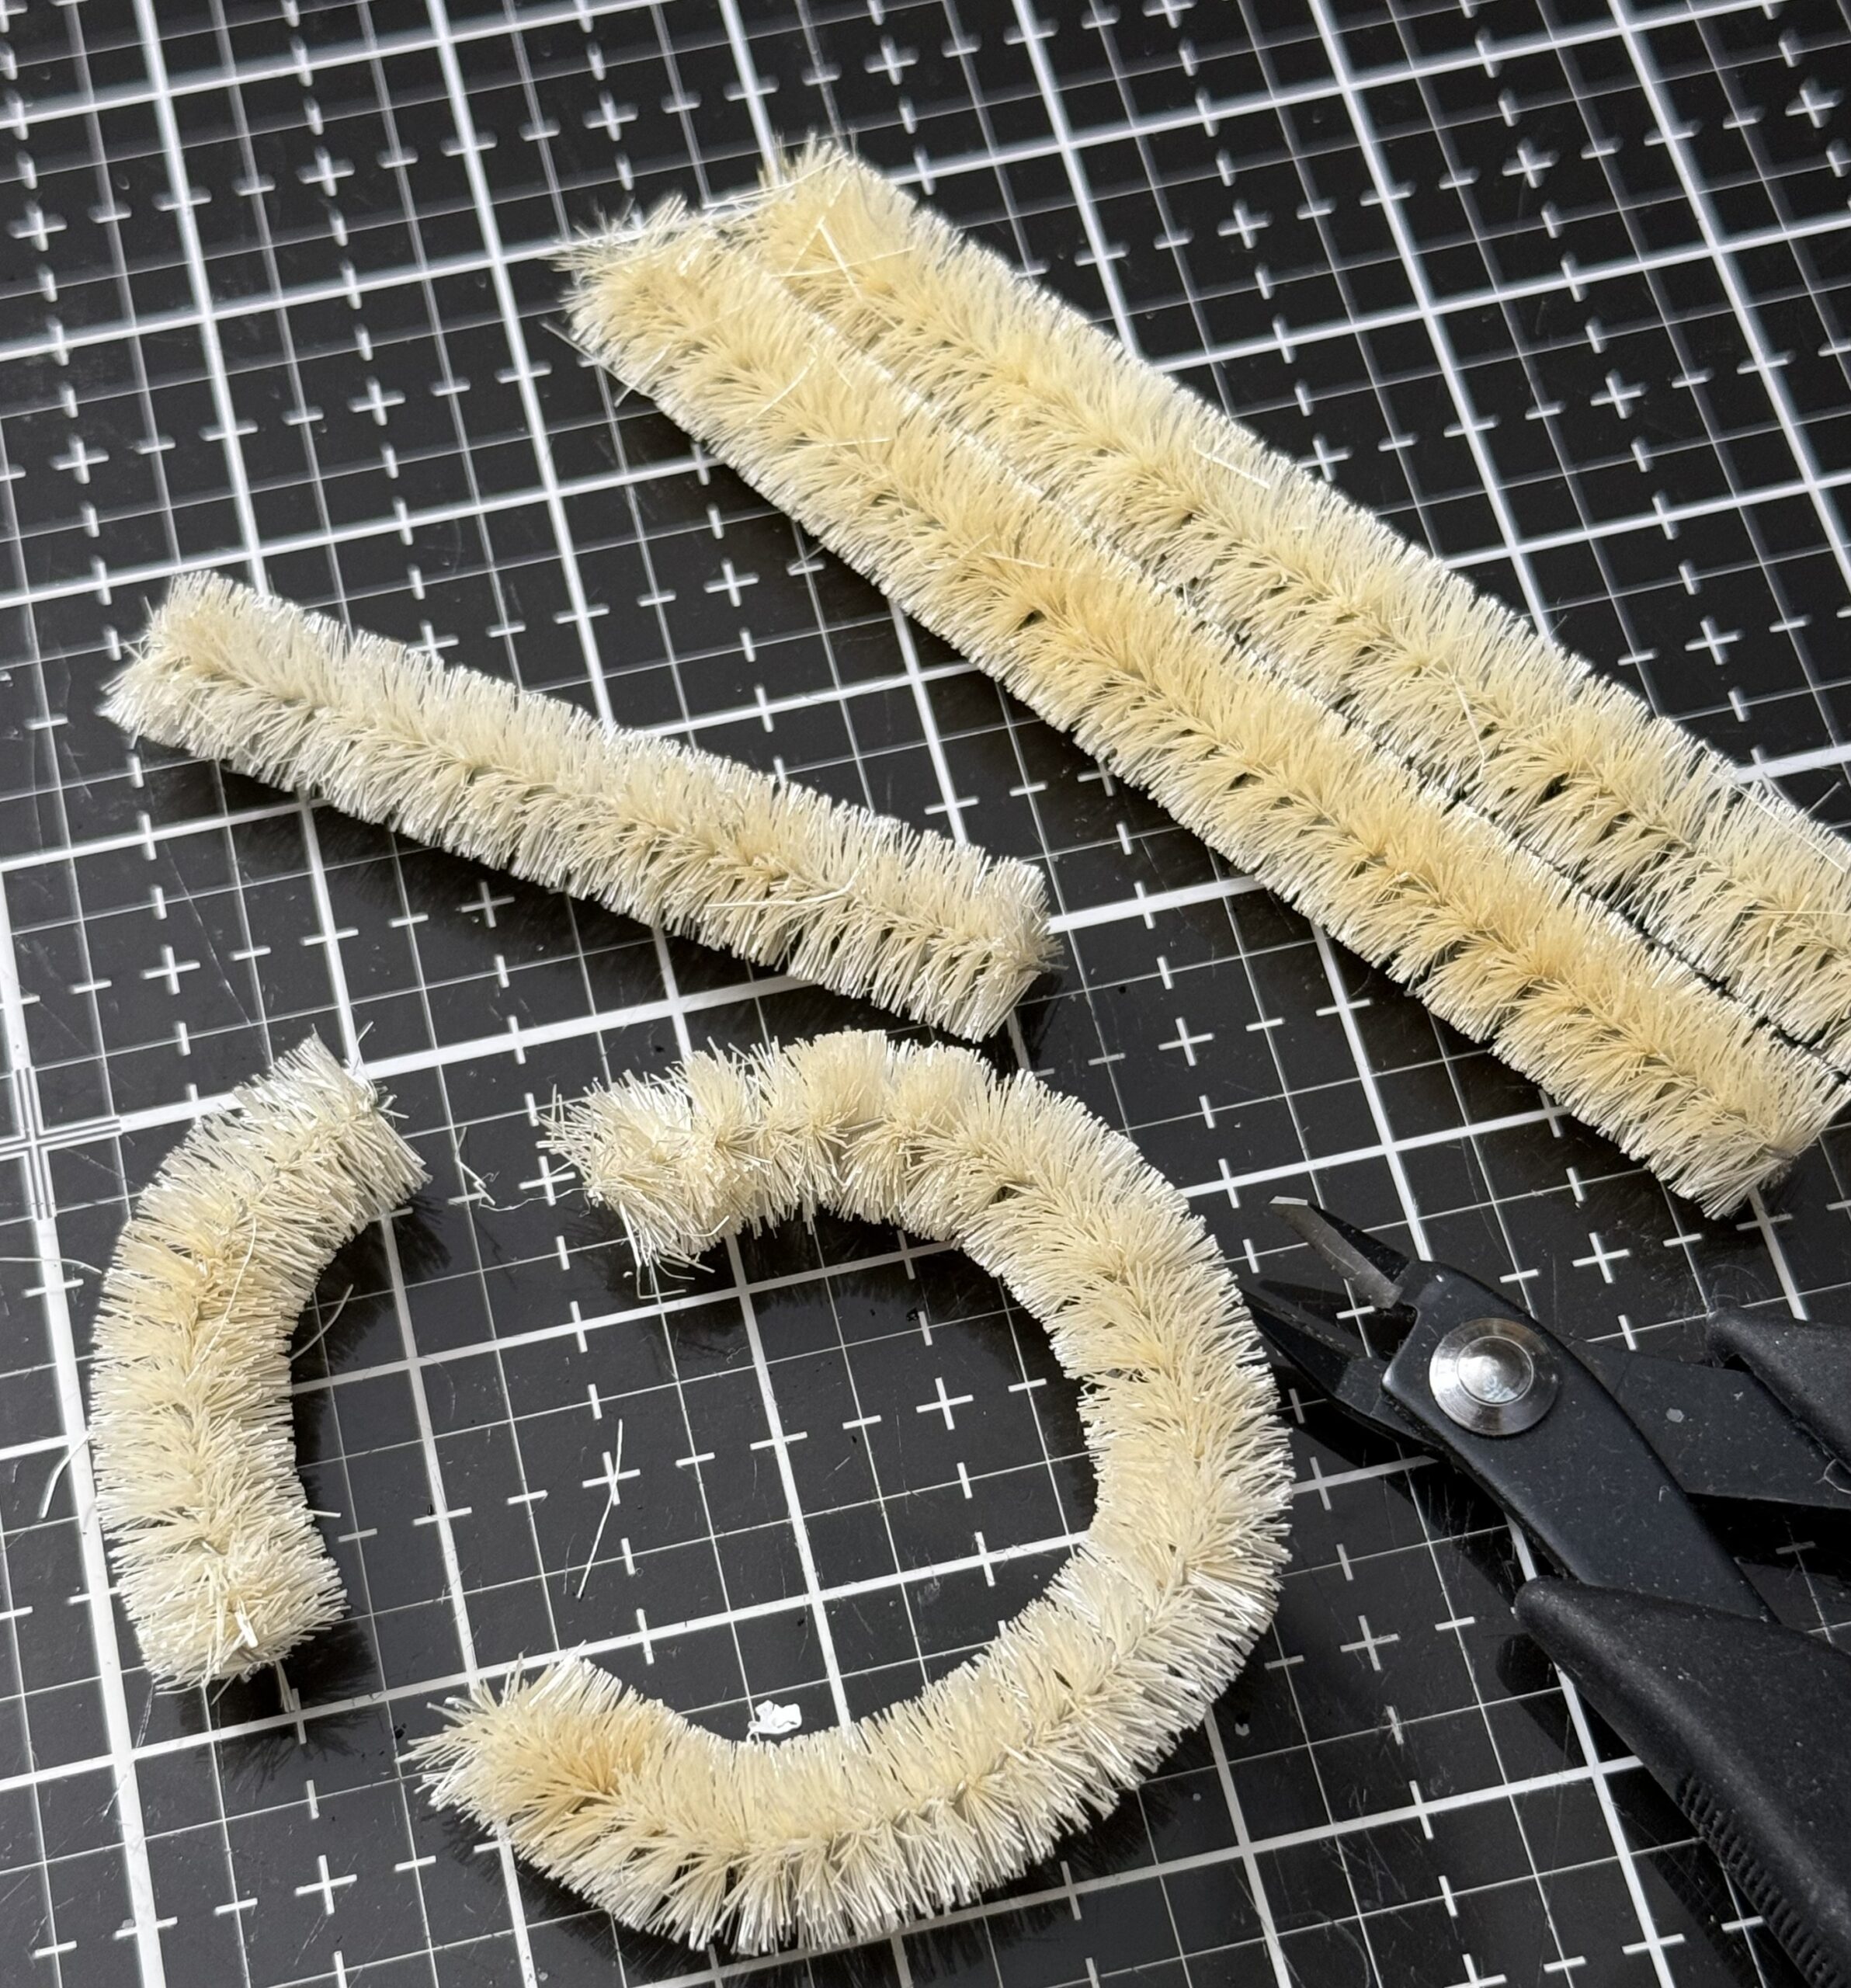
Then I used the Woodlands Garland and made a wreath shape. The length of the garland wasn’t long enough to get the size of wreath that I wanted to use to fill the small square box, so I trimmed off a portion of another piece using wire cutters.
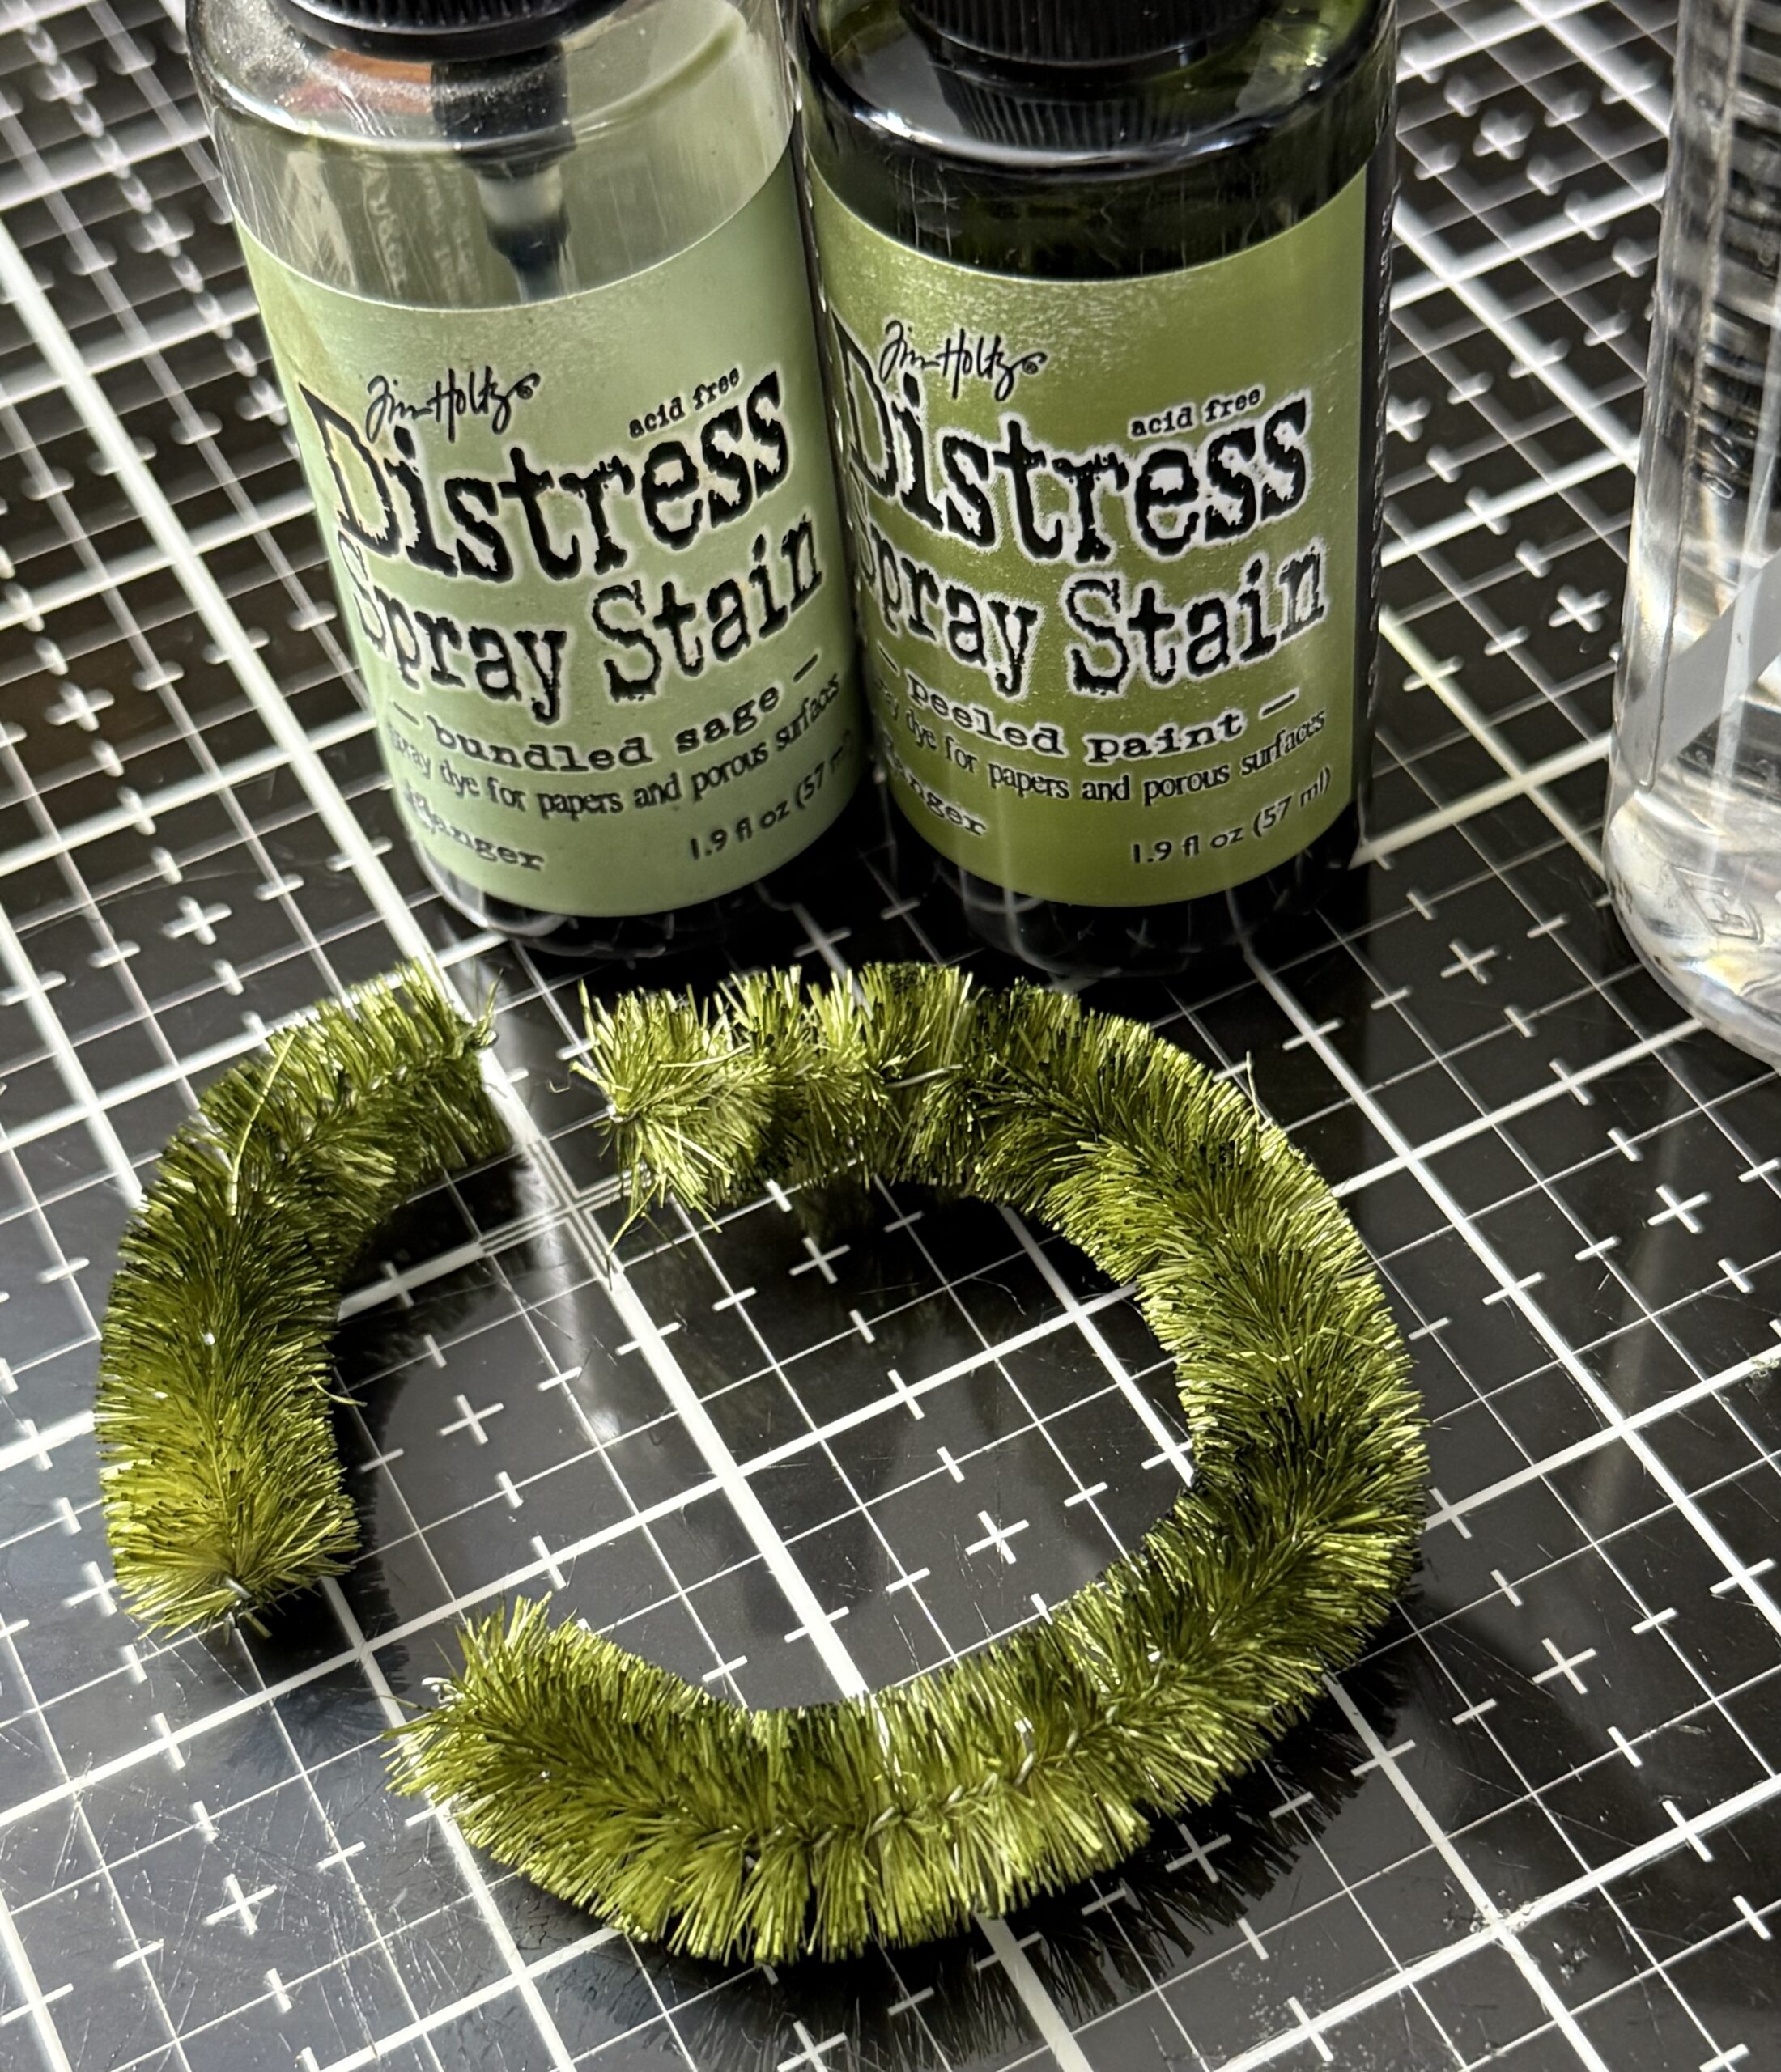
I colored up the pieces by spraying them with some water, then used a combination of Bundled Sage and Peeled Paint Distress Spray Stains, then dried it with my heat tool. After they were dry, I adhered the ends to the larger piece to form the wreath by using hot glue.
If you. have a little space leftover, don’t worry about it, you can place baubles there…no problem!
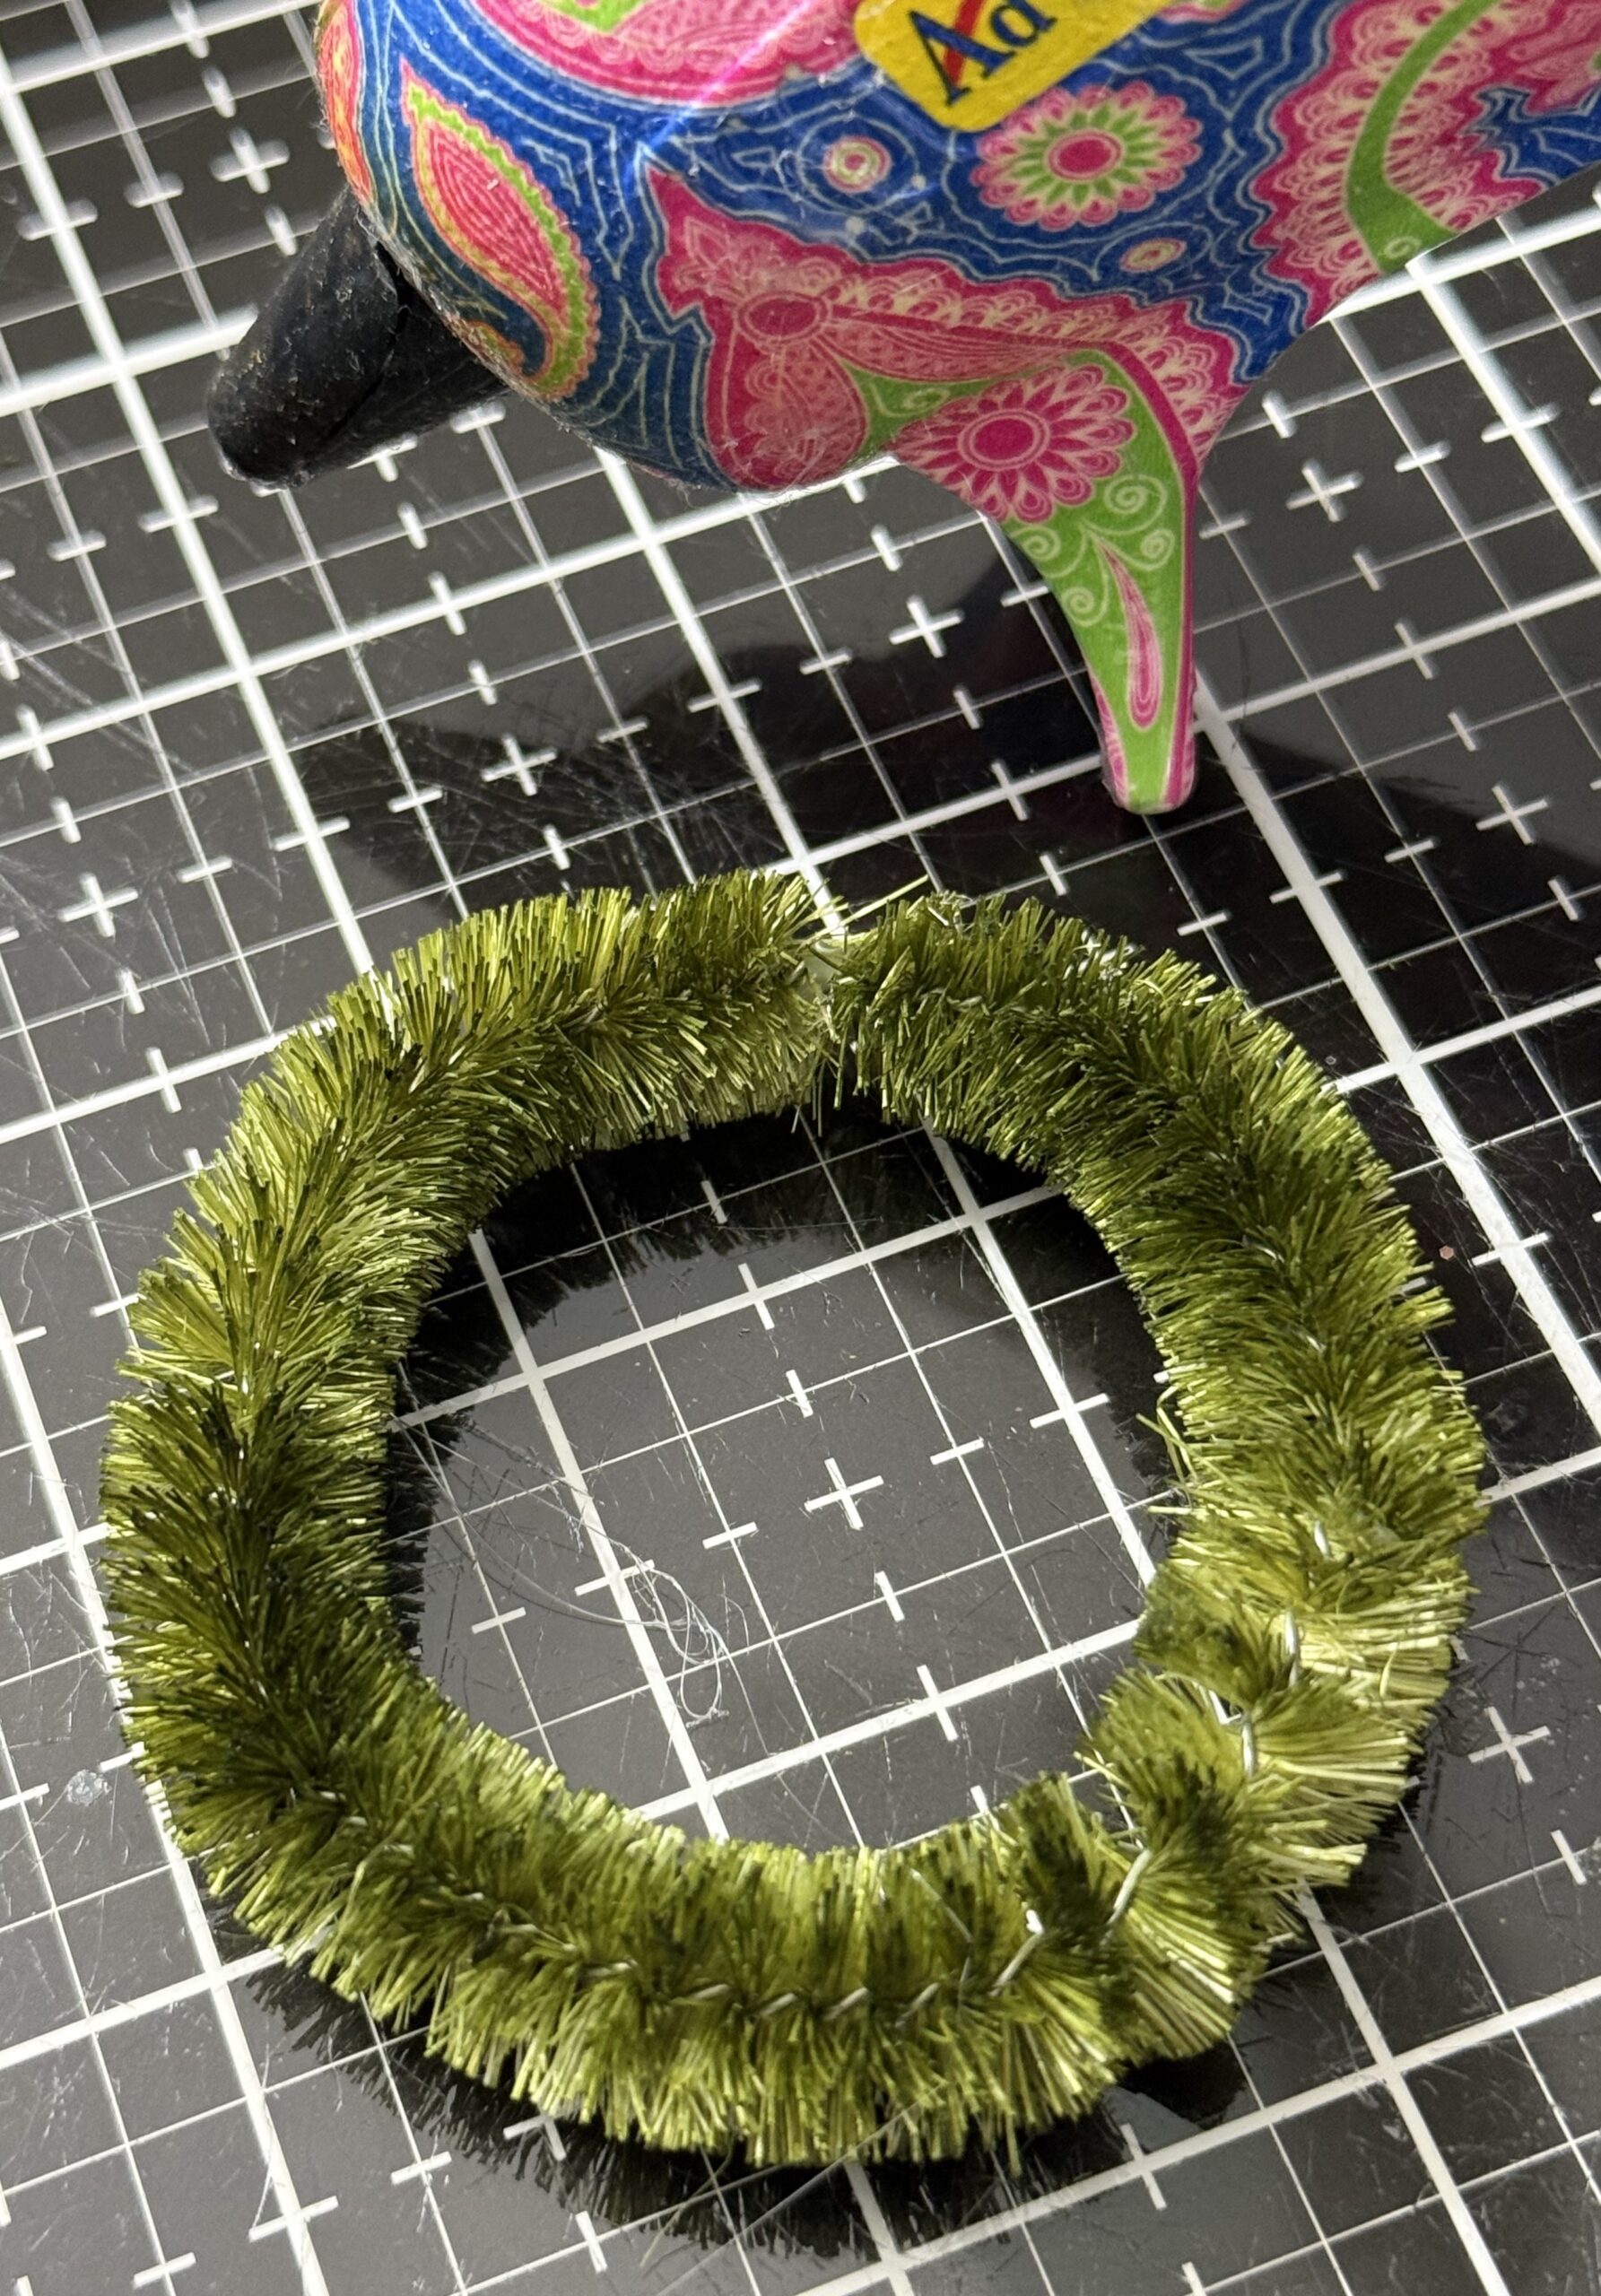
I began adhering the little baubles into place using the hot glue until I had the wreath full. I tied a bow using some inky 1/4″ seam binding ribbon just so I knew what size the ribbon was and how much space it would take up on my wreath.
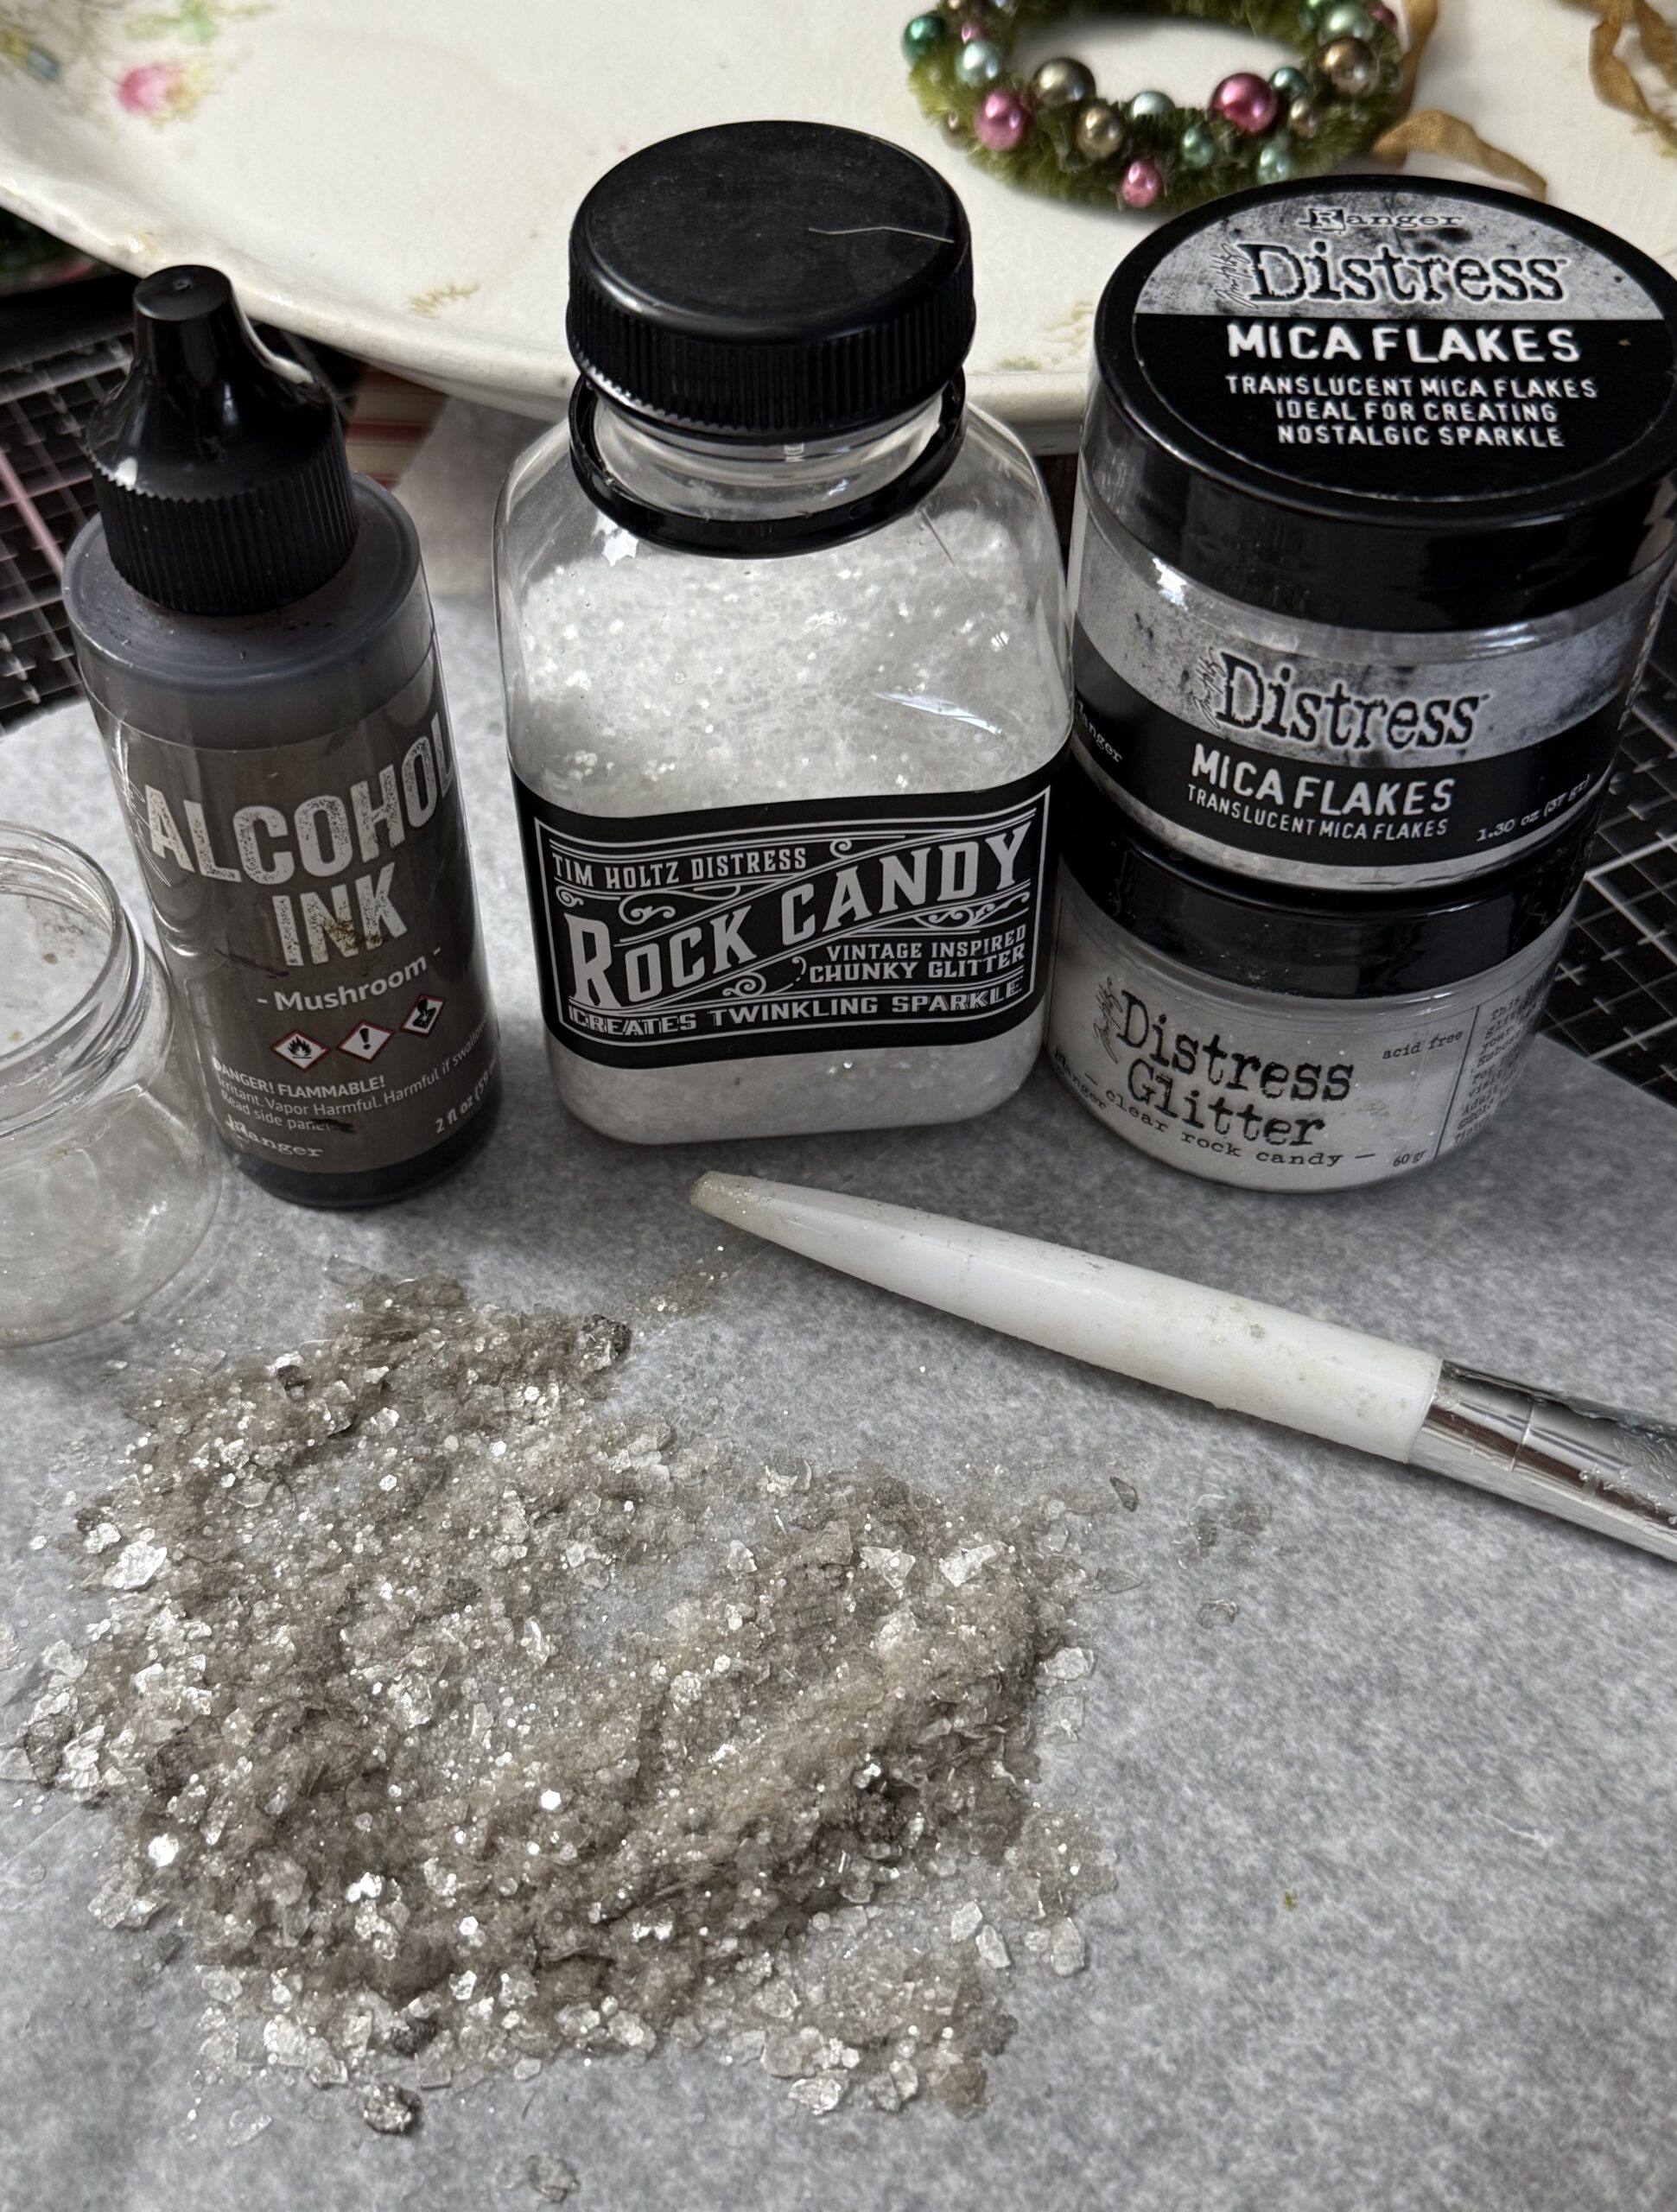
Next, adding sparkle…I always have a supply of Mushroom glitter mix in my stash to use for Christmas/vintage makes when I want to add glitter to…it’s more of a grungy glitter mix. I combine a little of each of these to a portion cup then add some drips of Mushroom Alcohol Ink, shake it up and stir until its to a good grunge, then I spill it out onto a piece of paper towel for it to dry for a little bit. I always have this combo on hand… I’d say it’s about equal parts or both the glitters (regular and chunky) and slightly less of the mica flakes.
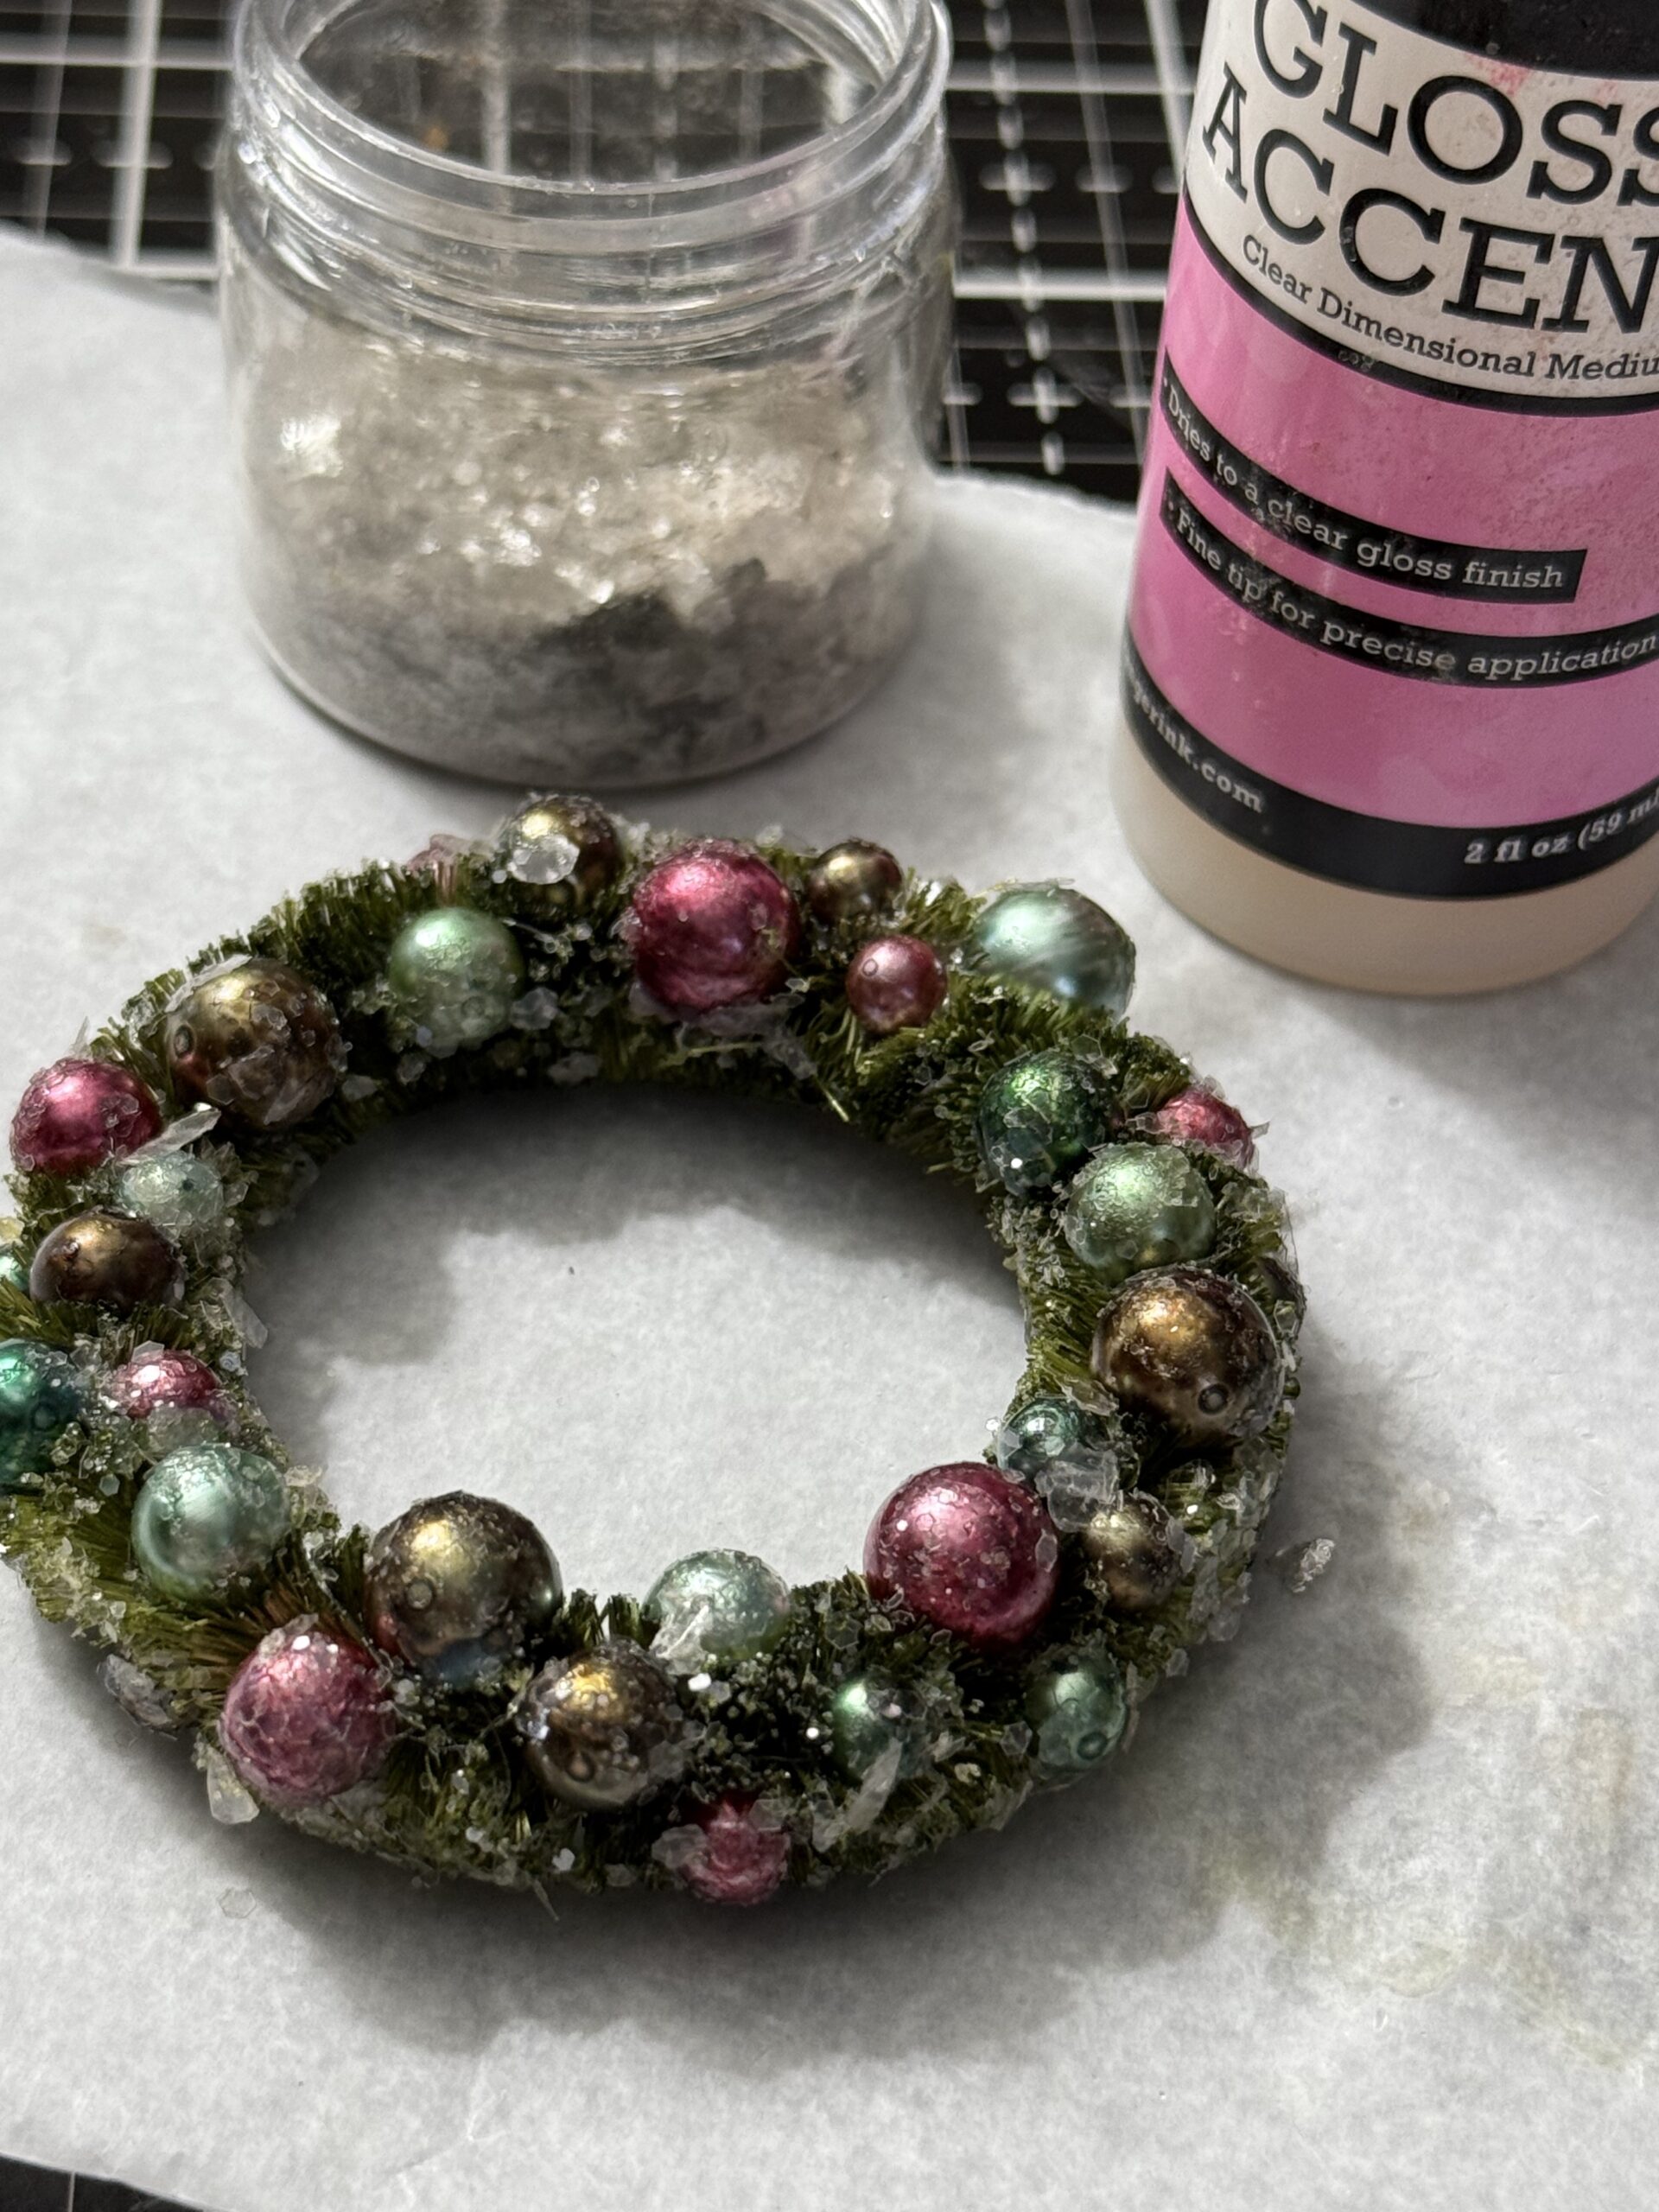
This was what I applied to the wreath using Glossy Accents and a brush, then, after it was dry, I added some of the new Liquid Tinsel in Tarnished Chunky, then the wreath was set aside to dry while I worked on covering the box. The photo below is while it was drying from the mica flakes mix of glitter before the addition of Liquid Tinsel.
I adhered the bow to the top of the wreath using some hot glue, then added the little banner that I found in the Christmas Ephemera pack. This is before I added the Liquid Tinsel…
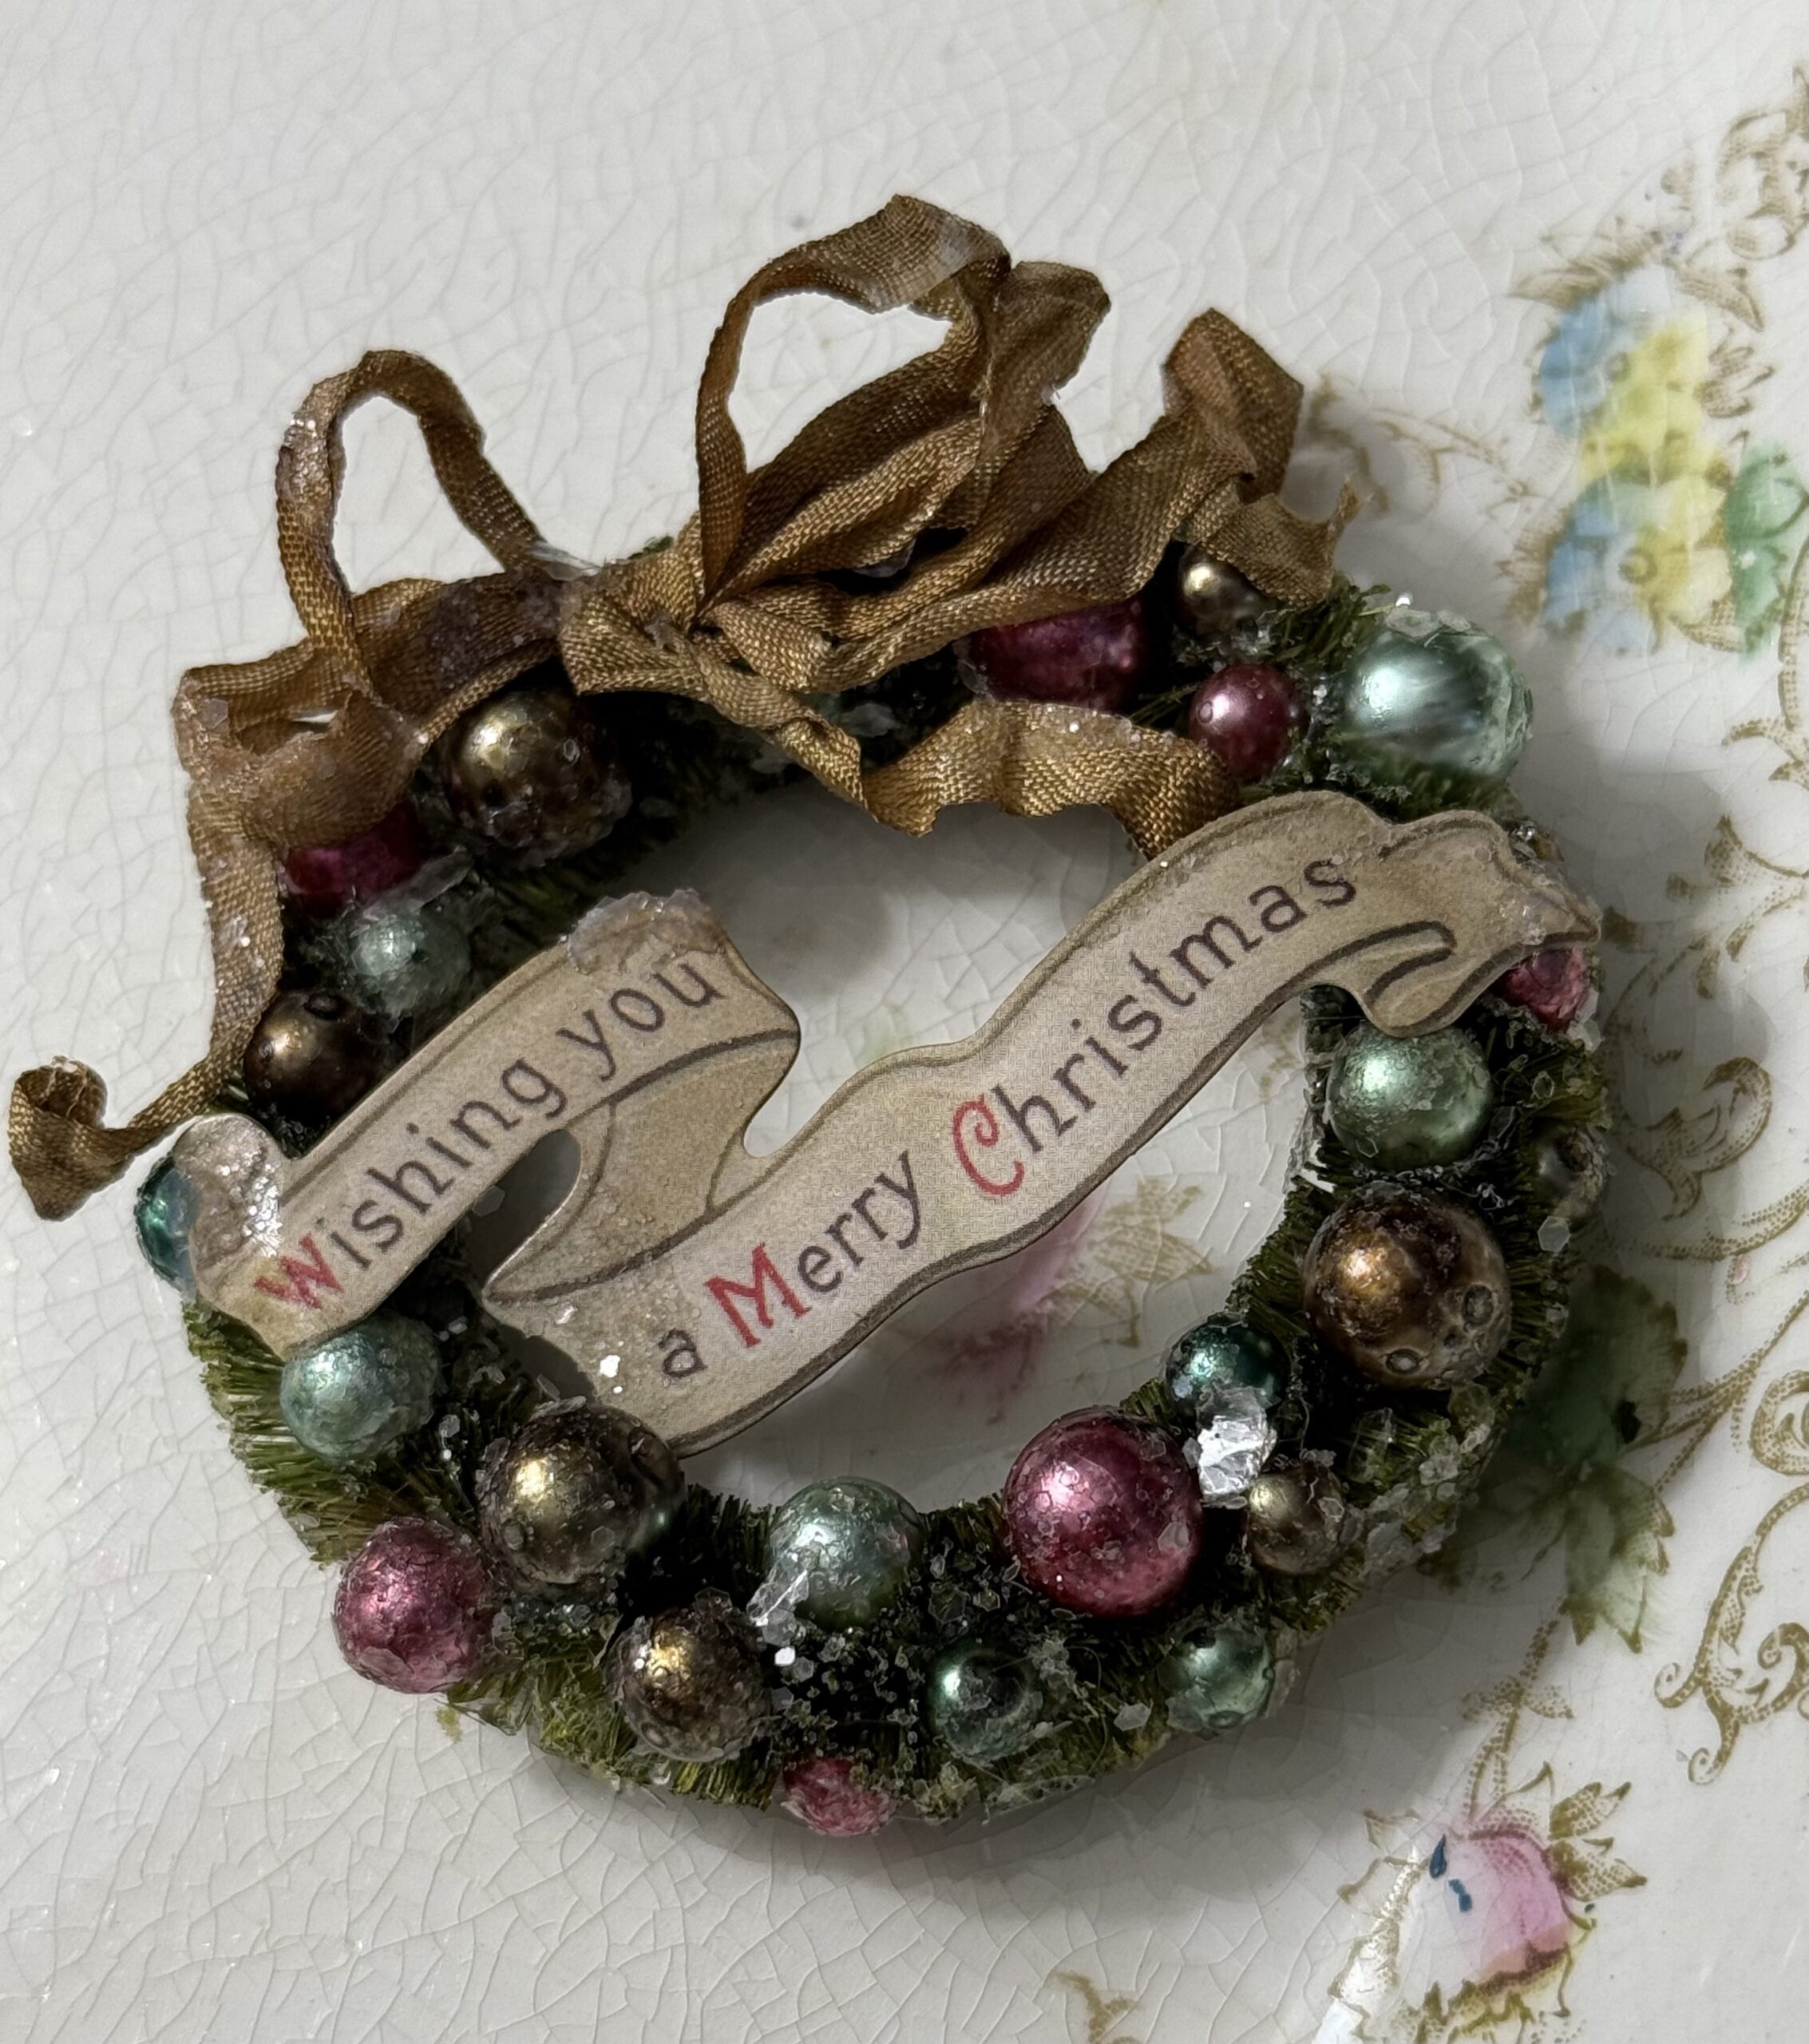
And this was after…unfortunately, I don’t have photos of that process as that was on day two of my making and I forgot to take them, I applied the Liquid Tinsel Chunky (in Tarnished) using a paint brush adding it in a few places like the bow, the banner, on the baubles here and there and around the edges of the vignette, then I set it aside to dry. The Liquid Tinsel is a wet product, so it needs to dry for a bit, but once it’s dry, the tinsel is set and doesn’t shake off as normal glitter does. It truly gives the piece a vintage look. You can see that it wasn’t a heavy application of the liquid tinsel, just a whisper of it as almost all vintage pieces have.
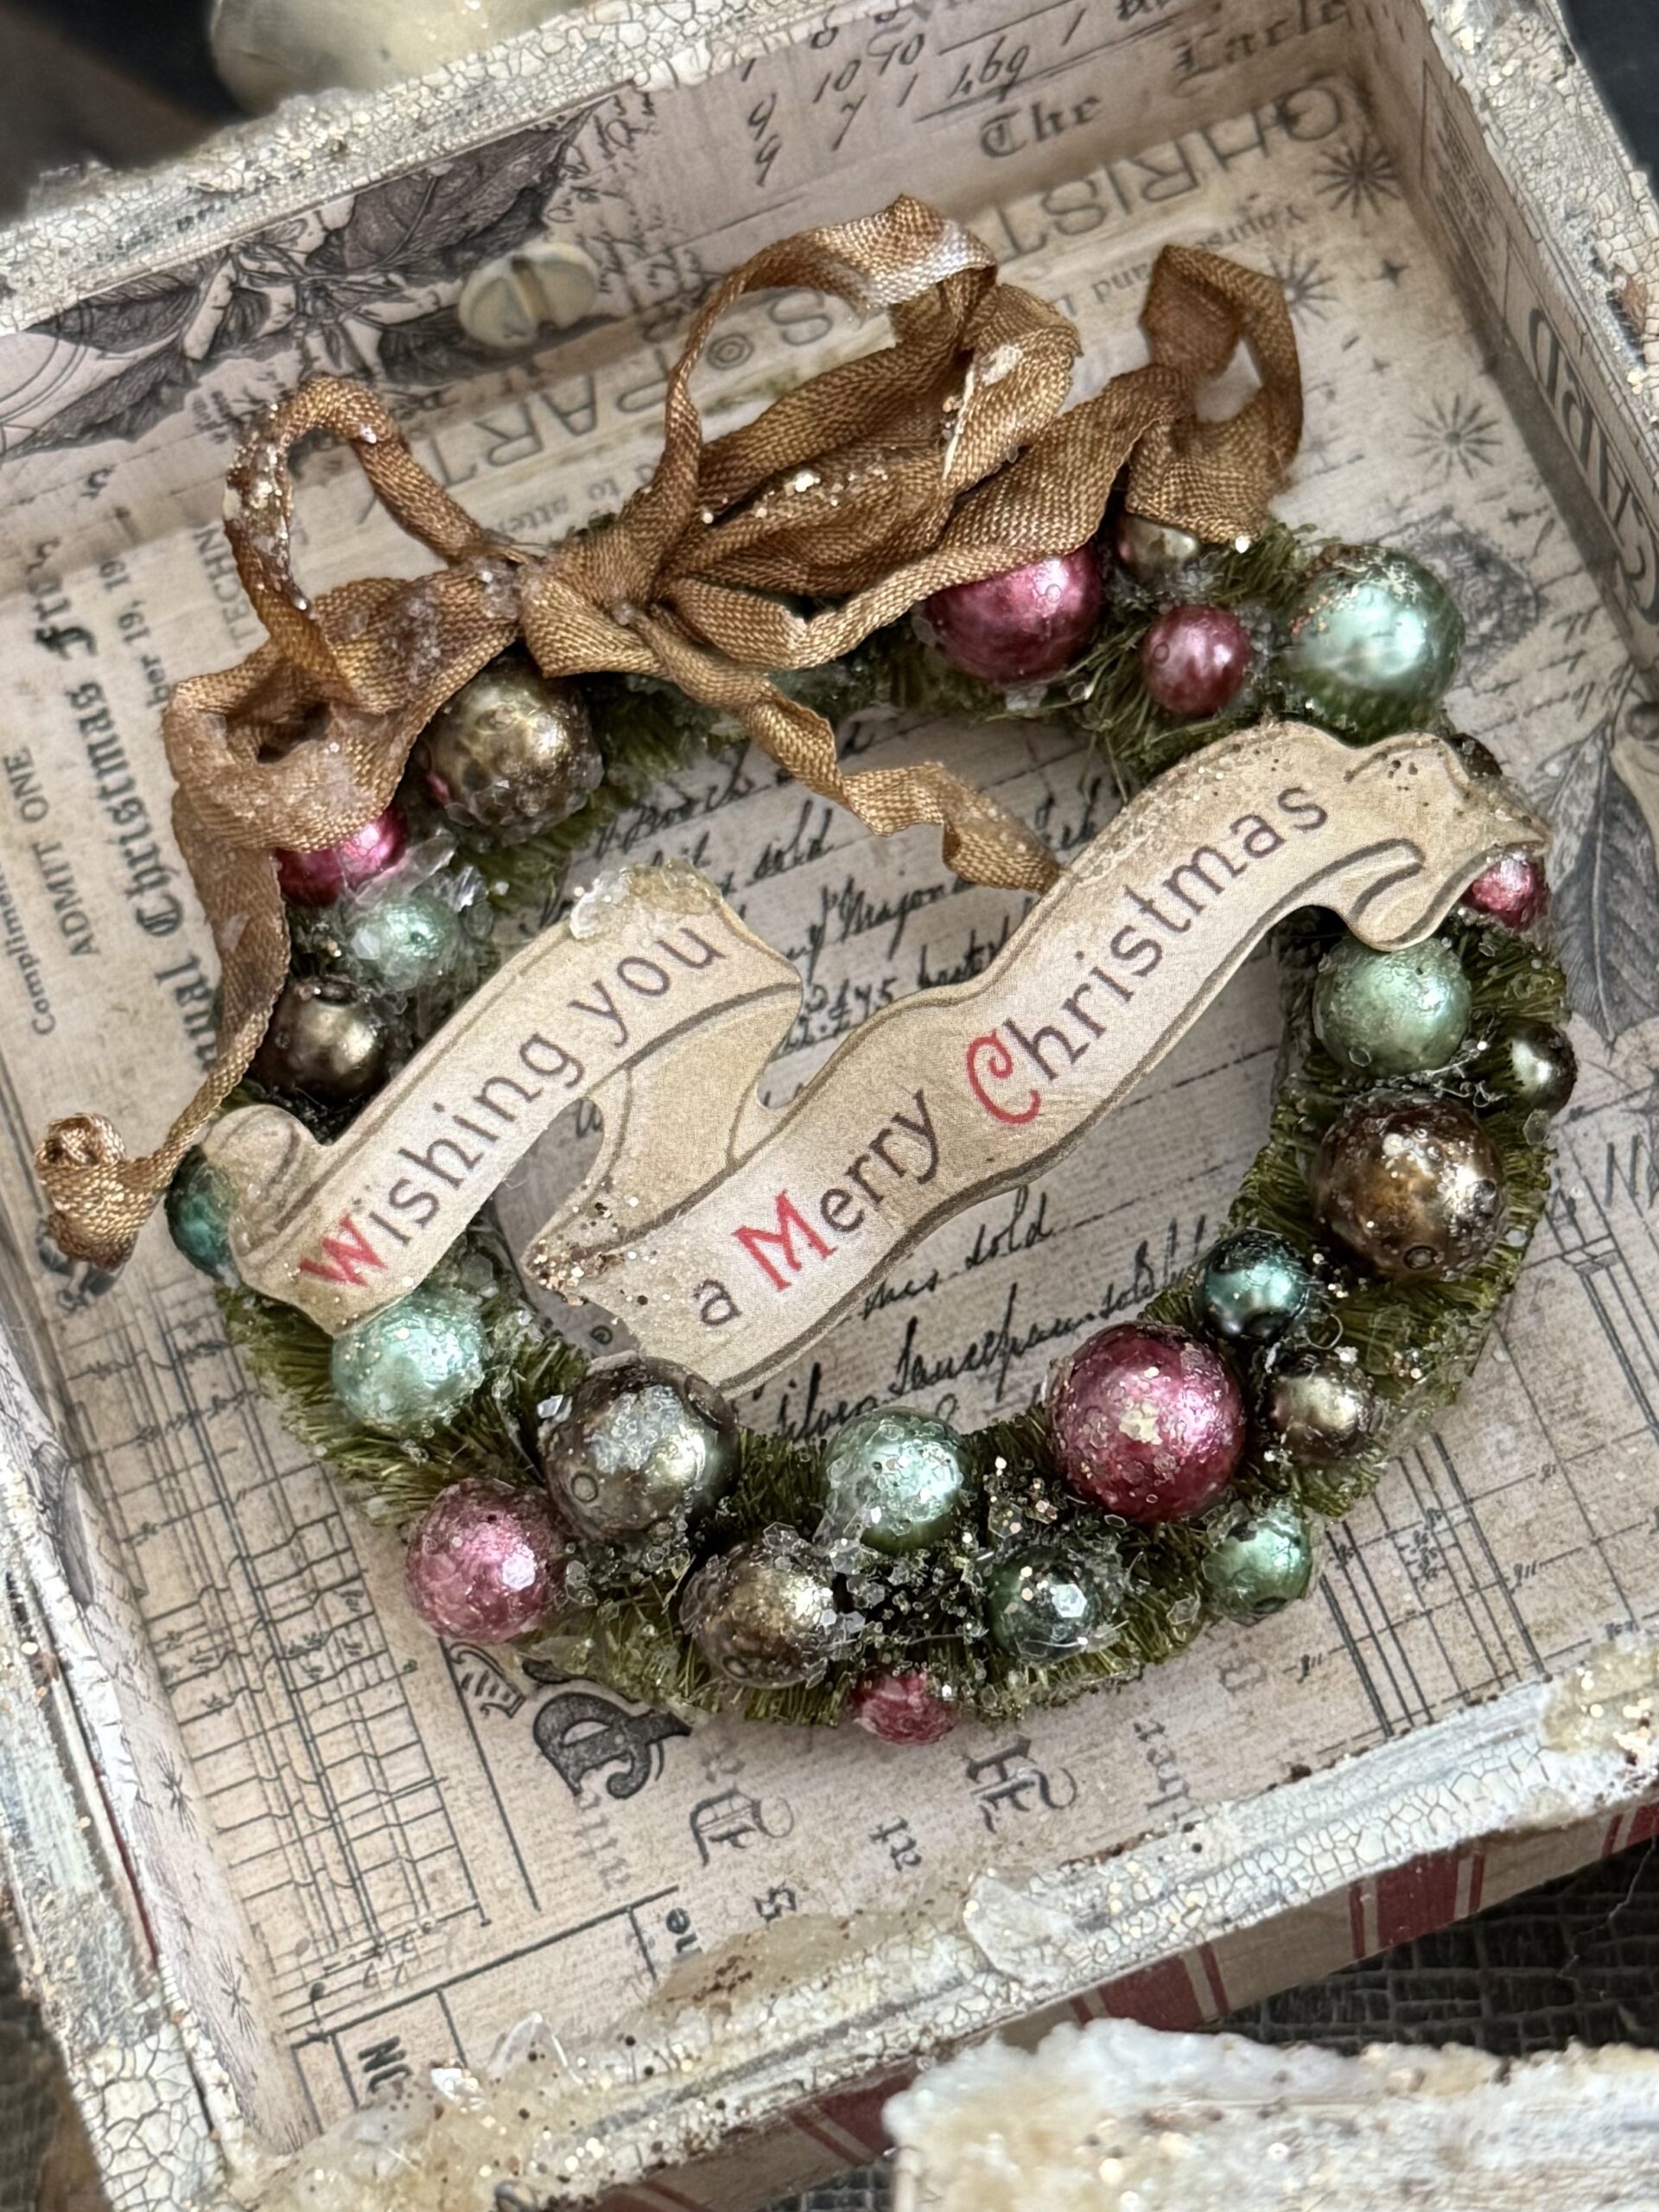
Here is the rest of my process for building the wreath box…
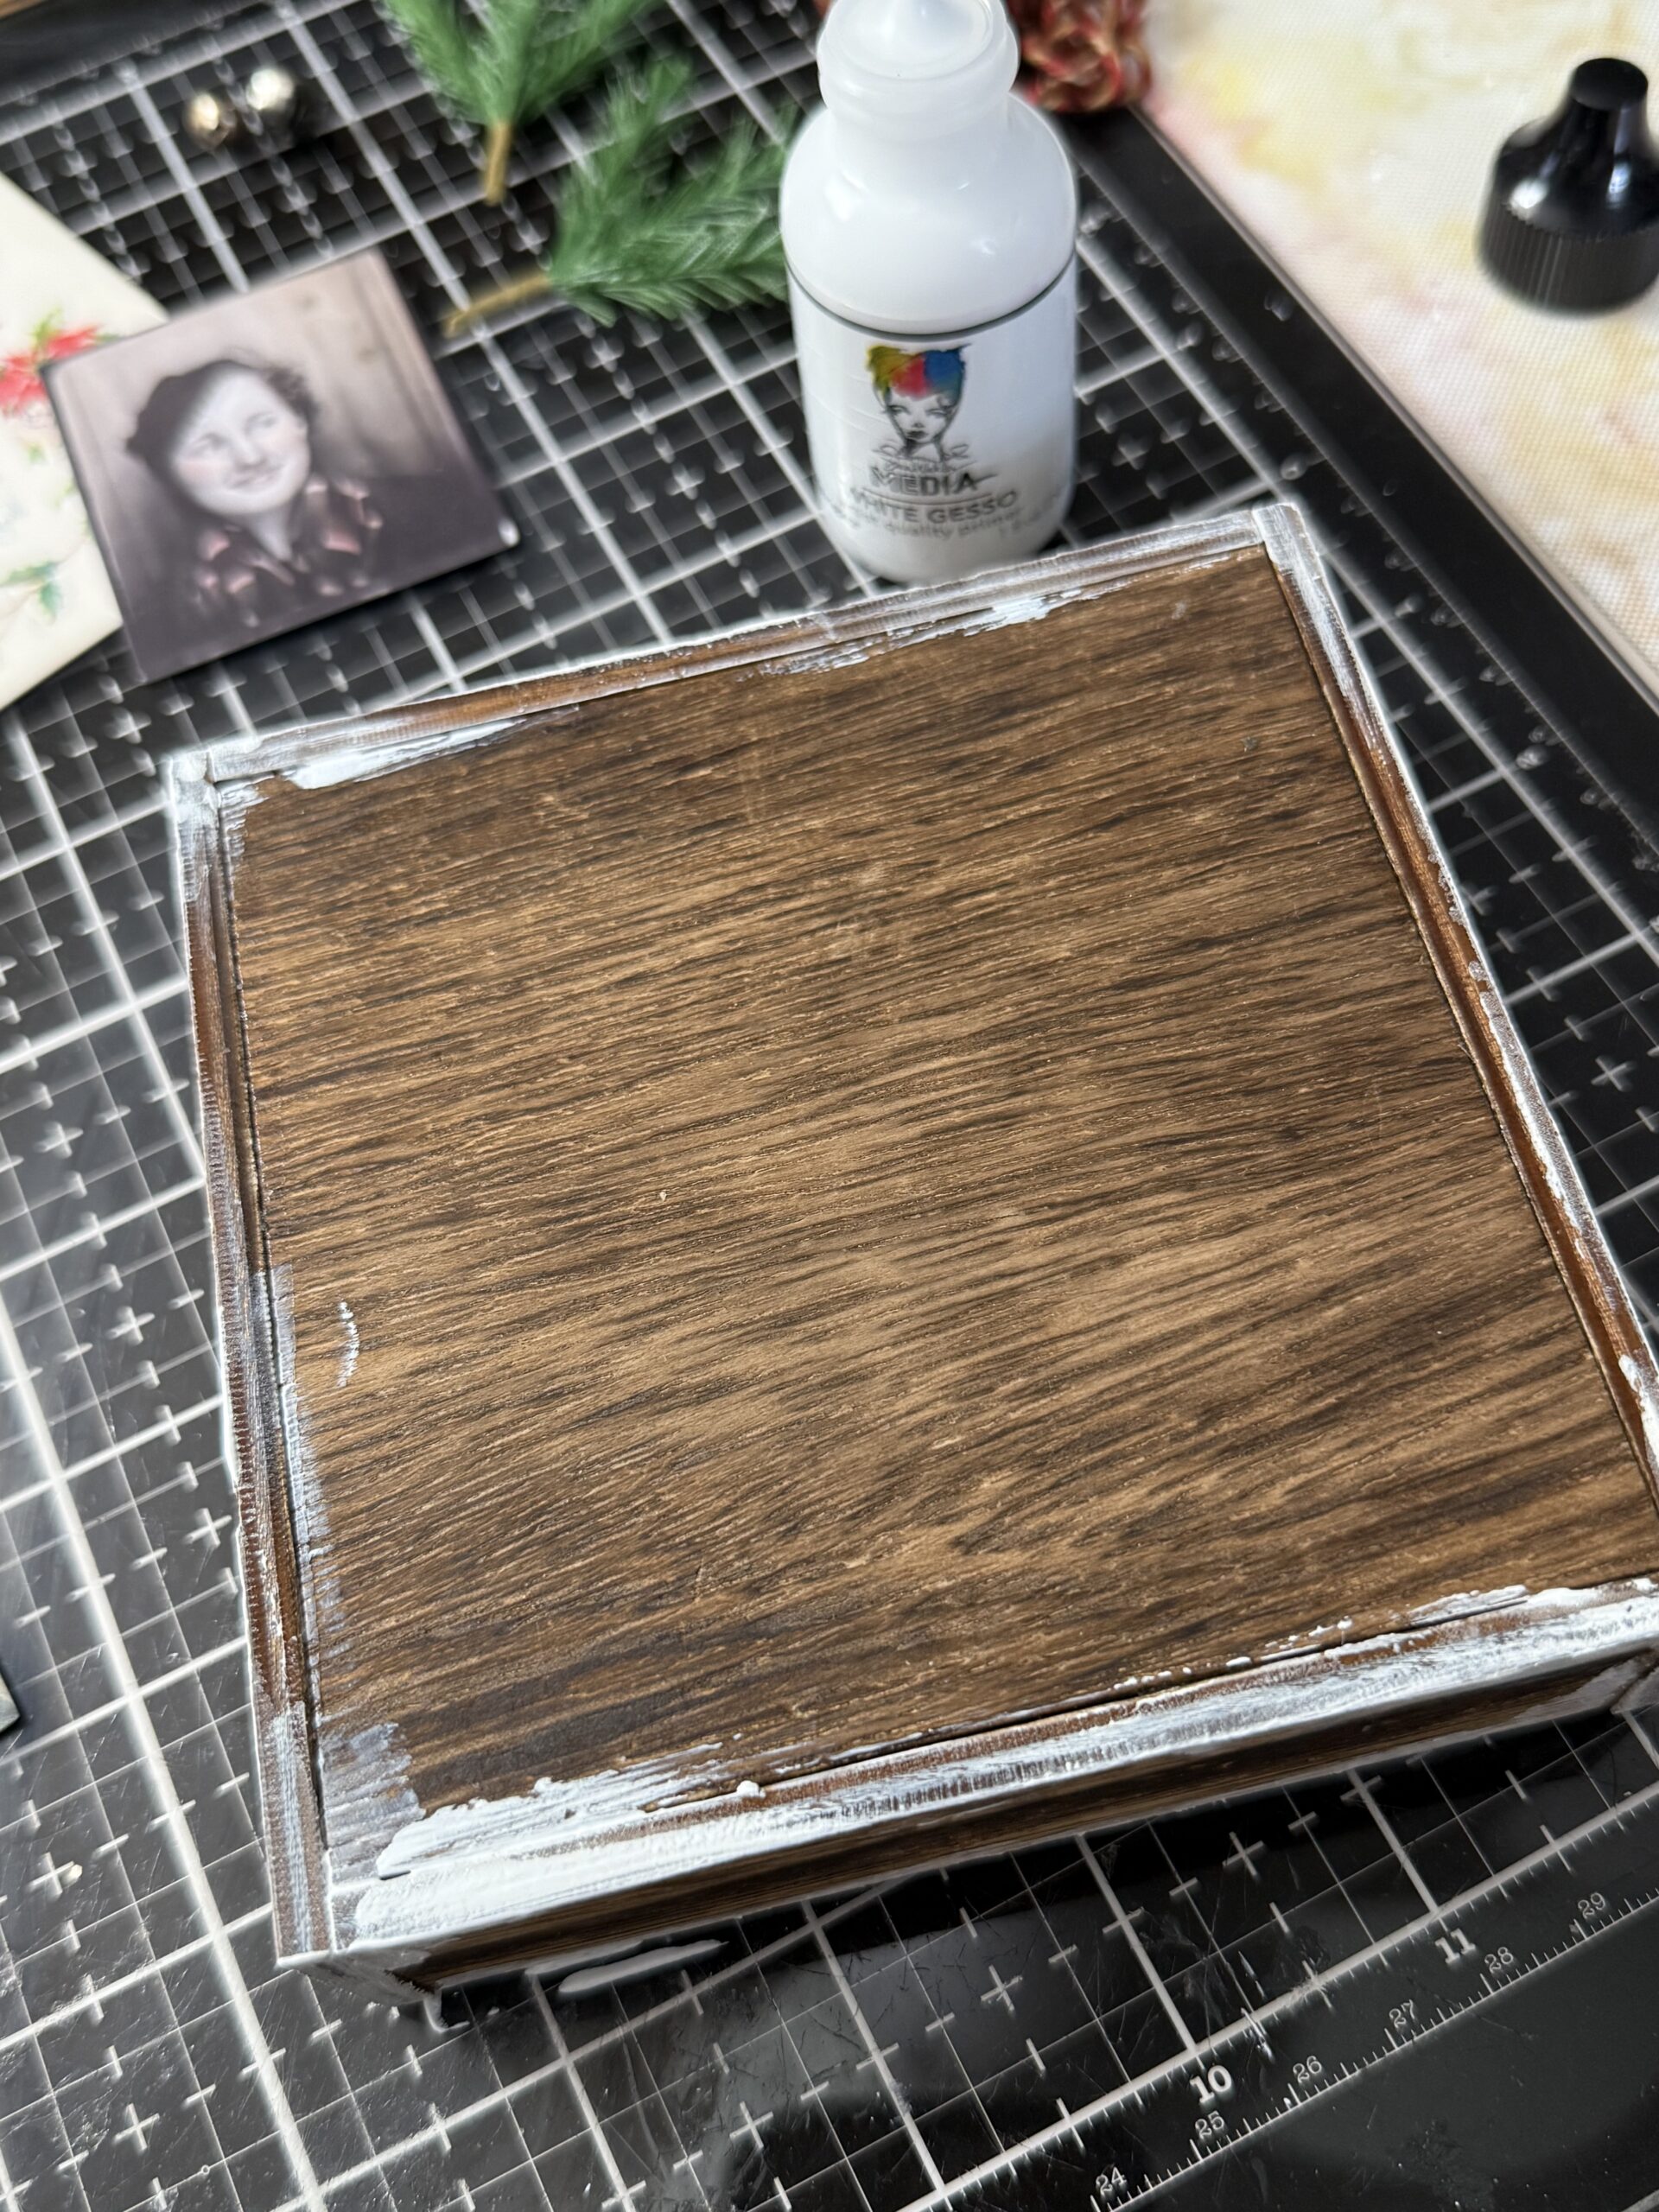
I painted the edges of my box using some White Gesso and set it aside to dry.
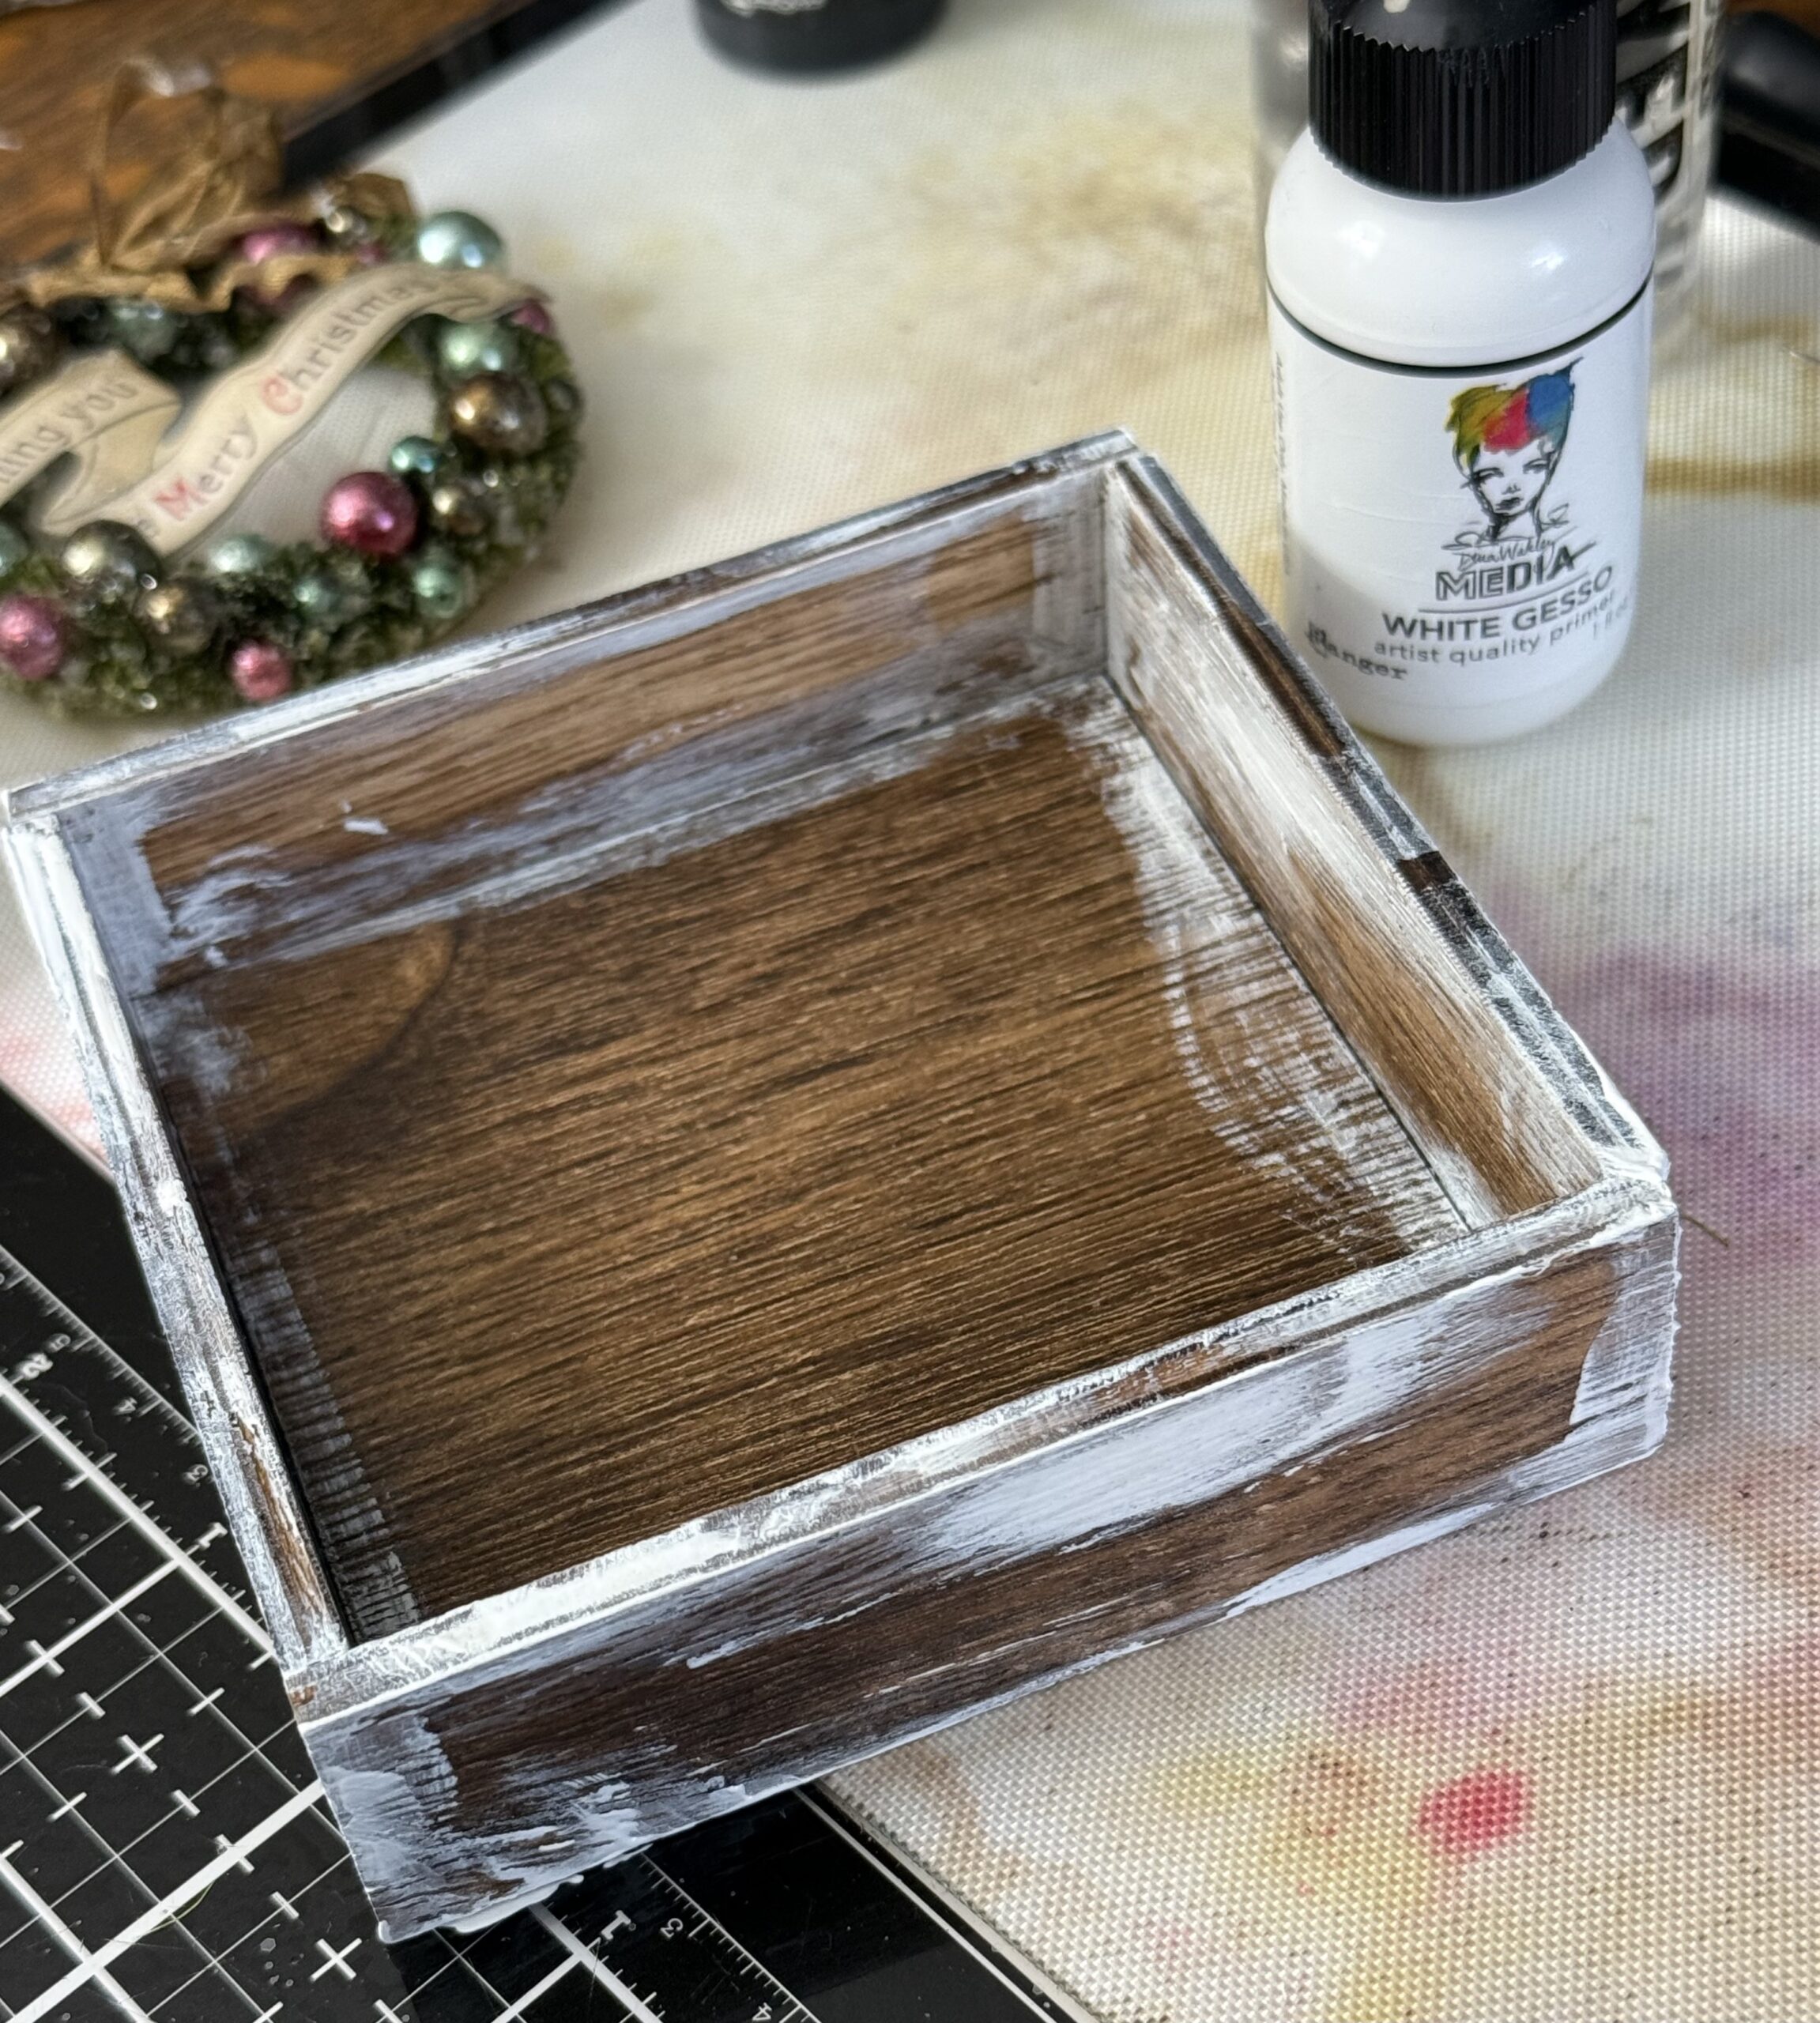
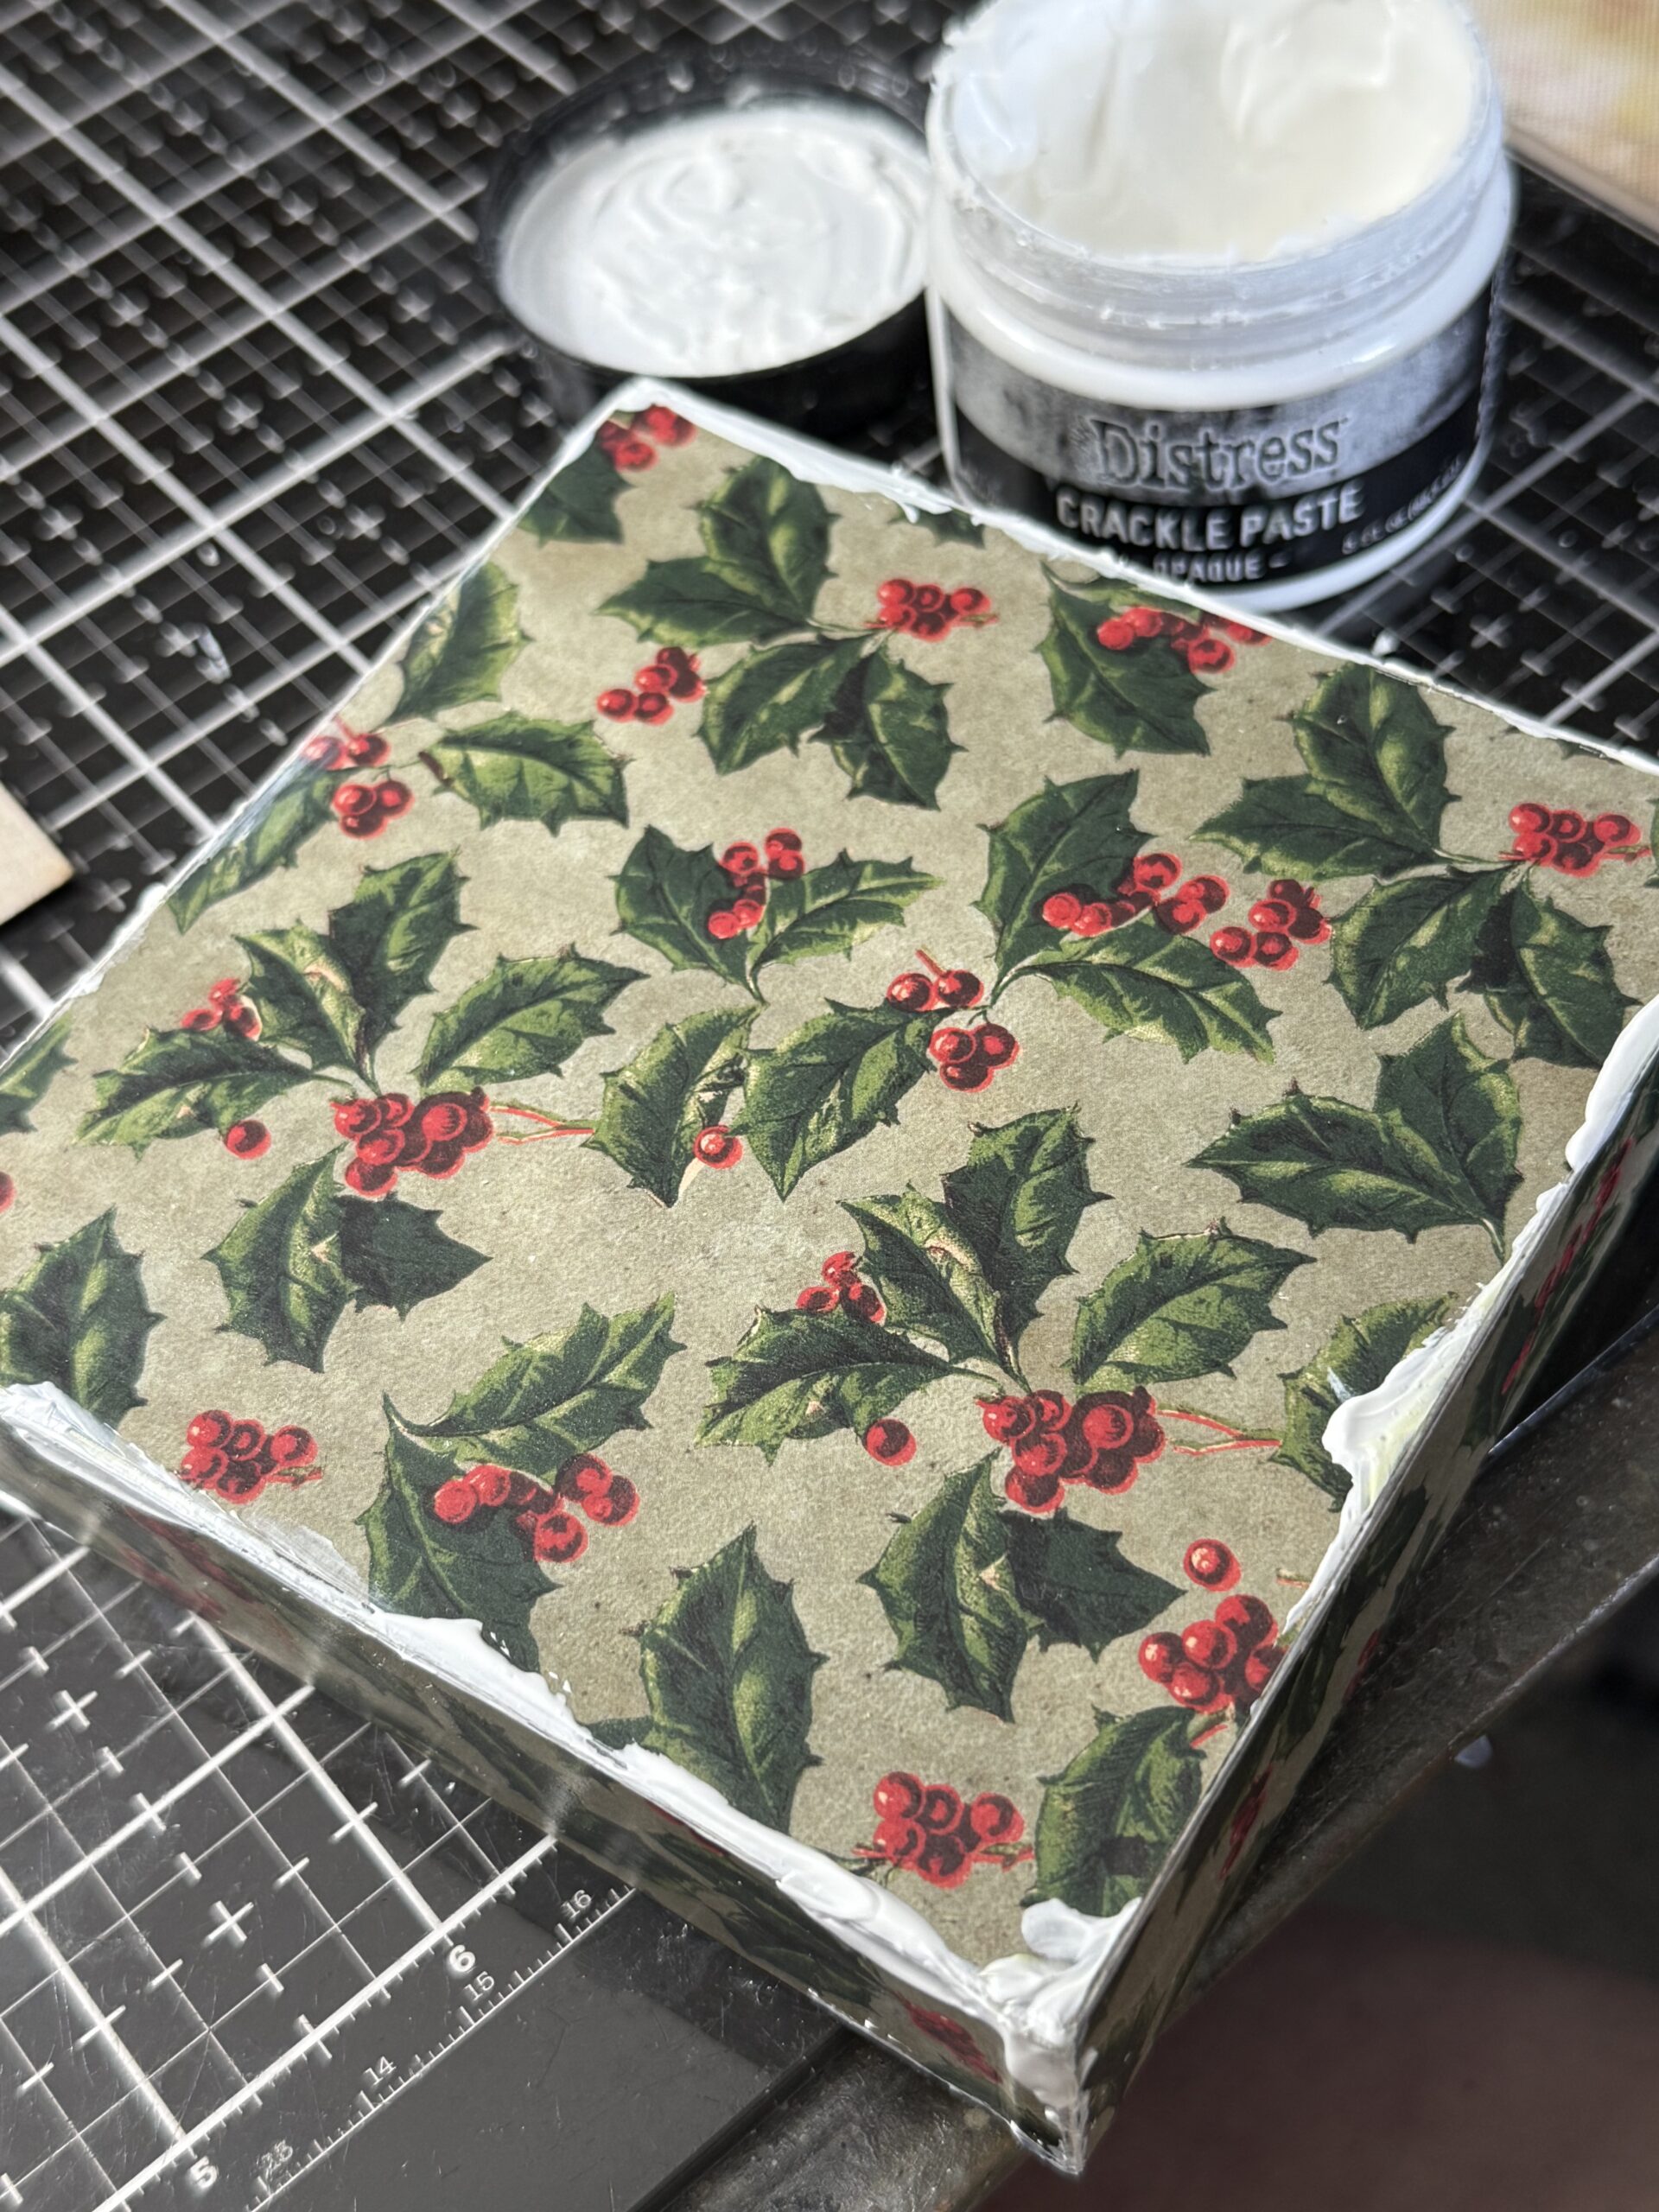
Once dry, I used collage medium and adhered the strips of paper to all of the sides of the vignette box. The collage medium was applied to the fronts of the paper too so that I could rub them with Distress Crayon and it also helps to have a base of Collage Medium in place before rubbing the boxes with Opaque Crackle Texture Paste.
After the collage medium was dry, I applied some Crackle Paste to the edges of the vignette box, then set it aside to dry and crackle.
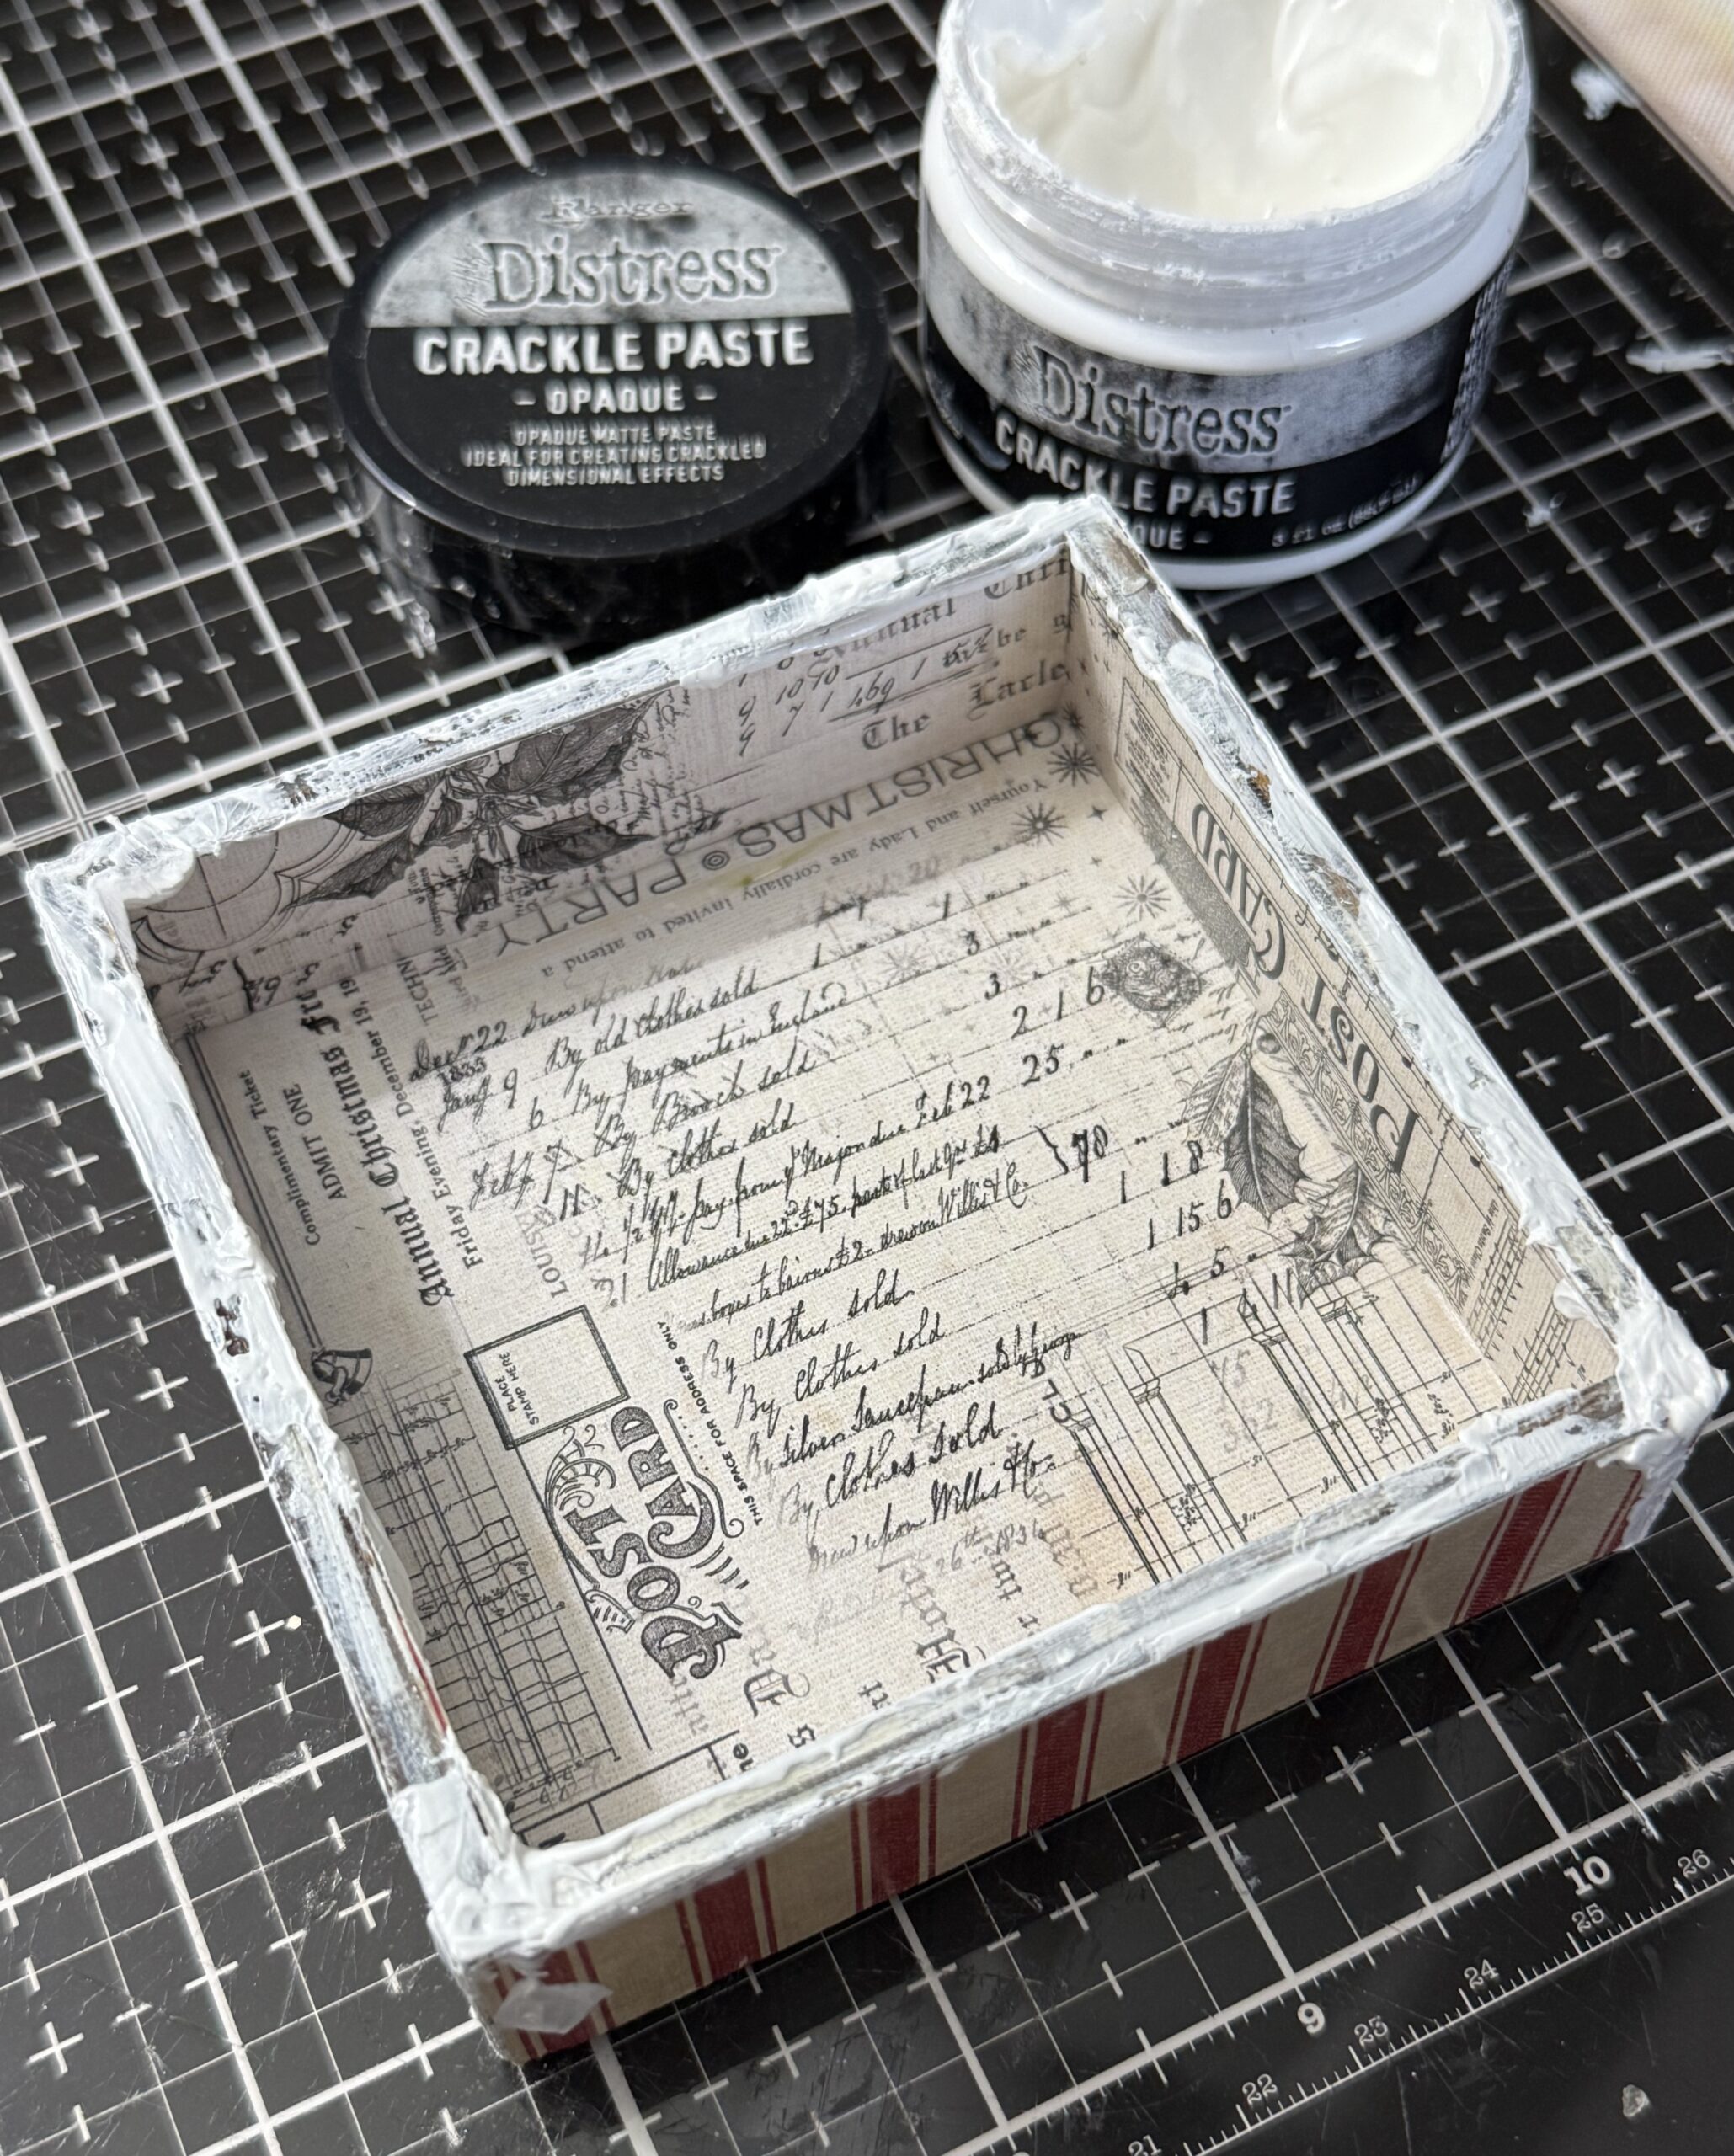
Once the box was crackled, I rubbed the entire box with some Gathered Twigs Distress Crayon. To do that, I scribbled some of the crayon onto my craft mat, then using a damp brush, picked up color and pounced it all around the box both inside and out and especially the crackled areas…this is how you see so much crackle.
I added a painted idea-ology knob to the top of the vignette using a Dremel to drill the whole, then attached it to the top. I adhered the wreath in place using hot glue.
Once the crayon was dry, I applied some Snowfall Grit-paste. This was applied around the edges of the vignette in random areas, then it was set aside to dry.
Some of the Snowfall grit-paste took on a green-ish antiqued look because it was applied after the distress crayon…if you don’t like a grungy look, skip the crayon or apply it after you have added the grit-paste in places where the grit-paste is not…for me, I like the grungy vintage aged look, but, if that isn’t for you, change it up! 🙂
With that, the first box was complete.
Now, onto box two…
Here is a look at some of the elements I thought to use, some made it, some didn’t but that is how a project comes to be.. this time I knew I wanted to do the outside of the vignette box, so I started there.
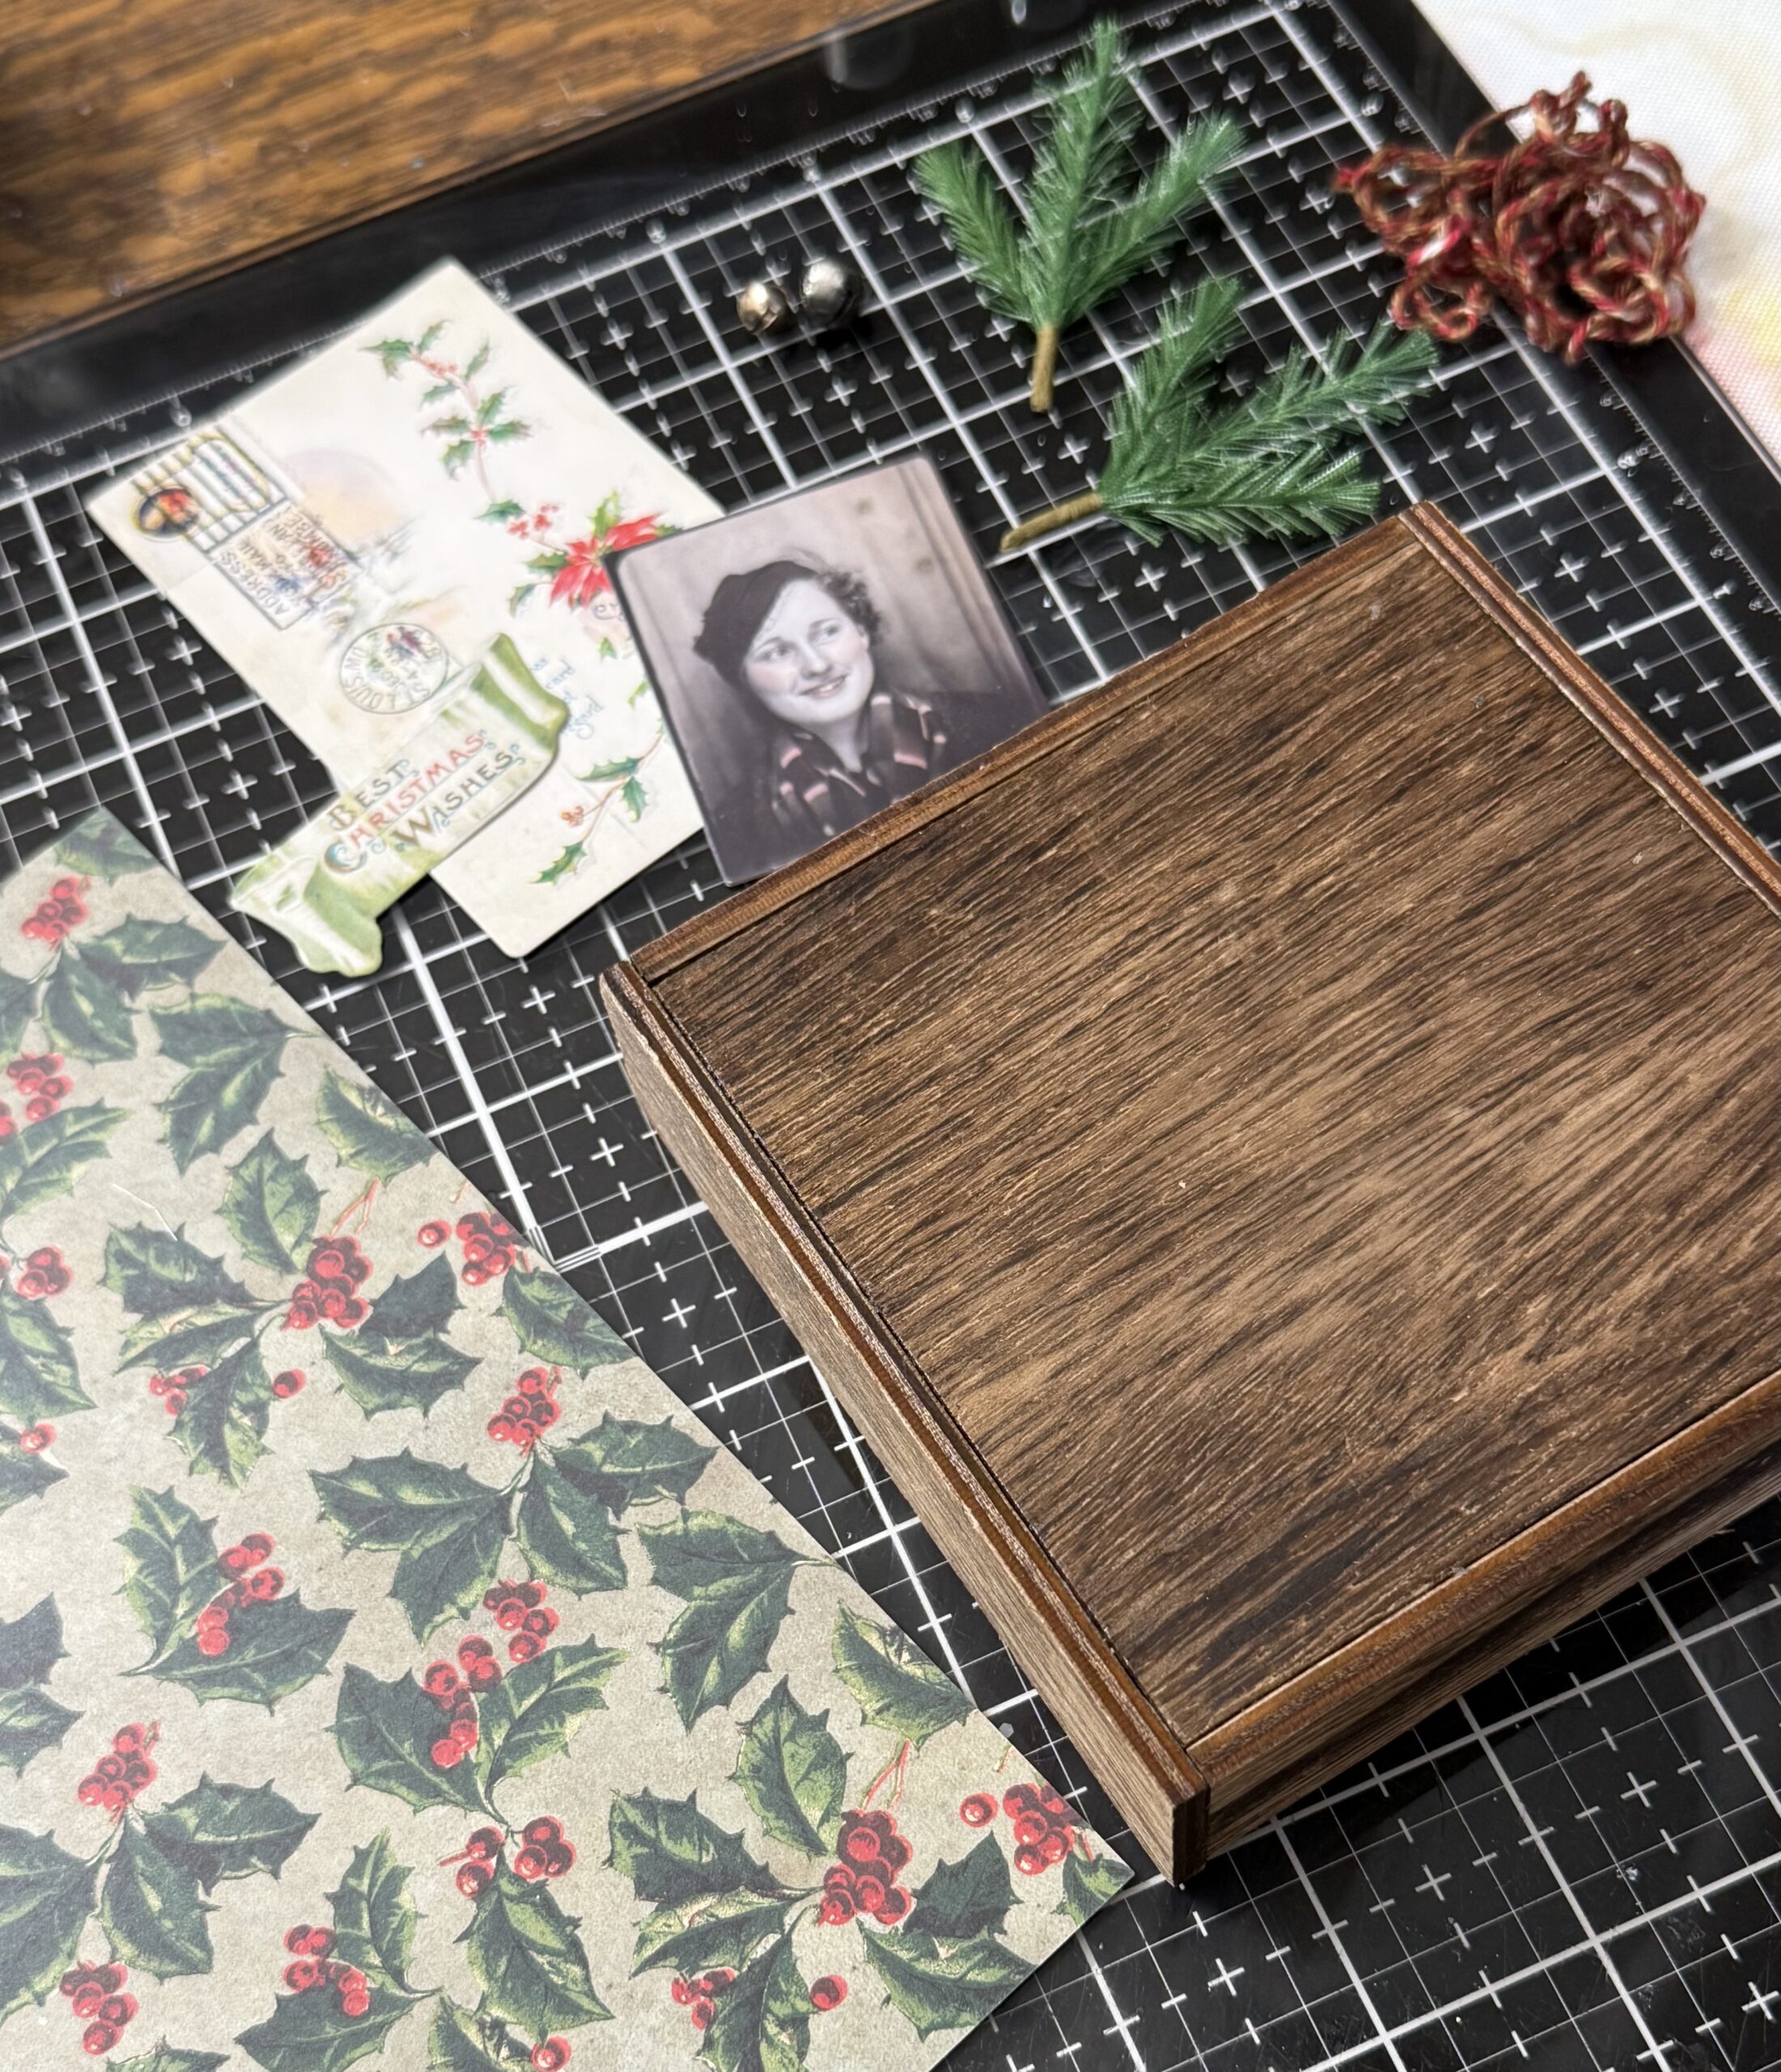
I painted the edges of the vignette box using the White Gesso, then let it dry.
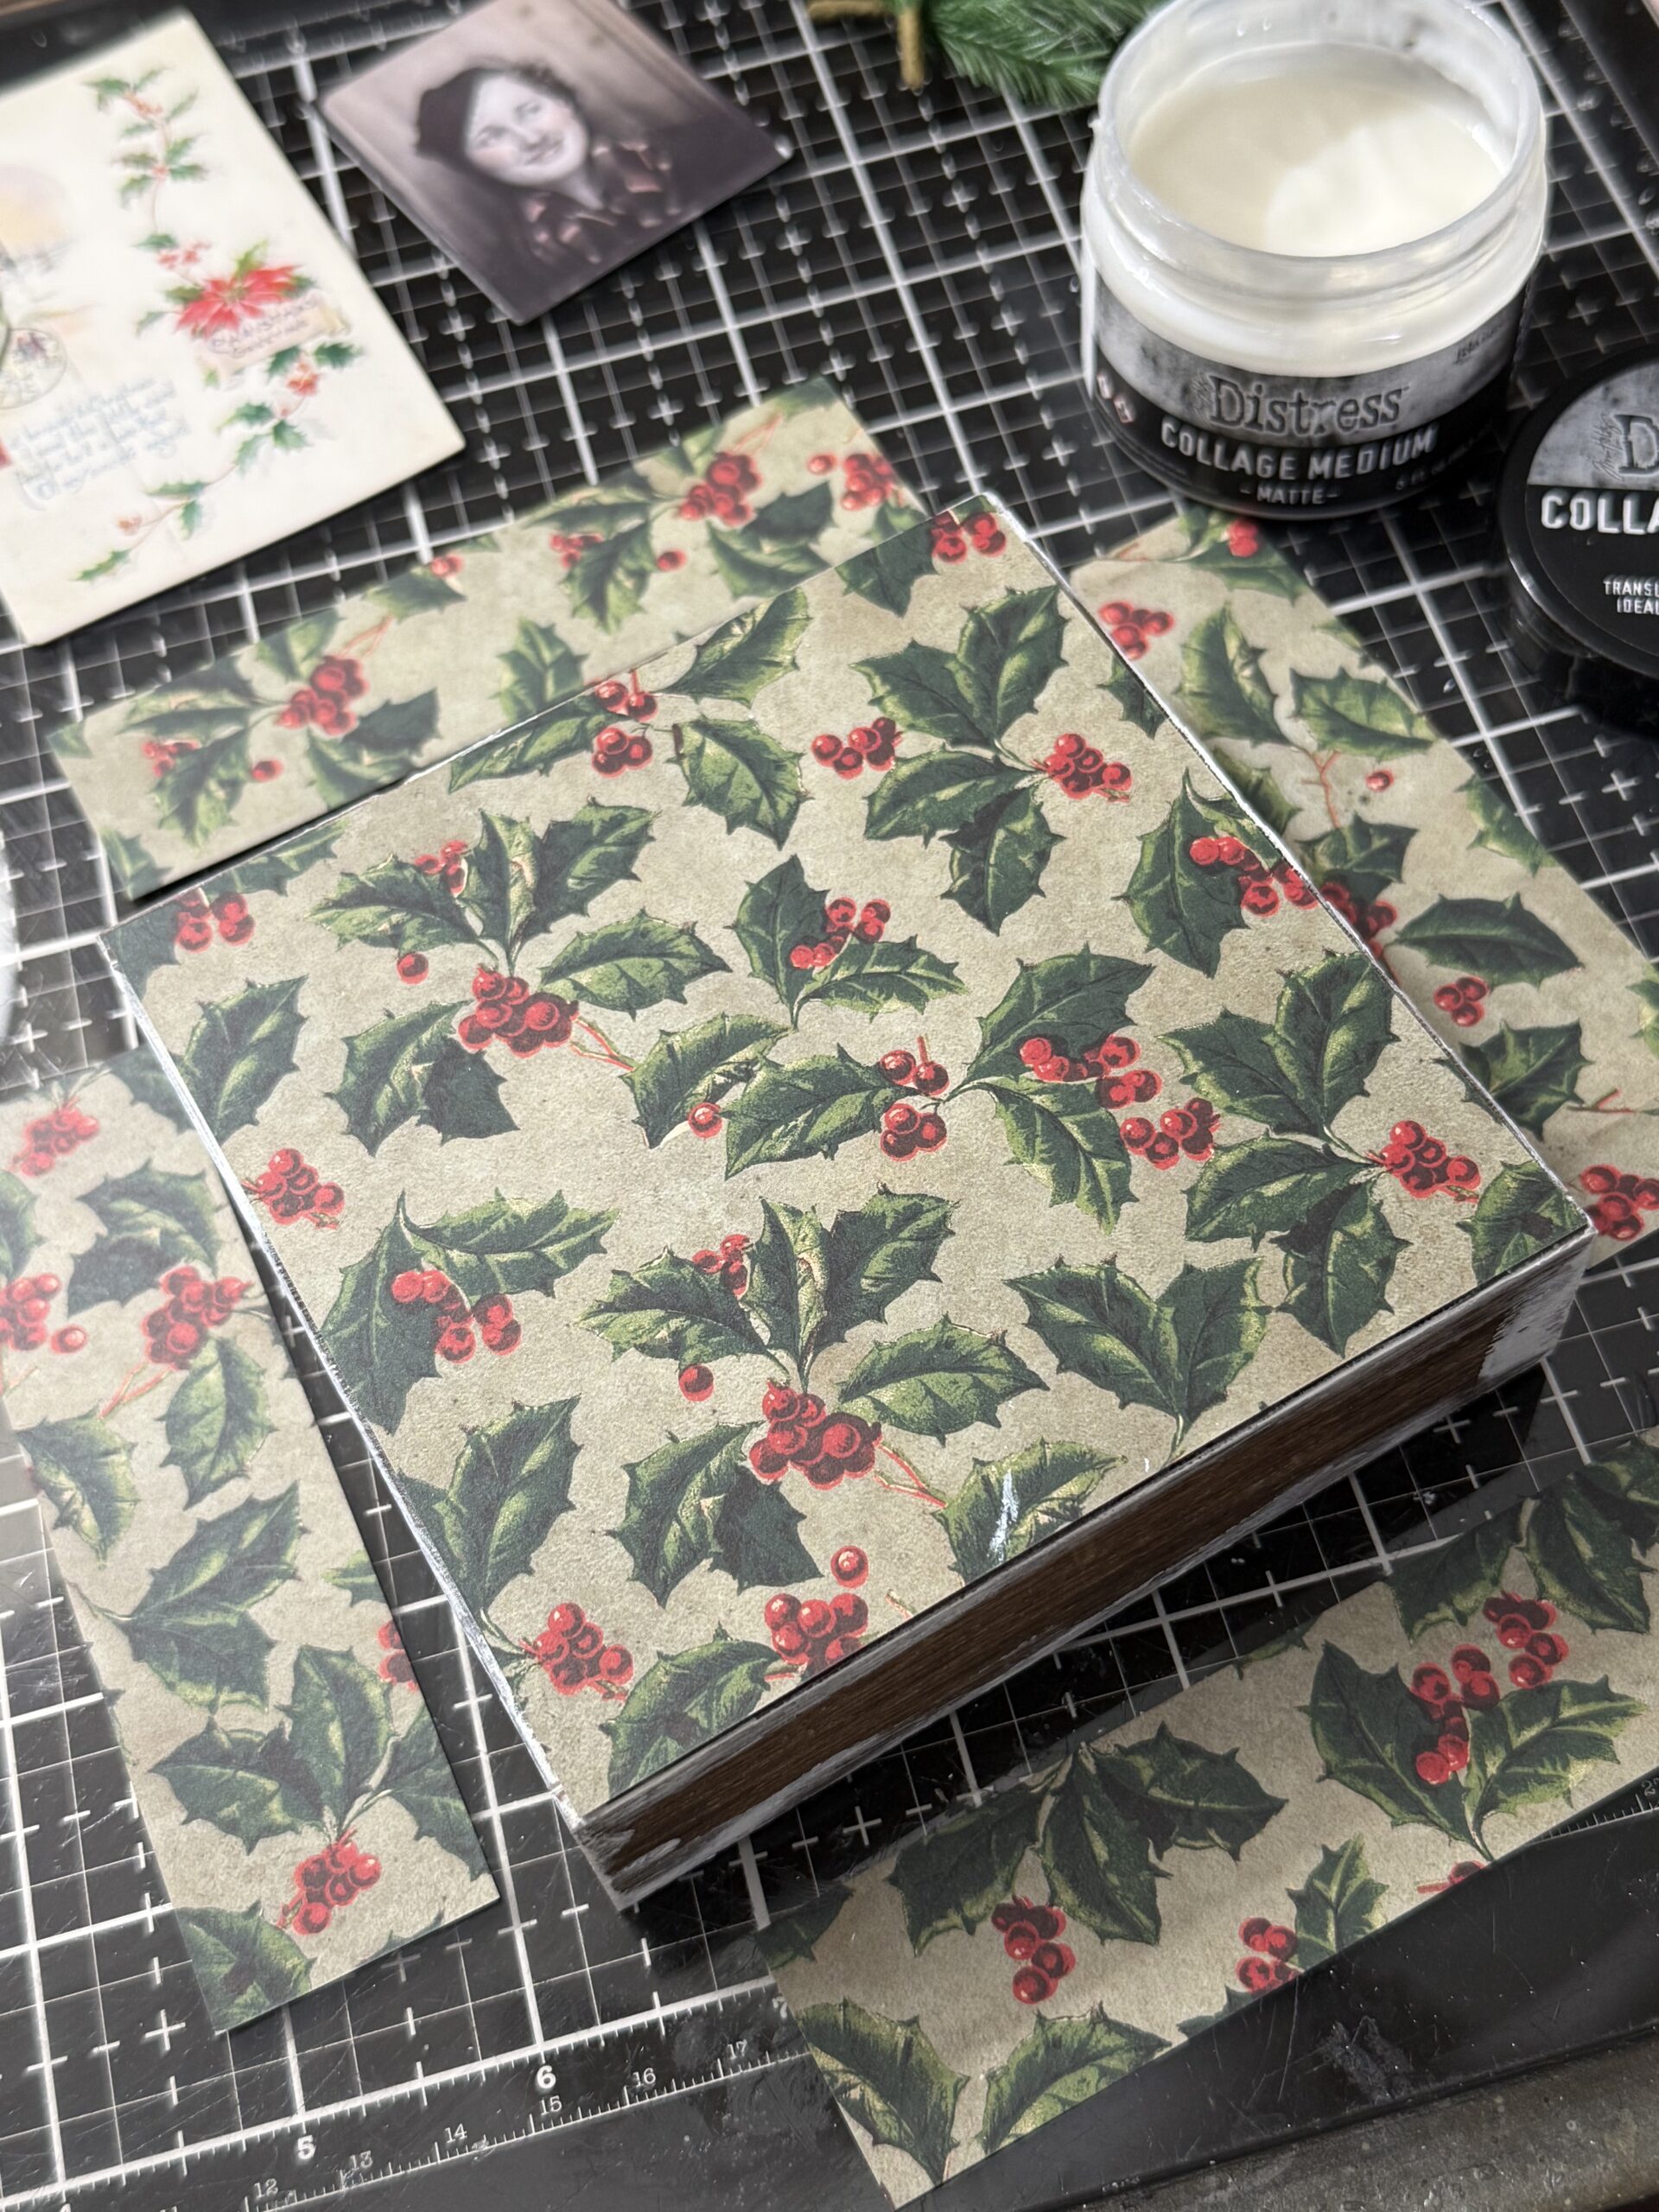
I cut the pieces of paper from the Christmas 8×8 Palette Paper Collection to fit the sides and front of the vignette box, then adhered them to the box using Collage Medium, being sure to rub a light coat over top of the papers so that I could rub with Distress Crayon.
Then, I added the Opaque Crackle Paste around the edges as I had done with the first box, then set it aside to dry.
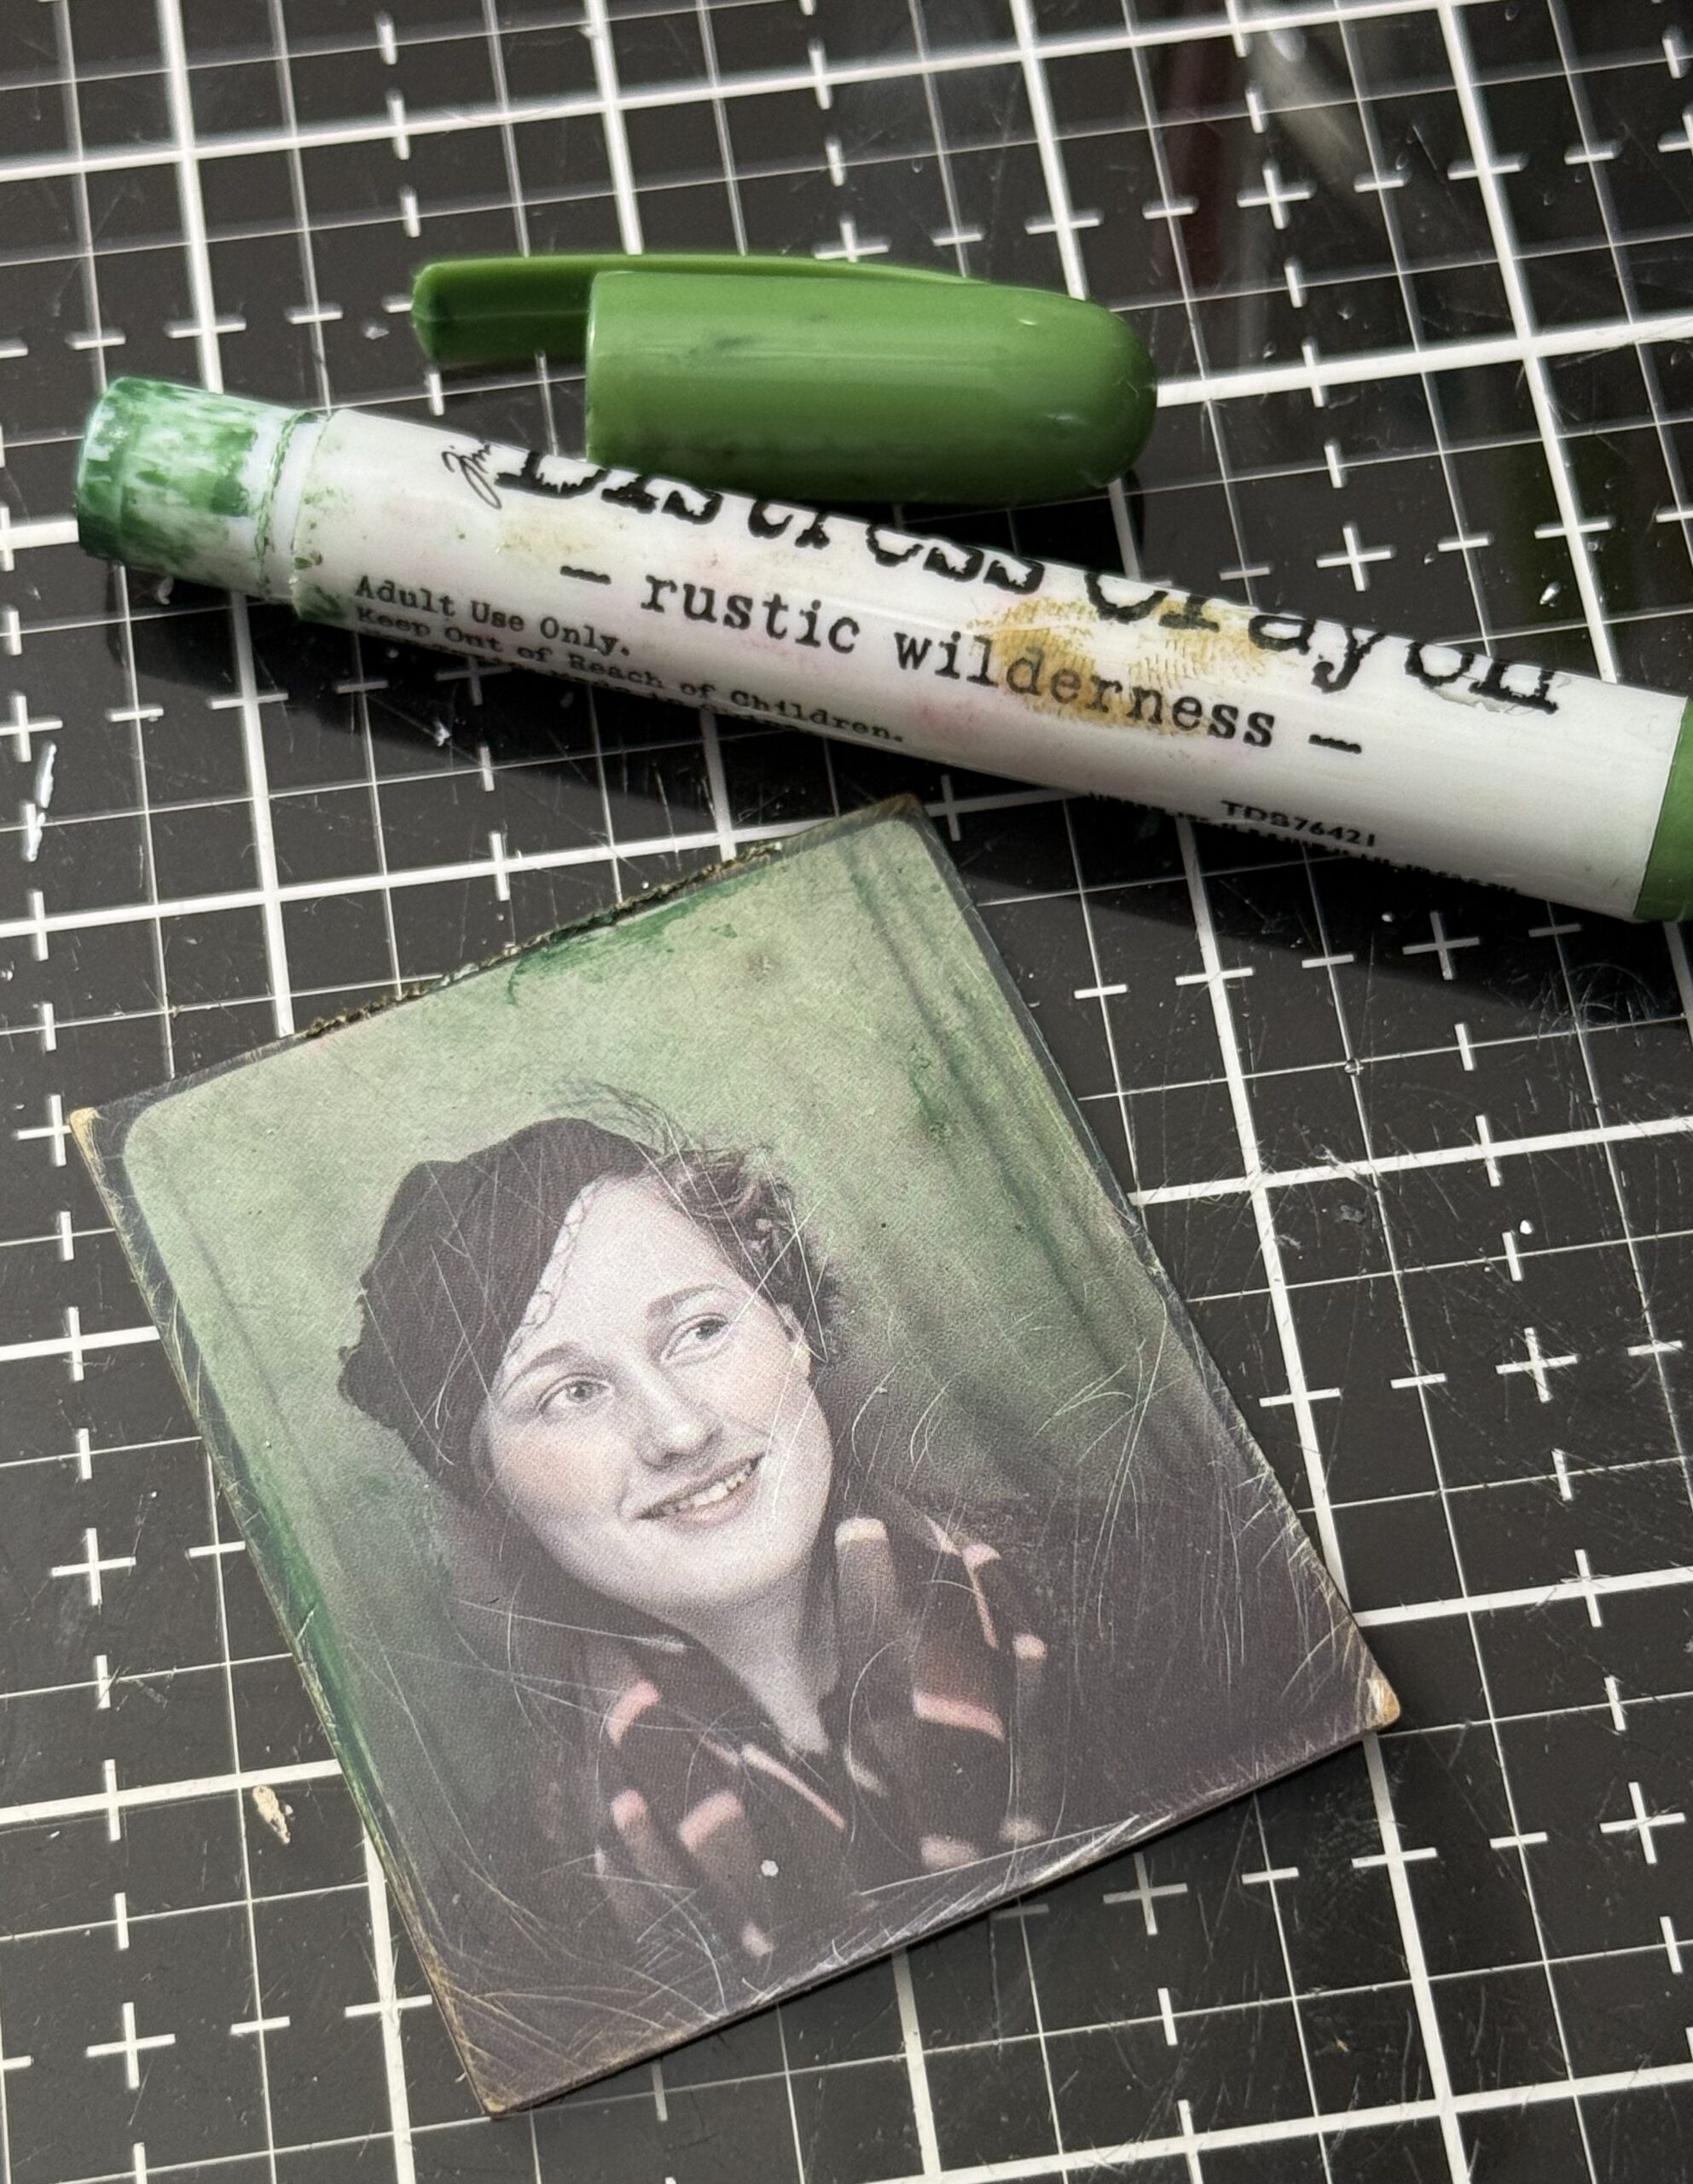
The photomatic photo was sanded a bit with my sanding grip to add age, then I scribbled a little Rustic Wilderness Crayon into the background and rubbed it with my finger to color it. Her cheeks were already a pink tone so I added some red to her scarf.
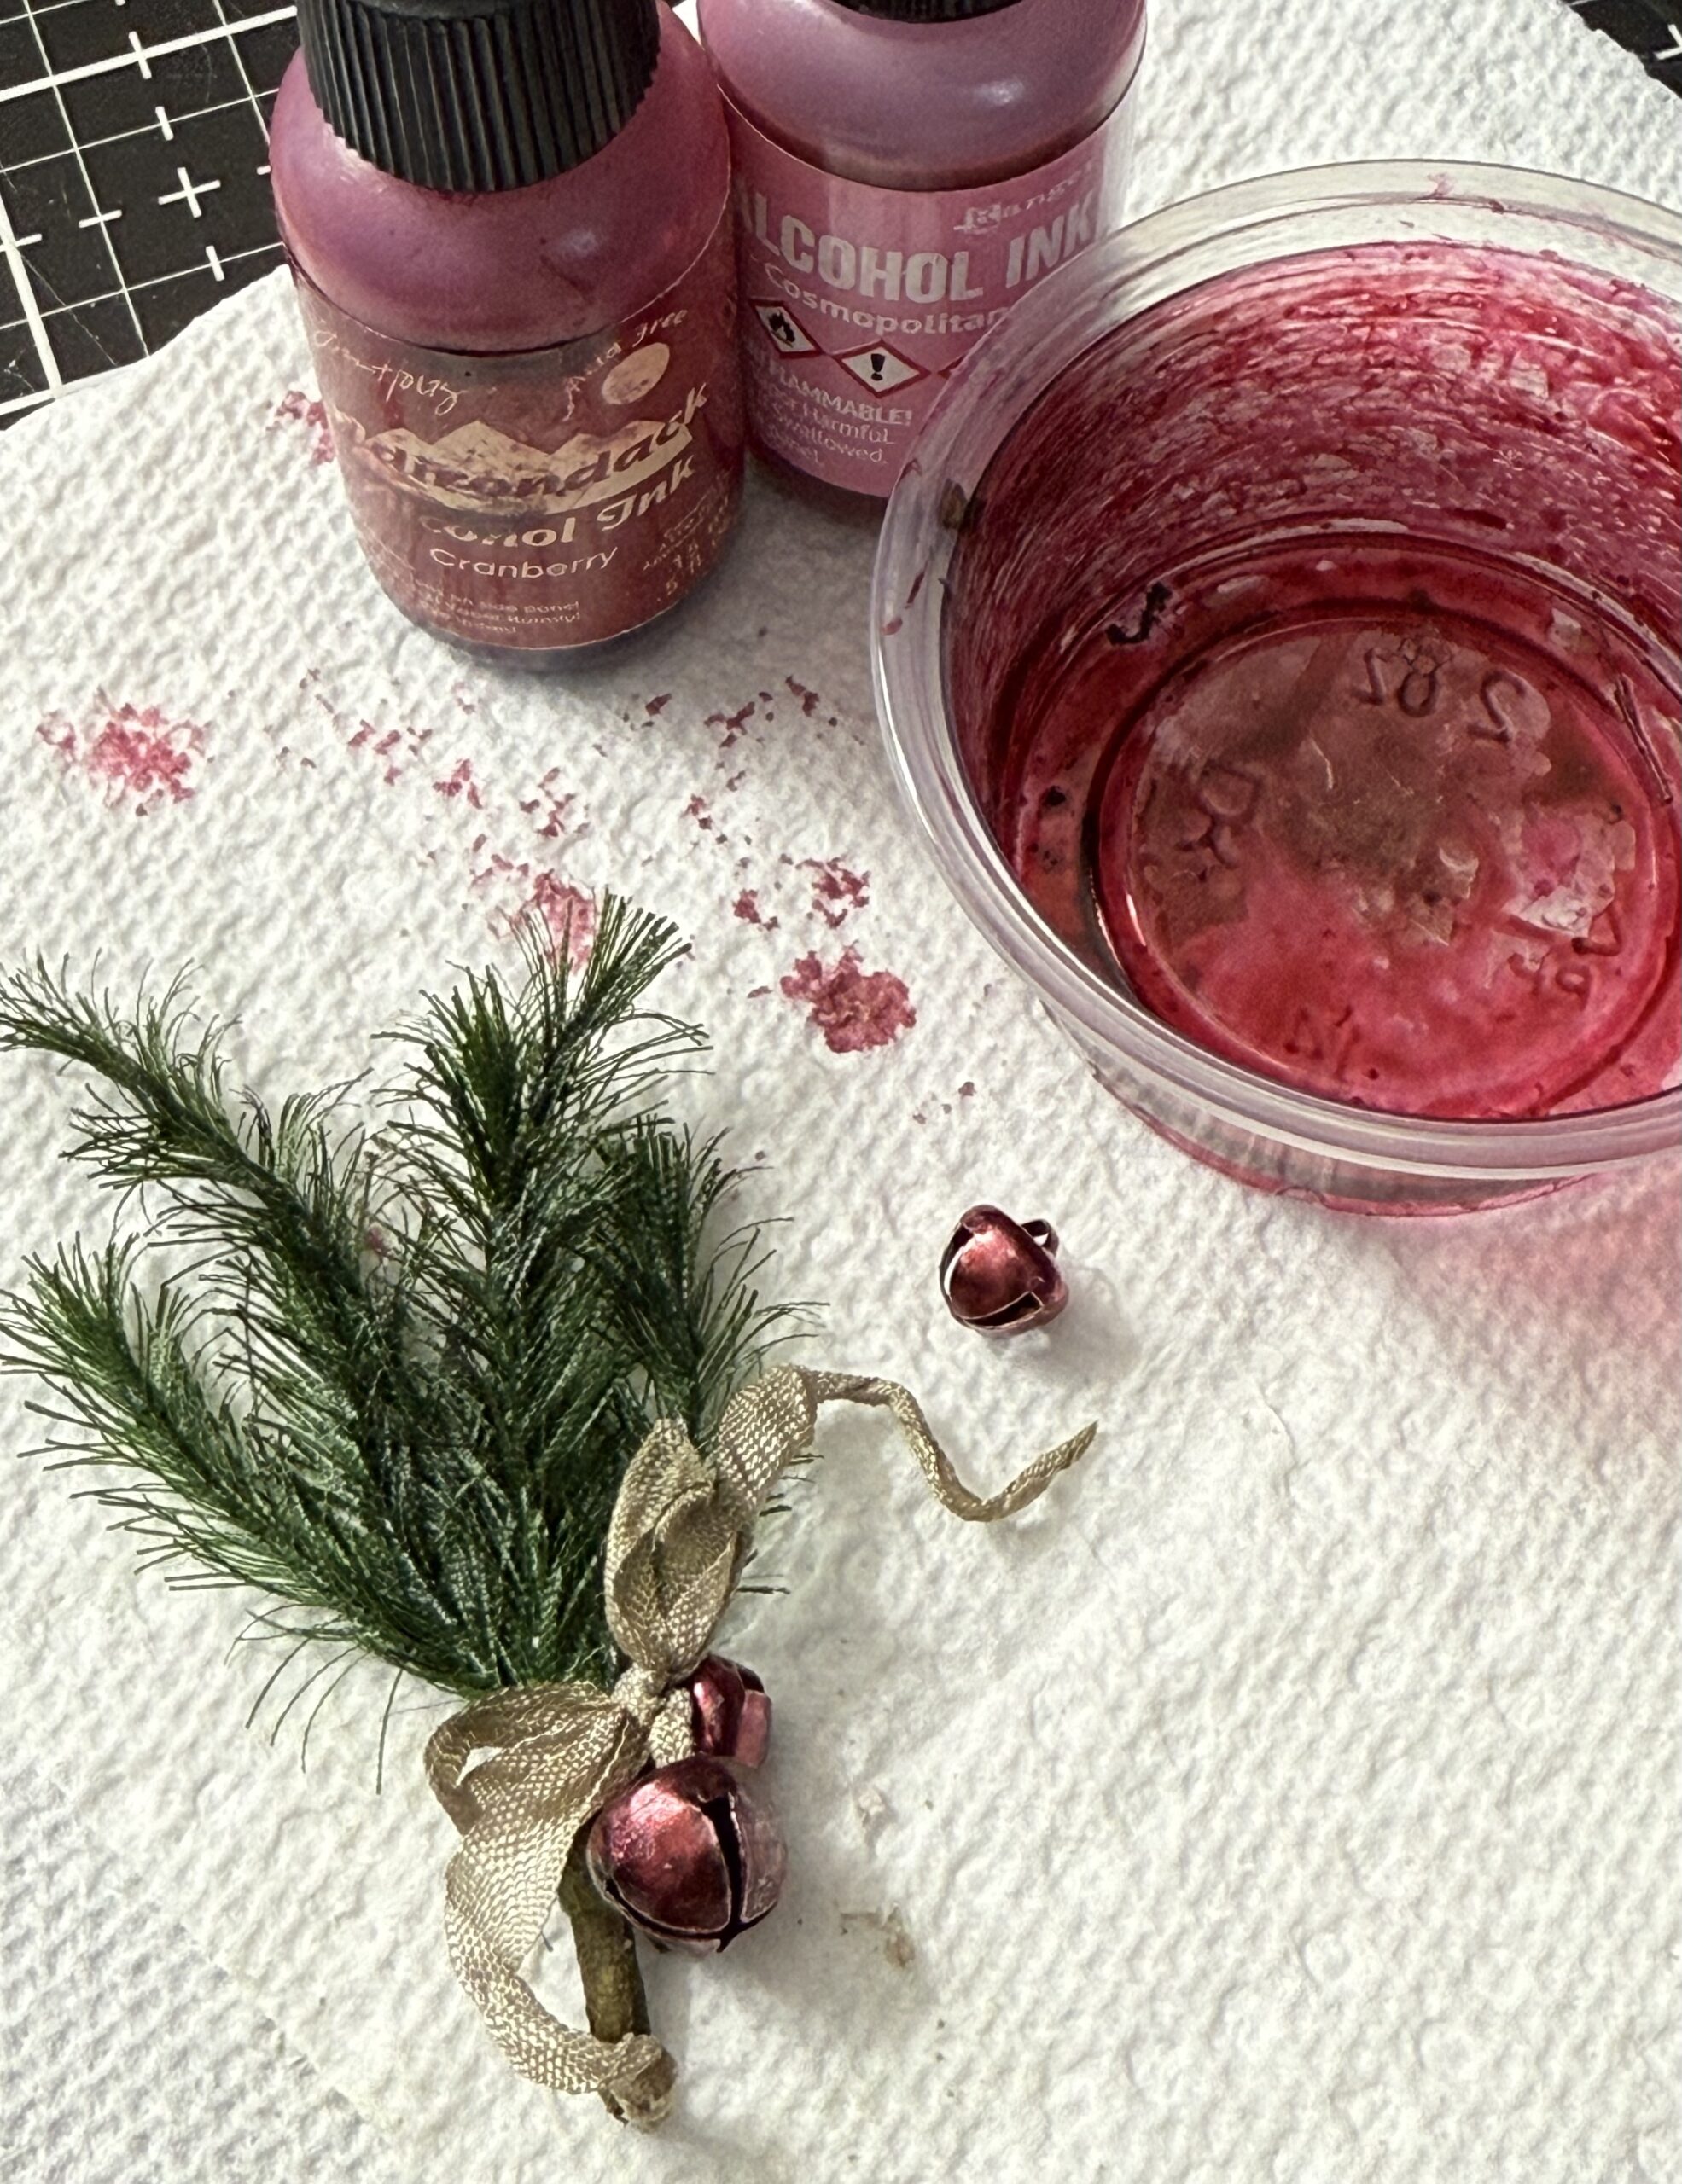
Next, I began working on the corsage…I colored up a few of the idea-ology jingle bells using Alcohol Inks, then set them onto a piece of paper towel to dry. I brought two pieces of idea-ology Pine Stems together and tied on a piece of inky ribbon, then tied on two jingle bells and tied a bow.
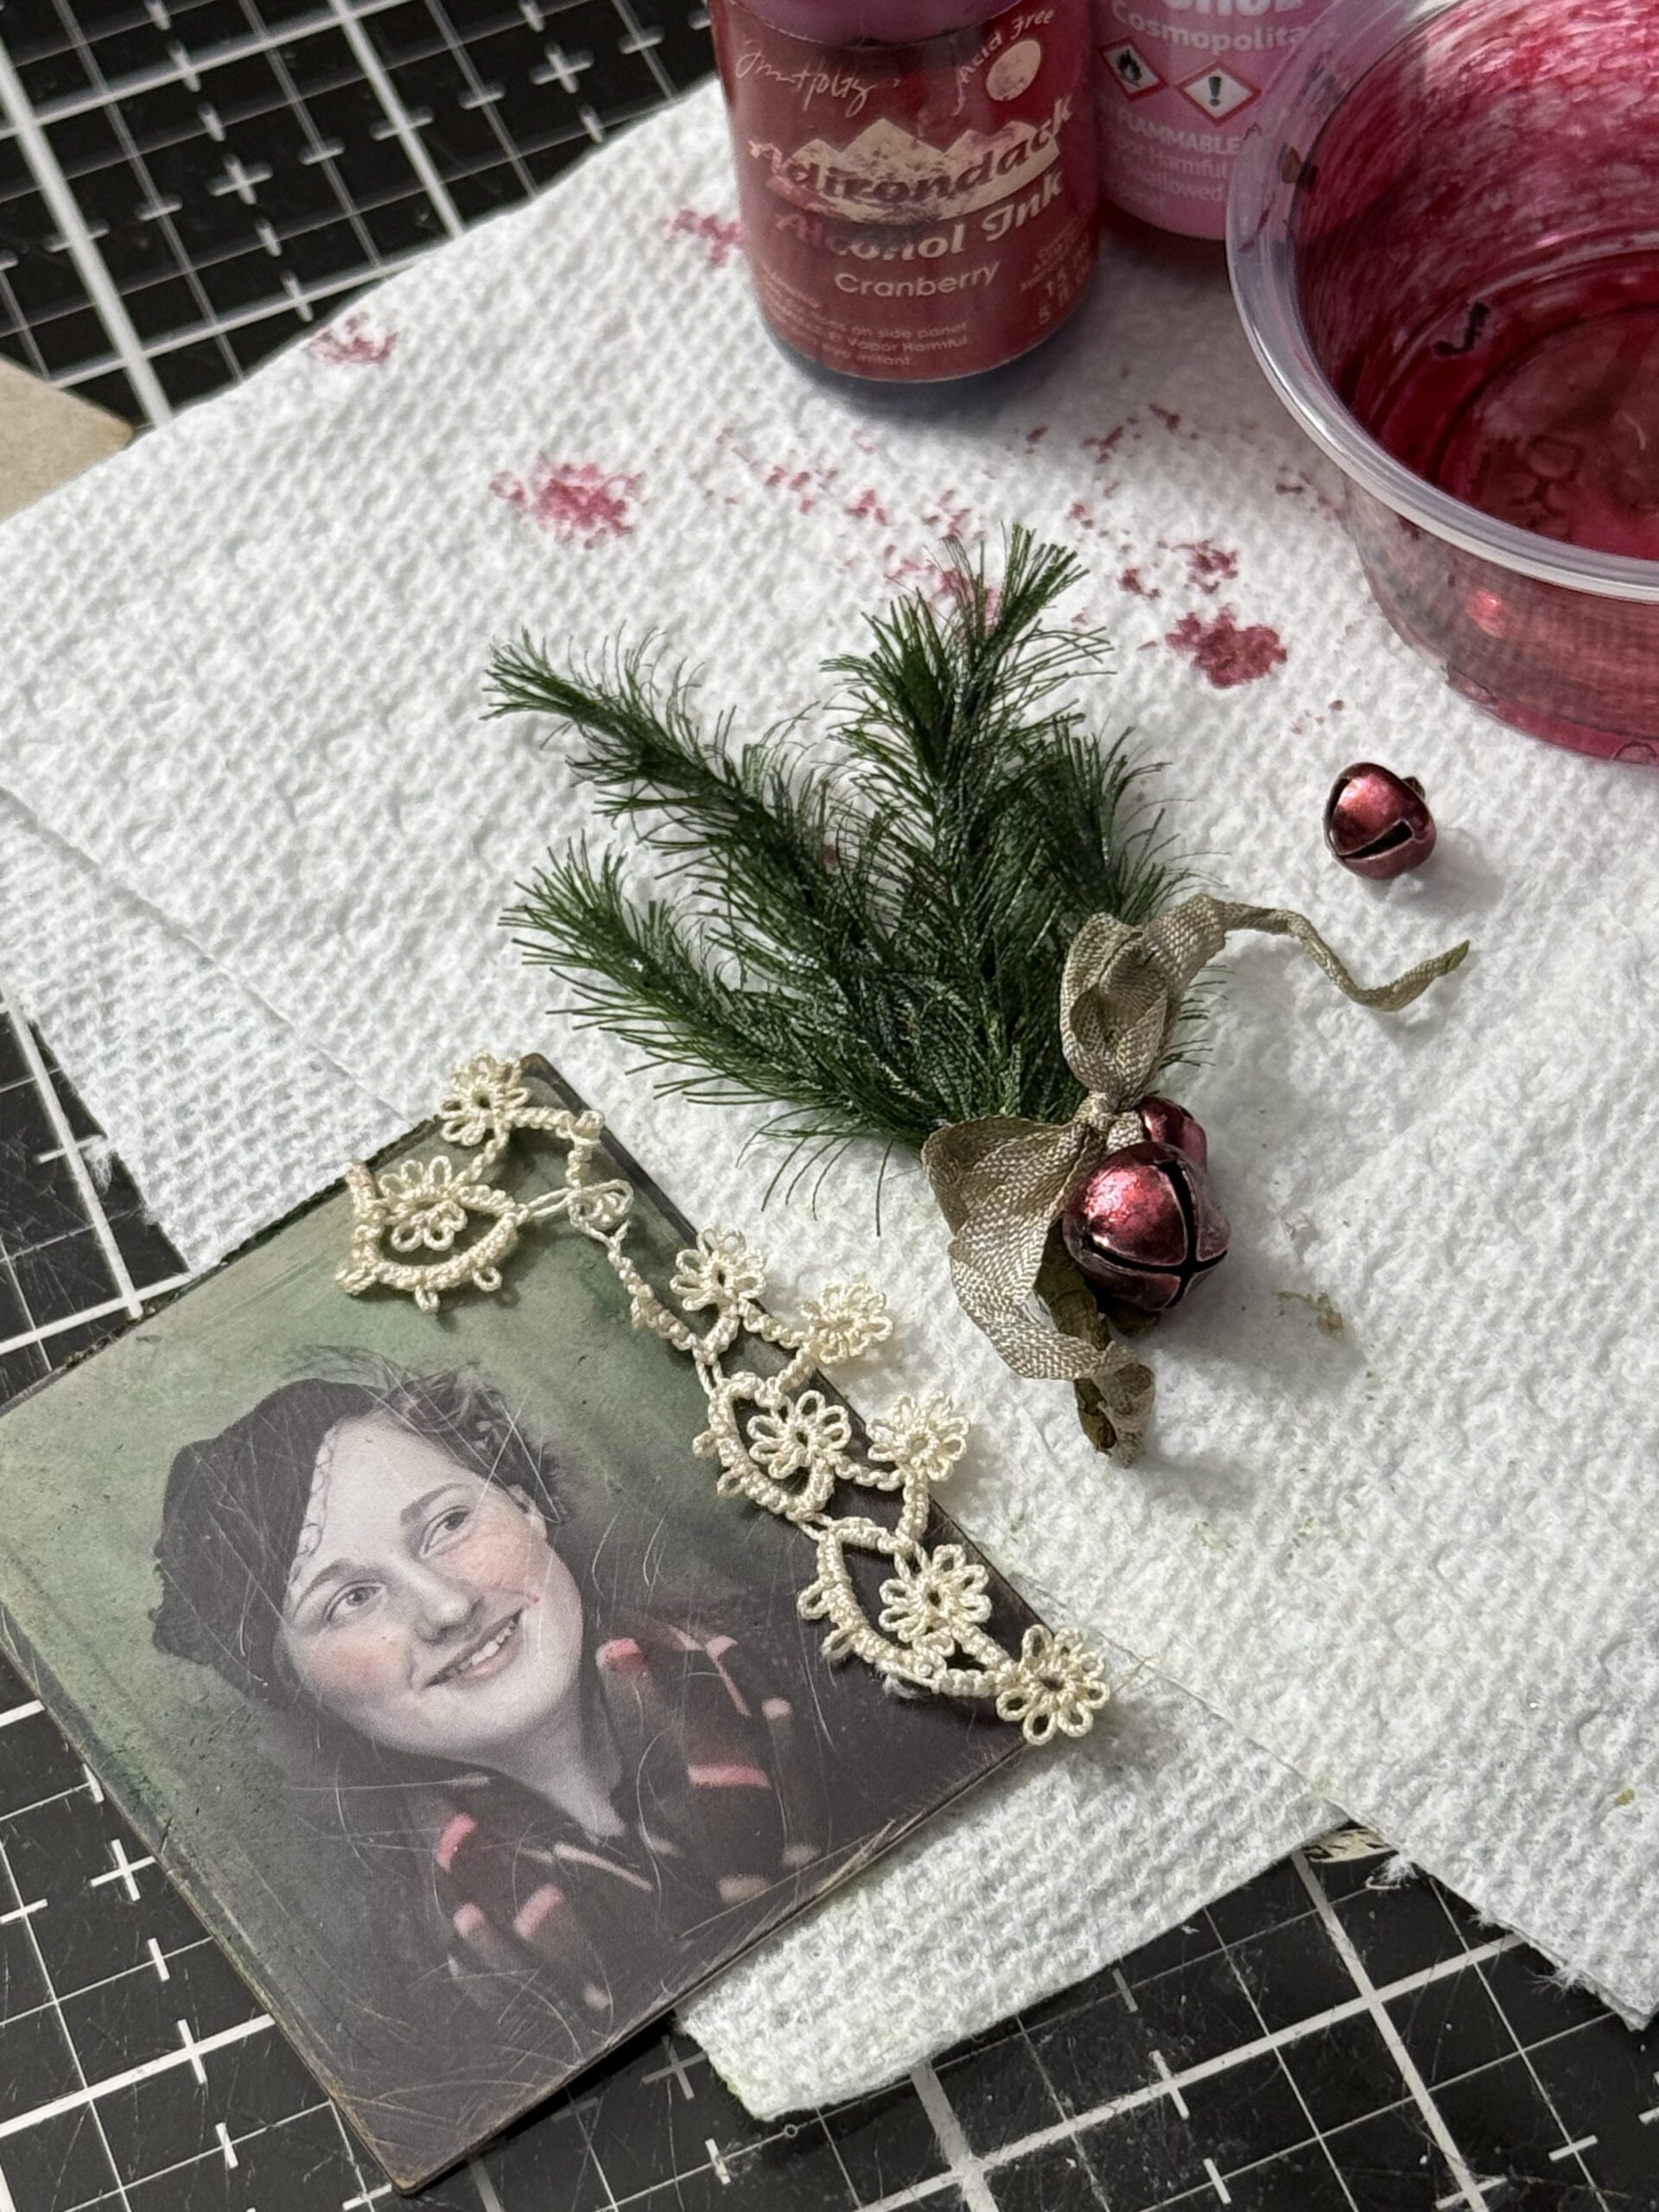
I decided to add a small piece of lace to the corsage and tied it around the pine branches.
The other parts of the collage were added that included a Postcard from the Christmas Layers pack, then a flower from the Botanical Layers. These were both sanded with my sanding disk, then rubbed with Gathered Twigs Distress Ink. They were then adhered to the vignette box using foam adhesive to add depth. I used a couple tack nails in the corners of the postcard to add more age.
The photo edges were distressed and then the entire vignette box was rubbed with the Gathered Twigs Distress Crayon. I stitched around on the photo and stitched on the tiny Christmas banner that I found in the ephemera pack.
The little corsage was adhered and then set aside to dry over night. After it was dry, I added some little baubles in-between the pine branches. I added some of my Mushroom Glitter mix and added some Snowfall Grit-paste. This was left to dry, then the final addition of Liquid Tinsel here and there to add the vintage bling.
Then I moved on to box three…
I trimmed some pieces of paper from the Christmas Backdrops paper pack and the Christmas Palette 8×8 pack to fit the inside and outside of the largest Vignette Box, then I adhered them in place using Collage medium (again being sure to add it on top of the papers for the addition of Distress Crayon). Then I set it aside to dry.
I rubbed the edges with some Distress Opaque Crackle Paste, then set it aside to dry and crackle.
Once dry, I rubbed on some Gathered Twigs Distress Crayon using a damp paintbrush, then set it aside to dry. Again, I wanted all 3 projects to go together, so they were all given the same treatment.
While it dried I created the snowman…
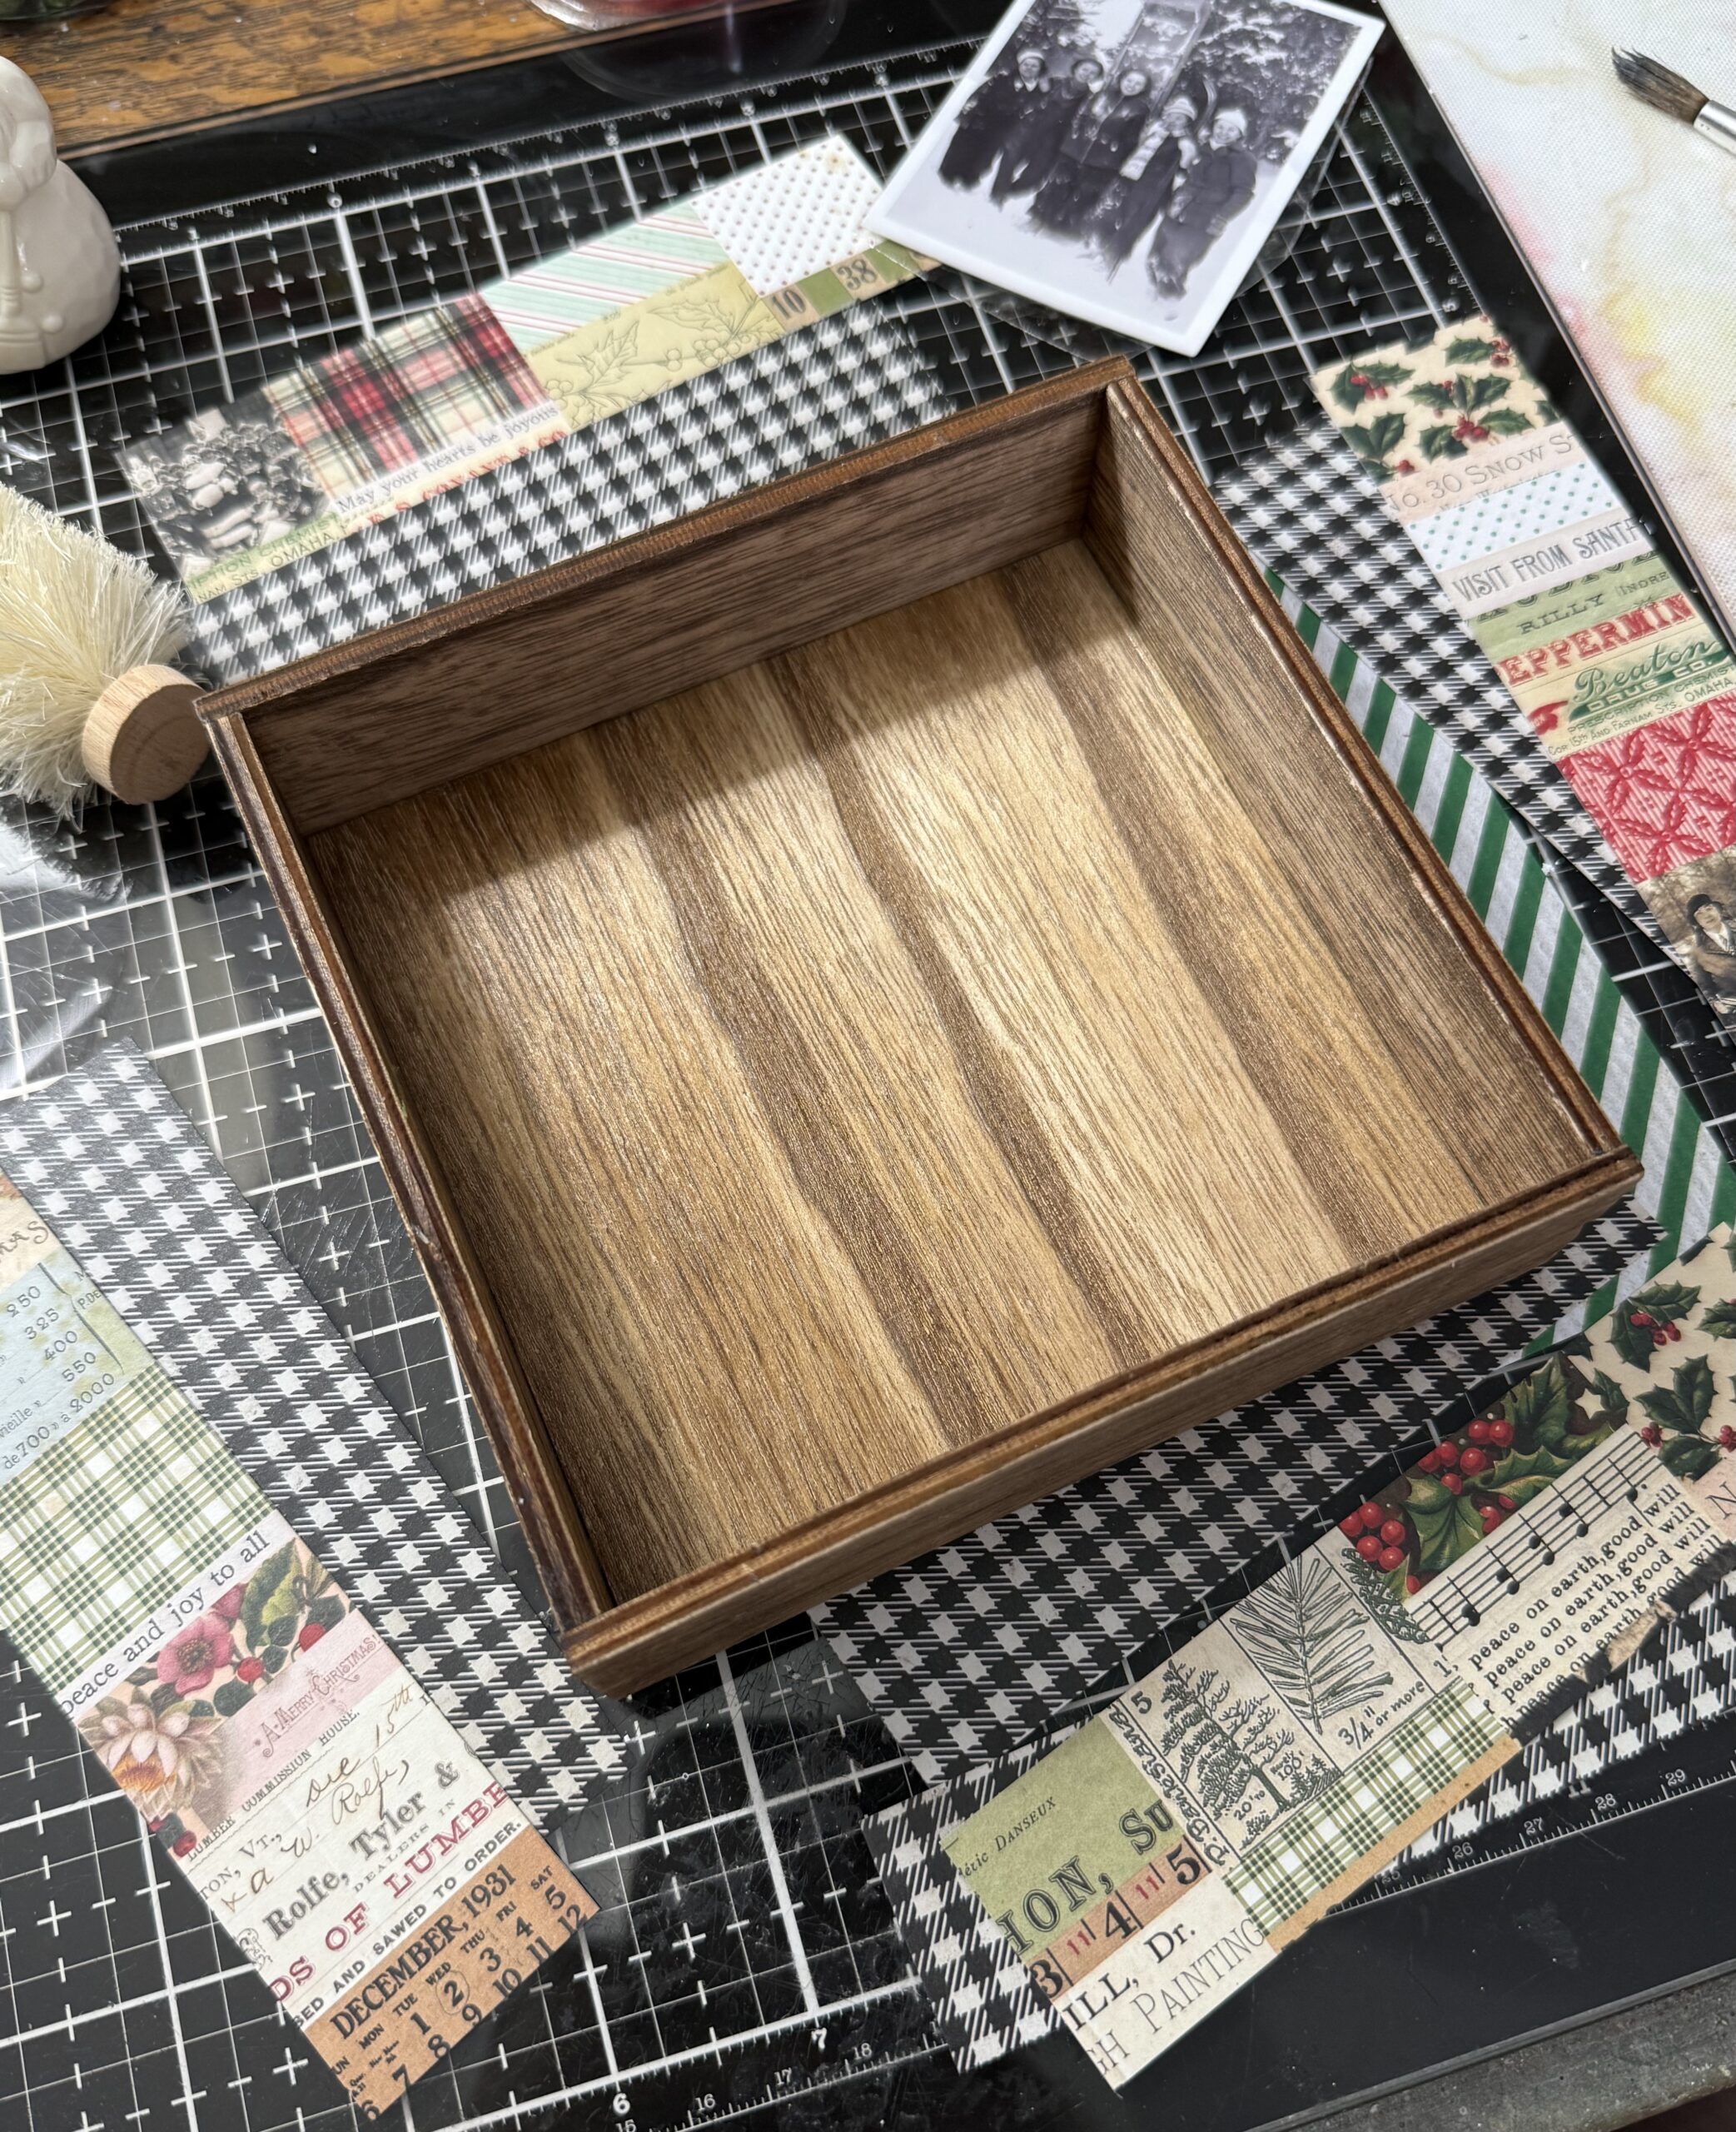
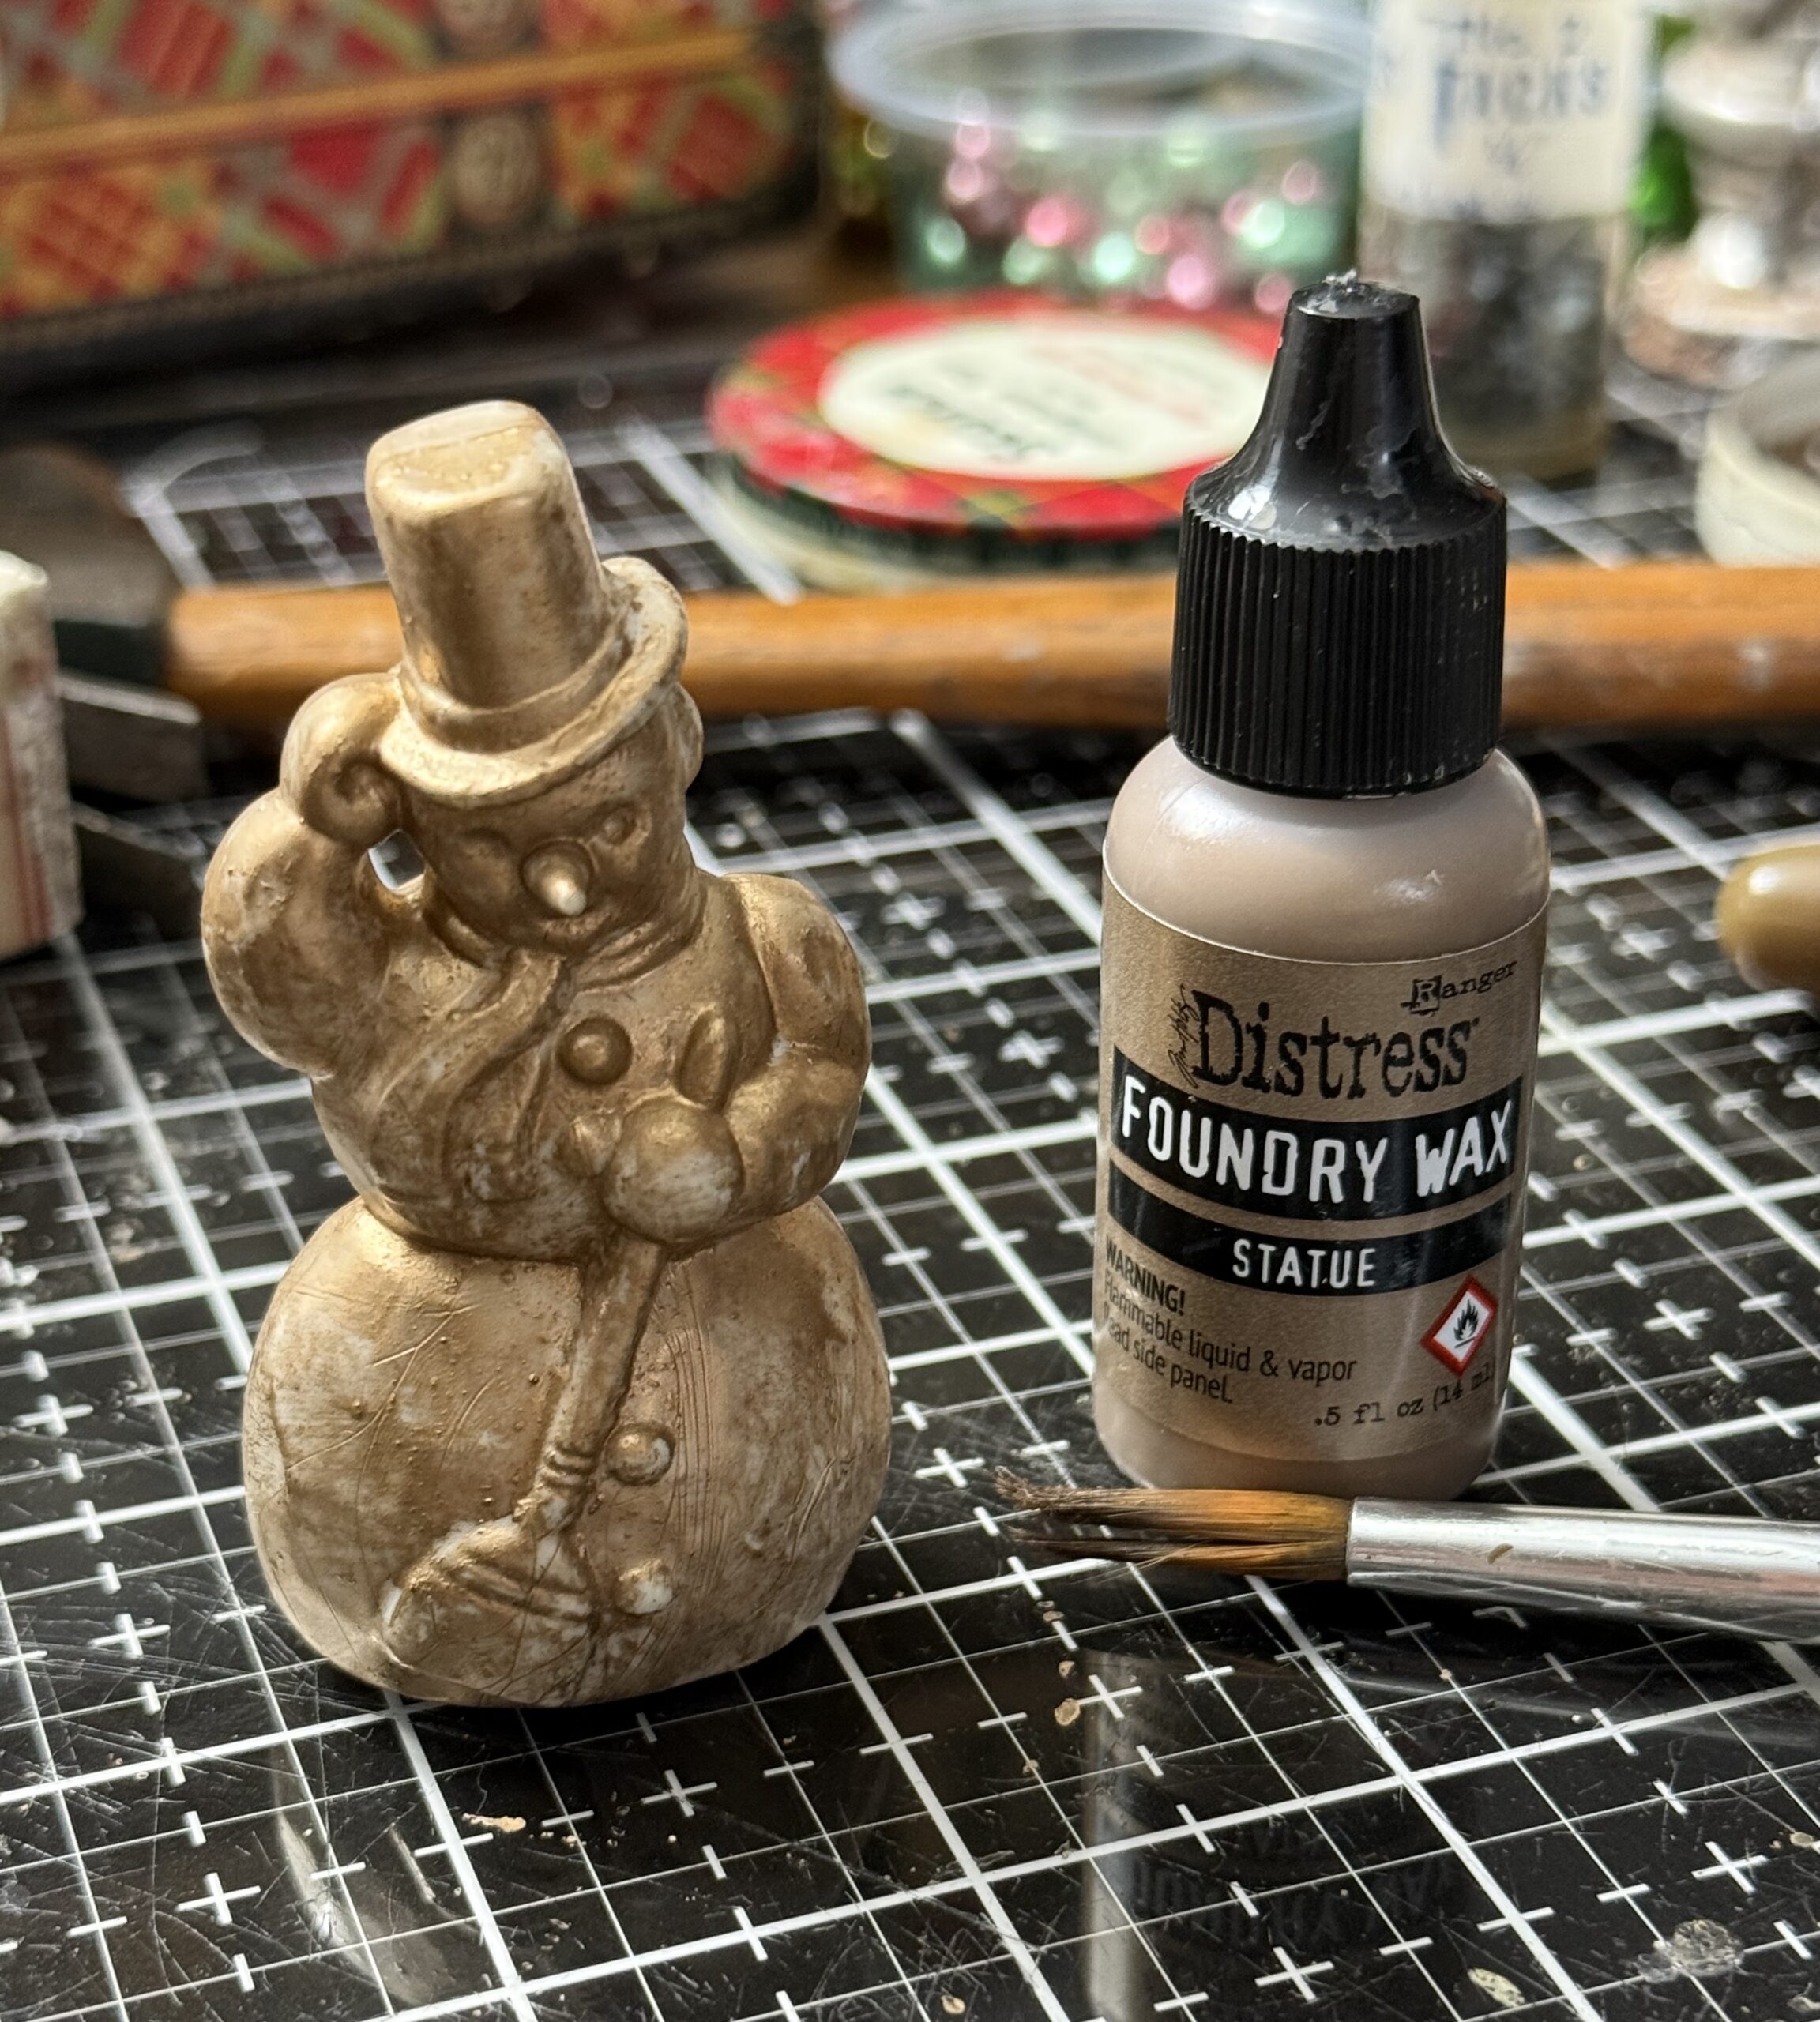
While it dried I went on to coloring up the Salvaged Snowman…this is the larger size. I used a paint brush and applied Statue Foundry Wax to the snowman.. I worked in sections, adding the wax, then heating it up using my embossing gun to set it, and continued until the snowman was covered in the wax.
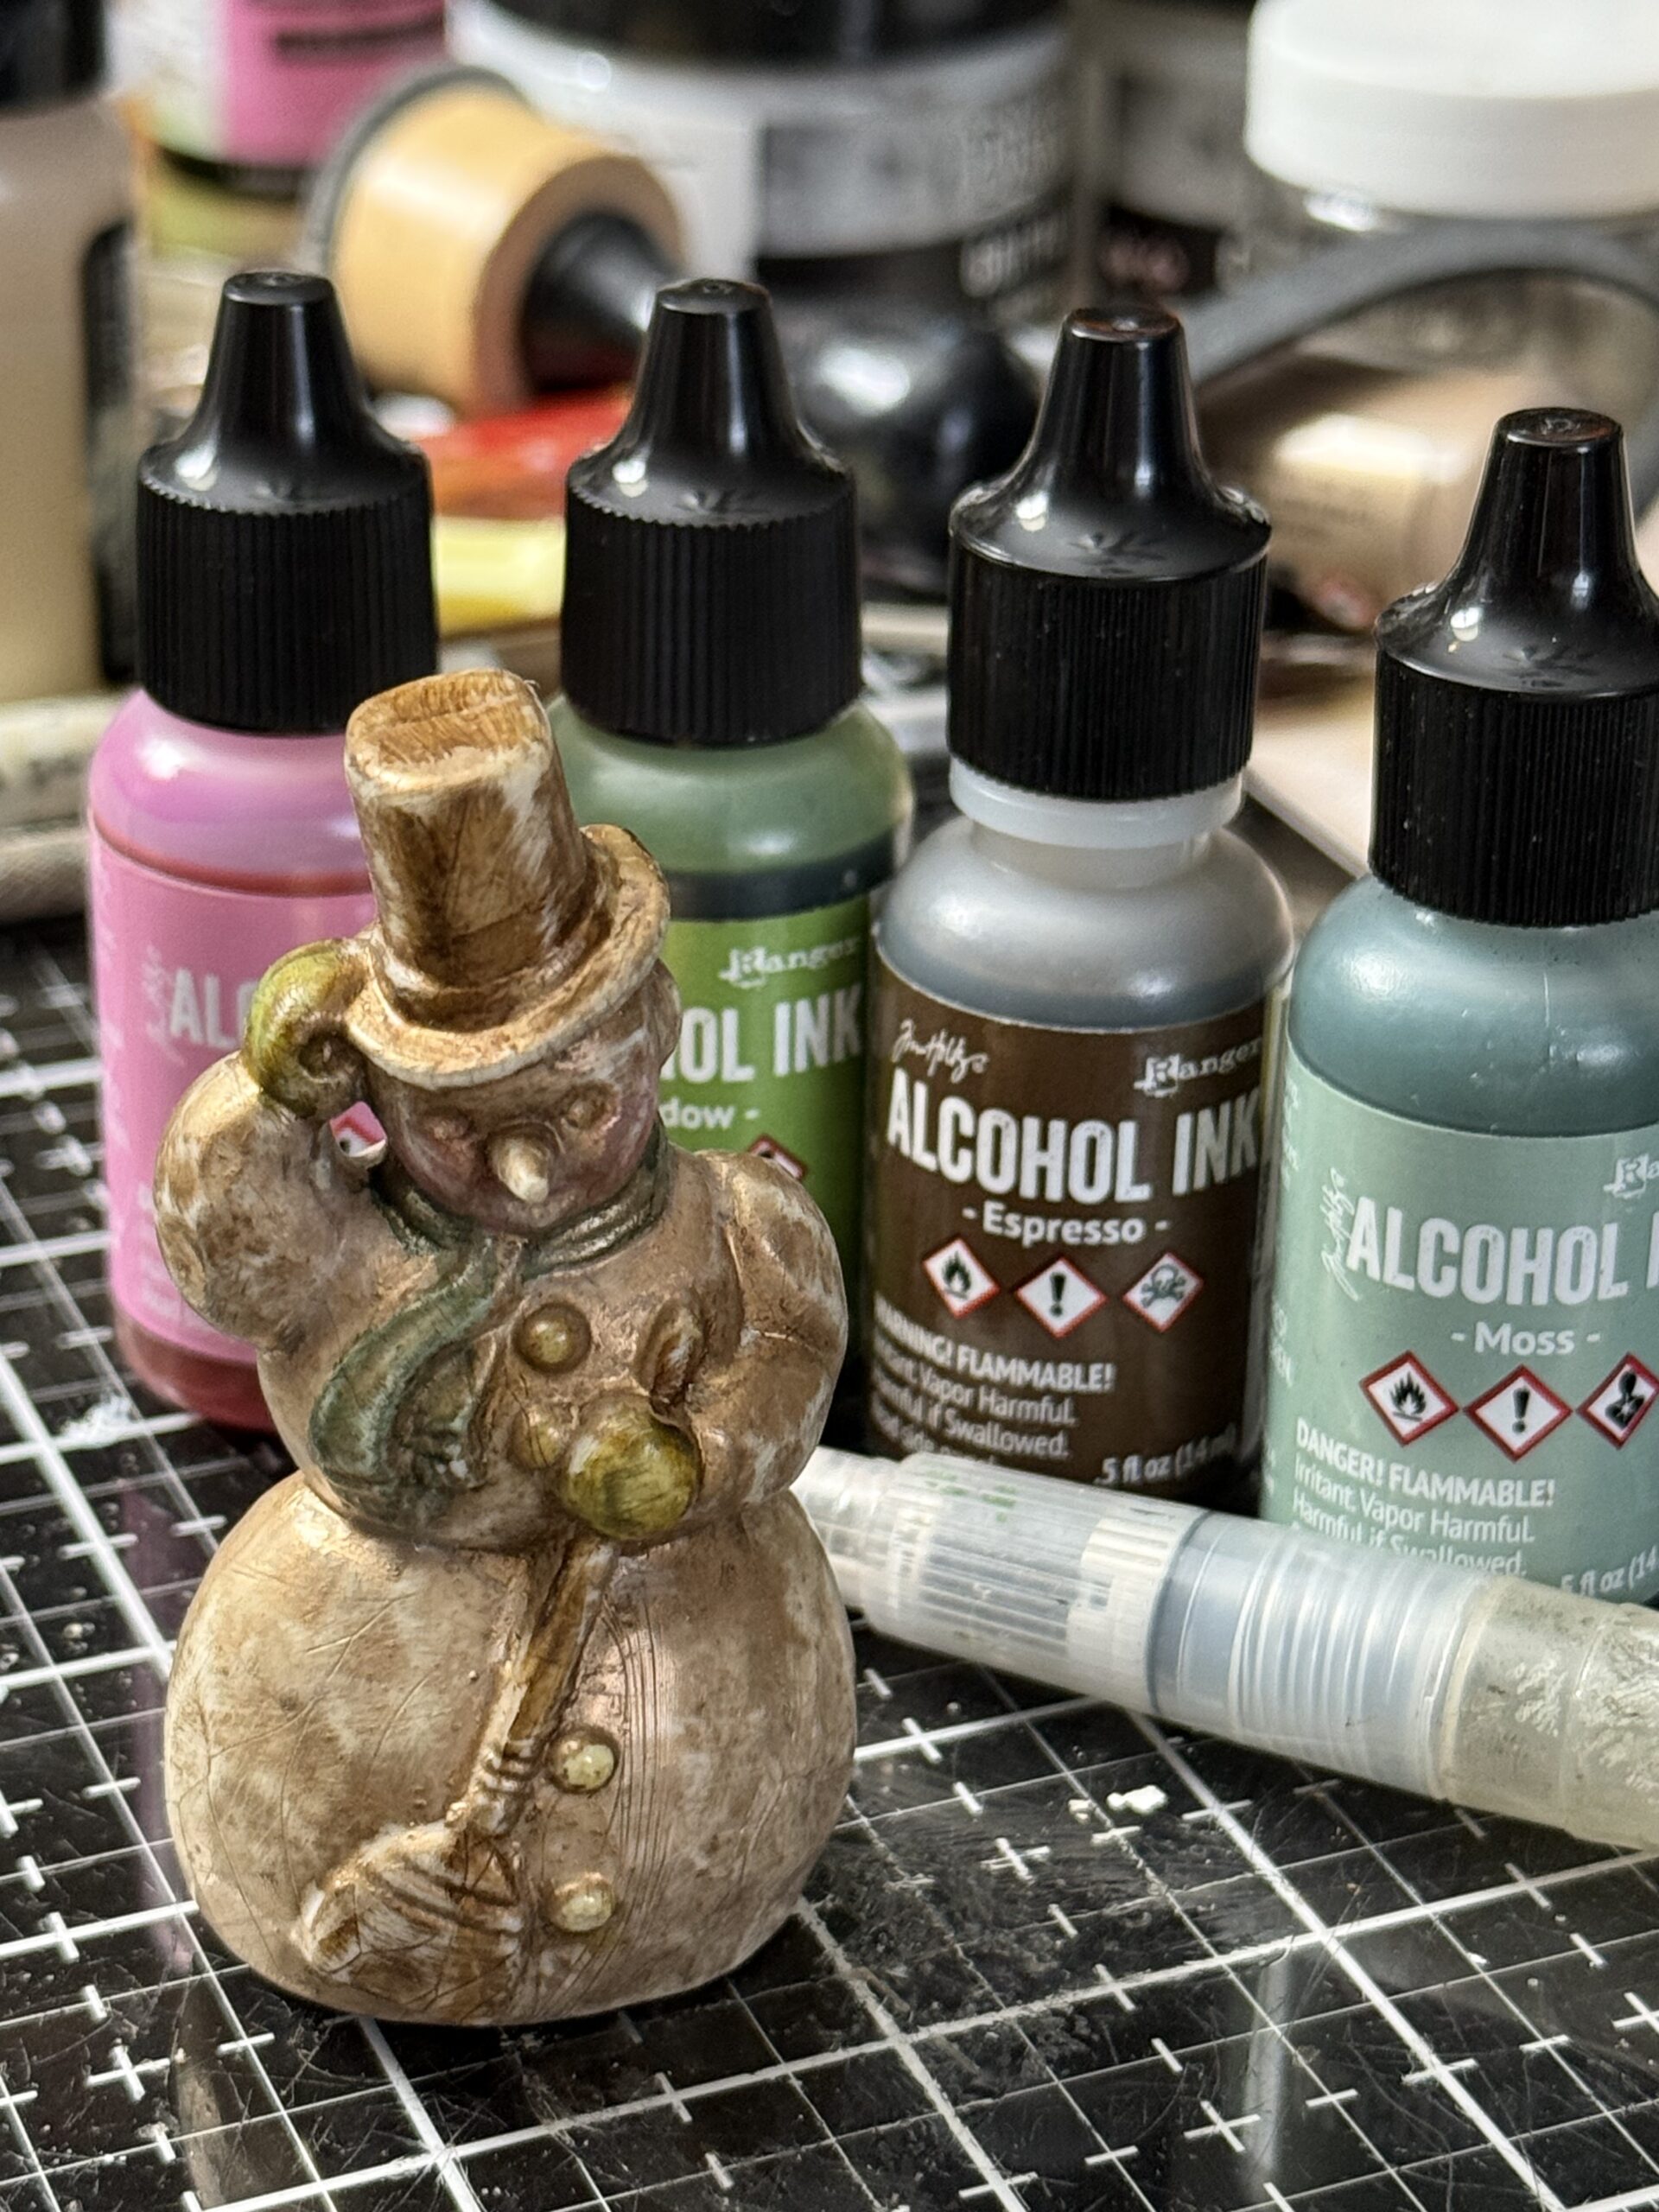
Then I colored up some of his little accessories using the same colors of Alcohol Ink that I had used for the baubles..I wanted all three of the projects to flow together. I used a fine tip paint brush to add the colors to his scarf, mittens, hat, and buttons, until I had him all coordinated with the baubles. I added some pink to his cheeks as well.
Then he got a little dusting of the Mushroom glitter mix. I used a little Glossy Accents and my finger to add the adhesive, then sprinkled him with some the glitter.
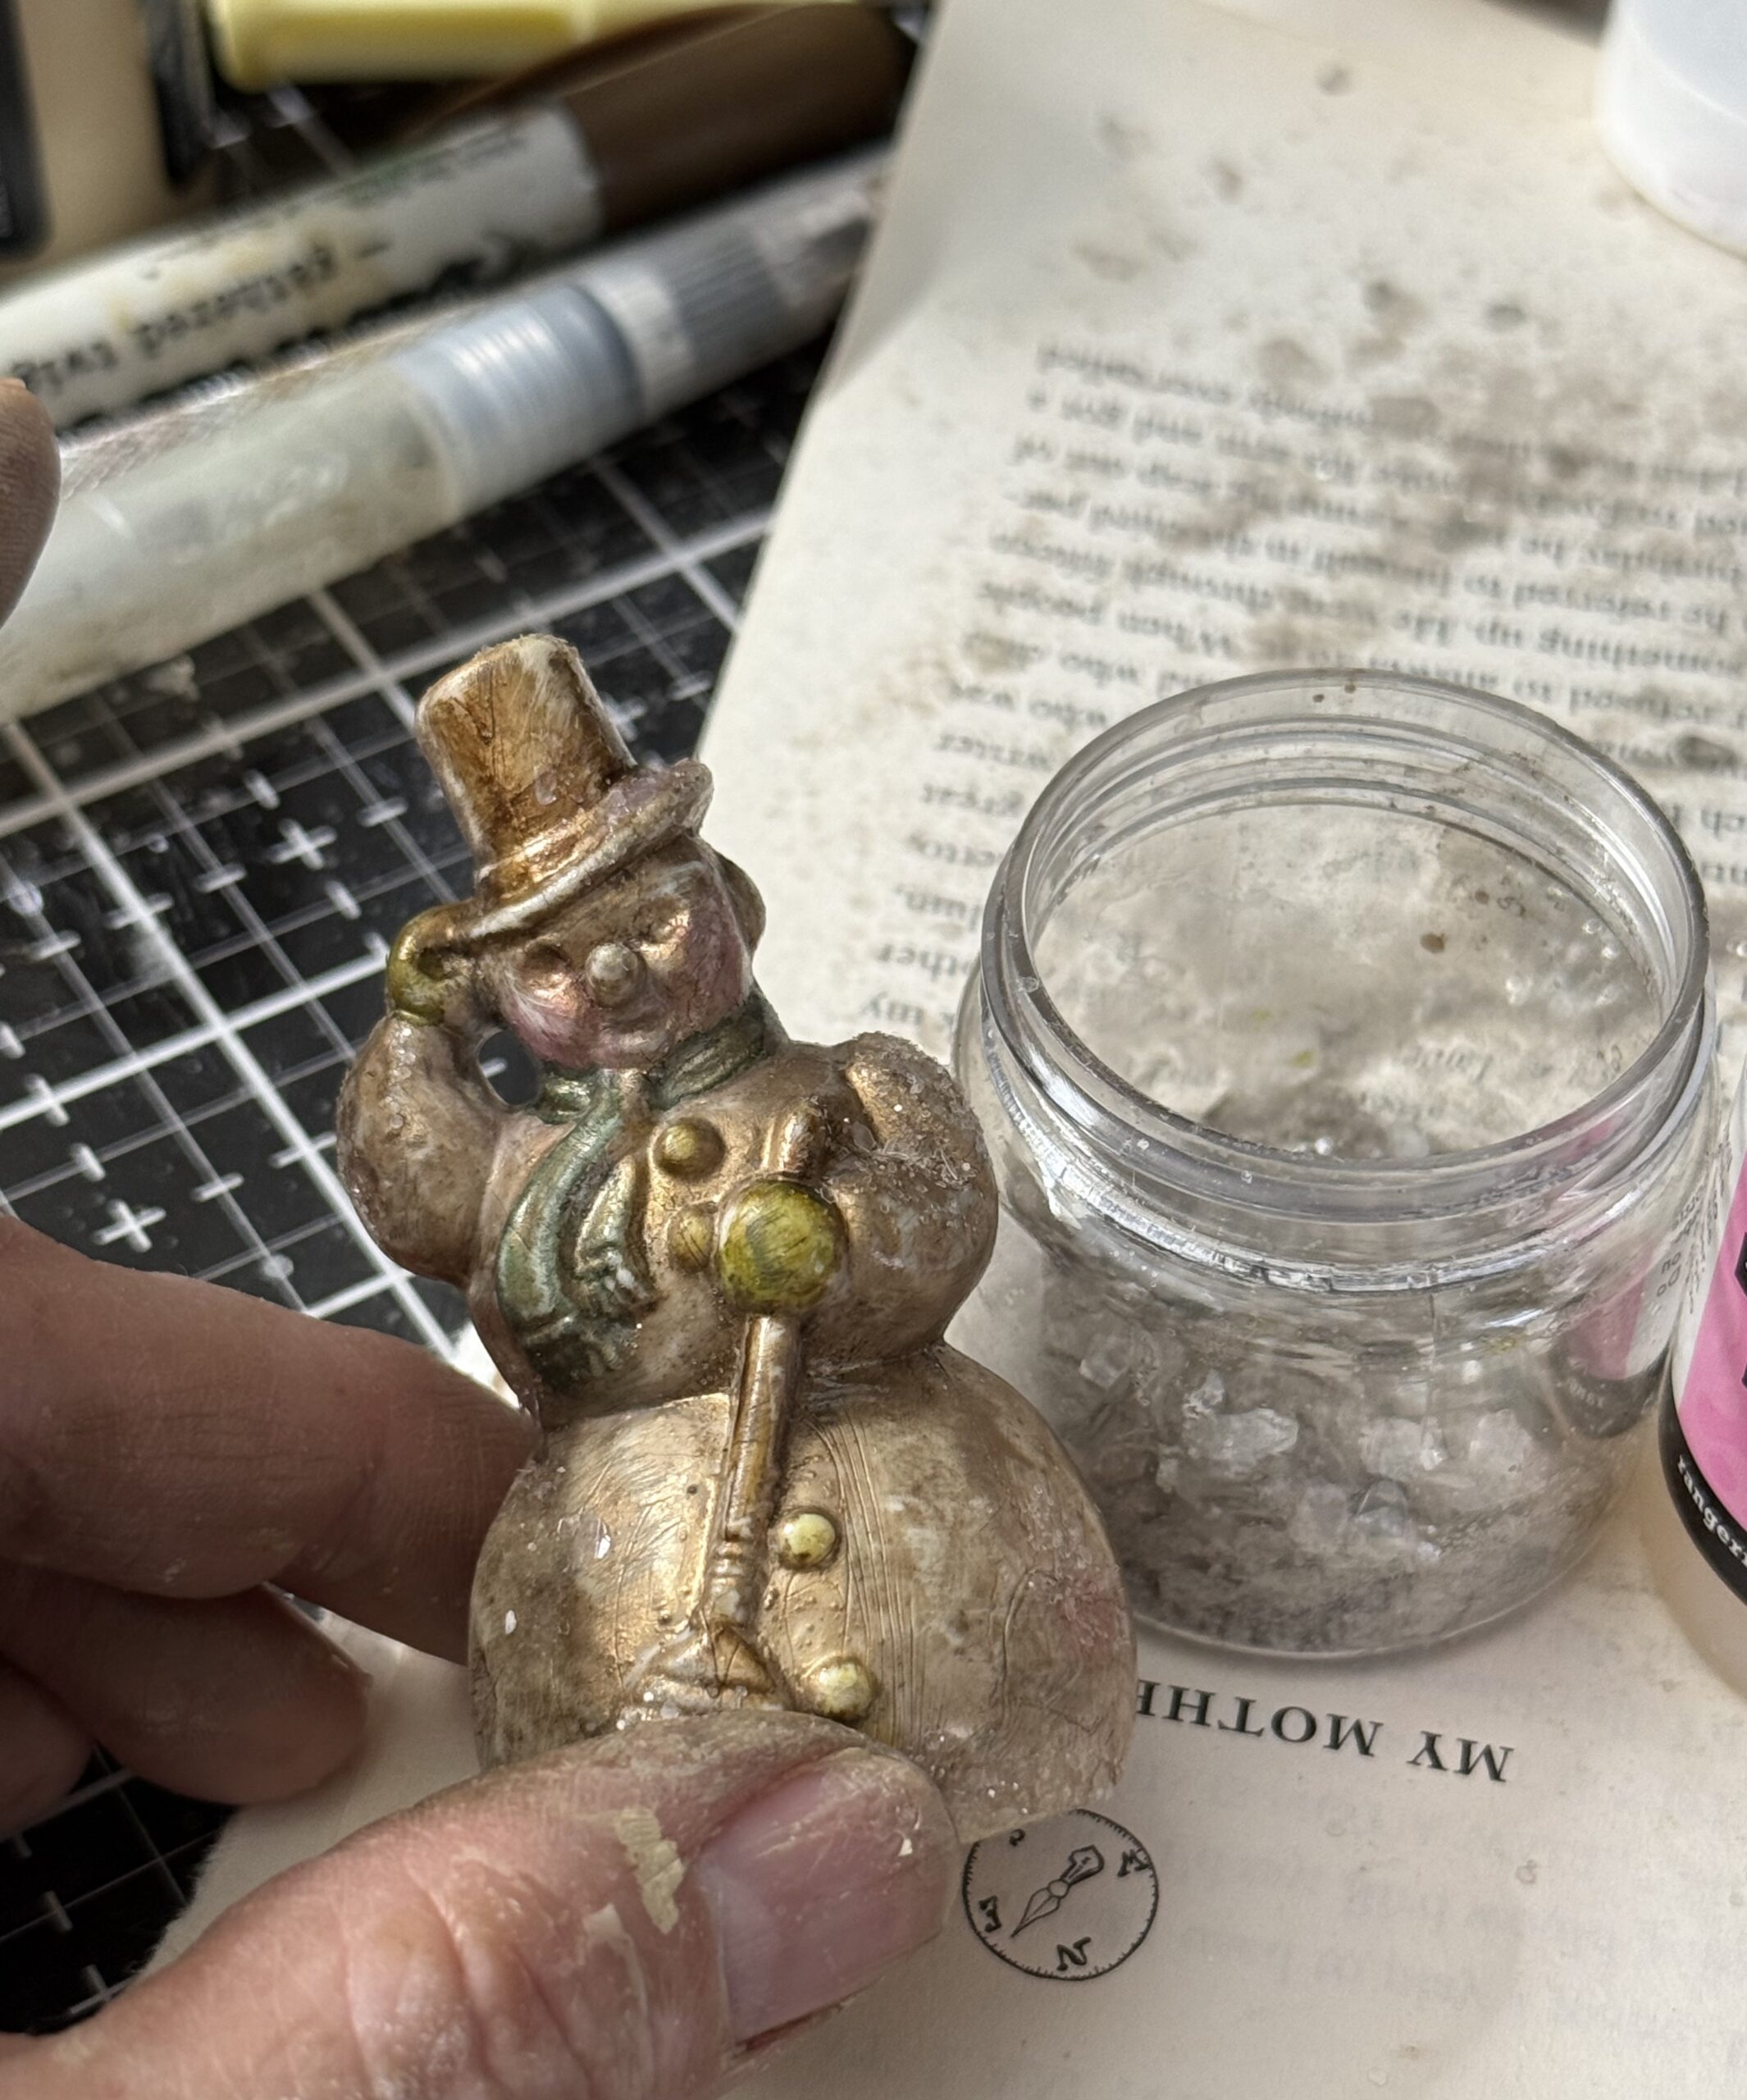
Then I worked on the tree..this was done in the exact same way using the same steps as I had done my wreath with the same colors, just applied to the tree. The baubles were added using the hot glue gun, I used glossy accents to rub on some glue, then sprinkled the tree with some mushroom glitter mix. The tree was set aside to dry, then I applied some of the Liquid Tinsel using a brush to highlight some of the branches here and there.
The snapshot photo was rubbed using my sanding disk to add age, then I used my sewing machine to add a little border around the photo. I used my glossy accents to add some of the mushroom glitter mix onto the snow areas on the photo, then set it aside to dry.
Once dry, I rubbed some of the edge with some Gathered Twigs Distress Ink to add some age. This was adhered inside the vignette box using foam adhesive, then I tacked in a couple nails. I painted up a set of tiny skates found in the Wonderland Adornments using Black Soot Distress Paint, then, after they were dry, rubbed them with some Statue Foundry Wax and set the wax with my embossing gun. The tiny skates were tied together using some bakers twine that had been rubbed with some ink. These were tied to one of the tack nails inside the vignette.
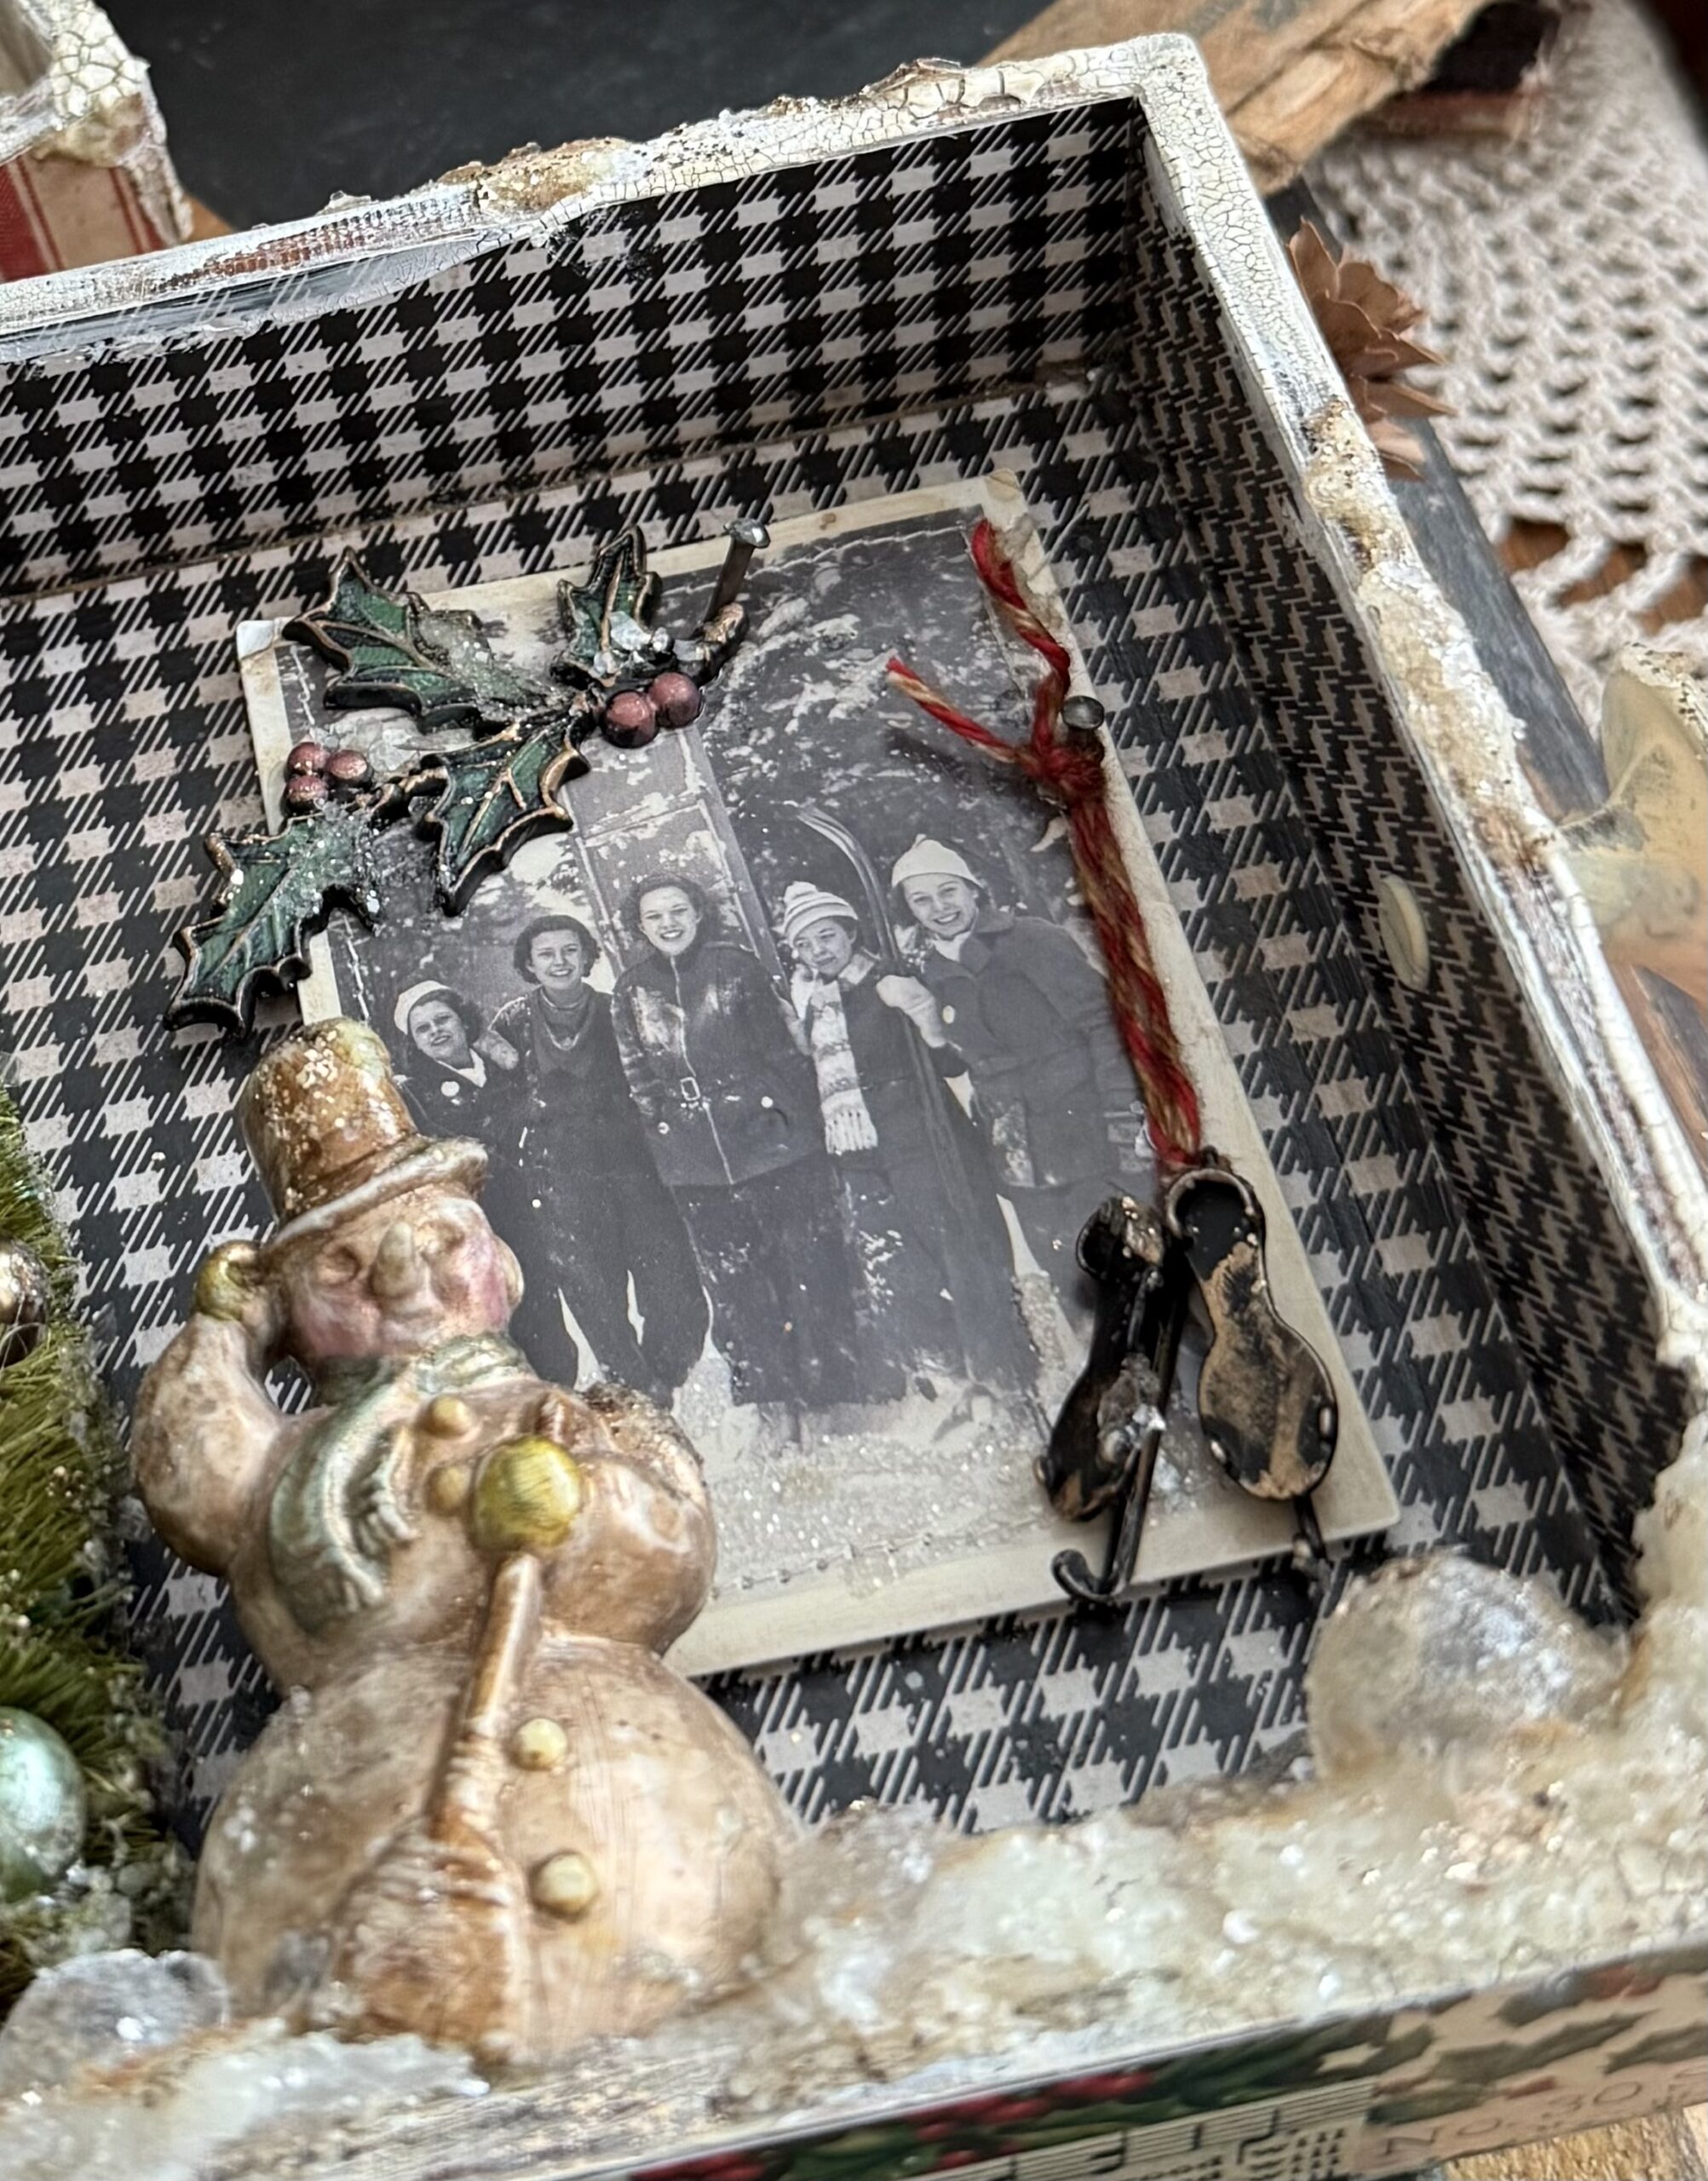
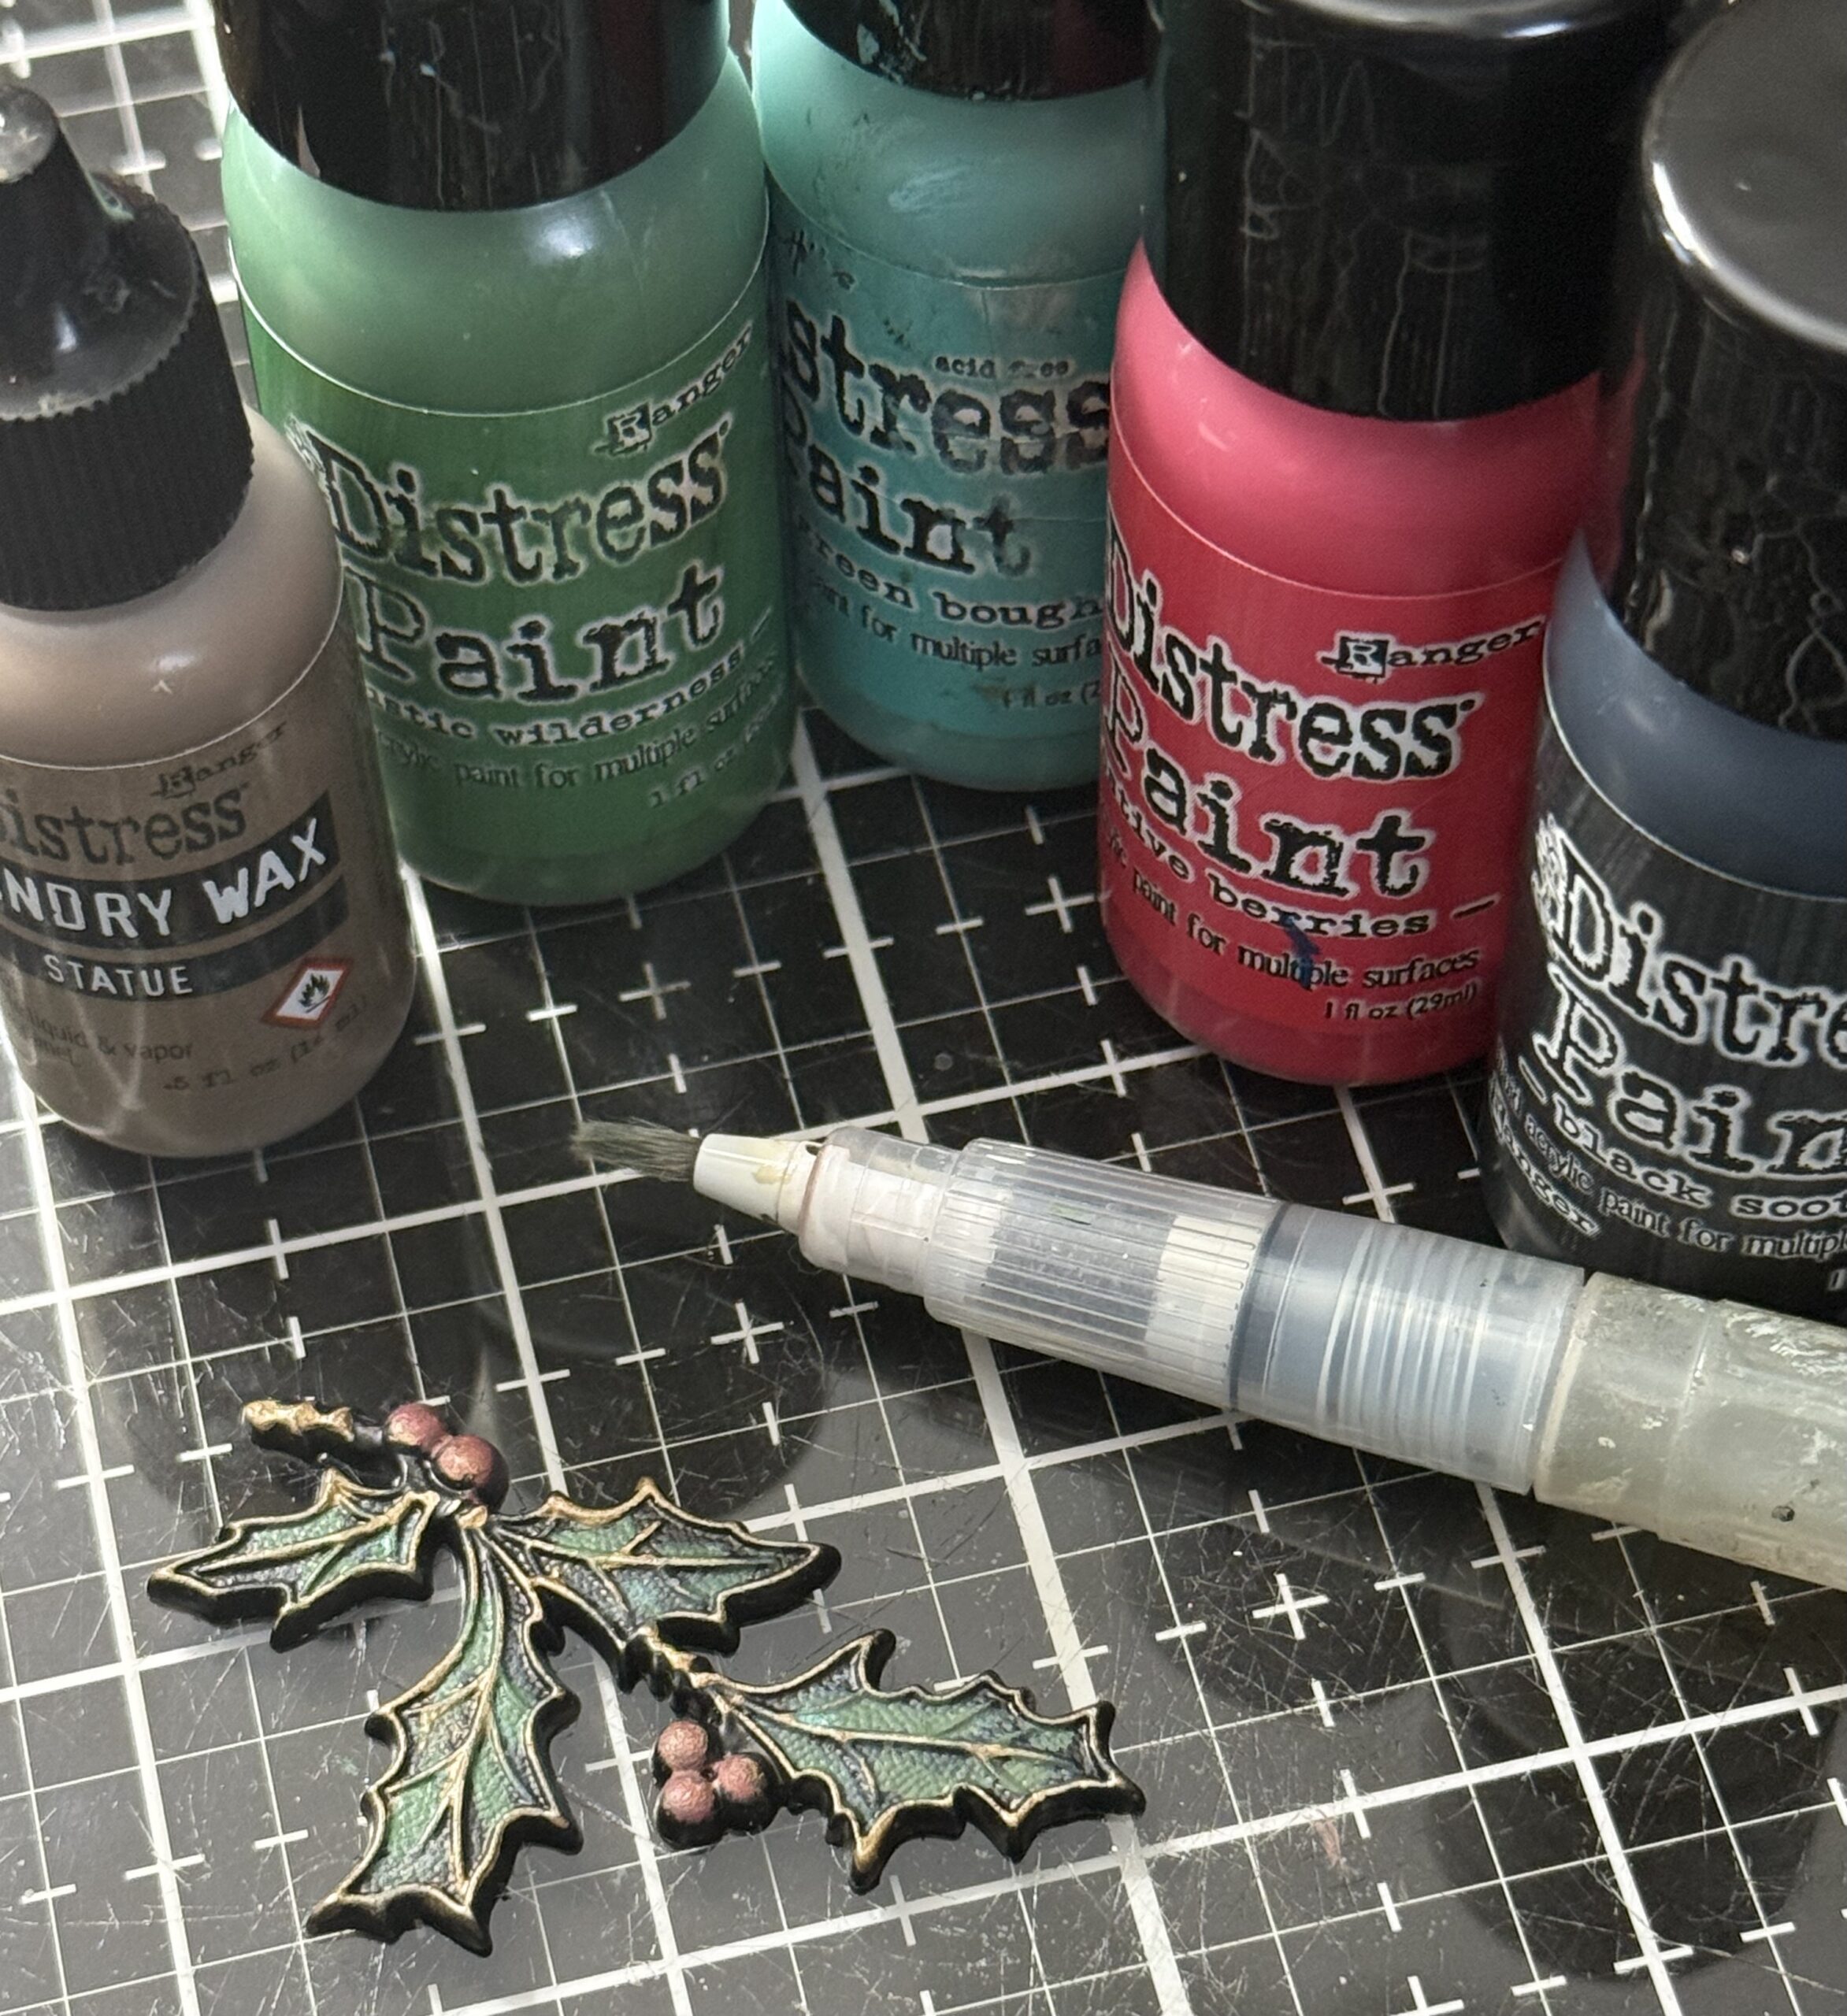
I painted one of the Holly Branches from the Festive Adornments first by painting it black, letting it dry, then painting some colors into the leaves and berries.. after the colors were dry, I rubbed it with some Statue Foundry Wax, set it and adhered it on top of the photo using collage medium, then set it aside to dry flat.
After the holly branch was completely dry, the bottom of the vignette was built…I added the tree in the corner, then added the snowman.
The next part was adding the Snowfall Grit-paste, I applied a good amount inside the vignette then decided to add some snowballs. I applied some glossy accents inside on top of the snowfall paste here and there until I was happy with the amount.
The snowballs I had were pre-made from another making session, so I don’t have process photos.
To make the snowballs, I rubbed some idea-ology bubbles with some Glossy Accents, then dropped them into a portion cup with some Rock Candy Glitter in both fine and chunky, then let them dry. Once dry, use them as you wish. 🙂 You can also find a Tim video of him creating these by CLICKING HERE. (around the 1:30 time stamp)
Once the snowball section was dry, I added a final coat of some of the snowfall grit-paste and sprinkled it with some Mushroom Glitter mix, then a bit of Liquid Tinsel here and there.
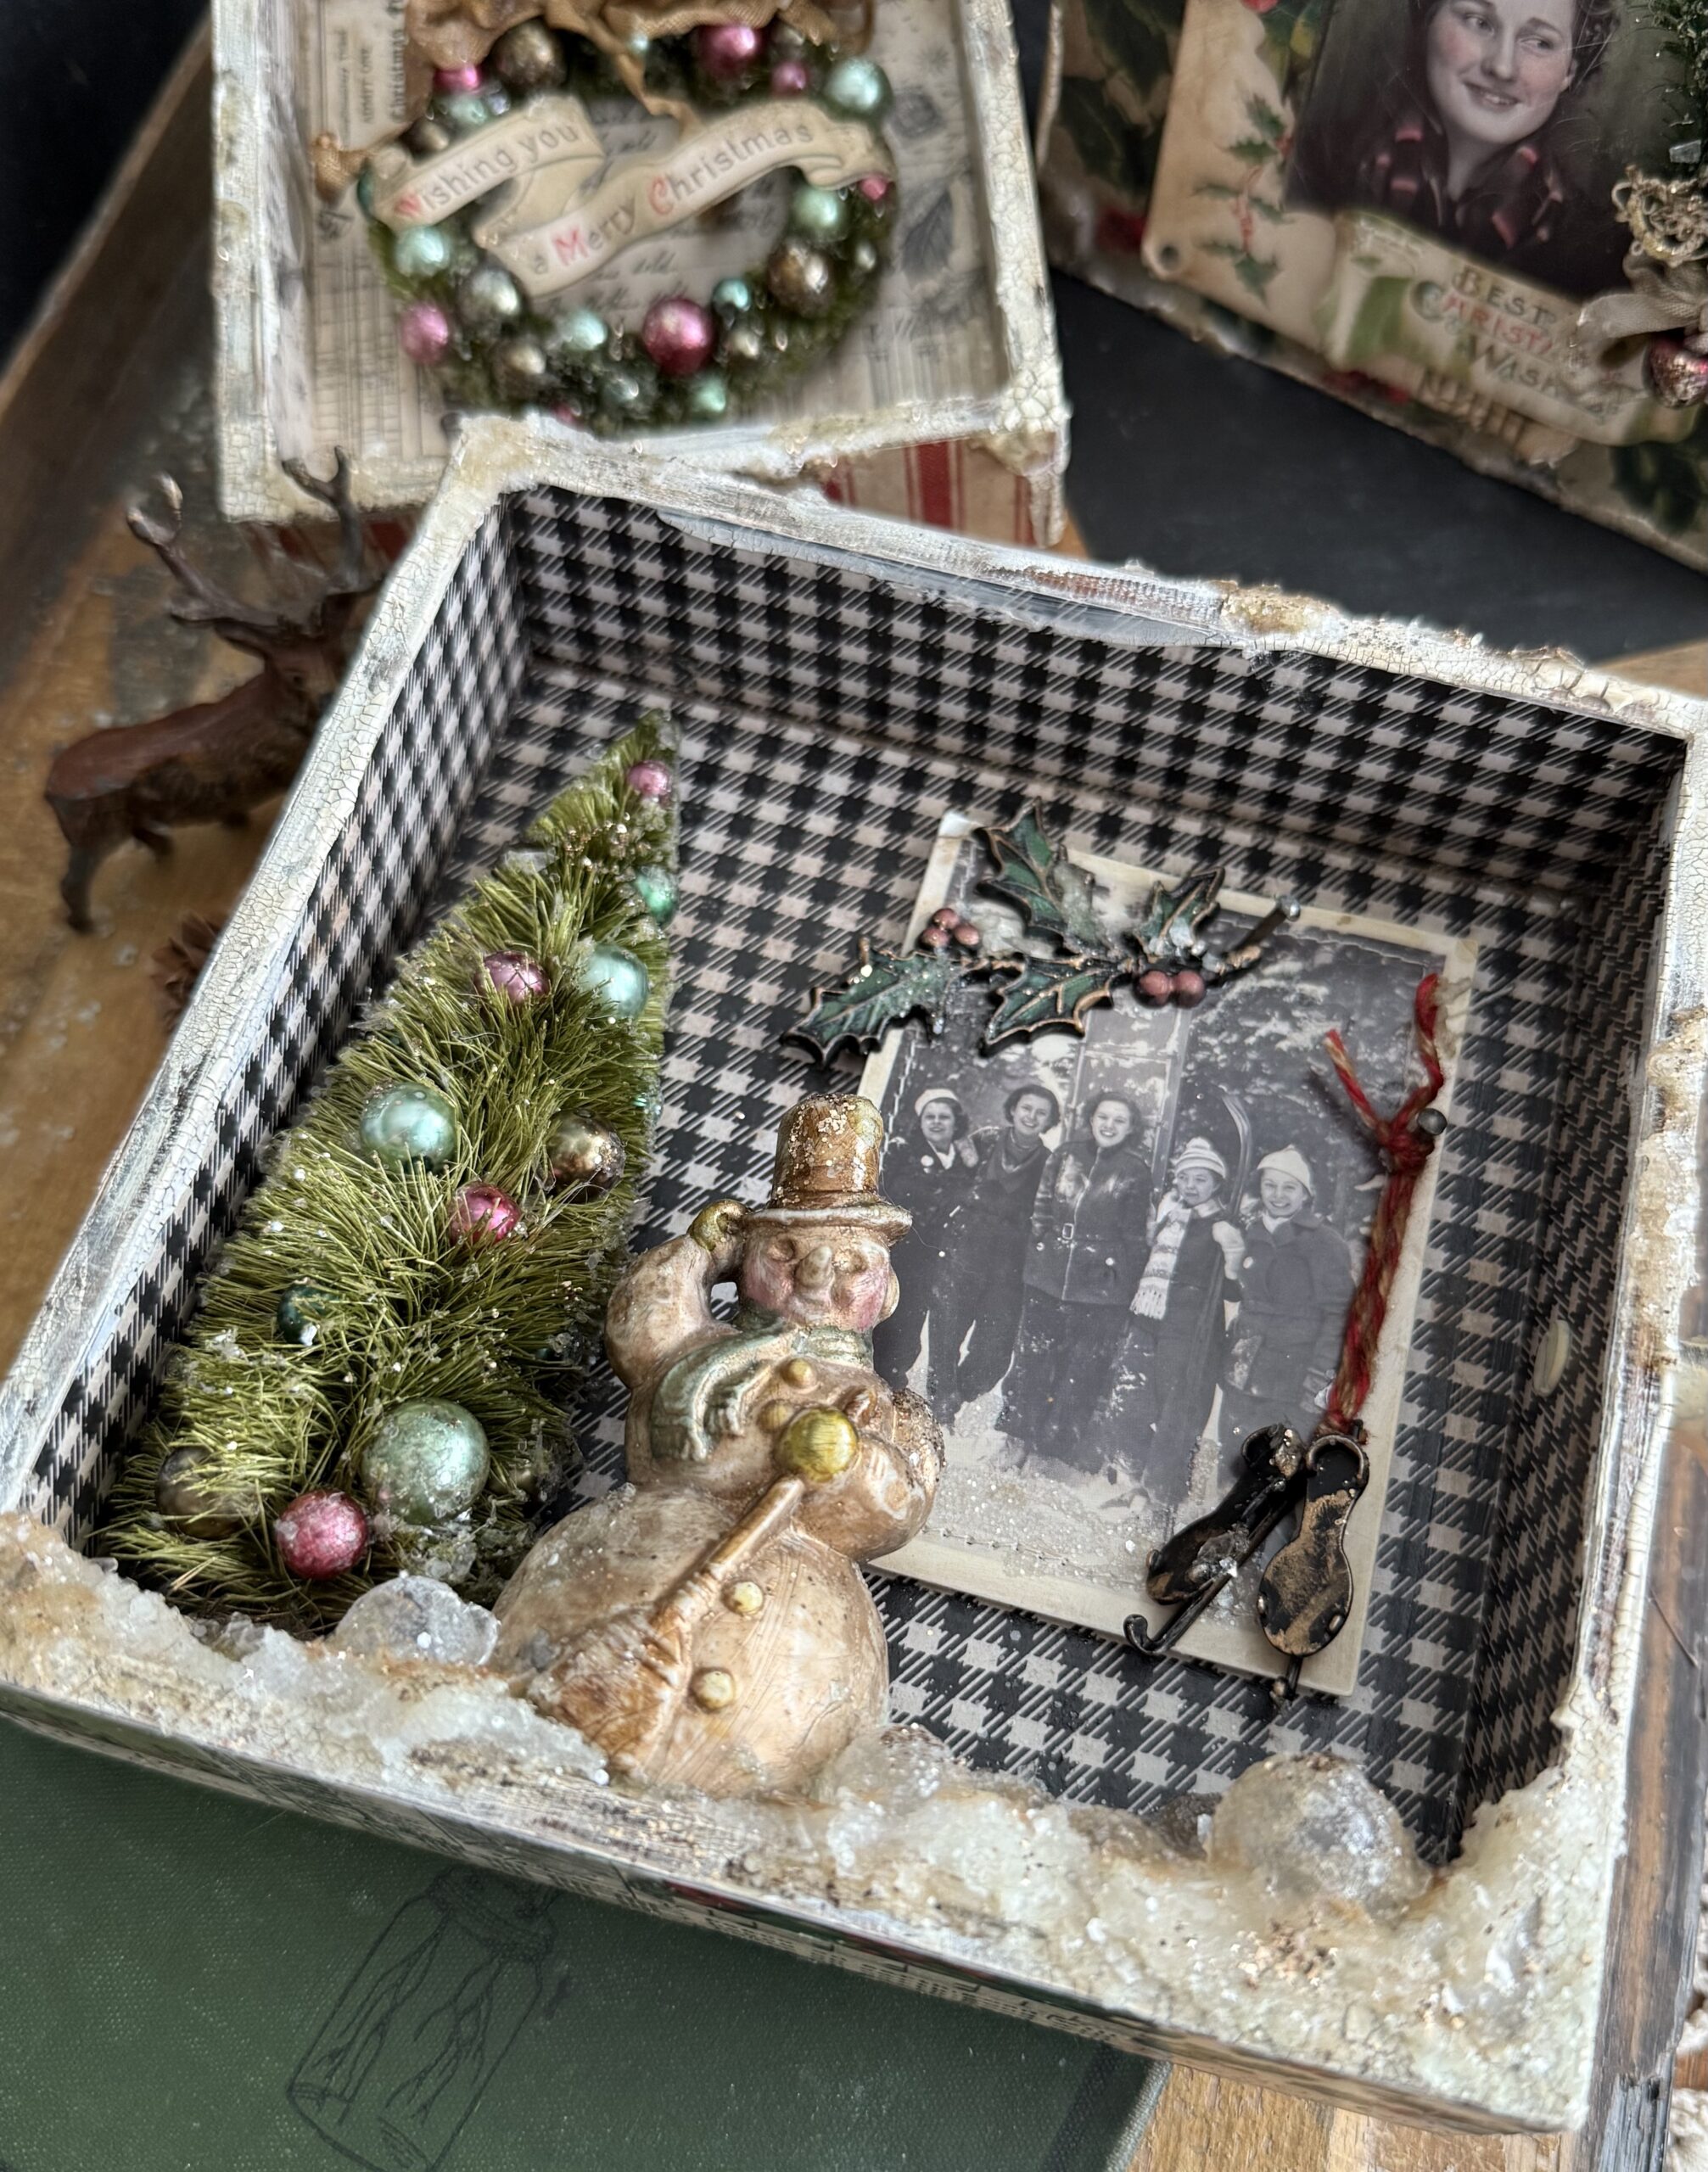
And…with that, all three vignettes were done, I know this sounds like a lot, but it really didn’t take that long, I always get lost in the process of making and that is what I love about it. I enjoy the process of it all, so it doesn’t seem as though I really spent that much time creating them.
I hope you enjoyed following along..
Thanks so much for stopping by and be sure to check out the entire release… it is a great one!
Creatively yours,
Stacy
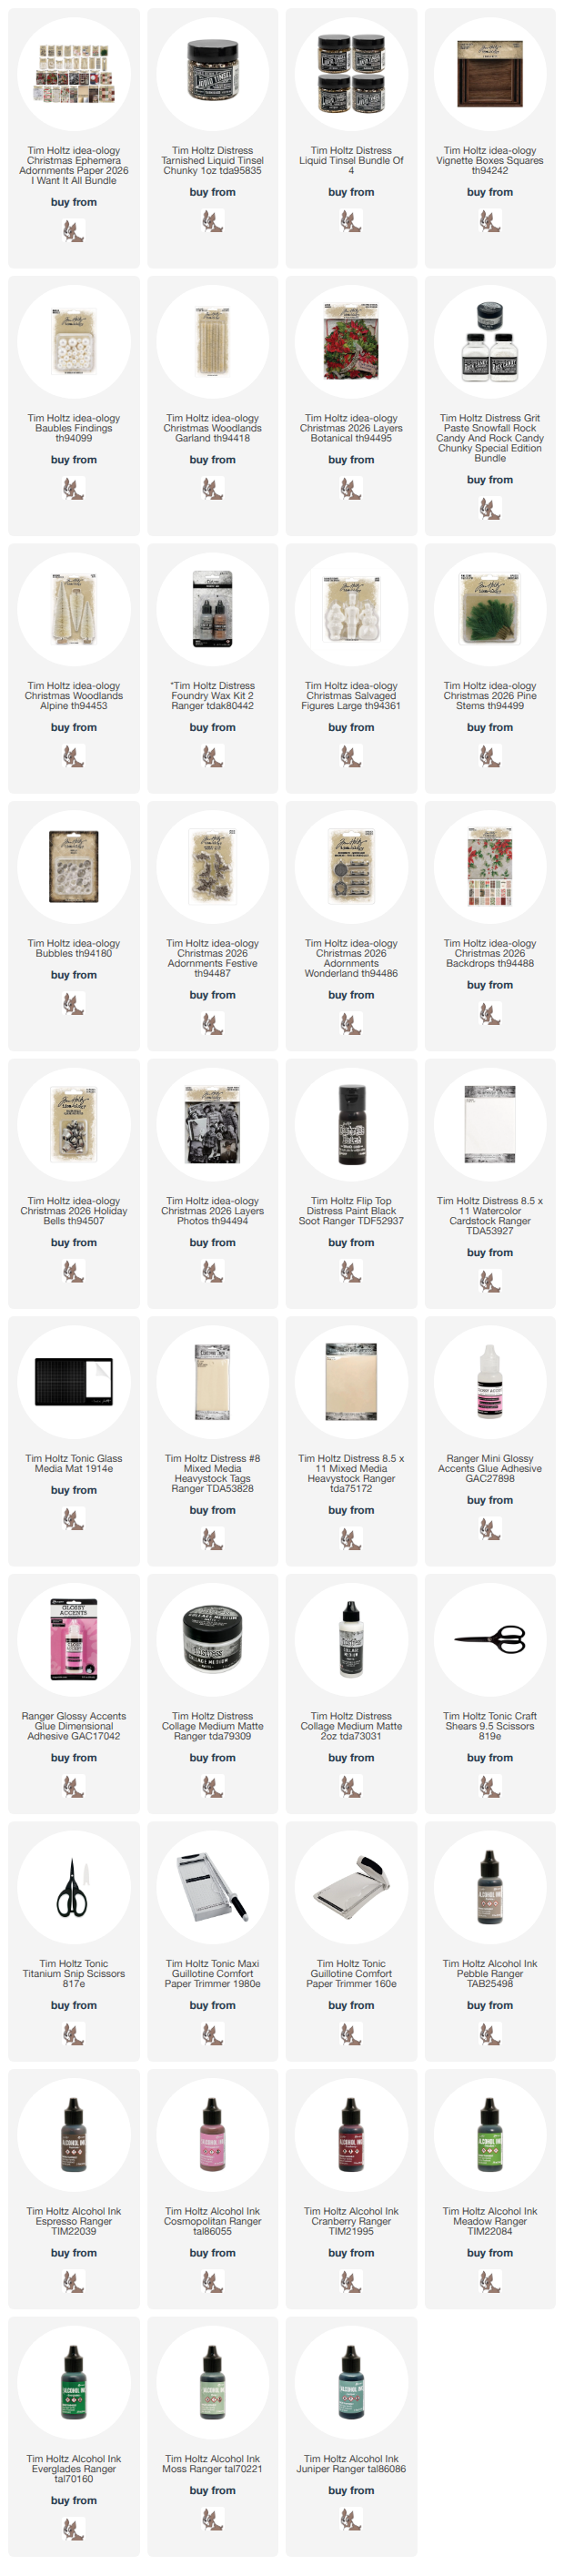
Shop Simon Says Stamp by clicking on this link. Thank you! I appreciate you for supporting me.
What is an affiliate program, and why should I click on the link and buy through you?
When you shop via the affiliate link on this blog, I receive a small commission from the affiliate provider (Simon Says Stamp) at no extra cost to you, whatsoever. These commissions help me to cover the hosting fees and other costs to run my blog and be able to provide you with FREE inspiration. If you shop the links, THANK YOU! I truly appreciate being able to share my love of creating with you.










Leave a Reply