Hello friends!
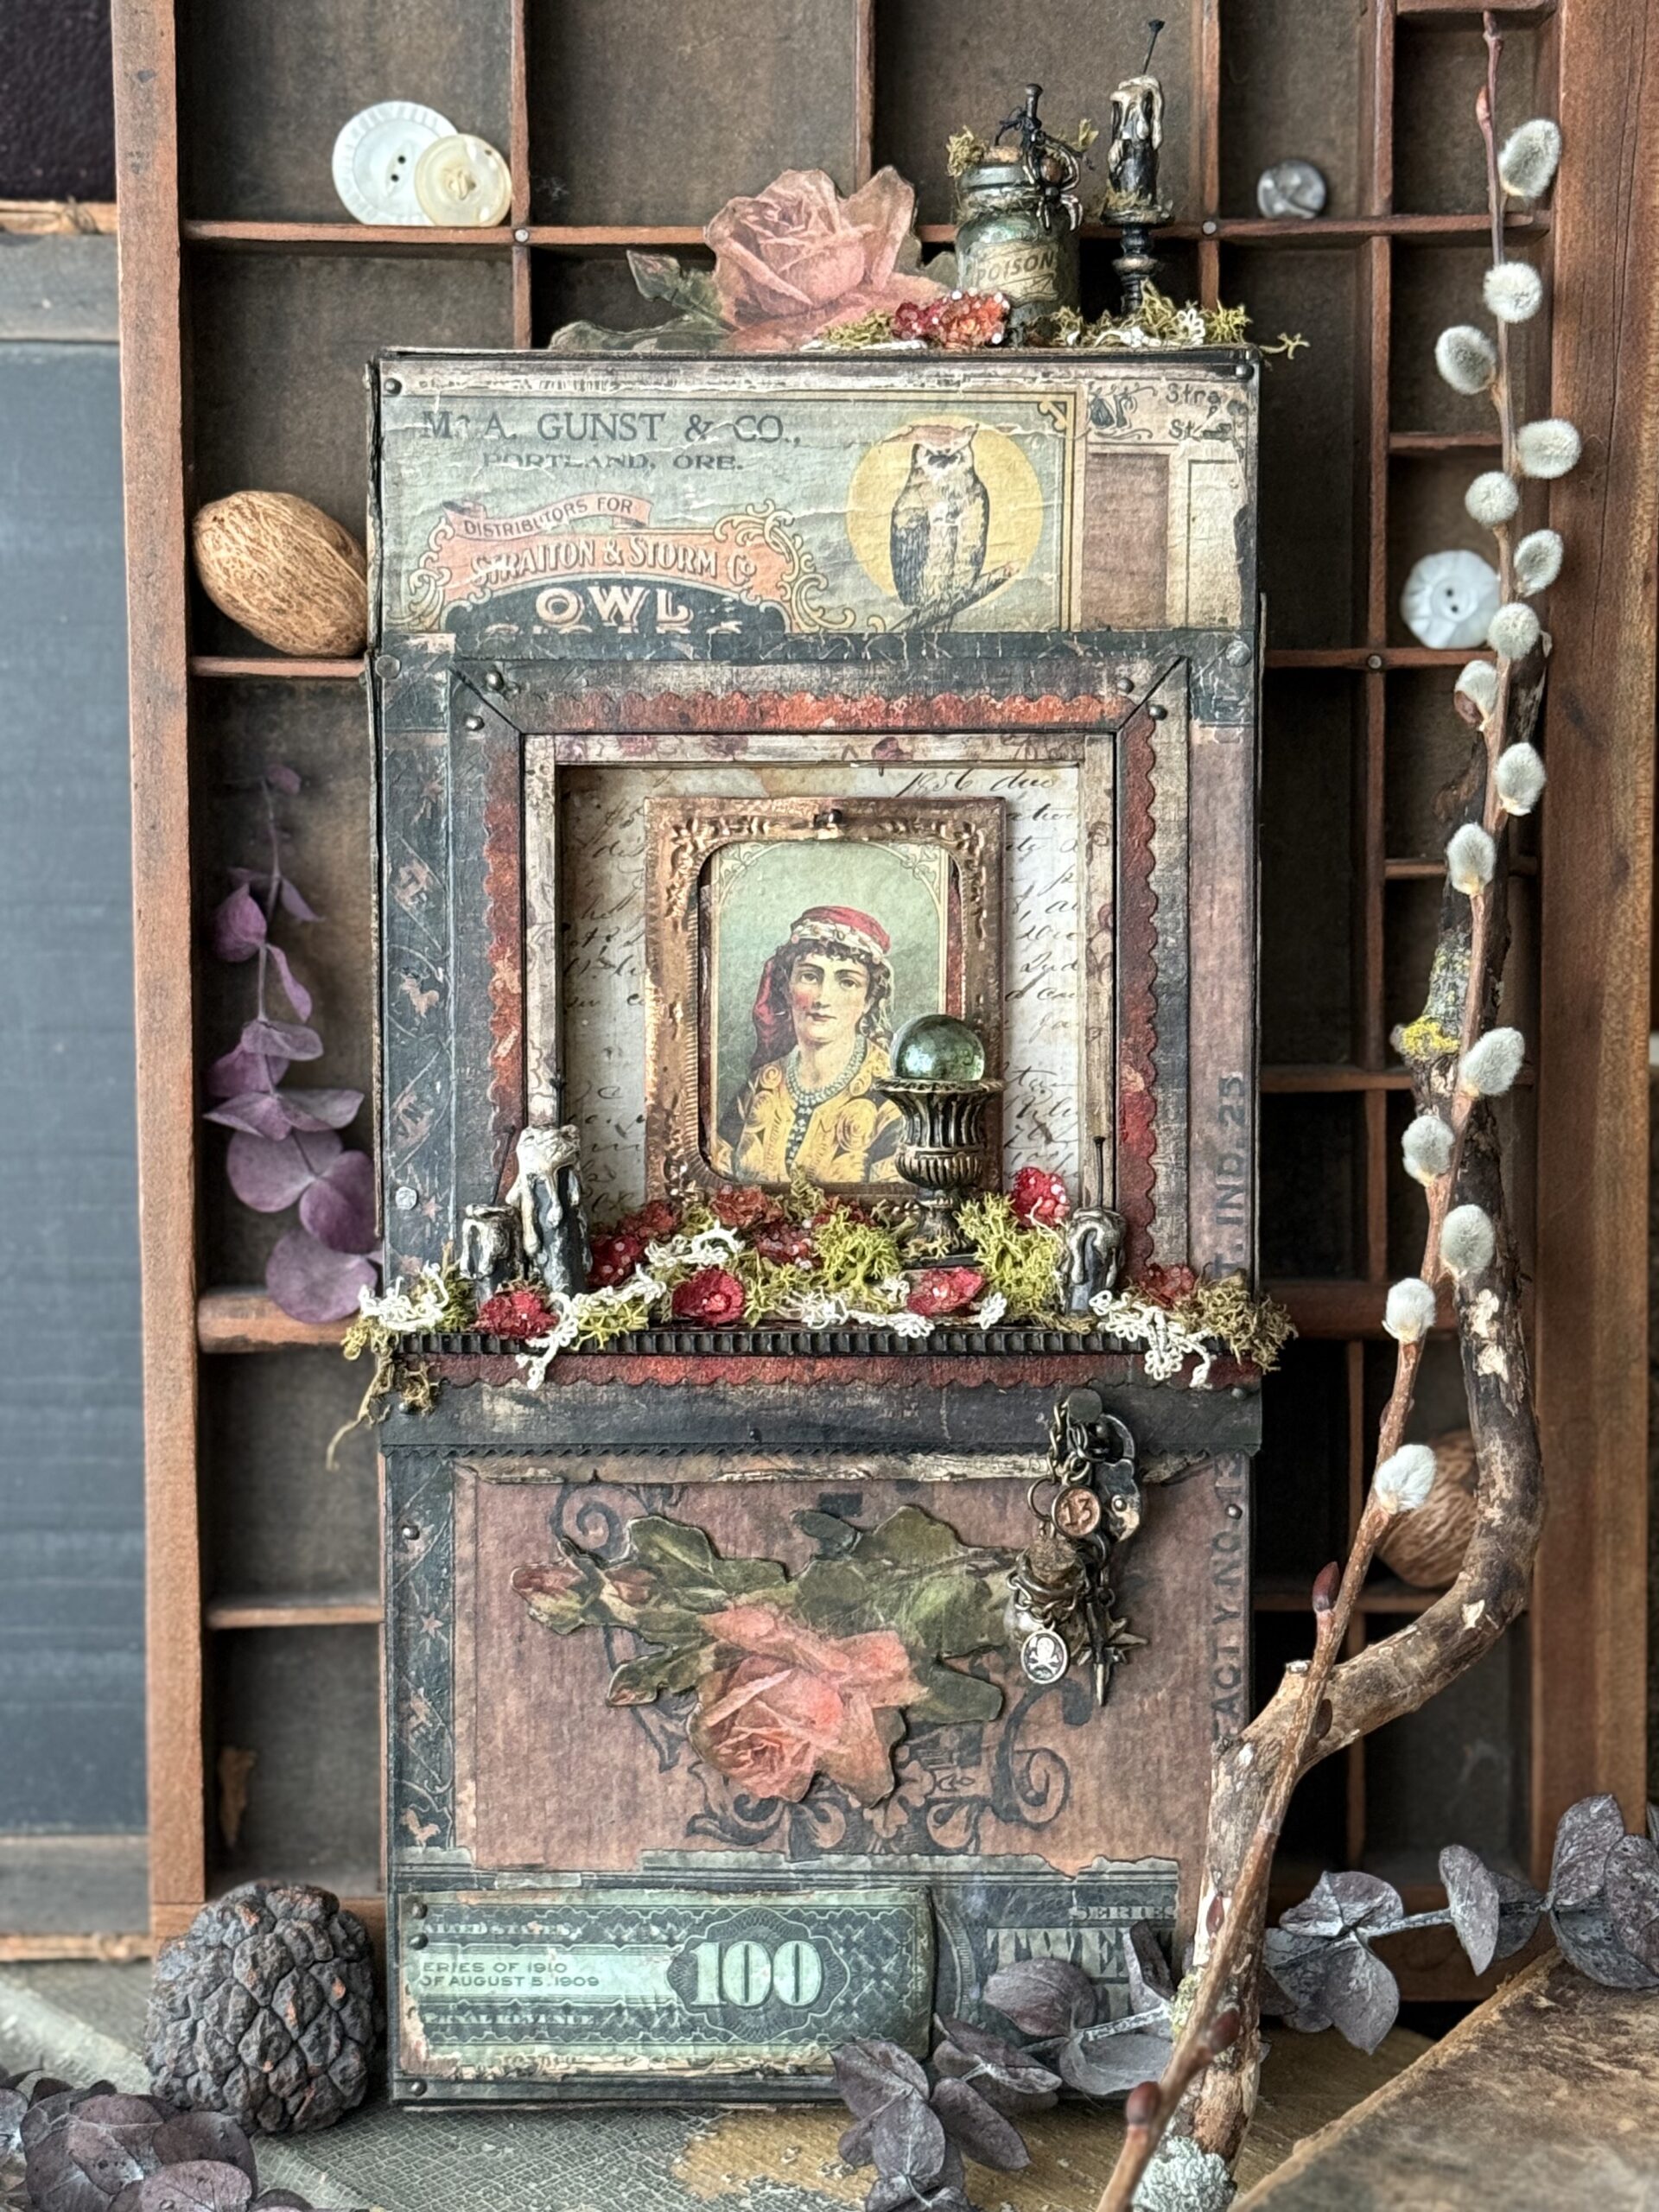
Ahhh, Halloween is here..at least when you create with Tim Holtz idea-ology it is, and I couldn’t be happier! I love a good story made with and inspired by vintage goods and the grungy details of them. My preferred way is to add as much age to the little pieces to help create the story of the life that they may have lived. This project took on a little life of it’s own. The mystery of the little Gypsy and the trinkets and memories that she carried and in the end, became a little shrine to her and the life that she lived and is remembered by.
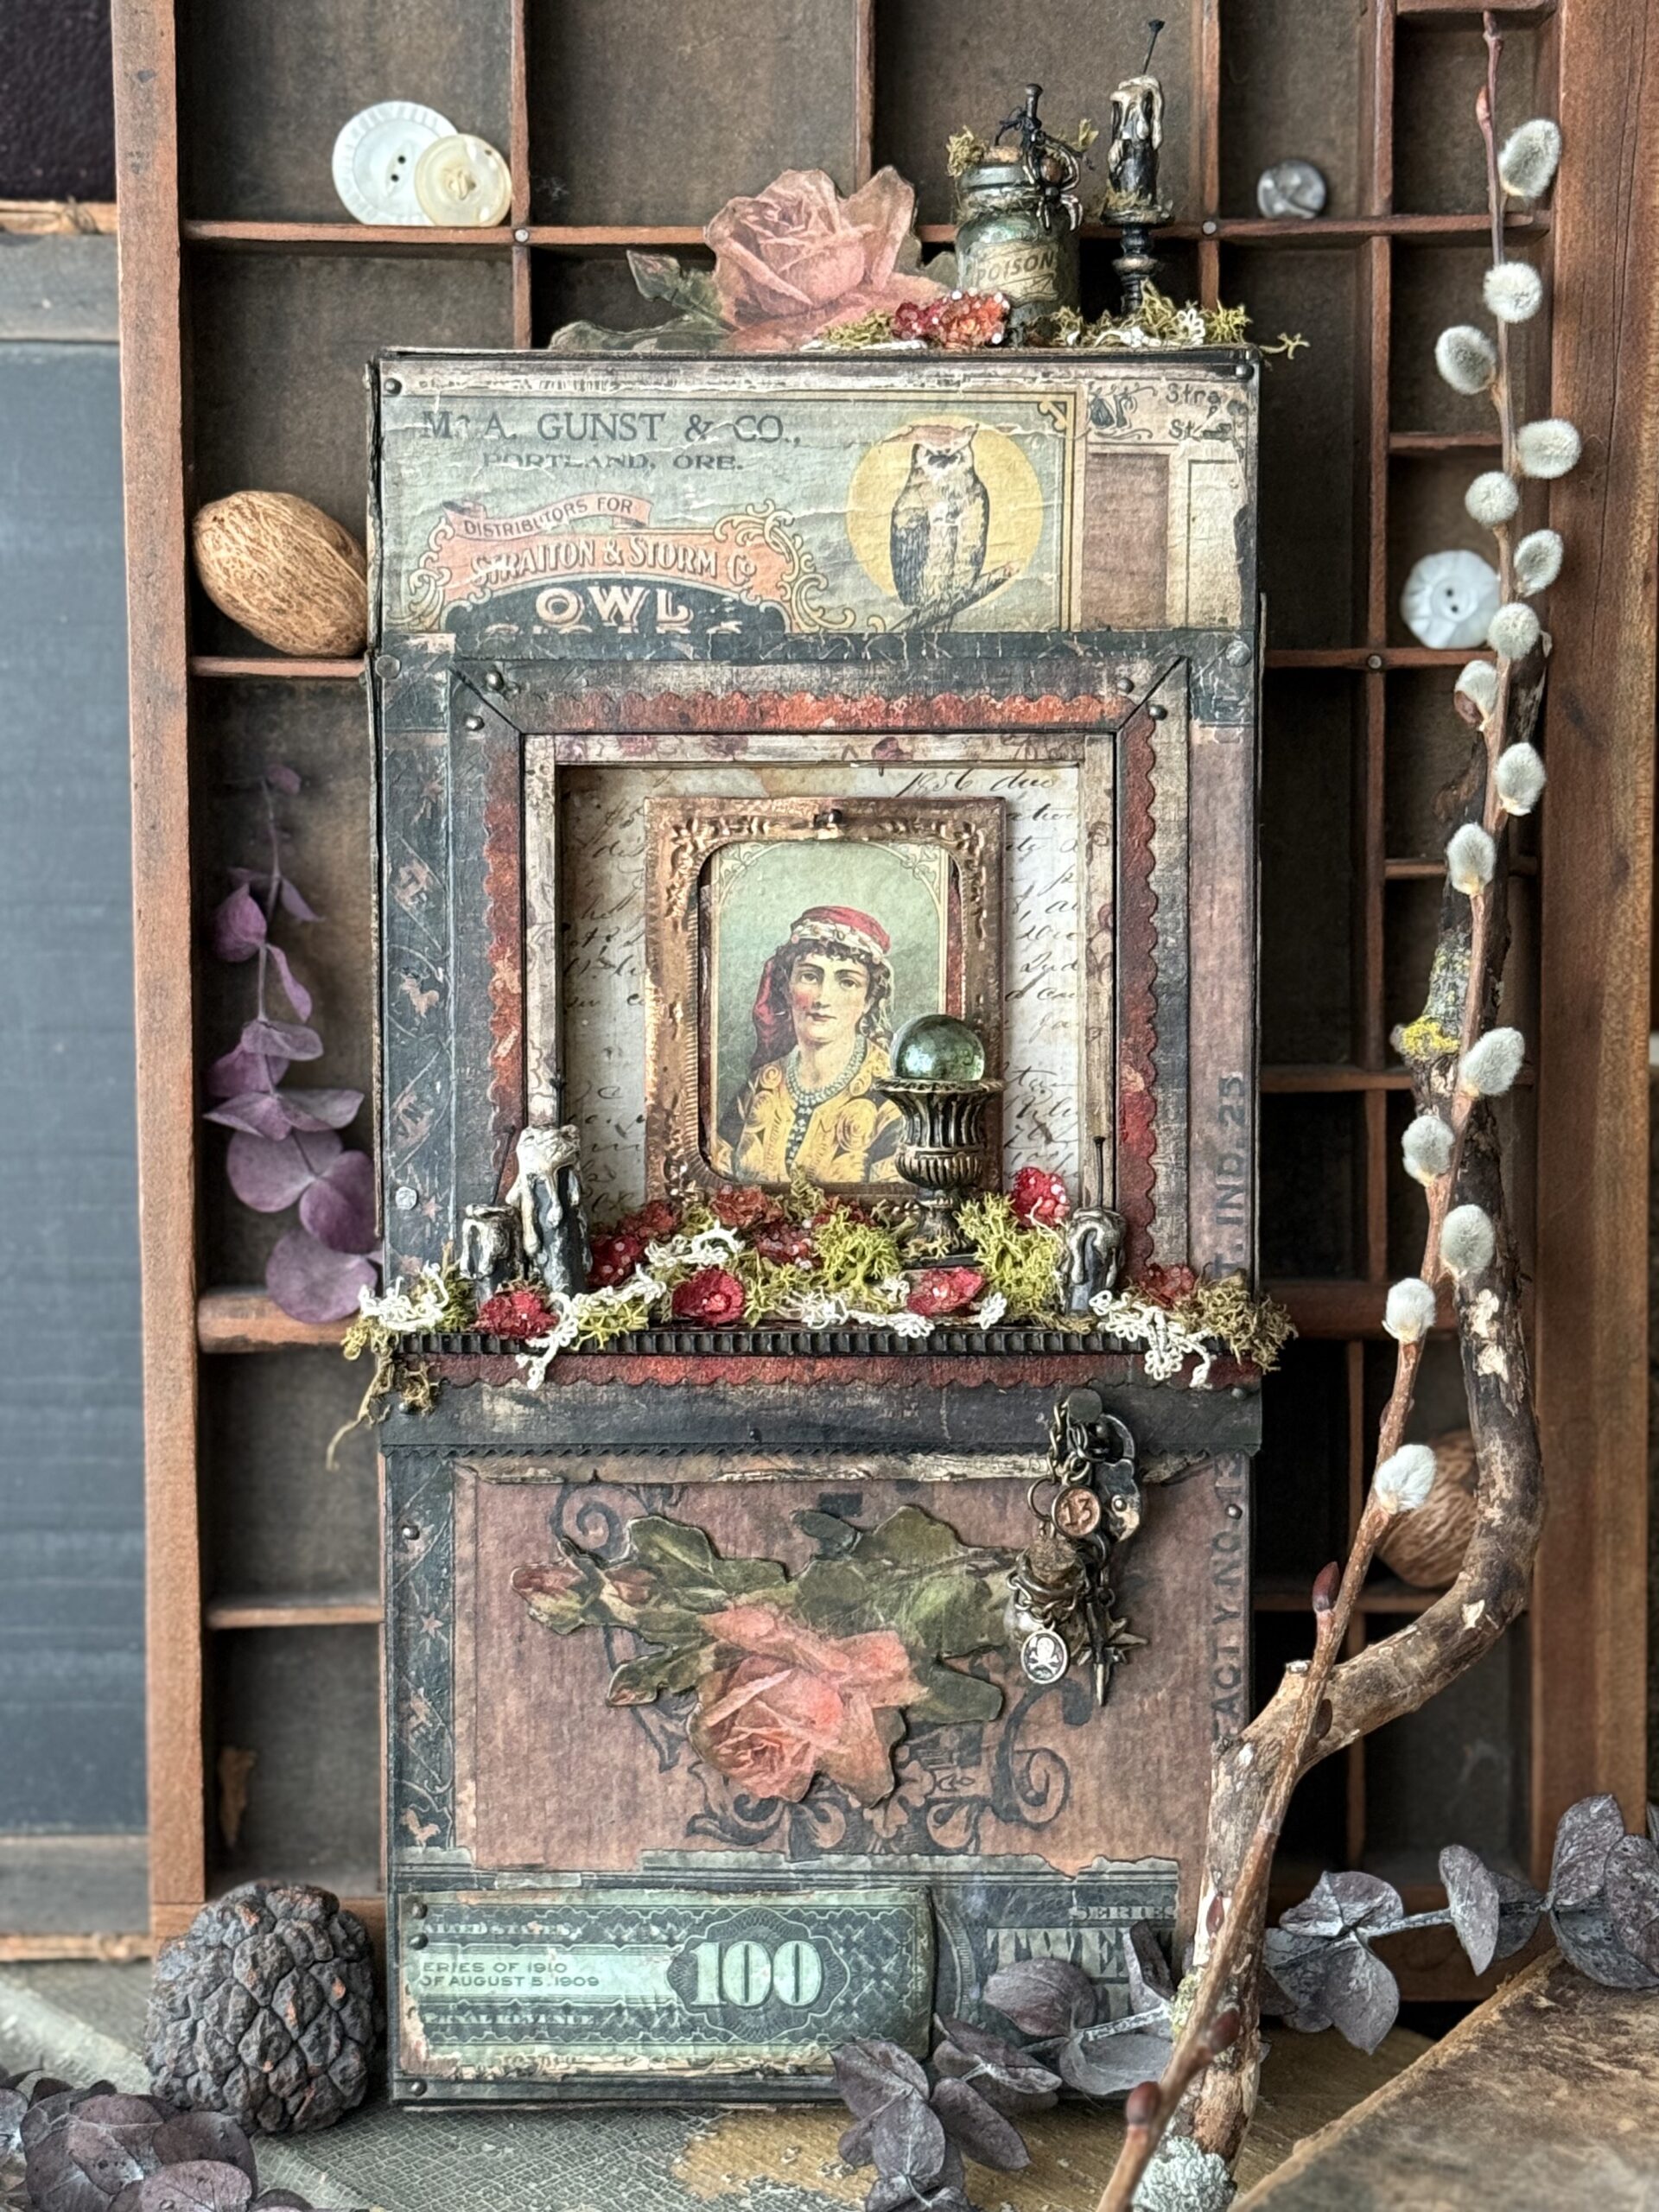
Tim Holtz idea-ology has a way of transporting you into a time and helps to trigger creativeness in ways that you can only imagine…
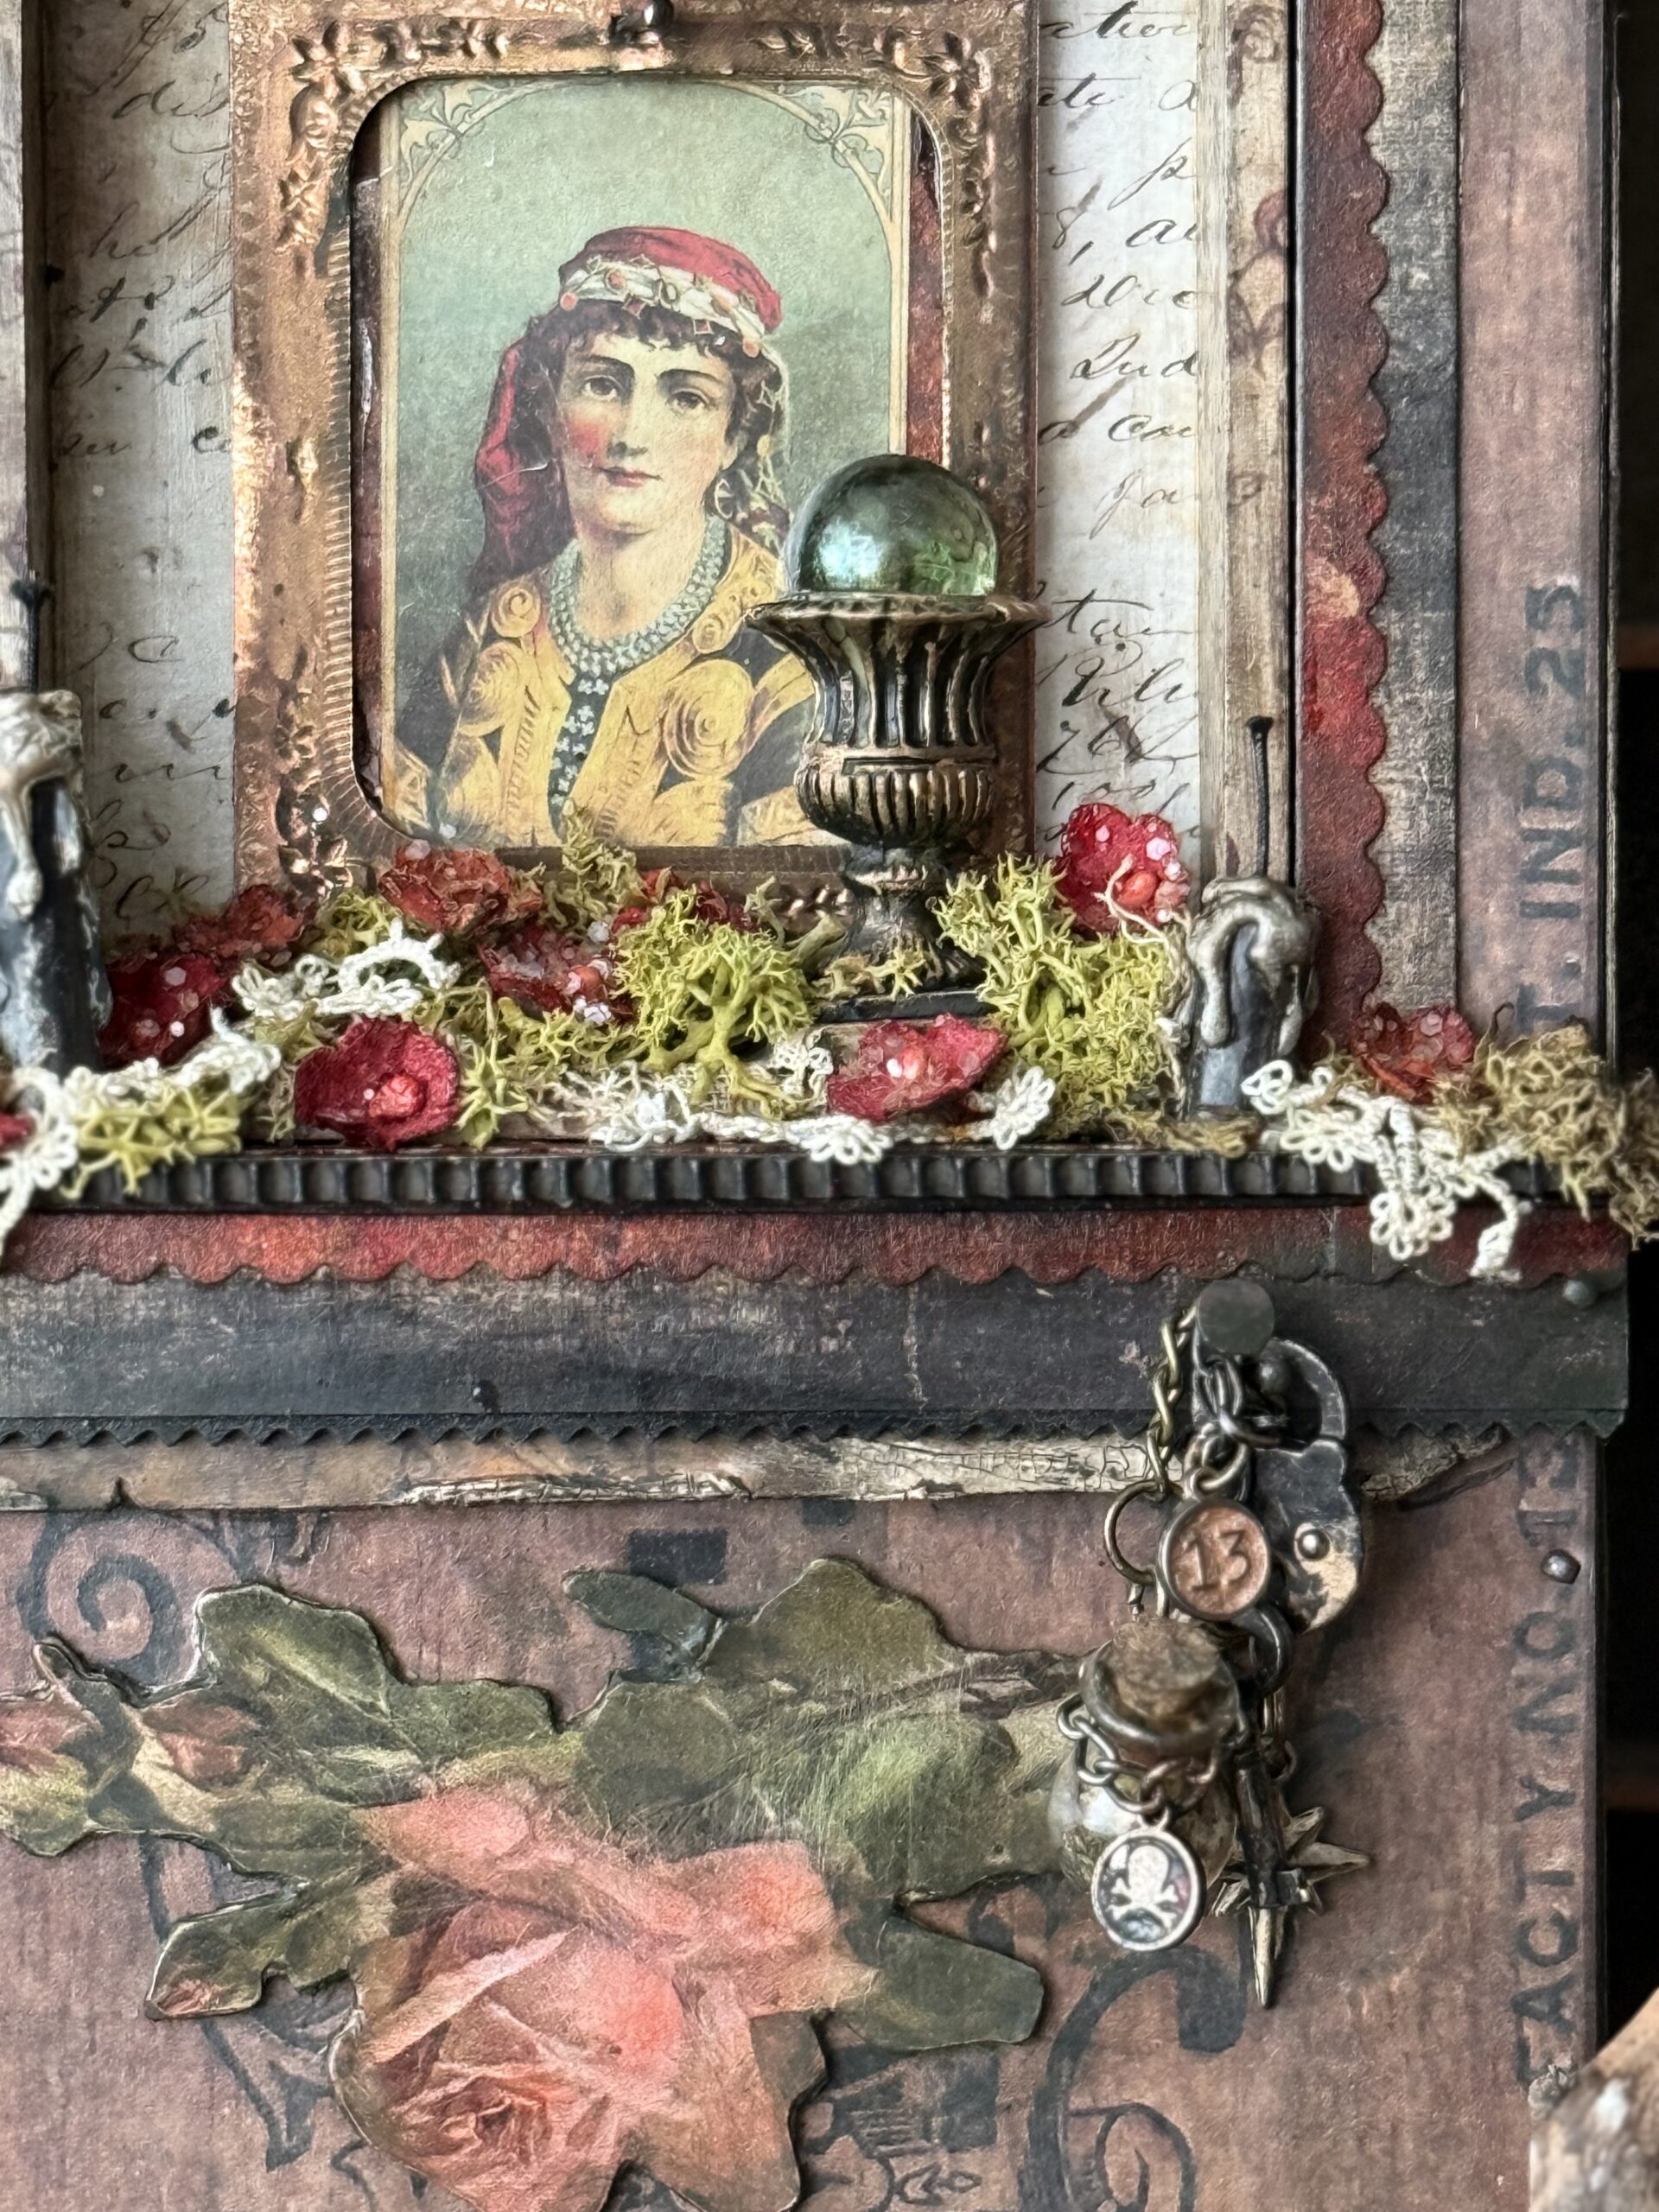
This years Halloween idea-ology release is a wonderful one full of all sorts of trinkets, ephemera and papers that are sure to get your creative juices flowing.
CLICK HERE to see the entire release.
Sometimes all it takes is to sit down and look through a pack of ephemera to trigger an idea and inspire a story, then for me, I just jump in and see where it can go to.
That’s how this project came to be…I started by digging through the ephemera pack and saw the gypsy girl, and instantly my brain went into a shrine type design using some of my favorite techniques and playing with all the idea-ology Halloween trinkets to make that story come to life.
That is what I love so much about these products, it makes it easy to dream of a time or place that you could only imagine being in, then turning around and making that story all your own and bringing it to life by using your creativity. My Halloween stories always involve grungy bottles and jars, glittered flowers, vintage lace, tattered labels, crusty nails, vintage papers and boatloads of tiny details…that’s the stuff that brings me joy…
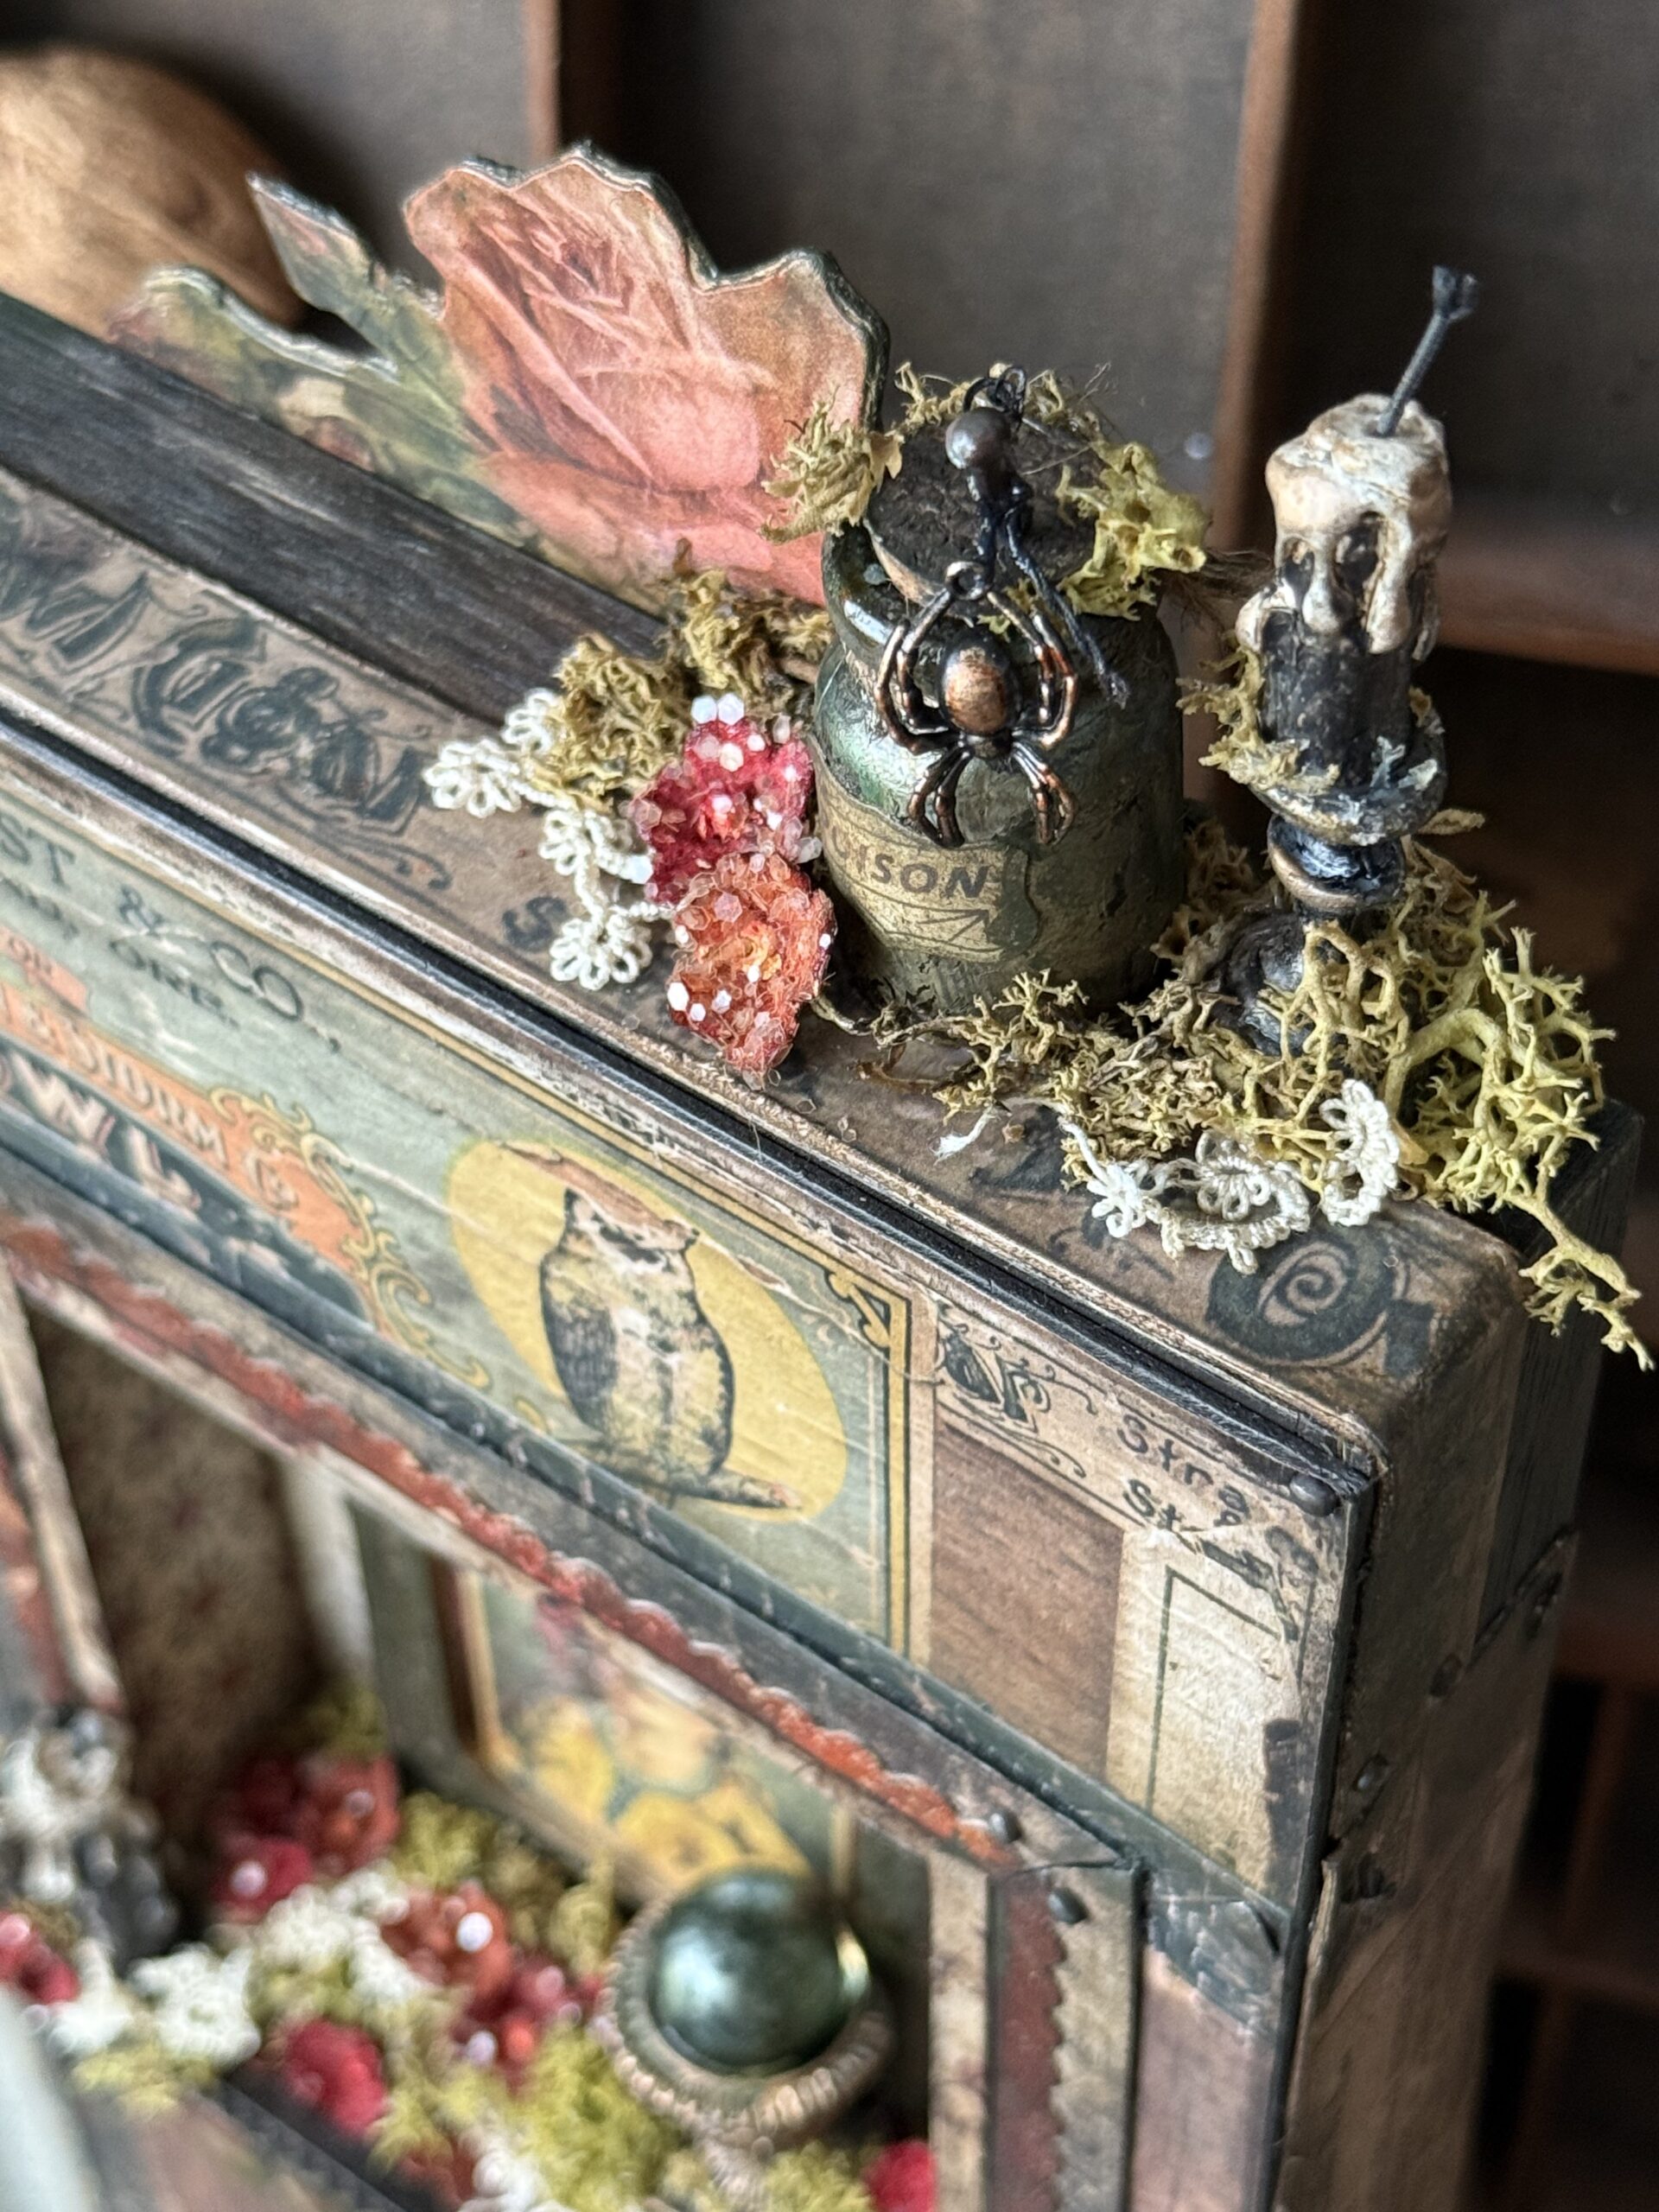
..and making for the joy of it couldn’t be more fun!
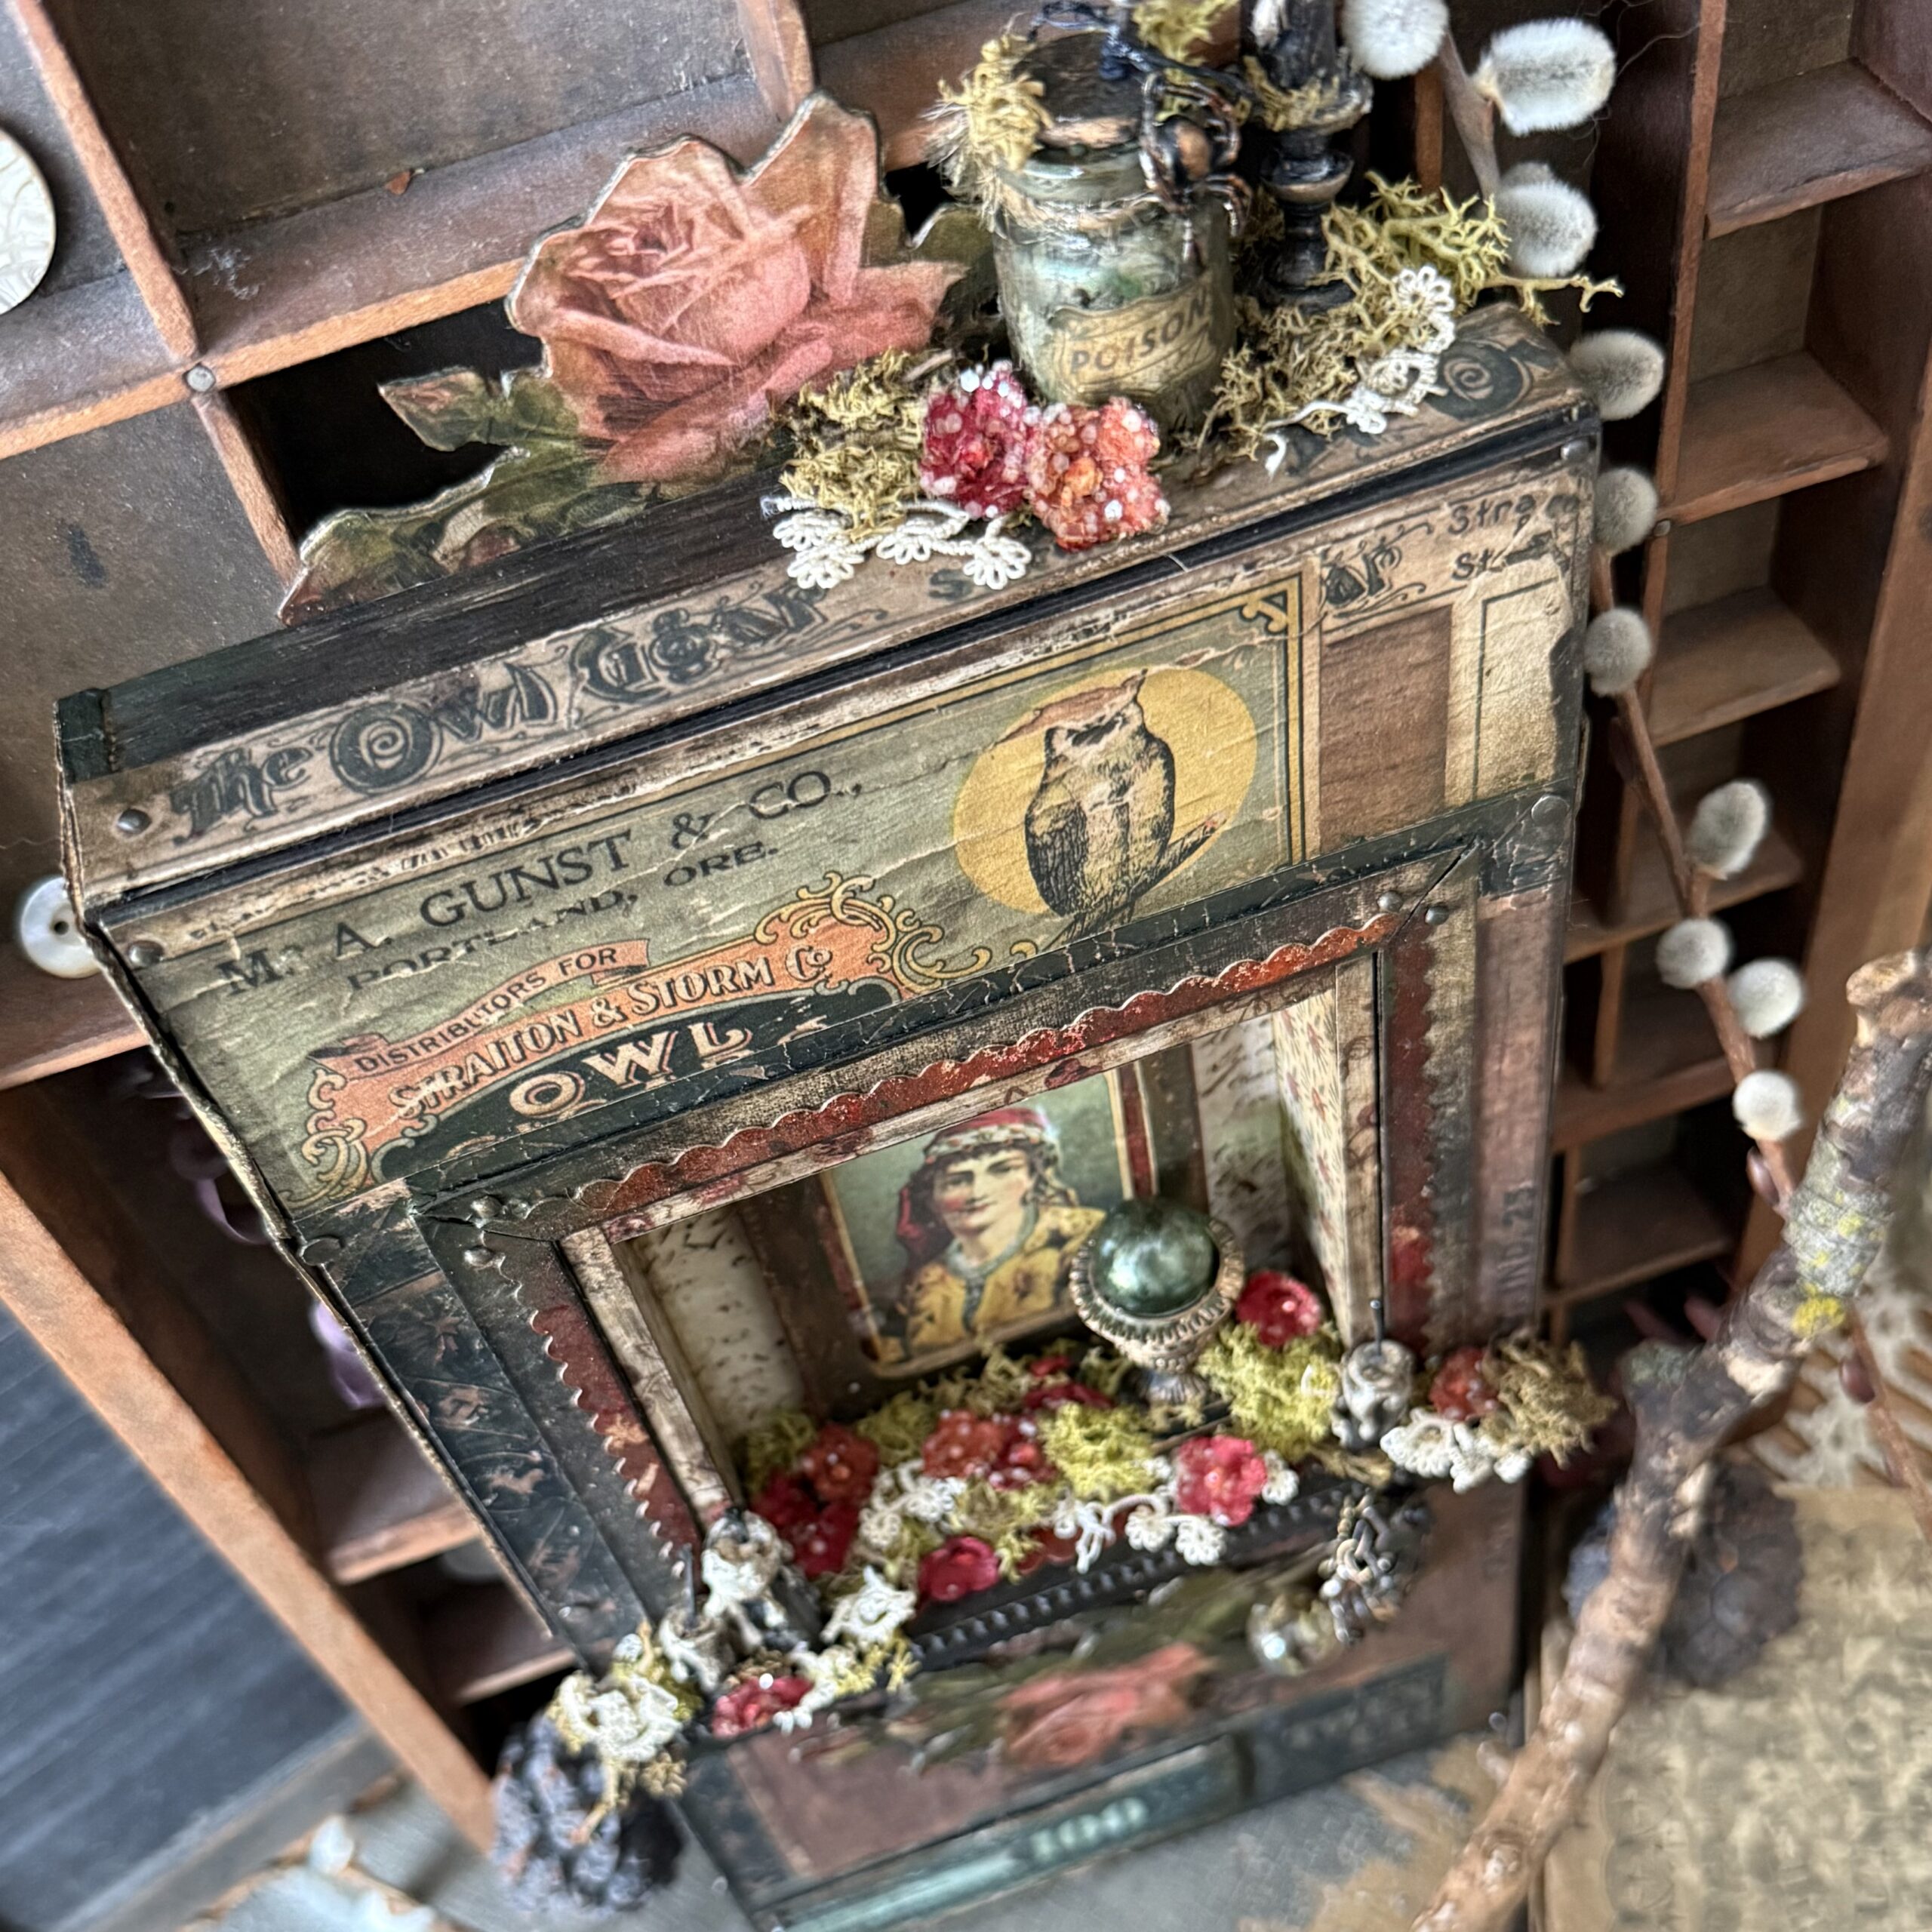
So, are you ready? Find a comfy place to read and nice tall glass of something you love and let’s get to it! I started by picking out the large vignette tray to be the base of the project and a variety of papers from the Halloween Backdrop Paper Pack. I knew I wanted it to look like the shrine was created using an old cigar box, so I picked some of those type of papers…I also had some scraps of cigar box papers in my stash of previously used papers, so I used some of those as well. The photo below shows the general idea of where I wanted the project to go with my initial thoughts, I ended up not using the chipboard wood slats that you see in the photo 😉
If you’ve followed me for awhile, then you know that in the past (in fact, Halloween of 2024) I made an enclosed vignette tray. I knew I wanted to do that again, so I worked with the project in that direction. To do this, I enclosed a small vignette box inside a vignette tray by creating a base cover with chipboard. This gives the project an old cabinet or Hoosier cabinet kind of feel, perfect for creating spaces for displaying goodies inside and creating the vintage look of a cabinet.
To see a look at that previous cabinet CLICK HERE.
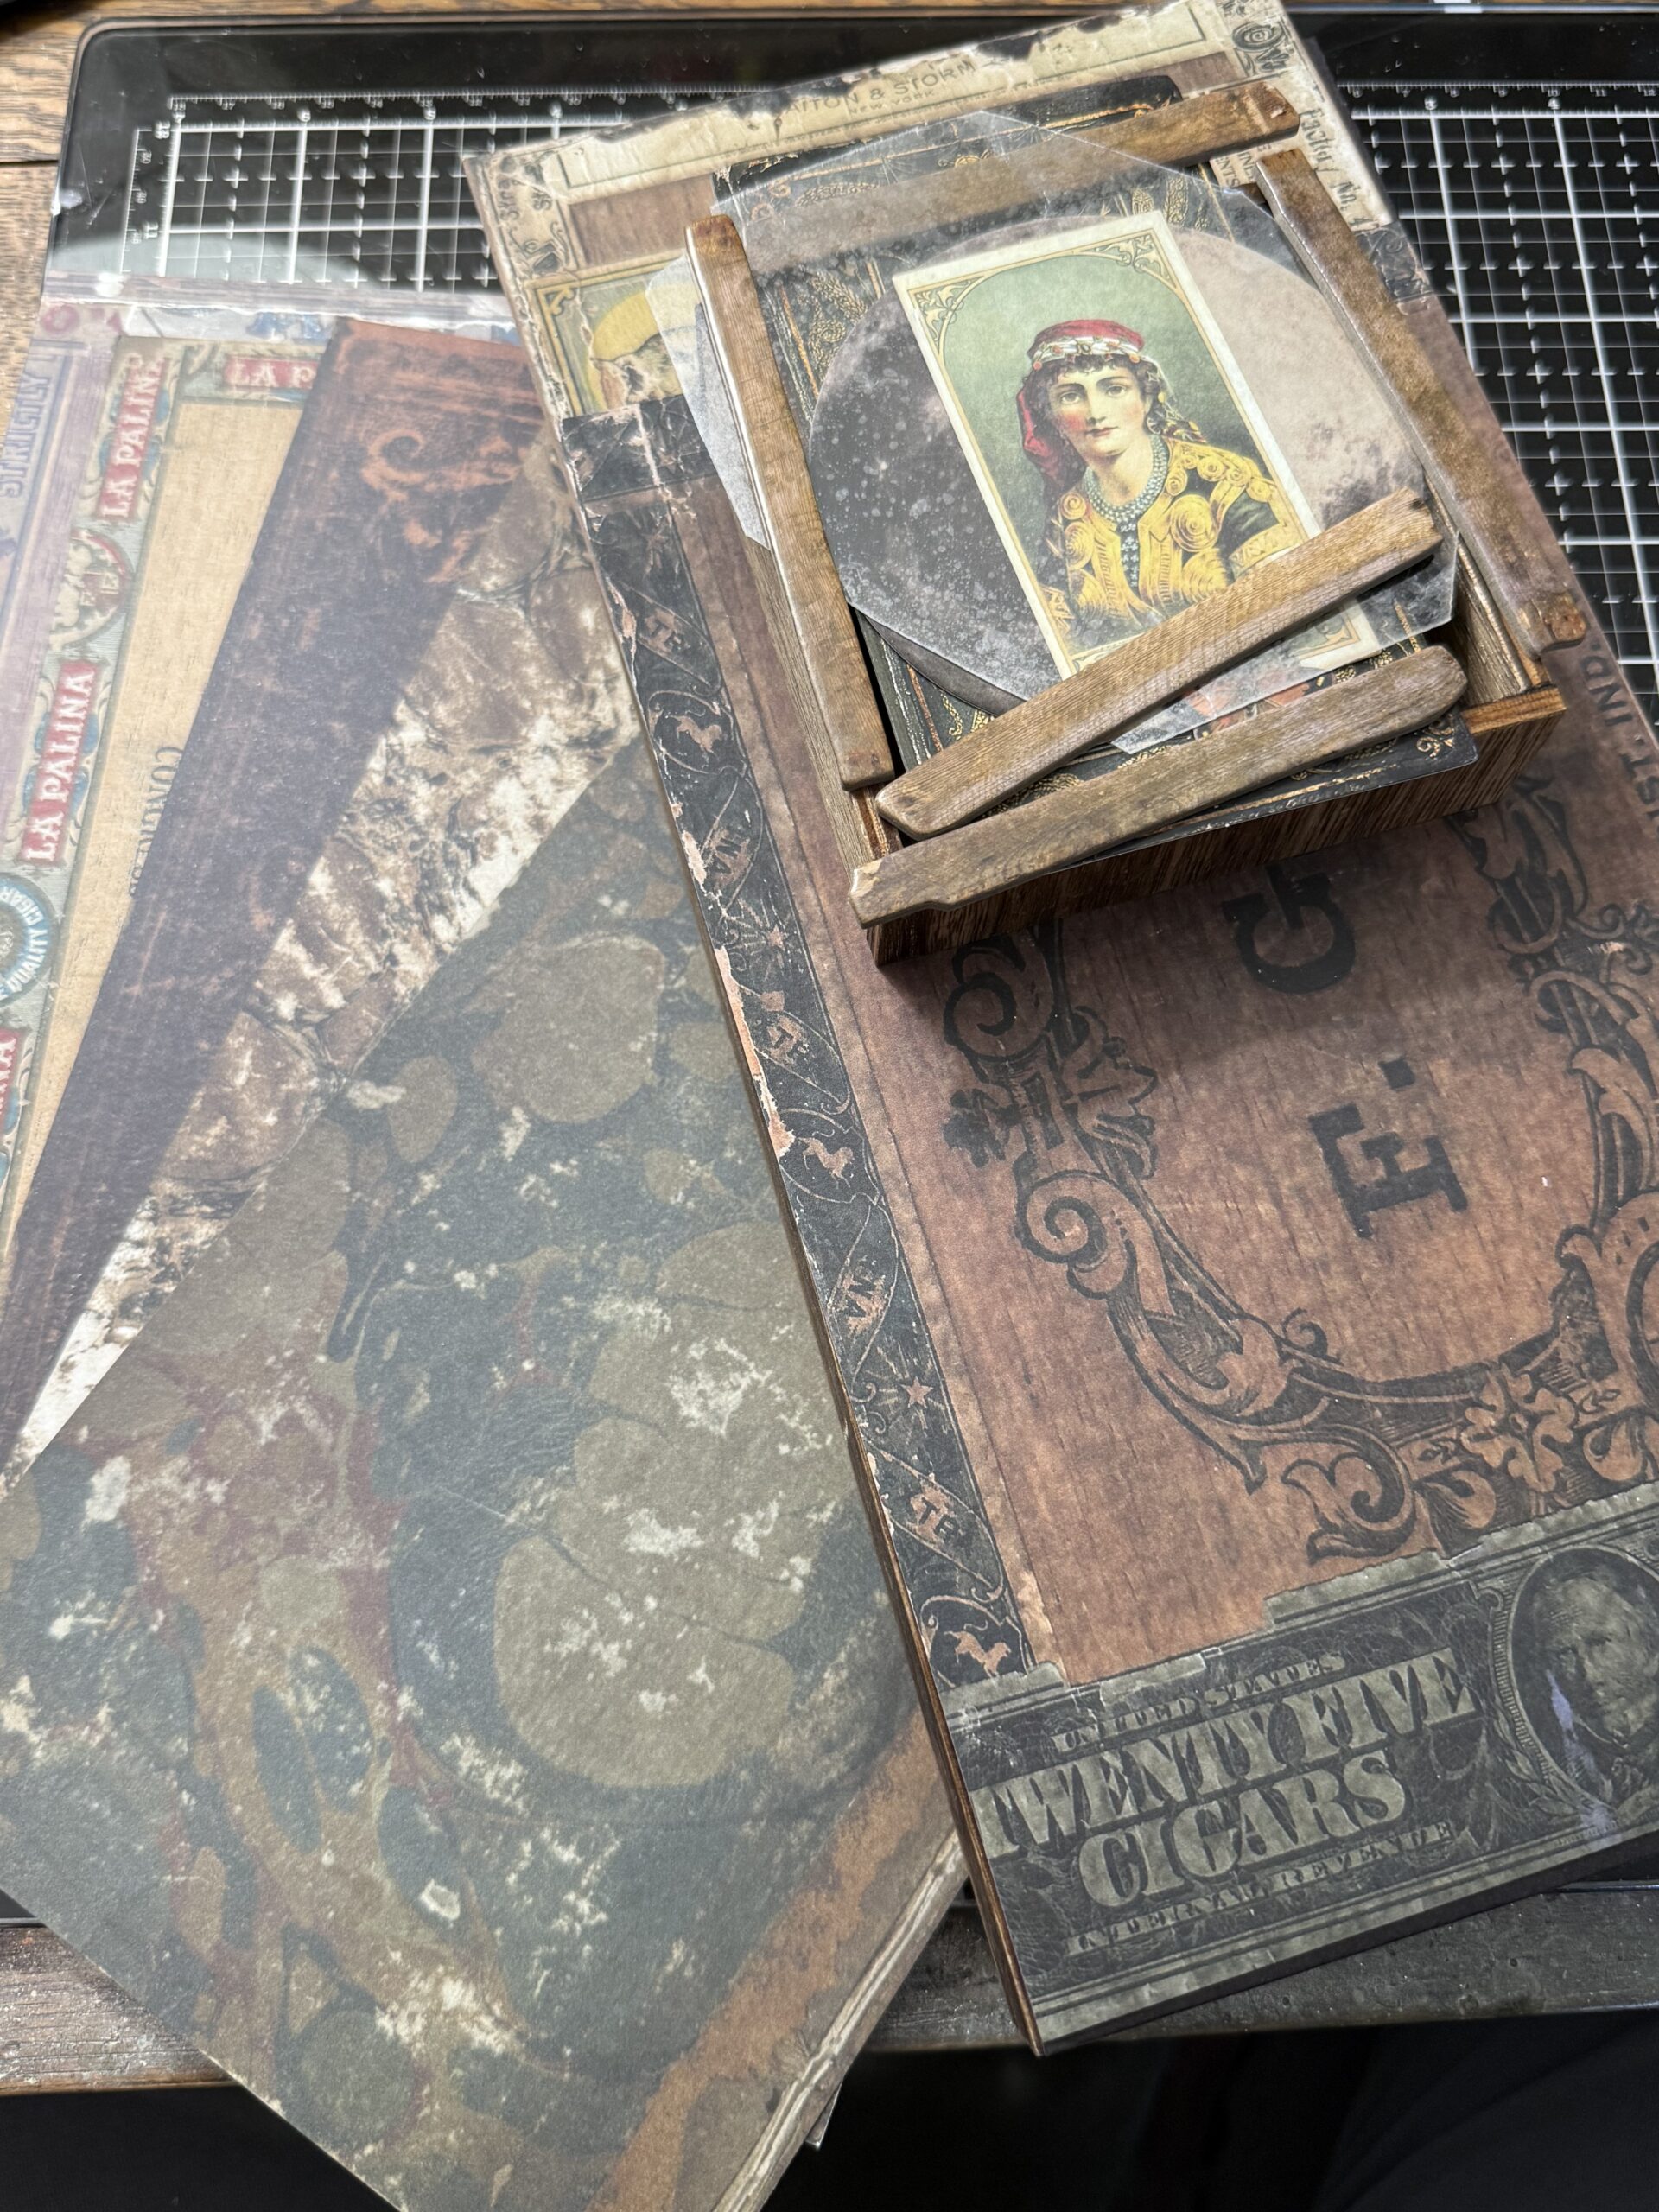
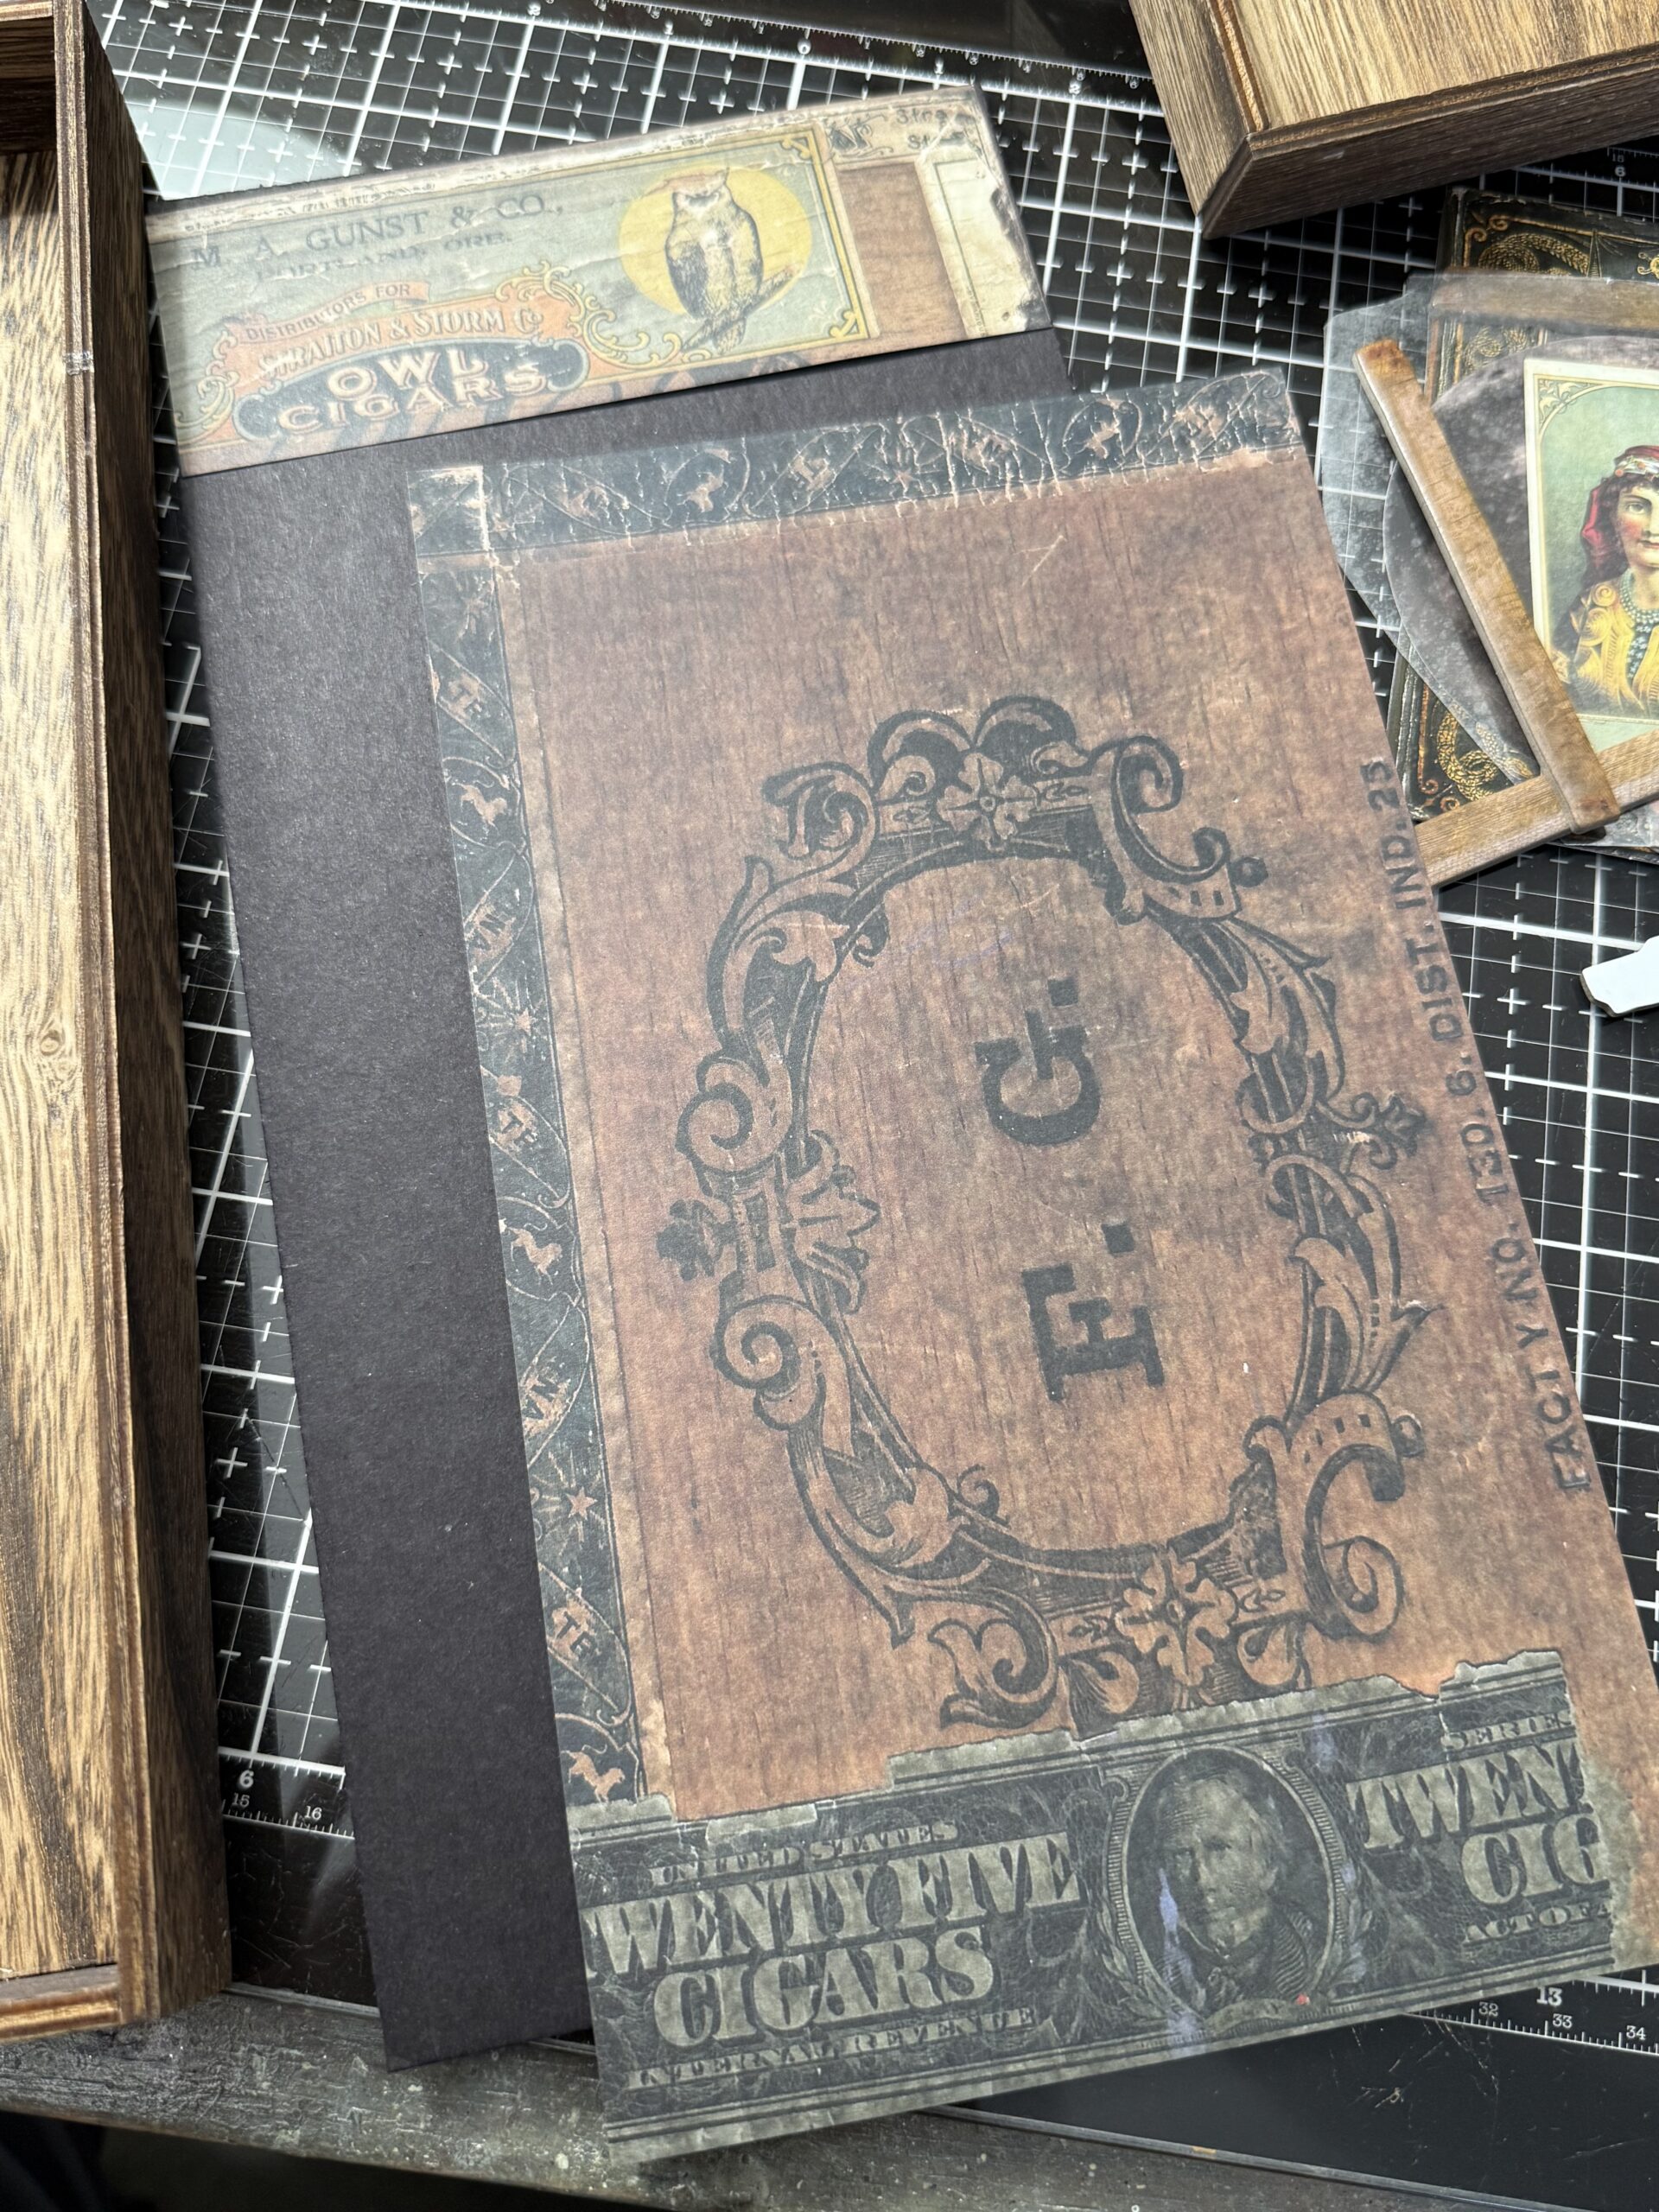
The large vignette tray (6″x12″x1.25) is longer than the Backdrops paper (6″x10″) by a couple of inches, so I used some of the scrap paper cigar box paper (that piece with the owl) to finish the top and cover the large piece of chipboard that I had cut to fit the front of the tray. I adhered those two pieces to the front piece of chipboard using collage medium, then set it aside to dry.
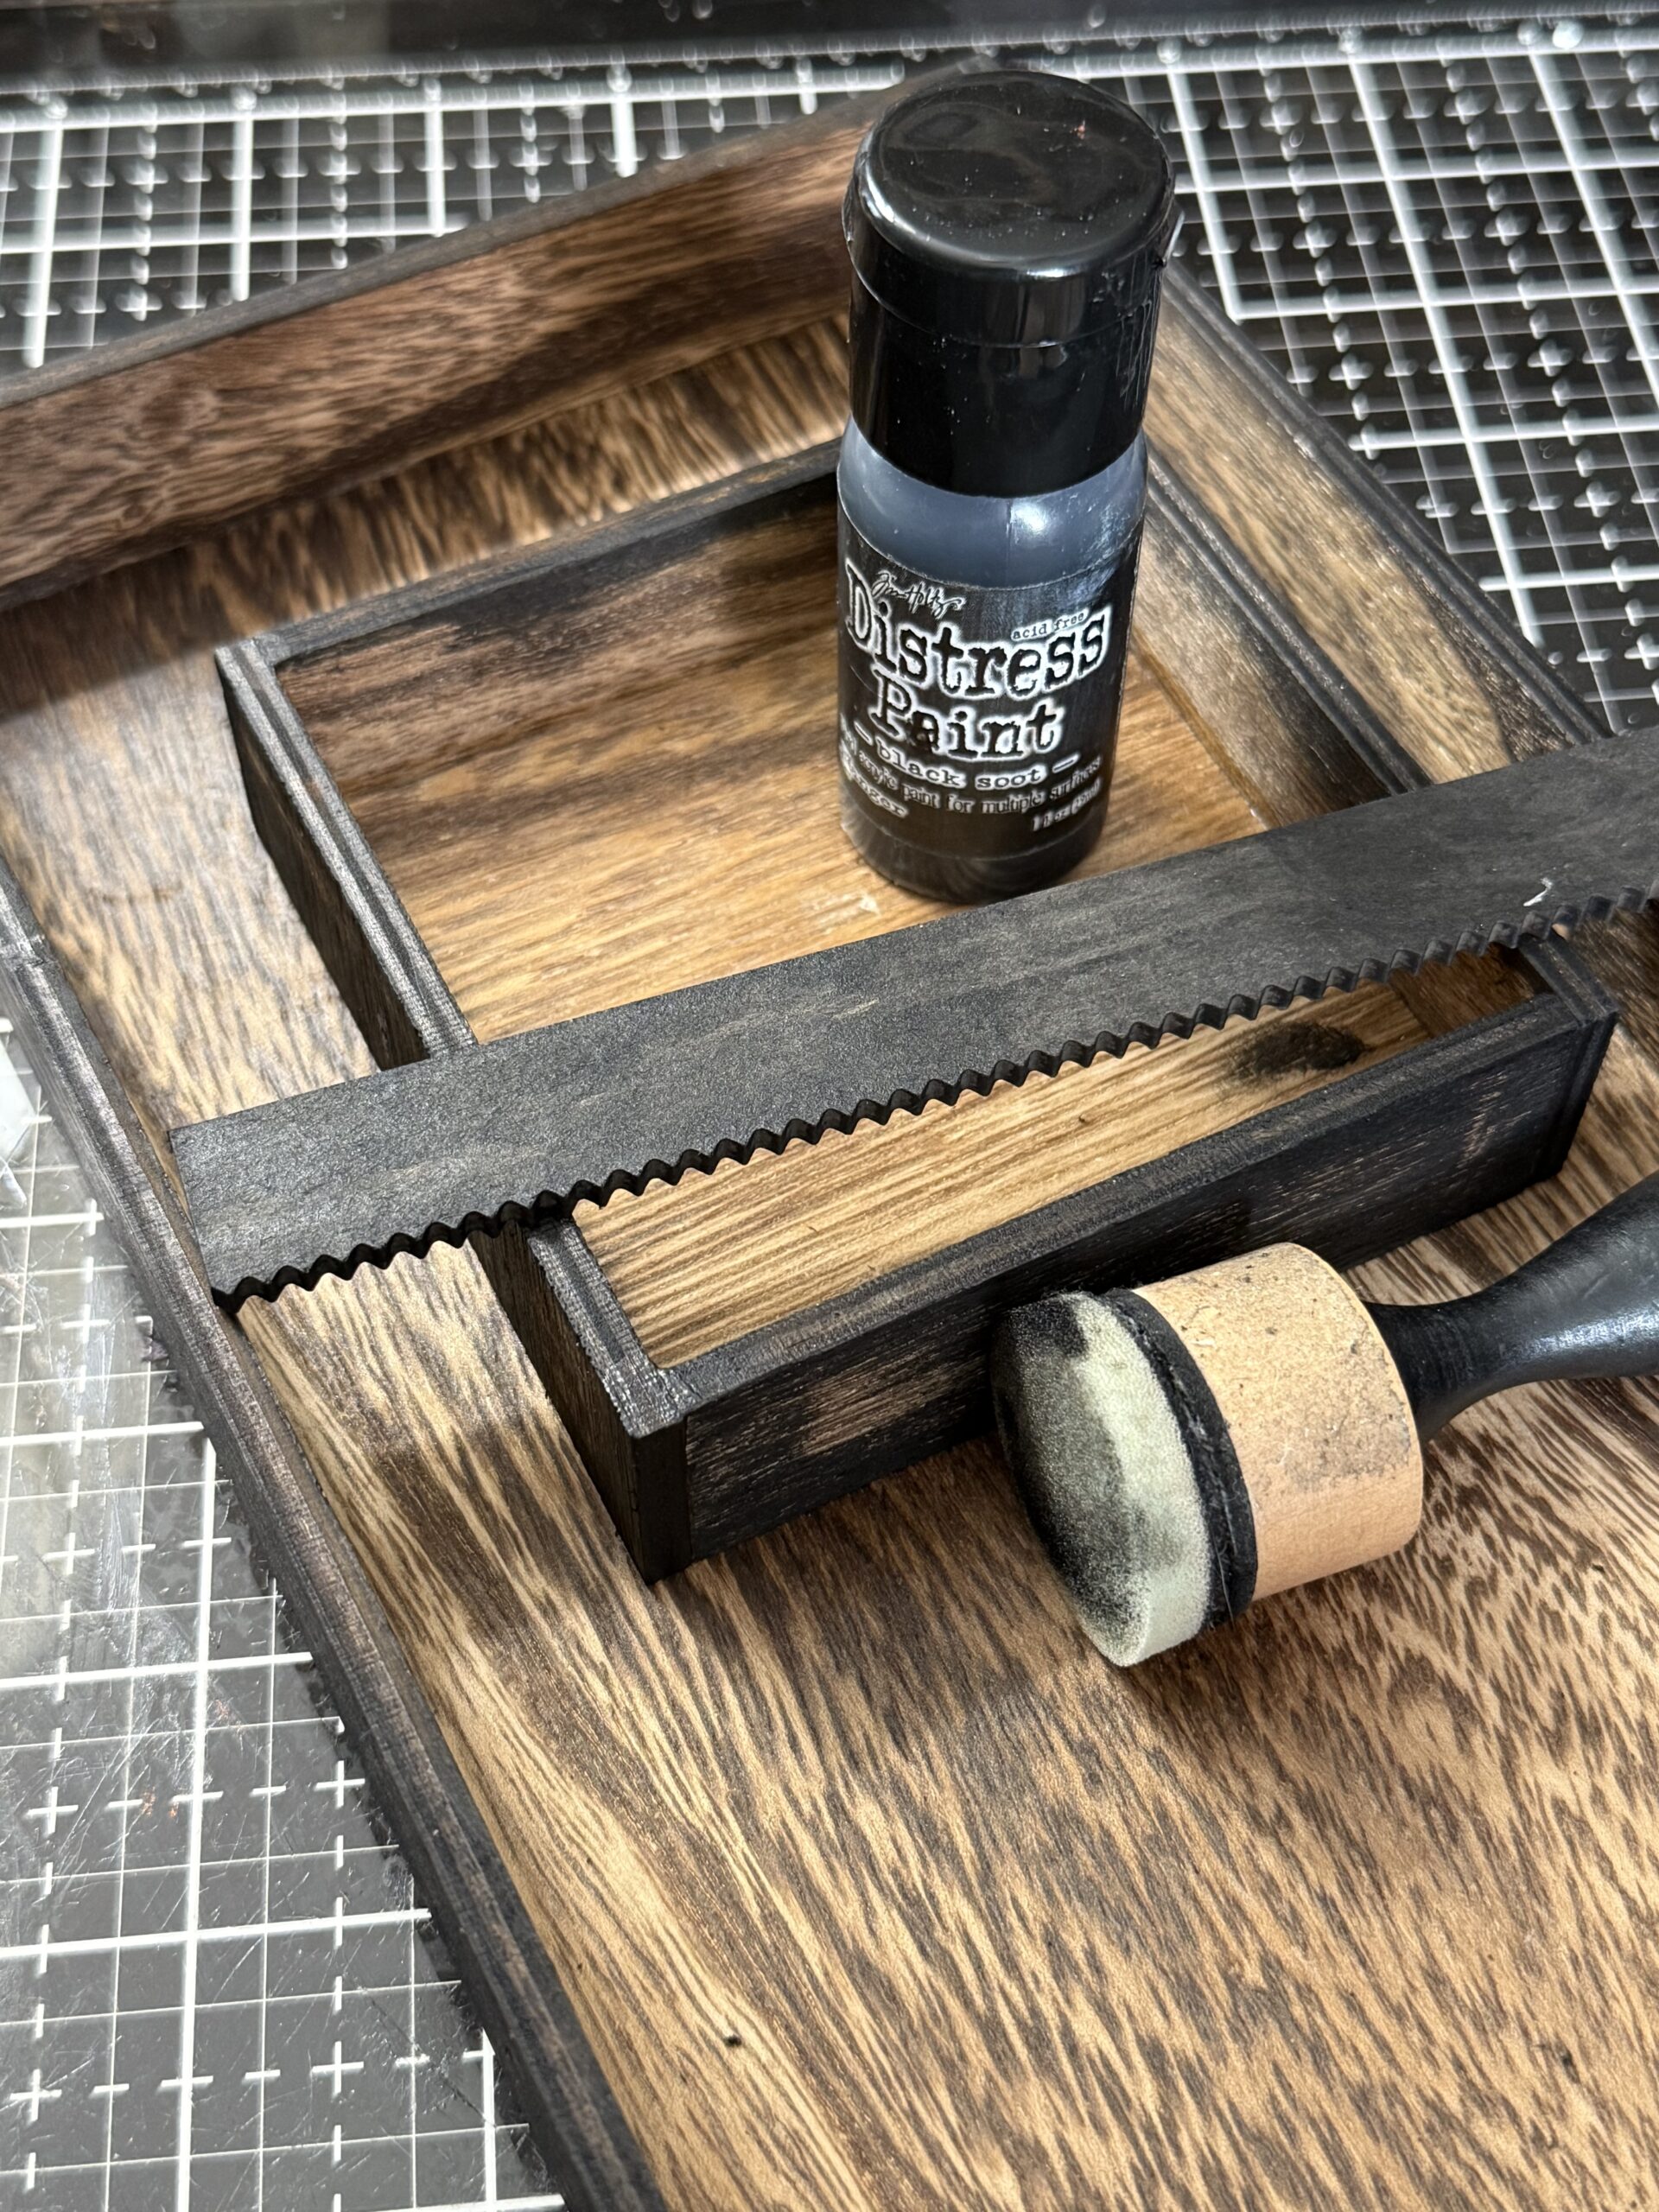
Next, I painted the edges of the vignette tray and the small square vignette that I was going to add to the inside of the tray using black soot Distress Paint. I also painted a piece of Pinked Etcetera Trim that I was going to use on the front of the vignette, then set those aside to dry.
I used a small scrap of some Kraft Mixed Media Paper and added some spritzes of Distress Spray Stain and Distress Mica Spray to it and dried it with my heat tool. Then, after it was dry, blended it with some Distress Ink.
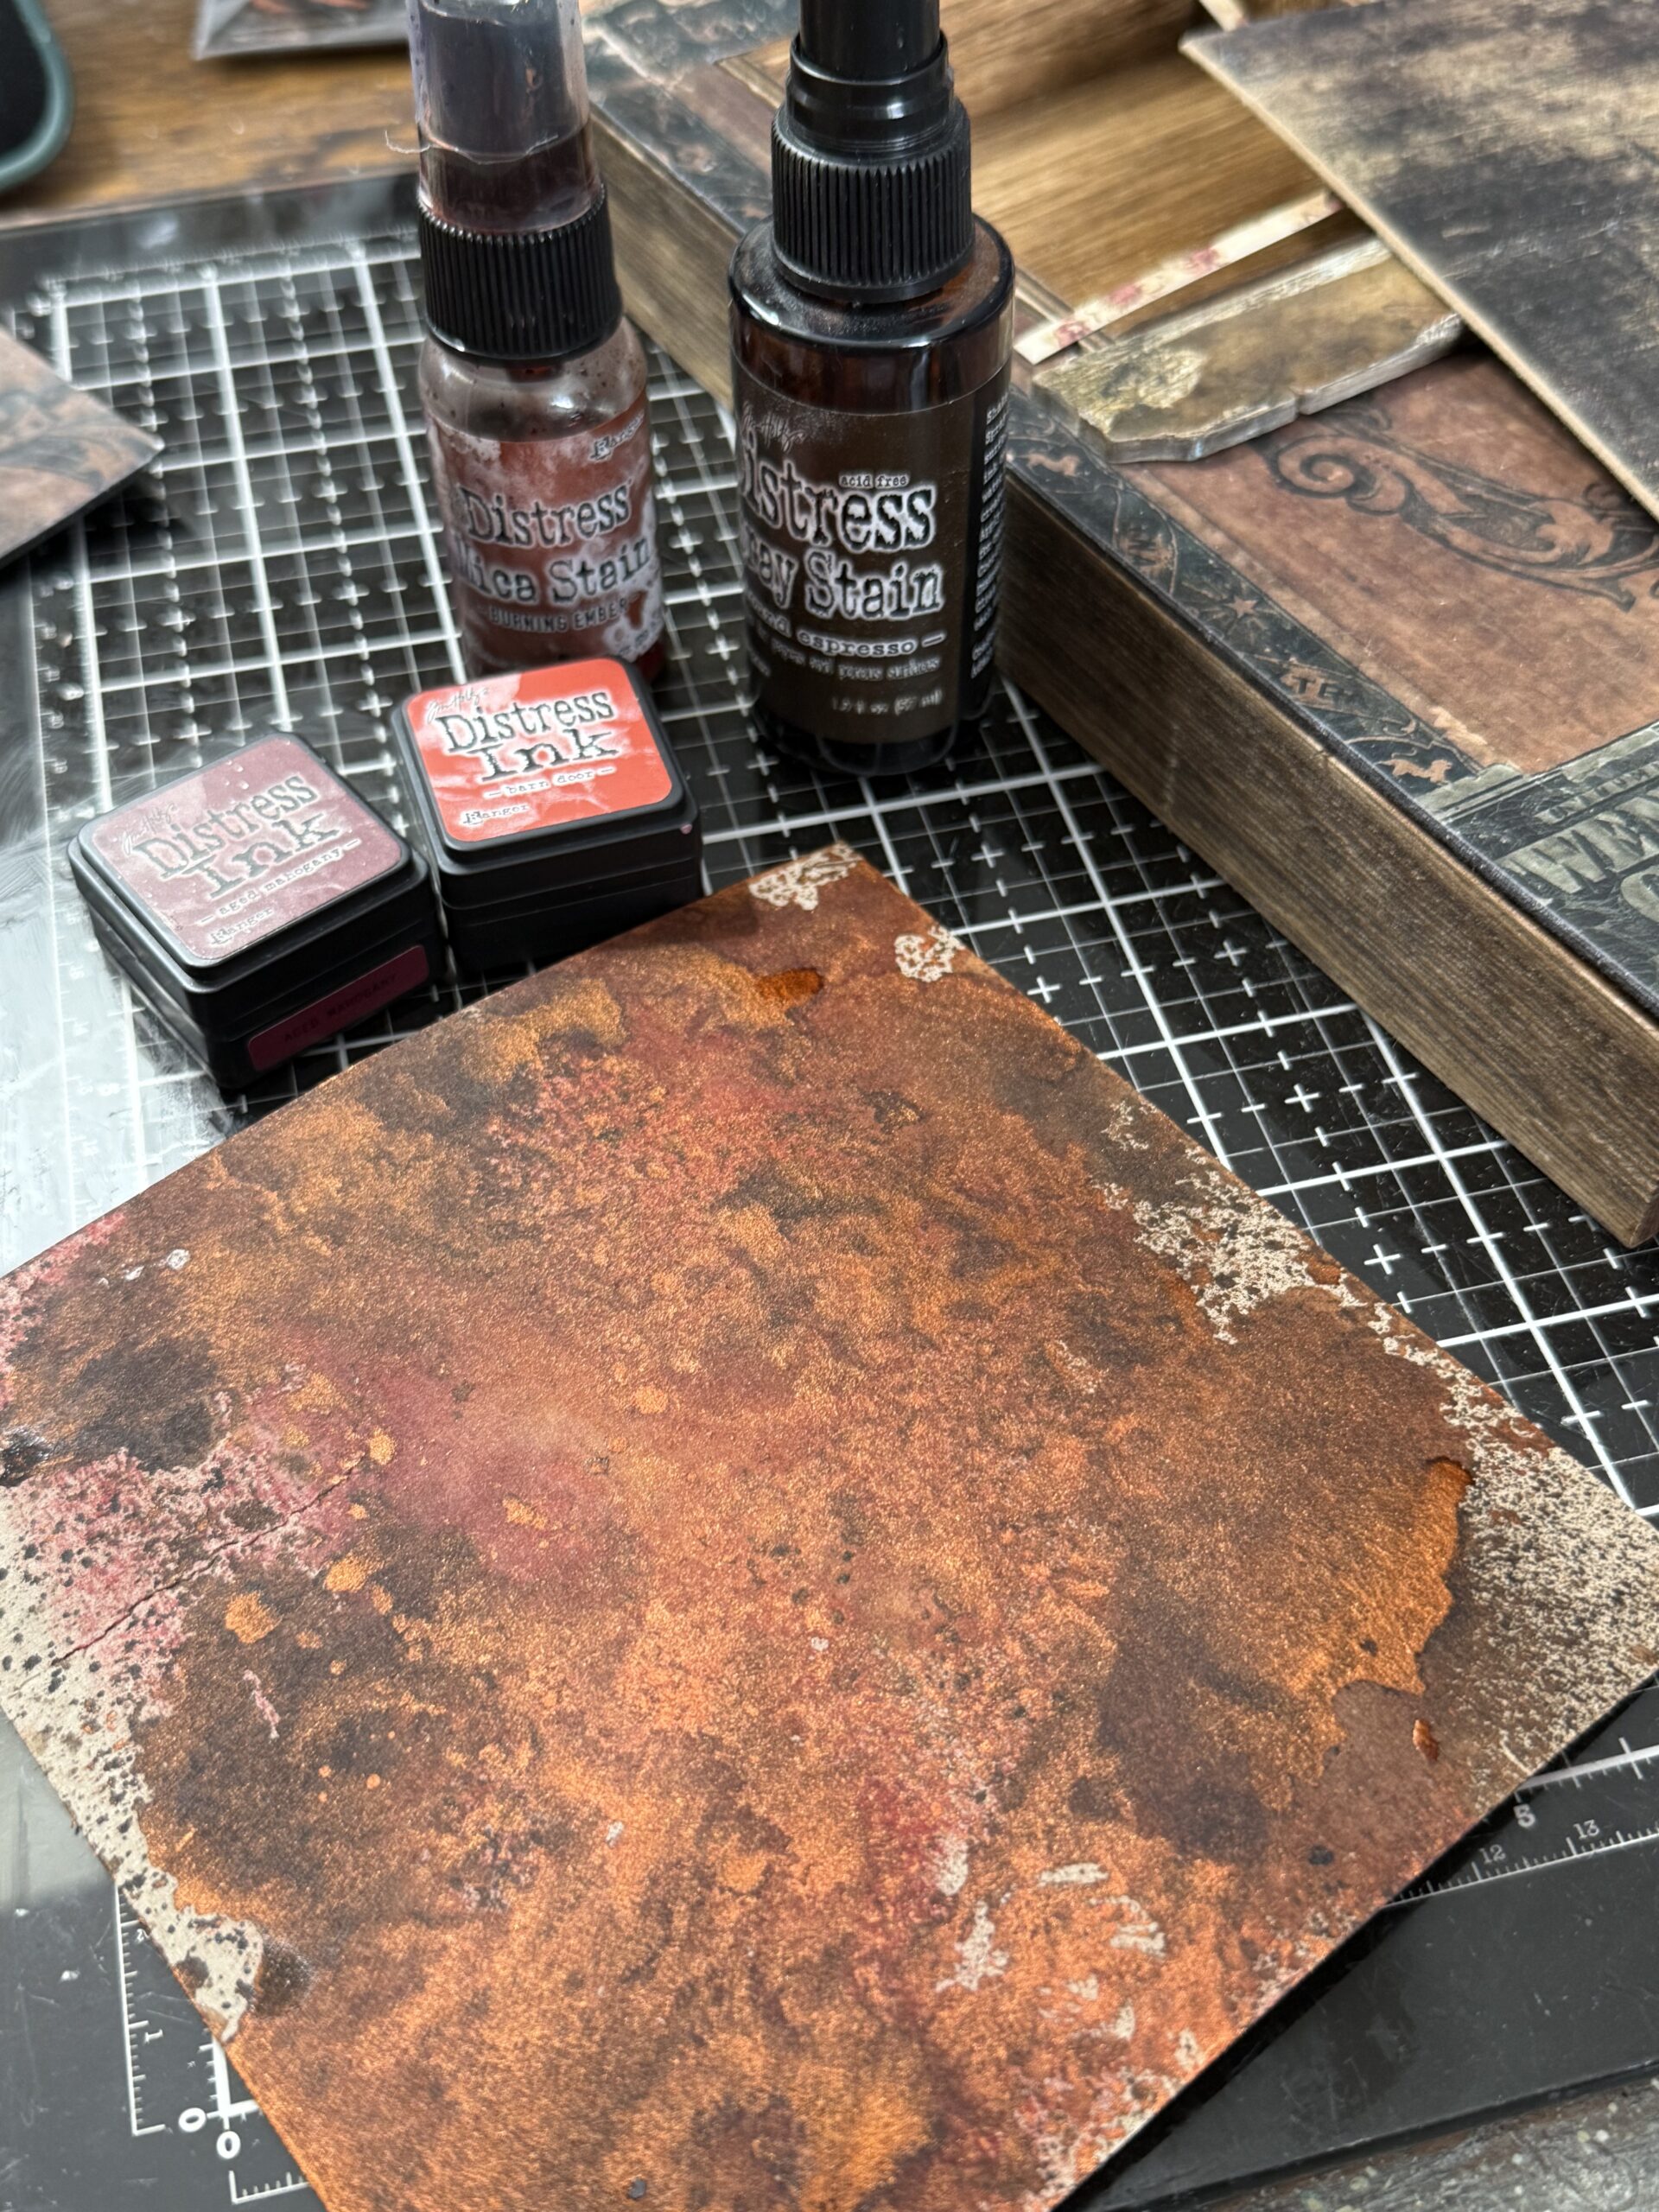
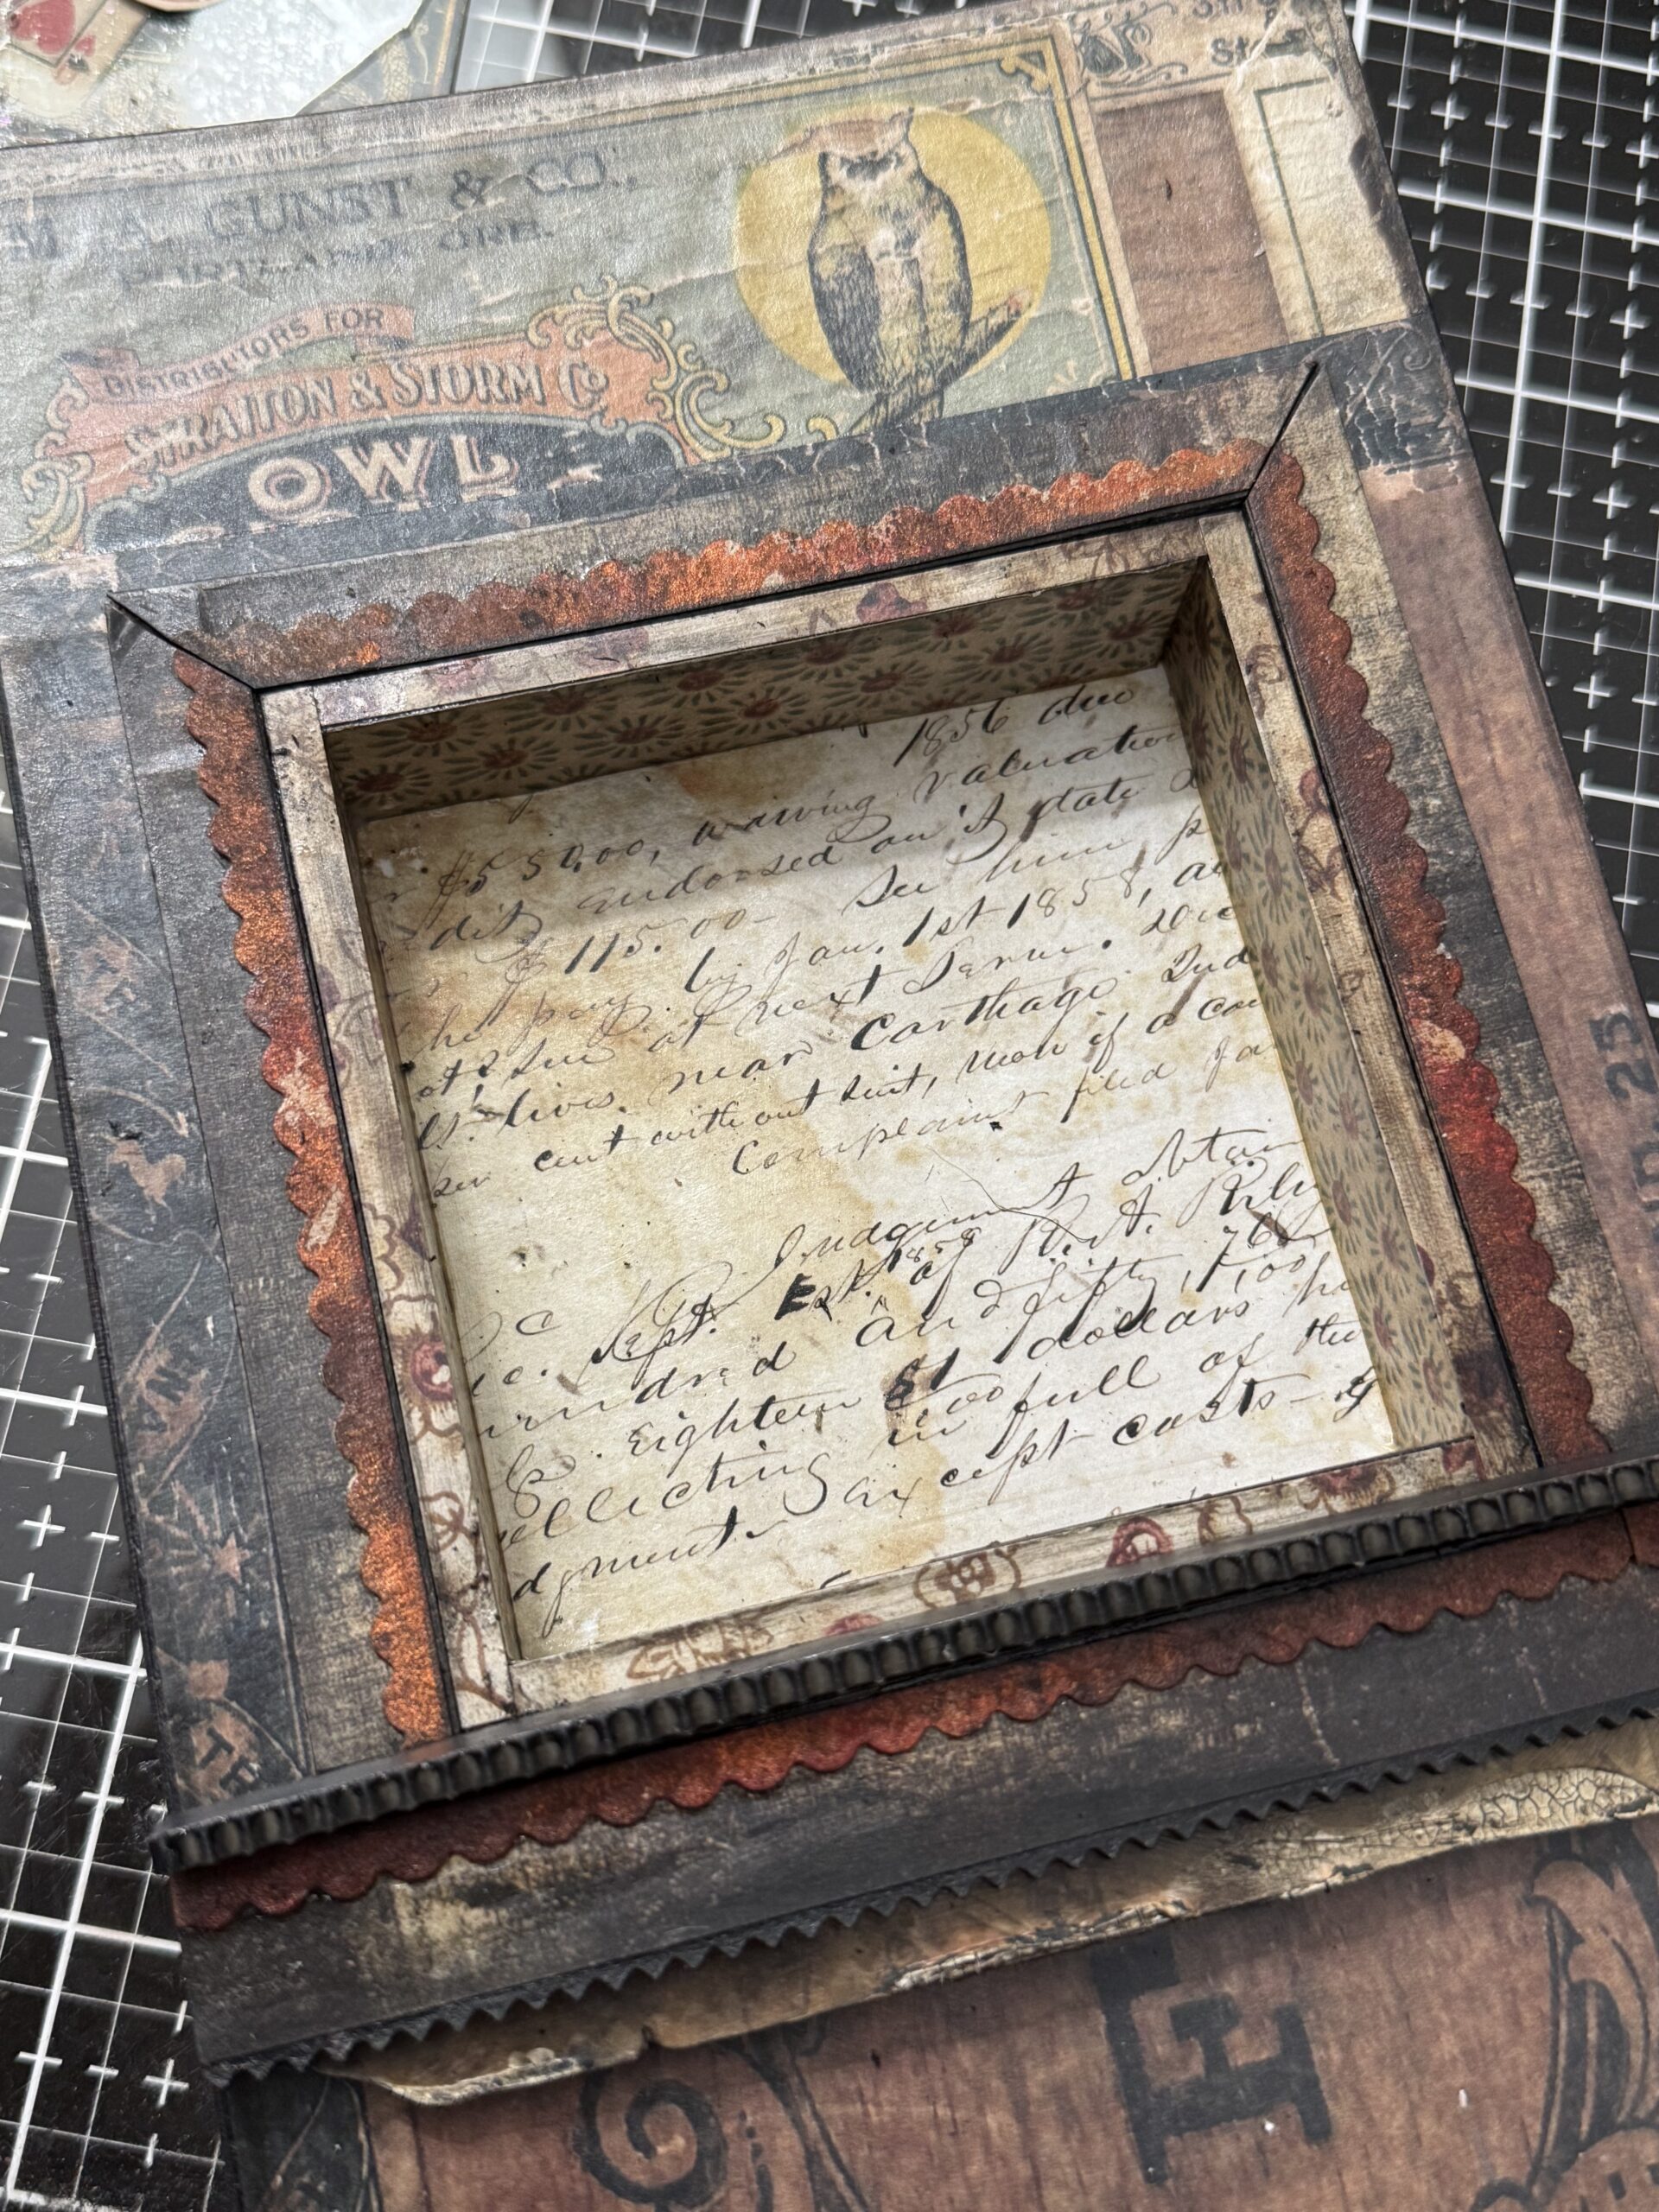
This piece was trimmed using a pair of scallop scissors and became so of the trim that I added to the frame around the vignette box where all the shrine pieces would be added later on, you can see it in this photo below.
I began arranging the area where the small square vignette would be added, then traced the square where it would fit on the back of the chipboard and cut the square out using an exacto knife.
I added Backdrop paper pieces on the inside of the small vignette square including the edges of the box by using collage medium to apply them. Then I created some trim pieces for around the box using some more of those scrap papers. I cut them to size (about 1/2″) and adhered them to some chipboard to give them more stability. The scalloped trims were cut and added to the trim pieces using collage medium. I cut the strips to create mitered corners and set them aside. I would arrange all the pieces once I had all the other elements complete. You’ll see in the photo below where I ended up using another piece of Pinked Etcetera Trim to make a shelf for my shrine elements. These pieces were adhered together to create a shelf, then later added once the shelf was dry.
The embellishments for the shrine…
The Roses
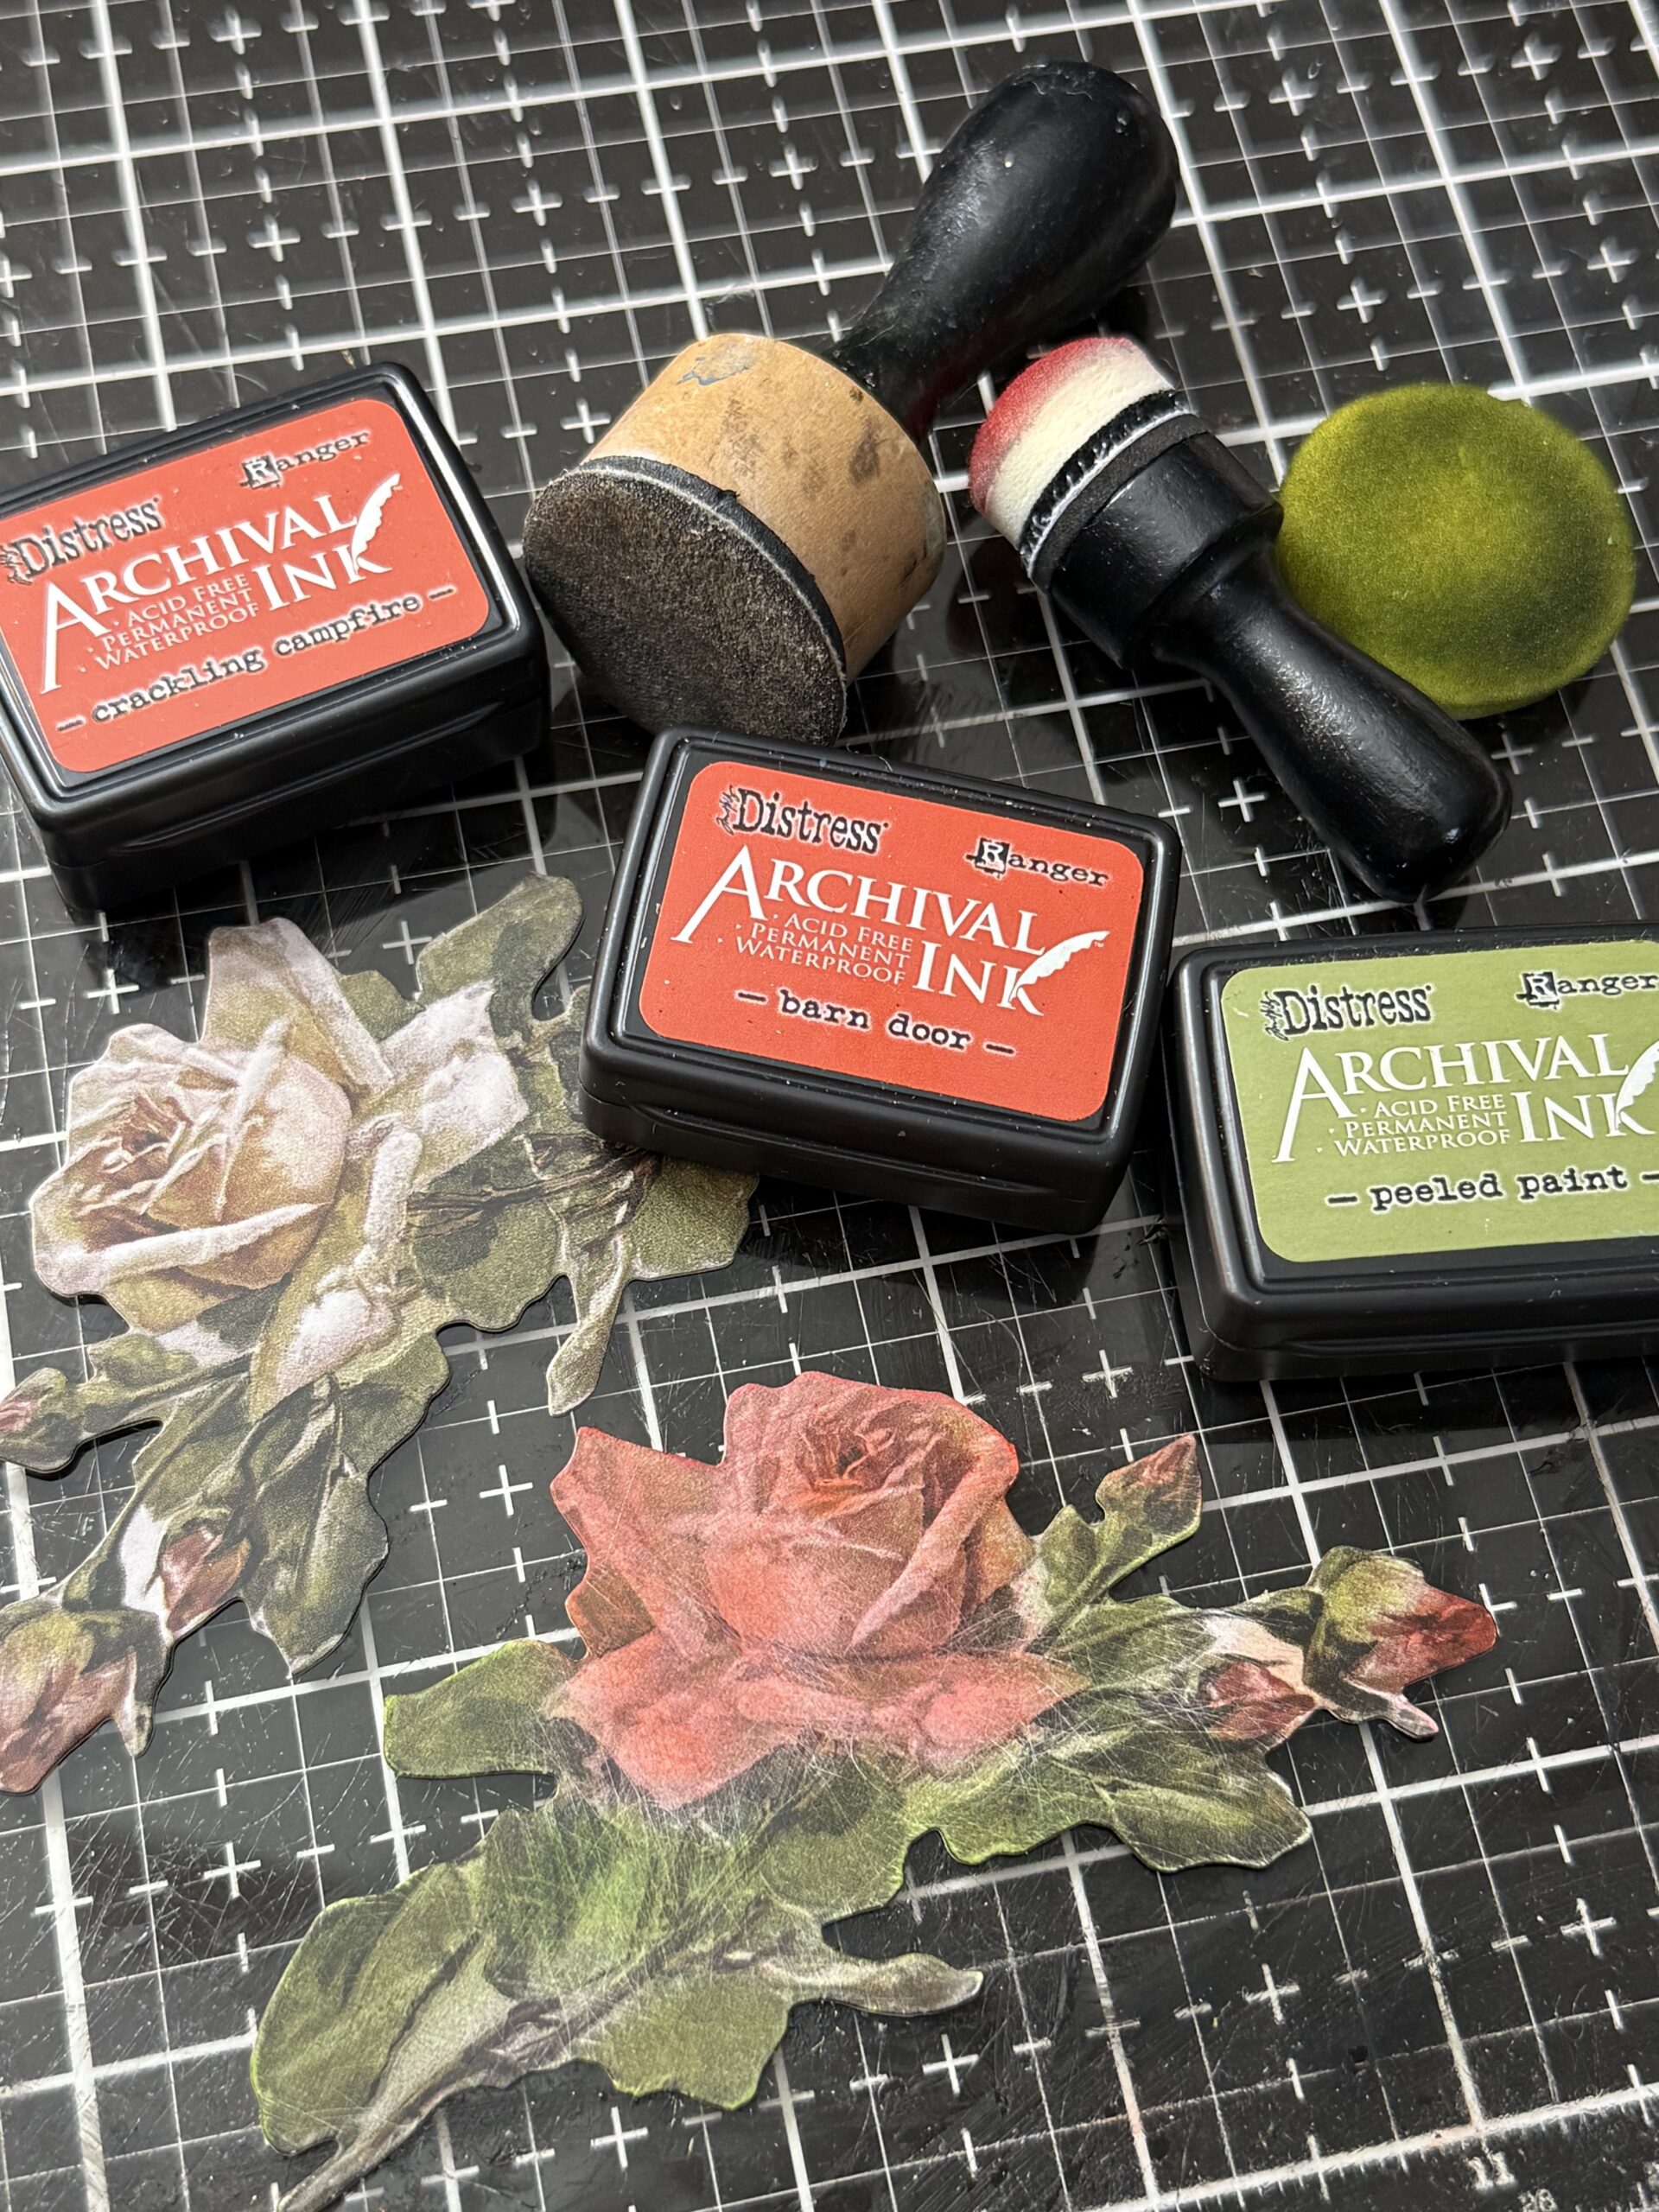
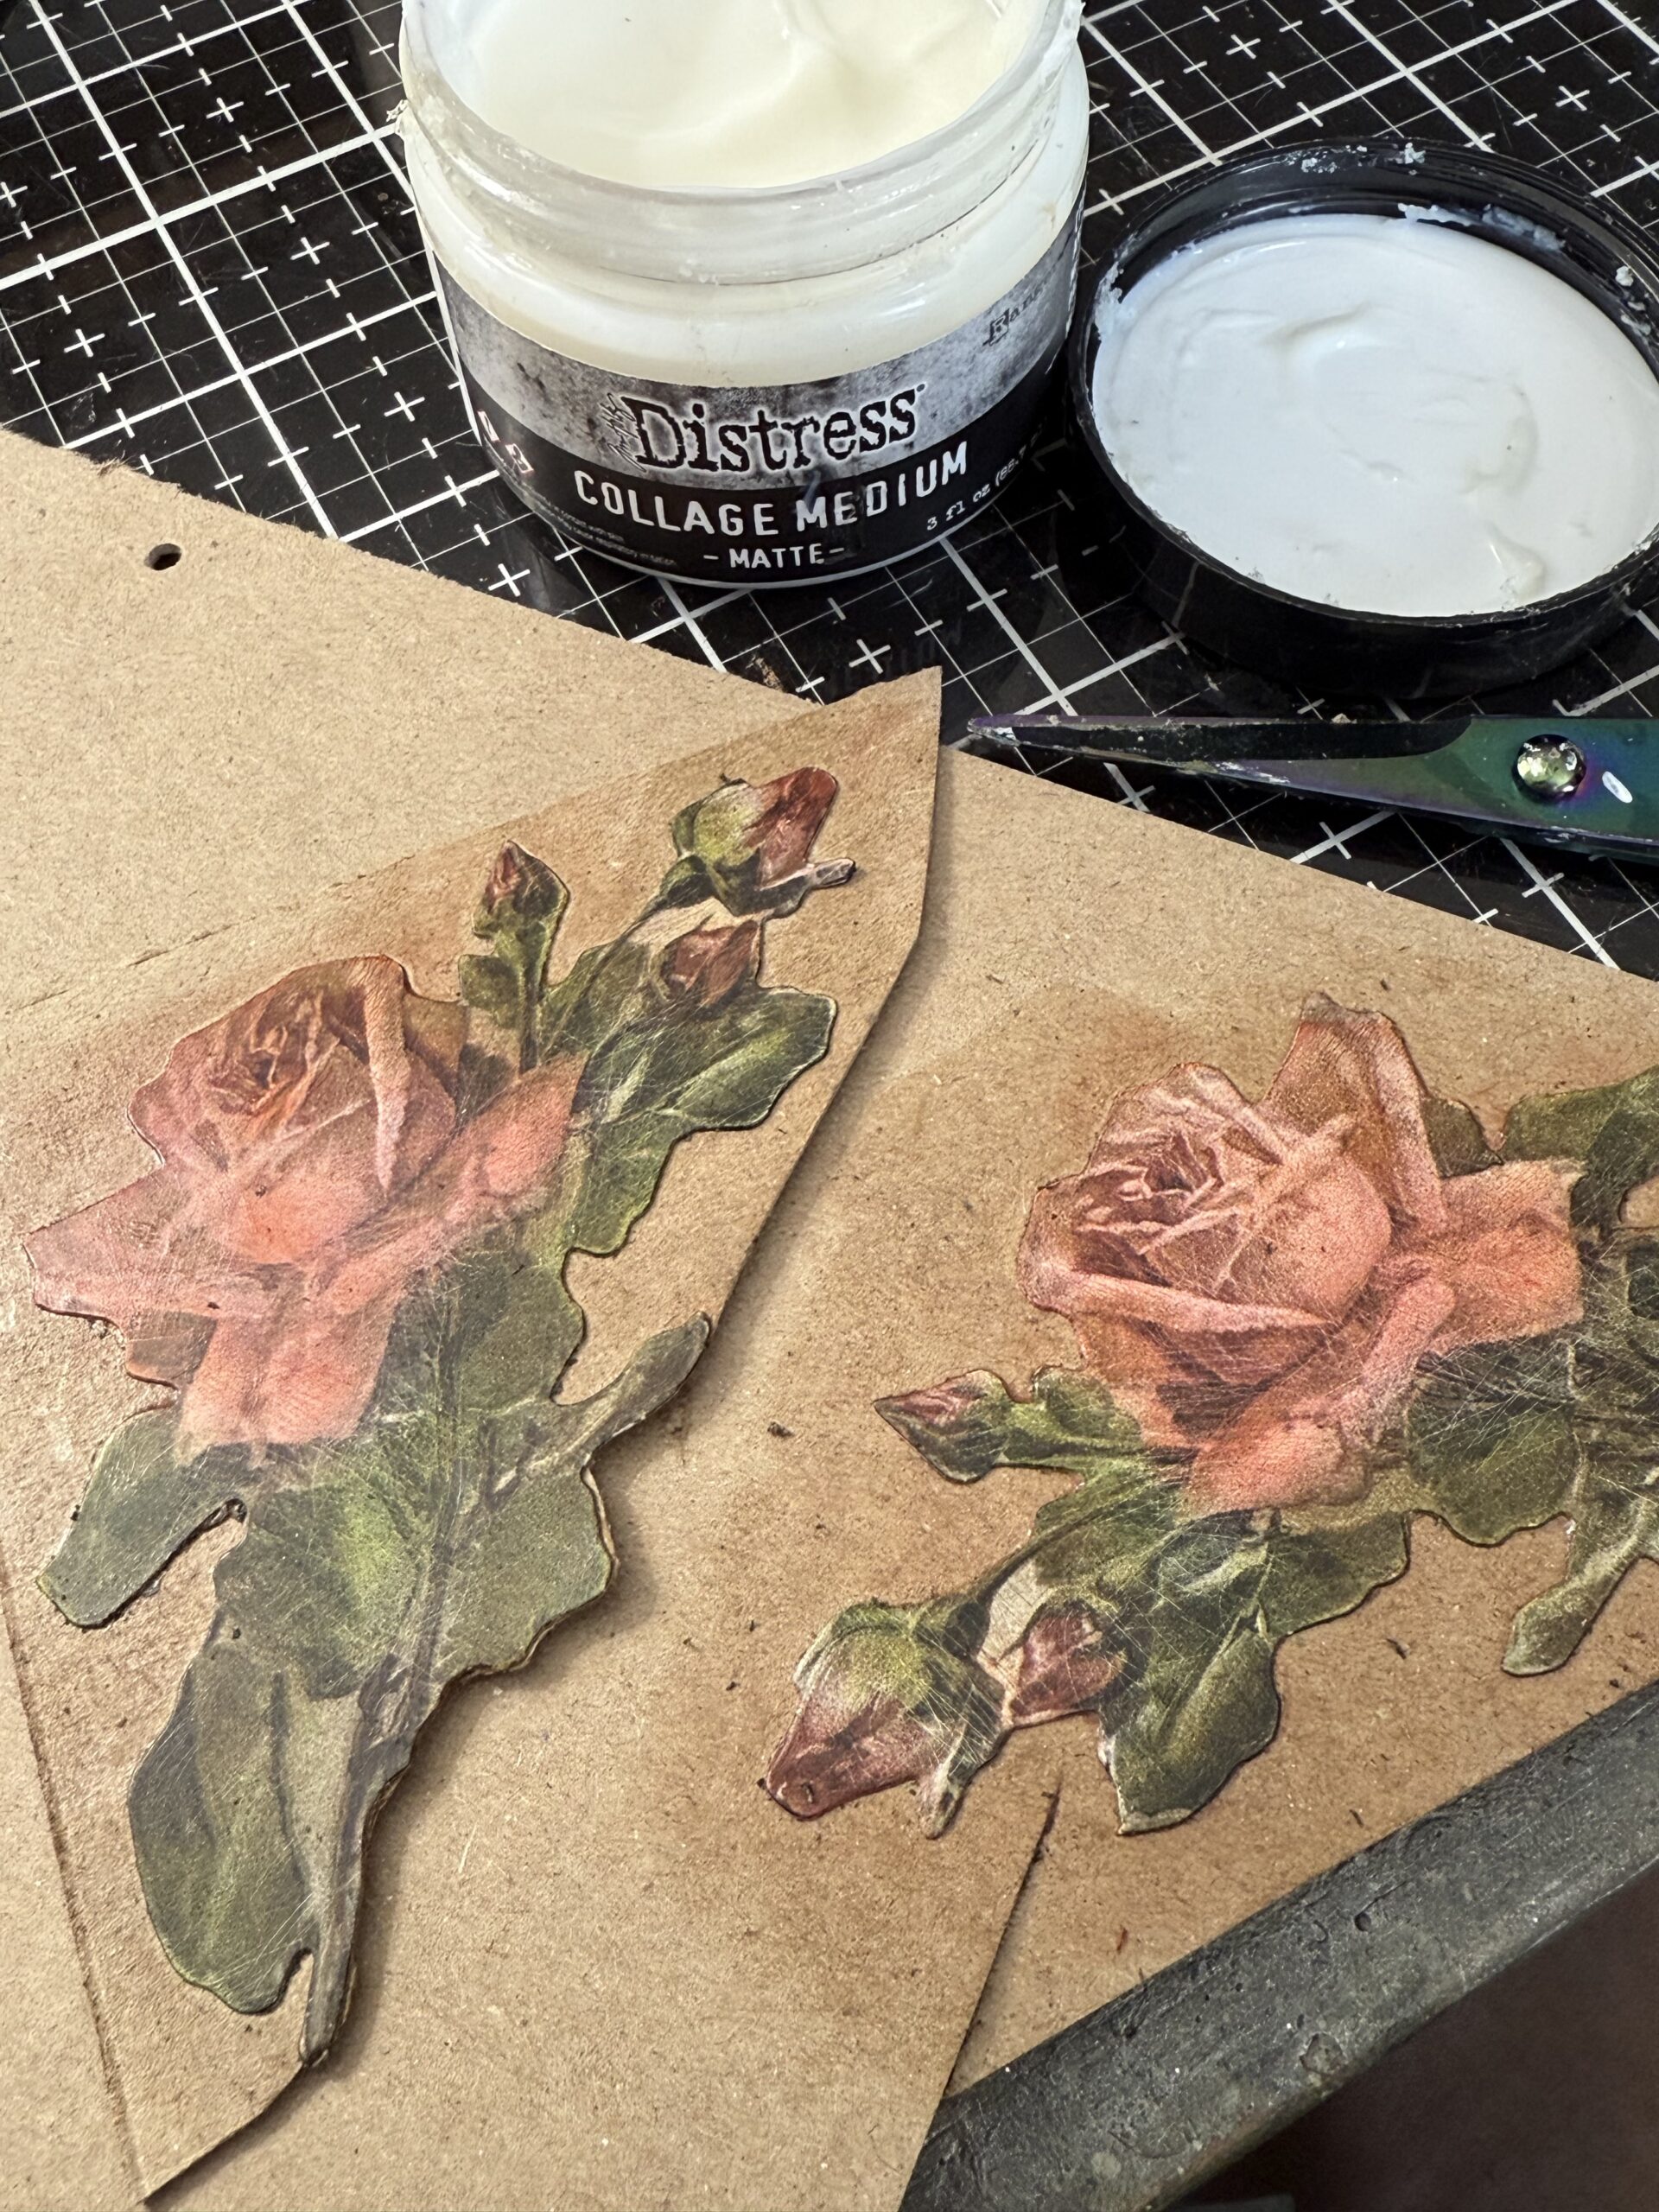
The rose pieces I used to embellish the shrine came from the idea-ology Halloween Layers pack. These are slick pieces that are similar to chipboard weight but able to be colored with distress crayons and permanent colors like Alcohol Inks or as I did, Archival Inks. The roses in the pack are cream, any good gypsy loves red roses…so I colored them up!
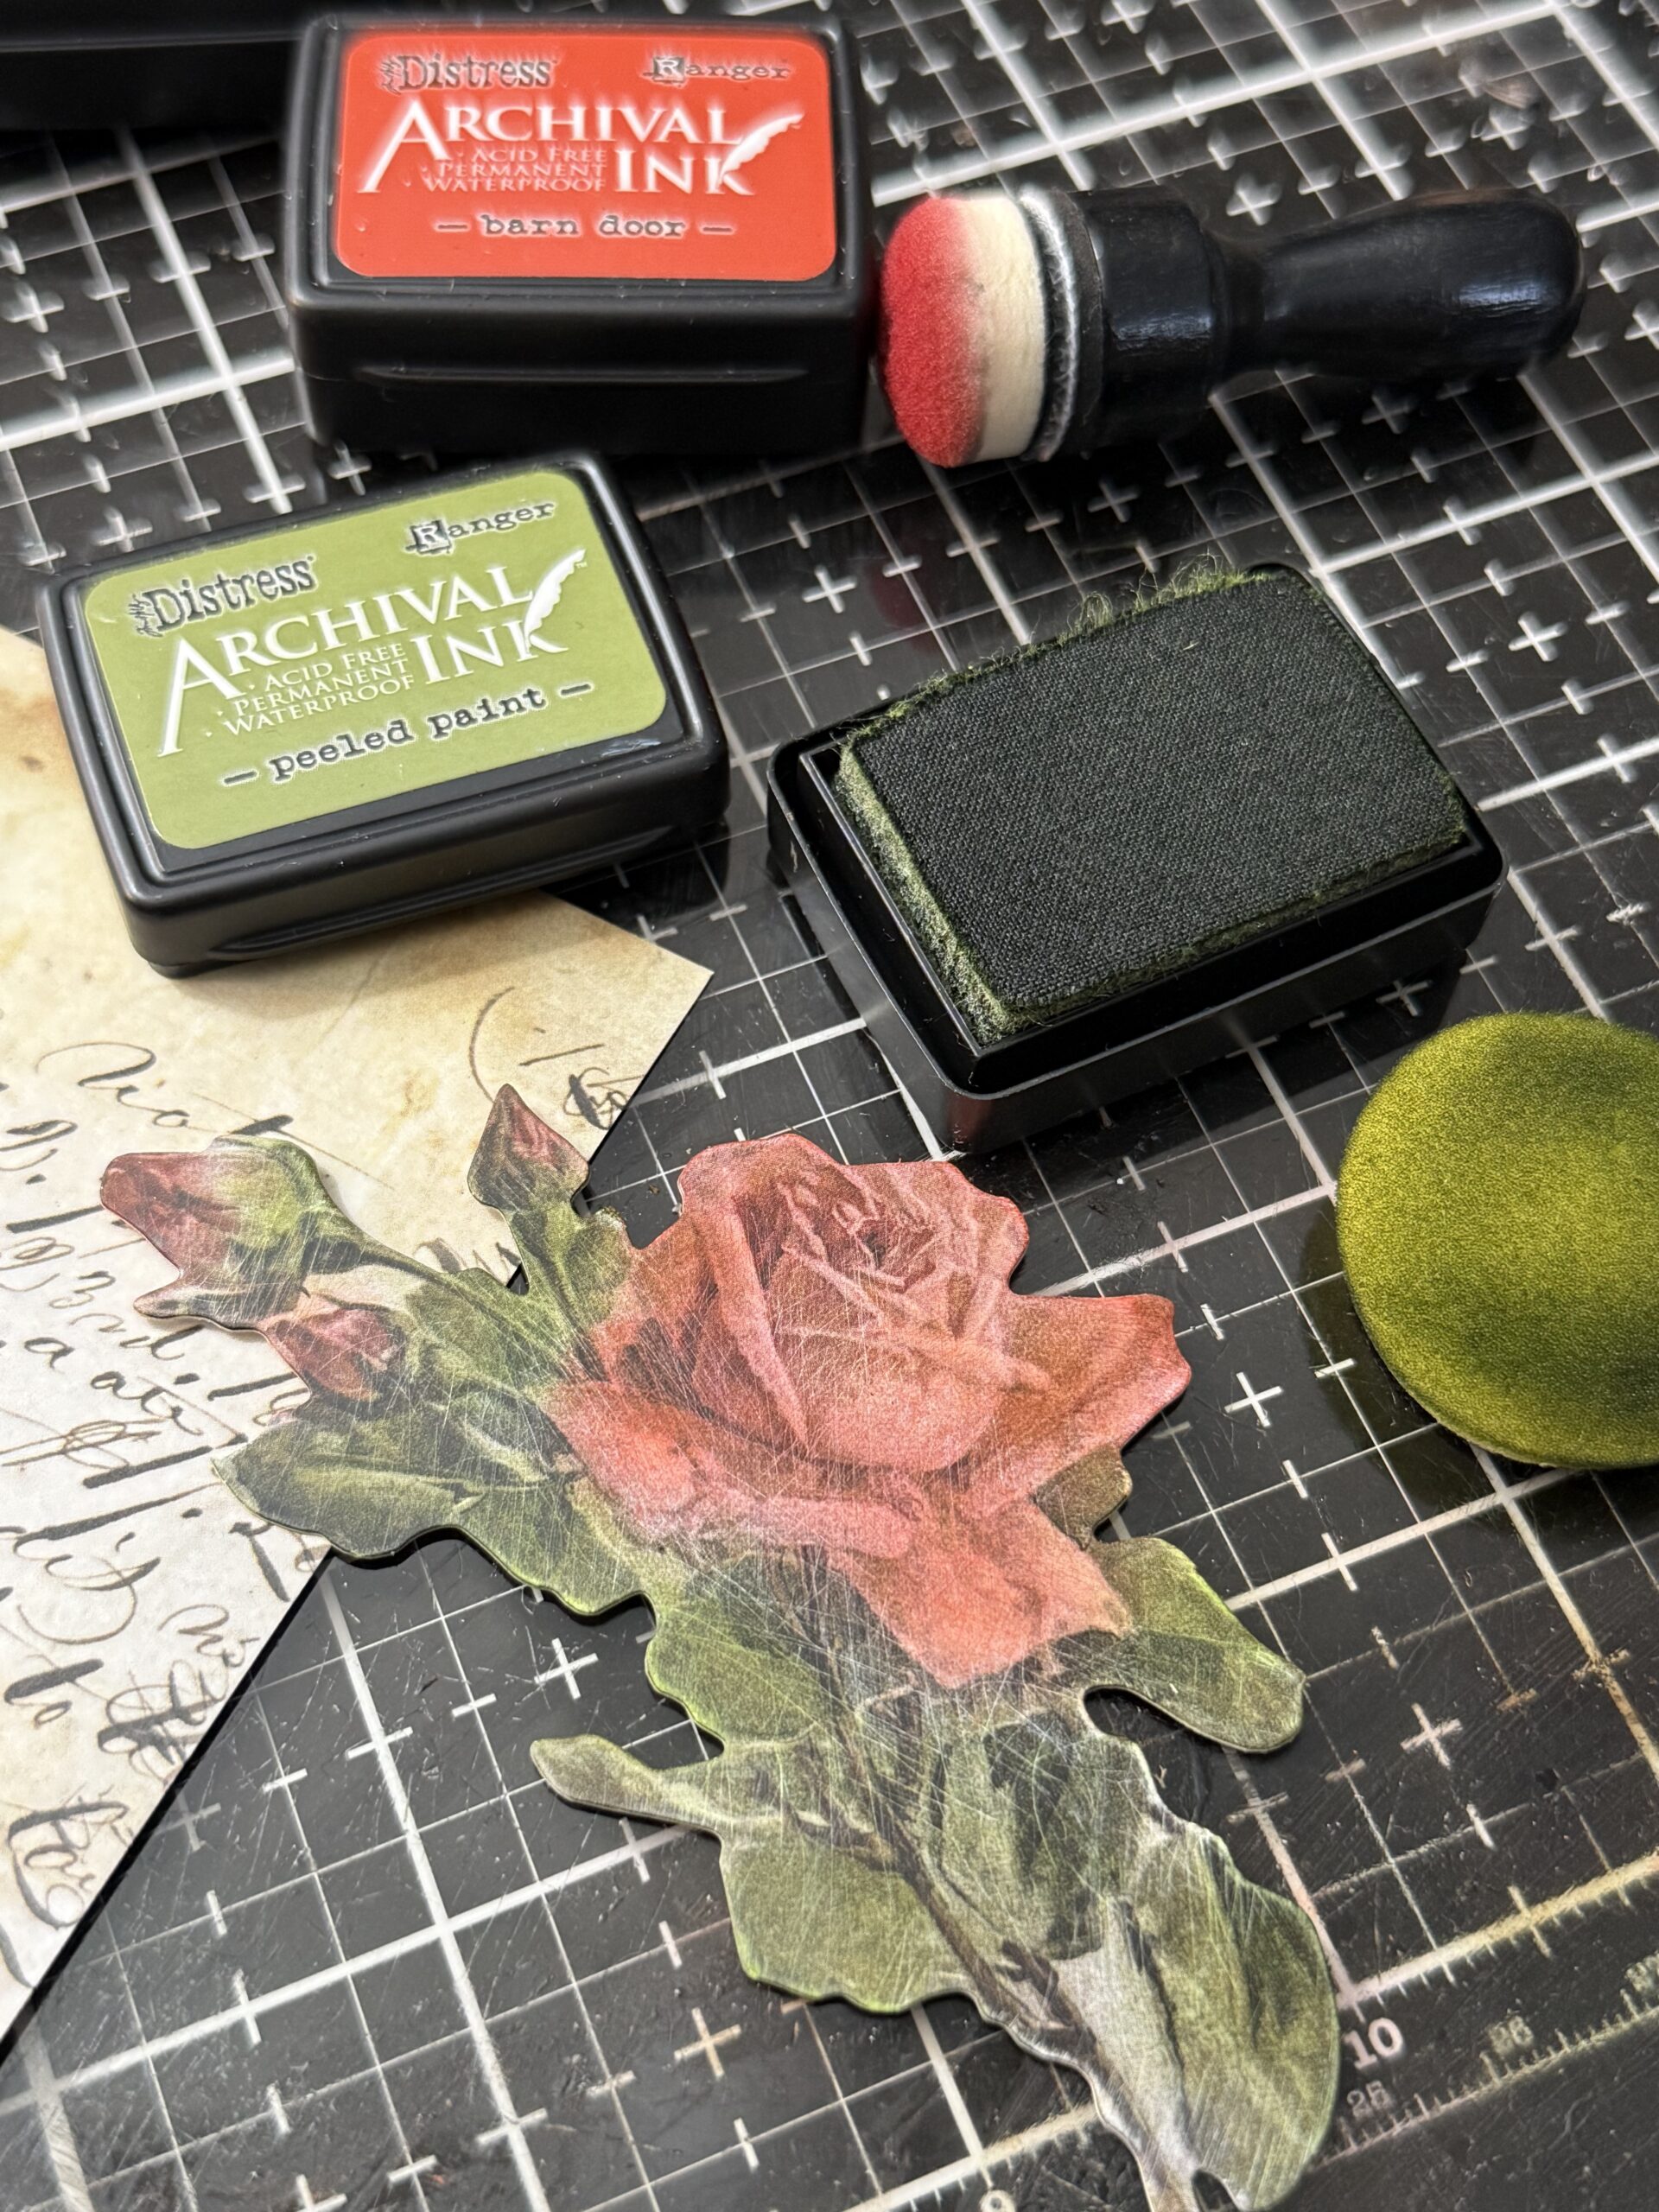
I started by using my sanding grip to scratch up the roses a bit to add scuff marks and age. Then, using tiny blending tools and Archival Ink, I added the color being sure to keep the red on the flower and the green on the leaves, hence the tiny blending tool, it works great for little areas. Then I dried the ink with my heat tool.
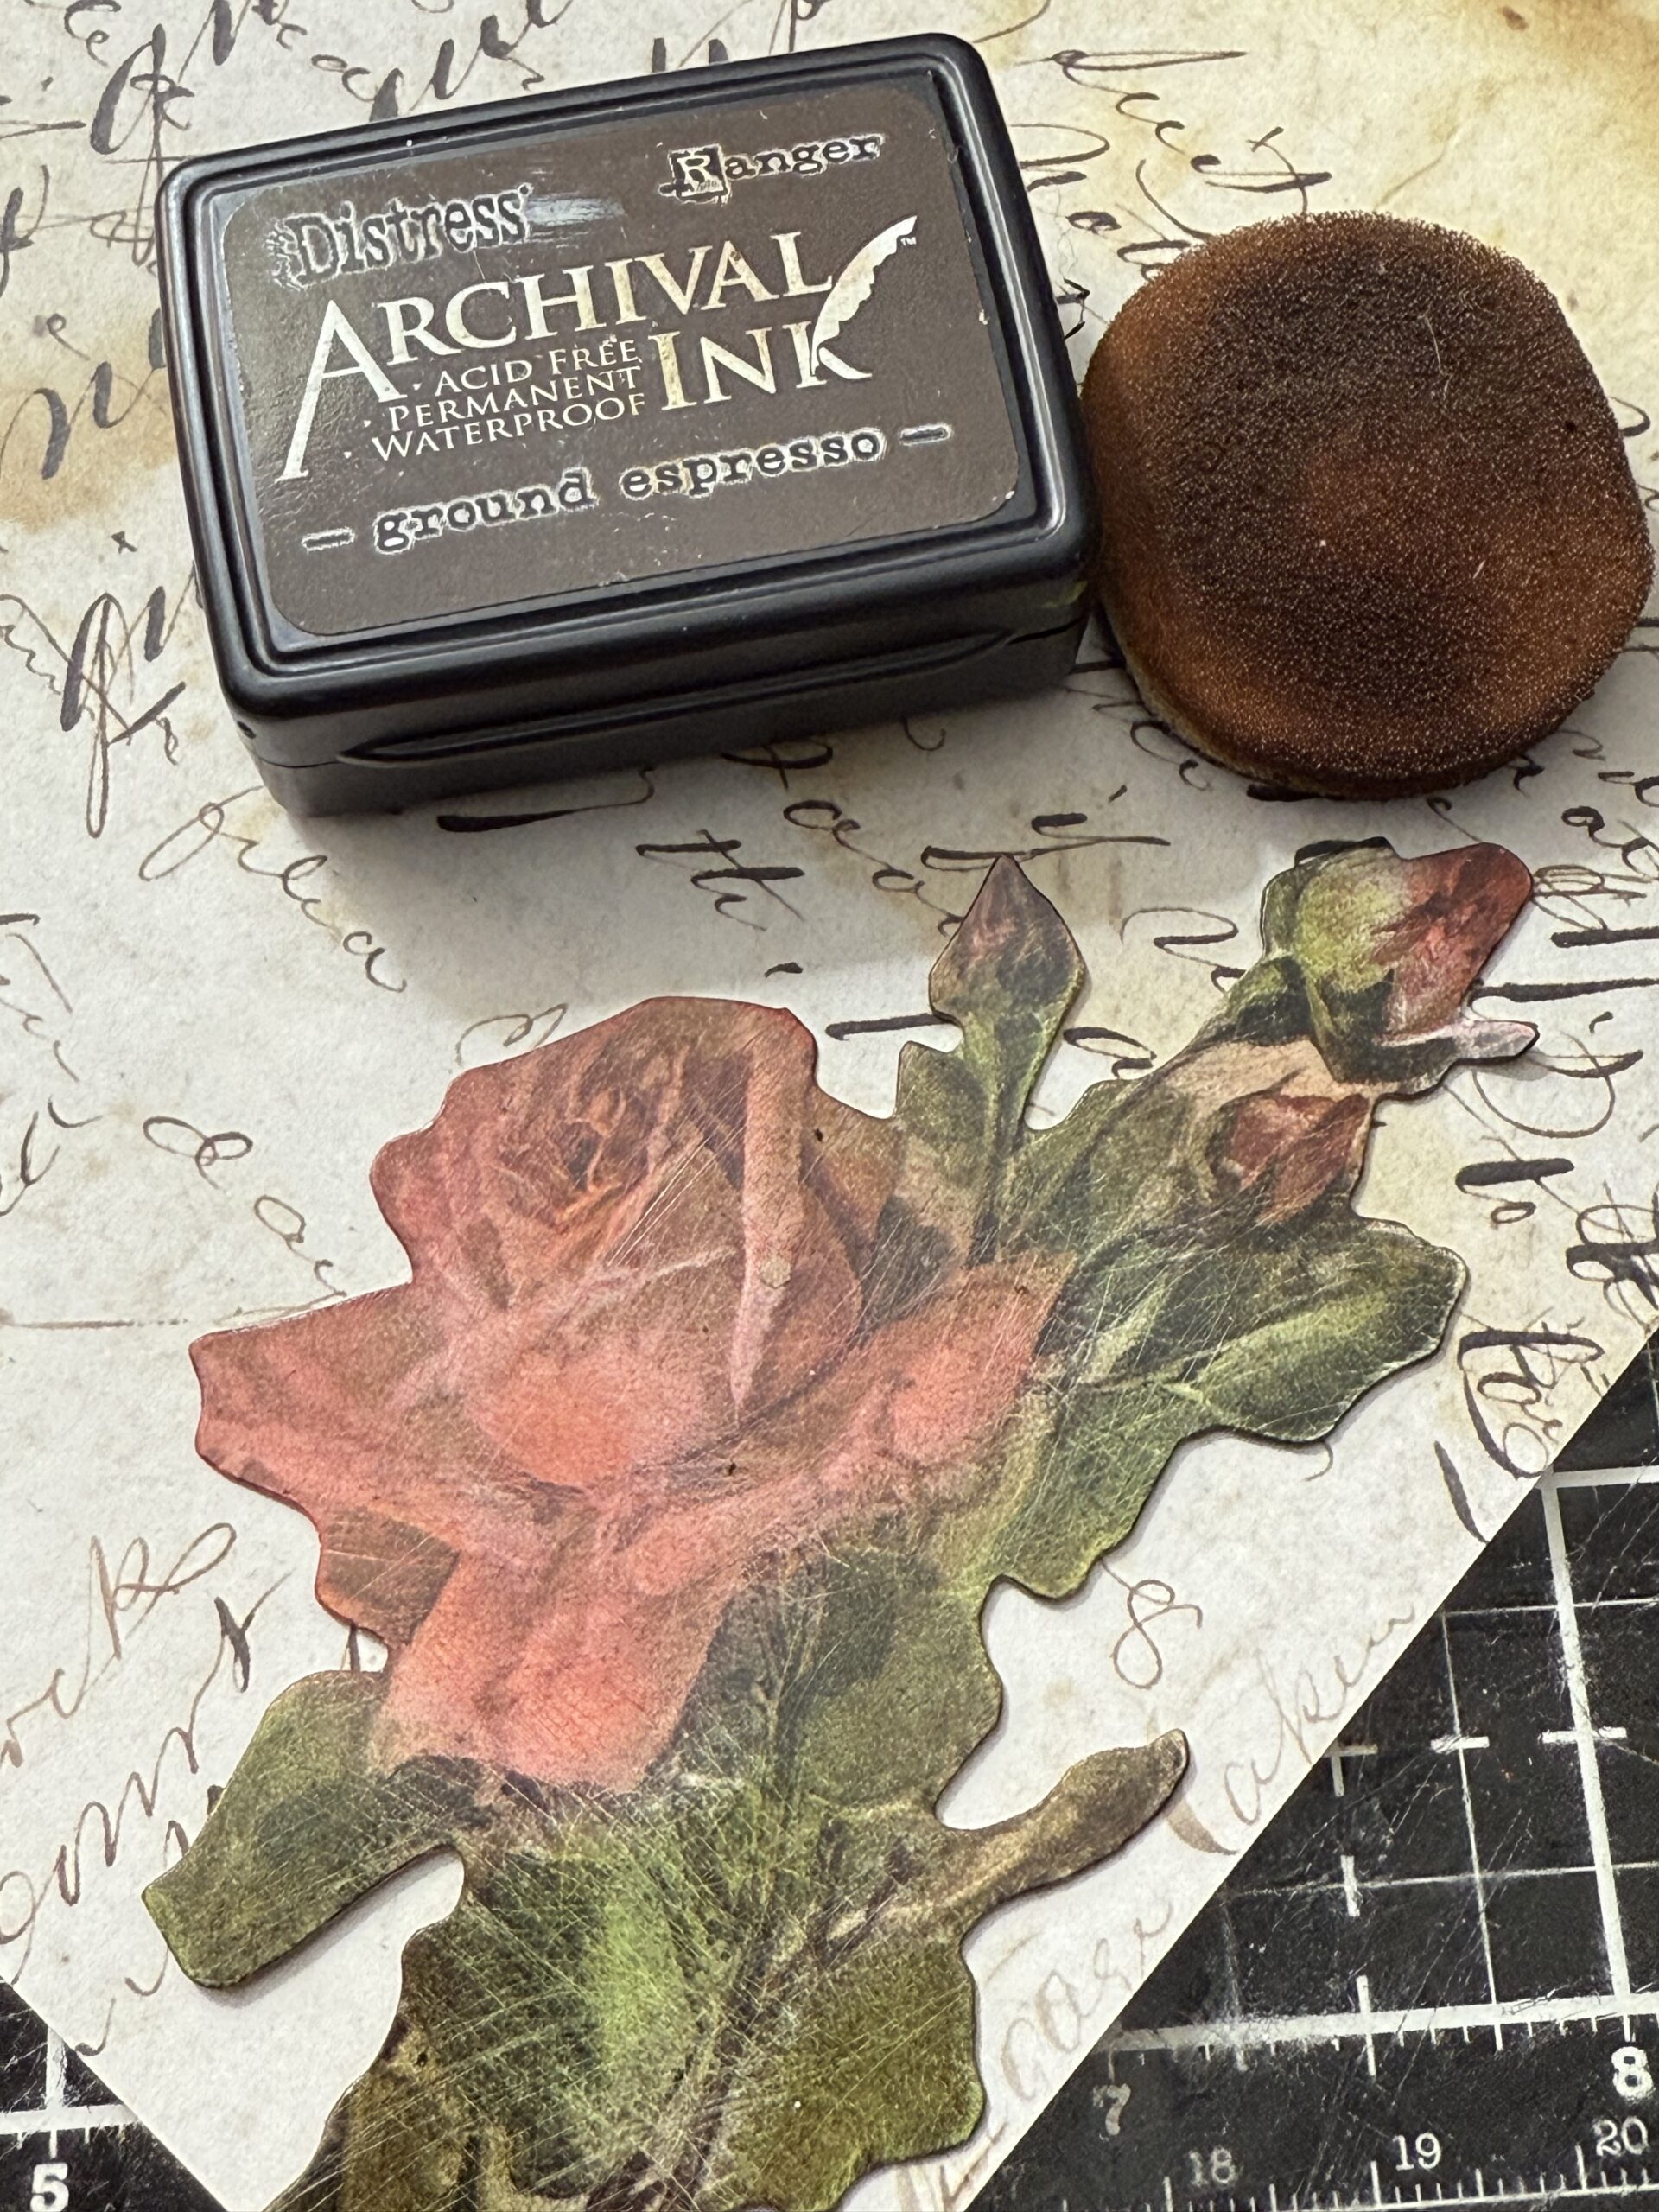
Once the red and green were dry, I used a blending tool pad and blended the area with some brown to add age, and dried it again.
Once they were both dry, I used collage medium and added them to some pieces of chipboard. I knew that these were going to be on the front of the vignette and wanted them to be more substantial of a piece, so the chipboard was the way. I added them, then used an exacto and scissors to cut around them. The collage medium was added to the fronts of them as well so that I could use Distress Crayons over top to add additional age.
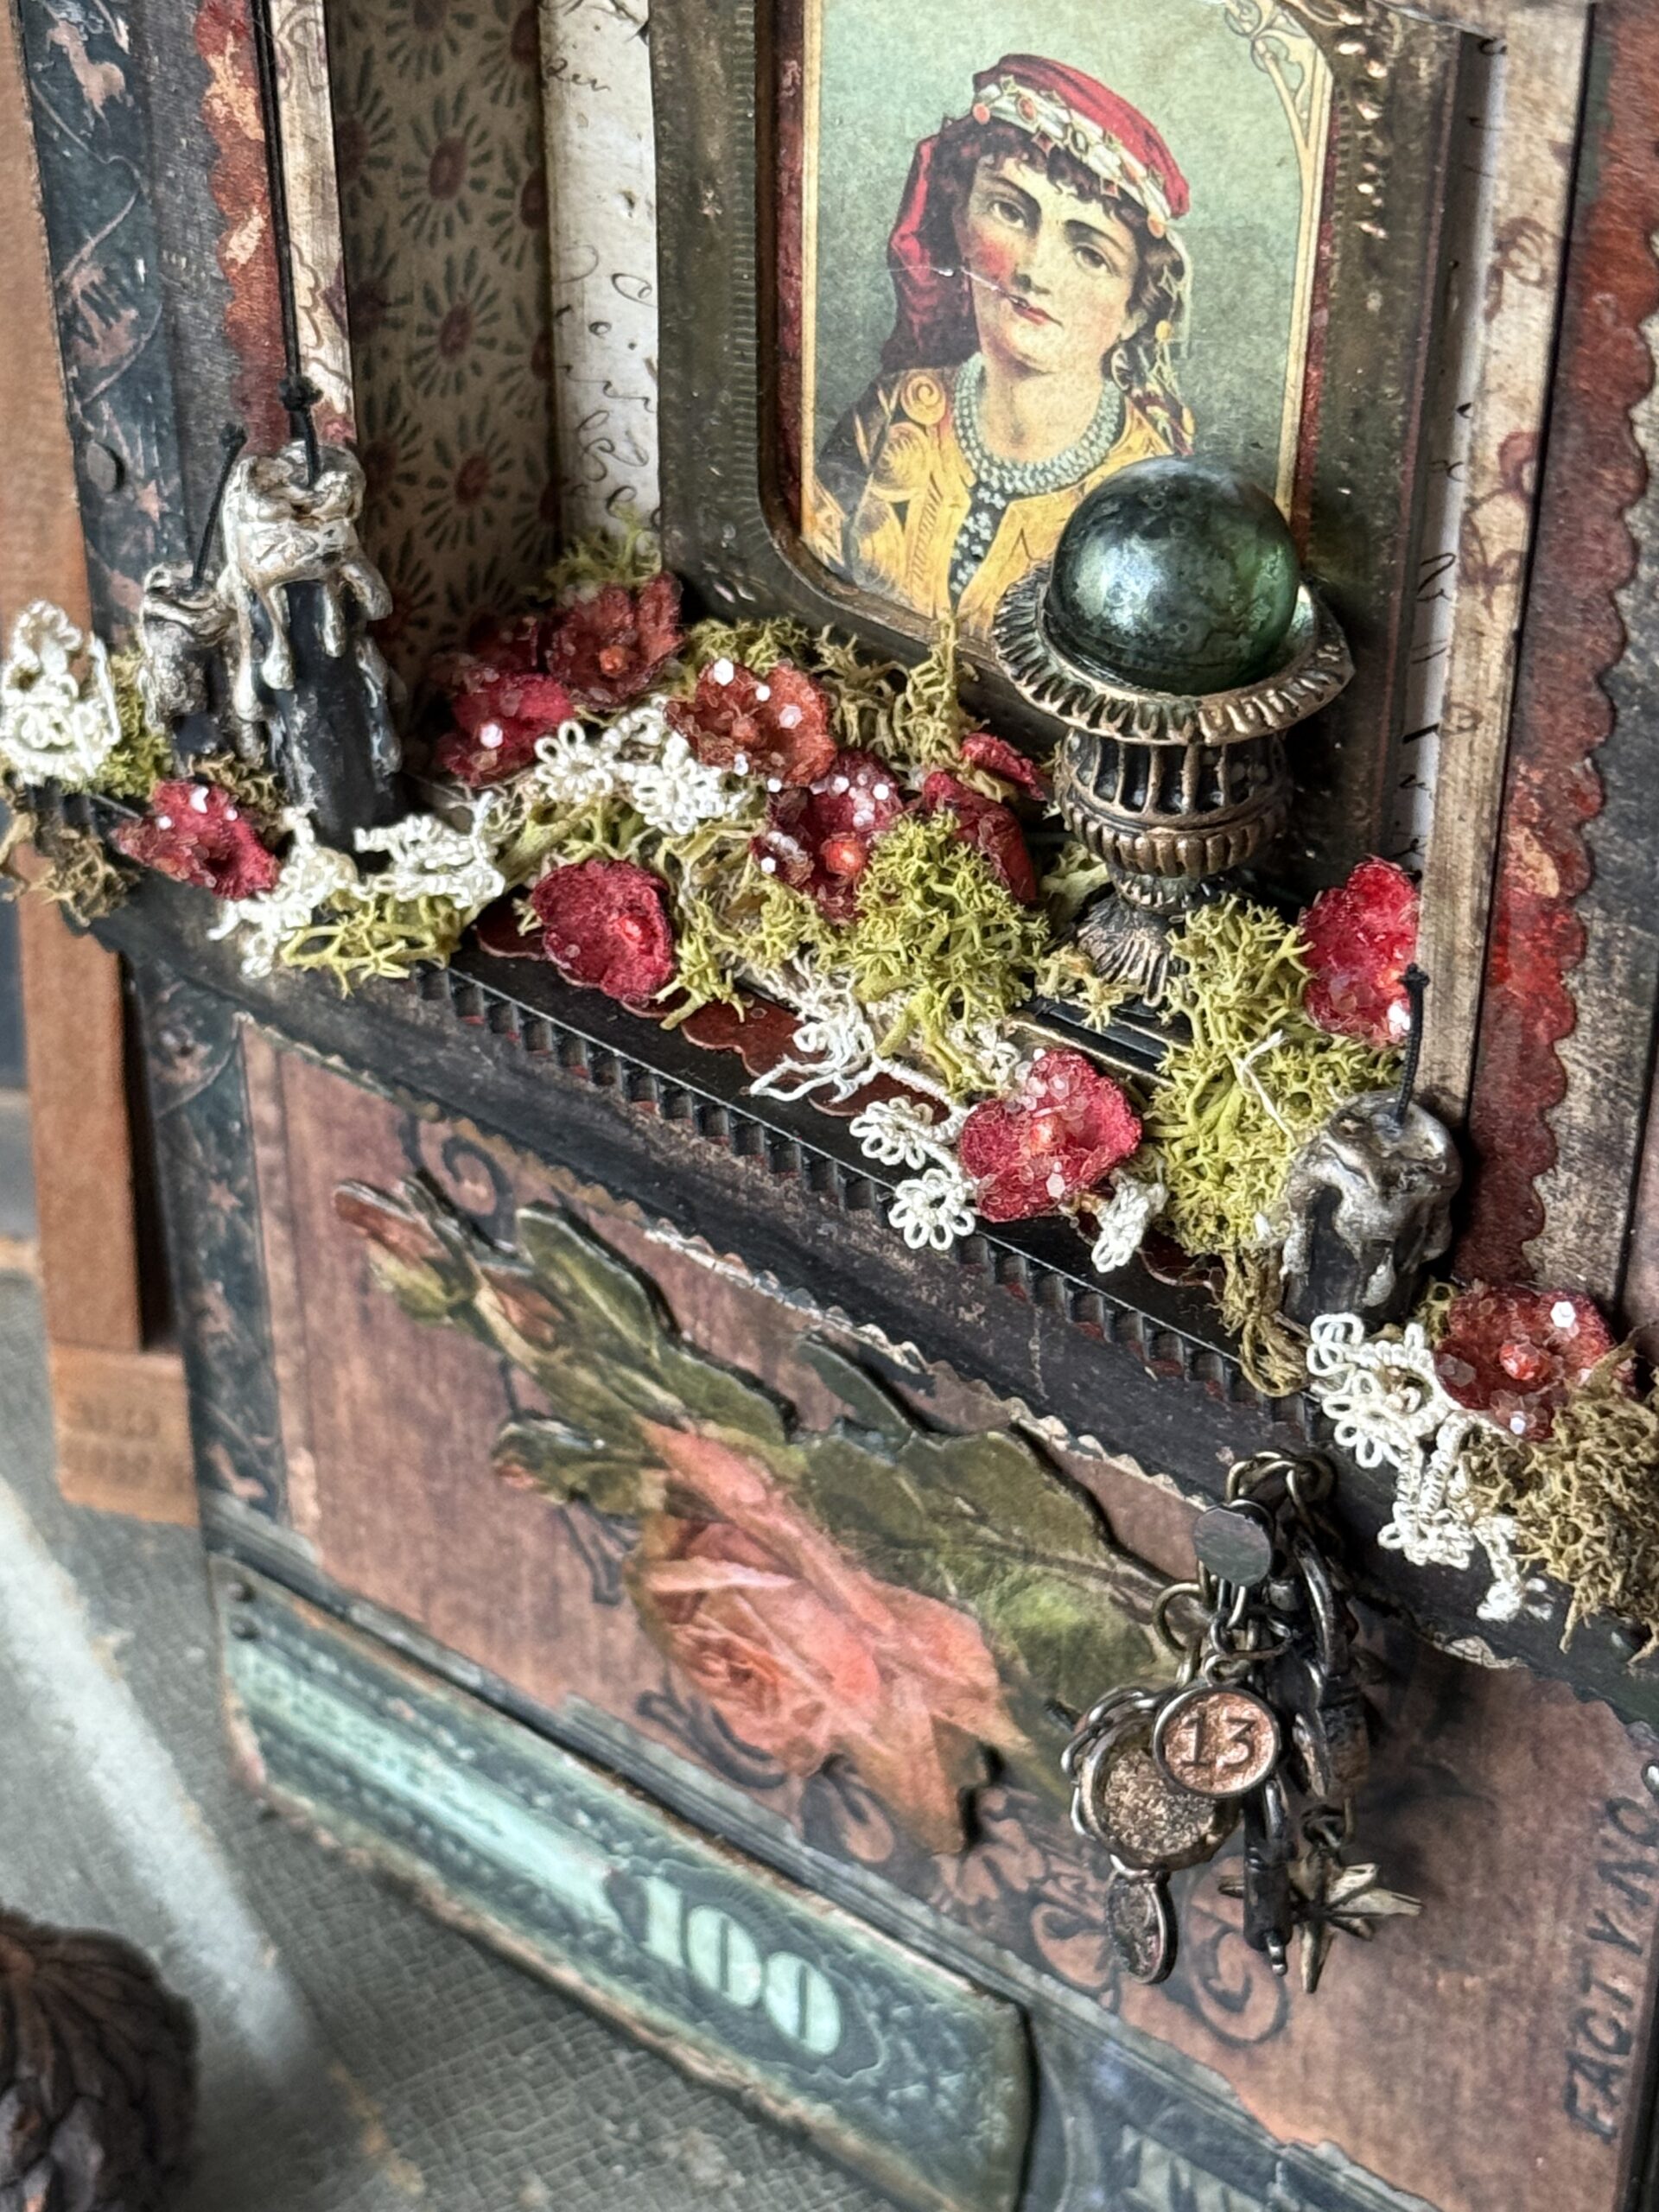
Here is where the first one ended up, at the front just under the little shelf and shrine display.
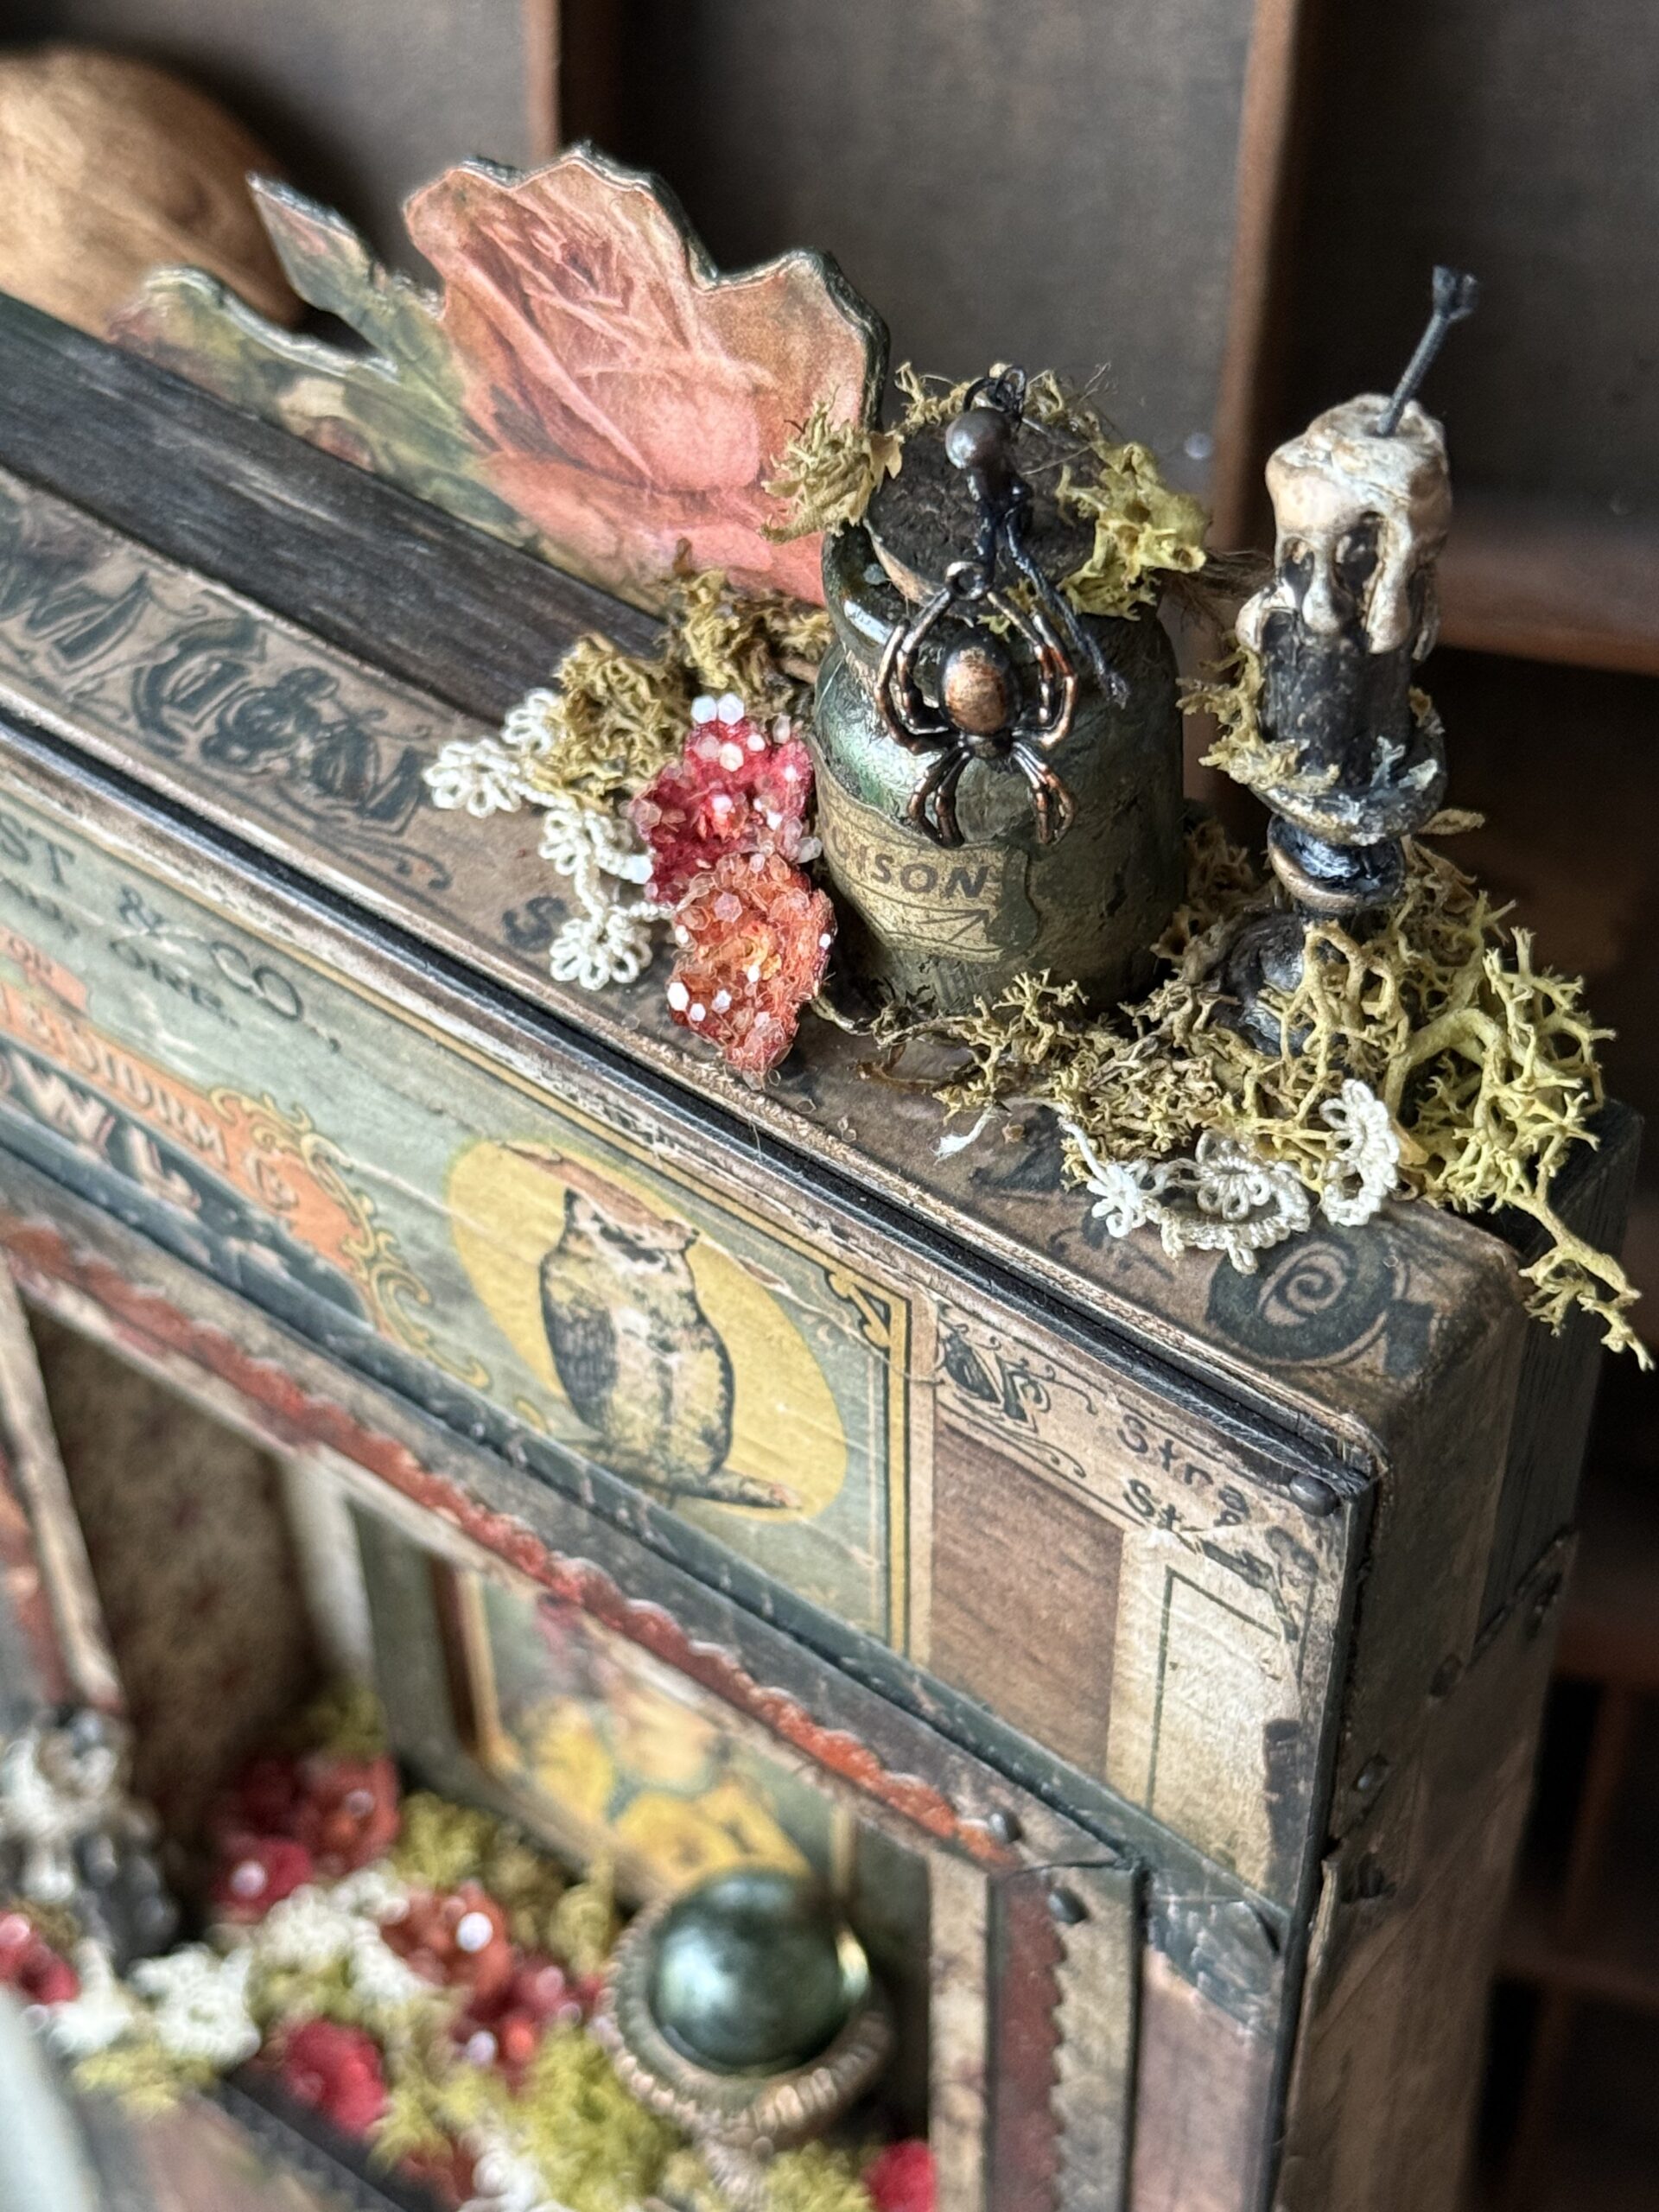
The second one was added to the top of the vignette much like an old kitchen cabinet would have a borderer decorative piece around the top, I added this to the back of the tray using some nails, again, a vintage look, my favorite!
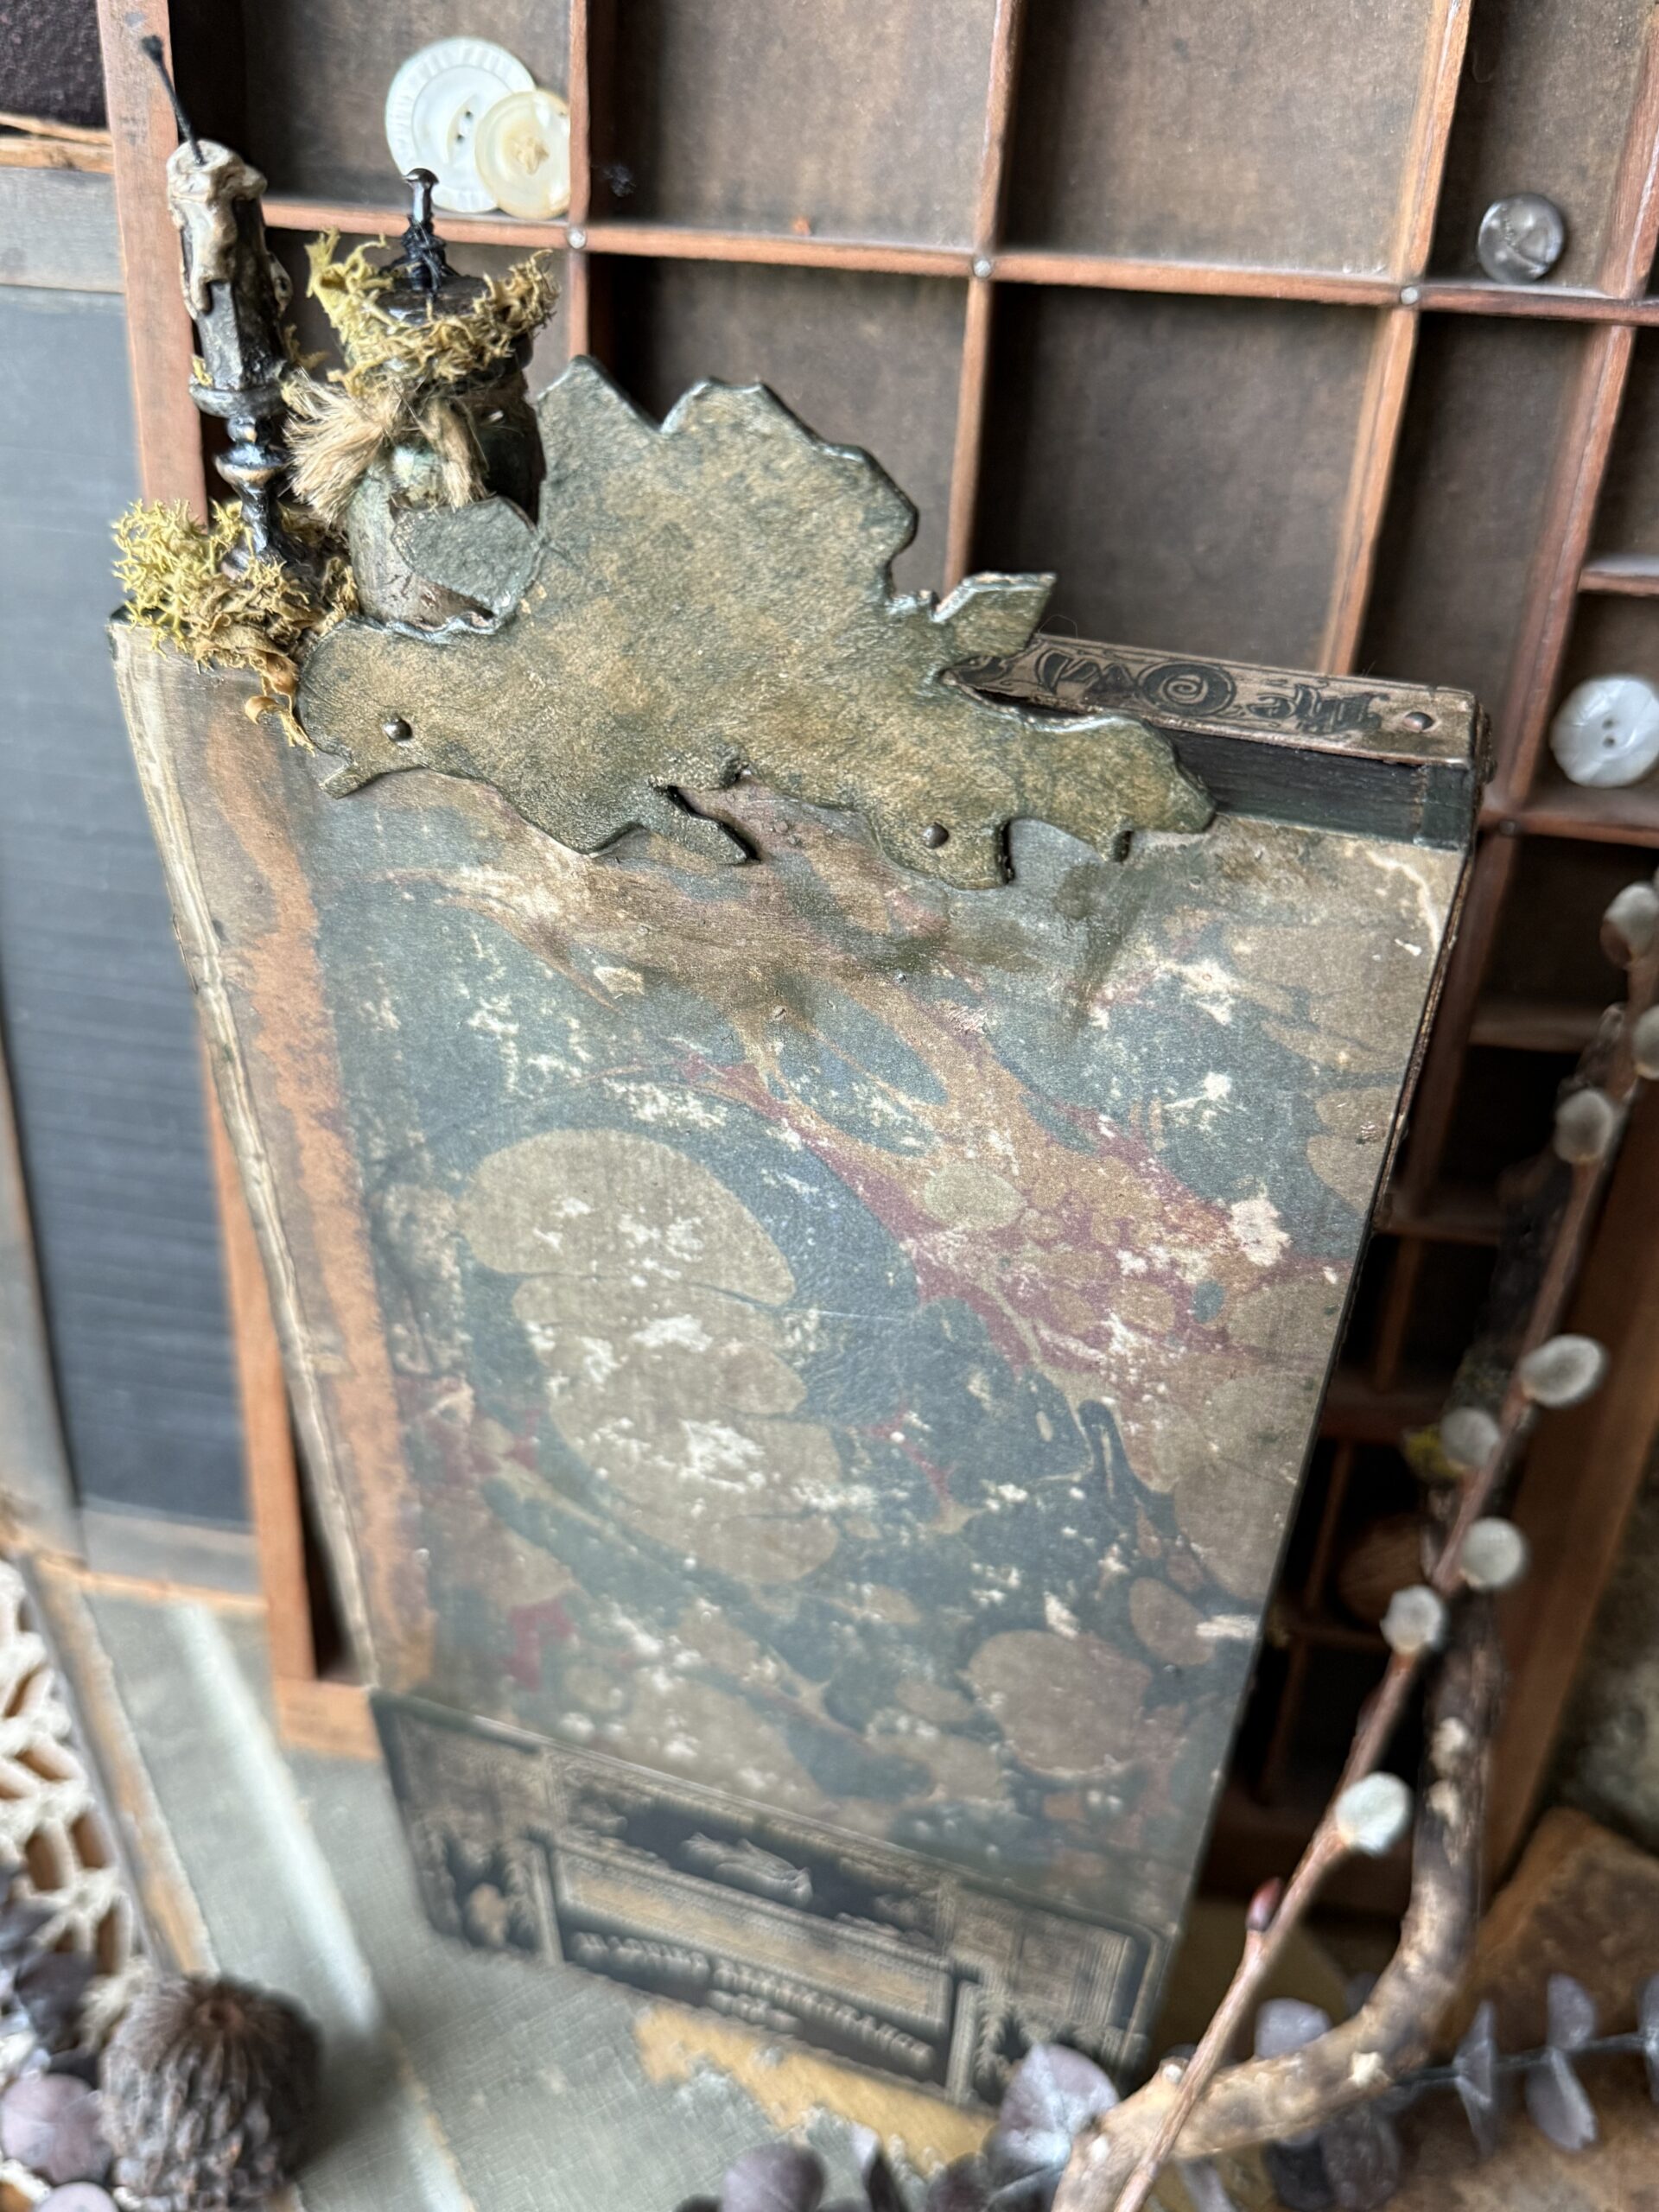
Here you can see that I blended the chipboard back with some brown distress crayon, then rubbed it around to give it age, then I nailed it to the back of the vignette. No one will really see this side but me, but it made me happy to add the nails and it will definitely stay on.
The paper flowers…
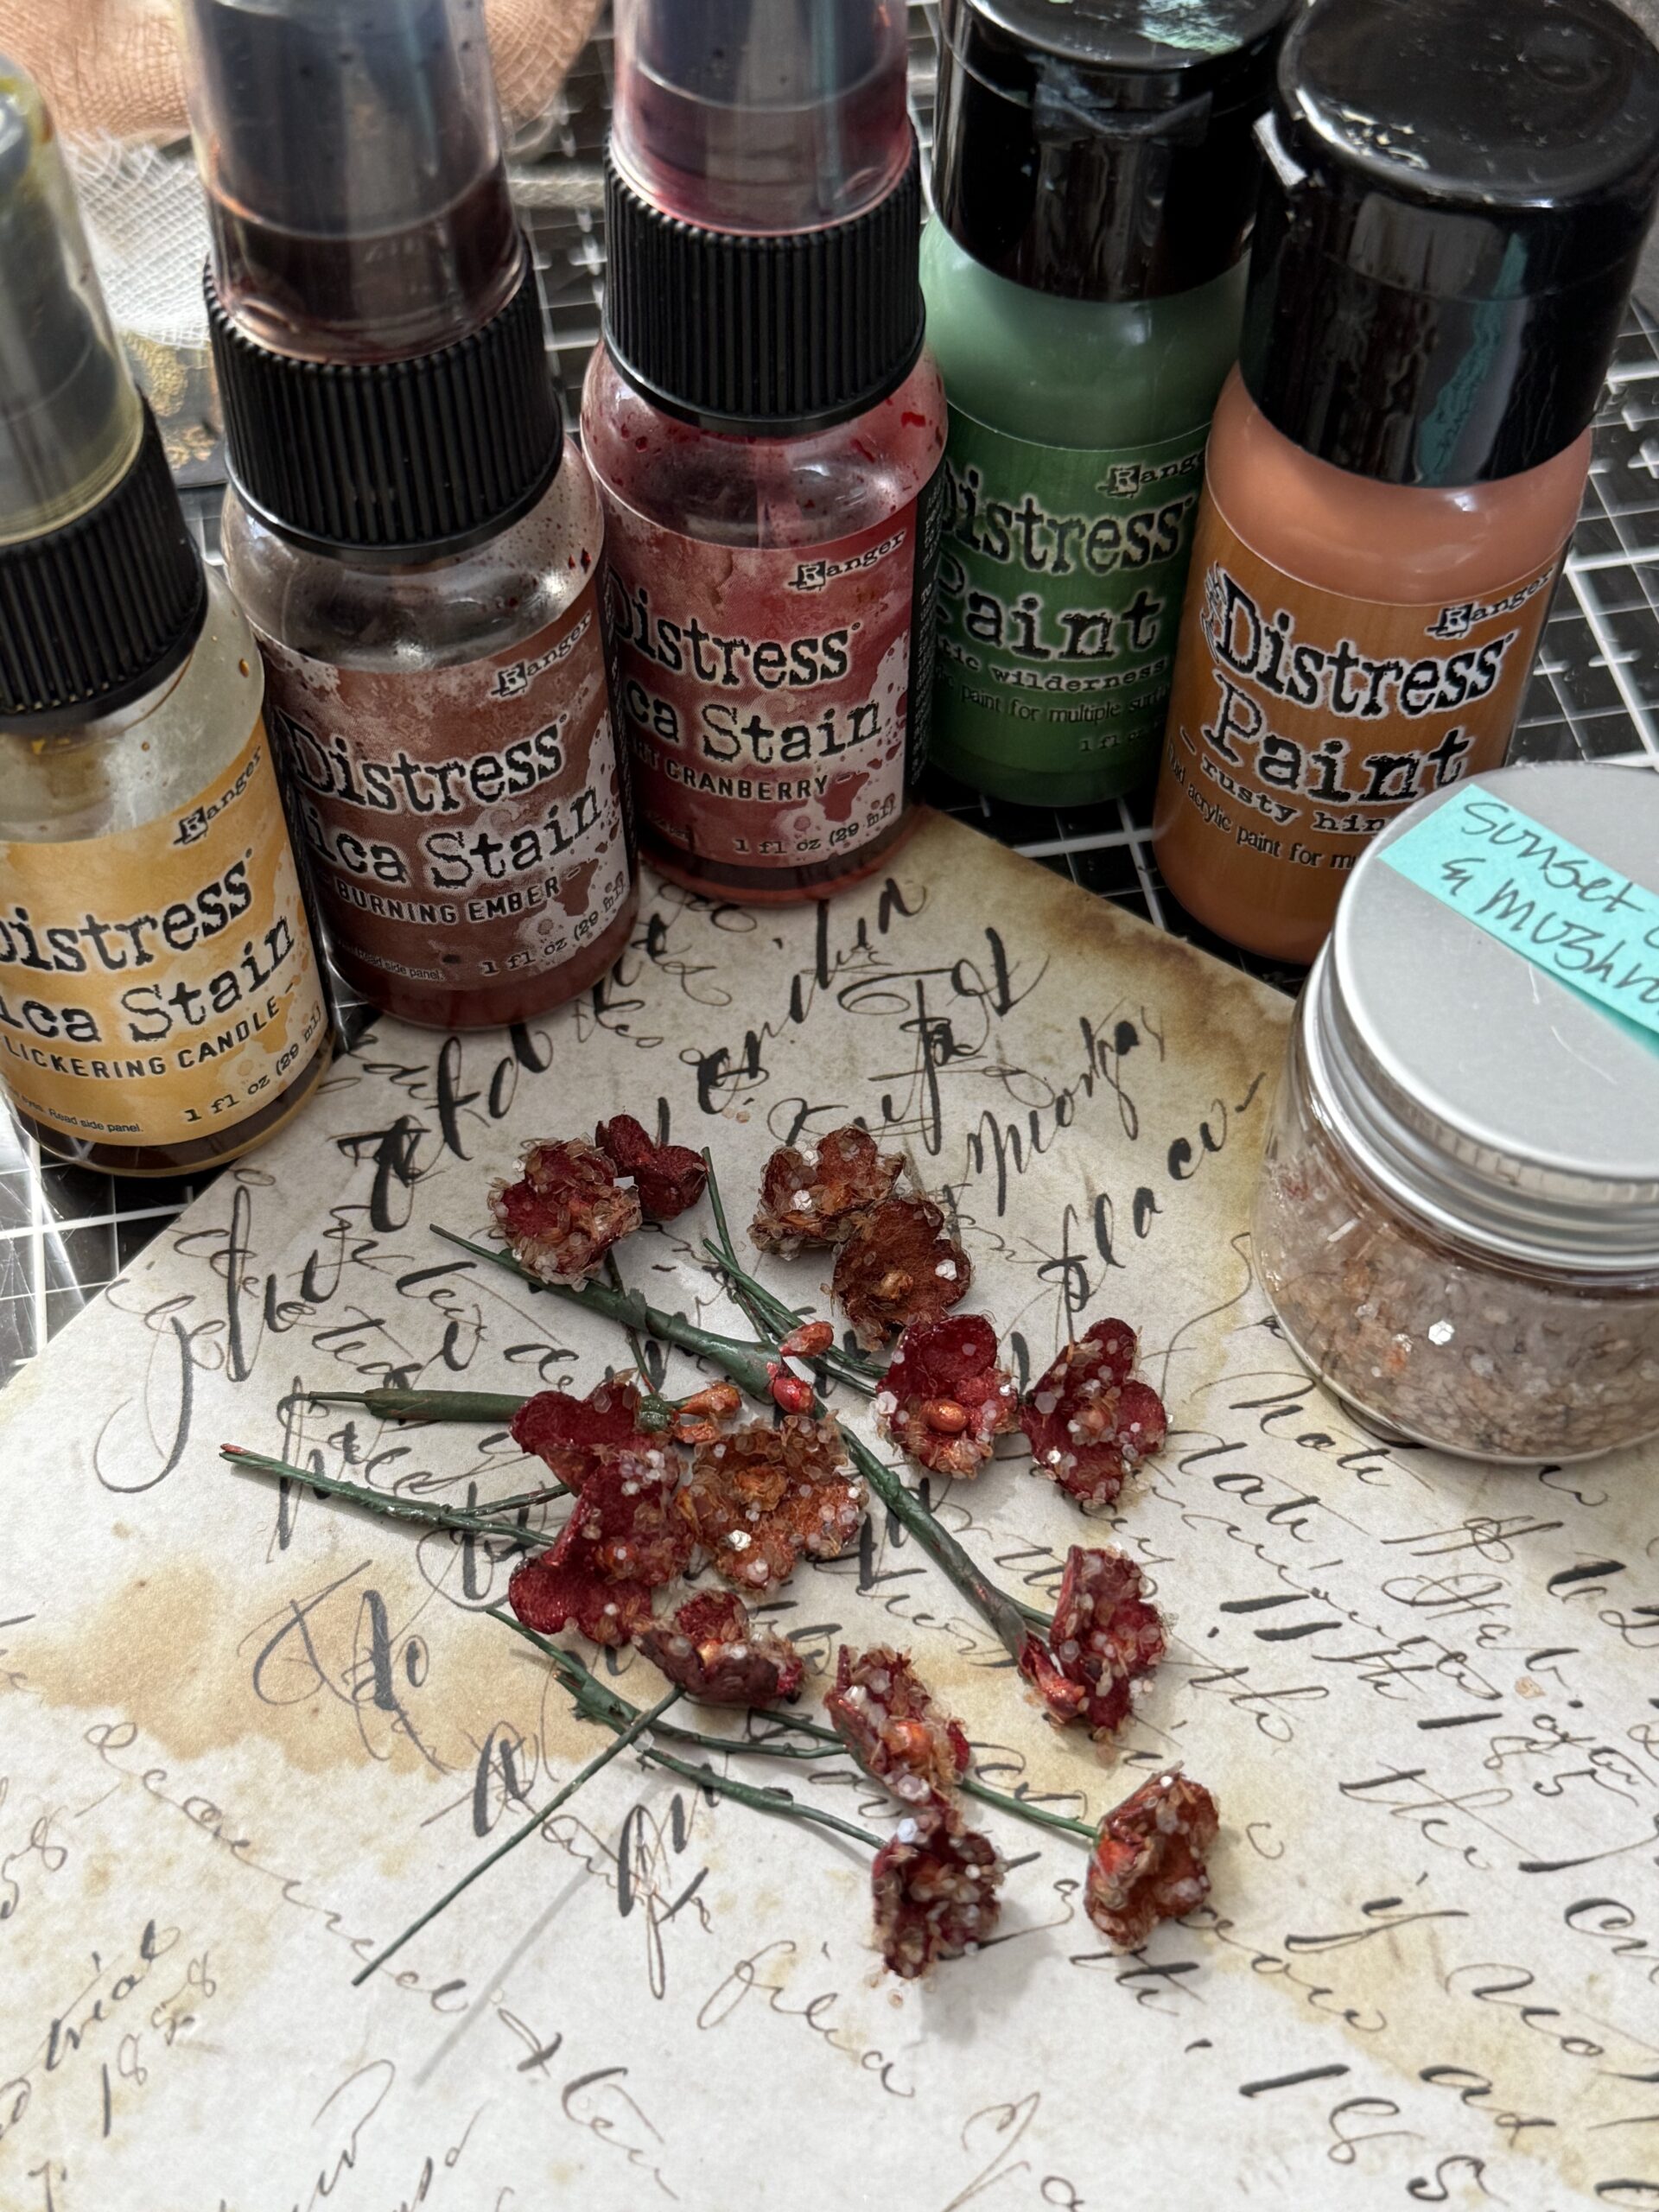
These are flowers that are retired from idea-ology but it seems I can not get away from using them, I feel like everything I make needs at least a few, LOL! I stained them using some Distress Sprays and for the stems, painted them up using Distress Paint. Distress Paint is permanent so, as I wanted to glue them into place, having something that isn’t water reactive is a very good thing!
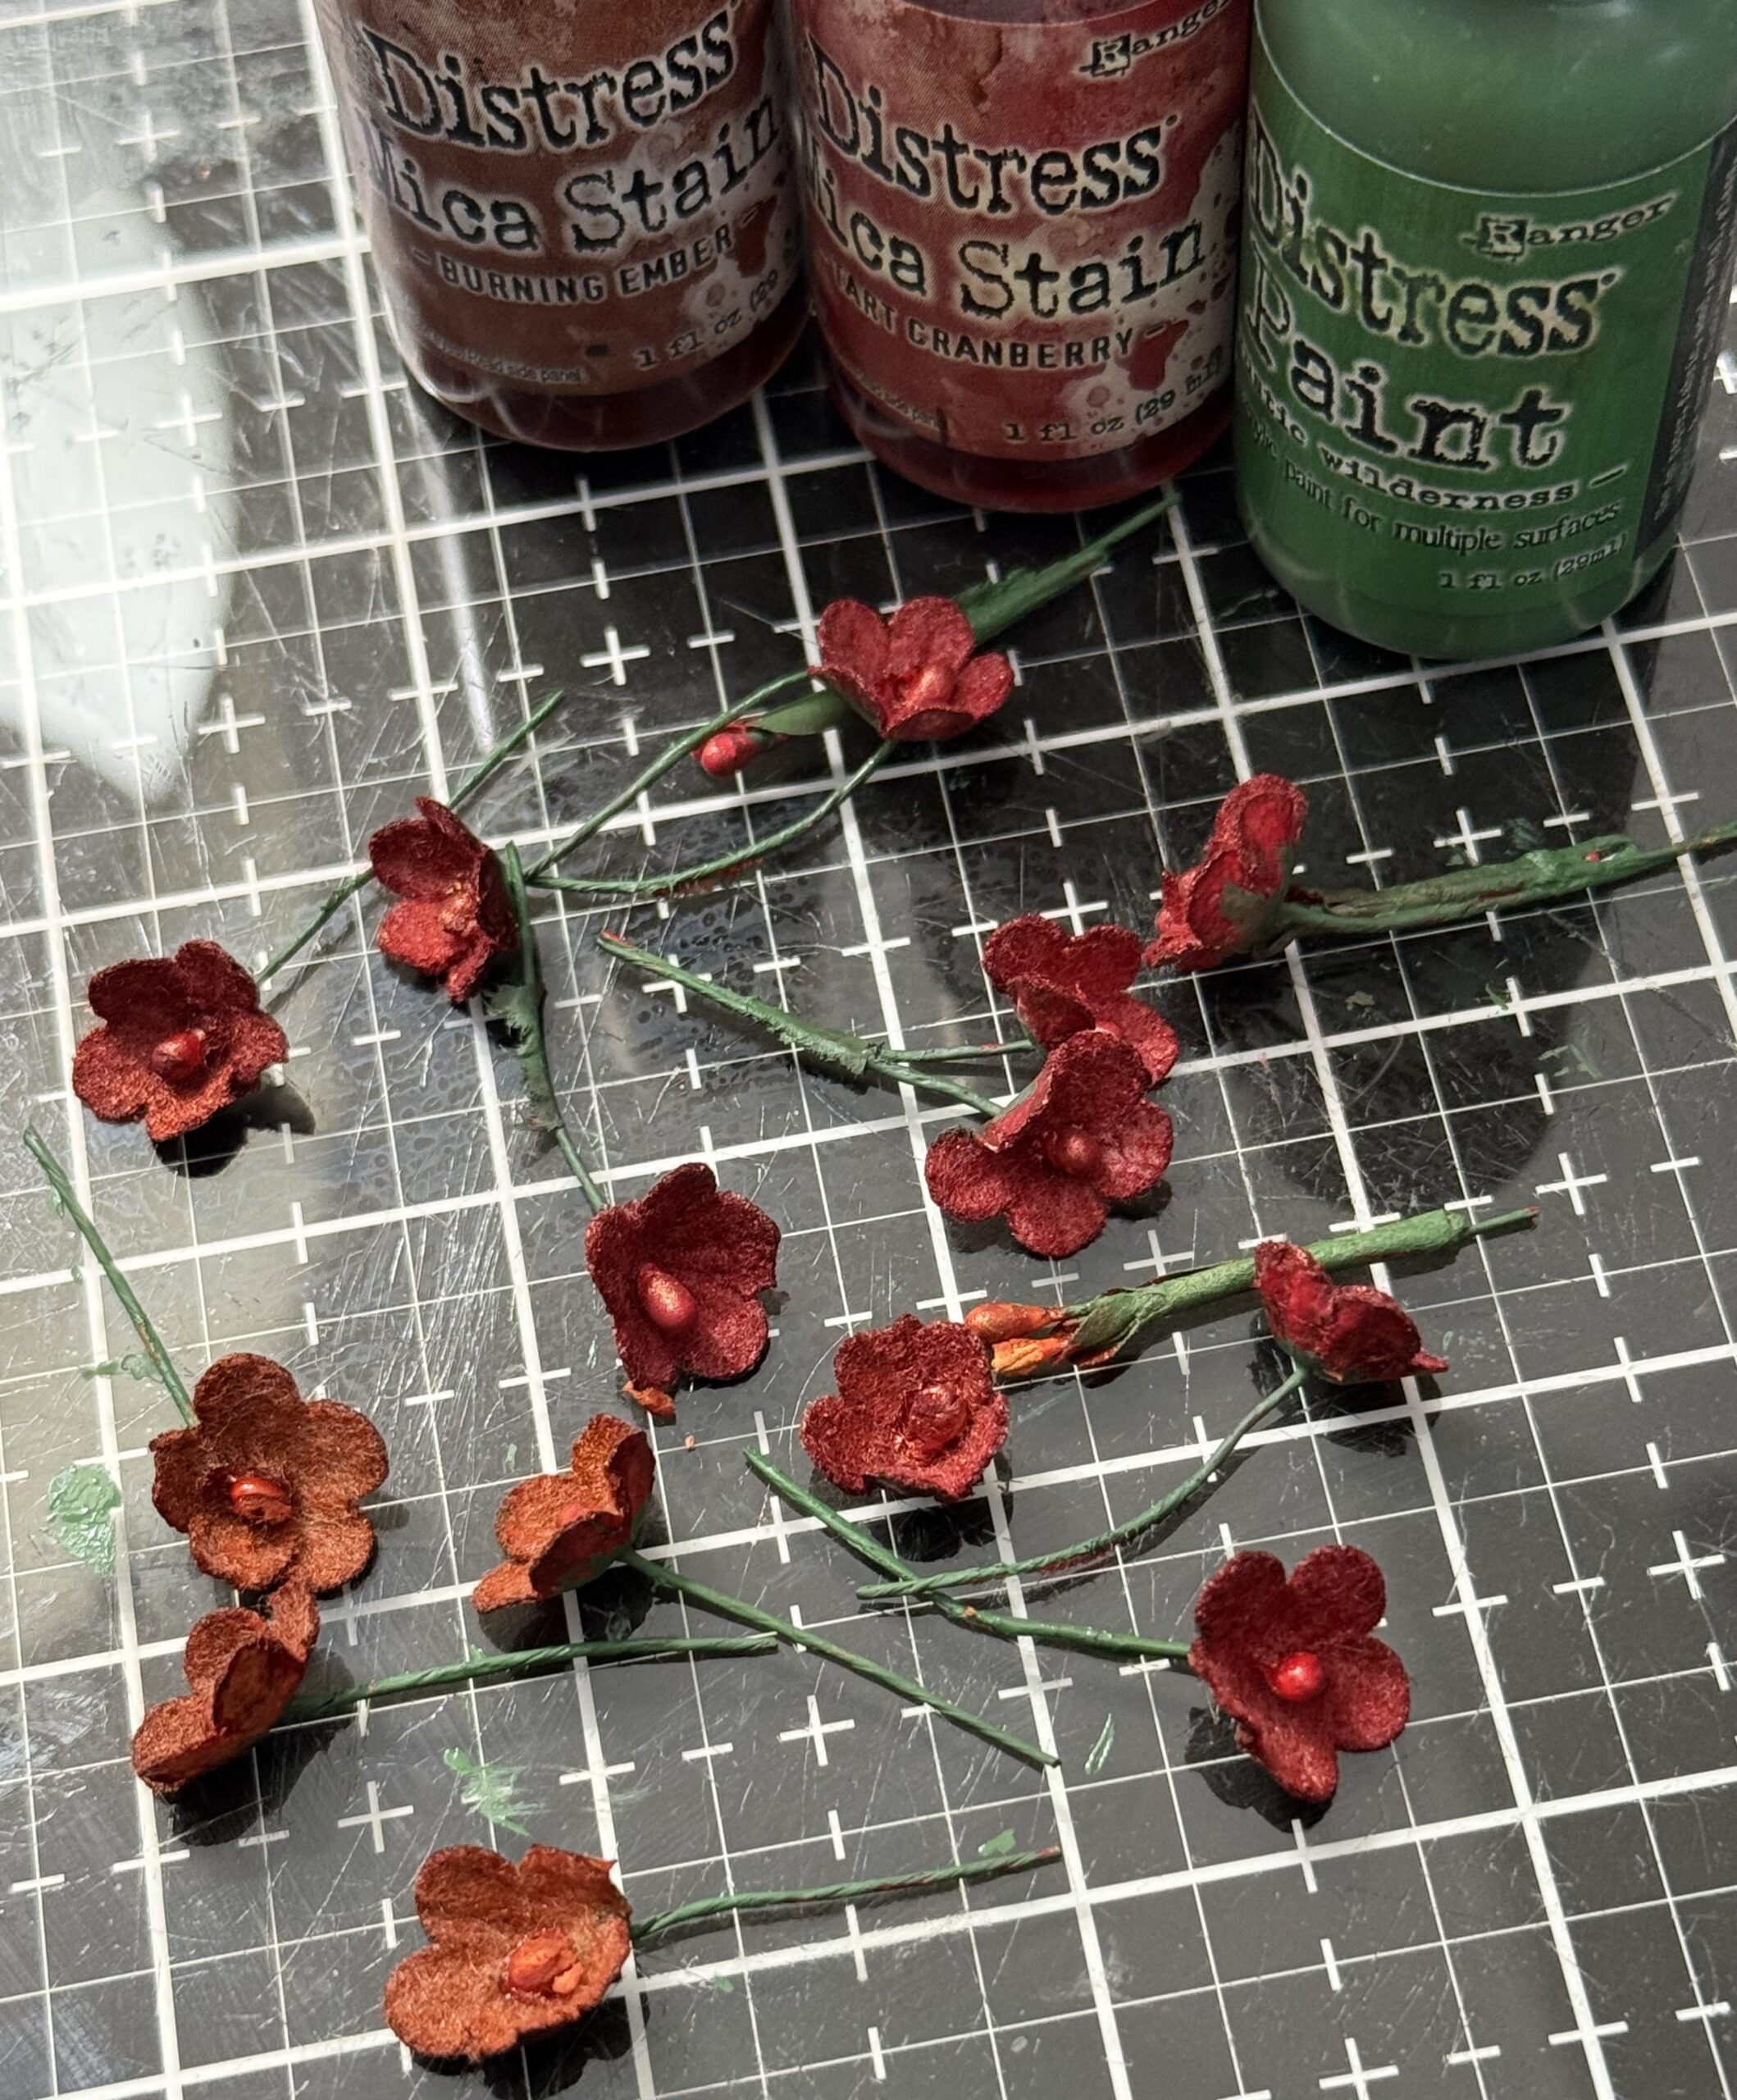
To finish the flowers, I painted the tiny stamen in the centers with some rusty hinge and a tiny drip of Flickering Candle to add some shimmer, then I used Glossy Accents to add some glitter.
The rest of the idea-ology embellishments…
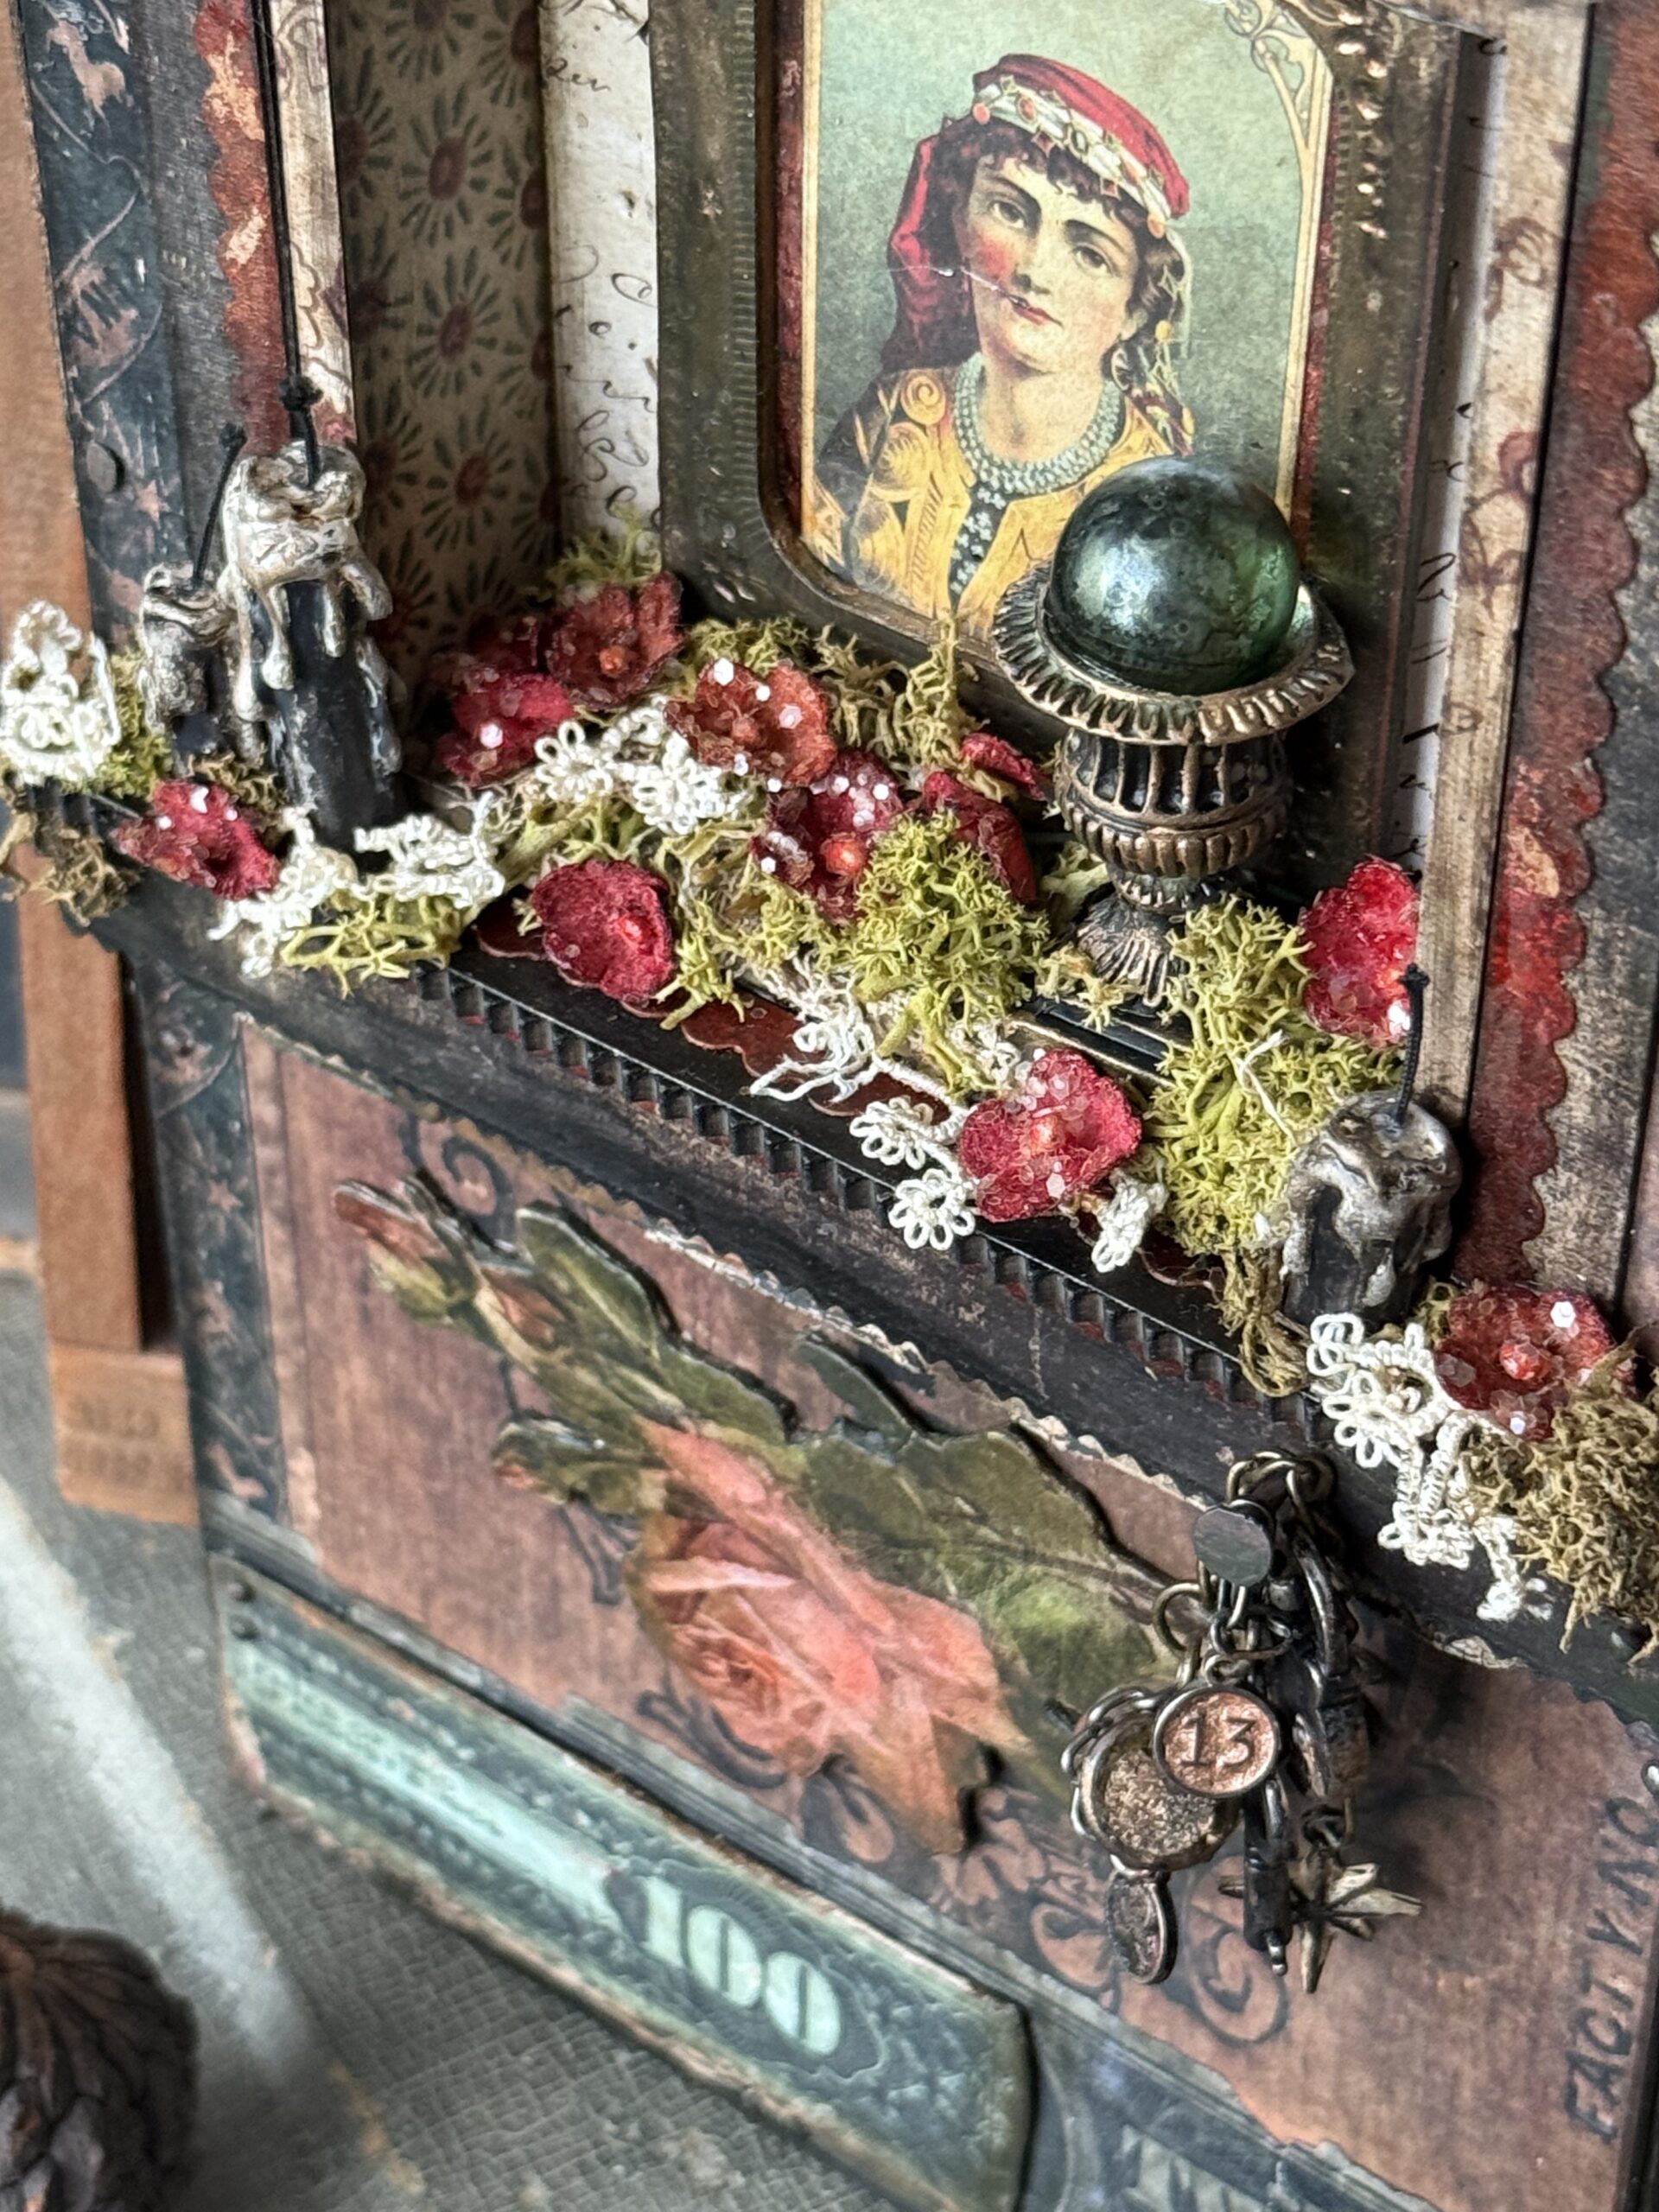
The candles, urn, candle stick, lock, chain, key and spider were all painted using Black Soot Distress Paint, then set aside to dry.
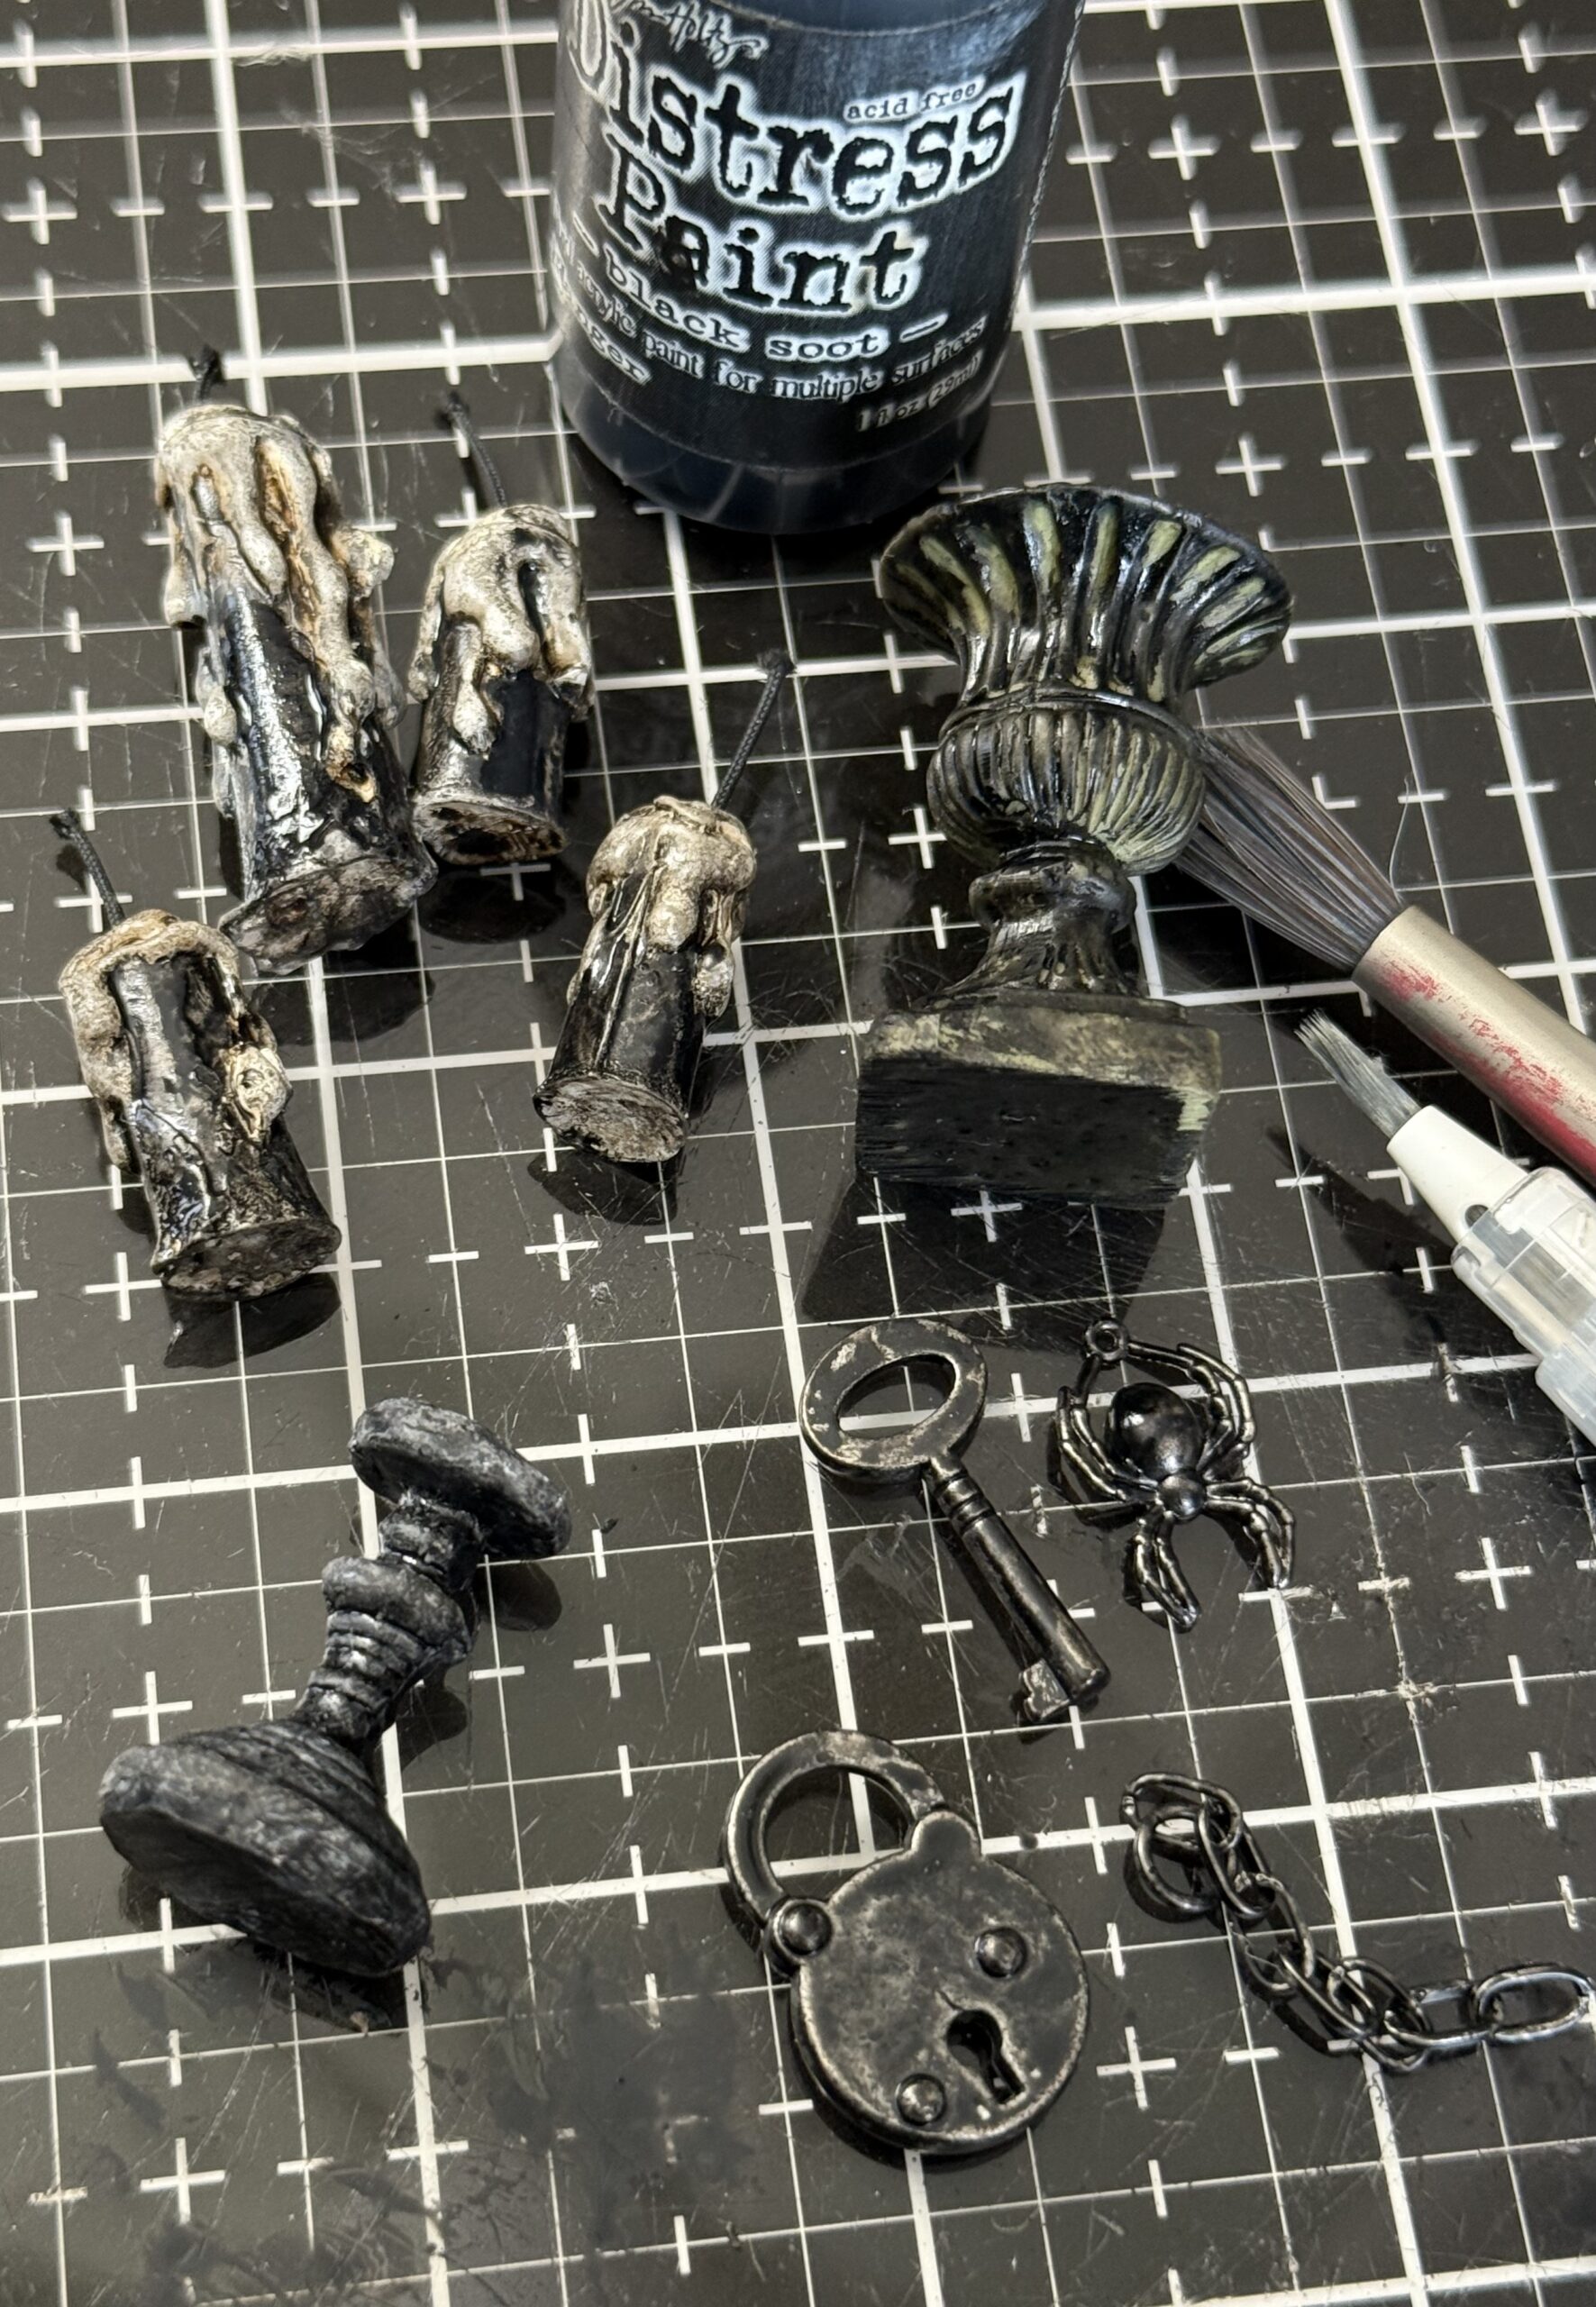
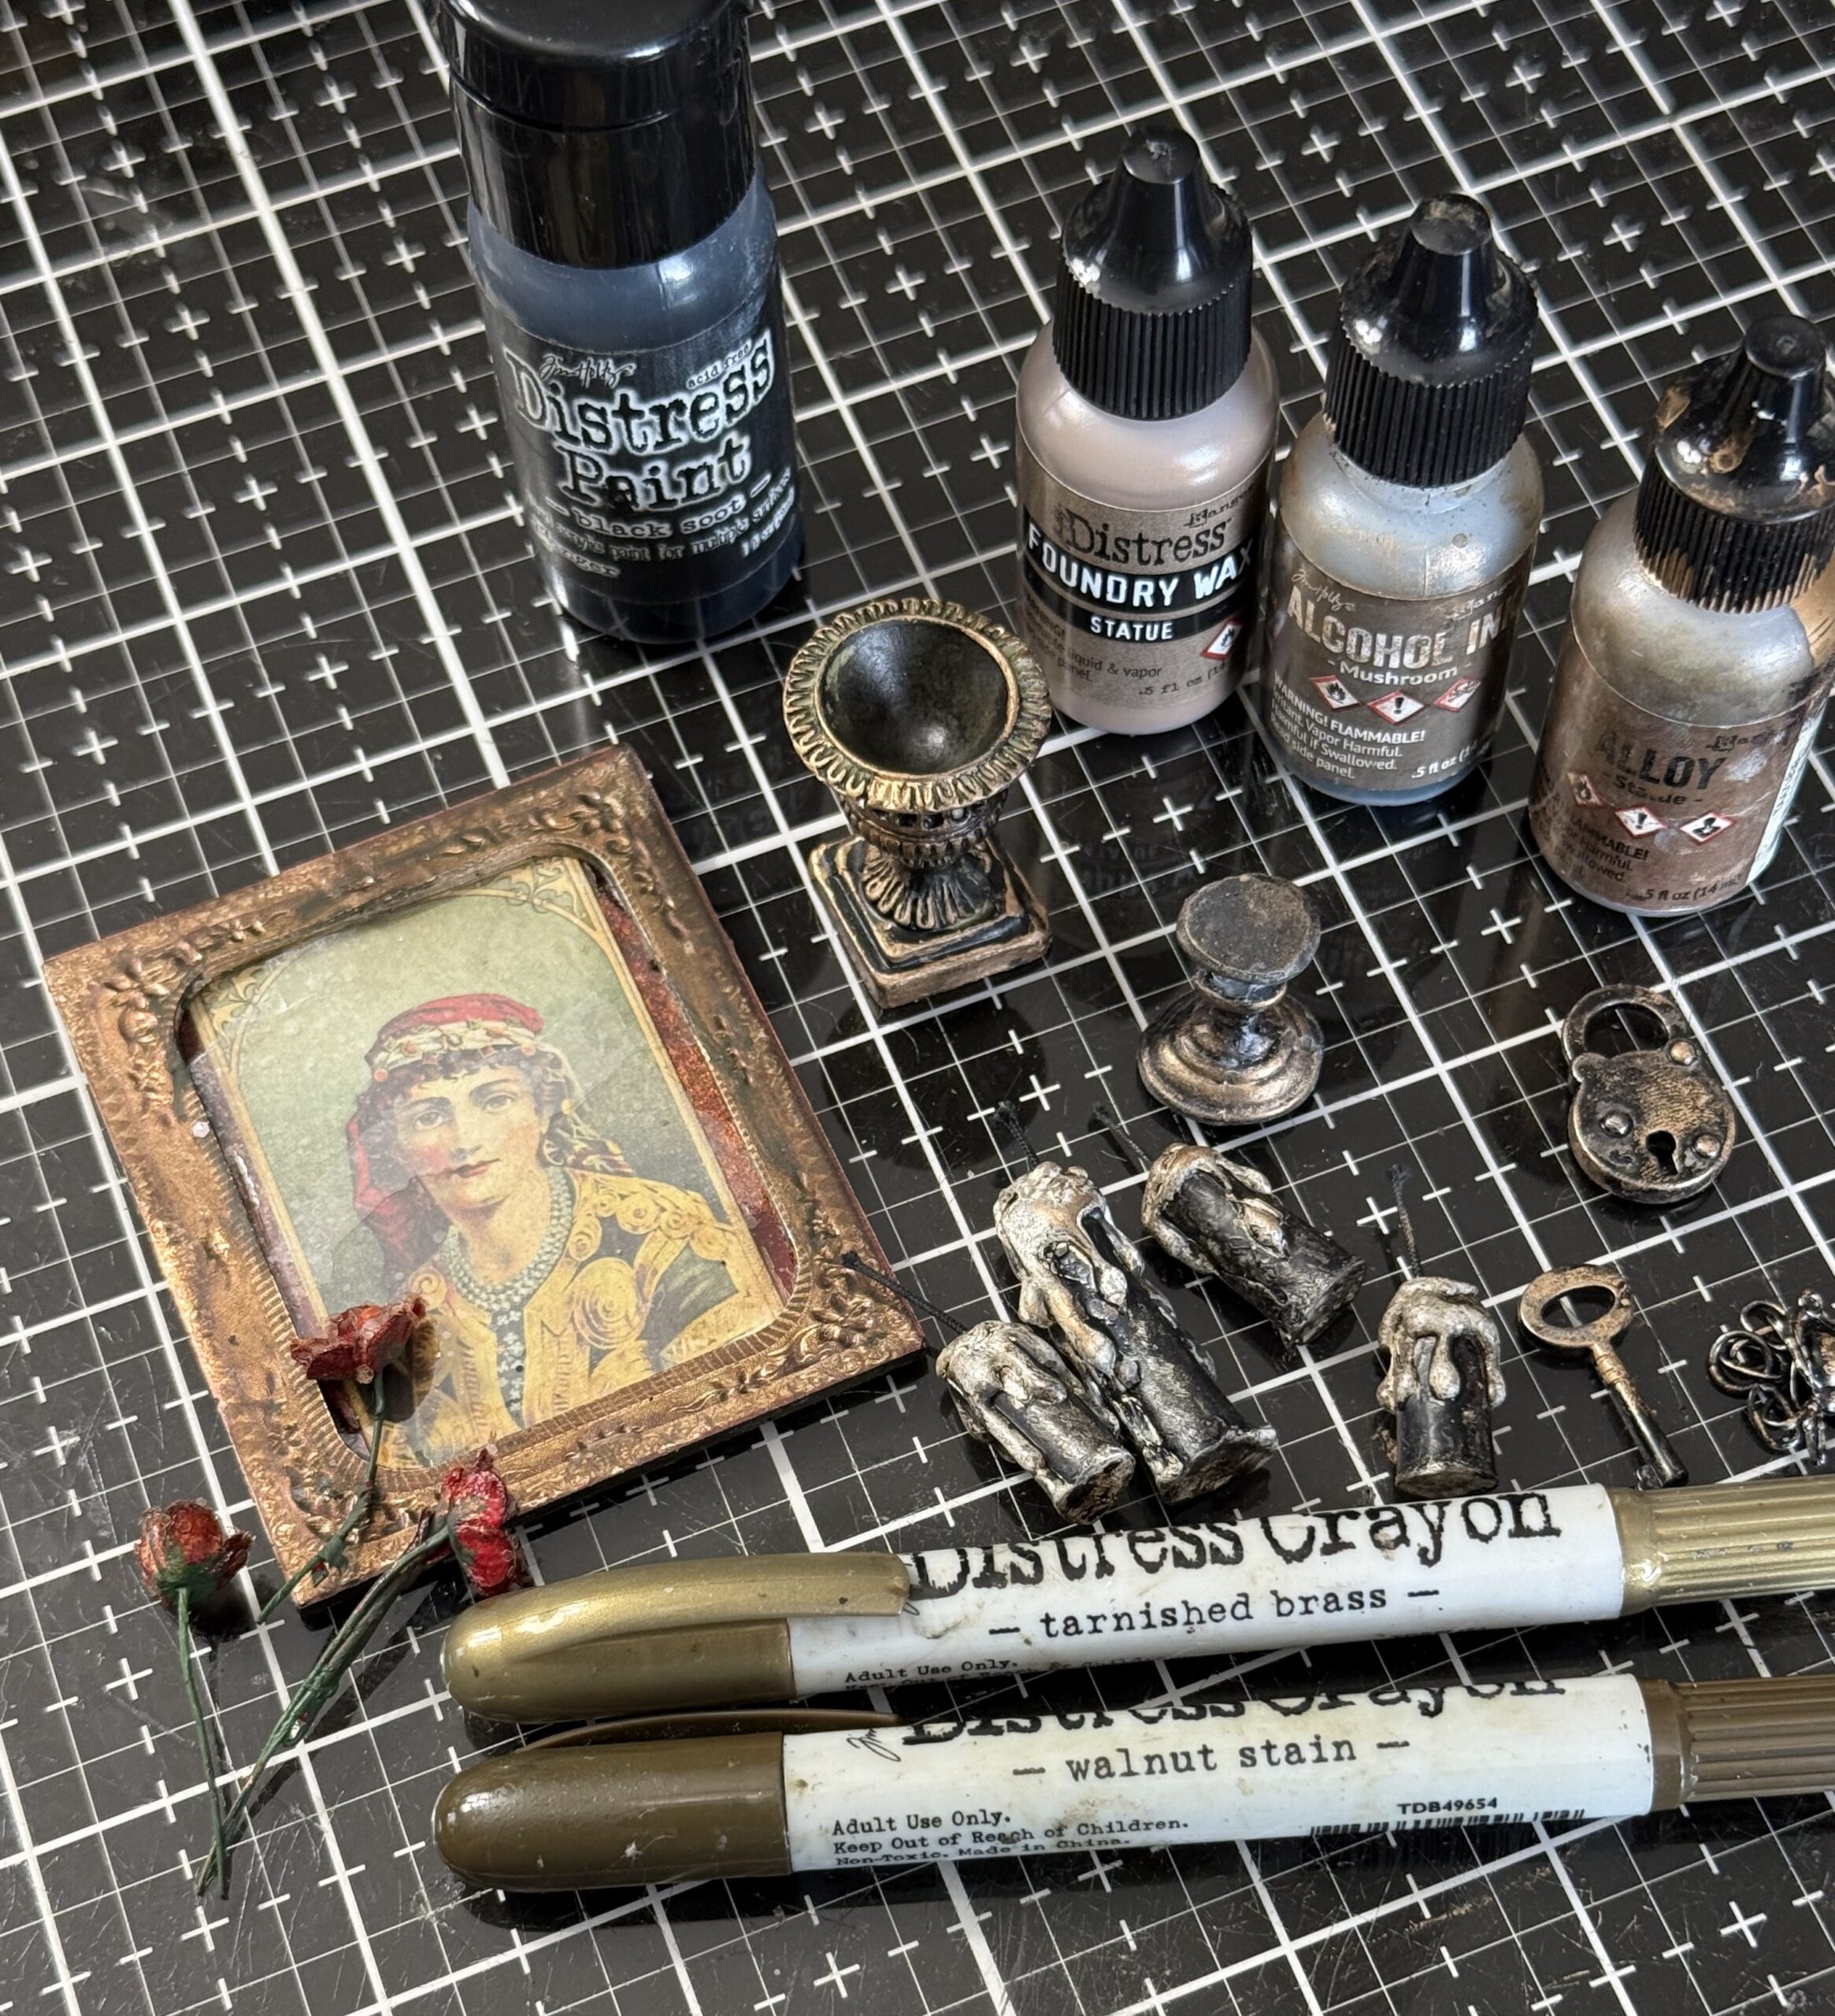
Once they were dry, I used a variety of Distress Products to add more age to the pieces. I used some Statue Foundry Wax on the Urn, Candles and Candles Stick, then set the wax using my heat tool. The Lock, Key and Chain were rubbed with some Mushroom Alcohol Ink and some Statue Alloy…whatever you have, use, it really is your preference as to what works for you. Once the pieces were dry, I used a couple of Distress Crayons to add some more age to them.
You’ll also notice that in the photo below I placed the gypsy girl behind a mica tile then matted it to the back of na idea-ology Curio Frame. I aged the frame by sanding it with a sanding disk, then rubbing it with the Distress Crayons, the edge of the frame was also treated the same way, rubbed with crayon to darken it.
Building the vignette…
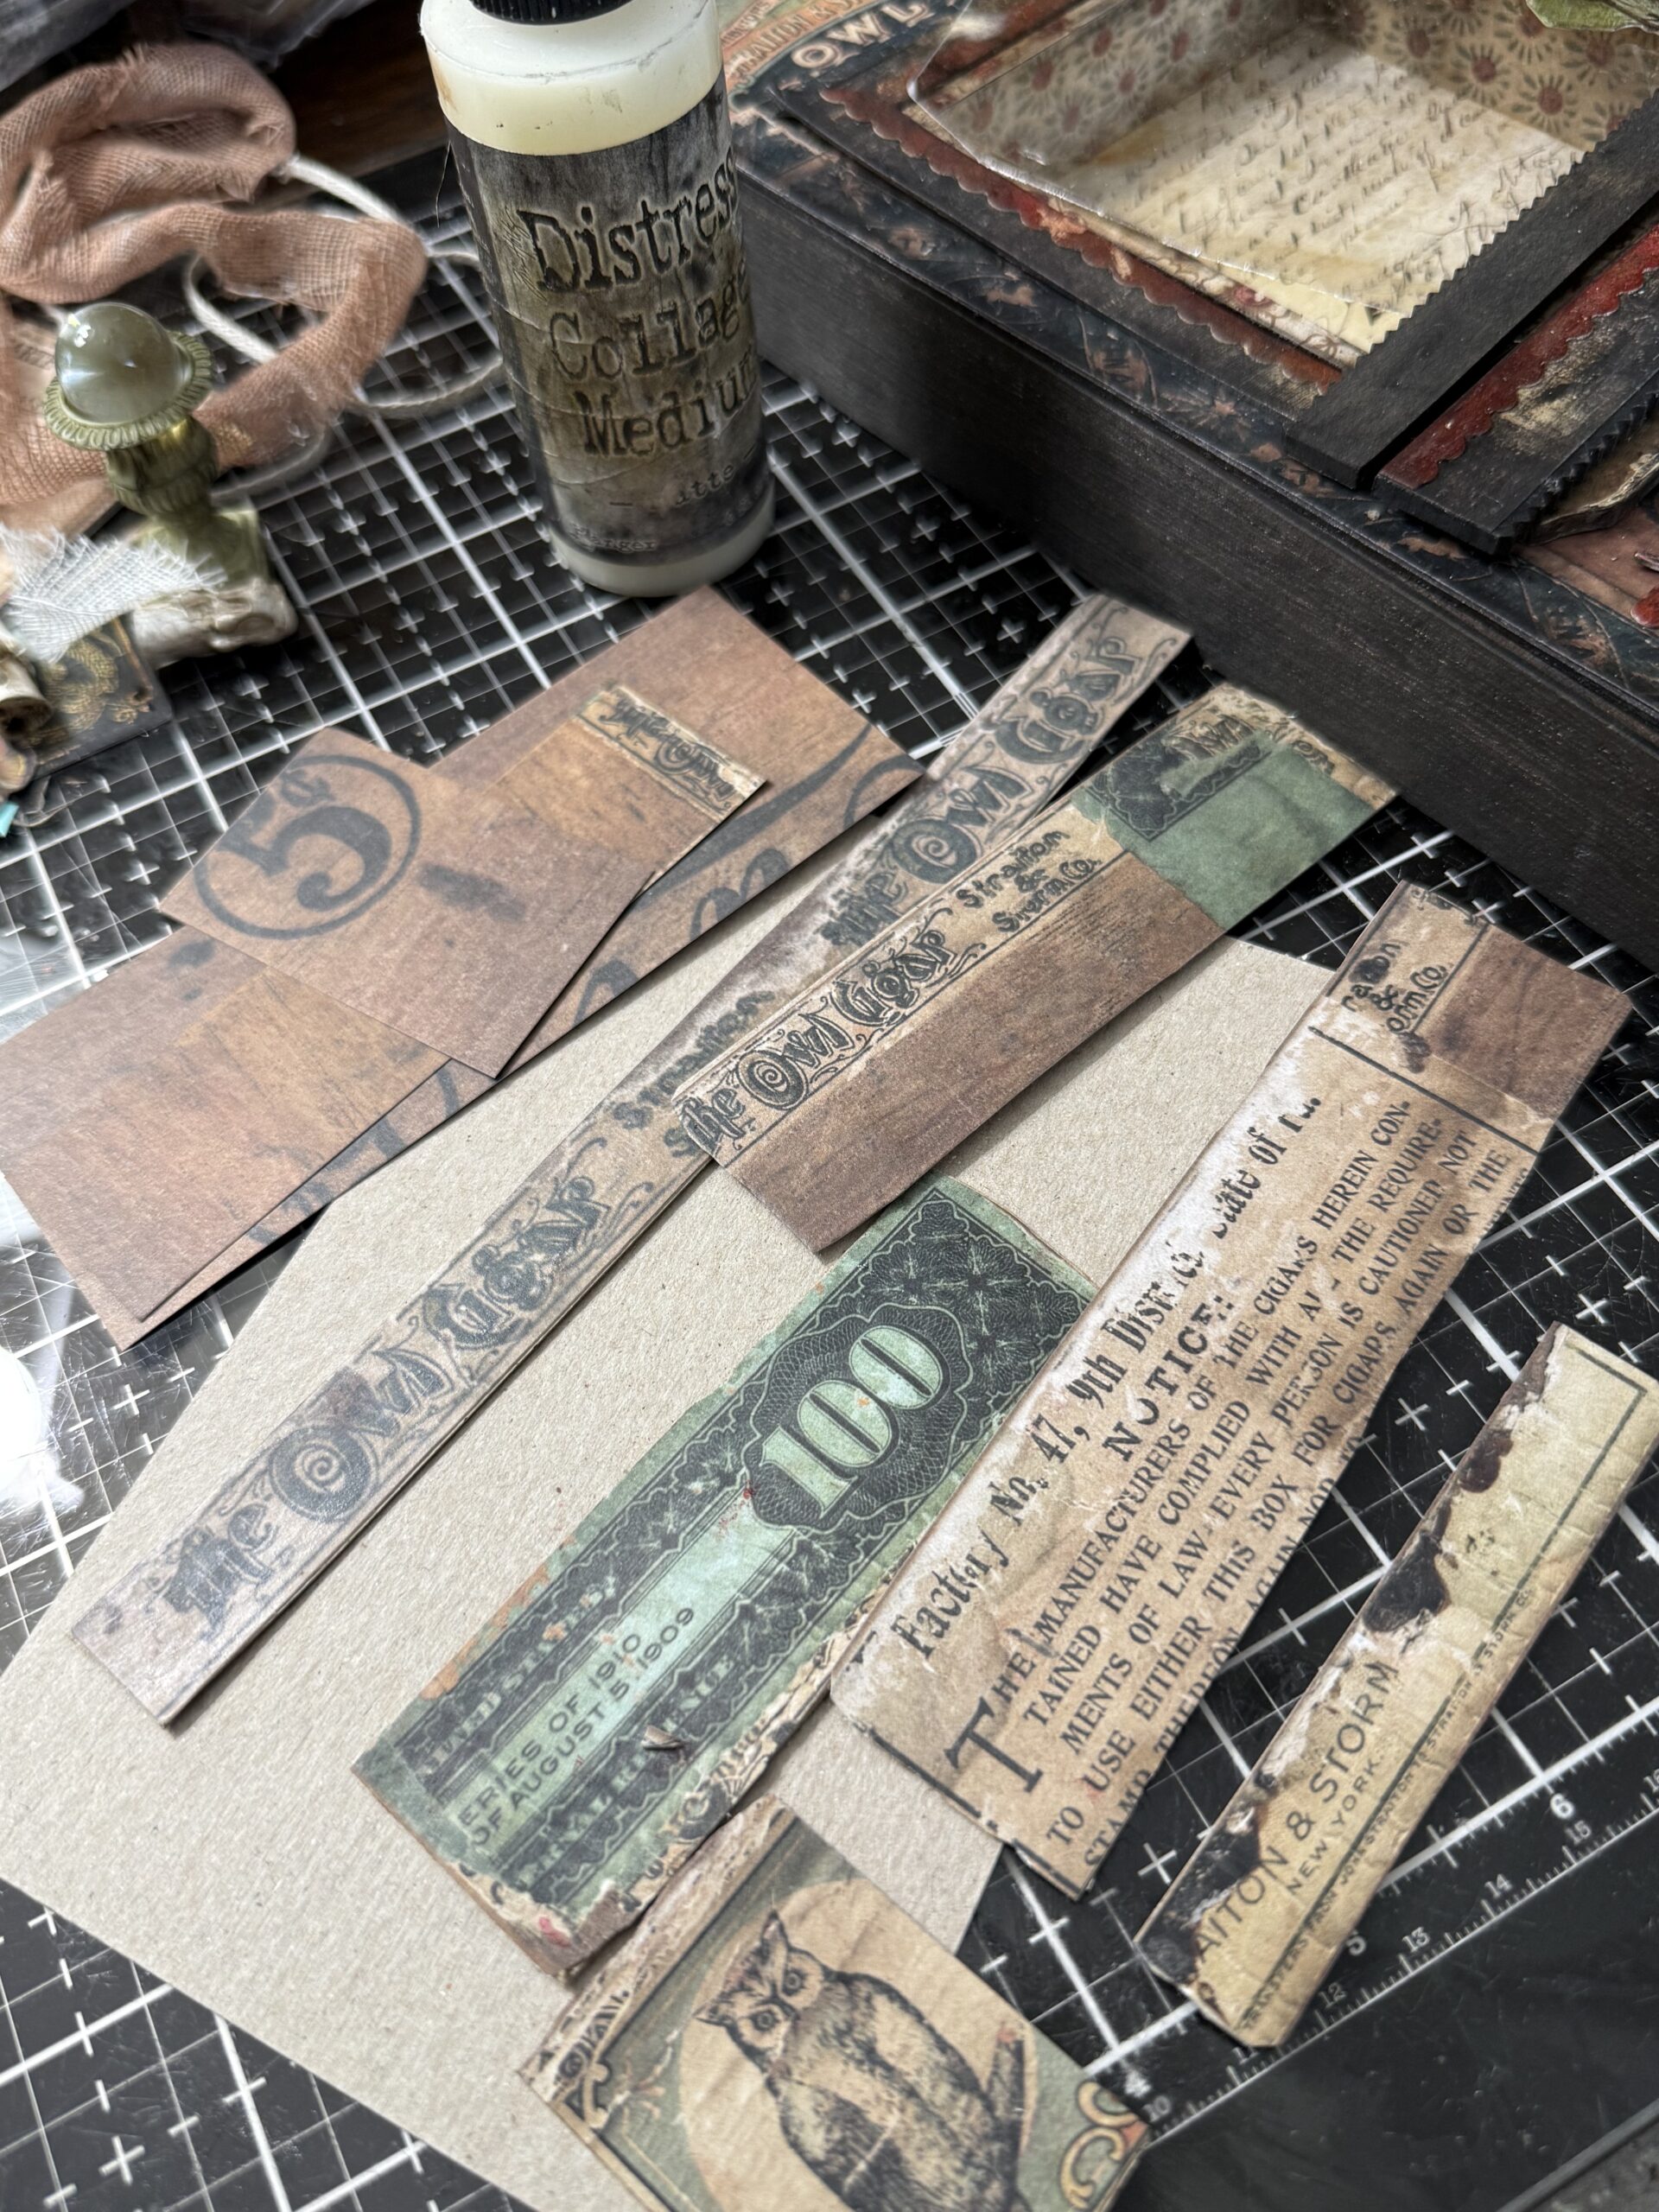
The pieces you see below are pieces of the paper that I trimmed from a couple of the Backdrop Papers that look like cigar boxes, I trimmed off the labels and some of the writing to use around the edges of the vignette tray. The Owl Cigar Border is from the idea-ology Halloween Ephemera Pack. Again, just like the roses, I wanted the pieces to be more substantial and stand out more on my make. I backed each of these paper pieces with chipboard, then rubbed the edges of them with Brown Distress Crayon. These were adhered using collage medium around the outside randomly wherever I thought they looked good. the border pieces were then nailed in the corners to give the pieces more age.
You can see the sides a little bit in this photo. At the top you can see that I placed the border around the corner of the top, and one of the other pieces just under where it wrapped around.
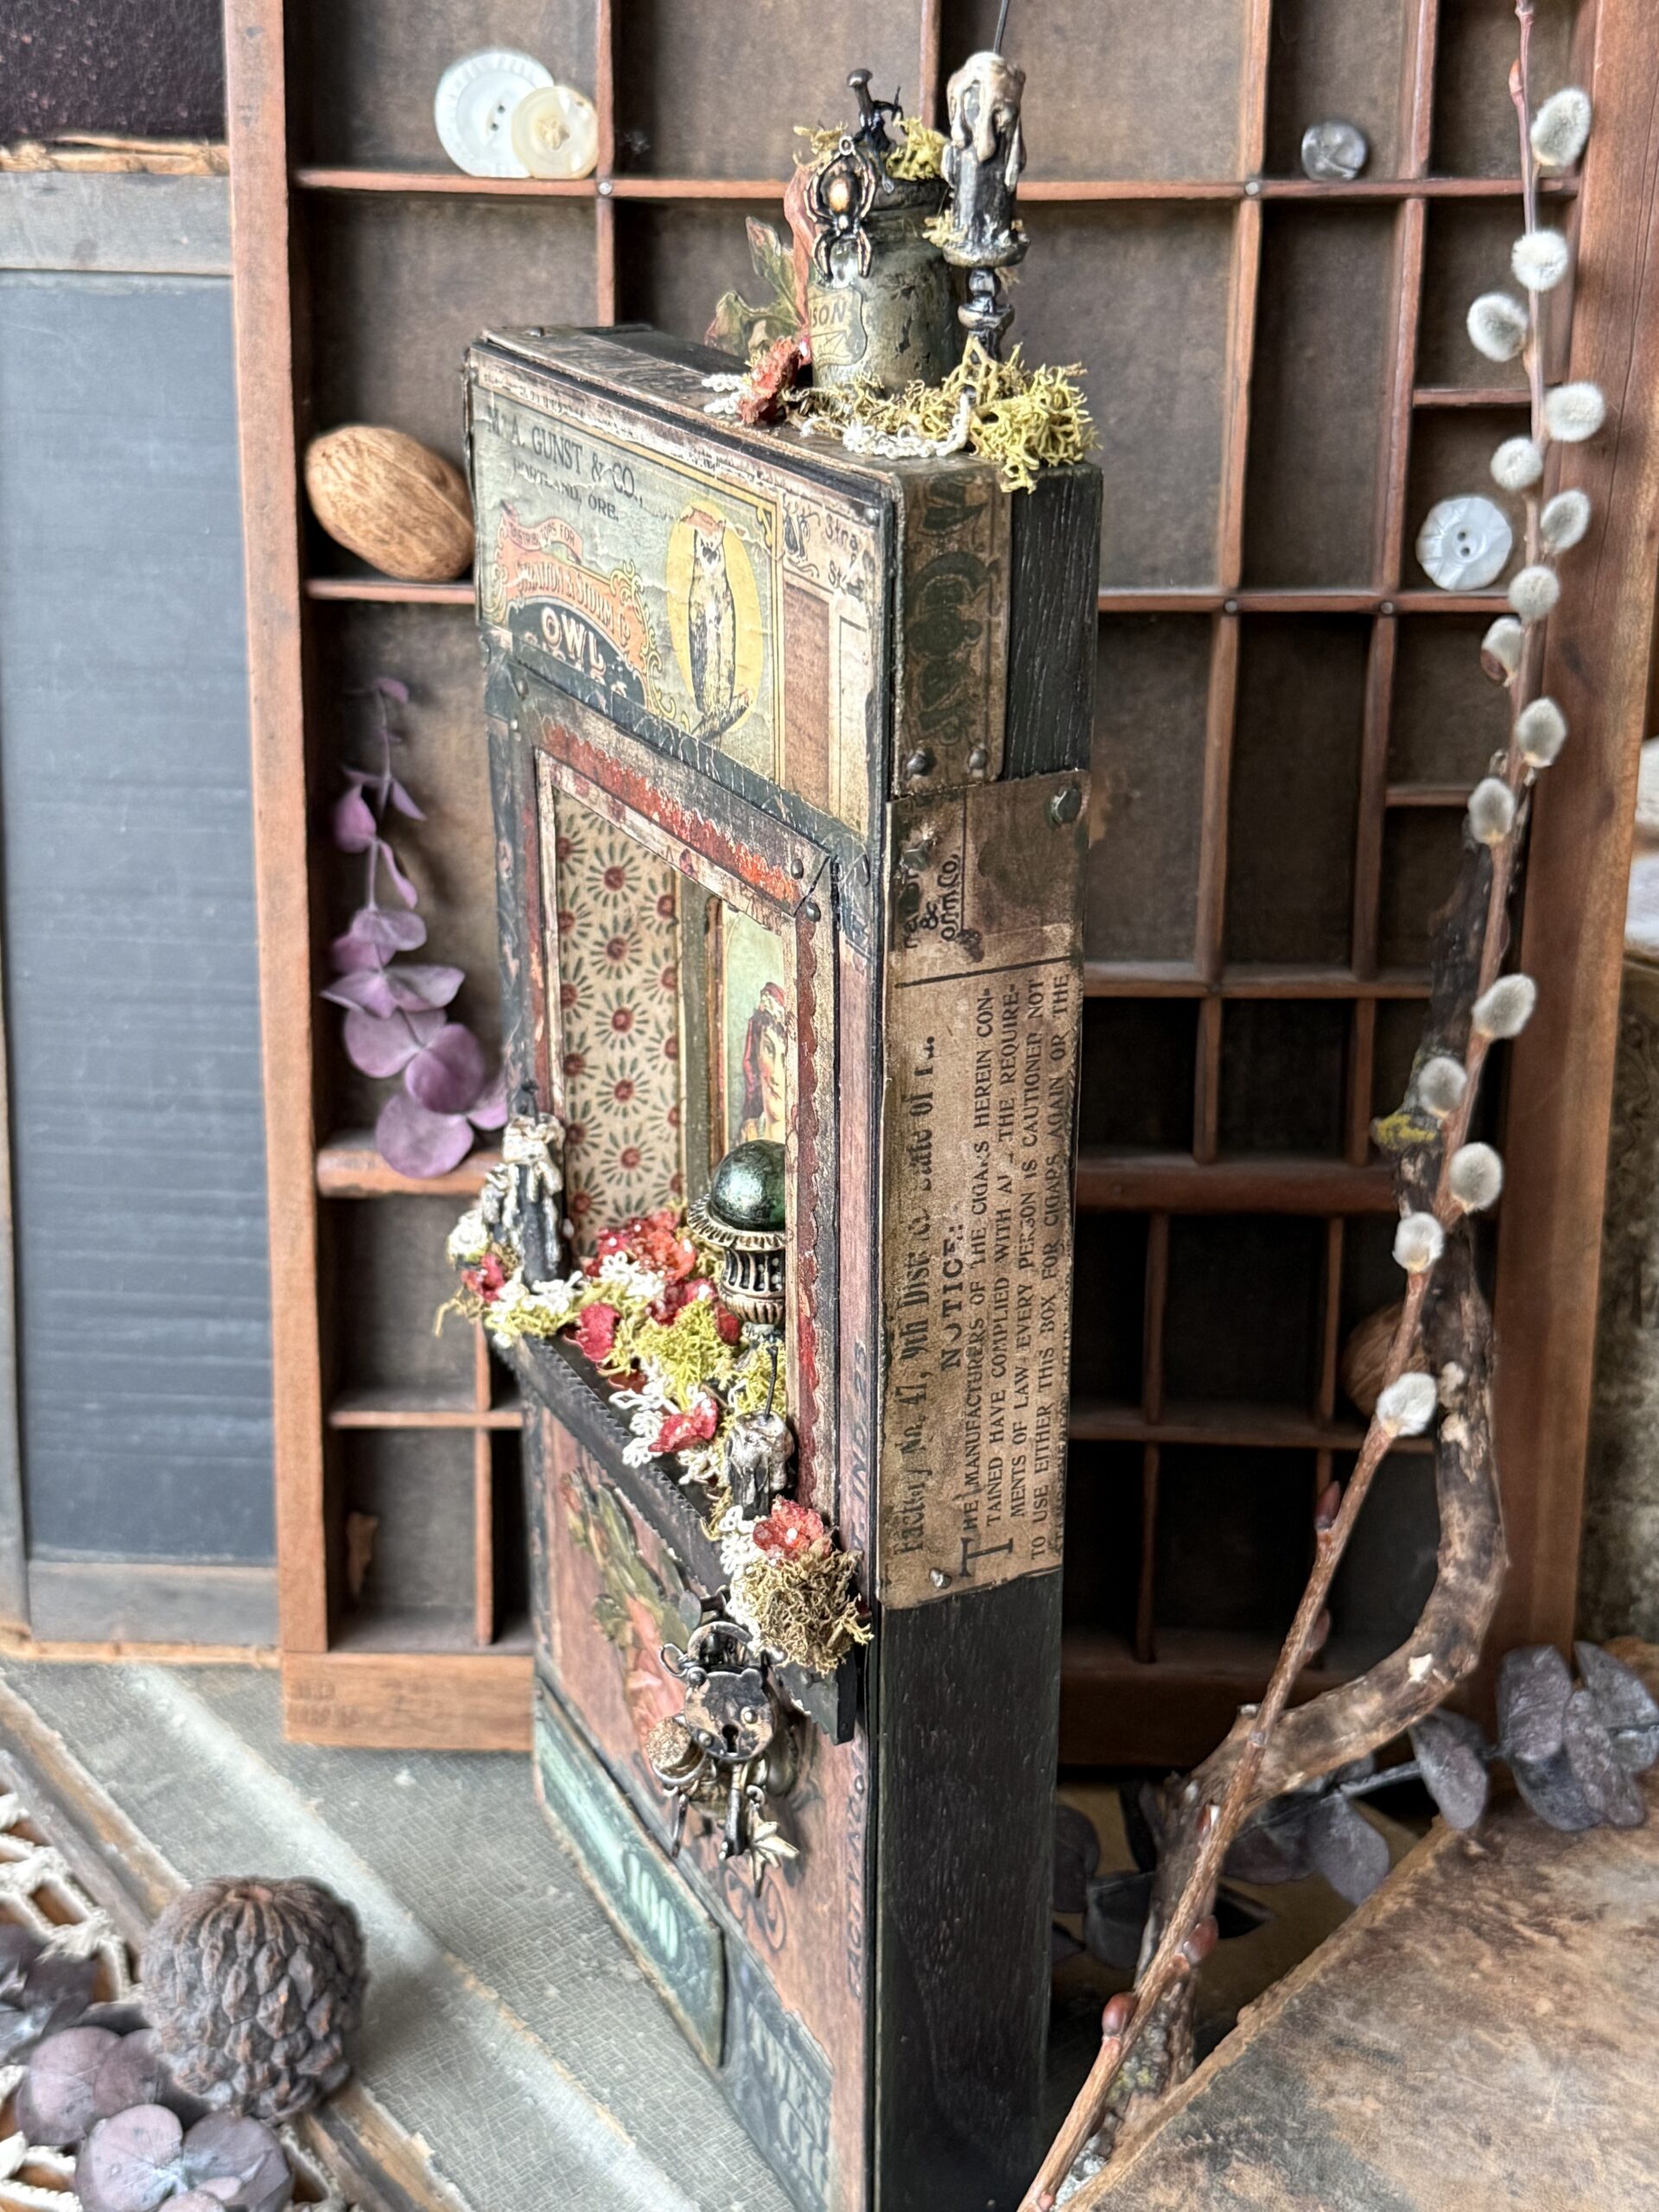
The one that had the “100” on it was placed on the front where a matching area was on the Backdrop paper.
I forgot to take a photo of one of the sides, but you get the idea, kind of a patchwork of cigar boxes here and there and attached with nails.
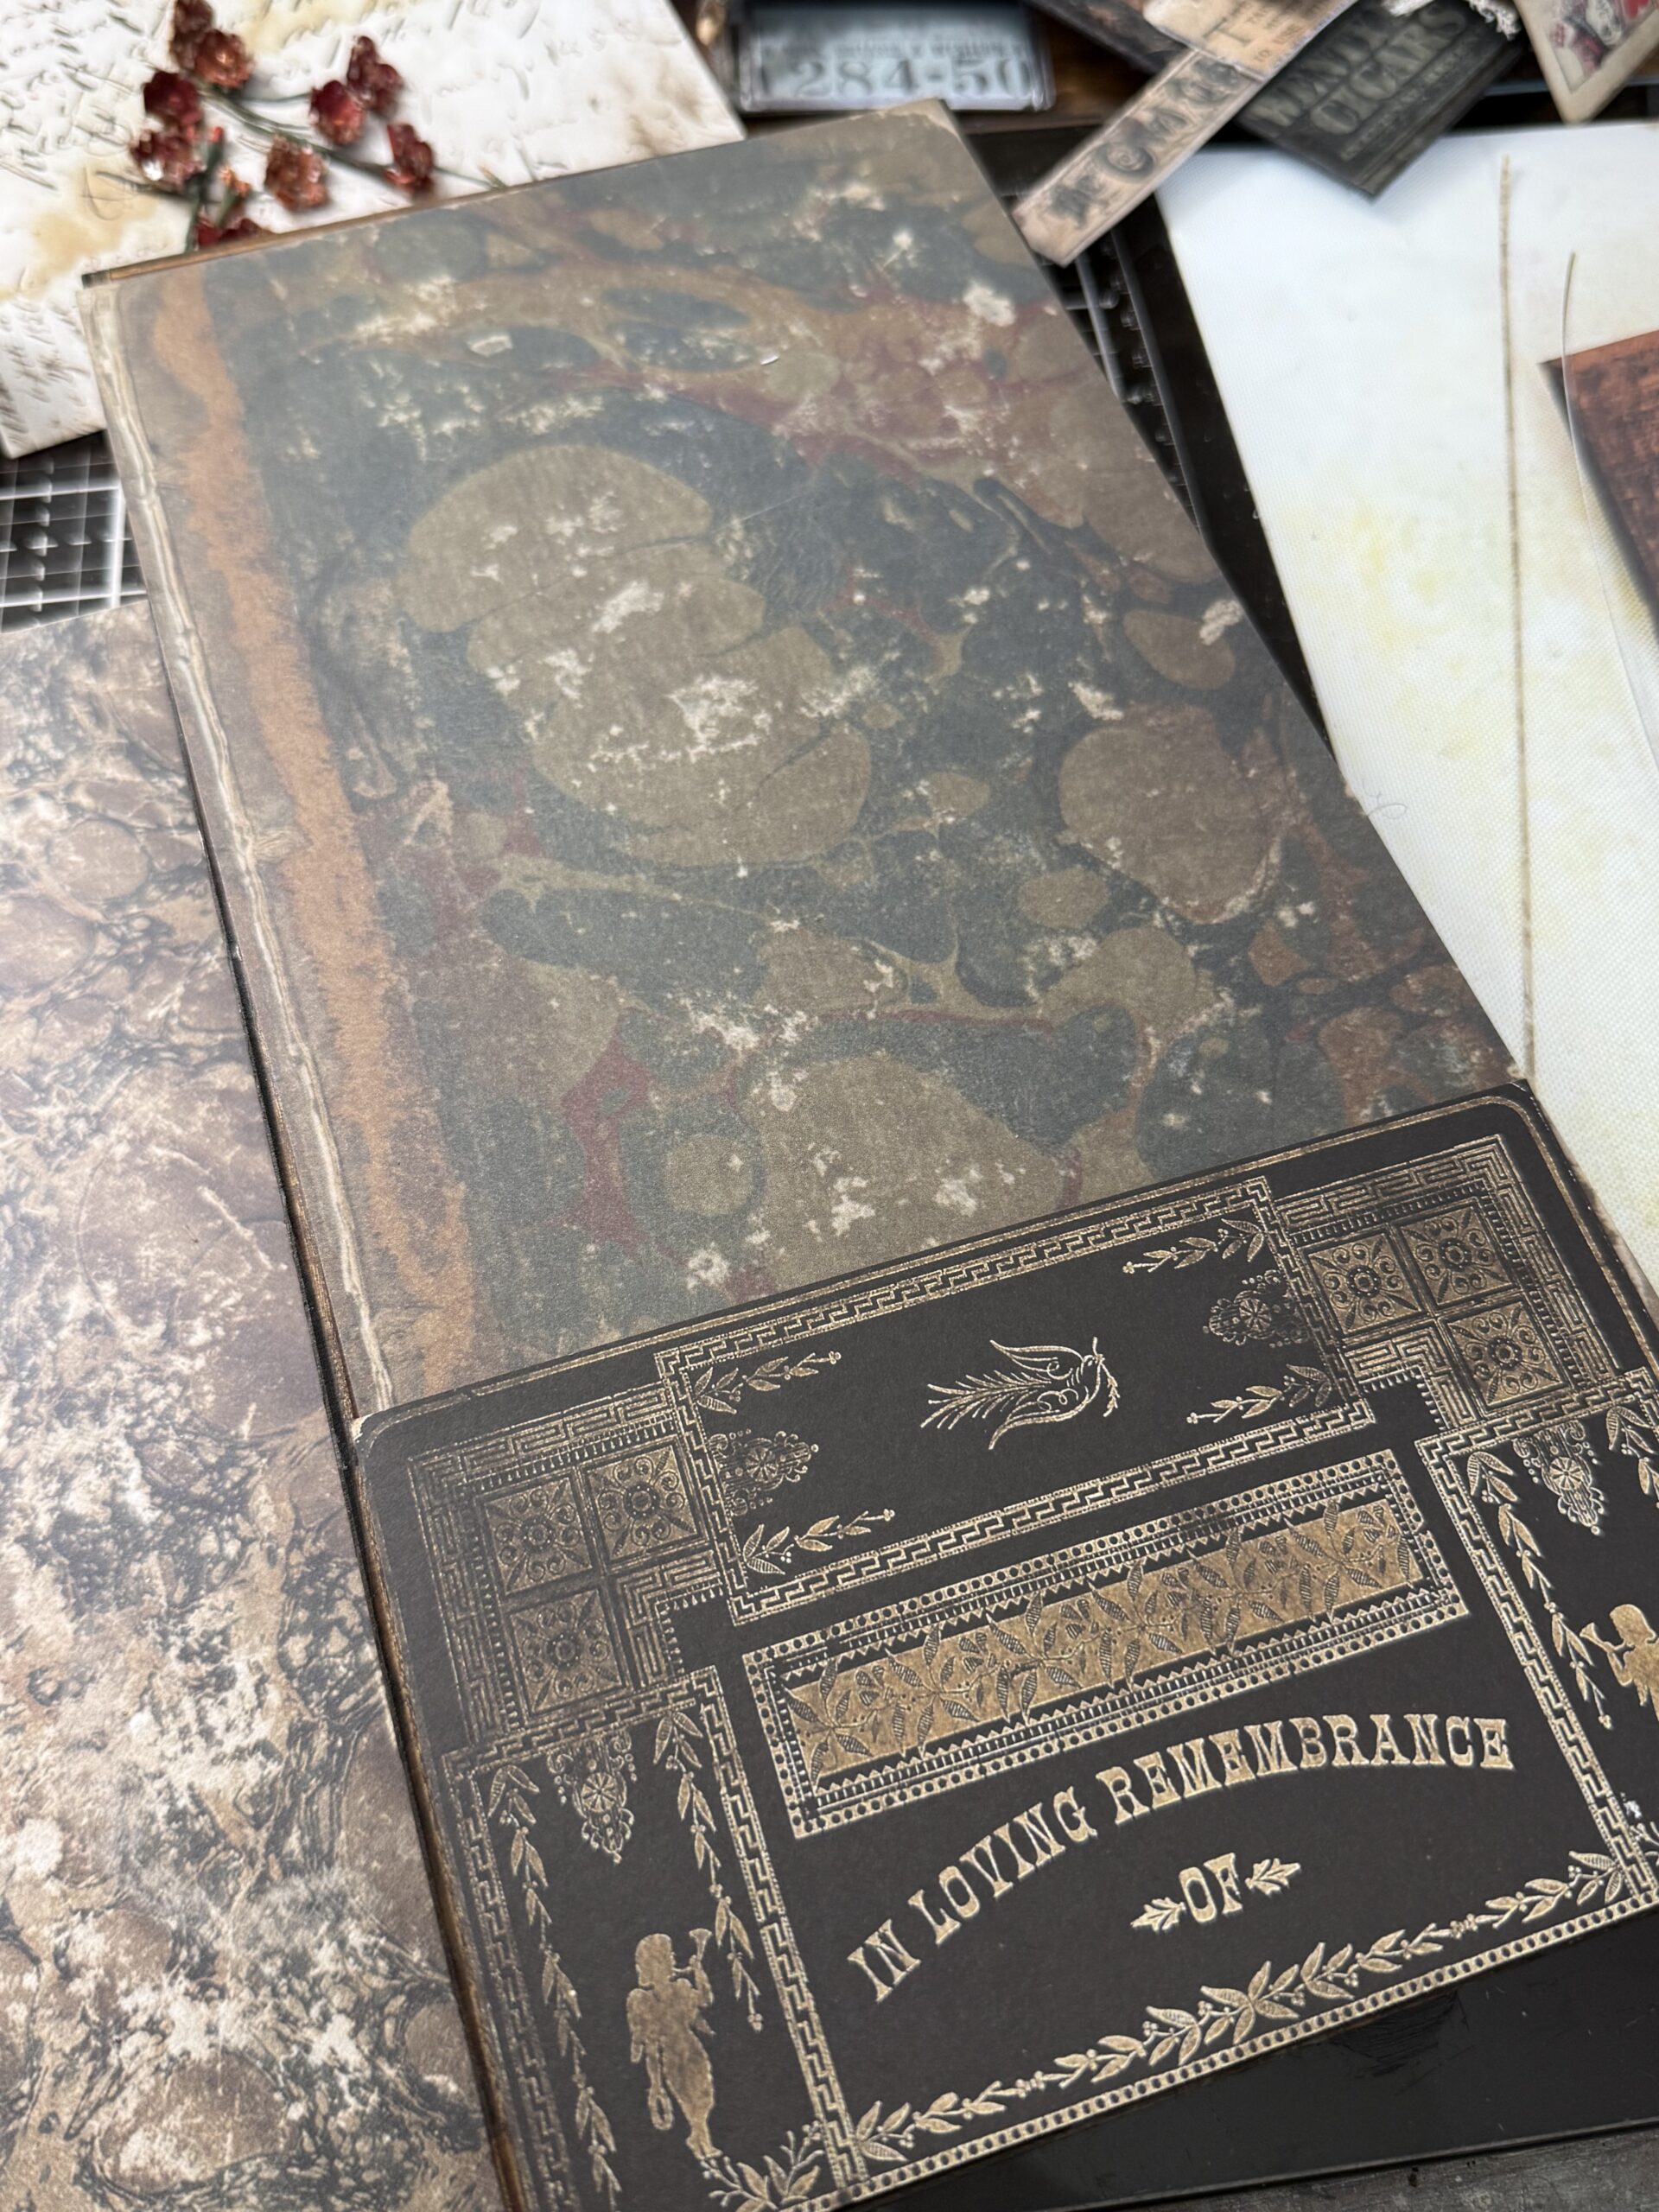
Next, I built up the box, I added some of the background paper to the back of the vignette just to continue the idea that it was an old box. I pieced together a couple sheets of the paper. I even used a portion of one of the backdrops that had “in loving remembrance of” on it because it fit the piece so well, again, no one else will really see it, but I know it and it makes me happy!
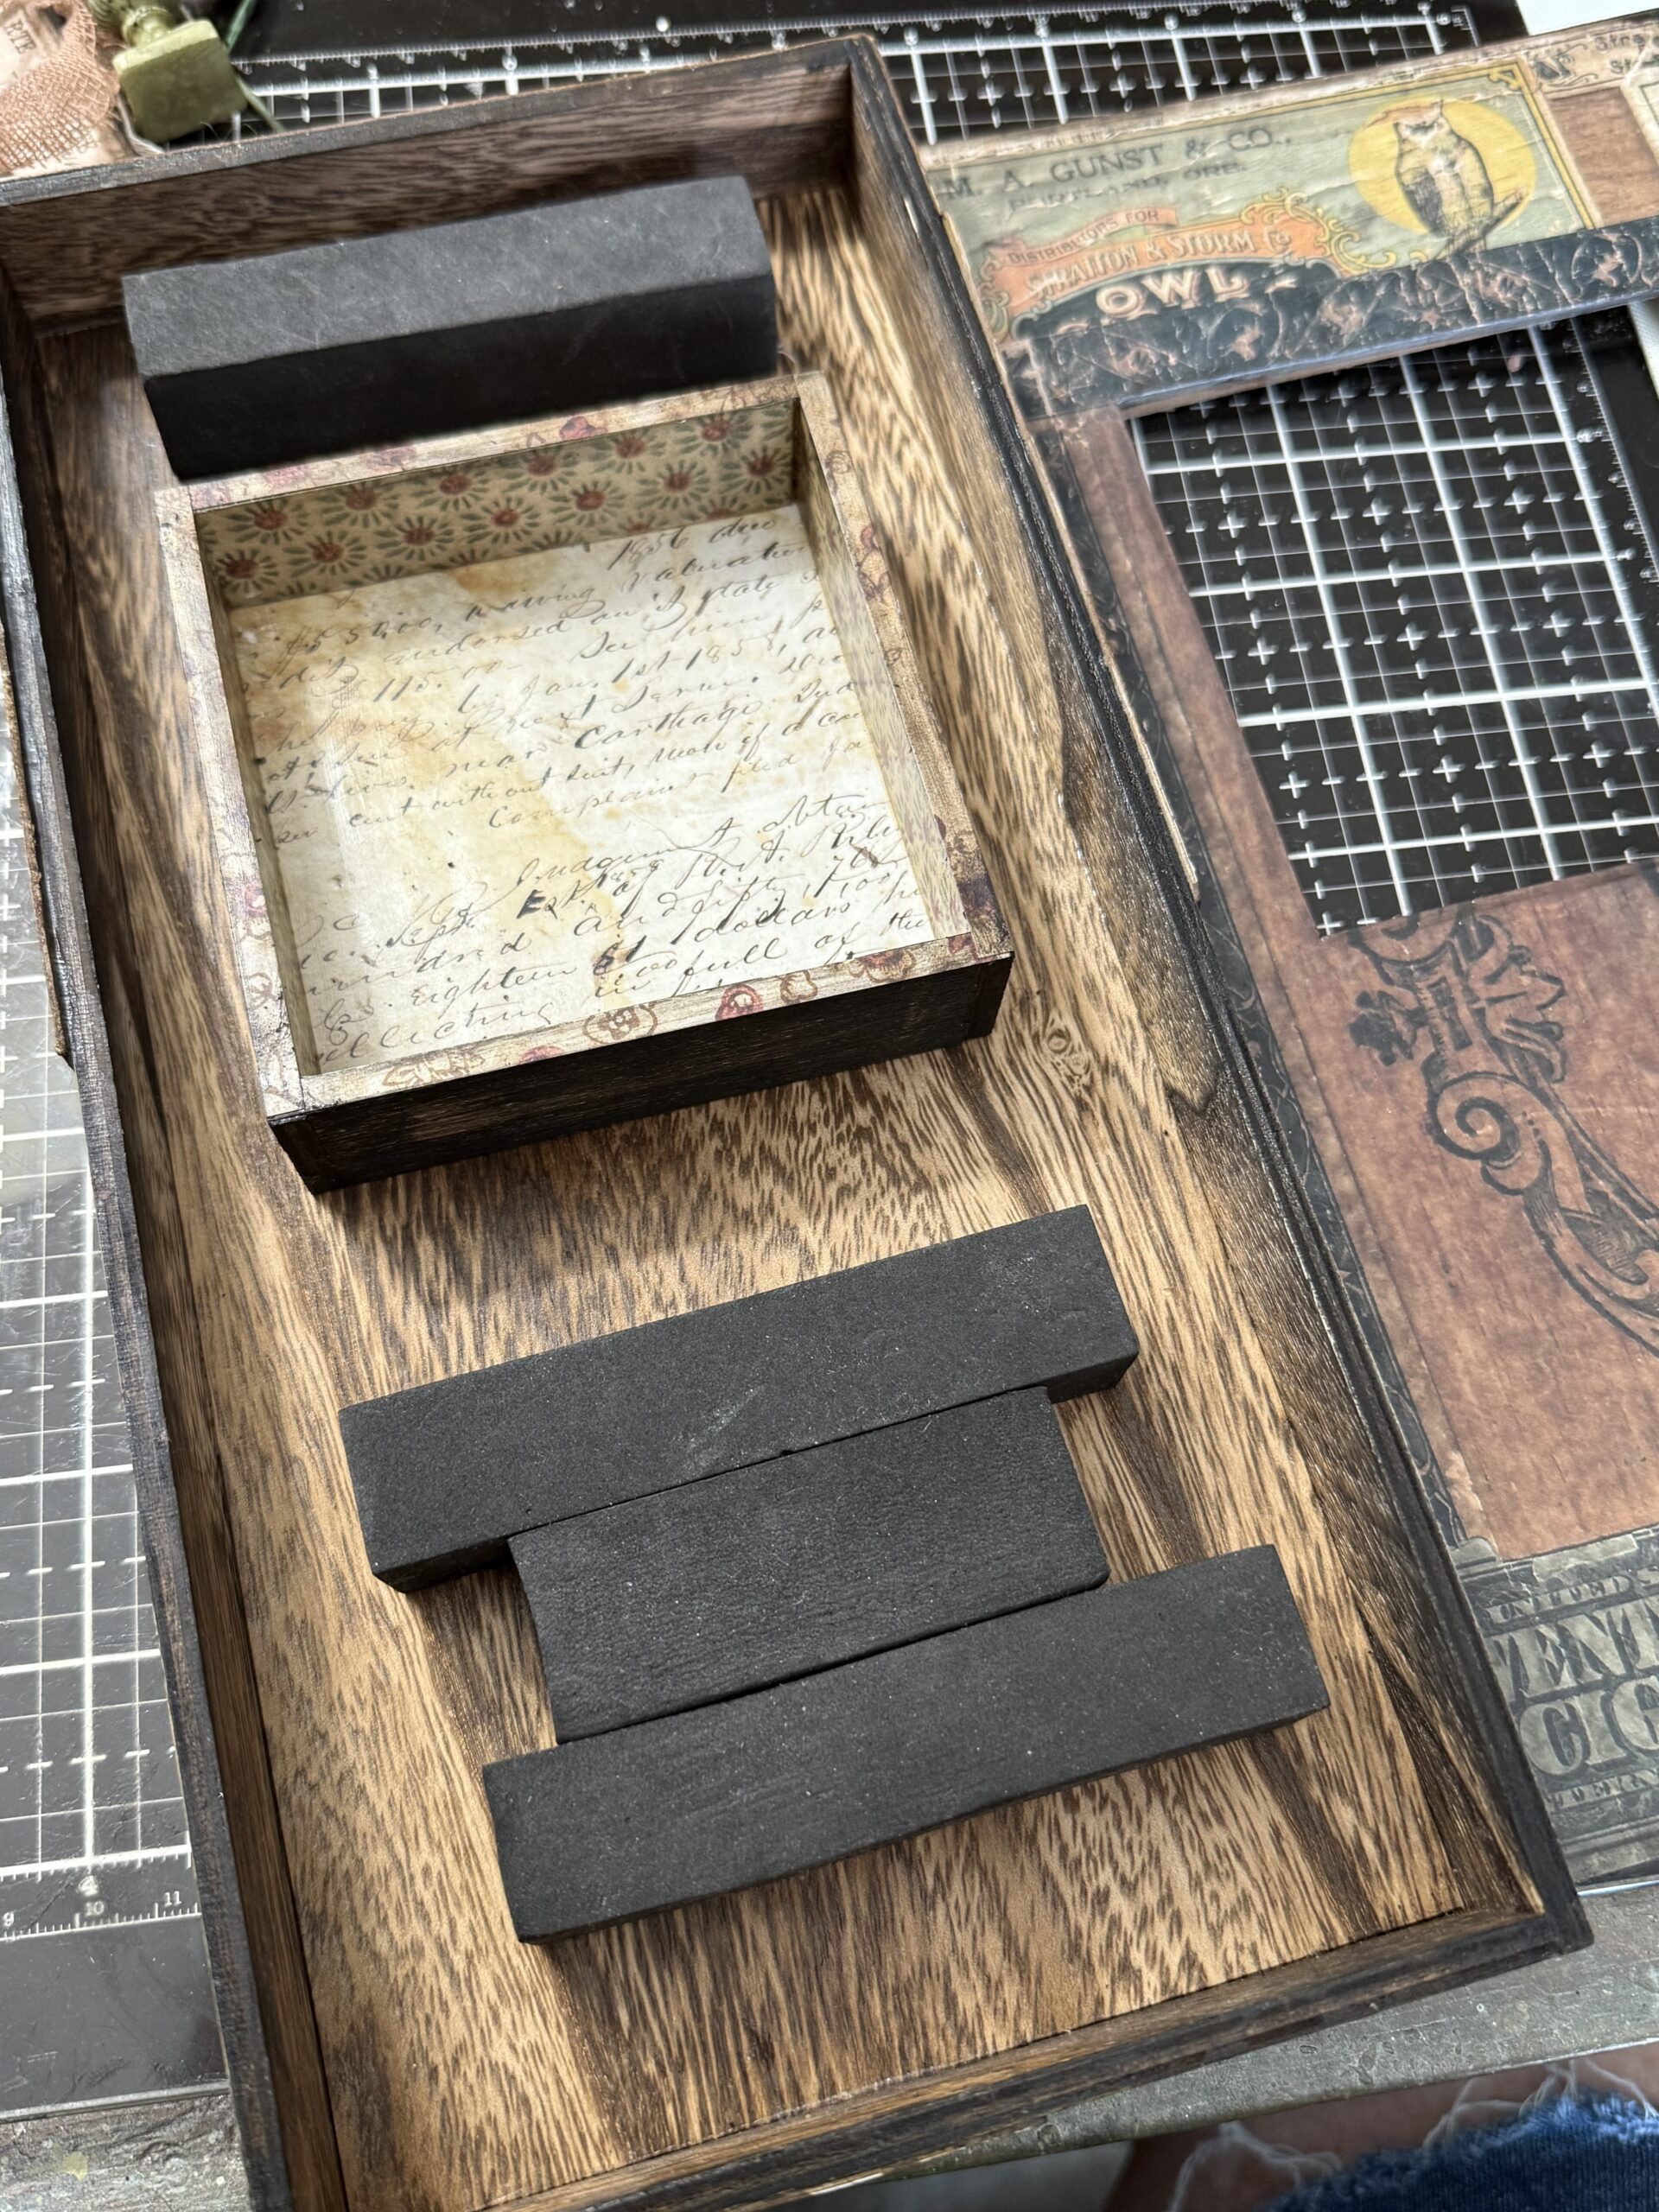
The small square vignette that we had covered with paper was placed inside the vignette and adhered using hot glue. I find for this type of a project if I need something glued quickly and it is a building piece, I use hot glue, it works great! Then I added some foam pieces to add stability for the front of the project. These foam pieces were actually from packaging from the vignette trays when they were packaged for sale, they kept the package together for shipping and display, I just kept them to use for this type of thing. If you don’t have anything like this, you could use pieces of foam core board that could be adhered together to the right depth.
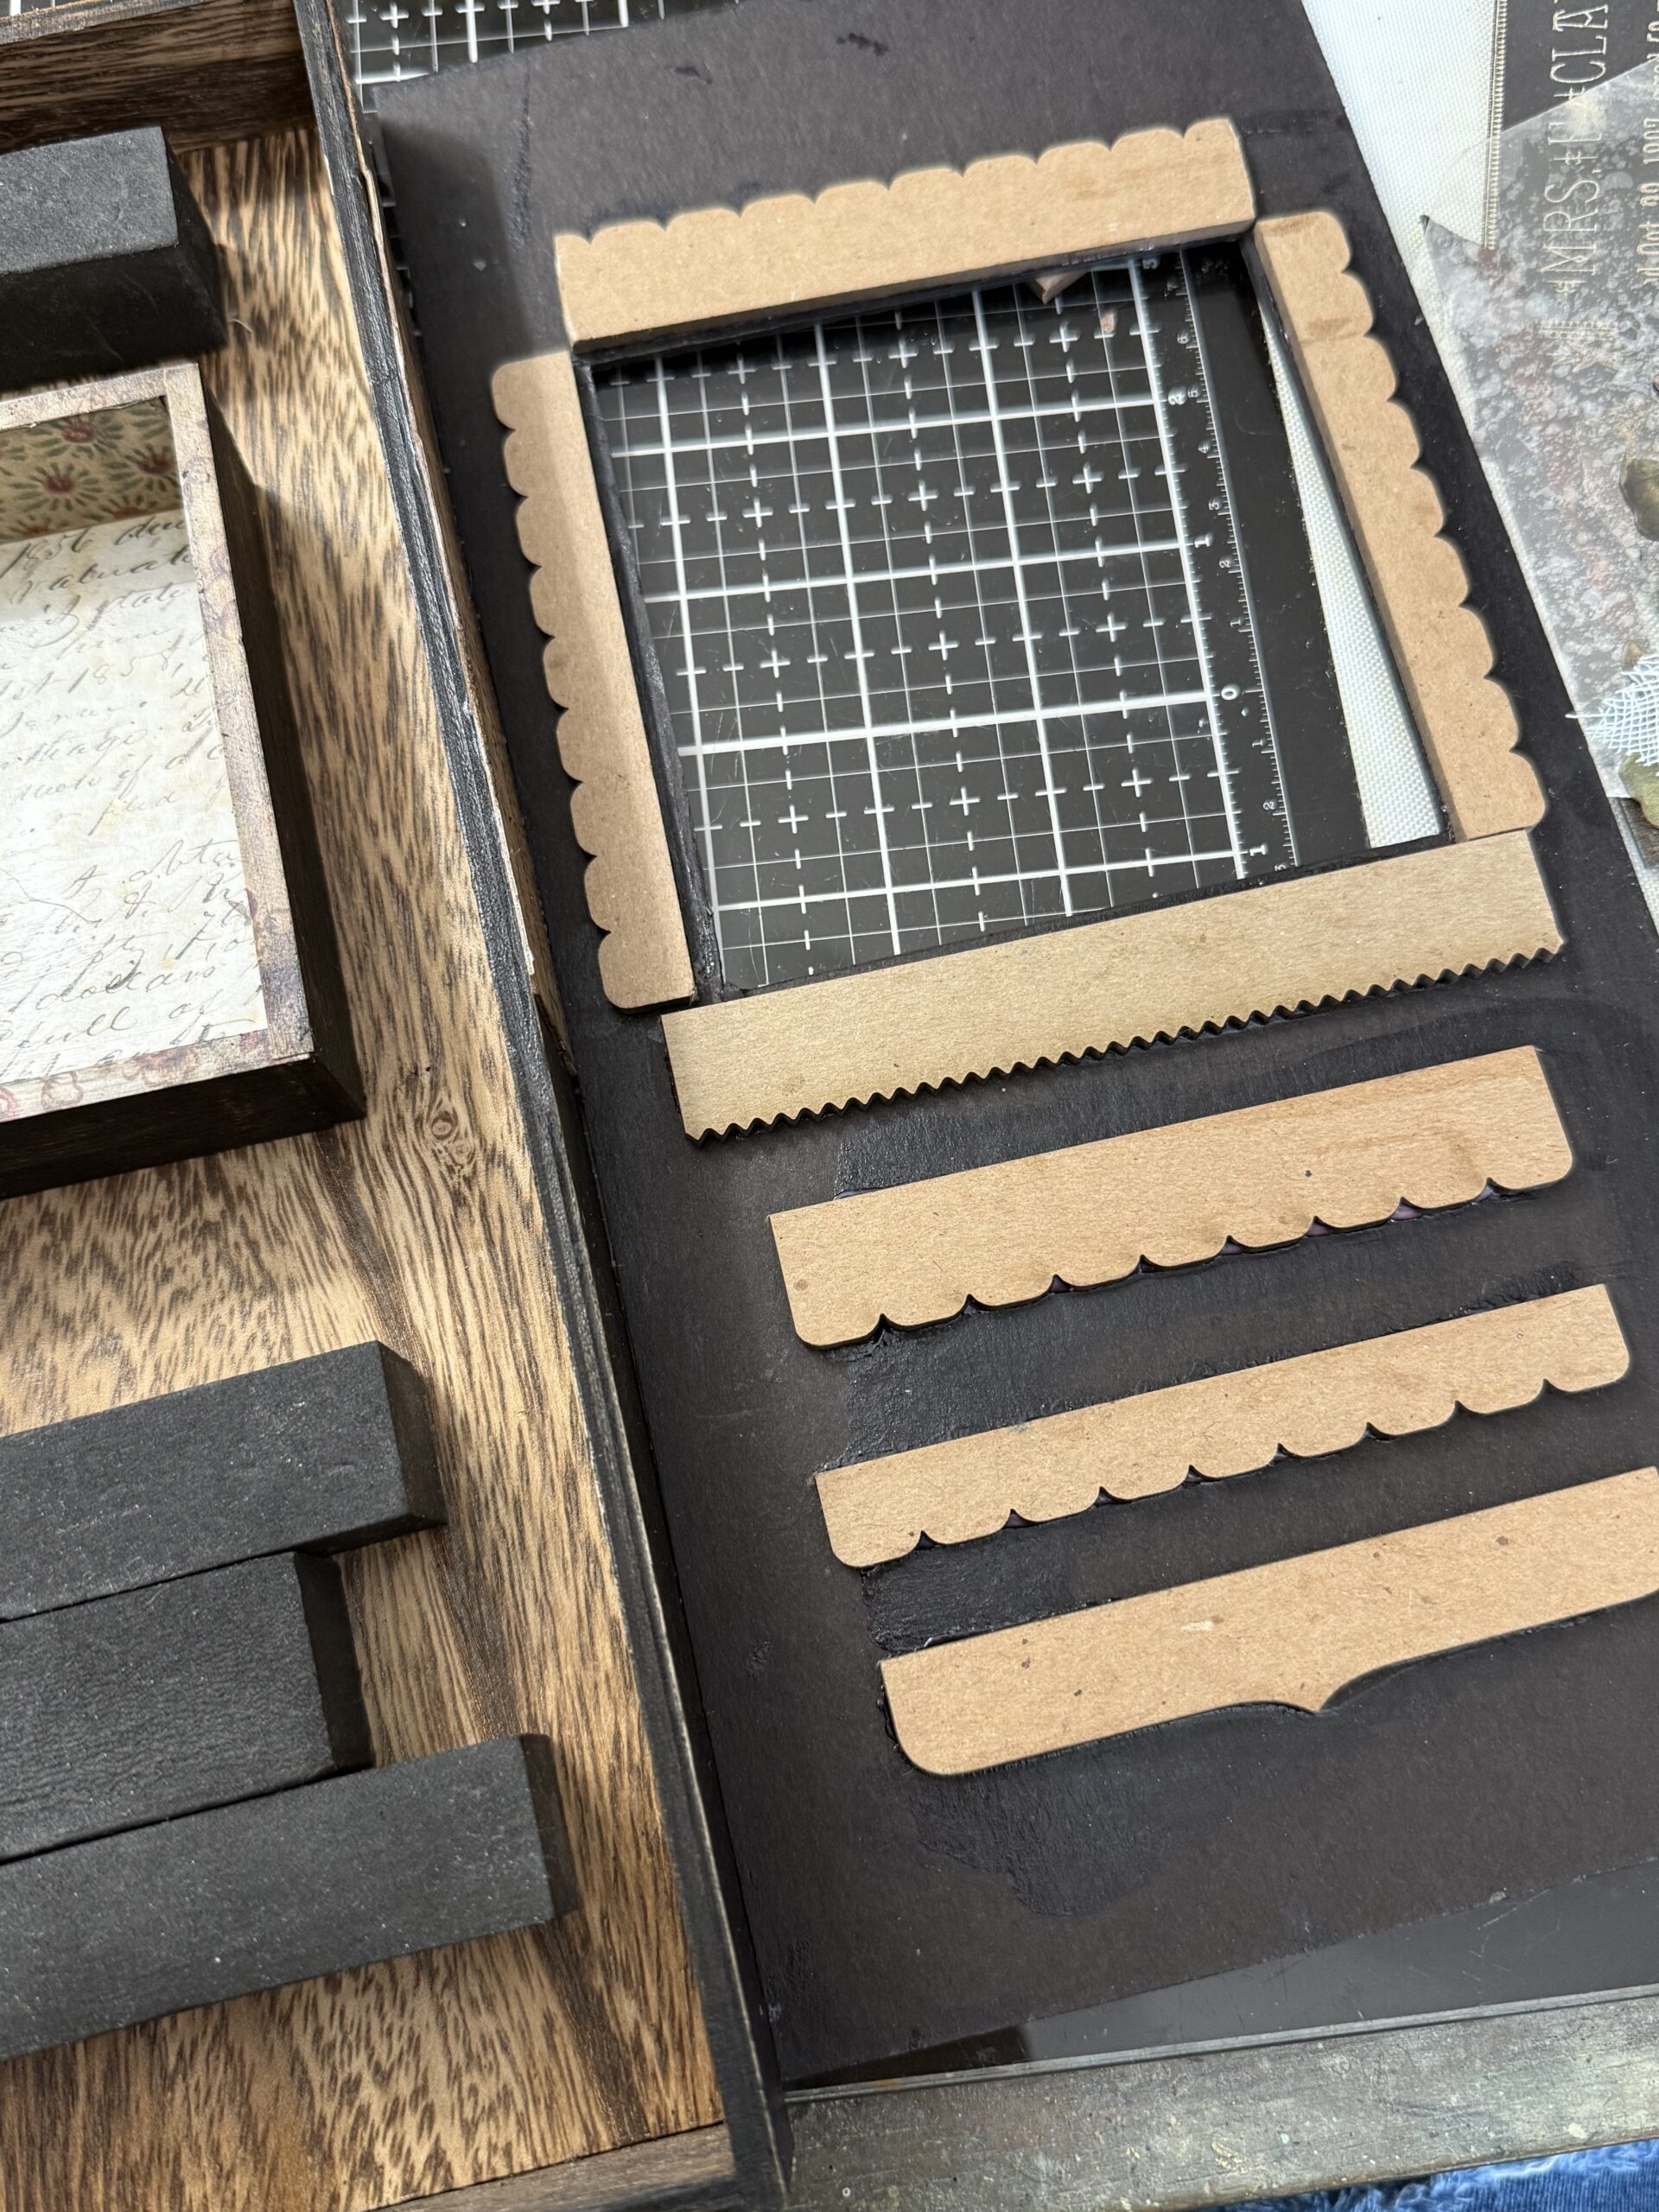
You can see the front of the vignette piece to the right of the vignette tray in this photo below and how the foam pieces line up with the foam where the cardboard could cave in after time…I didn’t want that and want this piece to last for years, so I came up with this way of doing it.
Another thing that I added to the inside of the vignette for stability were some Etcetera Trims. These were smaller pieces that I just happened to have sitting within my reach, but they worked great for this! I adhered them at the back of the chipboard piece to again add stability and the good thing is that it worked and didn’t add much weight to the piece. You can see that I added some of the pieces around the edge where I had cut out for the vignette square, again, it made it so that the piece wouldn’t warp after time.
And them finally, I added the covered chipboard piece to the front of the vignette. I adhered it by using a little hot glue just around the inside edge of the vignette to keep it in place, then, I used some nails around the corners and edge. Next, I added the mitered trim pieces, in the photo below you can see that there was a little gap that was left after I cut the opening for the square vignette. To cover them, I used those trim pieces with the scallop borders.
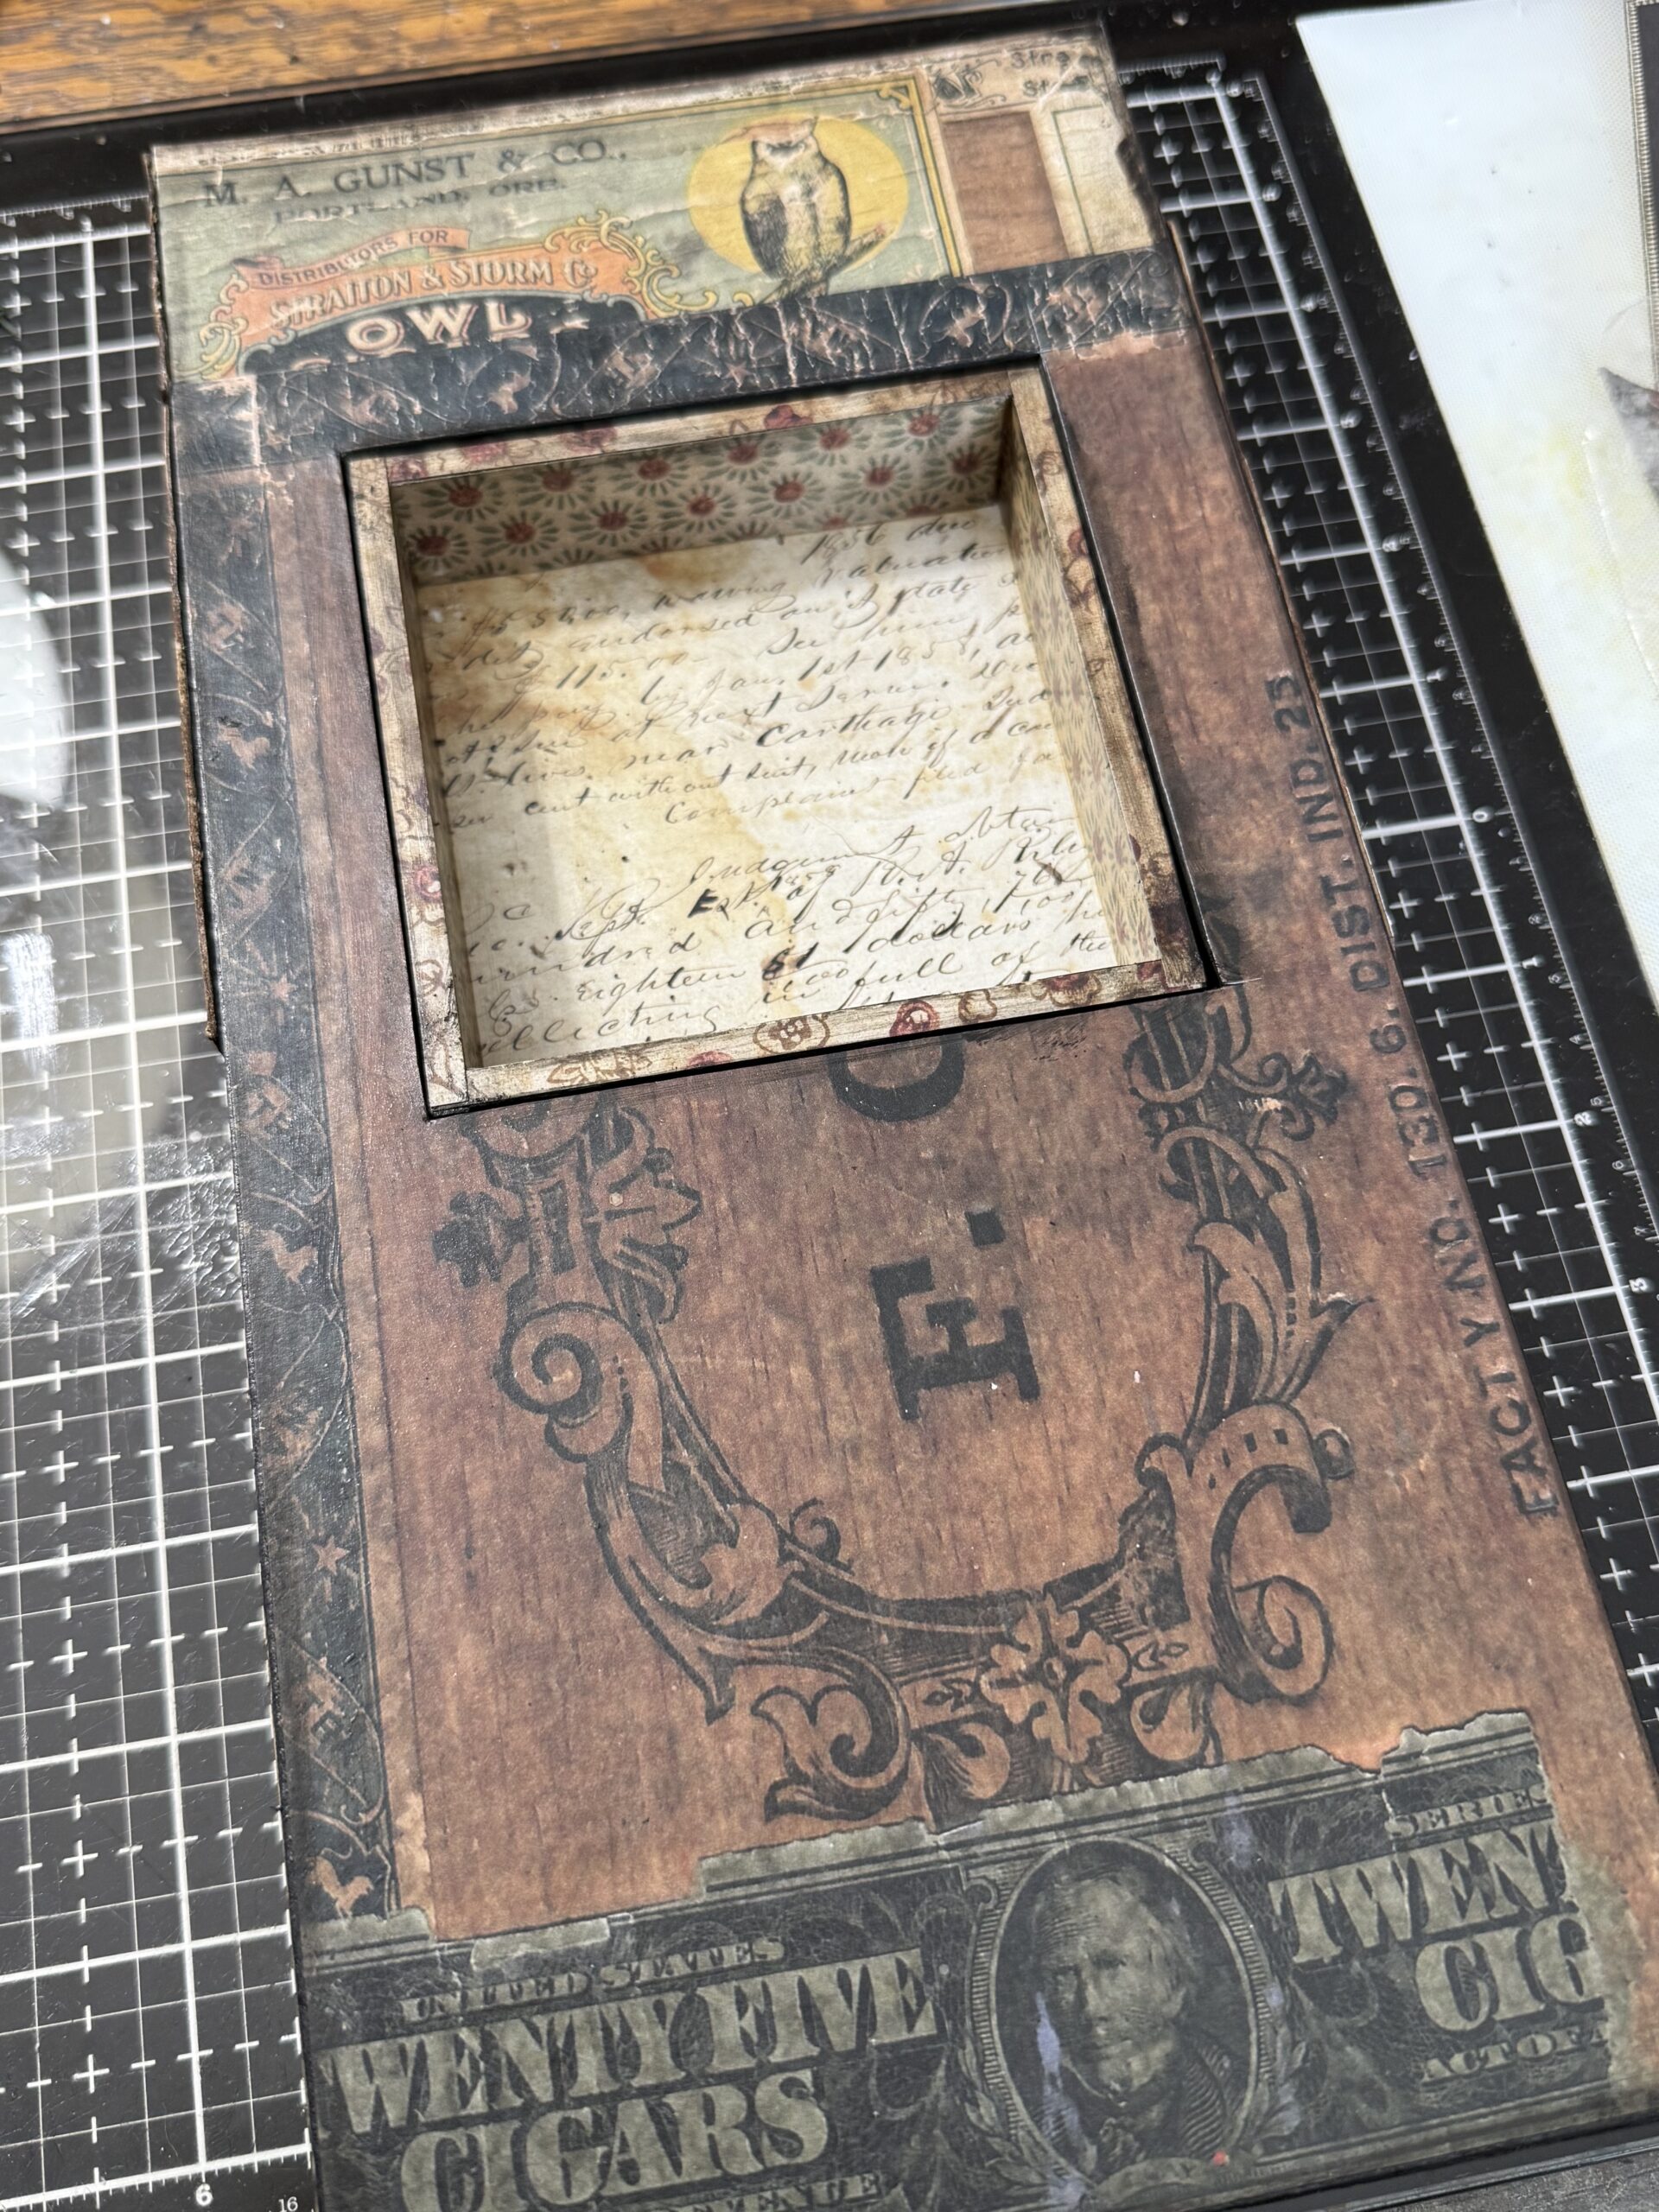
Those were then adhered around the square using collage medium.
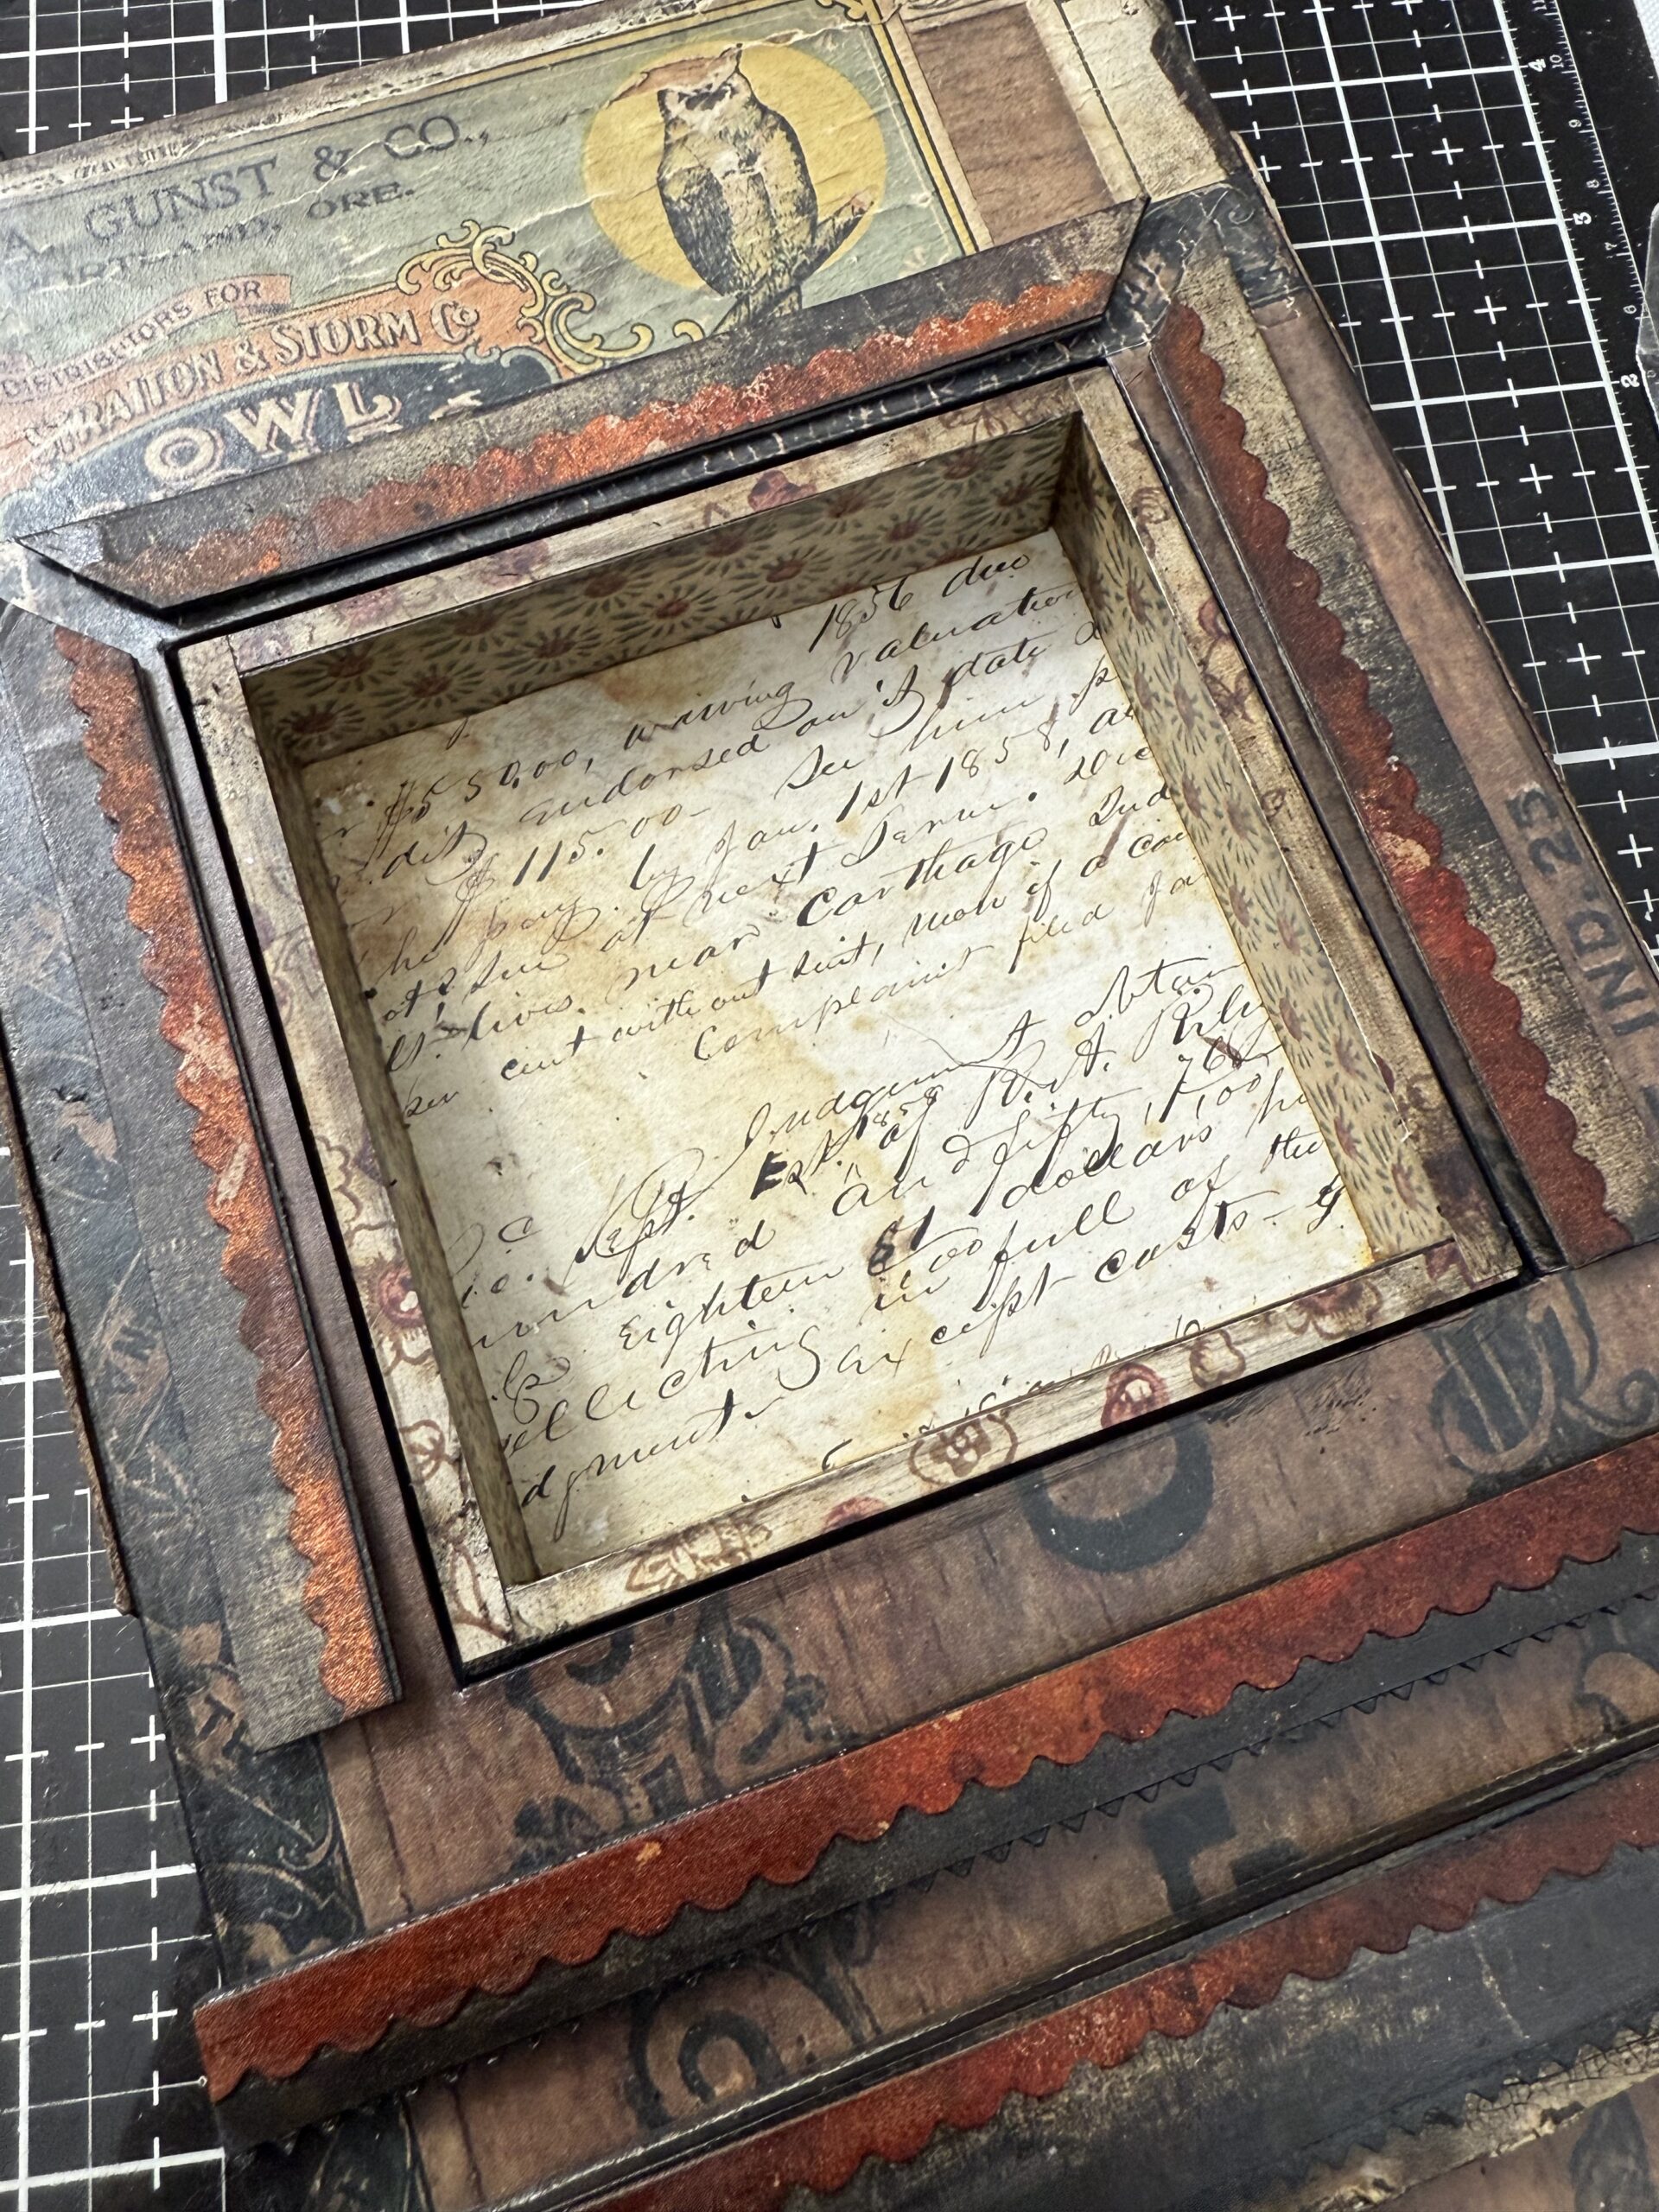
I finished the framed shrine area by placing the Etcetera Trim shelf that I made, then set it aside to dry over night, then began adding all the little pieces to the vignette.
A couple things that I didn’t get photos of because I have shared these processes before…
the poison bottle- rubbed with collage medium, set aside to dry, then dripped with Alcohol Pearls and colored with Distress Crayon. Label added, nail added into the cork and spider added with a tiny bit of string.
crystal ball- idea-ology Bubble and a painted idea-ology Urn. Bubble colored using Alcohol Inks and Pearls and placed inside the Urn to create a crystal ball.
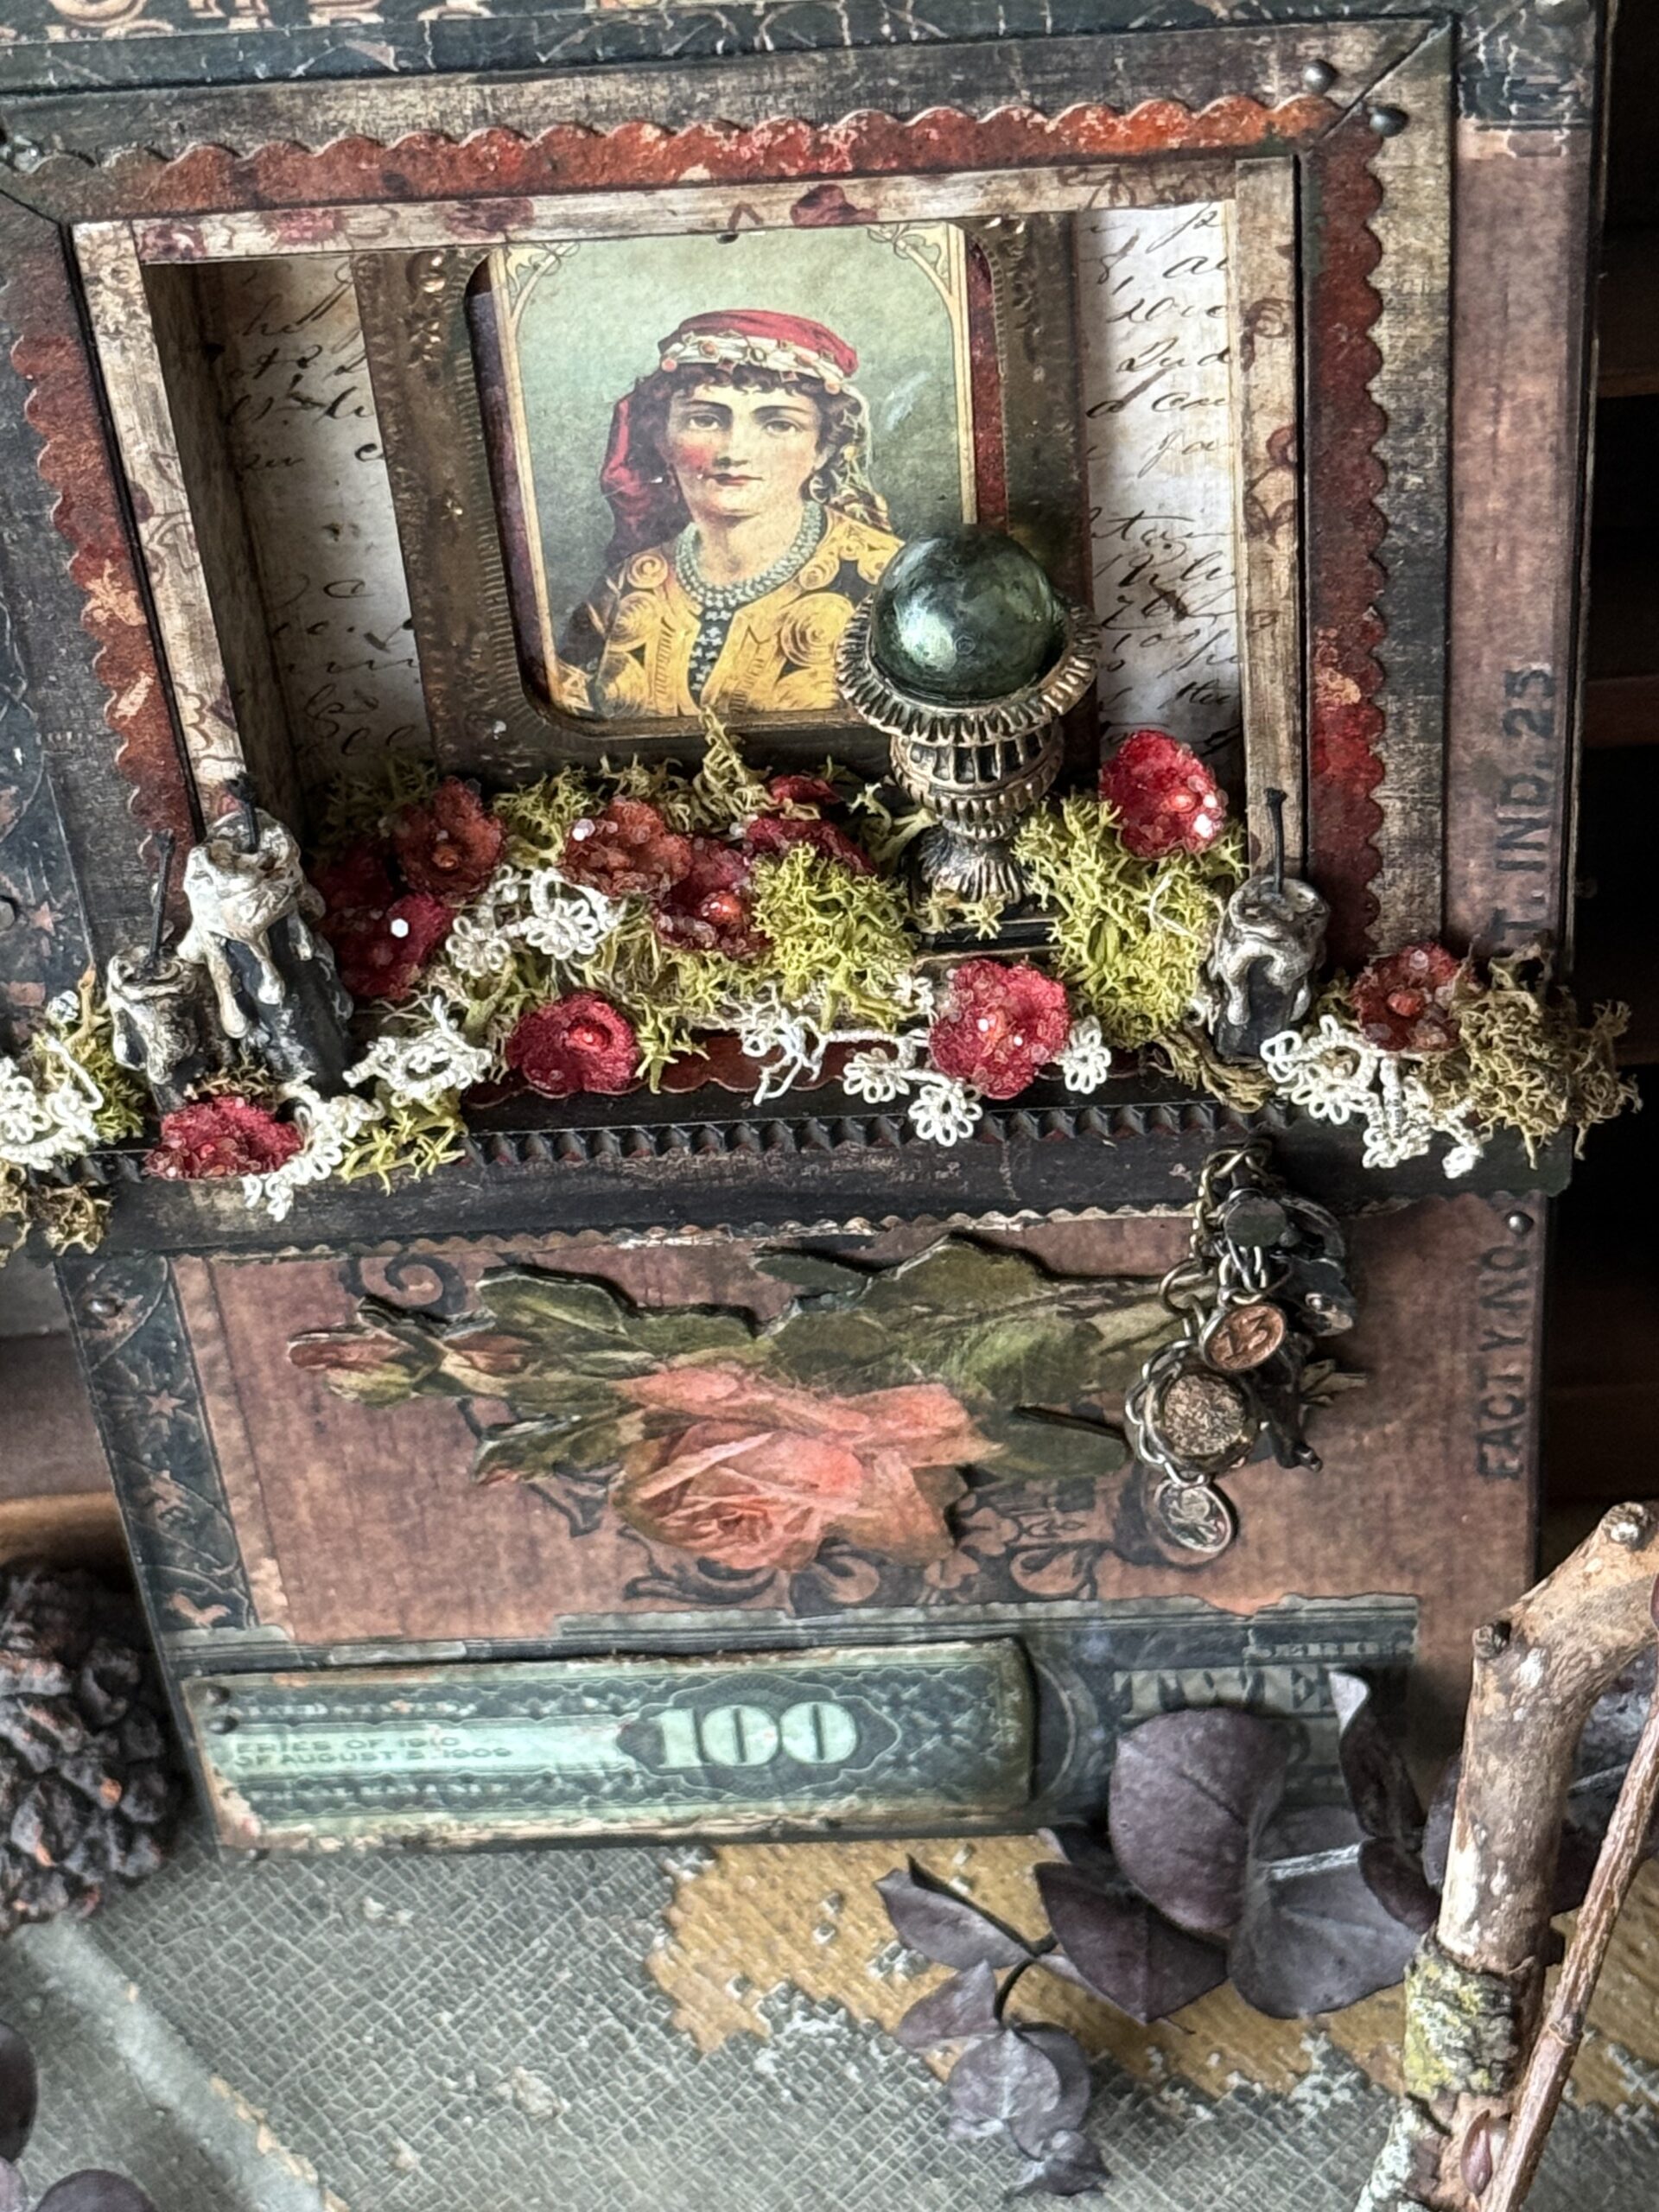
shrine interior- gypsy girl portrait was adhered inside the square vignette and the decorative elements were adhered in place using collage medium. I used floral moss and piece of vintage tatted lace and added the candles, flowers and crystal ball urn.
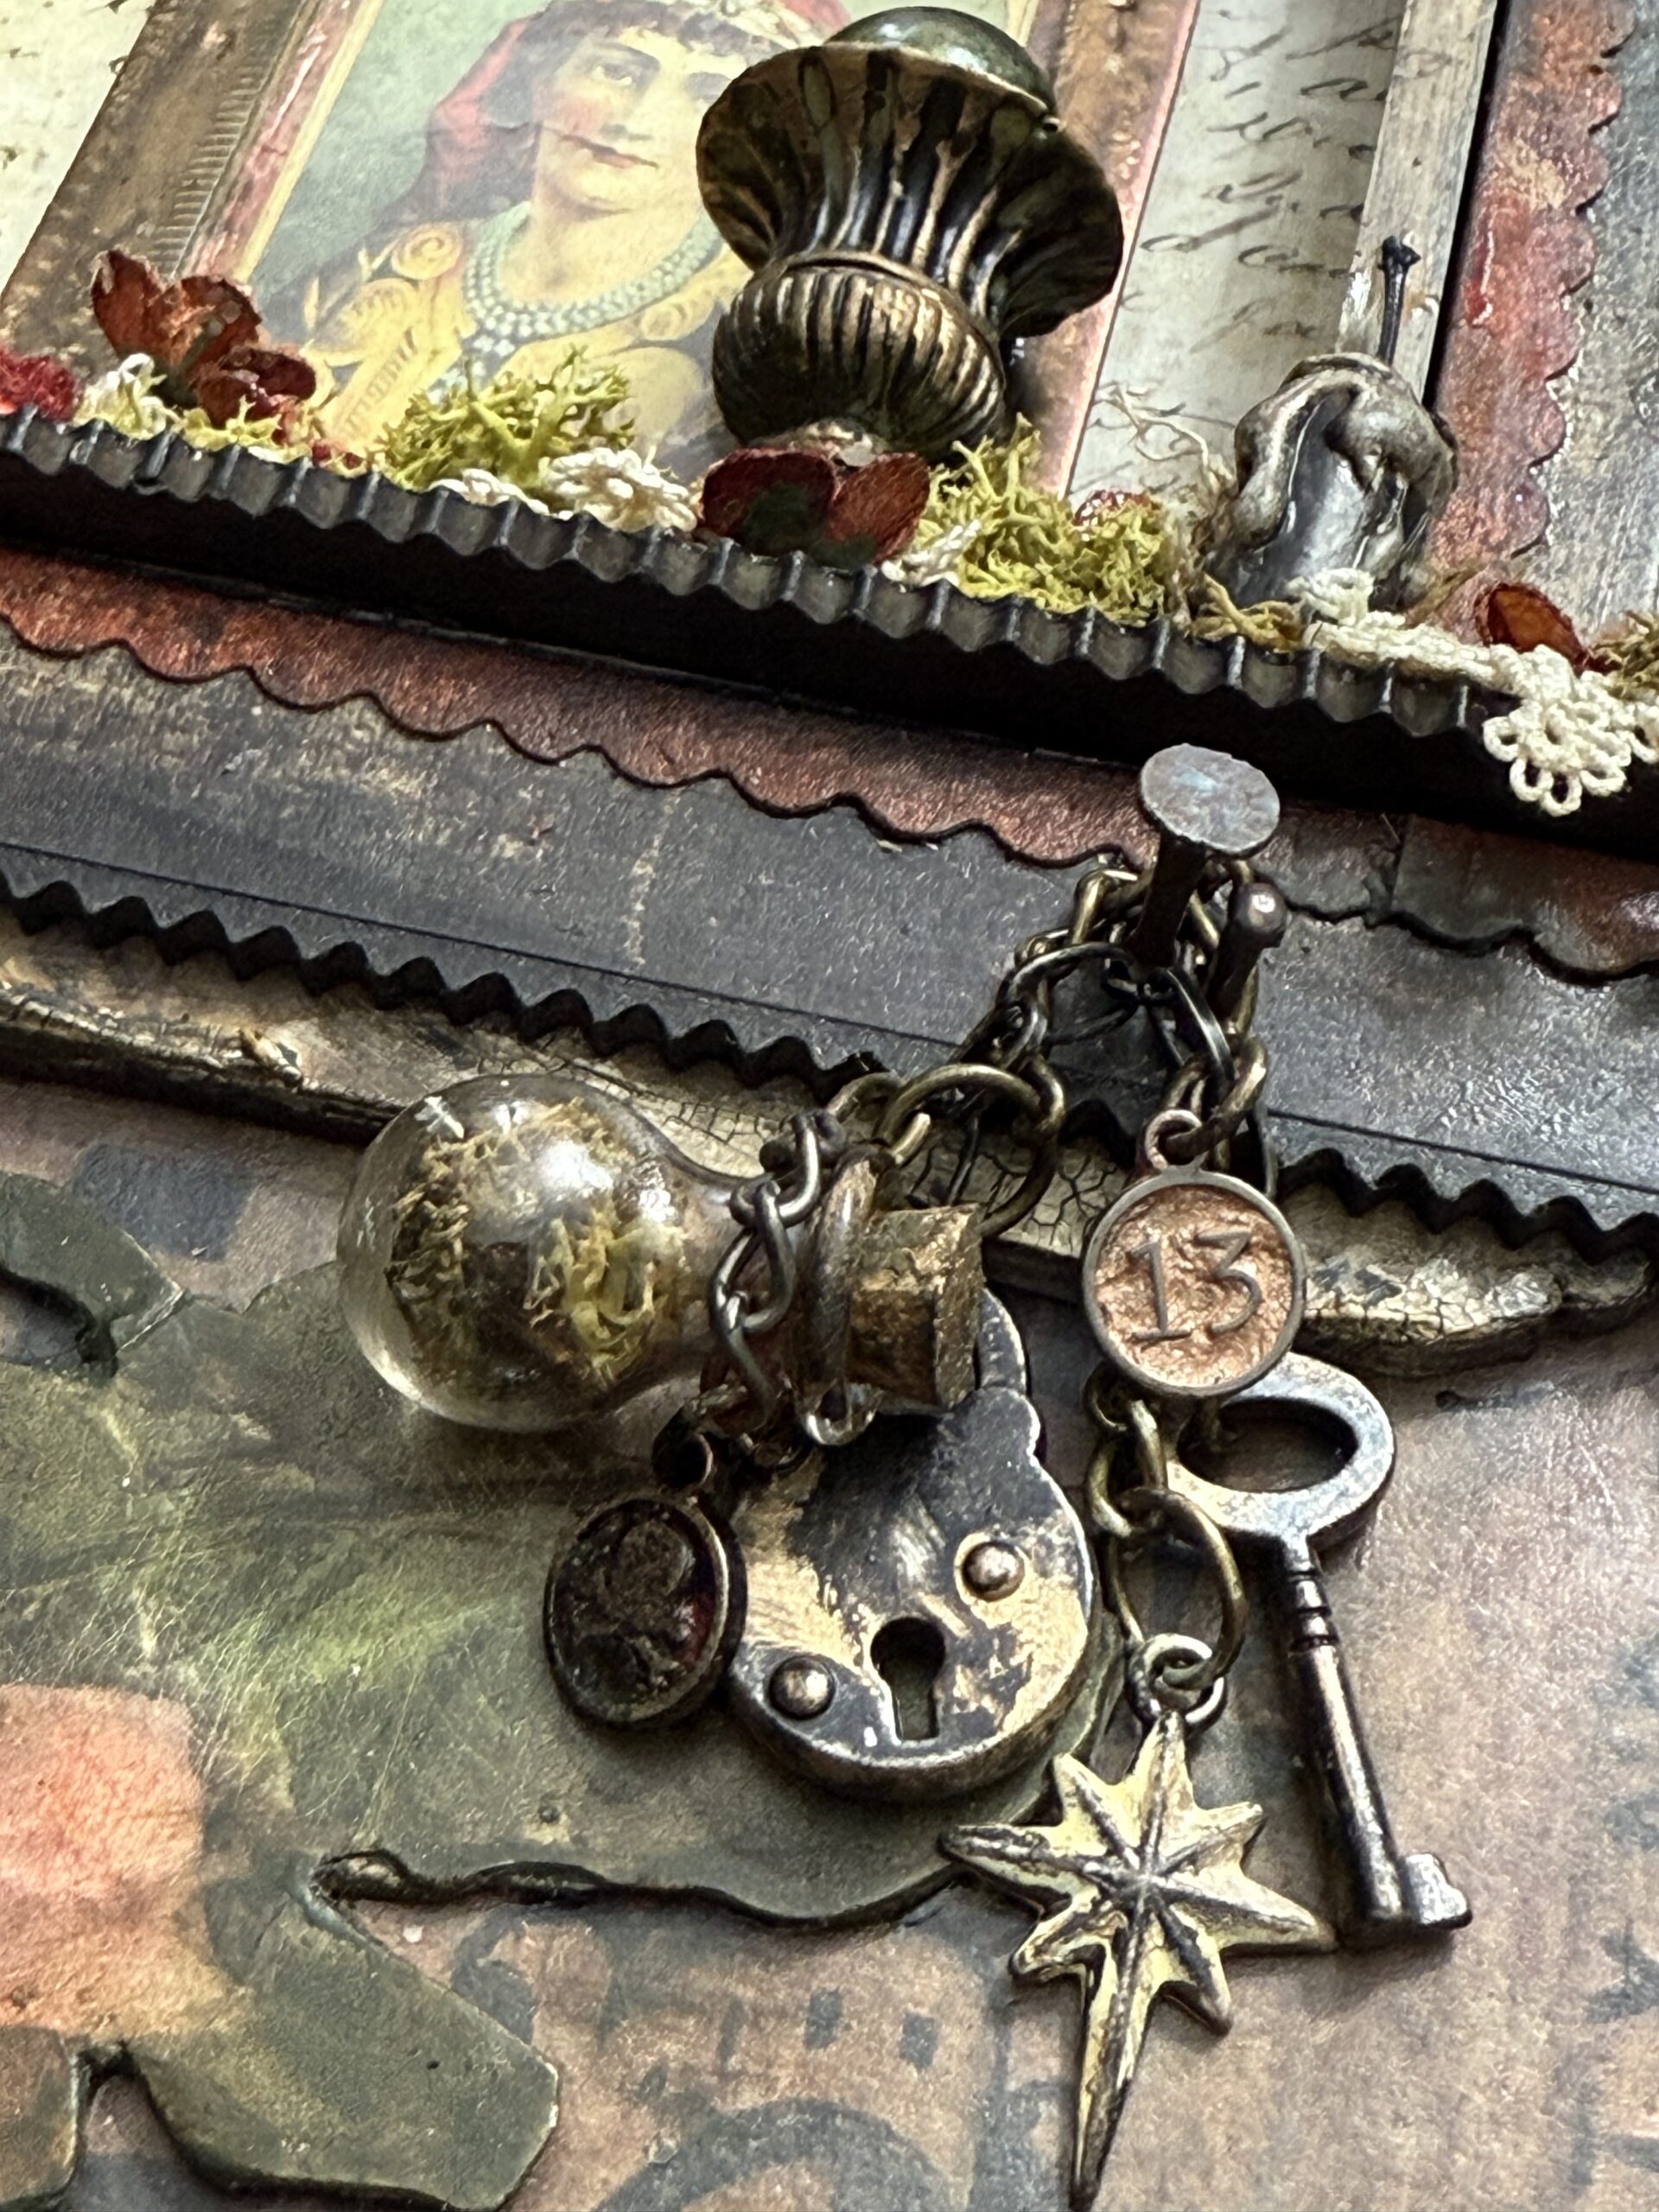
the chatelaine/chain of charms made with idea-ology- these little charms were all attached to the chain links using the chain from the Gothic Gate set Adornments set. I also used a little idea-ology vial that I filled with some moss and wrapped a scrap of other chain that I had and attached it to a link. The little charms of the skull and 13 were from the Halloween Word Plaques and Tags set, they were rubbed with Distress Crayon to add color. The star came from a Christmas pack of Adornments from years ago, it was painted and rubbed with crayon. The entire piece was then attached to the front of the shelf piece using an old nail.
With that, my project was complete!
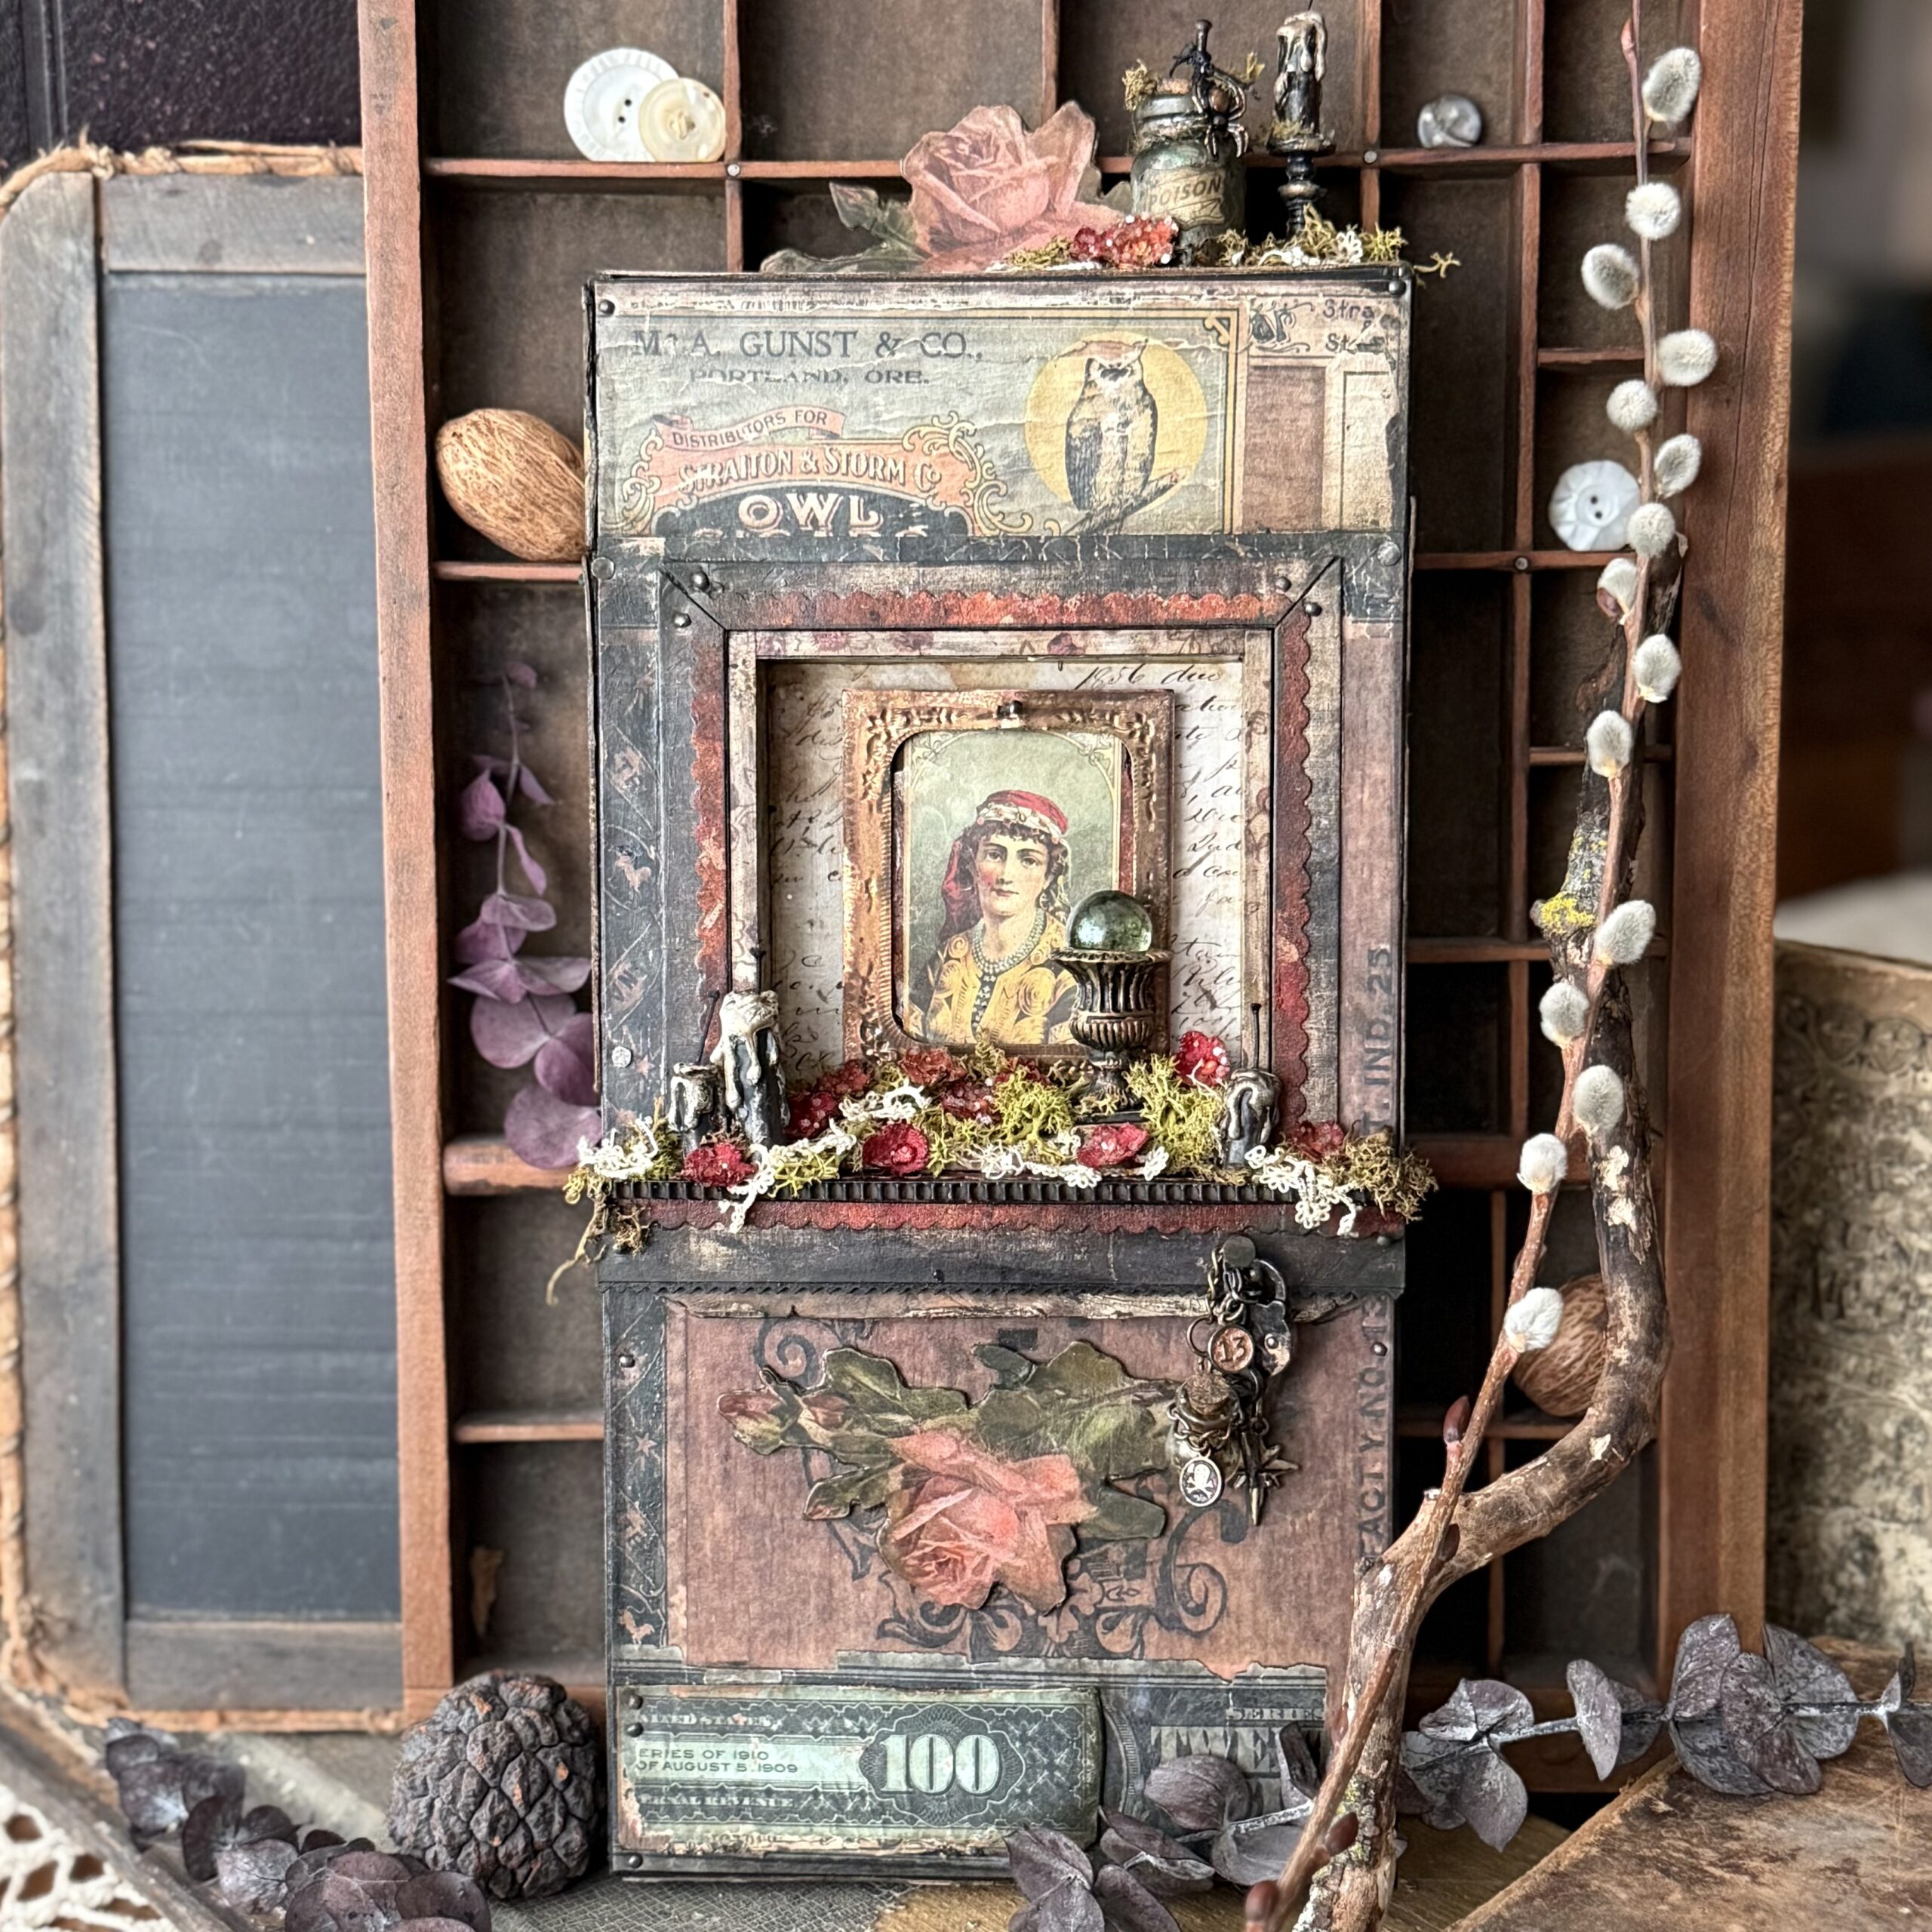
Whew! I think I have covered everything…this was such a fun project that I kind of got lost in the process and was living the story in my head…and enjoying every minute of it!! Thanks so much for sticking around and visiting me and my blog, I hope you get a chance to check out the entire line of Halloween idea-ology and give yourself some time to make with it, it is surly good for the soul! Take care and thank you!
Creatively yours,
Stacy
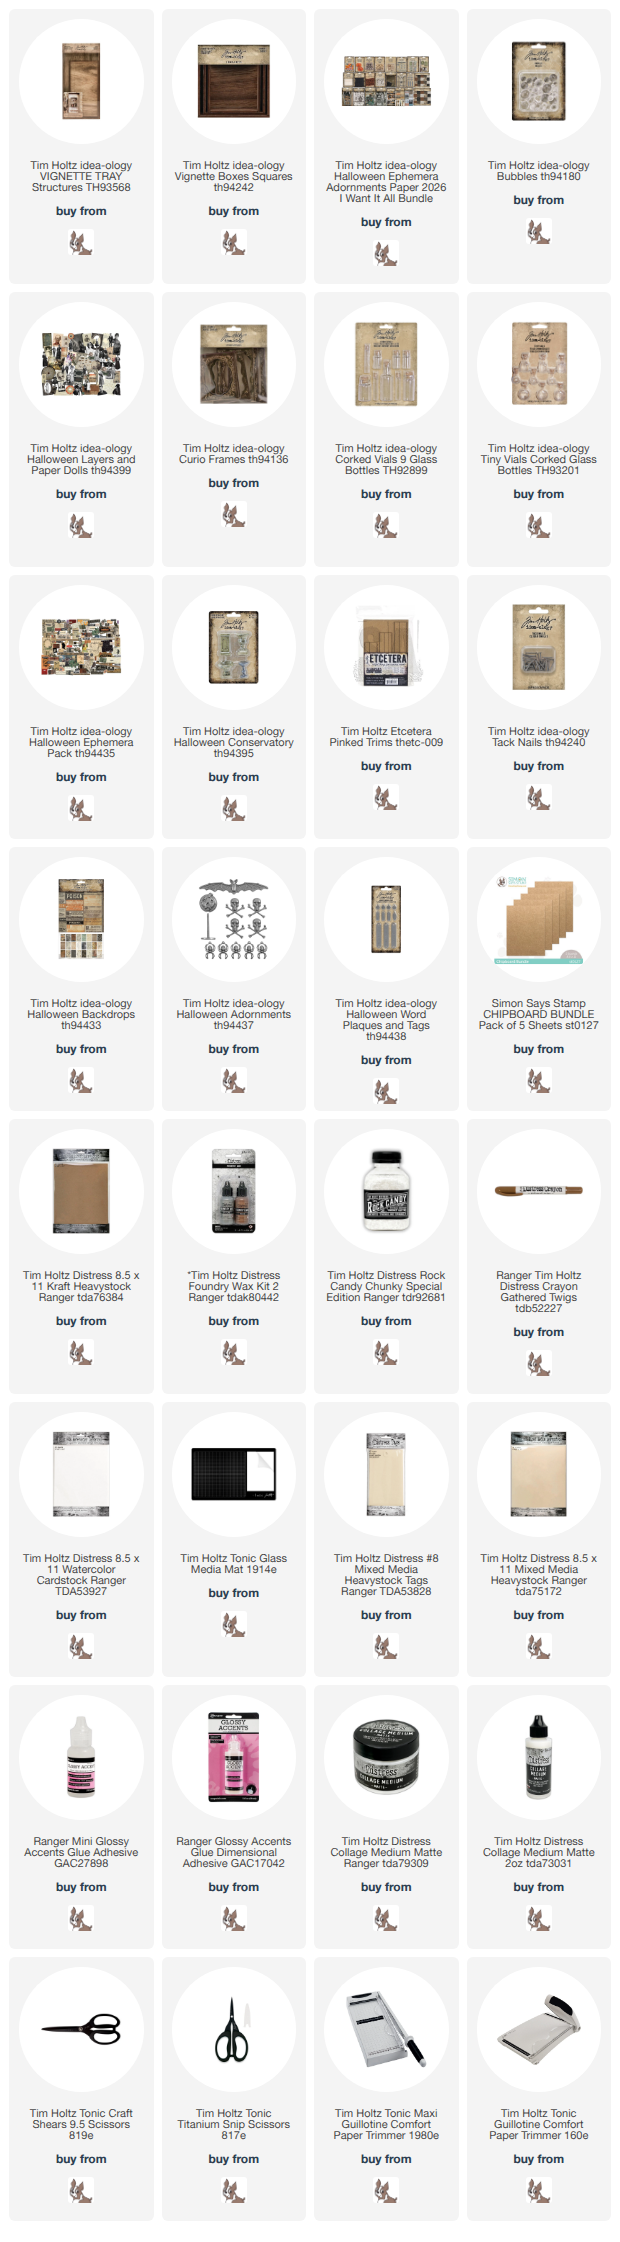
Shop Simon Says Stamp by clicking on this link. Thank you! I appreciate you for supporting me.
What is an affiliate program, and why should I click on the link and buy through you?
When you shop via the affiliate link on this blog, I receive a small commission from the affiliate provider (Simon Says Stamp) at no extra cost to you, whatsoever. These commissions help me to cover the hosting fees and other costs to run my blog and be able to provide you with FREE inspiration. If you shop the links, THANK YOU! I truly appreciate being able to share my love of creating with you.










Stacy, you are the Queen of detail! What an intricate and beautiful make. 💯
Wow. I think I’ll pull out my stash of TH Halloween and see what I can make. So very inspiring. Thanks.
The details in this vignette are extraordinary, Stacy. Gorgeous work. I pulled out my gypsy girl after seeing this on Saturday. Looking forward to a creative day where I see what I can do with your make as inspiration. Thank you!